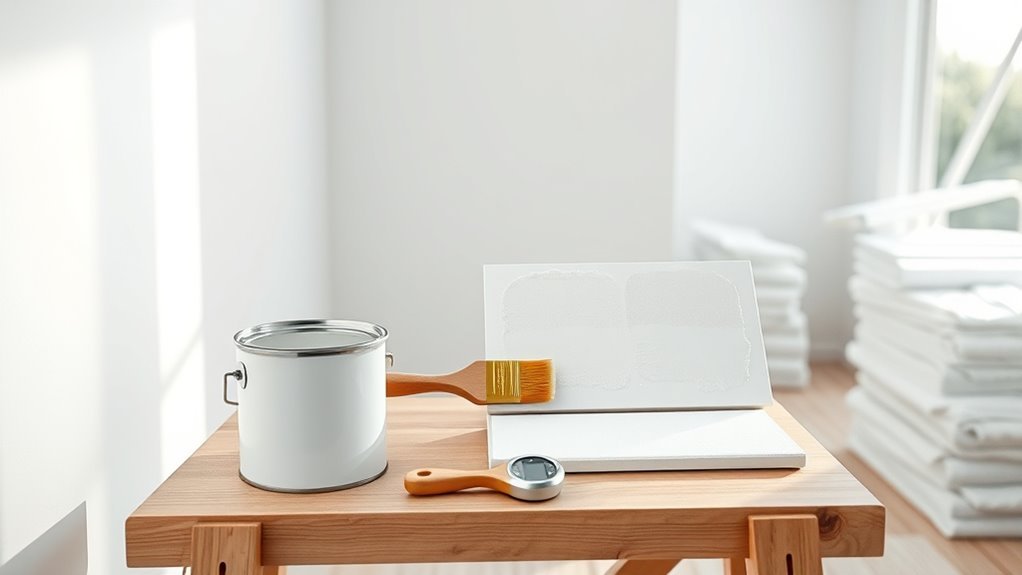
How Long Does White Paint Take to Dry
White paint usually feels dry to the touch in 1–8 hours depending on type and conditions: latex or acrylic often in 1–2 hours, oil-based in 6–8 hours, while full curing can take days to up to 2–4 weeks. Thicker coats, humidity, low temperatures, poor ventilation, or contaminated paint slow drying. Recoat windows commonly range 2–6 hours for thin coats; primer, sheen, and prep also matter — keep going for tips on timing, troubleshooting, and special cases.
Quick Answer: White Paint Drying vs Curing Times
Although paint feels dry to the touch within a few hours, it isn’t fully cured for days or even weeks, so you should treat “dry” and “cured” as different stages: drying means the surface no longer feels tacky, while curing means the paint has reached its full hardness and durability.
You’ll usually see white latex dry in 1–2 hours, recoat in 4–6, and cure in 2–4 weeks; oil-based paints take longer. Temperature, humidity, and coat thickness change times.
While you’re waiting, practice Color blending and Brush techniques on scrap to refine finish and avoid premature handling.
How to Use This Guide (Project Timing Checklist)
Now that you know the difference between drying and curing and how environmental factors affect times, use this guide’s project timing checklist to plan each step realistically.
Start by noting substrate prep, primer, first coat, recoat window, and full cure times for your paint type.
Begin by recording substrate prep, primer, first coat, recoat window, and full cure times for your paint.
Account for temperature, humidity, airflow, and work breaks.
Log any color mixing batches and label them with date and ratio; that helps matching and avoids wasted paint.
Include paint storage instructions to keep unused product usable between coats.
Build buffer time for unexpected delays, and check surfaces before sanding or final handling to confirm cure.
White Paint Types: Latex, Acrylic, Oil, Enamel – Drying Basics
When you’re choosing white paint, remember that “latex,” “acrylic,” “oil,” and “enamel” describe different binder chemistries that dry and cure in distinct ways.
You’ll find latex and acrylic dry fastest—waterborne, tack-free within an hour and recoatable in a few hours—while oil and alkyd enamel rely on solvent evaporation and oxidation, taking 6–24+ hours to feel dry and days to cure.
Historical techniques used oils for durability and depth; modern water-based formulas mimic that look with quicker turnaround.
Consider color psychology too: white’s perceived brightness can shift with sheen, so pick a binder that supports the finish and mood you want.
How Many Coats Change Drying and Recoat Timing
A single coat of white paint usually feels dry within an hour or two, but full cure can take days depending on the formula.
When you apply multiple coats, each additional layer slows drying and extends the wait before a proper recoat.
Follow the paint maker’s recoat timing—typically 2–4 hours for water-based paints and 24 hours for oils—to avoid lifting or uneven finish.
Single Coat Drying Time
Though a single coat of white paint might feel dry to the touch within an hour or two, its true drying and recoat readiness depend on the paint type, film thickness, temperature, and humidity. You should check manufacturer times and feel: water-based paints dry faster than oil-based. Thin films dry quicker; thick application prolongs cure. Store leftover properly—paint storage and color mixing affect future touch-ups and consistency. Use the table to compare typical touch-dry versus recoat windows.
| Paint Type | Touch-Dry | Recoat Window |
|---|---|---|
| Latex | 30–60 min | 2–4 hours |
| Acrylic | 20–60 min | 1–3 hours |
| Oil-based | 6–8 hours | 24+ hours |
Multiple Coats Impact
If you apply multiple coats, each layer changes how fast the paint dries and when you can safely recoat. You’ll notice thinner coats dry quicker, while heavy coats trap solvents and slow curing. Balance coverage with drying speed to maintain color consistency and avoid runs. Also factor paint cost when deciding coat count.
- Thin coats: faster dry, easier touch-ups.
- Thick coats: longer wait, richer coverage but higher paint cost.
- Spot priming: reduces total coats, improves uniformity.
You should monitor tackiness and manufacturer guidance rather than guessing between layers.
Recoat Timing Guidelines
Since each coat affects drying and tackiness, you’ll want clear recoat timing guidelines to know when it’s safe to add the next layer without damaging the finish. You should wait longer with more coats: two coats may be ready in 2–4 hours, while three or more require longer cure times. Check tackiness, not just surface dry. Consider color blending—thin first coats help—and finish sheen, since higher sheens show defects sooner. Humidity and temperature change times. Use this quick reference:
| Coats | Typical Recoat Time |
|---|---|
| 1 | 1–2 hours |
| 2+ | 2–6 hours |
When to Apply the Next Coat of White Paint?
Wait the recommended dry time between coats listed on the paint can, but remember that humidity and temperature can lengthen or shorten that window.
You can use a gentle surface touch test—if the paint feels dry to the touch and doesn’t tack, it’s usually safe to recoat.
If conditions are cold or humid, give it extra time so the next coat adheres properly and cures evenly.
Dry Time Between Coats
When you’re planning multiple coats of white paint, timing the next coat matters more than you might think. Applying it too soon can trap solvents and cause sagging, while waiting too long makes adhesion harder.
- Check the label: most latex dries to touch in 1–2 hours, recoat in 4; oil-based often needs 24 hours.
- Feel the paint texture visually: a matte finish can hide slight imperfections, gloss shows defects—adjust recoat timing accordingly.
- Consider environment: high humidity or low temp extends dry time; good ventilation speeds it up.
Also remember color psychology: fresh white alters perceived light—plan coats for consistent coverage.
Surface Touch Test
If the paint surface feels dry to the touch but still gives a slight tack when you press gently with a clean finger, it’s not ready for another coat; use this simple touch test to decide whether to wait longer or proceed. You’ll compare color contrast and paint sheen to judge readiness: matte may hide tackiness, gloss shows it. Lightly press several spots, check edges for drag, and sniff for solvent odor. If tack remains, wait; if fully dry, apply the next coat. Use consistent pressure and note variations across the wall to avoid uneven layers.
| Spot | Tactile | Sheen |
|---|---|---|
| Center | Slight | Low |
| Edge | Dry | High |
| Corner | Tacky | Medium |
Environmental Impact On Drying
Because temperature, humidity, and airflow directly affect how quickly paint solvents evaporate, you should factor local conditions into your recoat timing. You’ll check Environmental factors and Indoor conditions before applying another coat. Use a surface touch test, but adjust based on:
- Temperature: warmer speeds curing; avoid below label minimum.
- Humidity: high moisture slows drying; wait longer after rainy days.
- Airflow: good ventilation speeds solvent escape; use fans if safe.
If conditions are poor, wait several extra hours or a full day. When in doubt, follow manufacturer recoat windows to avoid adhesion problems.
Surface Prep and Substrate: How They Affect Drying
Although you might be enthusiastic to start brushing on paint, how you prepare the surface and what the substrate is will directly change drying time and final adhesion.
Surface prep and substrate type directly affect paint drying and adhesion—don’t skip cleaning, sanding, and matching the coating.
You should remove surface contamination like dust, oil, or mildew because contaminants slow solvent evaporation and block film formation. Sanding and degreasing create a consistent surface so paint wets and cures evenly.
Consider substrate flexibility: rigid materials let coatings dry uniformly, while flexible substrates may stress the film as they move, causing microcracks or delayed cure.
Match paint type to substrate and follow manufacturer instructions to guarantee predictable drying and lasting adhesion.
Does Primer Change White Paint Drying and Cure?
Using a primer can change how quickly white paint feels dry and how fast it fully cures. So you’ll often notice shorter tack and recoat times.
It also boosts adhesion and can prevent issues like peeling or uneven curing. But the effect depends on the primer type you choose (oil-based, latex, or bonding).
Match the primer to your surface and paint for the best drying and cure performance.
Primer Affects Dry Time
If you prime your surface before painting, you’ll often see noticeable differences in both drying time and final cure, since primers create a uniform base that helps paint adhere and evaporate solvents more evenly.
You’ll notice faster tack-free times and more consistent curing, especially with light paint color that might otherwise need extra coats.
Primer evens porosity, so brush types matter less for absorption. Consider these effects:
- Seal porous surfaces to reduce uneven drying.
- Reduce required topcoat thickness and speed overall cure.
- Improve coverage for bright whites, cutting recoat time and labor.
Adhesion And Cure Rate
When you prime before painting, the primer boosts adhesion and lets the topcoat cure more predictably by providing a consistent surface that paint can bond to. You’ll notice the topcoat dries evenly and reaches full cure on schedule because primer reduces soak-in and variable porosity.
Better adhesion improves paint durability, so your white finish resists chipping and wear longer. Primer also helps color retention by preventing substrate stains and tannins from bleeding through, keeping white true.
While it won’t speed initial surface dry time dramatically, primer promotes a reliable cure and a tougher, longer-lasting painted surface overall.
Primer Type Matters
Although primers don’t all act the same, the type you pick can noticeably affect how quickly your white paint dries and reaches full cure. You’ll notice differences in absorption, drying time, and final look based on primer chemistry and surface prep. Consider these practical effects:
- Oil-based primer: speeds initial drying on tannin-rich woods, improves adhesion, but can alter color blending slightly.
- Acrylic primer: promotes even paint sheen and consistent topcoat cure, dries faster in humid conditions.
- Shellac primer: seals stains quickly, gives rapid tack-free time, though compatibility with some topcoats can slow full cure.
How Temperature Affects White Paint Drying
Because temperature speeds up or slows the chemical and physical steps in drying, you’ll notice paint behaves very differently on hot days versus cold ones.
You’ll find higher temps shorten tack time and speed solvent evaporation, so white paint skins over faster but risks uneven sheen or brush marks if you push coverage.
Cold conditions prolong drying and can prevent proper film formation, so don’t rush recoats.
When mixing color or adjusting tints, remember temperature affects pigment dispersion; keep consistent paint storage at recommended temperatures to preserve viscosity.
Plan work for moderate temperatures to guarantee predictable drying, adhesion, and final appearance.
How Humidity Slows or Speeds Drying
When humidity’s high, you’ll notice white paint takes longer to dry because moisture in the air slows evaporation.
In contrast, low humidity helps solvents and water in the paint evaporate faster, so the surface dries more quickly.
Keep humidity in mind when planning your painting schedule to avoid extended tackiness or cracking.
High Humidity Effects
If the air around you holds a lot of moisture, white paint will take noticeably longer to dry. High humidity slows water evaporation, so you’ll notice tacky surfaces and extended recoat times. Factors tied to white paint chemistry and paint formulation determine how much you’re affected.
- Latex: waterborne paints retain moisture longer in humid conditions, increasing dry times.
- Oil/enamel: slower solvent release combines with humidity to extend curing.
- Additives: antifoam or coalescents in the formulation can either help film formation or worsen tackiness when humidity’s high.
Plan for extra ventilation and longer wait times.
Low Humidity Benefits
High humidity can stall paint drying, but low humidity works in your favor by speeding evaporation and shortening tack and recoat times. You’ll notice white paint firms up faster, so you can sand or apply a second coat sooner without lifting the first.
Low moisture also helps maintain consistent paint texture, preventing sagging or extended tackiness that blurs smooth finishes. Faster drying reduces dust and debris adhesion, giving truer color psychology effects—clean, bright whites read cooler and crisper.
Still, don’t overdo it: extreme dryness can cause cracking or uneven sheen, so balance ventilation and moderate humidity for best results.
How Ventilation and Airflow Influence Drying Time
Because air movement carries moisture away from the paint surface, improving ventilation speeds drying and helps coatings cure more uniformly. You’ll want to control airflow while you work: open windows, run fans, and avoid stagnant pockets so solvent and water evaporate faster.
Proper paint mixing ensures consistent moisture content, and correct brush techniques lay thinner, even coats that dry quicker.
- Position fans to push humid air out and draw fresh air in.
- Use cross-ventilation to prevent trapping damp air near walls.
- Pause between thin coats—circulation reduces tack time and improves cure.
How White Paint Sheen (Flat to Gloss) Affects Dry Time
Airflow and ventilation help paint dry more evenly, but the sheen you pick also changes how fast that happens. You’ll find flat and matte finishes feel dry sooner to the touch because they’ve more pigment and less binder, slowing solvent evaporation.
Eggshell and satin are in the middle, balancing durability and drying speed.
Semi-gloss and gloss use more resin, so they often tack longer before curing fully.
When doing color mixing, remember added pigments or tints can alter drying behavior slightly.
Choosing finish types affects appearance and practical drying time, so match sheen to use and patience.
When Is White Paint Dry Enough to Handle or Move Furniture?
If you need to move furniture or handle a freshly painted surface, wait until the paint is at least dry-to-touch and has had time to form a light skin—typically 1 to 6 hours for water-based whites and longer for oil-based or high-sheen finishes—so you don’t leave fingerprints, smudges, or tacky marks.
Wait until paint is dry-to-touch and lightly skinned—usually 1–6 hours for water-based whites—before handling.
You’ll also consider ventilation, temperature, and humidity; faster dry times reduce disruption.
For safe handling, follow these steps:
- Wait for dry-to-touch, then press gently in an inconspicuous spot.
- Lift with padded glides or felt to avoid scuffs.
- Allow 24–48 hours before heavy use.
Color blending and paint mixing can alter timings.
Tests to Check If White Paint Is Dry or Cured
When you want to know whether white paint is merely dry-to-touch or fully cured, run a few simple tests to check surface feel, firmness, and solvent resistance; these quick checks tell you if the paint can handle handling, traffic, or a second coat without damage.
Lightly press with a fingertip to assess tackiness and paint texture; a cured surface feels firm, not gummy. Try a fingernail scrape in an inconspicuous spot to check adhesion. Dab a cotton swab with rubbing alcohol to test solvent resistance.
Observe color psychology effects under different lights—cured paint shows consistent hue and sheen.
How to Speed Up Drying Safely (No Finish Damage)
You can speed up drying without harming the finish by boosting air circulation, keeping the room at a steady, warm temperature, and using safe drying aids.
Open windows or run fans to move air, but don’t blast hot air directly onto the paint.
If you use products like low-heat drying lamps or quick-dry additives, follow manufacturer instructions to avoid surface defects.
Increase Air Circulation
Although you can’t rush chemistry, boosting air circulation is one of the safest ways to speed white paint drying without harming the finish. You’ll avoid drips and soft spots by moving air gently across wet surfaces. Keep fresh air flowing, but avoid blasting wind that cools too much.
- Use oscillating fans to create steady, even airflow across the room.
- Open windows and doors to exchange humid air with drier outdoor air when possible.
- Position fans to pull air along painted walls, not directly onto wet brushstrokes.
Control Ambient Temperature
Because paint dries by evaporation, keeping the room warm (but not hot) speeds that process without harming the finish. So aim for a steady temperature in the manufacturer’s recommended range—typically 65–75°F (18–24°C) for most latex and oil-based paints.
You should avoid rapid swings that stress the film; sudden cooling can slow curing and sudden heat can trap solvents. Maintain consistent humidity too, since overly dry air can alter color matching and overly humid air prolongs tackiness.
Use a thermostat and small heaters if needed, but monitor for hotspots to prevent uneven drying, bubbles, or eventual paint peeling.
Use Safe Drying Aids
When you need to speed up drying without risking the finish, choose gentle, approved aids that boost evaporation or air movement rather than force chemical changes. You’ll protect finish durability and avoid altering paint color by using noninvasive methods.
Try these safe approaches:
- Use room fans to circulate air; position them to move moist air away from the surface.
- Run a dehumidifier to lower humidity and hasten solvent evaporation without heat stress.
- Apply low, indirect heat—like a distant space heater—briefly and carefully, monitoring temperature to prevent softening or discoloration.
Follow product instructions and test a hidden patch first.
Common Mistakes That Cause Slow or Tacky Drying
If paint’s drying slower than you expected, odds are a simple mistake is to blame. You might apply thick coats thinking coverage improves, but that traps solvents and delays curing.
Painting in high humidity or low temperature slows evaporation, so check weather and room conditions before you start.
Using the wrong primer or mixing different paint types causes incompatibility and tackiness.
Poor color matching can tempt you to overwork areas, extending open time.
Also, improper paint storage—old cans or contamination—alters consistency and drying behavior.
Follow label instructions, thin only as directed, and keep materials clean to avoid problems.
Troubleshooting Tacky or Slow-Drying White Paint
Although tacky or slow-drying white paint can be frustrating, you can usually pinpoint and fix the cause quickly by checking a few key factors: coat thickness, room temperature and humidity, ventilation, paint age or contamination, and compatibility with primer or previous coatings.
- Measure coat thickness and recoat only after proper drying; heavy layers trap solvents.
- Improve ventilation and lower humidity; fans and dehumidifiers speed curing and aid texture smoothing.
- Check paint age, contamination, and color blending issues; improper tints or mixed bases can prevent proper curing.
If problems persist, remove tacky layers and restart with correct prep and compatible products.
Special Cases: Cabinets, Trim, Ceilings, and Exterior White Paint
Covering cabinets, trim, ceilings, or exterior surfaces calls for different expectations and techniques than painting walls, so you should adjust drying times, product choices, and prep accordingly.
For cabinets and trim, use fast-drying alkyd or waterborne enamel for durability; allow 24–48 hours between coats and longer before heavy use.
Ceilings dry faster but show drips, so work quickly and use flat or matte formulas.
Exterior white paint needs breathable, weather-resistant formulations and can take longer to cure—watch humidity.
Keep leftover paint in proper paint storage, and test small areas for color matching before committing to full coverage.
Seasonal Tips: Painting White Paint in Winter vs Summer
When you paint white in winter versus summer, temperature and humidity change how quickly the paint dries, how it levels, and how it ultimately looks, so plan your timing and product choices accordingly. You’ll adjust techniques: in winter, warm the room, use slow-drying formulas, and monitor humidity to prevent lap marks.
Painting white in winter vs summer changes drying, leveling, and appearance—adjust timing, products, and techniques accordingly.
In summer, work earlier or later to avoid rapid drying that hinders leveling. Mind color blending when touching up under different seasons, and follow paint storage guidelines to keep consistency.
Tips:
- Winter: slow cures, humidify, longer recoat times.
- Summer: faster drying, thin coats, cool ventilation.
- Test swatches indoors.
Frequently Asked Questions
Can White Paint Yellow Over Time and Why?
Yes — white paint can yellow over time because additives, oil-based bases, nicotine, and UV exposure affect paint longevity and color stability. You’ll see gradual discoloration unless you choose high-quality, low-yellowing, UV-resistant formulations.
Is White Paint Safe for Nurseries and Infants’ Rooms?
Yes—white paint can be safe for nurseries if you choose low-VOC or zero-VOC formulas and let them fully cure; you’ll protect nursery safety and support infant health by avoiding strong odors, chemicals, and improper ventilation.
How Does VOC Level Affect White Paint Odor and Drying?
Like a whisper versus a shout, higher VOC emissions make odor duration longer and stronger; you’ll notice harsher smells and slower dissipation, while low‑VOC paints cut odor duration and let rooms air out faster, keeping occupants safer.
Can White Paint Cover Stains Without Special Primer?
Yes, you can often cover stains without special primer, but you’ll need a thicker paint or stain-blocking coat. Consider paint texture and drying temperature—smooth, opaque finishes at warm temps hide stains better than thin, cold-applied coats.
Will Tinted or Color-Matched White Dry Differently?
Yes — tinted or color-matched white can dry differently; you’ll notice slight shifts in color consistency and tint retention depending on pigment load, base type, and drying conditions, so test a sample before finishing the job.
Conclusion
You’ve got the essentials: drying vs. curing, paint types, recoat timing, and fixes for tacky white finishes—now what? Think ahead about temperature, humidity, and coat thickness to avoid delays, and always wait the manufacturer’s recoat time before sanding or applying another layer. For tricky spots like cabinets or exteriors, give extra cure time. Follow those tips, and your white paint will look crisp and durable—aren’t a few smart precautions worth a flawless finish?