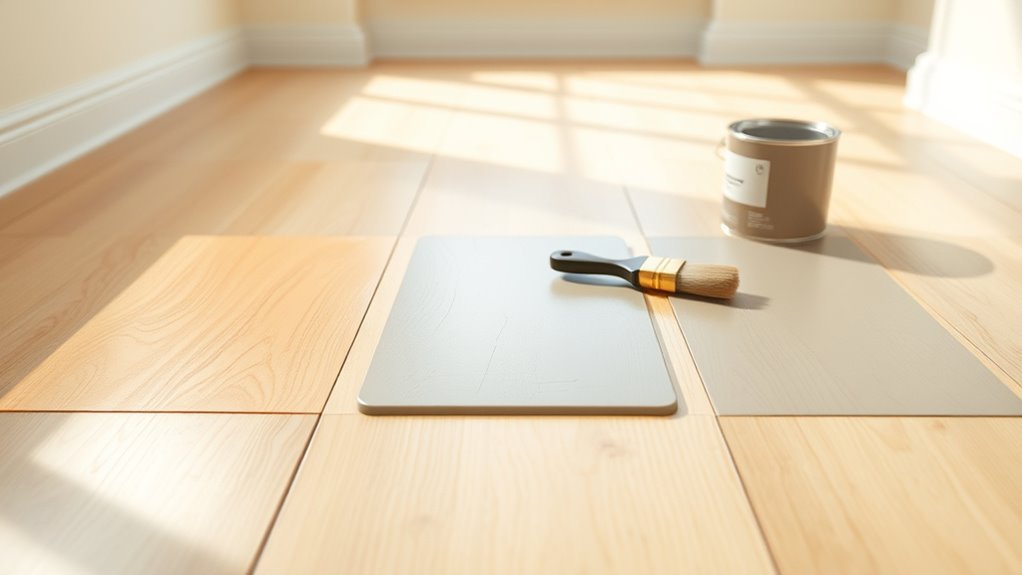
How Long Does Wood Floor Paint Take to Dry
You’ll usually find wood floor paint dry to the touch within 1–6 hours, but full, durable cure can take 24 hours to 30 days depending on paint type, coat thickness, temperature, and humidity. Latex paints recoat in 4–6 hours and cure slower; oil-based and polyurethanes may need 24–48 hours before light use and up to weeks to harden. Follow manufacturer times, ventilate, apply thin coats, and keep traffic light — more details explain why.
Typical Wood Floor Paint Drying & Curing Times (Quick Guide)
When painting a wood floor, you’ll want to know both how long the paint needs to dry to the touch and how long it takes to cure fully. Drying times typically range from 1–6 hours depending on product and conditions, while full curing often takes 7–30 days.
You’ll plan around manufacturer specs, temperature, and humidity. Oil-based paints usually dry slower and cure longer than water-based ones.
If you mix colors, keep records of color mixing ratios for touch-ups.
Store unused paint properly—seal cans, label them, and follow paint storage guidelines to preserve consistency and extend shelf life.
Dry to the Touch vs Fully Cured: What’s the Difference?
After you know the manufacturer’s drying and curing windows, it helps to understand what those stages actually mean for your project. You’ll notice “dry to the touch” feels solid overnight, but full cure can take days or weeks. Touch indicates surface dryness and reduced paint odor; cure means chemical hardening, full abrasion resistance, and stable color consistency. Don’t move heavy furniture until cured.
| Stage | What it means |
|---|---|
| Dry to touch | Surface feels dry |
| Tacky risk | Can still dent |
| Full cure | Hard, durable finish |
| Odor | Diminished vs gone |
Paint Types and Drying: Latex, Oil, and Polyurethane
When you’re choosing finishes for wood floors, the type of paint affects how quickly it dries and when you can walk on it.
Latex usually becomes touch-dry within hours but needs days to cure.
Oil-based paints take longer to dry and can require a week or more to harden fully.
Polyurethane topcoats have their own timing depending on solvent- or water-base.
I’ll explain typical dry times and curing steps for each so you can plan your project.
Latex Paint Dry Times
Curious how long latex paint will take to dry on your wood floors? You’ll usually get dry-to-touch in 1–2 hours and recoat in 4–6, depending on humidity, temperature, and ventilation. Thin coats dry faster; sanding between coats improves adhesion. Mind color blending—adding pigments or tints can change drying slightly. Proper paint storage preserves consistency and performance. Avoid heavy traffic for 24–48 hours and full cure for up to 30 days.
| Condition | Typical Dry Time |
|---|---|
| Touch dry | 1–2 hours |
| Recoat | 4–6 hours |
| Light use | 24–48 hours |
| Full cure | ~30 days |
Oil-Based Paint Curing
How does oil-based paint cure on wood floors, and what should you expect? You’ll get a hard, durable finish as solvents oxidize and evaporate, but curing takes longer than latex.
Expect tack-free times around 6–8 hours and recoat or light traffic after 24–48 hours. Full cure can take 7–30 days depending on temperature and humidity.
Keep ventilation to disperse paint fumes and avoid trapping solvent under rugs. Sand lightly between coats to follow wood grain and improve adhesion.
Maintain steady, warm, dry conditions to speed chemical crosslinking, but don’t rush use until the film fully hardens.
Polyurethane Topcoat Timing
Because polyurethane seals and protects the paint film, you should time your topcoat to match the underlying finish’s tack-free and recoat windows—on latex, that’s usually 24 hours; on oil-based, 24–48 hours or longer—so the poly bonds properly without trapping solvents. You’ll check manufacturer recommendations, consider humidity and temp, and wait until the finish’s recoat window. Color choices won’t affect drying much, but darker tones can show defects so sand lightly before poly. Budget considerations influence oil vs. waterborne poly.
| Substrate | Wait Time | Notes |
|---|---|---|
| Latex | 24 hr | Waterborne poly |
| Oil | 24–48 hr | May need longer |
| Newly painted | Follow label | Test adhesion first |
Primer Choice and Its Effect on Drying Times
When you pick a primer for a painted wood floor, you’re choosing the foundation that largely determines how fast the topcoat will dry and how durable the finish becomes.
Choose primers formulated for wood; oil-based sealers improve primer adhesion on tannin-rich or bare wood, while water-based acrylic primers dry faster and allow quicker recoats.
Low-VOC primers may slow curing slightly. If you need speed, use products labeled with drying accelerators or apply in warm, low-humidity conditions.
Always follow manufacturer recoat windows—skipping them risks poor bonding or extended curing despite fast surface dry times.
How Paint Sheen Changes Dry and Cure Times
Although sheen doesn’t change the chemical cure, it considerably affects how fast a painted wood floor feels dry and how quickly it can take traffic. You’ll notice gloss sheens dry to the touch faster and resist scuffs sooner than flats, since higher sheen films sit tighter and shed moisture more quickly. That doesn’t speed full cure; solvent or water must still evaporate and crosslink.
When choosing sheen, balance durability and appearance—high sheen shows imperfections and complicates color matching, while low sheen hides flaws.
Leftover paint? Use proper paint recycling to dispose of or repurpose rather than mixing incompatible sheens.
How Many Coats: And How Long to Wait Between Them?
Now that you know how sheen affects feel and scuff resistance, you’ll want to plan how many coats to apply and how long to wait between them to get both the look and durability you expect.
Aim for two to three thin coats for floors: one primer or base, one color coat, and an optional topcoat for high traffic.
Wait until each coat is dry to the touch—usually 2–6 hours—before light sanding and recoating.
For color matching, test a small area and keep leftover paint sealed; proper paint storage preserves tint and viscosity for touch-ups later.
Coat Thickness, Application Method, and Drying
How thick you lay each coat strongly affects how long the paint takes to dry—thicker layers hold more solvent and cure slower.
The method you use—brush, roller, or sprayer—also changes film thickness and drying uniformity.
Keep both factors in mind so you can plan realistic wait times between coats.
Coat Thickness Effects
Curious how the thickness of each coat and the way you apply it change drying times? You’ll find thinner coats dry faster while thicker ones extend cure time and risk tackiness. Balance color selection with coat builds: darker tints can mask thin spots, lighter tones show texture. Also consider finish durability—multiple thin coats often outlast a single heavy one.
- Thin coats: quick drying, smoother finish
- Thick coats: longer cure, potential for runs
- Multiple layers: improved durability, controlled drying
- Sand between coats: promotes adhesion, evens surface
Adjust coat thickness for room humidity and ventilation to optimize results.
Application Method Impact
Because the way you apply paint affects drying as much as coat thickness, choose your method with the cure schedule in mind. You’ll see rollers lay thicker layers faster; brushes give control but can drag drying; sprayers mist thin coats for quicker tack-free times. Match application to Color options and Budget considerations: spraying may cost more upfront but speeds cure. Test a small area to confirm drying, adhesion, and finish. Compare methods side-by-side:
| Method | Dry Time Impact | Suitability |
|---|---|---|
| Roller | Slower | Large areas |
| Brush | Moderate | Trim, detail |
| Sprayer | Fast | Smooth, fast jobs |
| Pad | Moderate-fast | Even coverage |
Surface Prep That Speeds Drying and Improves Adhesion
Before you apply paint, prep the wood so it dries faster and bonds better: clean off dirt and oils, sand to dull glossy finishes, repair holes, and remove loose finish or wax. You’ll control surface gloss to help adhesion and reduce trapping solvents that cause strong paint odor. Follow these focused steps to speed drying and secure a lasting coat:
- Wipe with TSP or mild degreaser, then rinse and dry thoroughly.
- Sand glossy areas with fine grit, vacuum dust, tack cloth.
- Fill gaps with wood filler, sand smooth.
- Remove residues and old wax; guarantee good ventilation before painting.
How Temperature Affects Wood Floor Paint Drying
You’ll want to keep paint drying in mind when choosing when to work—most wood floor paints dry best in an indoor temperature range of about 60–80°F (15–27°C).
Humidity interacts with temperature, so higher moisture slows curing even if the air is warm, and very dry air can cause surface skinning that traps solvents.
In cold weather the whole process stalls, so you’ll need heat or longer wait times to reach full hardness.
Ideal Temperature Range
When conditions are right, paint on a wood floor dries evenly and reaches full hardness on schedule; aim for a consistent indoor temperature between about 60°F and 80°F (15°C–27°C), since most floor paints cure best in that range.
You’ll get predictable drying, better adhesion, and fewer finish defects if you keep temps steady. Consider these tips:
- Start painting when your space has stabilized within the range.
- Avoid sudden temperature swings that disrupt curing.
- Test small areas for color matching under the room’s typical temperature.
- Choose eco friendly options that still specify this temperature window.
Monitor and adjust HVAC to stay within range.
Humidity And Temperature
Although temperature sets the pace for chemical reactions in floor paint, humidity plays an equally important role by controlling how quickly moisture leaves the finish and the wood beneath it. You’ll notice high humidity slows solvent evaporation, extending tack time and increasing dust pickup risk.
Lower humidity speeds drying but can cause surface skinning that traps solvents below, harming color durability and adhesion. Aim for moderate temperature and 40–60% relative humidity for even cure, consistent finish sheen, and ideal wear resistance.
Monitor conditions during and after application, and adjust ventilation or a dehumidifier to maintain steady drying for best results.
Cold Weather Effects
Wondering how cold weather will change your floor paint’s drying? You’ll notice slower cure times as low temps reduce solvent evaporation and chemical reactions. Cold can also affect adhesion and the final finish sheen, so plan longer wait times and controlled conditions.
Consider these steps to manage cold-weather painting:
- Warm the room slightly before and after application to speed drying.
- Use heaters and dehumidifiers to keep conditions stable.
- Choose paints formulated for lower temperatures and test paint color on a small area.
- Allow extra curing time before heavy use; cold can extend tackiness and reduce durability.
Follow guidelines to avoid peeling or uneven sheen.
How Humidity Affects Drying and Curing
How does humidity change how fast wood floor paint dries and cures? You’ll notice high humidity slows solvent and water evaporation, lengthening tack and cure times; low humidity speeds evaporation but can cause fish-eyes or cracking depending on paint color and layer thickness. Choose compatible application tools to control film thickness and reduce problems. Monitor humidity during each coat to time recoat and traffic safely.
| Humidity Level | Effect on Drying |
|---|---|
| Low (≤40%) | Faster dry, risk of cracking |
| Moderate (40–60%) | Ideal balance for most finishes |
Ventilation, Airflow, and the First 24 Hours
During the first 24 hours, you’ll want to boost air exchange by opening windows and using fans to move fresh air across the painted surface.
Keep humidity in check with a dehumidifier or HVAC settings so moisture doesn’t slow drying.
Proper airflow and controlled humidity together speed surface drying and set the stage for curing.
Improve Air Exchange
Want your newly painted wood floor to cure cleanly and evenly? You should boost air exchange in the first 24 hours to help solvent evaporation, prevent tackiness, and preserve wood grain and color matching.
Open windows and doors to create cross-breezes, and use fans to move air gently across the surface. Avoid blasting air directly, which can cause dust and uneven drying.
Check progress hourly and adjust airflow as paint sets.
- Open opposite windows for cross-ventilation
- Place box or oscillating fans strategically
- Keep doorways open between rooms
- Limit foot traffic until paint skins over
Control Humidity Levels
Why does humidity matter when your wood floor paint is drying? You’ll slow or speed drying based on humidity levels; high moisture traps solvent, extending tack time, while very low humidity can cause rapid skinning and bubbling.
In the first 24 hours, control airflow with windows, fans, or dehumidifiers to keep conditions steady. Aim for moderate humidity and consistent ventilation so coatings cure evenly and you avoid blotches that affect paint transparency.
Check a hygrometer, avoid drastic temperature swings, and don’t seal or heavy-traffic the floor until readings stay stable. Small adjustments now save you rework later.
How Wood Species and Moisture Content Influence Drying
Because different species absorb and release moisture at different rates, you’ll see big variations in paint drying times across wood types. Dense, oily woods like teak or mahogany slow drying, while porous species like pine let solvents evaporate faster.
Different wood species alter paint drying—dense, oily woods slow curing while porous woods like pine dry faster.
You should check wood grain orientation and stain absorption before painting: tight grain holds moisture longer, increasing tack time. Moisture content matters—too high and paint won’t cure properly; too low and it can soak in unevenly.
Consider these practical effects:
- Porosity affects initial drying speed
- Moisture gradient causes uneven finish
- Seasonal changes alter cure time
- Sanding changes absorption rate
Additives and Extenders: Do They Slow or Speed Drying?
When you add extenders or additives to wood floor paint, they’ll change how fast the coating skins over and cures.
Some thickeners and anti-sag agents can slow drying by trapping solvents, while fast-evaporation retarders or certain catalysts can speed it up.
You’ll need to weigh the performance trade-offs—appearance, durability, and application ease—against any change in drying time.
Effects On Drying Time
Additives and extenders can meaningfully change how fast your wood floor paint dries, since they alter the paint’s viscosity, solvent balance, and film-forming behavior. You’ll notice thicker extenders usually slow surface drying by trapping solvents, while fast-evaporation additives speed skin formation.
Choose eco friendly options carefully; some water-based extenders prolong tackiness despite lower VOCs. Also consider color matching: pigments and tints can affect heat absorption and drying uniformity.
Practical effects include:
- Slower cure with high-viscosity extenders
- Faster surface set with rapid solvents
- Uneven drying from heavy tinting
- Longer full cure for eco-friendly blends
Types And Trade-Offs
Although extenders and additives each change paint behavior in specific ways, you’ll usually trade drying speed for other performance benefits like flow, leveling, or durability. You’ll find extenders slow evaporation to improve color blending and open time, while fast-dry additives speed curing but can raise brush marks and alter finish sheen. Choose based on traffic, climate, and desired look: slower drying helps self-leveling; faster drying reduces dust contamination. Test small areas to balance open time against durability. Refer below for quick comparisons to decide which compromise matches your project needs.
| Additive | Effect |
|---|---|
| Extender | Slows drying |
| Fast-dry | Speeds drying |
| Leveler | Improves sheen |
Reading Manufacturer Drying and Recoat Times Correctly
Because manufacturers list both “dry to the touch” and “recoat” times, you need to know which one applies to your next step. The first tells you when the surface can be handled lightly, while the second tells you when it can be recoated safely without trapping solvents or causing adhesion problems.
Read labels and tech sheets carefully, since ambient conditions change times. Consider color blending and paint durability when planning coats so you don’t rush and risk streaks or weak bonds.
- Note “touch” vs “recoat” explicitly on your schedule.
- Adjust times for humidity and temperature.
- Wait full recoat interval for durability.
- Use recommended thinner or conditioner.
How to Test Whether Paint Is Fully Cured at Home
Knowing the difference between “touch” and “recoat” times helps, but you still need simple checks to confirm paint is fully cured before heavy use.
Gently press an inconspicuous spot with your fingernail; cured paint resists denting and won’t peel.
Test abrasion by rubbing a hidden area with a soft cloth and a little mineral spirits—no tackiness or color transfer means good cure and proper color matching.
Try a small weight on a scrap board painted with identical brush techniques to check for cracking or marks after 24–48 hours.
If all tests pass, the finish is likely cured enough for normal use.
When a Floor Is Safe for Light Foot Traffic
Once the paint no longer feels tacky and withstands the simple cure checks, you can cautiously allow light foot traffic—like slippers or socks—after the manufacturer’s recommended recoat window, usually 24–48 hours for most floor paints.
Walk slowly, test small areas, and avoid high-moisture zones. Consider how color selection and paint durability affect wear: lighter tones hide scuffs differently; tougher formulas resist abrasion.
Follow these quick best practices before wider use:
- Keep traffic minimal for the first 48–72 hours.
- Use soft-soled footwear only.
- Spot-test with a damp cloth for finish transfer.
- Avoid dragging anything across the floor.
When to Move Furniture Back After Painting
You’ll want to wait for the full cure time per coat rather than just surface dryness before returning furniture. Keep in mind warmer, well-ventilated rooms speed curing, while cool or humid conditions can add days.
When you do move pieces back, use felt pads, lift instead of dragging, and protect legs and edges with blankets or cardboard.
Cure Time Per Coat
Because curing continues long after the surface feels dry, you’ll want to wait the recommended cure time per coat before putting heavy furniture back on a freshly painted wood floor.
You’ll also consider color customization and environmental factors, since coatings deepen and harden differently. Follow manufacturer times—often 24–72 hours between coats, and full cure in 7–30 days—before returning heavy items.
- Light foot traffic: after 24–48 hours
- Additional coats: wait full recommended interval
- Heavy furniture: only after full cure period
- Protective pads: use them even after cure for extra care
Check the paint label for exact cure guidance.
Room Temperature Effects
How warm the room will have a big impact on drying and curing times, so don’t rush moving furniture back until the temperature has stayed within the paint’s recommended range for at least the minimum cure period.
You’ll want to monitor humidity and maintain steady warmth—fluctuations slow curing and can affect sheen and adhesion.
If you chose specific color options, note darker hues can absorb heat and cure differently.
Use proper tool selection during application to guarantee even film thickness; thicker coats take longer to cure.
Only return furniture when the floor’s fully cured to avoid impressions or tacky stains.
Furniture Protection Tips
When deciding when to move furniture back, wait until the floor’s finish has reached its recommended cure time and feels fully hard to the touch. Otherwise, you risk impressions, stains, or adhesive transfer.
You’ll protect your investment with simple Furniture care steps and mindful Color selection so finishes don’t scuff or discolor. Follow these actions before returning pieces:
- Use felt pads or coasters under legs to prevent scratches and indentations.
- Lift rather than drag furniture; use sliders for heavy items.
- Test a small area to confirm no adhesive transfer from pads.
- Allow rugs and mats extra cure time to avoid trapping solvents.
When Rugs, Pets, and Heavy Use Can Return
If you want rugs, pets, and heavy traffic back on your freshly painted wood floor without damaging the finish, wait until the paint has cured enough to handle weight and abrasion—usually several days for light use and up to a week or more for heavy use.
You’ll test small areas first: press, drag, and inspect for tackiness.
Use non-slip rug pads to prevent scuffs and guarantee color matching if overlays alter appearance.
Let pets roam gradually, trimming nails to reduce scratches.
Prefer eco-friendly paints? They may cure differently—follow manufacturer cure times before resuming full use.
Exterior vs Interior Wood Floor Paint Drying Times
Because exterior and interior wood floors face different temperatures, moisture, and UV exposure, their paint dries and cures at different rates and needs different formulas. You’ll choose exterior formulas for porches and decks that resist sun and rain, while interior paints prioritize low odor and faster touch-dry times.
Consider historical context for older homes when matching sheen and durability, and plan color matching so finishes look consistent indoors and out.
- Exterior: slower cure, UV-resistant, flexible
- Interior: quicker dry, low-VOC, harder finish
Prep: essential for adhesion and longevity
Topcoat: different specs for each environment
Seasonal Timing: How Seasons Change Project Duration
You’ll notice temperature and humidity are the biggest factors that speed up or slow down paint drying on wood floors.
In hot, dry months, paint will cure faster, while cold or humid weather can extend drying and recoat times by days.
Plan your project schedule around seasonal forecasts so you’re not stuck waiting for conditions to improve.
Temperature And Humidity
When planning your wood floor painting, remember that temperature and humidity directly change how fast paint dries and cures. Warm, dry conditions speed things up, while cold or humid air slows solvent evaporation and film formation.
You’ll want to control environment and timing so Color matching stays consistent and Tool maintenance isn’t rushed.
Consider these practical steps:
- Paint when indoor temps are within the product’s recommended range.
- Use dehumidifiers or fans to reduce moisture and promote even curing.
- Avoid painting right before expected humidity spikes (like storms).
- Allow extra cure time in cooler or damp conditions to prevent tackiness.
Seasonal Drying Times
How do seasons affect your wood floor paint project timeline? You’ll find spring and fall often offer the best balance: moderate temperatures and humidity let coats dry predictably, so you can recoat faster and finish sooner.
In summer heat, paint can skin over quickly but cure unevenly, requiring longer full-dry times.
In winter, low temps and indoor heating slow drying and raise humidity indoors.
Plan schedules around these patterns, allow extra curing time when needed, and ventilate to speed drying.
Also consider environmental impact: avoid open-air stripping in sensitive seasons and follow proper paint disposal to protect ecosystems.
Comparing Brand Drying Times: What to Look For
Because different manufacturers formulate paints for distinct performance priorities, comparing brand drying times means looking beyond the single “dry to the touch” number on the can. You should examine label details, testing conditions, and how historical techniques influence modern formulations.
Also weigh eco-friendly options and VOC claims, since they affect solvents and cure behavior. Check:
- Manufacturer-specified cure time versus tack-free time
- Test conditions (temperature, humidity) used to derive times
- Finish type (oil, waterborne, alkyd) and recommended recoats
- Real-user reviews about practical dry times in similar climates
That helps you pick a brand matching your schedule and values.
How to Speed Up Drying Safely Without Harming the Finish
If you want faster drying without risking tacky spots or a weakened finish, focus on controlling environment and application rather than shortcuts like heat blasts or heavy solvent use.
Increase ventilation with fans and open windows to move dry air across the floor. Use a dehumidifier in humid conditions and modest heat (under 75°F/24°C) to avoid film issues.
Apply thin, even coats and follow manufacturer recoat times; thin layers cure faster.
Choose low-VOC, eco-friendly finishes formulated for quicker cure.
For historical restoration, test finishes in an inconspicuous area to ensure compatibility and avoid harming patina.
Common Mistakes That Prolong Curing (And How to Avoid Them)
When you rush the job or skip a few key steps, paint takes far longer to fully cure and you risk blemishes or a soft finish. You can prevent common mistakes that stall curing by controlling conditions, prepping properly, and handling the coat right.
Watch for these issues and fix them early:
- Applying thick coats that hide wood grain but trap solvents, slowing cure.
- Painting in high humidity or low temps; ventilation matters for paint texture.
- Skipping sanding between coats, which prevents adhesion.
- Using incompatible primers or topcoats that react and remain tacky.
Follow instructions, thin coats, and test adhesion.
How to Calculate Total Project Time (Prep to Full Cure)
Although estimating total project time takes a few steps, you can get a reliable schedule by adding prep, coats with drying intervals, and the full cure period for traffic. First, list tasks: sanding to reveal wood grain, cleaning, primer, coats, and color matching touch-ups. Sum minimum and buffer times. Use a simple table to track stages, durations, and notes.
| Stage | Typical Time | Notes |
|---|---|---|
| Prep | 2–6 hrs | Sanding, wood grain check |
| Primer | 2–4 hrs | Quick dry |
| Coats | 4–24 hrs each | Include color matching |
| Cure | 24–72 hrs | No heavy traffic |
Plan Drying Time by Room Size, Ventilation, and Traffic
Now that you’ve mapped out prep, coats, and cure times, plan drying by factoring room size, ventilation, and expected traffic. Smaller rooms dry faster; larger spaces trap humidity and need more airflow. Open windows, run fans, and use dehumidifiers to speed drying without harming decorative accents or disrupting color matching.
Consider when people will need access and protect freshly painted areas accordingly.
- Small rooms: quicker turnover, minimal disruption
- Large rooms: stagger work, increase ventilation
- High-traffic zones: extend cure before walking
- Low-traffic areas: shorter wait, watch for dust
Adjust timelines to avoid rework and ensure consistent finish.
Schedule Follow-Up Maintenance After Painting
Because paint continues to settle and your floor sees wear, schedule routine follow-up maintenance so small issues don’t become costly repairs. You’ll inspect after the first week, then monthly for three months, and yearly thereafter.
Patch chips promptly to prevent moisture damage; keep a small stash of each paint batch for accurate color matching.
Use the right brush selection for touch-ups—a fine angled brush for edges and a short-bristled sash brush for small panels—to blend repairs seamlessly.
Reclean before touching up, scuff glossed areas lightly, and recoat high-traffic zones as needed to maintain finish and longevity.
Frequently Asked Questions
Can Painted Wood Floors Be Recoated With a Different Paint Type Safely?
Yes — you can recoat painted wood floors with a different paint type, but you’ll need thorough floor prep and confirm paint compatibility. Sand, clean, prime as needed, and test a small area so adhesion and finish won’t fail.
Will Paint Yellowing Over Time Affect Dry/Cure Timing?
Like a slow sunrise, yes — yellowing won’t change dry times much, but it signals cure issues: Color fading and temperature fluctuations can affect ultimate hardness and gloss, so you’ll want proper ventilation and stable temps for best results.
Does Underfloor Heating Speed Curing or Damage Paint?
Yes — underfloor heating speeds curing but can also damage paint if too hot or rapid. You’ll see Heat impact accelerating solvent loss; watch Moisture influence too, avoiding large fluctuations and following manufacturer temperature and cure guidelines.
How Does Stain-Through From Old Finishes Impact Drying?
Stain-through acts like a hidden tide that soaks the shore; it slows drying and can re-dissolve finishes. You’ll see uneven wood grain appearance and reduced finish penetration, so prime or strip to guarantee proper drying.
Can High-Traffic Pet Nails Cause Premature Finish Failure?
Yes — you’ll see finish damage when pet nails repeatedly scratch and gouge; you’ll need tougher coatings, regular maintenance, trimming nails, and protective mats to prevent premature finish failure and extend the floor’s lifespan.
Conclusion
You’ve painted, prepped, and patiently paced the process—now protect your polished planks. Remember: drying is different from durable curing, so don’t rush foot traffic. Prioritize proper primer, pick paint and sheen that suit your space, and promote airflow to prevent prolonged problems. Measure moisture, minimize mishaps, and map out maintenance. With smart scheduling and steady sanding or sealant steps, your wood will weather wear while retaining its refreshed, resilient, reliable radiance.