How Long for Joint Compound to Dry Before Painting
You should wait until the joint compound is completely dry and hard before sanding, priming, or painting—usually 24–72 hours for thin coats, longer for thick layers, high humidity, or cool temperatures. Thin 1/16–1/8 inch coats dry fastest; setting powders cure faster than premixed mud. Check by touch, fingernail, and uniform matte color or use a moisture meter; use heat, ventilation, or dehumidifiers cautiously to speed drying. Keep going to learn practical checks and tips.
How Long Should You Wait to Paint Over Joint Compound?
If you’ve just finished applying joint compound, don’t rush to paint—wait until it’s fully dry and cured to avoid adhesion problems and visible imperfections.
If you’ve just applied joint compound, wait until it’s fully dry and cured before painting to avoid problems.
You’ll typically wait 24–72 hours per coat under normal humidity and temperature; thicker layers or cooler, humid conditions prolong the drying process.
Feel for firmness and absence of coolness to confirm dryness.
Sand lightly, remove dust, and then prime to seal the surface before painting.
If multiple coats were applied, allow each coat to dry fully.
Rushing risks peeling, blistering, or muddy seams—so be patient and test before you paint.
Quick‑Set (Hot) Mud vs Premixed All‑Purpose Mud
Now that you know to wait for full dryness before painting, consider how the type of joint compound you used affects drying and workflow: quick‑set (hot) mud and premixed all‑purpose mud behave very differently.
You’ll find quick‑set sets by chemical reaction, giving predictable hard times and faster sanding; it’s useful when you need short turnaround and strong joint adhesion on deeper fills.
Premixed all‑purpose mud dries by evaporation, so you must allow more time, especially in humid areas, but it’s easier to feather and repair.
Check paint compatibility on product labels; some quick‑sets may need a primer before painting for best results.
What Drying Times to Expect for Common Compounds (Brand Examples)
When you’re planning paint time, know that different compounds dry at very different rates.
Ready‑mix all‑purpose compounds usually need 24 hours between coats.
Lightweight topping compounds can dry a bit faster but may still take 12–24 hours.
Setting‑type powder compounds offer predictable set times from 5 minutes to several hours depending on the mix.
Pick the product based on how fast you need to finish and follow the manufacturer’s stated set/dry time.
Ready-Mix All-Purpose Compound
Because ready-mix all-purpose compound comes pre-blended for convenience, you can expect its drying behavior to differ from powder setting compounds. You’ll find it dries slower, especially in thick layers, so plan for 24–48 hours between coats under normal conditions. Ignore common joint compound myths and focus on proper finishing techniques: thin coats, good ventilation, and sanding when fully dry.
| Condition | Typical Dry Time |
|---|---|
| Thin coat, warm/dry | 12–24 hours |
| Thin coat, cool/humid | 24–48 hours |
| Thick coat | 48+ hours |
Adjust times for temperature and humidity.
Lightweight Topping Compound
If you want a faster, easier finish on your final skim coats, lightweight topping compound is a good choice because it dries quicker and sands softer than standard all-purpose mixes. You’ll find most brands dry to paint in 24–48 hours under normal conditions, though thin coats can be ready sooner.
Drying depends on thickness, humidity, temperature, and the compound formulation. Expect slightly longer times in cool or damp spaces.
- Use thin skim coats for fastest drying.
- Increase ventilation and warmth.
- Avoid overworking the surface.
- Test dryness by touch and a small paint patch.
- Light sanding improves adhesion.
Setting-Type (Powder) Compounds
Lightweight topping compounds speed up final coats, but setting-type (powder) compounds give you more control over cure time and strength for repairs and deeper fills. You’ll choose from quick-setting (20–45 minutes), standard (45–90 minutes), and slow-setting (several hours) powders—brands like Durabond, EasySand, and Level 5 list specific set times on the bags.
For deep fills, mix thicker and allow full chemical cure before sanding. Proper joint preparation speeds drying and adhesion.
After sanding, check moisture; then pick primer selection compatible with the compound and substrate. That guarantees paint adhesion and avoids blistering or uneven sheen.
How Application Thickness Affects Drying Time
If you apply joint compound in thin layers, it’ll dry much faster and more evenly.
Thick coats hold moisture and can take considerably longer to cure, sometimes needing extra drying time between passes.
Plan your work in thinner applications when possible to speed up drying and reduce cracking.
Thin Layers Dry Faster
Because joint compound dries from the surface inward, you’ll get faster results by applying thinner coats. You’ll control joint texture and speed up drying with proper compound mixing and thin, even passes. Thin layers reduce trapped moisture and let you paint sooner.
- Apply 1/16–1/8 inch per coat for consistent drying
- Use light feathering to blend edges without buildup
- Mix to a creamy, lump-free consistency for even spread
- Sand lightly between thin coats to refine texture
- Allow adequate flash time (15–30 minutes) before next coat
Thin layers save time and improve finish quality.
Thick Coats Take Longer
When you apply a thick layer of joint compound, it holds far more moisture and dries much more slowly than thin passes, so plan for extended drying times and possible cracking as the surface skins over while inner layers stay wet. You’ll want to avoid heavy builds unless correcting deep gouges; thick coats increase sagging risk and lengthen cure time dramatically.
For joint smoothing, feather thin layers and wait fully between applications to prevent trapped moisture and uneven wall texture. Use a moisture meter or press test before sanding or painting, and remember that patience prevents rework and visible defects.
Why Temperature Speeds Up or Slows Drying

Although temperature might seem like a simple number on a thermostat, it directly changes the chemical and physical processes that dry joint compound. You’ll notice Temperature effects fast or slow moisture evaporation and the compound’s curing reactions, creating or preventing drying delays.
If it’s too cold, bonding and water release stall; if too hot, surface skinning can trap moisture.
- Warmer air increases molecular movement, speeding evaporation.
- Cooler air reduces reaction rates, lengthening cure time.
- Extreme heat can cause cracking or uneven drying.
- Mild, steady warmth promotes uniform curing.
- Monitor temps to avoid surprises before painting.
How Humidity and Ventilation Change Drying Speed
Temperature sets the stage, but humidity and ventilation determine how quickly moisture actually leaves your joint compound. If humidity’s high, drying slows and you’ll wait longer before paint.
Low humidity speeds evaporation but can cause rapid surface crusting. You should run fans and open windows to create steady airflow, or use a dehumidifier in damp spaces.
Balance airflow to avoid dust settling on tacky surfaces, which affects texture enhancement and final appearance. Plan your schedule around prevailing humidity forecasts so color selection and finish won’t be compromised by uneven drying that forces extra sanding or touch-ups.
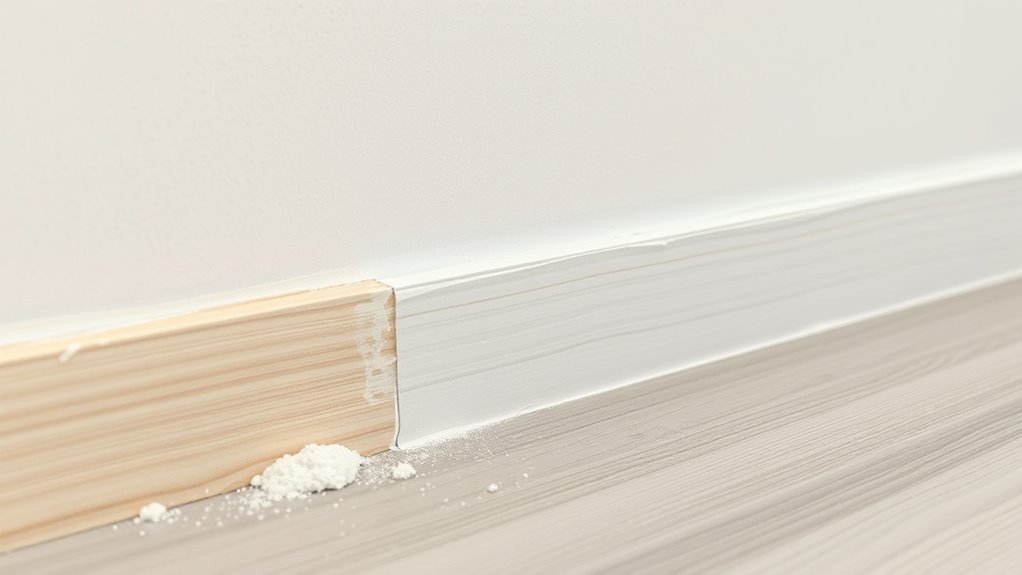
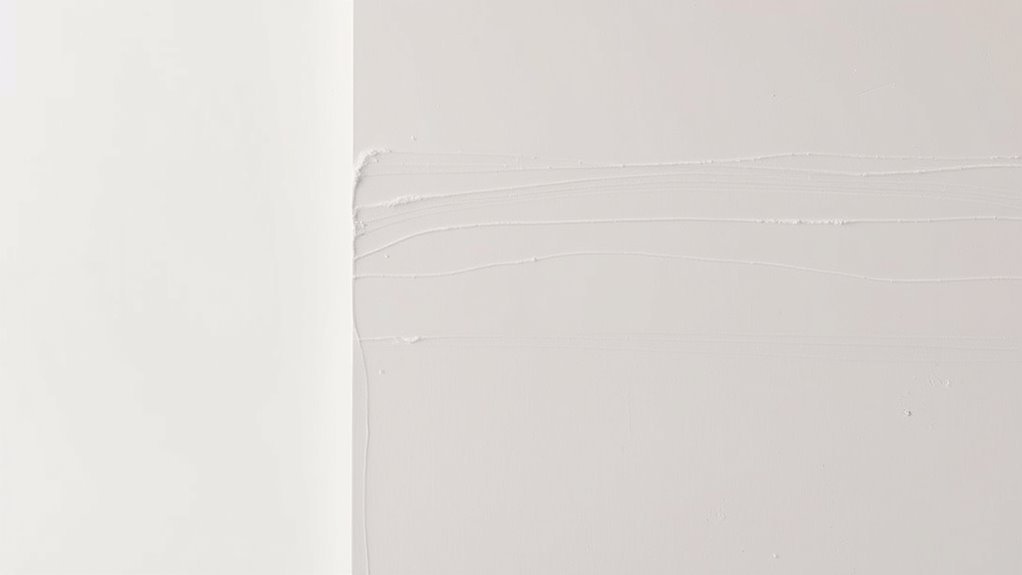
How to Tell If Joint Compound Is Fully Dry
If the joint compound no longer feels cool or slightly damp to the touch and shows a uniform, matte finish with no darker patches, it’s likely dry enough to sand or paint. You’ll still want to verify visually and tactilely as part of the drying process.
Check these simple cues before proceeding:
- Surface color is consistent with surrounding drywall.
- No soft or gummy spots when gently pressed.
- Edges aren’t lifting or cracking.
- Thin areas dry faster; inspect them closely.
- Lightly sand a small spot to confirm powdery dust, not smearing.
Trust these signs to avoid premature painting.
Using Moisture Meters and Dew Point Checks to Confirm Dryness
When you need objective confirmation that joint compound is ready for sanding or painting, use a moisture meter and check the dew point to avoid trapping moisture under paint. You’ll take spot readings with moisture meters across patches, comparing values to the surrounding drywall. Also calculate dew point from temperature and relative humidity; if substrate temperature is near dew point, wait — condensation can form under paint.
| Check | Action |
|---|---|
| Moisture meters | Take multiple readings |
| Dew point | Compare to surface temp |
| Decision | Proceed if readings low and surface temp > dew point by several degrees |
Drying Time Guidelines for Taping and Finishing Coats
Because drying varies with compound type, coat thickness, and site conditions, you should treat the manufacturer’s stated times as starting points rather than guarantees. You’ll base taping and finishing schedules on conditions: gypsum-based compounds dry faster than setting-type mixes, thin coats dry quicker than thick ones, and warm, ventilated spaces speed curing.
Watch for uniform dullness and firm edges before next coat. For best results think beyond time—consider surface appearance, color matching, and texture blending so repairs disappear.
- Thin coats wherever possible
- Allow extra time in cold/humid rooms
- Use setting compounds for tight timelines
- Check seams visually
- Prioritize even texture blending
When You Can Sand: Wait Times and Simple Tests
You can usually sand joint compound once it’s fully dry to the touch and feels hard rather than tacky. To check, press a clean fingertip gently—if it leaves no mark and the surface doesn’t feel cool or soft, it’s ready.
For thicker or cold/apartment conditions, wait longer and try a small scratch test with a fingernail before sanding the whole area.
When To Sand
Wondering how long to wait before sanding joint compound? You’ll rely on the drying process and visual cues: the surface should look uniformly matte and feel cool, not tacky. Don’t rush — premature sanding causes gouges and uneven finish.
Follow these quick pointers to decide when to sand:
- Confirm compound is fully dry to the touch across the entire patch.
- Look for consistent color and no darker, damp spots.
- Gently press with your fingertip; no indentation should remain.
- Room temperature and low humidity speed drying.
- Thin layers dry faster than thick ones.
Sand lightly and check progress frequently to avoid overworking the surface.
Simple Dry Tests
When the patch looks and feels uniformly dry, run a few quick tests before you grab the sander. You’ll confirm cure, avoid gouging, and verify proper joint preparation and paint compatibility. Try a fingernail press, a light scratch, and a moisture check with a damp cloth; all should show firmness, no tack, and no darkening. If uncertain, wait another hour and retest.
| Test | What to look for | Action if fails |
|---|---|---|
| Fingernail press | No indentation | Wait, retest |
| Scratch | No tack | Wait, retest |
| Damp cloth | No dark spot | Wait, retest |
| Tap | Solid sound | Proceed to sand |
Painting Timelines After Sanding vs Before Final Coats
Although sanding removes imperfections and smooths the surface, the timing between sanding and applying your final coats matters for adhesion and finish quality. You need to respect the joint compound drying process; if you sand too soon you risk weak adhesion and visible shrinkage lines.
Sand when fully dry, dust thoroughly, then wait briefly before priming to let micro-dust settle.
Sand thoroughly once completely dry, clear dust, then wait a moment before priming to let micro-dust settle
- Sand only after joint compound feels hard and cool
- Remove dust with a vacuum and tack cloth
- Prime soon after cleaning to seal pores
- Avoid long exposure that attracts moisture
- Check for hairline cracks before final coat
Apply paint confidently after these checks.
Speed Up Drying Safely: Heat, Airflow, Dehumidifiers
You can speed up joint compound drying by using controlled heat—keep temperatures moderate to avoid cracking.
Increase airflow with fans and open windows to move moist air away from the surface.
Run a dehumidifier to pull extra moisture from the room and shorten drying time safely.
Use Controlled Heat
If you need to speed up joint compound drying, controlled heat plus airflow and dehumidification will do it safely without cracking or bubbling. You’ll use temperature control and moisture management to dry evenly: keep temps moderate, avoid direct hot blasts, and pair heat with dehumidifiers.
Monitor progress and adjust to prevent surface skinning.
- Set thermostat to a steady, moderate level
- Use indirect heaters, not direct torches
- Combine with dehumidifier for consistent moisture removal
- Check compound temperature and feel for tackiness
- Reduce heat as material near dries
You’ll protect finishes and stay on schedule.
Increase Airflow Strategically
When you boost airflow around joint compound, you speed moisture loss without raising temperature too much—so set up fans to move air across surfaces, not blast them directly. You’ll focus on Airflow optimization to promote steady evaporation and moisture control. Position oscillating fans to circulate air along walls and ceilings, keep rooms ventilated, and alternate fan angles every few hours. Avoid directing hot air straight at patches or creating dust. Monitor compound firmness; stop airflow if edges dry too fast. Use the table below for quick setup tips.
| Action | Note |
|---|---|
| Fan type | Oscillating |
| Placement | 3–6 ft away |
| Angle | Along surface |
| Timing | Intermittent |
| Check | Touch test |
Run A Dehumidifier
Along with controlled airflow, running a dehumidifier pulls excess moisture from the room and speeds compound curing without overheating the space. You’ll shorten dry time reliably, especially in humid climates, and protect texture techniques while preserving surface integrity.
Set the unit for steady humidity reduction, not rapid desiccation, to avoid cracking. Monitor with a hygrometer and check edges for uniform dryness before sanding. Consider primer compatibility once dry; some primers need fully cured compound to adhere properly.
- Use a dehumidifier sized for the room
- Maintain moderate airflow
- Check humidity daily
- Avoid direct heat on compound
- Test a small patch before priming
Rookie Mistakes That Ruin Paint Adhesion
Because paint only sticks to a clean, stable surface, a few simple rookie mistakes can wreck your finish before you even open the can.
You’ll want proper joint preparation: remove dust, dry skim coats fully, and sand lightly without glazing the compound.
Don’t assume any primer will fix everything—match primer type to paint compatibility and substrate.
Avoid painting over damp spots, oily residues, or loose compound.
Skip heavy coats to mask flaws; they’ll sag or peel.
Test a small area if unsure.
Follow manufacturer cure times and use recommended primers so your paint actually adheres and lasts.
Troubleshooting Long‑Drying Spots and Soft Patches
If you spot areas that stay soft or take forever to dry, first check for hidden moisture sources like leaks, high humidity, or poor ventilation.
Then assess whether the compound was applied too thickly—thicker layers cure much slower and may need sanding or reapplication in thin coats.
Finally, perform a simple adhesion and cure test by pressing and lightly scraping a small area to decide if you can paint or must strip and re-treat.
Identify Moisture Sources
When you spot long-drying areas or soft patches in joint compound, your first step is to find where moisture’s coming from so you can fix the root cause rather than chase symptoms. Check visible leaks first, then hidden sources. Think of joint health like preventing mold in drywall installation: moisture ruins seams.
- Inspect roofs and flashing for leaks.
- Check plumbing lines and fixtures nearby.
- Look for condensation from poor ventilation.
- Scan for exterior wall penetration or flashing failures.
- Probe behind trim or outlets for hidden dampness.
Document findings, dry the area, then repair the true source before reapplying compound.
Assess Compound Thickness
While checking moisture sources is essential, you also need to verify the compound’s thickness because overly thick layers are the most common cause of long drying times and soft spots. Check depth with a straightedge and light sanding; thin coats dry faster and avoid soft patches. If you find thick areas, remove excess and reapply thinner layers, letting each layer complete the drying process. Monitor room temperature and ventilation to support the joint compound drying process. Use a moisture meter only to confirm dryness after thinning; don’t confuse surface dryness with internal curing.
| Indicator | Action |
|---|---|
| Thick ridge | Scrape down |
| Soft patch | Sand/trim |
| Shine | Wait/test |
| Uneven | Feather edges |
Test Adhesion And Cure
Because proper adhesion and full cure are what keep your repairs durable, you’ll want to test both before priming or painting. Check firmness with a fingernail and press lightly across the surface; soft spots need more cure time. Use these drying time tips to speed stubborn areas: humidity control, thin layers, and airflow. Don’t fall for joint compound myths like “it’s dry when surface feels dry.” If adhesion fails, remove and reapply a thinner coat.
- Press test: firm vs. springy
- Scratch test for cohesion
- Edge check near tape
- Time log for unpredictable areas
- Environmental adjustments
Special Cases: Exterior, Basement, and High‑Humidity Rooms
If you’re tackling joint compound in exterior walls, basements, or humid rooms, drying times and techniques change considerably. You’ll need ventilation, dehumidification, and sometimes heat to reach recommended cure before sanding or sealing.
Exterior work demands moisture-resistant mixes and attention to weather; historical techniques like lime-based finishes can inspire breathable approaches.
Exterior projects need moisture-resistant mixes and weather awareness; consider breathable, lime-based finishes inspired by traditional methods.
In basements you’ll monitor humidity and try eco-friendly materials to reduce mildew risk.
In high-humidity rooms, apply thinner coats, allow extra drying days, and use fans to move air without blasting cold or wet air across surfaces.
Always test a small patch before proceeding across larger areas.
Choosing Primer and Paint for Newly Dried Joint Compound
When your joint compound feels fully dry and hard, choose a primer that matches the compound type and the paint you plan to use; this guarantees adhesion and uniform sheen. You’ll pick products that seal porous mud, prevent flashing, and aid color matching.
Consider paint sheens for touch-up blending, and use a primer suited for drywall or setting-type compounds. Keep tool maintenance in mind so rollers and brushes apply evenly.
- Seal porous areas first
- Match primer to paint base
- Test a small patch for sheen
- Use quality brushes/rollers
- Clean tools immediately after use
Step‑By‑Step Checklist: From Mud to Painted Wall
Before you pick up paint or primer, follow a tight checklist that moves you from final mud to a finished wall. You’ll confirm dryness, sand smooth, wipe dust, inspect for pinholes, and tack up edges. Choose primer compatible with decorative finishes and consider eco friendly materials for paints and sealers.
| Step | Action | Check |
|---|---|---|
| 1 | Confirm compound fully dry | No dark spots |
| 2 | Sand & feather edges | Smooth to touch |
| 3 | Clean surface | Dust-free |
| 4 | Prime & finish | Compatible with finish |
Finish by applying chosen decorative finishes, letting each coat cure before handling.
Estimated Timelines: Small Repair, Single Room, Whole House
Estimate the full timeline by breaking the job into stages—prep, mud application, drying, sanding, priming, and finish coats—so you can plan for a small patch, a single room, or an entire house and know where delays are likely.
Break the job into prep, mud, drying, sanding, primer, and finish coats to plan timelines and delays.
For a small repair, expect 24–48 hours total.
A single room takes 3–5 days.
A whole house can span 1–2 weeks or more depending on humidity and crew size.
Consider Color coordination and matching Wall textures early.
Plan buffers for drying and touchups.
- Small patch: 1–2 drying cycles
- Room: multiple coats, one day per coat
- House: staged areas
Humidity affects timing.
Primer speeds finish.
Frequently Asked Questions
Can I Paint Over Joint Compound the Same Day I Apply Texture?
You shouldn’t; joint compound curing takes longer than same-day painting allows. You’ll need to wait until drying time completes—usually 24–48 hours for typical thin textures—so paint adhesion and finish won’t be compromised.
How Does Paint Sheen Affect Visibility of Imperfections on New Compound?
Like a spotlight revealing dust, you’ll see imperfections more with higher sheen; you’ll need thorough surface preparation, because sheen comparison shows gloss highlights flaws while flat hides them, so sand, prime, and inspect before painting.
Will Joint Compound Dry Differently Over Painted vs. Bare Drywall?
Yes — you’ll see joint compound curing vary: over painted surfaces it dries slower and may need sanding for adhesion, while on bare drywall it soaks in faster. Prioritize drywall surface preparation to guarantee even drying and finish.
Can Additives (Binders, Retarders) Change Final Paint Adhesion?
Yes — additives like binders or retarders can change final paint adhesion. Picture a gluey scaffold: additive effects often improve wetting and adhesion improvement, but excessive retarders can weaken bonding, so measure and test carefully first.
Is Knockdown or Skip Trowel Texture Compatible With Latex Paint?
Yes — you can paint knockdown or skip trowel texture with latex paint. You’ll use texture techniques that accept latex well, but respect drying times so compound fully cures; otherwise adhesion or finish problems can occur.
Conclusion
Don’t rush it — your patience now saves you from a horrid, rippling disaster later. Let joint compound fully dry (hours for quick‑set, days for thick premix), then prime and paint; otherwise you’ll spend weekends sanding, repainting, and muttering at the ceiling like it betrayed you. Follow cure times, control humidity and temperature, and do thin coats. Do that and your walls’ll look showroom‑ready instead of proudly displaying a DIY horror story.