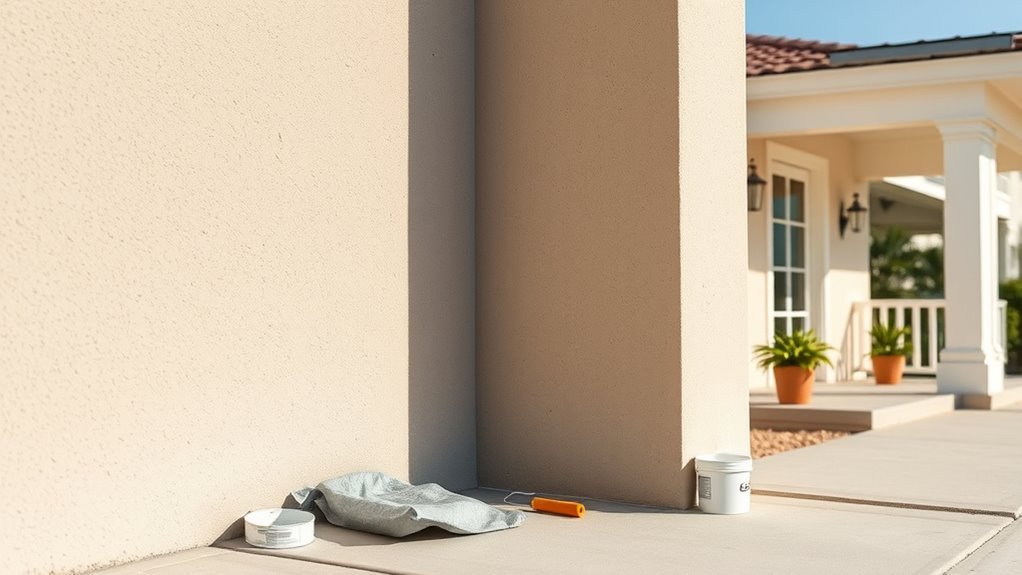
How Long for Stucco to Dry Before Painting
You should wait until stucco is fully cured, not just surface dry: for traditional three‑coat cement stucco that’s generally about 28 days, while acrylic or one‑coat systems often need 7–14 days; small patch repairs can be ready in 2–7 days depending on size. Check uniform color, no powdering, and use a moisture meter for consistent readings across the wall. Follow primer and paint maker guidance, and keep going for tips on testing and timing.
Quick Answer: When Is Stucco Ready to Paint?
If your stucco’s new or just repaired, wait until it’s fully cured before painting — typically 28 days for traditional cement stucco and about 7–14 days for acrylic or synthetic systems.
You’ll check surface dryness, absence of efflorescence, and consistent color before starting.
Test a small area with your chosen paint to confirm adhesion and color matching, and use primers formulated for stucco if needed.
Walk the surface to feel for loose particles and inspect texture for uniformity; resolve any irregularities to guarantee texture enhancement when you coat.
When conditions are right—dry, clean, and stable—you can confidently paint.
Typical Drying Time for Traditional Three‑Coat Stucco
When you’re working with traditional three-coat stucco, the drying happens in stages: scratch, brown, and finish, each needing time to set before the next coat.
How long each stage takes depends on temperature, humidity, thickness, and substrate conditions.
You’ll need to account for those factors when deciding if the wall’s cured enough to prime and paint.
Drying Stages Explained
Because three-coat stucco cures in distinct stages, you’ll want to track each layer’s drying time rather than assume a single blanket duration.
You first apply the scratch coat; it sets within 24–48 hours but continues chemically hydrating for days, so you’ll wait before tacking on the brown coat.
The brown coat firms over 3–7 days, allowing shaping for artistic finishes while achieving structural strength valued in historical preservation.
The finish coat typically dries surface‑hard in 48–72 hours and reaches full cure over weeks.
You’ll inspect moisture, hardness, and adhesion at each stage before painting to avoid trapping dampness.
Factors Affecting Cure
Although environmental and material variables interact, you can expect a typical three‑coat stucco system to need anywhere from several days to several weeks before it’s ready for paint.
You should factor in temperature, humidity, and wind: warm, dry, breezy conditions speed curing; cold or humid slows it.
Mix consistency and application thickness matter, too—thin, well-bonded layers cure faster.
Curing affects Stucco textures and how the surface accepts primer; uneven cure can ruin color matching later.
Check moisture with a probe or moisture meter and follow manufacturer cure times.
If in doubt, wait longer to guarantee durable adhesion and accurate color matching.
Typical Drying Time for One‑Coat (Monocouche) Stucco
If you apply a one-coat (monocouche) stucco correctly, you can usually expect it to be dry enough for light handling and finishing in about 24 to 48 hours under warm, dry conditions. This quick turnaround reflects modern mixes, though historical techniques and cultural influences shaped earlier slower methods.
You’ll find that humidity, temperature, and wind alter that window, so check surface dryness before painting. Use touch tests and moisture meters to confirm readiness.
Avoid painting too soon—soluble salts or trapped moisture can cause failure. When conditions are cool or damp, extend drying time accordingly and monitor regularly.
How Stucco Thickness Affects Curing Time
Thicker stucco holds more moisture, so it takes longer to cure than thin applications.
If you apply multiple coats, each layer adds drying time and may need separate curing before the next coat or paint.
Expect curing estimates to rise as thickness and coat count increase, so plan accordingly.
Thickness And Moisture Retention
Because stucco holds water within its mass, the thicker your application, the longer it’ll take to cure fully; each additional coat or heavier layer increases the volume of moisture that must evaporate or be chemically bound during hydration. You’ll notice slower drying in deep profiles, which affects how soon you can apply paint or achieve crisp color contrast in decorative finishes. Monitor moisture with probes or surface checks and plan for extended curing under cool or humid conditions. Use proper mixing and avoid trapping water.
| Thickness | Expected Dry Time |
|---|---|
| Thin (1/8″) | 3–7 days |
| Medium (1/4″) | 7–21 days |
| Thick (1/2″+) | 21–60+ days |
Coat Count Impact
When you add more coats of stucco, each layer increases the overall moisture load and slows curing. So plan drying times based on how many coats you apply rather than just thickness per coat.
You’ll notice curing rates drop as layers stack, affecting finish adhesion and readiness for paint. Consider how coat count interacts with surface profile and pigment choices—color theory can influence perceived uniformity, while texture enhancement may demand extra layers.
- Single coat: faster cure, simpler texture
- Two coats: balanced durability, moderate drying
- Three coats: improved texture enhancement, longer cure
- Additional coats: slowest drying, careful planning
Drying Time Estimates
Coat count affects drying, but thickness per coat is often the bigger driver of curing time, so you’ll want to gauge how many inches of material you’ve applied rather than just number of layers.
Thinner coats (1/8″–1/4″) typically dry in a few days to a week in warm, dry conditions. Medium coats (1/4″–1/2″) can need one to three weeks. Thicker applications may cure over several weeks.
Monitor color contrast and texture consistency as visual cues: darker or damp-looking patches and inconsistent texture mean moisture remains.
Adjust timelines for humidity, temperature, and ventilation to avoid premature painting.
How Ambient Temperature Speeds or Slows Curing
If the air’s chilly, stucco will cure much more slowly, and if it’s warm it’ll set faster—so you’ll want to plan your painting schedule around local temperatures. You’ll monitor daytime highs and nighttime lows because freeze or extreme heat can affect bond strength and finish.
Consider project timing with color psychology choices and historical preservation needs when selecting paint type and application windows.
Quick tips to manage temperature effects:
- Aim for a consistent 50–85°F work range
- Avoid painting during temperature swings
- Use temporary shelters or heaters cautiously
- Allow extra cure time after cold nights
Adjust schedule based on local forecasts.
How Humidity Prolongs Stucco Drying
How much longer will stucco take to dry in muggy weather? You’ll notice high humidity slows evaporation, extending cure times from days to weeks depending on thickness. You’ll want to monitor moisture with a probe or meter before painting.
In historically humid regions, builders used historical techniques—thinner coats, lime-rich mixes—to manage moisture; those cultural influences still inform modern practice.
You can speed safe drying by controlling indoor humidity, increasing ventilation, and avoiding sealing surfaces too soon. Plan extra drying time after rain or damp spells, and confirm uniform dryness across the surface before applying primer and paint.
How Wind and Sun Exposure Change Dry Time
Because wind and sun drive evaporation and surface temperature, they’ll substantially shorten stucco’s drying time compared with still, shaded conditions. You should monitor conditions because strong sun and drying breezes can speed surface cure but might trap moisture deeper, affecting final adhesion.
Lighter stucco color reflects heat and dries cooler; darker hues warm faster. Decorative textures with varied depth dry unevenly—shallow areas finish sooner than recesses. Adjust your waiting and testing accordingly.
- Check surface temperature before painting
- Note wind speed and persistent sun exposure
- Account for stucco color effects on heat
- Inspect decorative textures for hidden dampness
Seasonal Windows for Painting Exterior Stucco
When you plan exterior stucco painting, pick a season with steady, moderate temperatures and low humidity so the coating can cure evenly without trapping moisture. You’ll aim for spring or fall in many climates, avoiding freezing nights and hot, drying afternoons that can cause cracking or improper adhesion.
Check forecasts for consistent days and schedule around rainy periods. Consider how historical techniques and cultural influences shaped local timing—traditional builders often timed work around weather patterns and festivals.
Prep and primer work should follow similar windows to ensure full curing. If unsure, consult local pros for ideal seasonal windows.
How Additives and Accelerators Affect Dry Time
Seasonal timing affects curing, but additives and accelerators let you fine-tune stucco’s drying behavior for specific schedules or conditions. You can speed or slow set times to match weather, crew availability, and paint windows.
Use accelerators cautiously—too fast risks surface cracking; retarders help in hot, dry spells. Consider how changes affect substrate moisture and final appearance under interior lighting during inspections.
Test small areas to confirm color matching and texture before full application.
- Choose compatible additives per manufacturer
- Trial panels for color matching
- Monitor moisture with a meter
- Allow manufacturer cure recommendations
Does Primer Change When You Can Paint Stucco?
Although primer doesn’t change the fundamental cure time of stucco, it can alter the practical waiting period before you paint by improving adhesion and sealing surface porosity.
You can often apply primer once the surface is dry to the touch and free of efflorescence, which reduces paint absorption and helps achieve consistent color matching. Primer also aids texture blending, smoothing differences where repairs meet original stucco so topcoat appearance is uniform.
Choose a primer formulated for masonry, follow manufacturer recoat windows, and wait for recommended flash times. Proper primer lets you paint with confidence sooner without compromising finish longevity.
Moisture‑Meter Testing for Stucco Readiness
How do you know the stucco is truly dry enough to paint? Use a moisture‑meter to verify substrate readiness before committing to color theory or brush techniques. You’ll measure percent moisture across several spots and compare to manufacturer limits.
Steps to follow:
- Take readings at base, mid, and high sections for consistency.
- Avoid readings after rain or during heavy dew for accuracy.
- Record and average values; wait if above recommended threshold.
- Recheck after additional curing or primer application if needed.
A moisture‑meter helps you decide when to apply paint so your chosen hues and brush techniques won’t fail from trapped moisture.
The Tape Test for Surface Dryness
You can perform a simple tape test to check stucco dryness by pressing strong tape onto the surface and pulling it off to see if any material sticks.
If the tape peels away residue, the surface still needs more drying or cleaning before painting.
No residue and good adhesion mean the stucco is likely ready for primer.
Tape Adhesion Check
Before you grab a brush, perform the tape adhesion check to confirm the stucco’s surface is dry enough to accept paint. You’ll press a strip of painter’s tape into the stucco, smooth it, then pull sharply. If no grit or damp residue lifts, the surface’s moisture level supports proper adhesion, which helps with color blending and texture enhancement when you paint.
Repeat in several spots, including shaded and sun-exposed areas. Watch for loose particles that indicate more drying time is needed.
- Choose 2-inch painter’s tape
- Press firmly, then pull quickly
- Test multiple locations
- Record results and retest if unsure
Surface Residue Inspection
After the tape adhesion check, inspect the pulled tape for any surface residue—fine grit, chalky powder, or damp spots—that signal the stucco isn’t ready for paint.
If you see residue, delay painting until the surface is clean and fully dry; lingering material interferes with color matching and prevents proper texture blending.
Wipe a small area, retest, and note weather conditions that slowed drying.
When the tape stays clean and the stucco feels uniformly dry, you’re clear to prime.
Keep records of tests so contractors can reproduce conditions and achieve consistent color matching and seamless texture blending across the job.
The Scratch Test: Checking Full Stucco Cure
When the surface feels dry to the touch, do a simple scratch test to confirm the stucco has fully cured. You’ll gently scrape a fingernail or coin in an inconspicuous spot; cured stucco resists powdering and flakes minimally. Note texture, hardness, and any powdery residue.
When dry, perform a gentle scratch test in an inconspicuous spot—cured stucco resists powdering and flakes minimally.
- Scratch lightly with fingernail or coin
- Inspect for powdery residue or crumbling
- Compare tested area to surrounding finish
- Record results and wait if unsure
Remember historical inspiration and cultural influences on finish expectations—older styles may accept more texture. If the scratch yields powder, give the stucco more time before painting.
Why Full Cure Matters More Than Surface Dry
You shouldn’t judge readiness by a dry surface alone, because moisture can remain deep within the stucco and affect the overall moisture profile.
If the substrate hasn’t fully cured, paint won’t bond properly and you’ll compromise strength and adhesion.
That trapped moisture can also shorten the coating’s lifespan and hurt long-term durability.
Moisture Profile Depth
Although the surface may feel dry, stucco can still hold significant moisture below the outer skin, and that hidden water is what determines when it’s safe to paint. You need to assess the moisture profile depth, not just the feel, because trapped damp affects adhesion, stucco texture, and color matching over time.
Use a probe or moisture meter at various depths to verify dryness and wait until readings are consistently low. Consider these checks:
- measure near windows and corners
- test across different depth levels
- account for recent rain or humidity
- recheck after warm, dry days
Paint only when the core is dry.
Strength And Adhesion
Because stucco gains most of its strength as the cementitious binders fully cure beneath the surface, painting too soon can trap a substrate that hasn’t reached its design strength and compromise adhesion. You need full cure, not just dry touch, to avoid peeling or soft spots when applying paint across varied stucco textures and to guarantee reliable color matching. Wait for manufacturer-recommended cure times, check moisture at depth, and test adhesion before committing.
| Test | When | Result |
|---|---|---|
| Moisture meter | Before paint | % at depth |
| Adhesion pull | After cure | Pass/fail |
| Visual | Any time | Texture/color match |
Long-Term Durability
When stucco doesn’t fully cure beneath the surface, the paint may look fine at first but will accelerate long-term failures like chalking, cracking, and delamination. You need the full chemical cure so the substrate can bear paint stresses over years, not just days.
You should wait for complete cure to guarantee color matching holds and texture consistency remains stable. Early painting traps moisture and weakens bonds, causing failures that require costly repairs.
Plan for manufacturer-recommended cure times, test moisture content, and address cracks before painting.
- Reduced adhesion over time
- Fading and chalking risks
- Texture shifts after painting
- Hidden moisture damage
Estimating Paint‑Ready Time After New Stucco
If you’re planning to paint new stucco, you need a realistic timeline—paint too soon and the coating won’t adhere, wait too long and you lose momentum.
Generally, expect a minimum of 28 days of curing under normal conditions, with longer times required in cool, humid, or shaded areas. You should check moisture with a meter and watch for consistent dry readings.
Also consider temperature and sun exposure; warm, dry days speed cure.
Before painting, finalize color coordination and texture matching decisions so samples sit on the surface while it stabilizes. That prevents surprises and guarantees proper adhesion and appearance.
Waiting Time After Patching or Repairs
After you patch stucco, each repair can dry at a different rate depending on patch thickness and product used. Expect thin skim patches to cure in a couple of days.
While deeper repairs may take a week or more before they’re paint‑ready. Remember that temperature, humidity, and direct sun will speed or slow curing, so adjust your wait time accordingly.
Drying Time Per Patch
Although drying times vary with patch size, temperature, and humidity, you should plan on at least 24 to 72 hours per small patch before priming or painting. You’ll check firmness and dryness by touch and depth—press lightly to verify no give.
Larger patches can need several days. Don’t rush, or primers and paints may fail. Consider testing a small area before full painting to assess surface texture and color matching.
- Small hairline cracks: 24–48 hours
- Medium patches: 48–72 hours
- Large repairs: 3–7 days
- Test area: confirm adhesion and finish
Environmental Factors Impact
Now consider how weather and site conditions change those patch-drying timelines: temperature, humidity, wind, and sun exposure all speed up or slow down curing, so you’ll need to adjust your wait times accordingly. You’ll watch for Environmental impact on drying and how moisture retention alters cure rates. In cool, damp, or shaded spots, expect longer waits; heat and wind shorten them but can crack finishes. Plan inspections, use moisture meters, and delay painting until readings match manufacturer specs. Trusting senses alone risks failure.
| Feeling | Condition | Action |
|---|---|---|
| Unease | Damp patch | Wait |
| Relief | Dry touch | Test |
| Confidence | Meter OK | Paint |
| Frustration | Cracks | Repair |
Surface‑Prep Checklist: Clean, Patch, Prime Stucco
Before you paint, get the surface right: clean away dirt and mildew, repair cracks and chips, then apply a suitable primer so paint will adhere and last.
You’ll start by washing the stucco with a mild detergent and bleach solution, rinse thoroughly, and let it dry.
Patch with compatible stucco mix, matching color and texture consistency as you feather repairs.
Prime with a masonry primer suited to stucco’s porosity.
- Wash and rinse surface
- Patch cracks, feather edges
- Match color and texture
- Apply breathable masonry primer
Let repairs cure fully before painting.
Choosing Paint for Fully Cured Stucco
Before you pick paint, check that the stucco’s surface moisture is low and the wall has fully cured.
Choose breathable, masonry‑compatible paints and avoid impermeable coatings that trap moisture.
Use a primer formulated for stucco to guarantee adhesion while maintaining breathability.
Surface Moisture Check
Because moisture trapped in stucco will ruin paint adhesion, you should verify the surface is dry before choosing a finish, even if the stucco has cured for the recommended time. Use a moisture meter on several spots, avoiding edges and shadowed areas. Check after rain or high humidity, and wait for consistent low readings.
Also consider how your color options might show moisture-related staining; test a small area.
Keep tool maintenance in mind—dry brushes and rollers prevent contamination.
- Use a quality moisture meter
- Test multiple locations
- Perform spot paint tests
- Dry and store tools properly
Paint Type Compatibility
When your stucco is fully cured and dry, choose paints formulated for masonry—acrylic latex exterior paints are the most reliable because they flex with the substrate, resist moisture, and bond well to textured surfaces.
You’ll pick a finish that complements texture smoothing efforts; flat or low-sheen hides imperfections, while satin highlights relief.
For color matching, test swatches on a small area to view drying shifts and light interaction with the stucco’s texture.
Use breathable, exterior-rated formulations to avoid trapping moisture.
Apply according to manufacturer directions, checking temperature and humidity, so your chosen paint adheres and lasts without premature failure.
Primer And Breathability
If you want your paint to last on fully cured stucco, start with a breathable masonry primer that promotes adhesion without trapping moisture. You’ll protect the substrate, improve topcoat performance, and allow vapor transmission so moisture escapes.
Choose primers labeled vapor-permeable and compatible with acrylic or elastomeric paints. Think about color selection to reduce required topcoat coats and boost uniformity. Consider how primer affects texture enhancement—some primers level slightly, others preserve grit.
- Pick a breathable, acrylic masonry primer
- Match primer to intended topcoat type
- Use tintable primers for color selection efficiency
- Test on a small area for texture enhancement
When to Use Elastomeric Coatings
Although elastomeric coatings add a thick, flexible barrier that resists cracking and water intrusion, you should choose them only for masonry or stucco surfaces that show hairline cracks, frequent dampness, or chronic efflorescence.
You’ll pick elastomeric when moisture problems recur despite repairs, when substrate movement causes repeated hairline splits, or when efflorescence signals ongoing salt migration.
Be aware elastomeric can obscure fine decorative textures and slightly alter stucco color, so test a small area.
Apply only to clean, cured surfaces following manufacturer limits for temperature and humidity.
Use elastomeric as a targeted remediation, not a cosmetic first choice.
Breathable Paints and Stucco Moisture Balance
Because stucco needs to release trapped moisture, choose breathable paints that let vapor pass while shedding liquid water so you don’t trap salts or cause peeling. You’ll protect substrate health and preserve texture enhancement while selecting finishes that suit your design.
Pick waterborne, vapor-permeable formulations and avoid impermeable coatings that force moisture migration.
- Use breathable acrylics for moderate vapor transmission
- Match finish to texture for best color contrast
- Check permeance ratings (perm values) on product data
- Prefer flexible, UV-stable binders to resist chalking
Follow manufacturer guidelines and test a small area before full application.
How to Speed Up Stucco Drying Safely
When you need to speed up stucco drying safely, focus on controlling temperature, airflow, and humidity while avoiding practices that trap moisture or damage the finish. Use gentle heat, fans, and dehumidifiers; don’t force rapid curing. Check stucco texture as it dries to guarantee any adjustments won’t alter finish or affect color matching later. Protect edges and joints from drafts that cause uneven drying. Monitor moisture with a meter; wait until readings reach recommended levels before painting. Follow manufacturer cure times and test a small area first to confirm texture and color matching remain consistent.
| Action | Benefit |
|---|---|
| Gentle heat | Speeds evaporation safely |
| Fans | Even airflow, prevents streaks |
| Dehumidifier | Lowers ambient moisture |
| Moisture meter | Confirms readiness for paint |
Common Mistakes That Trap Moisture in Stucco
If you seal over damp stucco, skip proper flashing, or block drainage paths, you’ll trap moisture that leads to staining, mold, and delamination.
You should avoid common mistakes that hold water in the wall and compromise stucco texture and color matching when you finally paint. Check details and let surfaces dry fully.
- Applying impermeable paints too soon
- Improper flashing or missing weep screeds
- Poorly sealed joints and penetrations
- Covering vents or drainage gaps
Inspect substrates, correct drainage, and only proceed when moisture readings are within recommended limits to protect finish and adhesion.
How Flash‑Curing and Rapid Drying Hurt Adhesion
If the stucco surface cures too quickly you’ll weaken the bond between the coating and the substrate, because rapid film formation can trap solvents and create a brittle, poorly adhered skin.
That fast skin prevents proper coalescence of paint binders, so the finish won’t form a continuous, durable film.
You’ll also risk locking moisture under the surface, which leads to blistering and adhesion failure later on.
Surface Bond Weakening
Although stucco looks dry on the surface, rapid evaporation from flash-curing can leave a thin, hard skin that’s poorly bonded to the underlying material. You’ll notice this weak surface bond when paint peels or flakes despite proper application.
Addressing material compatibility and timing prevents failures. Check for looseness before priming; don’t rely on appearance alone.
- Inspect for powdery residue or brittle top layer
- Test adhesion with a tape pull or small scrape
- Wait for full cure before applying primer compatible with stucco
- Correct substrates or use a bonding primer if compatibility is doubtful
Film Formation Issues
A weak, powdery surface often signals a deeper problem with film formation caused by flash-curing and rapid drying. When paint dries too fast on stucco, the binder can’t form a continuous film, so coatings chalk, flake, or fail to bridge micro‑texture.
You should control conditions—temperature, humidity, wind—and delay coating until drying is uniform. Test a small area for adhesion before full application.
Also consider color selection and texture matching: darker colors and smooth coatings can hide defects but may stress thin films, while textured finishes need proper film build to adhere.
Proper staging prevents premature failure.
Trapped Moisture Problems
When stucco dries unevenly and the surface skin seals too quickly, moisture can stay trapped beneath the coating and you’ll end up with poor adhesion, blistering, or late failures. You should slow drying to protect interior finishes and decorative accents: trapped moisture breaks bonds, stresses paint, and hides defects until it’s too late.
Control temperature, humidity, and airflow; avoid rapid heat or direct sun. Inspect before painting and use moisture meters.
- Prevent flash‑curing with shading or misting
- Maintain gentle airflow and stable temps
- Confirm substrate moisture below manufacturer limits
- Repair blisters and replace compromised areas before topcoating
Planning Paint Work Around Weather Forecasts
If you’re scheduling stucco painting, check the extended forecast so you can pick a continuous dry window with daytime temps between about 50–85°F and low overnight humidity. These conditions let primer and topcoat cure properly and prevent problems like blistering or poor adhesion.
You should plan around several consecutive dry days to avoid interrupted curing. Match timing to drying times on product labels, and consider wind and sun exposure.
Use the forecast to coordinate labor and materials, test small areas first, and decide on creative color schemes and eco-friendly paint options now so supplies arrive before your chosen window.
Calculating Allowable Working Days for Exterior Stucco
You’ll need to account for drying time variables like temperature, humidity, and coat thickness when calculating allowable working days.
Use those factors to set realistic daily goals and buffer days for unexpected slow curing.
That way you’ll schedule paint crews only when the stucco is reliably ready.
Drying Time Variables
Because curing depends on more than just calendar days, you’ll need to track the key variables that control stucco drying—temperature, humidity, wind, sun exposure, coat thickness, and mix/brand specifications—to calculate allowable working days for exterior finishes.
You’ll assess how each factor speeds or slows moisture loss and how that affects stucco textures and color matching when finish coats go on. Monitor site conditions and manufacturer cure charts, then adjust your timeline.
Consider these primary variables visually:
- Ambient temperature and forecasted lows/highs
- Relative humidity and recent rain
- Wind and direct sun exposure
- Coat thickness and product-specific cure time
Scheduling Work Days
Several factors determine how many workable days you can schedule before applying finish coats to exterior stucco, so plan timelines based on measured conditions rather than fixed calendar days.
You’ll track temperature, humidity, sunlight, and wind to estimate daily cure progress, adjusting for colder or wet spells.
Create buffer days for unexpected delays and for testing adhesion and color consistency, especially if you’re choosing stucco color options or applying complex decorative finishes.
Sequence tasks: base coat curing, primer checks, finish application.
Communicate realistic windows to crews and clients, and reevaluate daily so you don’t rush final coats.
How Contractors Verify Stucco Cure Before Quoting
When evaluating a stucco job before quoting, contractors use a mix of visual checks, moisture tests, and timing benchmarks to confirm the substrate has cured enough for paint.
Before quoting, contractors combine visual checks, moisture testing, and timing benchmarks to confirm stucco has cured for paint.
You’ll inspect uniform color, absence of efflorescence, and hairline cracks, and you’ll ask about curing schedule and any Historical techniques used that affect drying.
You’ll measure moisture with a pin or non‑destructive meter and compare readings to manufacturer specs.
You’ll factor substrate type, recent weather, and use of Eco friendly materials.
Typical verification steps include:
- visual surface inspection
- moisture meter readings
- review of cure timeline
- substrate compatibility check
Painting Stucco in High‑Humidity Climates
If you’re painting stucco in a high‑humidity climate, you’ll need to plan for longer cure times, stricter moisture limits, and products formulated to resist mold and efflorescence. You’ll monitor substrate moisture with a meter and wait until readings meet manufacturer specs; drying can take weeks after rain.
Choose breathable, mildew‑resistant primers and paints so trapped moisture can escape. Test paint on sample areas to ensure stucco texture doesn’t hide flaws and to verify color matching under humid light.
Work on dry days, avoid late‑day application when dew forms, and maintain ventilation to speed safe curing and long‑term performance.
Painting Stucco in Cold Climates
High humidity brings its own challenges, but cold climates demand a different focus: you’ll be fighting low temperatures, frost, and slower chemical curing that can prevent paint from bonding properly.
Cold conditions shift the challenge: guard against frost, slow curing, and poor paint adhesion on stucco.
You’ll wait longer for stucco to reach safe moisture and temperature levels, and you’ll use heaters or choose warmer windows for application. Prioritize Color selection to maximize solar gain and pick breathable, flexible coatings that resist cracking while preserving texture enhancement.
- Schedule work on sun‑exposed walls during warmer daytime hours
- Use temporary frost protection and gentle heaters
- Check surface temperature and moisture before painting
- Allow extended cure times per manufacturer
Painting Stucco in Very Hot Climates
In very hot climates you’ll notice stucco dries much faster, which can affect tack time and require shorter wait times between coats.
Choose heat-resistant, breathable paints and lighter colors to reduce thermal stress and fading.
Prep the surface in cooler parts of the day, keep it shaded during application, and make sure the stucco is fully cured despite rapid surface drying.
High Heat Drying Times
Because intense sun and heat speed surface drying, you’ll see stucco look dry much sooner than it’s actually cured. That superficial dryness can mislead you into painting too early. You should wait for proper cure to protect stucco texture and guarantee reliable color matching.
Hot conditions create fast evaporation, increasing the risk of adhesion failure, blistering, and uneven sheen if you paint prematurely.
Monitor moisture with a hygrometer or plastic sheet test, and aim for cooler mornings.
- Check interior moisture and substrate temperature
- Use shade or tarps to slow surface drying
- Test adhesion with a small patch
- Delay painting after evening dew stabilizes
Paint Selection For Heat
When you’re painting stucco in very hot climates, pick coatings formulated to reflect heat, resist chalking, and tolerate wide temperature swings. These features help paint stay adherent and keep color stable despite intense sun and rapid surface drying.
Choose high-quality acrylic elastomeric or cool-roof formulations that handle expansion and contraction without cracking.
Test samples on varied stucco texture to confirm coverage and adhesion.
Use pigments and binders rated for UV resistance for reliable color matching. Darker tones absorb more heat, so favor lighter shades or special reflective pigments.
Always follow manufacturer temperature limits and application guidelines for best results.
Surface Prep In Sunlight
Although sunlight speeds drying, you’ll need to slow its effects during surface prep so paint will bond properly to stucco in very hot climates. You’ll work in the morning or late afternoon, wetting the surface lightly and avoiding rapid skinning that traps dust.
Consider historical techniques and local cultural influences when choosing abrasives or lime washes, since traditional methods often suit heat-adapted stucco.
- Wet down stucco before sanding to reduce dust and prevent uneven drying.
- Use breathable primers compatible with lime or cement-based stucco.
- Shield the work area with shade cloth to control temperature.
- Follow local practices reflecting historical techniques and cultural influences.
Adjusting Drying Time for Textured Finishes
If you’re working with a textured stucco finish, expect longer drying times than for smooth surfaces and plan your painting schedule accordingly. You’ll monitor thicker ridges and recesses because texture variation traps moisture and slows evaporation.
Check multiple spots, not just the surface, since deeper hollows can remain damp. Adjust drying estimates based on humidity and temperature, and delay priming until readings are even to avoid adhesion problems.
When you paint, use techniques that promote color consistency across high and low areas—thin, even coats and controlled application. Patience here prevents peeling, blotching, and uneven sheen.
Substrate Effects: Masonry, Lath, and Foam Bases
Because the substrate holds and releases moisture differently, you’ll need to treat masonry, lath, and foam bases as distinct drying and priming challenges. You should assess substrate compatibility and whether moisture barriers are present before painting. Different bases change drying time, primer choice, and surface prep.
- Masonry: dense, so it’ll hold moisture longer; use breathable primers for substrate compatibility.
- Metal lath: dries faster but can trap water in mesh; check behind lath for moisture barriers.
- Wood lath: wicks moisture; allow extra drying and use compatible primers.
- Foam insulation: sheds moisture quickly but needs compatible coatings and vapor considerations.
Removing Efflorescence and Lime Bloom Before Painting
After you’ve checked the substrate and primer needs, look for white, powdery deposits on the stucco — that’s efflorescence or lime bloom, and you’ll want to remove it before painting.
You should dry-brush loose salt with a stiff bristle brush, then rinse with water.
For persistent staining, use a diluted vinegar or masonry cleaner following manufacturer directions for efflorescence removal.
Rinse thoroughly and let the surface dry fully; salts can reappear if moisture persists.
For chronic issues, consider professional Lime bloom treatment to address salt sources or apply a breathable masonry sealer.
Only paint once salts are gone and the wall is dry.
Handling Mildew, Dirt, and Staining on New Stucco
When mildew, dirt, or staining shows up on new stucco, tackle it promptly to prevent long-term damage and guarantee an even paint finish. You’ll inspect affected areas, then choose appropriate cleaners—mild detergent for dirt, diluted bleach or commercial fungicide for mildew. Follow safety precautions and rinse thoroughly.
For stubborn marks, use a soft brush and repeat treatments sparingly to avoid surface damage. After cleaning, allow full drying before any primer or paint application.
- Assess extent and document spots
- Use gentle cleaners first
- Apply targeted mildew prevention treatments
- Perform stain removal tests on inconspicuous areas
Documenting Stucco Cure for Warranty and Insurance
Cleaning and stain removal are only part of the story; you’ll also need a clear record of the stucco cure to support warranties and insurance claims.
Photograph stages—fresh application, drying progress, and final surface—so you can prove cures matched manufacturer timelines and environmental conditions.
Log dates, temperatures, humidity, and any surface treatments; tie those entries to contract clauses or warranty terms.
Note observations affecting stucco aesthetics and color matching, since variations can influence claim outcomes.
Keep receipts for materials and contractor reports, and store everything digitally with backups.
A concise, chronological file makes claims faster and defenses stronger.
Choosing Tests and Records for Long‑Term Proof
Because future claims hinge on objective evidence, you should pick tests and records that are verifiable, repeatable, and tied to warranty terms. You’ll want documentation that proves moisture levels, cure timelines, and installation methods while noting historical accuracy and cultural significance when applicable to restoration projects. Use standardized tests and clear logs so claims are defensible.
Choose verifiable, repeatable tests and clear logs tied to warranty terms for defensible future claims.
- Moisture meter readings with timestamps
- Third‑party lab test reports (compressive strength, porosity)
- Photographic timeline with location notes
- Signed contractor checklists referencing warranty clauses
Keep copies in durable formats and link records to specific warranty language for long‑term proof.
When Immediate Painting Is Acceptable (And When Not)
Having solid records and test data lets you decide whether you can paint stucco right away or need to wait. Moisture readings, cure reports, and photos tell the real story.
You’ll paint immediately when readings hit acceptable moisture levels, substrate strength is verified, and environmental conditions match manufacturer specs.
Don’t rush if tests show retained dampness, recent patching, or incompatible primers. Consider historical techniques and any layered lime or cement mixes that affect breathability before sealing them with modern paints.
Decorative finishes may demand longer cures to avoid trapping moisture.
When in doubt, follow measured evidence rather than assumptions to avoid failures.
Final Checklist: Ready‑To‑Paint Confirmation Steps
Before you pull out brushes or rollers, confirm a short checklist that proves the stucco is truly ready. Check moisture with a meter—levels must be within paint manufacturer specs.
Before painting, run a quick readiness check: moisture meter, surface cure, and suitable temperature/humidity.
Inspect surface hardness and cure; you shouldn’t leave fingerprints or soft spots.
Verify temperature and humidity meet application limits.
Finally, do a small test panel to confirm adhesion, color matching, and texture blending before committing.
- Moisture meter reading within spec
- No soft spots; surface cures evenly
- Ambient temperature and humidity acceptable
- Test panel for adhesion, color matching, texture blending
If all pass, you can paint with confidence.
Frequently Asked Questions
Can You Paint Stucco Indoors Using the Same Timing Guidelines as Exterior Stucco?
No — you shouldn’t assume exterior timing indoors; you’ll need to verify interior paint compatibility and allow proper cure times. Also check moisture barrier considerations, ventilation, and substrate dryness so the paint adheres and won’t trap dampness.
How Does Painting New Stucco Affect Nearby Landscaping or Plant Health?
You’ll want to protect plants because paint drift and solvents can harm foliage; investigate shielding beds with tarps, creating barriers, and using plant protection to prevent contamination, plus runoff prevention measures to stop toxic wash into roots.
Are There Specific Safety Precautions for Workers During Stucco Paint Application?
Yes — you should follow safety protocols and wear protective gear: you’ll use respirators, goggles, gloves, coveralls, and fall protection; you’ll guarantee ventilation, secure scaffolding, monitor weather, train crews, and have first-aid and spill kits on site.
Can Paint Color or Sheen Affect Long-Term Stucco Moisture Behavior?
Yes — color impact and sheen effects matter: you’ll see darker colors absorb more heat, speeding moisture loss, while higher sheens reduce vapor permeability and trap moisture; choose combinations that balance drying and breathability for longevity.
What Documentation Should Homeowners Keep After Painting for Future Resale?
Keep careful copies: you’ll want receipts, warranties, contractor licenses, product data sheets, paint durability testing, color longevity records, prep and repair photos, maintenance logs, and final invoices to prove provenance and protect resale value.
Conclusion
You’re ready to paint stucco when moisture’s low and curing’s complete—usually 7–28 days depending on type, thickness and weather. Notably, studies show ambient humidity can extend curing time by up to 50%, so high-humidity sites often need much longer before painting. Always check depth, perform a moisture test, and document conditions for warranty proof. If readings are within manufacturer limits, go ahead; if not, wait—rushing risks adhesion failure and costly repairs.