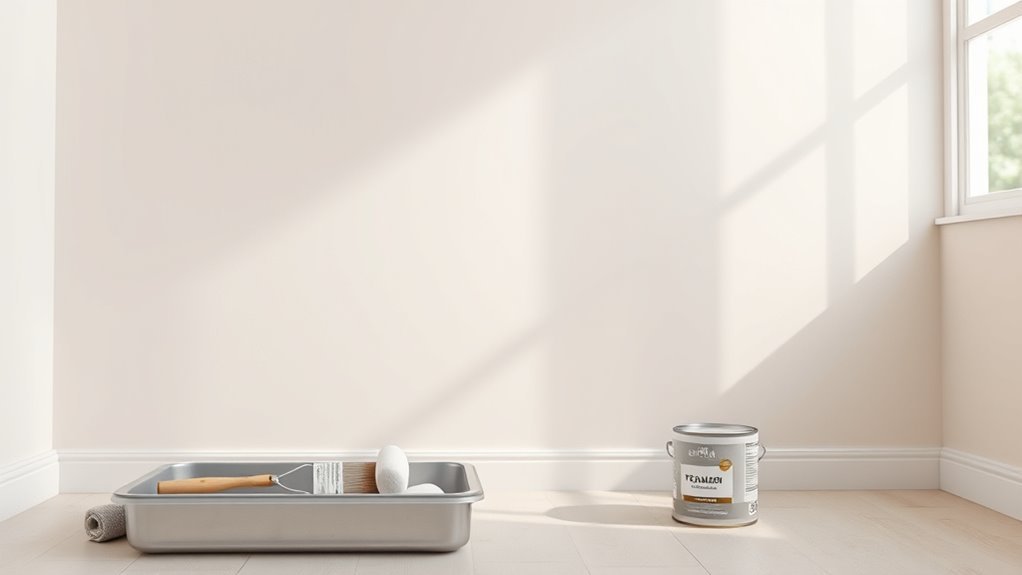
How Long Satin Paint to Dry
You’ll usually find satin paint is dry to the touch in about 1–2 hours and ready for a light recoat in 4–6 hours for latex; alkyd types may need 24 hours. Full curing — where the film reaches maximum hardness — takes anywhere from 7 to 30 days (longer with high humidity, cold temps, or thick coats). Handle gently for the first week, and keep ventilation steady; keep going and you’ll see tips for testing, speeding cure, and troubleshooting.
Quick Answer: How Long Does Satin Paint Take to Dry?
If you’re working with satin paint, expect it to feel dry to the touch within 1 to 2 hours and be ready for a light recoat in about 4 to 6 hours under normal indoor conditions.
Satin paint feels dry in 1–2 hours; you can lightly recoat after about 4–6 hours indoors.
Full curing typically takes 7 to 30 days depending on humidity, temperature, and coat thickness. You’ll notice factors like ventilation, surface porosity, and coat thickness change timing.
For quick projects, plan recoats around the 4–6 hour window but avoid heavy handling until fully cured.
Consider the historical context of finishes and their evolving drying technologies, and acknowledge satin’s cultural significance in balancing sheen and durability.
Dry-to-the-Touch vs. Fully Cured Satin Paint
Knowing when satin paint is merely dry to the touch versus fully cured helps you decide when it’s safe to recoat, move furniture, or wash a surface. You’ll notice dry-to-the-touch when the surface feels no longer tacky. Curing takes longer as solvents evaporate and resins harden.
Environmental factors and application thickness affect timing, and even historical trends and cultural influences shaped expectations about patience and drying rituals.
- Check feel: light touch—no tackiness.
- Wait times: follow manufacturer for recoating vs. full cure.
- Test discreet area before heavy use to avoid damage.
Satin Drying Times for Walls (Latex vs. Alkyd)
When you paint with satin, expect latex to be dry-to-touch in about 1 hour. Alkyd can take several hours.
You’ll want to wait longer before recoating or relying on full cure. Latex typically allows recoating in 4–6 hours and cures in a couple of weeks.
In contrast, alkyd may need 24 hours to recoat and several days to harden.
Remember that temperature, humidity, and ventilation will speed or slow both dry and cure times, so adjust your schedule accordingly.
Dry-To-Touch Time
Although satin finishes feel soft, their dry-to-touch time can vary a lot depending on whether you use latex or alkyd paint. You’ll notice satin sheen and paint texture affect how quickly solvents evaporate and oils set.
Latex usually feels dry in 1–2 hours in warm, dry conditions; alkyd can take 6–8 hours because it cures by oxidation. Humidity, temperature, and layer thickness change those windows, so check by light touch rather than clock.
Follow these quick checks:
- Lightly touch an inconspicuous area after the minimum time.
- Look for no tack and even texture.
- Wait longer if it feels soft or transfers.
Recoat And Cure
Because satin paints finish differently, you’ll plan recoat and full cure times around whether you’re using latex or alkyd.
For latex, wait 2–4 hours between coats; it dries fast to a satin sheen and you’ll often recoat the same day. Full cure takes about 2–3 weeks, so handle surfaces gently and avoid heavy cleaning until cured.
Alkyd requires longer: recoat in 24 hours and allow up to 7 days to harden, with full cure sometimes taking several weeks.
When matching color or touching up, confirm the existing film is fully cured to prevent sheen or color matching issues.
Environmental Effects
You’ve seen how recoat and cure times differ between latex and alkyd; environmental conditions will shift those windows for satin finishes on walls. You’ll notice drying speeds change with temperature, humidity, and ventilation.
Choosing eco friendly finishes and low VOC levels helps indoor air quality, but won’t override physics. Consider these factors:
- Temperature: warmer air speeds solvent evaporation for alkyd and water loss for latex, shortening tack time.
- Humidity: high moisture slows latex drying markedly; alkyd’s solvent-based cure is less sensitive but still affected.
- Ventilation: steady airflow removes vapors, aiding both fast, even drying.
Satin Drying Times for Trim and Doors
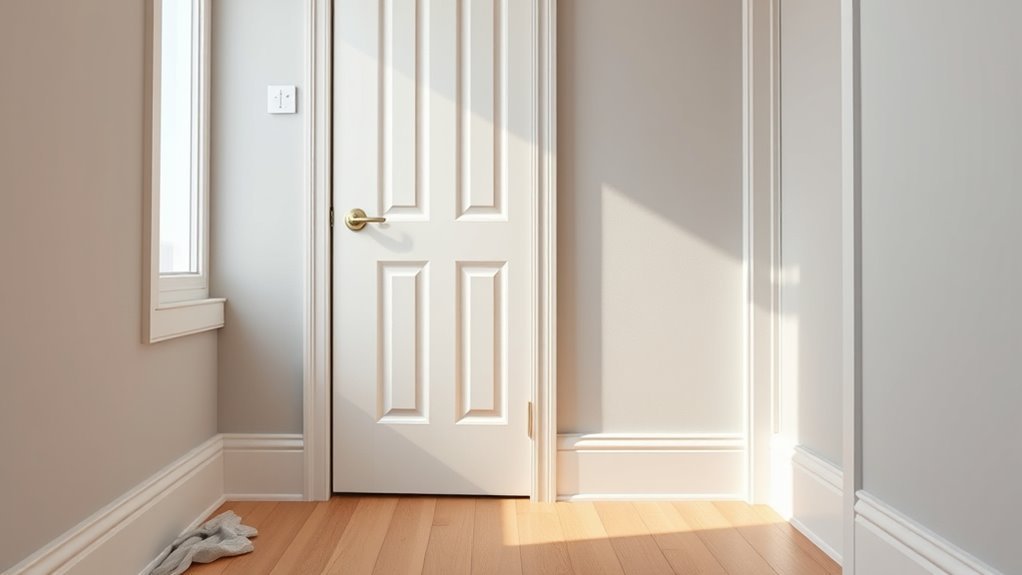
When you paint trim and doors with satin, expect slightly different dry times than walls—usually quicker to the touch but slower to fully cure.
Drying depends on paint type, humidity, temperature, and how thickly you apply each coat. To speed things up, use thinner coats, improve ventilation, and keep doors propped open until the finish firms.
Dry Time Overview
Curious how long satin paint takes to dry on trim and doors? You’ll usually see a dry-to-touch stage within 1–2 hours and light handling possible in 4–6 hours, thanks to the satin sheen that balances durability and subtle gloss.
Full cure often needs days, but you can work between coats sooner.
- Initial dry: 1–2 hours for paint sheen to set.
- Recoat window: commonly 4–6 hours; follow manufacturer guidance.
- Full cure: typically 24–72 hours for normal use; up to a week for maximum hardness.
Keep traffic light until cured to avoid marks.
Factors Affecting Drying
Although satin paint often looks dry fast, several key factors change how quickly it actually sets on trim and doors. You’ll notice humidity, temperature, and ventilation directly affect surface drying. Low airflow prolongs tackiness and risks color fading over time if conditions encourage dust or sunlight exposure.
Application thickness and the number of coats alter drying stages. Substrate type—raw wood, primed MDF, or previously painted surfaces—changes absorption and final sheen.
Brush marks, tool choice, and curing time influence any subtle texture change. So plan projects knowing these variables impact when you can handle and finish trim and doors.
Tips For Faster Drying
Now that you know what slows satin paint on trim and doors, you can speed drying with a few targeted actions. You’ll want to control humidity and temperature, thin coats, and boost airflow so the satin sheen cures evenly. Use fast-dry additives sparingly and test compatibility with your paint sheen before committing. Plan work in stages to avoid re-touches while tacky.
- Increase ventilation: fans and open windows to move moist air away.
- Apply thinner coats: thinner layers dry faster and reduce sagging.
- Use low-humidity timing: paint on dry days or use dehumidifiers for quicker cure.
Standard Recoat Times You Can Trust
A reliable rule of thumb is to wait 2–4 hours before recoating most satin paints, but always check the manufacturer’s label and local conditions.
You’ll find that satin sheen behaves like other mid-sheen finishes: it levels well and allows quicker recoats than gloss.
For paint sheen consistency, lightly sand between coats if you need perfect adhesion or to remove dust nibs.
Humidity, temperature, and ventilation change times—cool, humid rooms slow curing.
If you follow label guidance and test a small area, you’ll avoid problems like lifting or uneven texture while keeping your schedule efficient and predictable.
When Satin Paint Is Safe to Touch, Tape, or Move Furniture
When the satin paint feels dry to the touch, resist assuming it’s fully cured—surface dryness can occur long before the finish can handle tape, contact, or furniture placement. You should wait at least 24 hours before gentle touch; satin color and paint texture may still be delicate.
For tape or heavy contact, aim for 7 days to avoid lifting or sheen changes. When moving furniture, wait longer so solvents evaporate and hardness develops.
- Light touch: 24–48 hours for initial skin-safe dryness.
- Masking/tape: 5–7 days to prevent peel or tack transfer.
- Furniture placement: 7–14 days for full handling safety.
How Long Before Cleaning Satin-Painted Surfaces
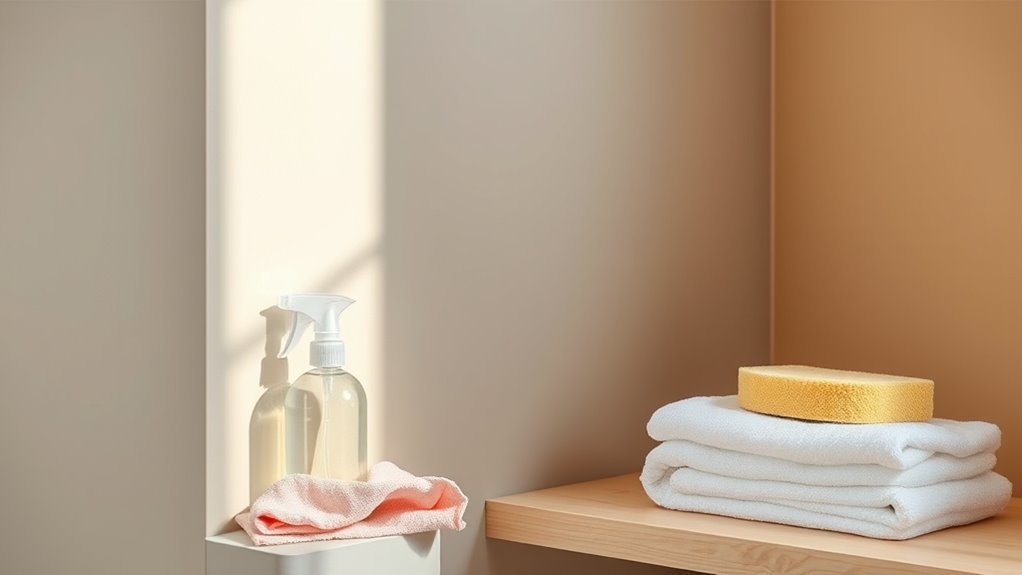
Wait at least 7–14 days before doing any wet cleaning so the satin finish has time to cure and resist moisture.
When you do clean, use a soft cloth or sponge with mild soap and lukewarm water, avoiding abrasive pads or harsh chemicals.
Test a small inconspicuous spot first to make sure your technique won’t dull the sheen.
Drying Time Before Washing
If you want to clean satin-painted surfaces without damaging the finish, give the paint enough time to cure rather than just dry to the touch. You’ll usually wait 2–4 weeks before washing interior satin, longer for high humidity or low temperature. Decorative finishes and recent color matching work may need extra cure time to avoid scuffing or lifting. Test a hidden spot first.
- Wait at least 14 days for light cleaning.
- Allow 21–28 days for full cure under normal conditions.
- Extend to 6–8 weeks after heavy coats, textured, or imperfect ventilation.
Follow manufacturer directions for best results.
Gentle Cleaning Techniques
Because satin finishes need time to cure, plan gentle cleaning no sooner than about 14 days for light cleaning and 21–28 days for more thorough washing under normal conditions.
When you clean, test an inconspicuous spot with a soft cloth and mild soap diluted in water; avoid abrasive pads or strong solvents. Use gentle, circular motions and rinse with a damp cloth to prevent streaks.
For stubborn marks, repeat testing before applying a stronger mix.
Consider historical techniques and cultural influences on cleaning materials—natural soaps and soft brushes often work well.
Dry surfaces fully to protect the finish.
How Long Before Exposing Satin to Heavy Wear
When you’re planning to put a satin finish into regular use—like opening doors, sliding drawers, or setting dishes on a tabletop—plan on at least 7 days before heavy wear, with the first 48–72 hours being the most critical. You’ll avoid marring the Satin sheen and protect Color matching by delaying heavy contact.
During the first week, keep traffic light and use soft barriers. Follow these steps before full use:
- Test a small area for hardness and visual cure.
- Wait 48–72 hours before light handling; 7 days for appliances or tabletops.
- Use felt pads and liners to minimize abrasion.
Temperature: Effect on Satin Paint Drying
You’ve waited the week for satin paint to harden, but temperature will still shape how the final cure sets and how long it takes to reach full durability. You’ll notice warm conditions speed surface drying, letting you recoat sooner, while cooler temps slow chemical crosslinking and extend tackiness.
Avoid extremes: heat can cause uneven color blending as solvents flash off, and cold can trap solvents, weakening sheen. Moderate, steady warmth promotes even film formation and texture enhancement, helping brush marks level out.
For reliable results, aim for the manufacturer’s recommended range and adjust drying time expectations based on actual room temperature.
Humidity: Effect on Satin Paint Drying
High humidity slows satin paint drying because extra moisture in the air keeps the surface from losing solvents.
Low humidity speeds curing, but if it’s too dry the paint can skin over before the underlying layers set.
You should also watch for condensation forming on the finish when humid air cools, which can mar the sheen.
High Humidity Slows Drying
Although it doesn’t seem like much, humid air can noticeably slow satin paint’s drying time because moisture in the air prevents water- or solvent-based binders from evaporating quickly. You’ll notice tackiness lasts longer, and prolonged dampness can affect satin sheen and risk color fading over time if dust sticks.
To manage high humidity, you can:
- Use dehumidifiers or air conditioning to lower room moisture before and during application.
- Increase airflow with fans, keeping them directed but not blowing paint.
- Extend between-coat wait times and check tack test results before recoating to avoid trapping moisture.
Low Humidity Speeds Curing
When humidity’s low, satin paint will dry and cure faster because the drier air lets solvents and water evaporate more quickly. You’ll notice shorter tack times and quicker recoating windows, so plan thin, even coats to avoid lap marks.
Low humidity helps color blending stay predictable since pigments set faster, but you’ll need steady, confident brush techniques to maintain smooth edges before the film forms.
Work efficiently: load less paint, keep a wet edge, and use quality brushes for consistent strokes. Monitor drying times during the job, and allow full cure longer than touch-dry to guarantee durability and finish integrity.
Condensation Risk On Finish
If moisture condenses on a satin finish before it’s fully cured, you’ll see blotchy, cloudy patches and the paint’s sheen can become uneven. You should avoid painting when dew is likely, since condensation alters drying rates and harms satin sheen and paint texture.
If condensation occurs, drying slows and solvents can re-emulsify, leaving tacky spots and texture irregularities.
To manage risk, control temperature and ventilation, wait for stable conditions, and test a small area.
- Monitor humidity and forecast before starting.
- Use dehumidifiers or heaters to lower moisture.
- Delay application until surface feels dry to touch.
Ventilation & Airflow for Faster Drying
Because satin paint dries faster when moist air moves away from the surface, you should prioritize good ventilation and steady airflow in the room. Open windows and doors to create cross-ventilation, and use box or oscillating fans to direct air along painted walls. Keep airflow gentle to avoid dust landing on the satin sheen.
Run HVAC or portable dehumidifiers to lower humidity, especially after evening painting. Monitor drying progress by touch and time, not by color matching cues alone, since wet and dry paint look different.
Adequate ventilation speeds cure and reduces tackiness without altering finish quality.
Coat Thickness and Its Drying Impact
How thick you apply each coat has a big effect on drying time: thin coats dry faster and cure more evenly, while thick ones can stay tacky for hours or longer.
You’ll usually get better results with several thin layers rather than one heavy one. Plan your number of layers and drying time accordingly to avoid runs and extended tackiness.
Thin Vs. Thick Coats
When you lay on thin coats of satin paint, they dry faster and cure more evenly than thick layers, which trap solvents and extend tackiness. Thin applications also reduce drips and show fewer brush marks, letting you recoat sooner and get a smoother finish.
You’ll control sheen and avoid long tacky periods by managing coat thickness. Thin coats help with color blending and subtle texture enhancement without sagging. Apply multiple light passes rather than one heavy one.
Consider these practices:
- Use a high-quality brush or roller and maintain even pressure.
- Thin with manufacturer-recommended thinner only if needed.
- Monitor drying between passes.
Number Of Layers
Thin coats set the stage, but the number of layers you apply directly affects total dry and cure time: each additional coat adds solvent and film thickness, so two light coats will often dry and cure faster and more evenly than one heavy one of equal total thickness.
You should space coats according to manufacturer recoat times to avoid trapping moisture. If you’re doing color mixing, test blended samples to confirm coverage and drying behavior before committing.
Keep leftover paint sealed and stored correctly; proper paint storage prevents skinning and contamination that can alter drying.
Plan layers to balance appearance, protection, and cure time.
Primer Type and Its Effect on Drying Time
Because the primer you choose sits between substrate and satin paint, it has a big impact on how quickly the finish dries and cures. You’ll want primers formulated for quick absorption or fast cure if speed matters; oil-based primers slow drying, while acrylic or shellac-based primers speed it.
The primer under your satin paint greatly affects drying and cure—choose quick-absorbing or fast-cure primers for speed.
Consider how primer color affects tinting and color mixing when matching topcoat shades, and keep leftover primer in proper paint storage to preserve performance.
- Acrylic: fast-drying, breathable, good for most jobs.
- Shellac: very fast, seals stains, strong odor.
- Oil-based: slower dry, durable, blocks tannins.
Surface Type: Drywall, Plaster, Wood, Metal
The surface you paint on—drywall, plaster, wood, or metal—significantly changes how fast satin paint dries, with porous materials often absorbing more and drying faster at the surface but taking longer to fully cure.
You’ll need to take into account porosity and absorption when estimating dry time, since wood and bare plaster can suck up paint while metal and sealed drywall do not.
Proper prep and priming reduce absorption differences and give you more consistent, predictable drying times.
Dry Time By Surface
Curious how long satin paint will dry on different materials? You’ll find finish, ventilation, and temperature change times across drywall, plaster, wood, and metal. Use proper color mixing and smart brush selection to avoid extra coats that extend drying.
- Drywall and plaster: 1–2 hours to touch, 4–6 hours recoat in warm, ventilated rooms; plaster may feel slightly slower.
- Wood: 2–4 hours to touch, 6–8 hours before recoating; previously sealed wood dries faster.
- Metal: 1–3 hours to touch, 6–12 hours to handle; use primers for adhesion and to speed cure.
Adjust for humidity and temperature.
Porosity And Absorption
Now that you know typical dry times by surface, consider how porosity and absorption change those numbers.
Porous drywall and plaster soak up binder and solvent, so you’ll see faster initial set but longer cure beneath the surface.
Wood can pull in more, causing uneven color mixing unless you control application rates.
Metal’s low absorption keeps paint on the surface, so the finish sheen develops uniformly and dry time depends mostly on solvent evaporation.
You’ll adjust coat thickness and drying expectations by surface: more porous materials may need additional drying time between coats, while nonporous ones often dry superficially quicker.
Prep And Priming Needs
Because proper prep and priming dictate how satin paint adheres and dries, you’ll tailor steps to each surface. You sand and clean drywall for a smooth satin finish, using a primer that aids color blending.
On plaster, repair cracks, scuff, and choose a breathable primer to preserve texture enhancement.
For wood, strip contaminants, fill grain, and use a stain-blocking primer to prevent tannin bleed.
Metal needs degreasing, rust treatment, and a metal-specific primer for adhesion.
- Drywall: sand, dust, drywall primer.
- Plaster: patch, breathable primer.
- Wood/Metal: fill, seal, metal or oil-based primer.
Formula Factors: Binder, Solvent, and Additives
When you look past sheen and color, the paint’s formula — the binder, the solvent, and the additives — determines how fast satin paint sets and cures. You’ll notice binders control film formation and durability; acrylics dry quicker than alkyds.
Solvent type and evaporation rate set the initial tack and open time, so thinner solvents speed surface drying while slower ones aid leveling. Additives like retarders, flow agents, or anti-foam change drying dynamics and workability.
For best results, match color blending demands with proper brush techniques: use softer brushes for wet edges and faster strokes when solvents evaporate quickly to avoid lap marks.
Pigment, Color Intensity, and Drying Speed
You’ll notice pigment concentration can change how quickly satin paint sets, since heavier loads of pigment can slow solvent escape.
Darker, more intense colors often absorb and retain heat differently, which can alter surface drying times compared with lighter shades.
Keep this in mind when planning drying and recoating intervals.
Pigment Concentration Effects
Although satin paint’s feel and sheen often steal attention, pigment concentration quietly shapes both color intensity and drying behavior. You’ll notice richer pigment loads slow surface water release, slightly extending tack time, while thinly pigmented mixes dry faster but risk color fading and weaker satin sheen. Balance matters for application and cure.
- High pigment: deeper hue, longer open time, potential slower cure.
- Low pigment: quicker set, paler result, increased risk of fading.
- Medium pigment: ideal flow, reliable satin sheen, moderate drying speed.
Adjust pigment load to match drying conditions and desired finish.
Color Intensity Impact
Pigment concentration sets the stage, but color intensity itself further influences how satin paint behaves as it dries. You’ll notice deep, saturated hues often feel wetter longer because denser pigments retain solvents and slow evaporation.
Meanwhile, pale shades dry a touch faster. Strong color intensity can also hide early satin sheen development, making surfaces look matte until curing progresses.
Be mindful that aggressive thinning to speed drying risks color fading and weak film integrity. Adjust application thickness, ventilation, and drying time based on tint strength, and test a sample so you’ll predict sheen development and avoid unexpected color fading.
Water-Based vs. Alkyd (Oil) Satin Drying Differences
When choosing satin finishes, remember that water-based (latex) and alkyd (oil) formulas dry by different chemistry and on different schedules. You’ll notice faster touch-dry times with latex, less odor, and easier cleanup, while alkyd takes longer, self-levels differently, and yields a richer paint sheen that can affect color matching under varied light.
Consider these practical differences:
- Drying speed: latex dries in hours; alkyd can take a day or more to harden.
- Durability and leveling: alkyd often flows smoother; latex cures to a flexible film.
- Application environment: humidity impacts latex more; ventilation matters for alkyd.
Additives, Extenders, and Retarders: Pros/Cons
You can use additives, extenders, and retarders to tweak satin paint’s flow, open time, and durability, but each one has trade-offs. Check compatibility with water-based or alkyd formulas and follow manufacturer ratios to avoid problems like poor adhesion or extended cure times.
We’ll compare the pros and cons and show when to use each type for best drying results.
Pros And Cons
Although additives like extenders and retarders can solve drying and flow issues, they also introduce trade-offs you should know before mixing them in. You’ll appreciate the historical context of additives—manufacturers refined formulas to balance open time and finish—and you’ll notice subtle shifts in color psychology as pigments read differently with altered gloss or transparency.
- Extenders: They stretch paint and reduce cost but can thin saturation and weaken film strength.
- Retarders: They lengthen open time for smoother application yet can slow cure and attract dust.
- Overuse: Risks adhesion, longer recoats, and uneven sheen; measure carefully.
Usage And Compatibility
Building on the trade-offs just discussed, it’s important to match additives like extenders and retarders to your specific satin paint and project conditions.
You’ll use extenders to improve flow and open time for better color blending, especially on large surfaces. However, too much can weaken film integrity.
Retarders slow drying in hot or low-humidity environments, helping reduce brush marks. Yet, they can tack up longer and attract dust.
Test mixes on a scrap, note effects on sheen and adhesion, and follow manufacturer limits.
Store altered paint properly: avoid freezing, label mixes, and respect paint storage guidelines to preserve performance.
How Paint Brand and Formula Can Change Dry Times
Because manufacturers tweak resin blends, pigment loads, and additives, satin paints from different brands can dry at noticeably different rates. You’ll notice faster tack times with low-VOC formulas, while high-pigment mixes can stay open longer. Choose brand chemistry to suit your project, whether you’re exploring creative techniques or leveraging color psychology to influence mood.
Satin paint drying varies by resin, pigment, and additives—test samples to match brand chemistry with your technique and mood.
- Resin type: acrylic vs alkyd alters film formation and cure speed.
- Pigment concentration: heavy pigments can slow evaporation and surface setting.
- Additives and solvents: dryers, retarders, or co-solvents change both feel and recoat windows.
Test sample swatches under your jobsite conditions before committing.
Common Mistakes That Slow Satin Paint Drying
If your satin paint’s taking forever to dry, you’re likely running into a few common mistakes that trap moisture or interfere with film formation.
You may be applying coats too thickly, expecting a satin sheen to hide uneven layers; thick wet film extends cure time. Painting in high humidity or cold slows solvent evaporation, and poor ventilation traps moisture.
Skipping proper surface prep leaves contaminants that affect paint gloss and adhesion, causing irregular drying. Using incompatible primers or mixing different brands can disrupt drying chemistry.
Finally, recoat intervals ignored or tools left unclean introduce problems that prolong drying.
Diagnosing Tacky or Slow-Drying Satin Paint (Fixes)
When your satin paint stays tacky or dries slowly, start by systematically checking the basics: surface temperature and humidity, coat thickness, ventilation, and whether you used compatible primer and paint.
Next, diagnose causes—improper mixing, trapped solvents, or oil-over-water conflicts—and note visible signs like uneven sheen.
Next, troubleshoot causes—poor mixing, trapped solvents, or oil-over-water issues—and watch for uneven sheen.
Consider historical context: older finishes or lead-era substrates alter absorption.
Also remember color psychology: darker pigments can retain heat and appear different when tacky.
Fixes are practical and sequential:
- Remove excess build-up gently.
- Allow extended cure in stable conditions.
- Test adhesion and recoat compatibility before full remediation.
How to Speed Up Satin Paint Drying Safely
Although speed matters, you should prioritize safe, controlled methods to accelerate satin paint drying so you don’t compromise finish quality. You can improve drying by increasing airflow, lowering humidity, and using thin coats. Mind Color mixing—additives can alter cure time, so follow manufacturer limits. Choose appropriate Brush types to lay down even, thin films; synthetic brushes work well with water-based satin. Avoid heat that blisters the film.
| Method | Benefit |
|---|---|
| Thin coats | Faster evaporation |
| Airflow | Reduces drying time |
| Dehumidifier | Lowers moisture |
| Fan placement | Prevents dust |
| Proper brush | Smooth finish |
Tools & Gadgets to Monitor Drying and Humidity
Speeding up satin paint drying is easier to manage if you’ve got the right tools to track conditions and film set. You’ll want reliable gadgets that monitor humidity, temperature, and drying progression so you can judge tack-free and recoat times.
Consider how historical context influenced instrument design and even paint color symbolism in choosing sensors for restoration work.
- Digital hygrometer/thermometer for continuous RH and temp readings.
- Infrared thermometer to spot uneven surface temperatures.
- Drying time cards and moisture meters to compare tack and substrate moisture.
Use these to time interventions precisely and avoid guesswork.
Environmental and Health Tips While Speeding Drying
If you want to hasten satin paint drying, balance faster techniques with ventilation, personal protection, and environmental care so you don’t trade speed for health or damage. You should open windows, run fans, and avoid propane heaters that create Environmental hazards. Wear respirators or masks, gloves, and eye protection as basic Health precautions. Dispose of rags safely and keep pets away.
| Action | Benefit | Caution |
|---|---|---|
| Increase airflow | Faster drying | Watch dust |
| Use dehumidifier | Lowers humidity | Empty water |
| Low-heat fan | Gentle warmth | Avoid sparks |
| Proper PPE | Reduces exposure | Fit correctly |
Plan carefully.
Planning Your Painting Schedule: Realistic Timelines
When you map out a realistic schedule for satin paint, factor in prep, coat count, recommended dry times between coats, and curing—then add buffer for humidity and temperature changes.
You’ll prioritize surface prep, allow recommended intercoat drying, and plan final inspection after full cure.
Account for color matching touch-ups and how paint sheen can show flaws when not fully cured.
Be practical: don’t schedule furniture return or heavy use until curing’s complete.
Use a simple timeline, check manufacturer times, and adjust for conditions so your project won’t need repeated fixes.
- Prep and priming
- Coats and intercoat drying
- Curing and inspection
Real-World Drying Timelines and Scenarios
Now that you’ve scheduled prep, coats, and curing buffers, let’s look at how those timelines play out in real rooms and conditions.
In small, warm rooms with good ventilation, satin paint feels dry to the touch in 1–2 hours and accepts a second coat in 4–6 hours. Full curing still needs 7–14 days.
In cool, humid basements, tackiness can linger and you’ll wait 24 hours between coats and up to 21 days to cure.
You should plan around satin paint safety—ventilate when curing—and test color matching under actual lighting before final coats to avoid surprises.
Quick Checklist Before You Apply a Satin Coat
Before you open the can, run through a short checklist to make sure the surface, tools, and conditions are ready for a satin coat. You’ll want a clean, dry substrate and proper ventilation so the satin sheen lays down evenly without trapping moisture or dust.
- Surface prep: sand, remove dust, and repair imperfections for consistent paint gloss.
- Tools: choose a high-quality roller or brush rated for satin finishes to avoid brush marks.
- Conditions: paint between recommended temperature and humidity; allow previous coats to dry to touch.
Follow this and you’ll get a smooth, durable result.
How to Test If Satin Paint Is Fully Cured
If you’re unsure whether your satin paint is fully cured, perform a few simple checks that go beyond the “dry to the touch” test so you don’t accidentally mark or damage the finish.
First, gently press a corner with a clean fingernail—no indentation or tackiness means better cure.
Next, test a discreet area with mild soap and water; if the finish resists dulling, it’s likely cured.
Inspect under different lights to confirm color matching across panels and assure even sheen.
Finally, evaluate brush techniques: look for absence of brush marks or lifting when you lightly stroke a hidden edge.
When to Call a Pro for Persistent Slow-Drying Paint
Those quick checks will catch most curing issues, but persistent slow-drying paint signals a deeper problem you shouldn’t ignore. If your satin finish stays tacky despite proper ventilation and temperature, call a pro. They’ll diagnose solvent issues, incompatible primers, or hidden moisture—sometimes linked to historical techniques used in older homes.
A specialist can test substrate moisture, VOC levels, and primer compatibility so you don’t ruin a job.
- Bring in a pro when tackiness persists beyond recommended cure times.
- Ask about moisture meters and lab tests for solvents.
- Discuss color psychology impacts only with experienced restorers.
Buying Tips: Choosing Satin Paint Labeled Fast-Dry
When you shop for satin paint labeled “fast-dry,” look beyond the marketing and check the technical details—dry-to-touch and recoat times, VOC levels, and recommended conditions tell you how it’ll perform in your space.
Compare manufacturer charts and user reviews to confirm real-world speed under your humidity and temperature.
Ask about tinting limits since color mixing can alter drying; request datasheets after tinting.
Verify shelf-life and seal integrity; proper paint storage preserves catalysts that enable fast cure.
Choose reputable brands with clear specs, and test a small section to confirm advertised fast-dry performance before committing to large batches.
Frequently Asked Questions
Can Satin Paint Be Used in High-Humidity Bathrooms Long-Term?
Yes — you can use satin paint in high-humidity bathrooms long-term if you guarantee strong bathroom ventilation and choose high-quality, moisture-resistant formulas; you’ll avoid peeling, mildew, and maintenance by keeping airflow consistent and surfaces properly prepped.
Does Satin Sheen Hide Surface Imperfections Compared to Eggshell?
Yes — you’ll notice satin’s higher sheen reveals imperfections more than eggshell; for surface smoothing, choose eggshell or prep more heavily, since sheen comparison shows satin highlights flaws while eggshell masks them better.
Will Multiple Thin Satin Coats Look Different Than One Thick Coat?
Yes — you’ll achieve a more polished result with multiple thin coats; they subtly minimize paint texture and control coat thickness, so surfaces look smoother, finish evens out, and imperfections become pleasantly less conspicuous.
Can I Apply Satin Paint Over Wallpaper Safely?
You can, but you shouldn’t unless the wallpaper’s firmly adhered and primed; consider wallpaper removal for best results. Do thorough surface preparation, repair seams, and use a quality primer before applying satin paint for lasting adhesion and finish.
Do VOC Levels Change Satin Paint Drying Indoors?
Yes — VOC fluctuations can affect satin paint drying indoors: you’ll notice faster tack reduction with lower VOCs and controlled indoor humidity, but high VOC levels or elevated humidity slow curing, so you should ventilate and dehumidify.
Conclusion
You’ve got the rundown: satin paint dries to the touch in hours but can take days or weeks to fully cure depending on formula and conditions. Trust recoat times on the can, test with a fingertip or tape before stressing, and prep and ventilate to speed things up. If it lingers wet despite fixes, call a pro. Remember, “haste makes waste,” so take your time for a lasting, beautiful finish.