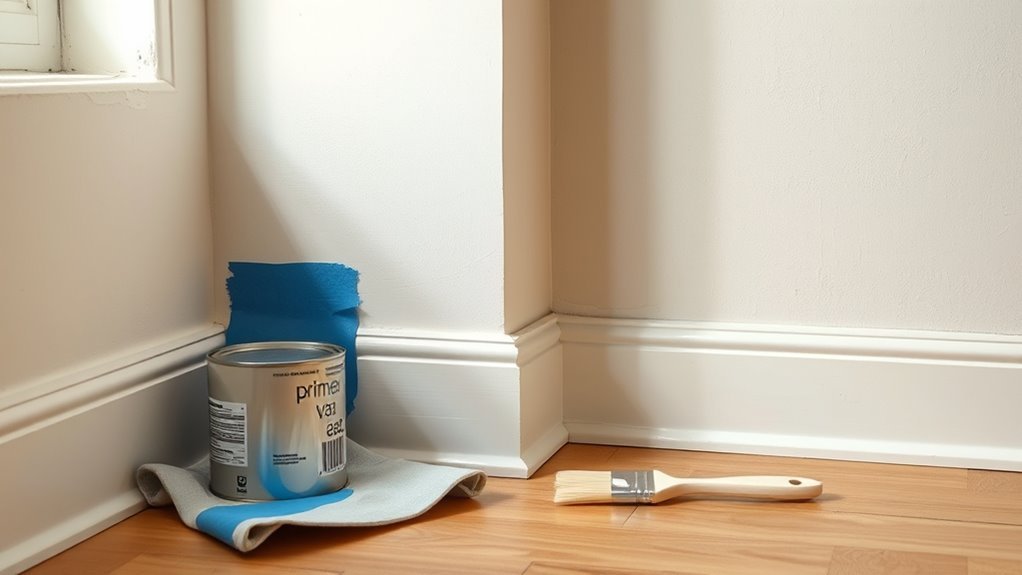
How Long Should Primer Dry Before Paint
You should wait until primer is dry to the touch and firm before painting—typically 30–60 minutes for water‑based, 6–8 hours for oil‑based, and 15–30 minutes for shellac, with many primers needing about 24 hours to fully cure. Check the label, test with a fingernail or tape, and avoid painting while tacky to prevent lifting, streaks, or adhesion failure. Keep conditions warm and ventilated, and more tips below will help you time and test like a pro.
Quick Answer: How Long Should Primer Dry Before Painting?
Although drying times vary, you should usually wait at least 30 minutes to 1 hour for surface-dry primers and 24 hours for full cure before painting for best results. You’ll check the label for specific times and feel the surface to confirm dryness.
If you need color matching, let the primer fully cure so the topcoat reflects true tones. Don’t rush; tacky primer causes streaks and adhesion issues.
If you must remove primer, sand or strip carefully, then clean before reapplying. Plan your schedule around manufacturer recommendations and room conditions like temperature and humidity to guarantee reliable results.
Why Timing Matters for Finish and Durability
Because primer sets the foundation for your paint, timing its dryness directly affects how the finish looks and how long it lasts. You’ll get smoother topcoats when primer cures properly, avoiding blistering, peeling, or uneven sheen.
Wet primer can trap solvents, altering color matching and causing subtle shifts once paint dries. Overly dry primer mightn’t bond as well, risking premature wear.
Proper drying guarantees consistent light reflection across the surface, giving true color and uniform gloss. Follow manufacturer times and check tackiness; when primer’s ready, your paint will adhere, reflect light evenly, and deliver durable, professional results.
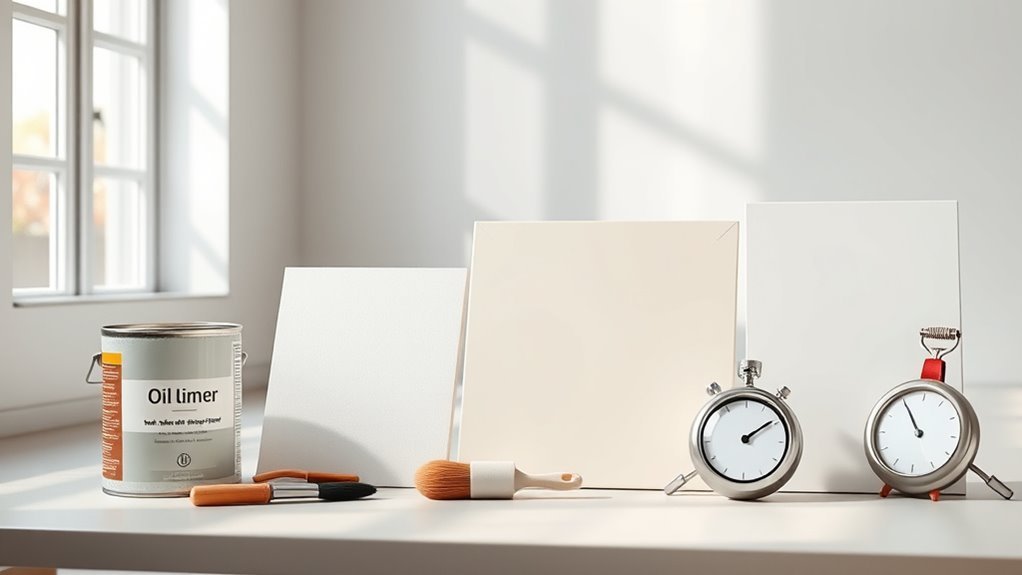
Primer Types: Water-Based, Oil-Based, Shellac – Quick Overview
When you pick a primer, choose the type that matches your surface and paint. Water-based primers dry fast, clean up with soap, and work well under latex paints; they’re forgiving for color matching and you can use smooth brush techniques for thin, even coats.
Choose a primer that fits your surface and paint—water-based dries fast, cleans with soap, and allows smooth, even brushwork.
Oil-based primers block stains and bond to slick surfaces, offering robust adhesion—use steady, longer strokes with natural-bristle brushes.
Shellac primers dry very quickly and excel at sealing tough stains and odors; they require careful ventilation and quick, precise brush techniques.
Match primer chemistry to topcoat and surface for best results without compromising finish.
Typical Ready-for-Paint Times by Primer Type
If you’re planning your painting schedule, know that different primer chemistries need different wait times before you can topcoat. Shellac primers dry fastest—often ready in 15–30 minutes for sanding and quick color matching—so you can finish projects fast.
Oil-based primers usually require 6–24 hours to cure before sanding or repainting; they resist stains but take longer, and primer removal is harder if you rush.
Fast-dry specialty primers may be ready in 1–2 hours, while heavy-duty stain-blocking formulas sometimes need overnight curing.
Always follow manufacturer recommendations and test a small area before full topcoating.
Water-Based (Latex) Primer: Drying and Recoat Times
Switching from fast-drying shellac or slow-curing oil primers, you’ll find water-based (latex) primers strike a middle ground for many projects. You’ll usually wait 30 minutes to an hour to tack-free, and 2–4 hours before recoating in normal conditions. Cooler or humid environments extend that.
Light sanding after 1–2 hours smooths the surface for ideal adhesion and color blending when you apply topcoat. Use proper brush techniques—short, even strokes or a quality synthetic brush—to avoid streaks and nap pickup.
Always follow manufacturer instructions and test a small area if timing or conditions vary.
Oil-Based Primer: Drying and Recoat Times
Because oil-based primers cure by chemical reaction rather than evaporation, you’ll typically wait longer than with latex—expect tack-free time around 6–8 hours and a full recoat window after 16–24 hours in normal conditions.
Because oil primers cure chemically, expect tack-free in 6–8 hours and full recoat after 16–24 hours.
You’ll want to check temperature and humidity, since cooler or damper air slows curing and extends recoat time.
Use oil primer when you need stain blocking, color blending, or superior adhesion on glossy surfaces.
Light sanding between coats helps with texture smoothing and promotes mechanical bond.
Avoid rushing; applying topcoat too soon can cause lift or wrinkling, so follow manufacturer times for best results.
Shellac Primer: Drying and Recoat Times

Oil and shellac primers both block stains, but shellac works fastest—you’re often ready to topcoat in as little as 45 minutes to an hour under normal conditions. You’ll appreciate shellac’s quick recoat for stains and odor sealing; check humidity and temperature, since high humidity can slow curing. Sand lightly if primer texture looks rough, and test a small swatch for color matching before committing. Use ventilation and solvent-appropriate cleaners.
| Factor | Typical Time | Tip |
|---|---|---|
| Dry to handle | 15–30 min | Light touch |
| Recoat | 45–60 min | Ideal temp 60–80°F |
| Full cure | 24–48 hr | Avoid heavy use |
| Sandable | 30–60 min | Fine grit sanding |
Dry to Touch vs. Ready for Paint: What’s the Difference?
While a primer may feel dry to the touch within minutes or hours, that doesn’t mean it’s ready for paint. “Dry to touch” simply means the surface won’t stick to light contact, whereas “ready for paint” means the primer has set enough to accept a topcoat without risk of lifting, adhesion problems, or visible flaws.
You should wait until the primer cures per type and conditions before painting, or you risk spoiling color matching and needing primer removal and rework.
Test by applying a small test coat or gently scuffing a hidden area; if it sands and adheres, it’s truly ready.
Manufacturer Recoat Times: How to Read and Apply Them
When you check a primer can, the recoat time tells you when it’s safe to apply the next coat without risking adhesion or finish problems, so learn to read those numbers as guidelines rather than absolutes. You’ll follow temperature, humidity, and surface notes on the label; manufacturer recoat times assume ideal conditions. Note maximum recoat windows too, since late repainting can need sanding. Track primer storage dates and avoid frozen cans. Consider Color mixing implications if tints are added — they can change dry times. Use the quick reference below for typical ranges.
| Condition | Minimum | Maximum |
|---|---|---|
| Cool/dry | 2 hrs | 24 hrs |
| Warm/dry | 30 min | 12 hrs |
| Humid | 4 hrs | 48 hrs |
Simple Tests to Check if Primer Is Paint-Ready
Before you paint, do three quick checks to make sure the primer’s ready.
Lightly touch the surface for tackiness.
Press a bit of tape to see if it pulls up any “tooth.”
Sprinkle a few drops of water to see if they bead or soak in.
If it’s non-tacky, the tape holds, and water beads, you can start painting.
Touch Test For Tacky
If the primer still feels slightly tacky to the touch, hold off on painting—your brush or roller can lift or gum up the finish. You’ll use a gentle touch: press a clean fingertip briefly, not enough to leave a print. If it’s tacky, wait; recheck every 15–30 minutes.
Consider how temperature and humidity affect drying and how different Color mixing ratios or additives can change set time. Also review your Brush techniques—lighter strokes reduce drag.
Quick checklist:
- Fingertip press — dry or tacky?
- Smell test — strong solvent odor indicates curing.
- Wait and recheck until consistently dry.
Tooth Check With Tape
You’ve checked for tackiness, now verify the primer’s “tooth” so paint will grip properly. Press a short strip of tape, pull sharply; the primer should stay intact and the tape shouldn’t remove film. Repeat in several spots, noting adhesion and any lifted areas. Use this simple tape check before color matching to guarantee topcoat uniformity. Keep tools clean—tool maintenance prevents false failures from dried residue. Record results and address weak spots with light sanding or recoat. Use the table below to quickly interpret outcomes and decide next steps.
| Result | Action | Confidence |
|---|---|---|
| Tape peels primer | Sand/reprime | Low |
| Tape holds | Proceed to paint | High |
| Partial lift | Spot fix | Medium |
Water Bead Assessment
One quick way to tell if primer’s ready is to drop a few water beads across the surface and watch how they behave; you’ll get a fast, visual cue. If beads bead up, the primer hasn’t fully adhered — wait and recheck.
If they flatten slightly and stay, you’re near paint time. If they soak in, it’s dry and porous enough to accept color theory-driven topcoats.
Try this 3-step check:
- Place beads evenly across area.
- Observe for 1–2 minutes for beading, flattening, or absorption.
- Record spots and test brush techniques on a small patch before painting.
Fingernail, Tack Cloth, and Tape Tests : How to Do Them Safely
When the primer feels dry to the touch, perform quick fingernail, tack cloth, and tape checks to confirm it’s ready without damaging the film.
Gently press a clean fingernail at an inconspicuous spot; if it leaves a mark, wait. Avoid using nail polish remover or solvents near primer.
Lightly run a tack cloth—if it drags or pulls fibers, the surface isn’t ready.
Press a small piece of low-tack painter’s tape and pull at 45 degrees; if primer lifts, don’t paint.
Wear safety goggles and gloves to protect from debris and adhesive.
Document results and retest after additional drying time.
When Primer Hasn’t Cured: Signs You Must Wait Longer
If the primer hasn’t cured, you’ll see clear signs that tell you to wait: tacky or gummy spots, poor adhesion during a fingernail or tape check, visible solvent blush or streaks, and a persistent smell of solvents or ammonia.
You’ll notice uneven sheen or darker primer colors where solvent pooled. Don’t rush; improper curing shows up with subtle and obvious cues. Check these three indicators:
- Surface tack when lightly pressed or dragged with a fingertip.
- Lift or smearing when tape or a fingernail is applied.
- Residual odor or visible streaks after normal drying time.
Inspect with clean application tools for accuracy.
Fixes for Primer That Dried Unevenly or Too Fast
Because primers can skin over or dry patchily, you’ll want to correct these flaws before topcoating to guarantee adhesion and a smooth finish. If primer dried unevenly or too fast, sand glossy spots lightly, wipe dust, and recoat thinly. Don’t buy primer myths about skipping sanding; prep matters. Adjust your application techniques: use consistent strokes, proper nap, and moderate load. For stubborn patches, feather with block sandpaper and apply a mist coat. Use the table below to plan fixes.
| Problem | Fix | Time |
|---|---|---|
| Skinning | Sand + wipe | 10–20 min |
| Patchiness | Mist coat | 30–60 min |
| Glossy spots | Block sand | 15–30 min |
| Thick build | Thin coat | 45–60 min |
| Recoat too soon | Wait & test | Variable |
How Temperature Affects Primer Drying Speed
Temperature controls how fast solvent or water evaporates from primer, so you’ll notice quicker drying in warm conditions and much slower drying when it’s cold.
Humidity also interacts with temperature — high humidity slows evaporation even if it’s warm, while low humidity speeds it up.
In cold weather you’ll need to allow extra curing time or use warming methods to avoid tacky or undercured primer.
Temperature And Evaporation Rate
When the air’s warmer, primers dry faster because heat speeds solvent evaporation and helps chemical curing reactions proceed. You’ll notice that temperature shifts change tack time and recoat windows, so plan projects around mild warmth, not extremes.
Consider Color selection and Surface preparation early; both affect perceived drying and final finish.
Quick guide:
- 60–75°F: steady evaporation, safer cure.
- 75–90°F: faster drying, shorter wait, watch flash-off.
- Above 90°F: very rapid evaporation, risk of film defects.
You’ll adjust application thickness and ventilation to balance drying speed without compromising adhesion or uniformity.
Humidity Interaction Effects
Although heat speeds evaporation, humidity often governs how quickly that moisture actually leaves the primer film, so you’ll see drying times change dramatically in damp air.
You’ll notice high humidity slows solvent and water escape, prolonging tackiness despite warm temperatures. That interaction depends on primer chemistry—waterborne primers trap moisture differently than solvent-based ones—so follow manufacturer specs for humidity limits.
Control the drying environment: increase ventilation, dehumidify, or delay recoating until surface feels dry and passes a tack test.
Low humidity speeds drying but can cause skin formation; balance conditions to ensure full cure beneath the surface before painting.
Cold Weather Curing Delay
Because cold slows the chemical reactions that let solvents and water escape, primers take much longer to set in low temperatures. You’ll often see tacky or soft films hours after application.
You should delay painting until the primer cures fully to avoid adhesion failures and poor color matching.
In cold conditions, consider these steps:
- Raise ambient temperature with heaters or choose a warm day.
- Extend cure time—check manufacturer specs and add extra hours per 10°F drop.
- Inspect surface; if primer peels or lifts, perform primer removal and reapply when warm.
Don’t rush; proper cure prevents costly rework.
How Humidity Affects Primer Cure Time
If humidity’s high, primer will take longer to cure because moisture slows solvent evaporation and chemical cross-linking.
If it’s very low, some water-based primers can dry too fast and fail to form a proper film.
You should monitor environmental factors before priming: high relative humidity delays tack-free time and full cure, while very low humidity can cause cracking or poor adhesion.
Adjust timing between coats based on manufacturer specs and local humidity.
Good surface preparation reduces trapping moisture under primer, improving cure consistency.
Use a hygrometer to track conditions so you apply paint only after the primer has properly cured.
Why Ventilation Speeds Drying : Best Practices
When you increase airflow through windows, fans, or vents, you speed solvent evaporation and help moisture-laden primers reach tack-free and full-cure stages more quickly.
You’ll want steady cross-ventilation, moderate temperatures, and unobstructed vents to avoid uneven drying that can affect color matching later. Keep doors open between rooms and position fans to move air across painted surfaces, not directly blasting them.
- Open windows opposite each other for cross-breeze.
- Use low-speed fans to promote gentle airflow.
- Remove obstructions that trap humidity.
Also, dry and store brushes promptly after brush cleaning to prevent solvent buildup that slows cure.
When and How to Speed Drying: Heaters, Fans, Dehumidifiers
When you need to speed drying, use electric heaters on a low, steady setting to gently raise room temperature without blasting the primer.
Position fans to create cross-ventilation that moves moist air out rather than blowing directly on the primed surface.
Set dehumidifiers to a moderate target (around 40–50% RH) and monitor progress so you don’t overdry or cause surface skinning.
Use of Electric Heaters
Although you can speed primer drying with heat, you’ll need to use electric heaters carefully to avoid problems like blistering, tackiness, or accelerated solvent entrapment. You should consider primer chemistry and application techniques before applying heat: some primers cure chemically and won’t benefit, while others thin and flow under warmth.
Use low, indirect heat and raise ambient temperature gradually. Monitor surface tack and solvent smell.
- Keep heater 3–6 ft away, pointing upward.
- Maintain steady 60–75°F and moderate humidity.
- Stop heating if primer skins over or blisters form.
Always test a small area first.
Positioning Fans Correctly
Because air movement speeds evaporation, you should position fans to create gentle, even airflow across primed surfaces without blasting them directly. Aim fans parallel to walls, angled slightly upward to carry moisture away; use oscillating fans for uniform circulation.
Keep fan distance at least 3–6 feet to avoid surface rippling or dust attraction. Monitor primer feel and tack before painting; faster drying can affect sheen and color matching, so test a small area.
Use proper brush selection for touch-ups after drying. Turn fans off briefly before applying paint to prevent dust settling and ensure consistent results.
Dehumidifier Settings Guide
Wondering how to speed primer drying without causing problems? Use a dehumidifier to lower humidity, which helps solvent evaporation while preserving color blending and texture smoothing. Set the unit to 40–50% relative humidity for most primers; higher heat can flash-dry surfaces and ruin finish.
Run the dehumidifier continuously until the primer feels tack-free, then drop to 50–60% during curing.
- Place dehumidifier near work but out of overspray.
- Combine with gentle fans for even airflow.
- Avoid direct heater blasts that cause cracking.
Monitor temperature, humidity, and primer manufacturer guidelines to protect adhesion and finish.
When and How to Slow Drying Intentionally
If you need to slow primer drying—for example when working in hot, dry conditions or when you want more open time to blend seams—you can do it deliberately by changing materials and the environment. Adjust primer chemistry (choose slower-cure formulas or add manufacturer-approved retarders) and control the drying environment (raise humidity, lower temperature) to gain working time. Work systematically and test a small area first. Don’t overdo additives. Use ventilation cautiously to avoid dust.
| Method | Effect |
|---|---|
| Humidity increase | Slows curing |
| Lower temperature | Extends open time |
| Slower primer | Longer dry |
| Add retarder | Moderate delay |
How Coat Thickness and Application Method Change Drying
When you lay down a thicker coat of primer or use a heavy-spray or roller technique, drying time increases noticeably because solvent and water have farther to travel and evaporate. You’ll notice edges tackier longer and sanding windows shift. Adjust technique and tools to control cure time and finish, remembering Color matching can require full cure for accurate results.
- Thick coat: longer cure, risk of blistering.
- Spray vs roller: spray lays thin, roller adds body.
- Brush selection: use appropriate bristle type for thin, even coats.
Check manufacturer recoat times rather than guessing.
Surface Differences: Primer Drying on Wood, Drywall, Metal, Plaster
Because different substrates pull moisture and solvents at varying rates, you’ll see primer dry much faster on some surfaces than others—wood soaks in, drywall wicks, metal beads, and plaster can vary based on porosity and sealers.
Because substrates draw moisture differently, primer dries unevenly—wood soaks, drywall wicks, metal beads, and plaster varies by porosity.
You’ll notice wood often needs longer to cure if it absorbs primer; sanding and a thin second coat help.
Drywall dries quickly but hates heavy buildup.
Metal requires anti-corrosion primers and full flash time so paint adheres.
Plaster depends on sealing and humidity.
Keep color theory in mind for tinting primers and prioritize tool ergonomics to reduce fatigue when applying multiple thin coats.
New Construction vs. Repainting: Timing Differences
If you’re working on new construction, primers usually need less time to cure because they’re going over fresh, uncontaminated surfaces and often in controlled conditions.
When repainting, you’ll often need extra drying time since old paint, residual oils, or uneven porosity can slow absorption and adhesion.
Adjust your wait times accordingly and test a small area before moving on to the full paint coat.
New Construction Timing
Though new construction and repainting both use primer, the timing you’ll need before topcoating differs considerably. On new builds, your primer often seals raw materials, so you’ll wait for full cure rather than just surface dry.
You’ll also consider Color blending and Texture contrast when selecting primer and schedule.
- Fresh drywall/wood: allow 24–72 hours depending on humidity.
- Masonry or concrete: wait 48–96 hours for moisture equilibration.
- Fast-track projects: use quick-dry primers but still verify tack-free status.
You’ll check manufacturer cure times and ambient conditions before painting to guarantee adhesion and even finish.
Repaint Drying Variances
New construction primers often need longer cure times because they’re sealing raw substrates.
But repainting brings a different set of concerns you’ll want to account for. When you repaint, surface condition, existing paint type, and contamination affect drying more than fresh substrate absorption. Primer chemistry still matters—latex over oil or bonding primers require specific flash times—so follow manufacturer guidance.
Light sanding and proper cleaning speed adhesion and reduce trapping solvents. Also consider color matching: darker topcoats may need extra primer coverage and dry checking before finish coats.
In short, assess substrate and primer chemistry, then adjust timing for reliable results.
Spot-Priming vs. Full-Priming: Timing Tips
When you’re patching small areas, spot-priming dries faster and lets you repaint sooner. But full-priming gives a uniform base that can prevent flashing and sheen differences across the whole wall. You’ll choose based on primer application and surface absorption: spot-priming suits limited repairs where absorption varies; full coats suit porous or repainted walls.
- Spot-priming: quick on small repairs, shorter wait times.
- Full-priming: longer dry time, consistent finish, less risk of patchy sheen.
- Hybrid: prime larger patched zones to blend, reducing visible transitions.
Always follow product dry-time guidance and test a small area first.
Primer on Trim and Doors: Special Timing and Handling
When you prime, trim, and doors, expect shorter tack times but still allow full cure before heavy handling.
Check manufacturer dry times—trim often needs only a couple of hours to recoat, but doors can take 24 hours or more before rehanging or frequent use.
Plan your schedule so you can gently handle pieces earlier, but wait for the full cure to avoid scuffs or sticking.
Dry Time For Trim
If you’re priming trim and doors, plan for faster tack-free times but longer full-cure waits than flat walls; you’ll still watch humidity and temperature closely.
For dry time on trim, consider these practical points:
- Tack-free: 30–60 minutes for latex, longer for oil-based.
- Sand-ready: 1–4 hours depending on primer type and shop conditions.
- Full-cure: 7–14 days for heavy handling or glazing.
You should allow longer before heavy use to avoid finish issues.
Prioritize proper color matching when spot-priming and be gentle with primer removal on historical mouldings to preserve profiles and adhesion.
Handling Doors After Priming
Because doors get the most handling, you’ll want to wait until the primer is firm enough to resist scuffs but not fully cured before rehanging or moving them. Check tackiness after the recommended dry time; if the surface yields slightly but doesn’t mark, you can handle it gently. When prepping for topcoat, consider Color matching if you’ve spot-primed. Keep a clean brush for touch-ups—good Brush cleaning prevents contamination. Use hardware protection and soft padding while transporting. Refer to this quick guide:
| Stage | Test | Action |
|---|---|---|
| Early | Very tacky | Wait |
| Firm | Slight yield | Handle gently |
| Cured | No give | Safe to rehung |
Exterior Primer Timing: Weather and Seasonal Rules
Although exterior primer can seem ready quickly on mild days, you should still factor weather and season into your timing because temperature, humidity, and wind change drying rates dramatically. You’ll check forecast windows, avoid rain, and plan around temperature swings.
Consider how Color selection affects heat absorption on siding, and keep Brush maintenance routine to prevent clogs in cooler weather.
Follow practical rules:
- Warm, low-humidity days: 2–4 hours tack-free, 24 hours full cure.
- Cool or humid days: 6–12 hours tack-free, 48+ hours full cure.
- Windy exposure: longer drying, protect from dust and debris.
Primer and Topcoat Compatibility: What to Avoid
Don’t put oil-based paint over a latex primer unless the products explicitly allow it, because adhesion problems will show up fast.
Make sure you’re using the right primer for the surface—wood, metal, and glossy finishes all need specific formulations.
Also avoid pairing primers and topcoats with wildly different finish levels, since sheen mismatches can highlight imperfections and affect durability.
Oil Over Latex
If you’re thinking of applying an oil-based topcoat over a latex primer or paint, be careful: the two don’t always play well together, and doing it wrong can lead to poor adhesion, cracking, or peeling. You can, but you’ll need to prep surfaces thoroughly.
Sand to scuff the latex, clean residues, and consider primer removal if the existing finish is flaking. Think about color schemes too—oil can deepen tones differently than latex.
Steps to follow:
- Sand and clean until smooth.
- Wipe away dust and solvents; let dry fully.
- Apply a bonding primer before the oil topcoat.
Wrong Primer Type
When you pick the wrong primer for your topcoat, adhesion problems, bubbling, or uneven finish can follow quickly. Different primer chemistries aren’t always compatible with certain paints. You should check label recommendations so your primer chemistry matches your topcoat type—oil-based primers with oil or compatible alkyd enamels, water-based primers with latex.
Ignore compatibility and you’ll waste time sanding and stripping. Also consider color matching: use tinted primers when covering dark or stained surfaces to reduce coats. If you’re unsure, test a small patch and let it cure fully; results will reveal whether adhesion and finish meet expectations before full application.
Incompatible Finish Levels
Although you can pair many primers and topcoats successfully, mismatched finish levels—like a high-gloss primer under a matte topcoat—can highlight imperfections or cause adhesion issues. You should match the primer’s sheen compatibility to the finish you want.
You’ll avoid patchy appearance and peeling by considering surface reflectivity and primer application technique. Also, watch color matching—primer tone affects topcoat depth.
Consider these scenarios:
- High-gloss primer + matte topcoat: shows bumps, may resist adhesion.
- Flat primer + semi-gloss topcoat: can absorb unevenly, dull sheen.
- Specialty primers + standard finishes: check manufacturer guidance before combining.
Sanding Primer Before Paint: When and Which Grit to Use
Before you paint, you’ll want to sand primer to knock down brush marks, remove dust nibs, and create a slightly roughened surface that helps topcoat adhesion.
Wait the primer’s recommended dry time first; sanding too soon gums the paper. Use 220–320 grit for latex primers and 320–400 for high-build or enamel primers.
Hand-sand trim and corners; use a sanding block for flats to keep surfaces even. After sanding, wipe with a tack cloth to remove dust.
Proper sanding aids color matching by ensuring smooth, consistent underlayers, and pairs with careful brush selection for a flawless final finish.
Recoating Windows and Trim: Minimum and Maximum Safe Intervals
Because trim and window work gets exposed to weather and frequent contact, you should follow specific recoat windows to avoid adhesion problems or surface defects.
You’ll typically wait a minimum of 2–4 hours for fast-drying primers and 12–24 hours for oil-based or low-temp curing.
Don’t exceed the maximum recoat window—usually 7 days—without light sanding.
Consider color psychology when choosing topcoats for trim; lighter hues feel open, darker ones frame views.
For sustainability, pick eco-friendly options with low VOCs.
Typical intervals to remember:
- Fast primers: 2–4 hours
- Latex/oil: 12–24 hours
- Max before sanding: ~7 days
Common Mistakes That Cause Peeling or Adhesion Failure
If you paint over uncured primer you’ll lock in a weak bond and risk peeling later.
You also cause adhesion failure when you skip proper surface prep—cleaning, sanding, and removing loose material are essential.
And using the wrong primer type for your surface or topcoat can prevent proper adhesion no matter how long you wait.
Painting Over Uncured Primer
When you paint over primer that hasn’t fully cured, the topcoat won’t stick properly and you’re inviting peeling, blistering, or flaking down the line. You risk trapped solvents and weak bonding; even perfect color theory choices and careful brush techniques won’t save a paint job if the primer’s still soft.
Let it cure per manufacturer guidance. If you’re short on time, test adhesion before finishing.
- Soft primer: topcoat slips, peels.
- Solvent entrapment: blisters form.
- Increased repairs: sanding, stripping needed.
Wait, test, and only proceed when the primer feels dry and firm.
Skipping Proper Surface Prep
You need to clean, sand, and remove contaminants so the surface texture accepts primer application evenly. If you leave dust, oils, or flaky old paint, primer won’t bond and topcoat will lift.
Light sanding creates tooth for adhesion; wiping with a suitable solvent removes residues.
Mask and repair holes or rust before priming.
Take this step seriously — proper prep guarantees your primer application performs and your paint finish lasts.
Using Wrong Primer Type
Because primers are formulated for specific surfaces and topcoats, choosing the wrong type undermines adhesion from the start. You’ll see peeling, bubbling, or flaking when primer application doesn’t match substrate or finish. Avoid assumptions: read labels and match oil to oil, latex to latex, or use a universal that’s proven for your surface.
- Metal + non-rust primer = corrosion undercutting.
- Glossy surfaces + no adhesion primer = topcoat failure.
- High-moisture areas + wrong primer = mold and lift.
Confirm compatibility before you start so paint adhesion holds and your finish lasts.
How to Handle Primer Failures and When to Re-Prime
If primer peels, bubbles, or doesn’t adhere, don’t panic—you can usually fix it without starting over.
First, remove failed primer by sanding to sound substrate, clean off dust, and inspect for contamination or moisture.
Sand away the loose primer to bare, sound substrate, clean dust thoroughly, and check for contamination or moisture.
Address root cause—repair leaks, allow surfaces to fully dry, or strip old finish.
Reapply primer only when the surface is stable; follow proper primer application techniques and recommended drying times.
For color matching, spot-prime and test a small area before committing.
If repeated failures occur, switch primer type or consult a pro.
Re-prime selectively rather than redo intact areas.
Pro Workflow: Timing for Multi-Coat Jobs
When you’re planning a multi-coat job, timing is everything: let each primer and paint layer dry to the manufacturer’s recommended minimum, but also allow extra cure time in high humidity or low temperatures so coats bond properly and you avoid trapping solvents.
You’ll sequence work to prevent mistakes and control costs; Color matching often requires test patches and extra touch-ups, so factor that into Budget considerations.
Follow a simple workflow:
- Apply primer, wait full dry/cure window, sand lightly.
- Apply first paint coat, inspect for coverage and color.
- Apply final coat, allow extended cure before handling or masking removal.
Quick Reference Chart: Primer Type → Paint-Ready Time (Normal Conditions)
You’ve already planned the sequencing and cure windows for a multi-coat job; now use a quick reference to pick the right primer and know when it’s paint-ready under normal conditions. Use this compact chart to decide fast:
latex primer — tack-free 30 minutes, paint-ready 1–2 hours;
oil-based — tack-free 4–6 hours, paint-ready 24 hours;
shellac — tack-free 15–30 minutes, paint-ready 1 hour;
bonding primer — tack-free 1–2 hours, paint-ready 4–6 hours;
high-build/epoxy — tack-free 2–4 hours, paint-ready 12–24 hours.
Consider color palettes and plan tool maintenance between coats to avoid cross-contamination and guarantee smooth application.
Final Troubleshooting Checklist Before You Start Painting
Before you pick up the brush, run a quick, focused checklist to catch issues that can ruin a finish. You’ll verify primer is fully dry and consistent; feel for tack, note any uneven gloss that suggests poor adhesion or needed primer removal. Confirm room temperature and humidity are within recommended ranges so drying isn’t compromised.
Check color matching under the room’s lighting and against a true swatch to avoid surprises. Finally, prep tools and tape, and test a small patch.
- Dryness and adhesion
- Environmental conditions
- Color matching and test patch
You’ll avoid costly rework by resolving these first.
Frequently Asked Questions
Can I Paint Over Primer if the Temperature Is Below Manufacturer Recommendations?
You shouldn’t; painting over primer below manufacturer recommendations risks poor adhesion and finish. You’ll face temperature concerns and extended drying time, so wait for proper conditions or use a primer rated for colder temperatures to avoid failures.
Will Primer Affect the Color Saturation of My Final Paint?
Absolutely—yes. Like a whisper altering a chorus, primer transparency influences color consistency: opaque primers mute tint, transparent primers preserve vibrancy, and your final paint will shift depending on primer choice, surface, and coat thickness.
Can I Use a Different Brand of Paint Over My Primer?
Yes — you can use a different brand over your primer, provided you check primer adhesion and paint compatibility; you’ll guarantee proper bonding by confirming product specs, doing a small test patch, and following surface prep and application instructions.
Is Tinted Primer Better Than White Primer for Coverage?
Think of tinted primer as a helpful friend: you’ll usually get better color coverage with tinted primer than white. Primer types differ, and tinting reduces coats needed, especially for strong or deep topcoat shades.
How Long Should I Wait Before Moving Furniture Back After Painting?
You should wait at least 24–48 hours before furniture repositioning; paint needs that time to cure enough. Also consider primer drying time earlier in the process—full cure can take up to two weeks for heavy use.
Conclusion
You’ve got this—wait the right amount and your paint will look showroom-fresh instead of disaster-movie terrible. Primer’s drying time matters: follow the type-specific windows, check tackiness, and don’t rush coats. If you see peeling, tackiness, or uneven sheen, sand and re-prime where needed. For multi-coat jobs, plan dry and cure times into your schedule so you’re not stuck repainting. A little patience now saves you big headaches later.