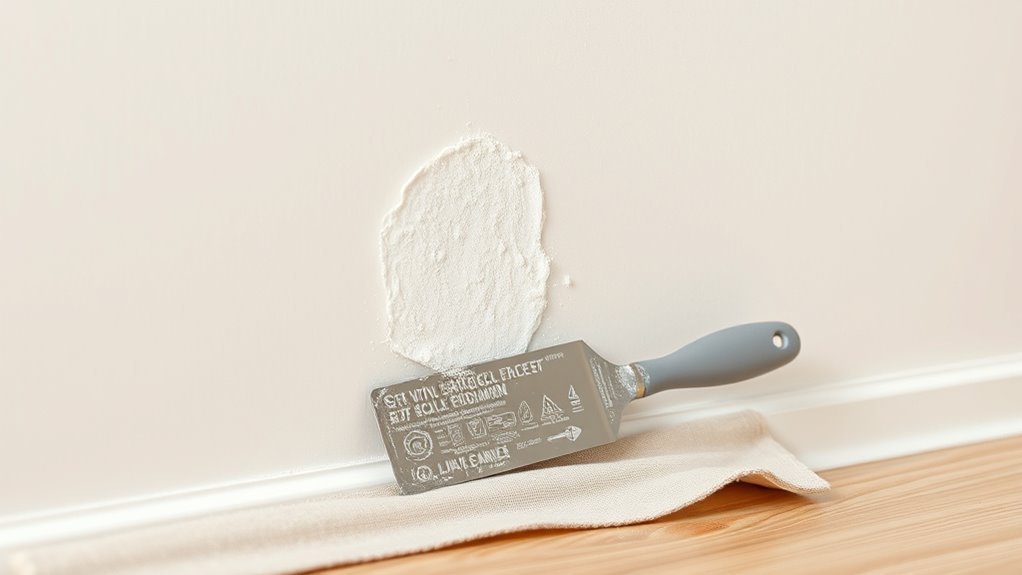
How Long Should Spackle Dry Before Painting
You should wait until spackle is fully dry and hard before painting: thin lightweight or vinyl coats can be ready in 30 minutes to a few hours, while deeper fills or damp, cool rooms often need 24–72 hours. Quick-setting compounds cure faster (minutes to hours) but still need to harden through. Test firmness with a fingernail; no indentation means you can sand, prime, and paint. Keep going to learn timing tips and troubleshooting.
Quick Answer: How Long to Wait Before Painting Spackle?

If you want a reliable rule of thumb, wait at least 24 hours after applying spackle before painting. You’ll let most lightweight spackles cure enough to sand and prime without tearing.
Thicker patches or humid conditions might need 48–72 hours, so check hardness by touch. Consider historical applications when matching older surfaces—older fillers often needed longer cure times.
You can also pick fast-drying or eco-friendly options labeled for same-day paint to shorten waits, but follow manufacturer directions.
When in doubt, sand a small test area; if it’s firm and smooth, you’re clear to proceed.
Spackle Drying Times at a Glance
When you need a quick reference, this table of typical spackle drying times shows what to expect for common products and conditions. You’ll find ranges for lightweight, all-purpose, and patching spackles, plus notes on thicker fills and temperature or humidity effects.
Remember historical techniques used longer curing times and layering methods that influenced modern standards. If you prefer eco-friendly alternatives, drying may vary with natural binders or low-VOC formulas, so check manufacturer guidance.
Use a knife test to confirm dryness before sanding or painting. Adjust expectations for depth of fill, ventilation, and seasonal humidity to avoid premature painting.
Typical Drying Time for Lightweight Spackle
You’ve seen the quick-reference ranges; now let’s look specifically at lightweight spackle. You’ll usually wait 30 minutes to 2 hours for a dry-to-touch surface, and 24 hours for full curing on deeper fills. Environmental factors speed or slow that.
- Relief — you’ll feel instant progress with fast tack-free times.
- Pride — historical applications show lightweight spackle’s long use in quick repairs, connecting you to past DIYers.
- Inspiration — try creative techniques like skim-coating thin layers to speed drying and improve finish.
Check depth, temperature, and humidity before priming to avoid failures.
Typical Drying Time for Vinyl Spackle
Vinyl spackle typically dries in about 1 to 4 hours for thin applications and up to 24 hours for deeper fills, depending on temperature and humidity.
You should watch factors like layer thickness, ventilation, and product brand since they speed up or slow down curing.
It’s paint-ready when it’s uniformly hard, no longer tacky, and sands smoothly without crumbling.
Drying Time Range
How long should you expect vinyl spackle to dry before painting? You’ll usually wait between 30 minutes and 24 hours depending on layer thickness and room conditions. Maintain consistent spackle texture so repairs blend; proper sanding helps color matching later.
- 30–60 minutes: thin skim coats; you’ll feel relief as small dings vanish quickly.
- 2–6 hours: medium patches; you’ll plan touch-ups without rushing.
- 12–24 hours: deep fills; you’ll avoid setbacks by letting the core cure fully.
Follow manufacturer guidance for best results and test before final paint.
Factors Affecting Drying
Because drying hinges on more than just the spackle itself, you’ll want to take into account layer thickness, room temperature, humidity, ventilation, and the substrate type when estimating cure time. Vinyl spackle typically sets faster in thin layers and warm, dry rooms; thick fills can take many hours. Historical context shows formulations improved for speed and adhesion. If you prefer eco friendly options, check low-VOC vinyl blends. Use this quick guide:
| Factor | Effect |
|---|---|
| Layer thickness | Thicker = slower |
| Temperature | Warmer = faster |
| Humidity | Higher = slower |
| Ventilation | Better = faster |
When It’s Paint-Ready
Although exact times vary with layer thickness and conditions, you can generally expect thin coats of vinyl spackle to be paint-ready in 30 minutes to 1 hour.
While thicker fills often need 4–24 hours to fully cure. You’ll know it’s ready when the patch feels firm, has no tack, and matches surrounding texture.
Check under different light to verify color matching won’t be affected by moisture, and lightly sand for texture blending before priming.
Trust your senses and a gentle fingernail test. Follow manufacturer guidelines, and don’t rush—painting too soon ruins the finish.
- Relief
- Pride
- Confidence
Typical Drying Time for Setting (Hot) Compound
Setting compounds come in timed formulas like 5-, 20-, or 90-minute mixes, and you’ll pick one based on how fast you need it to harden.
You’ll notice the initial set happens within the manufacturer’s stated minutes, but full cure can take several hours to a day depending on thickness and temperature.
Always check the product’s cure timeline before sanding or painting so you don’t ruin the finish.
Setting Compound Types
When you mix setting (hot) compound, it begins a chemical hardening that finishes far faster than regular joint compound, so you’ll need to plan your work in short bursts. Typical pot times range from 5 to 90 minutes and final set can occur anywhere from 20 minutes to several hours depending on the formula.
You’ll choose between quick, medium, and slow-setting powders that affect spackle texture and your repair techniques. Faster mixes let you finish small patches quickly; slower ones give more working time for larger repairs. Pick a type that matches job size, climate, and your pace.
- Relief
- Confidence
- Satisfaction
Typical Cure Timeline
Having picked the right setting compound speed for your project, you’ll see the hardening follow a predictable timeline: pot time (workability) lasts from about 5 to 90 minutes.
Initial set generally occurs within 20 minutes to a few hours, and full cure — where the patch reaches its maximum hardness and can be sanded and painted with confidence — can take anywhere from several hours up to 24 hours depending on the powder grade, layer thickness, temperature, and humidity.
You’ll plan multiple thin layers for faster curing, recall historical techniques that used lime plasters, and choose eco-friendly materials to reduce VOCs while maintaining reliable dry times.
How Patch Thickness Changes Spackle Drying Time
Because spackle dries from the outside in, the thicker your patch, the longer you’ll wait before it’s paint-ready. You notice spackle texture changes as layers build; dense, lumpy areas trap moisture and slow drying. Proper wall preparation—clean, dust-free surfaces—helps thin layers bond and dry more uniformly.
When you apply thick fills, expect extended cure times and possible cracking if painted too soon.
- Frustration: waiting feels endless when layers sag.
- Relief: sanding reveals a smooth, dry finish at last.
- Pride: a well-prepared patch blends seamlessly into the wall.
How Patch Size Alters Your Approach and Timing
Although patch size changes how you work and wait, the main rule is simple: bigger holes need more prep and much more drying time.
Although patch size alters your approach, remember: bigger holes demand more prep and significantly longer drying time.
For small dents you can apply thin layers and touch up within hours. For larger holes you’ll fill, sand, and often build in multiple passes.
You’ll choose materials and techniques based on size—historical techniques used coarse fillers for big repairs, modern spackle lets you layer more predictably.
For large areas consider backing, clamps, or mesh.
Also pick eco friendly options when possible; low-VOC compounds and recyclable patches reduce odors and environmental impact as you wait.
How Surface Porosity (Drywall vs Wood) Affects Drying
When you apply spackle to drywall versus wood, the materials absorb moisture differently and that changes how long the patch needs to dry. You’ll notice drywall’s higher surface porosity so spackle soaks in and sets faster, while wood’s lower porosity can hold moisture longer and risk material expansion.
Expect longer wait times on wood, especially in grain or knotty areas. Tailor thickness and sanding accordingly, and monitor firmness before painting. Feel confident knowing the substrate guides your timing.
- Relief — quick drywall fixes reassure.
- Frustration — slow wood drying tests patience.
- Pride — perfect finish rewards careful pacing.
How Room Temperature Affects Spackle Curing
Room temperature plays a big role in how quickly spackle cures, with warmer air speeding evaporation and cooler air slowing it down.
You’ll usually get best results around 65–75°F (18–24°C), where curing is steady without cracking.
If your room’s outside that range, plan for longer or shorter dry times and adjust ventilation accordingly.
Temperature Impact On Drying
If you keep the room too cool, spackle will take much longer to cure because lower temperatures slow the chemical reactions and moisture evaporation that set the compound.
You’ll notice delays that affect color matching and surface preparation timing; colder air traps moisture, so you’ll wait longer before sanding or painting.
Adjust your schedule accordingly and monitor humidity.
- Frustration — waiting extends projects and stresses deadlines.
- Relief — warming the room speeds drying and restores momentum.
- Confidence — correct timing protects finish quality and prevents rework.
Plan around temperature to get consistent, paint-ready results.
Ideal Room Temperature
Although cooler air slows curing, keeping the space between about 65–75°F (18–24°C) gives spackle the best balance of steady chemical reaction and moisture evaporation for reliable drying times. You’ll get predictable set times, which helps you plan sanding and painting without overworking the repair.
Higher temps speed water loss but can cause surface cracking; lower temps prolong tackiness and risk poor adhesion. Maintain gentle ventilation and avoid direct heat sources.
Consistent temperature also aids color matching by preventing shade shifts as the filler dries, and it supports uniform texture blending so your repair disappears under paint.
How Humidity Slows or Speeds Spackle Drying
Because moisture in the air directly affects evaporation, humidity is one of the main factors that determines how quickly your spackle will dry. You’ll notice higher humidity slows water loss, making drying take much longer, while low humidity speeds it up and risks cracking.
Consider historical techniques for adjusting moisture and modern eco-friendly alternatives that control humidity without harsh chemicals. Monitor levels and adjust expectations: you’ll wait more on humid days and can work faster in dryer conditions.
Emotions matter; patience, relief, and frustration are common.
- Patience
- Relief
- Frustration
How Ventilation Influences Drying Speed
When you increase airflow around a patched area, spackle sheds moisture faster and dries more evenly, so set up fans or open windows to speed the process without overheating the compound. You’ll want balanced Ventilation efficiency to promote uniform drying; aim airflow across, not directly onto, the repair. Good ventilation aids Moisture control, preventing surface skinning while inner layers stay wet. Monitor drying by touch and translucence; adjust fan speed or window opening to avoid drafts that cause cracking. Use this quick reference:
| Action | Effect |
|---|---|
| Open window | Gentle crossflow |
| Fan low | Even drying |
| Fan high | Faster surface dry |
| Close at night | Stabilizes moisture |
Use a Dehumidifier or Humidifier the Right Way
If you control the room’s humidity, spackle will dry more predictably, so use a dehumidifier to pull excess moisture out in damp conditions and a humidifier to prevent overly rapid surface skinning in very dry air.
You’ll manage humidity control by setting devices to a moderate range (40–60%) and monitoring with a hygrometer.
Tool selection matters: pick units sized for the room and with adjustable output.
Use steady, gentle airflow; avoid blasting heat.
Emotional payoff comes from confidence in timing and finish quality.
- Relief: you’ll stop guessing.
- Pride: surfaces look smooth.
- Calm: deadlines stay realistic.
Why Manufacturer Drying Times Can Be Misleading
Although manufacturers provide drying times on labels, you shouldn’t treat them as guarantees, since those figures assume ideal lab conditions you rarely have at home. You’ll find those numbers come from controlled temps, humidity, and thin test coats.
In real rooms, layer thickness, ventilation, and substrate absorbency change drying dramatically. Don’t assume fast numbers apply to older plaster or high humidity.
Compare product claims with historical techniques that relied on longer curing and simple airflow. Also consider eco-friendly options that may dry slower but release fewer VOCs.
Test small areas and adjust expectations rather than following labels blindly.
How to Read Spackle Product Labels for Real Timing
Because label times come from ideal tests, you’ll need to read spackle product labels with a critical eye: look beyond the “dry to the touch” claim to find cure time, recommended coat thickness, temperature and humidity ranges, and any notes about porous substrates or paint-over windows.
You’ll compare labels to your real conditions, remembering Historical techniques that warned slower drying in cool, damp air. Seek eco friendly options with clear, honest timing.
Watch for max coat depth per pass and recoat windows. Then ask yourself:
- Will my humidity delay cure?
- Is my coat thicker than recommended?
- Can I wait the full cure time?
When to Use Setting Compound Instead of Premixed Spackle
When you’re facing large or deep repairs, setting compound is usually the better choice because it fills and bonds much more reliably than premixed spackle.
Use it when you need fast drying to get to painting sooner or when the patch needs higher strength to resist cracking.
Keep premixed spackle for small surface fixes and save the setting stuff for heavy-duty jobs.
Large Or Deep Repairs
If you’re tackling holes larger than a quarter or repairs deeper than about 1/4 inch, reach for a setting compound rather than premixed spackle. You’ll need a stronger base for structural fill, better texture matching, and reliable cure times for finish smoothing.
Setting compounds resist shrinkage and let you build layers without redoing work. Use fast-setting formulas for staged work, and choose a sandable mix for crisp edges. Don’t rush sanding; test firmness before finishing.
- Relief — it restores surfaces reliably.
- Pride — your patch looks intentional.
- Confidence — the paint will sit flat.
Fast Drying Needed
Choosing a setting compound makes sense when you need a repair to dry quickly and hold up to sanding and painting the same day. You’ll pick setting compounds over premixed spackle when time’s tight: they set in minutes to an hour depending on the formula.
Use small batches, follow mixing ratios, and work efficiently to avoid waste. For textured surfaces, try creative techniques like stippling with a sponge before cure.
Consider alternative materials such as fast-setting joint compound or epoxy patch for tiny urgent fixes.
Always sand lightly, wipe dust, and prime before painting to guarantee adhesion and a seamless finish.
High Strength Requirements
Because some repairs need to withstand stress, vibration, or frequent contact, you should reach for a setting compound instead of premixed spackle for high-strength jobs. You’ll choose setting compound when strength matters: it cures rock-hard, resists shrinkage, and bonds in deep holes.
Premixed spackle suits light dings and easy color matching, but it won’t hold up where movement or impacts occur. Pay attention to spackle texture for sanding and feathering; setting compounds can be coarser initially but finish smooth.
Use setting compound for load-bearing areas, outdoors, or frequently touched spots to avoid repeated repairs.
- Safety — prevents failure
- Pride — lasts longer
- Relief — fewer callbacks
When Fast-Curing Spackle Is Worth the Extra Cost
When you need a repair done fast and can’t wait around for traditional spackle to dry, fast-curing formulas can be worth the extra cost—especially for high-traffic areas, time-sensitive projects, or jobs that require multiple coats in a single day. You’ll choose rapid cures when schedule, reduced downtime, and quick repainting matter.
They’re handy for rentals, event prep, or busy hallways. Check labels for compatibility with vintage color touch-ups and prefer eco-friendly formulations to limit fumes. Expect slightly higher price but smoother workflow.
For minor cosmetic fixes where time isn’t critical, standard spackle usually suffices.
Best Tools for Applying Thin, Fast-Drying Spackle
When you’re working with thin, fast-drying spackle, the right knife makes a big difference in speed and finish. Use a range of spackle knives—6-inch for small patches and 10–12-inch for feathering—to spread thin, even coats.
For ultra-quick application, consider quick-apply tools like corner trowels or spackle pumps that cut down brush-up time.
Best Spackle Knives
Choosing the right spackle knife makes thin, fast-drying spackle smooth and easy to apply, so you’ll get clean feathered edges and minimal sanding. You want blades that flex without wobble, comfortable handles, and edges that match spackle textures and wall repair techniques you use.
A 3–4″ flexible knife is superb for thin fills; a 6–8″ stiff knife spreads fast-drying compound over larger dents; a corner knife or 2″ detail blade finishes tight spots.
Choose corrosion-resistant steel and ergonomic grips so you’ll work faster, reduce waste, and feel confident restoring walls with precision and speed.
- Small detail blade
- Medium flexible blade
- Wide stiff blade
Quick-Apply Tools
After you pick the right knives, outfit yourself with quick-apply tools that make thin, fast-drying spackle go on evenly and disappear into the wall. Use a narrow flexible putty knife for small dents and a wider one for seams; their differing edges let you feather thin layers without ridges.
A foam spreader helps smooth fast, reducing sanding. For textured surfaces, carry a stipple brush or small roller to aid texture blending while it’s wet. Keep a damp sponge for immediate cleanup and gentle smoothing.
Don’t forget a palette knife for precise touch-ups and to assist color matching before paint.
How to Tell If Spackle Is Dry by Touch?
If you lightly press the spackled area with a fingertip, you can usually tell if it’s dry by feel. You’ll notice firmness instead of tackiness; slight give means it needs more time.
Remember historical techniques used touch to judge readiness, and modern alternative materials can change drying feel, so adjust your sense accordingly. Trust your fingertip, not the clock.
- Relief — satisfaction when it’s firm and smooth.
- Frustration — impatience if it’s still tacky.
- Confidence — ready to sand and paint once it resists indentation.
Visual Cues That Spackle Is Fully Dry
Look for a consistent color shift—fresh spackle is darker and it lightens as it dries. You’ll also notice the texture going from tacky or glossy to smooth and matte, matching the surrounding wall.
Finally, a firm, non-sticky surface when you touch it confirms it’s fully dry.
Color Change
When spackle dries, you’ll usually see its color shift from darker and glossy to lighter and matte. That change is one of the quickest visual cues you can use to judge readiness for sanding or painting.
You’ll notice the color changeover happens unevenly at first; wait until the patch matches nearby areas without a sheen. Check pigment compatibility if you’ll spot-prime or paint directly—some spackles darken under certain primers.
Trust your eyes, but test a small swatch before committing.
- Relief: the patch blends.
- Confidence: no tackiness remains.
- Pride: your repair looks seamless.
Texture Uniformity
Because a smooth, even surface shows that moisture has left the compound, check the patch for consistent texture—no glossy spots, ridges, or depressions—before sanding or painting.
Run your hand gently to feel for bumps or indentations and inspect under raking light to reveal unevenness. Small ridges need light sanding; depressions may require additional thin coats and repeat drying.
Achieve uniform tooth so your surface preparation is complete and the primer application bonds evenly. Only proceed when the texture matches surrounding drywall; otherwise you’ll seal flaws and magnify them after painting.
Consistency equals a professional-looking finish.
Dryness To Touch
If you press lightly with your fingertip and the spackle feels dry, dull, and firm rather than tacky or cool, it’s a good visual cue that most of the surface moisture has evaporated. You’ll also watch the spackle color shift from wet sheen to a uniform matte, signaling readiness.
Check surface adhesion by gently scraping an inconspicuous edge; it should resist crumbling. Trust your senses but confirm with touch and sight before painting.
- Relief — the patch looks seamless and stable.
- Confidence — color and feel match expectations.
- Satisfaction — surface adhesion holds, and you’re ready to paint.
How to Test Dryness With a Fingernail
Before you start painting, press your fingernail gently into the spackle at several points to check for tackiness and give an immediate sense of dryness. You want a smooth spackle texture with no indentations left behind; a slight resistance is okay, but wet or gummy areas will dent.
Test multiple spots, edges, and thicker patches since drying varies. If your nail leaves no mark and the surface feels firm, you’ve likely achieved proper surface cure for good paint adhesion.
Clean any dust from testing before painting. Repeat the fingernail check after additional drying time if uncertain.
What to Do If Spackle Isn’t Dry Yet
If the spackle isn’t dry yet, don’t paint—wait longer so it cures fully.
You can speed up drying by improving air circulation, using a fan, or lowering humidity with a dehumidifier.
For thicker patches, consider thinning future applications or applying thinner layers to reduce wait time.
Wait Longer Before Painting
When the spackle still feels damp or soft, don’t rush the paint—wait longer until it’s fully dry to avoid peeling and visible imperfections. You’ll notice spackle color shift as it cures and that helps you judge dryness; also inspect wall texture for uniformity before priming. Patience preserves your finish and saves time fixing mistakes later.
You’ll feel relief when the repaired area blends seamlessly.
You’ll avoid frustration from bubbled or flaking paint.
You’ll enjoy confidence knowing the wall holds paint properly.
Check again later; dry spackle accepts primer and paint reliably.
Speed Up Drying Process
You’ve waited and checked the spackle, but it’s still not ready — here’s how to speed up drying so you can move on. Open windows, run a fan, and raise room temperature slightly to reduce humidity. Thin layers dry faster, so scrape and reapply if it’s too thick. Check Spackle texture before sanding; rough spots mean more time. Use a hairdryer on low, moving constantly to avoid cracking. Confirm Color matching after full cure. Quick-dry formulas help next time.
| Action | Benefit |
|---|---|
| Fan/ventilation | Lowers humidity |
| Thin layers | Faster cure |
| Hairdryer | Spot drying without cracks |
When to Sand Spackle Before Painting
Before you sand spackle, make sure it’s fully cured and feels hard to the touch rather than tacky. Sanding too soon will gum up the paper and create a messy, uneven finish. You’ll test by lightly pressing a fingernail—no indentation means ready.
Use fine-grit sandpaper for a smooth surface and avoid over-sanding edges. Consider how color psychology affects your paint choice once smooth, and pick eco-friendly materials for cleanup and joint compounds when possible.
Trust your touch and sight; patience prevents rework.
- Relief: satisfaction of a seamless wall
- Pride: craftsmanship revealed
- Calm: a ready canvas
How Long to Wait Before Priming Over Spackle
After you confirm the spackle is fully cured and smooth under your touch, wait until it’s completely dry before priming—typically 24 hours for thin patches, but up to 48–72 hours for deeper fills or high-humidity conditions. You should test by pressing lightly; no impression means ready.
Choose a primer suited to the spackle type and substrate to guarantee adhesion and seal stains. If color matching is critical, use a tinted primer or test small areas before full application.
Consider eco-friendly options like low-VOC primers to reduce odors and off-gassing while maintaining performance. Apply evenly and allow manufacturer drying times.
How Long Before Applying Latex Paint to Spackle
Give the spackle at least the same curing time you’d allow before priming—typically 24 hours for thin patches and 48–72 hours for deeper fills or humid conditions—then make sure it’s fully dry and firm to the touch before you roll on latex paint. Test by lightly rubbing; no powder or give means you’re safe.
Use a quality latex primer if needed for adhesion and color uniformity. Consider historical techniques for surface prep inspiration, but prefer modern, eco-friendly materials to reduce fumes.
Trust your senses: sight, touch, and smell will tell you when to proceed.
- Relief
- Pride
- Calm
How Long Before Applying Oil-Based Paint to Spackle
While spackle generally needs similar curing whether you plan to use oil or latex paint, oil-based finishes usually demand a bit more patience: wait at least 24 hours for thin patches and 48–72 hours—or longer for deep fills, cold temperatures, or high humidity—until the repair is fully dry and firm to the touch. You should check spackle texture for firmness and sand smooth before priming. Oil paint can highlight imperfections, so guarantee complete dryness and a compatible primer. Match primer type to substrate to control adhesion and eventual paint sheen.
| Condition | Recommended Wait |
|---|---|
| Thin patch | 24 hrs |
| Medium fill | 48 hrs |
| Deep fill | 72+ hrs |
| Cold/humid | Extend wait |
How Paint Sheen Affects Spackled Repairs
Since oil-based paints can accentuate surface flaws, you should also consider how sheen affects spackled repairs: higher sheens (semi-gloss, gloss) reflect more light and make imperfections stand out, while flatter sheens hide minor texture variations.
Remember: higher sheens highlight spackled imperfections, while flatter finishes better disguise minor texture flaws.
You’ll pick sheen partly for aesthetics and color matching—gloss can shift perceived hue at edges. Also weigh environmental impact: low-VOC sheen options reduce fumes.
Prep and sanding become more critical with shiny finishes. Choose filler and finish that complement each other so repairs vanish.
- Frustration when seams show.
- Relief when touch-ups disappear.
- Pride in a flawless wall.
How to Blend Wall Texture Over Spackle Before Painting
You’ll want to match the existing texture so the repair disappears into the wall. Feather the spackle edges smoothly with a damp sponge or knife to avoid ridges.
If needed, blend the area with a thin layer of joint compound that matches the surrounding finish before priming and painting.
Match Existing Texture
When matching existing wall texture over spackle before painting, identify the pattern and choose a method—brush, sponge, stomp, or spray—that reproduces it. Then practice on scrap drywall until the texture blends seamlessly with the surrounding surface.
You’ll focus on surface preparation and color matching so the repair disappears; sand lightly, remove dust, and use the same compound consistency. Apply texture sparingly, build in thin layers, and step back often to compare.
Match lighting and shadow to fool the eye. Commit to patience; tiny adjustments make a big difference.
- Relief: feel pride in concealment.
- Calm: trust steady hands.
- Joy: enjoy a flawless wall.
Feather Edges Smoothly
After matching texture, focus on feathering the edges so the repair fades into the surrounding wall. Use a damp sponge or fine sandpaper to lightly blend the spackle perimeter, working outward in thin strokes so the patch loses its hard line.
Check surface preparation: remove dust, let spackle fully dry, and sand only when firm. Test how light hits the area and do subtle color matching trials after you prime.
Keep movements gentle to avoid creating dips. Reinspect in different lighting, and repeat gentle blending if needed until the repair reads as part of the wall before priming and painting.
Blend With Joint Compound
If the spackle has dried and your feathered edges look smooth, bring joint compound in to recreate the surrounding wall texture so the repair disappears under paint. You’ll work quickly, applying thin layers and matching stipple, knockdown, or orange-peel with a knife or brush.
Focus on color matching when paint goes on; even perfect texture blending fails if the tone jumps. Sand lightly between coats, step back often, and let each layer dry fully.
Trust small adjustments over heavy fills to avoid new ridges.
- Anticipation: you want seamlessness.
- Relief: texture hides the fix.
- Pride: invisible repair.
How Long Between Coats When Reapplying Spackle
Because you’ll want a smooth, durable finish, wait until the first spackle coat is fully set and dry to the touch before applying another. You’ll typically wait 1–4 hours for lightweight spackle, longer for deep fills or low temps. Use thin layers; they dry faster and bond better. Consider historical techniques for layering and modern eco friendly formulas that speed curing. Light sanding between coats improves adhesion. If humidity’s high, give extra time. Use a damp cloth to remove dust before the next coat.
| Coat | Thickness | Typical Wait |
|---|---|---|
| 1 | Thin | 1–4 hrs |
| 2 | Thin | 1–4 hrs |
| 3 | Spot fill | 4–8 hrs |
How to Fix Shrinkage After Spackle Dries
When spackle shrinks as it dries, you’ll see a recessed groove or tiny pit that can ruin a smooth paint-ready surface. But you can fix it cleanly with a few simple steps. Lightly sand the area, wipe dust, and inspect the depth.
Use a thin layer of eco-friendly spackle, pressing firmly to eliminate air pockets. Let it dry fully, then sand flush for seamless results. If you like creative wall textures, feather the edges so texture blends.
- Feel relief—problem solved.
- Admire the smoothness—confidence restored.
- Prepare to paint—pride renewed.
How to Prevent Cracking in Large Spackle Patches
Although large spackle patches can seem sturdy at first, they’re prone to cracking if you skip a few key steps. You should apply thin, layered fills, let each layer dry fully, and sand between coats to match spackle texture. Use mesh tape over seams, feather edges into surrounding wall, and pick a product with good paint compatibility to avoid adhesion failure. Control room humidity and avoid thick single passes. Check for movement in underlying material; stabilize it before spackling. Follow manufacturer cure times, then prime to guarantee uniform absorption and reduce future cracking.
| Step | Benefit |
|---|---|
| Thin layers | Reduce shrinkage |
| Sanding | Smooth texture |
| Mesh tape | Reinforce seams |
| Prime | Improve paint compatibility |
| Stabilize substrate | Prevent movement |
How to Slow Drying to Prevent Cracking
If you want to prevent cracking, you’ll need to slow the spackle’s drying so it cures evenly. You can extend drying time by adding a retarder additive and avoiding heat sources.
You should also control temperature and humidity in the room. These steps help the patch dry more uniformly and reduce stress that causes cracks.
Extend Drying Time
Because spackle that dries too fast is more likely to crack, you can slow its cure by controlling temperature, humidity, and airflow. You’ll protect the spackle texture and help color matching later by avoiding rapid surface skinning.
Keep the room cooler (but above freezing), raise humidity with a humidifier or open a kettle briefly, and eliminate strong drafts from fans or vents. Painstaking patience prevents hairline fractures and wasted touch-ups.
Follow these steps to extend drying time and preserve finish quality:
- Lower room temp slightly to slow evaporation.
- Increase humidity gradually.
- Block drafts and reduce airflow.
Add Retarder Additive
When you need more working time and want to prevent hairline cracks, add a retarder additive to the spackle mix to slow its cure and keep the surface pliable longer. You’ll measure small amounts, mix thoroughly, and test a sample patch. Retarders help preserve spackle color and allow you to focus on texture matching before it sets. Use sparingly—too much can prevent full cure. After applying, monitor tackiness and allow manufacturer-recommended extended time before sanding. Record ratios used for repeat jobs so spackle color and finish remain consistent across patches and repairs.
| Additive | Ratio | Notes |
|---|---|---|
| Mild retarder | 1–2% | Small delay |
| Moderate | 3–5% | More working time |
| Strong | 6–8% | Use with caution |
Control Temperature And Humidity
Adding a retarder can buy you time, but controlling the environment gives you predictable, consistent slow drying that prevents hairline cracks. You’ll manage temperature and humidity to protect texture and finish.
Lower temps and higher humidity slow evaporation so Eco friendly spackle cures evenly, letting you craft Creative wall textures without stress. Use a humidifier, thermostat, or temporary tenting to keep conditions steady. Watch dew points and avoid drafts.
- Stabilize: keep room 60–75°F and 40–60% RH to avoid fast shrinkage.
- Monitor: use a hygrometer for real-time control.
- Protect: cover fresh work from vents and sun.
How to Speed Up Spackle Drying Safely
If you want paint to go on smoothly without waiting all day, speed up spackle drying by increasing airflow, lowering humidity, and using thin layers so each coat cures faster.
Work in thin, even passes and remove excess with a damp sponge to avoid thick spots that trap moisture.
Choose a quick-setting spackle or follow tested spackle recipes for faster cure, and verify primer compatibility before painting.
Keep the room ventilated and avoid sealing with plastic or heavy covers while curing.
Check small test spots before priming to confirm hardness and complete dryness for best results.
How to Dry Spackle With Fans and Heaters Safely
Although you want the spackle to dry quickly, you should use fans and heaters carefully to avoid cracking, uneven drying, or fire hazards. Aim gentle airflow and moderate heat so spackle texture cures evenly; harsh blasts or high heat can shrink joints and ruin paint sheen. Keep heat sources several feet away and use indirect airflow to prevent surface skinning.
Use gentle airflow and moderate heat—avoid harsh blasts or high temperatures to prevent cracking, uneven drying, and ruined sheen.
Monitor humidity and touch the patch before priming.
- Use low-speed fans to comfort your nerves, not rush nature.
- Choose a thermostat setting that soothes worry, not stresses seams.
- Check progress often to protect your work.
Avoid VOC and Odor When Speeding Drying
When you speed up spackle drying with heaters or strong airflow, you’ll want to avoid products and methods that release VOCs or strong odors, since they can linger in the room and bother occupants.
Use eco-friendly solutions like low-VOC or water-based primers and sealers, and choose fans or gentle heat rather than solvent-based accelerators.
Open windows briefly to ventilate, and run exhaust fans to move air outside.
Consider odor neutralizing agents designed for indoor use, but check labels for low chemical emissions.
That way you’ll speed drying without compromising indoor air quality or comfort.
How to Handle Spackle in Cold Weather
When it’s cold, you’ll notice spackle takes much longer to dry because lower temperatures slow evaporation and curing.
Keep layers thin and apply multiple coats rather than one thick patch to speed drying and prevent cracking.
To accelerate drying, raise the room temperature slightly, use a fan to improve air circulation, or choose a fast-setting spackle rated for cooler conditions.
Temperature Effects On Drying
If you’re working in cold weather, spackle will take longer to set and can skin over or crack if temperatures drop too low, so you’ll need to adjust your timing and environment before painting. You’ll watch humidity and drafts: temperature considerations matter.
Raise room heat, block drafts, and use gentle drying acceleration like a space heater set at safe distance. Don’t rush with high heat that cracks the repair. You’ll check firmness by touch and wait longer than manufacturer times in chilly conditions.
- Frustration when repairs bleed into deadlines.
- Relief when you control warmth.
- Pride in a smooth finish.
Adjusting Spackle Thickness
Because cold slows curing, you’ll want to apply thinner layers of spackle so each coat dries through without cracking or sagging. In cold weather, keep layers under 1/8″, feather edges, and check spackle texture — you’ll notice slower firming and different sanding resistance. Let each thin coat dry fully before adding the next to preserve adhesion and avoid trapped moisture. Match finish before painting; Color matching can shift if you overwork wet spackle. Use gentle sanding and light primer to blend repairs.
| Tip | Action |
|---|---|
| Layer thickness | <1/8" per coat |
| Edge feathering | Smooth transitions |
| Texture check | Sand lightly |
| Color matching | Prime before paint |
Accelerating Dry Time
Although cold slows spackle curing, you can speed drying by controlling temperature, airflow, and humidity in the repair area. You’ll prep the surface preparation carefully: clean, dry, and remove loose debris so spackle bonds and its spackle color dries evenly.
Use a space heater or warm room to raise ambient temperature, but keep it safe and steady. Increase airflow with a fan to carry moisture away. Reduce humidity with a dehumidifier when possible.
Monitor touch-dry time before sanding and painting to avoid tearing the patch.
- You’ll feel relief.
- You’ll gain confidence.
- You’ll protect your finish.
How to Handle Spackle in High-Humidity Climates
When humidity stays high, spackle takes much longer to set and you’ll need to adjust your prep and timing to avoid soggy repairs and paint problems.
You’ll work slower: remove loose material, dry the area with fans or a dehumidifier, and apply thinner, multiple coats rather than one thick layer.
Check manufacturer drying estimates and add extra drying time.
If traditional spackle won’t cooperate, consider spackle alternatives or eco-friendly fillers designed for damp conditions.
Test a small patch before full application.
Keep humidity below recommended levels while curing, and only sand or paint when the patch feels fully firm.
How to Choose Spackle Based on Project Timeline
If your timeline’s tight, pick a fast-setting spackle designed to harden in minutes rather than hours so you can sand and paint the same day. You’ll choose based on repair size, working time, and final appearance.
For tiny dents, use lightweight spackle for smooth spackle texture and quick touch-ups. For larger holes, use patching spackle that accepts multiple applications.
Consider whether you’ll match a flat or glossy paint sheen later, since texture affects finish. Trust brand specs for cure times and follow instructions.
- Small fixes: relief and confidence
- Big holes: urgency and control
- Finish match: satisfaction and pride
How to Plan a Painting Schedule Around Spackle Drying
Because spackle needs time to set, plan your painting schedule around realistic dry times so you don’t rush sanding or prime too soon. Start by checking manufacturer dry estimates and add buffer for humidity and temperature.
Because spackle needs time, plan around realistic dry times—check manufacturer estimates and add humidity and temperature buffer.
Sequence tasks: spackle, wait, sand, clean, prime, then paint. Schedule multiple small repairs between coats to avoid idle waiting.
Consider historical techniques for moisture control—like venting and gentle heat—to speed uniform drying without damaging compound.
Choose eco-friendly materials for spackle and primer to reduce odors during extended drying.
Track times in a simple checklist so you know when each surface is truly ready.
How to Avoid Paint Flaking Over Repairs
After you’ve allowed spackle to fully set, take steps that prevent paint from flaking off those repaired spots—poor surface prep or incompatible products are the usual culprits. You’ll clean, sand smooth, and remove dust so paint adheres.
Test primer selection for porous or glossy surfaces, and let it cure. Match finish and texture when doing color matching so repaired areas disappear. Seal edges and feather paint outward to avoid ridges. If you follow these steps, repairs stay invisible and durable.
- Clean thoroughly — relief when dust’s gone
- Prime correctly — confidence in adhesion
- Match color/finish — satisfaction in seamless repair
How to Document Drying Time for Contractor or Warranty Work
When you document spackle drying time for contractor or warranty work, record the product, application thickness, ambient conditions (temperature and humidity), and exact start and end times so everyone has a clear, verifiable timeline. You’ll note spackle texture, tackiness checks, and any staining prevention steps. Photograph each stage with timestamps and label images. Log who applied and who inspected, plus tools used. Store entries in a shared file or app for easy retrieval. Use consistent wording and units to avoid disputes.
| Item | Example |
|---|---|
| Product | Lightweight spackle |
| Thickness | 1/8″ |
| Temp/Humidity | 70°F / 45% |
| Start/End | 9:00–2:30 |
How to Judge Whether to Reapply or Sand Before Paint
Now that you’ve documented drying conditions and inspections, decide whether the repair needs more spackle or smoothing before you paint. Test by touch and sight: feel for hollows, run a light across the surface, and dab a damp sponge to reveal imperfections.
If gaps remain, reapply thin layers; if smooth already, sand lightly with fine grit. Blend edges until seamless, then clean dust. Use Sustainable practices—reuse scrap sandpaper and dispose responsibly—and remember Historical techniques like feathering edges for invisible joints.
Trust your judgment: patience prevents redo and keeps finishes beautiful.
- Relief
- Confidence
- Pride
Frequently Asked Questions
Can Spackle Be Mixed With Other Compounds to Change Drying Time?
Yes — you can adjust spackle mixing with additives like retarders or accelerators to alter drying time, but you’ll void some warranties and risk weakened finish; test small areas and follow manufacturer guidance for compatibility and ratios.
Is Spackle Safe to Use on Exterior Surfaces?
Yes—you can use spackle for exterior application, but it’s more of a temporary fix; you’ll want weather considerations like sealing and paint, choosing exterior-grade patching compound for durability against moisture, temperature swings, and UV exposure.
How Long Before Installing Trim Over Freshly Spackled Areas?
You should wait until spackle’s fully cured—typically 24–48 hours—before installing trim over freshly spackled areas. Drying time varies; consider weather considerations like humidity and temperature, which can extend curing and affect adhesion.
Will Spackle Affect Smoke or Fire Alarm Sensors?
Yes — if you apply spackle near sensors, you can clog smoke detection openings and compromise fire safety. You should avoid coating alarms, keep ventilation clear, and let dust settle before reinstalling or testing detectors to guarantee proper operation.
Can Drywall Joint Tape Be Applied Over Spackle Patches?
Imagine patchwork like puzzle pieces fitting; yes, you can apply drywall joint tape over spackle patches once they’re fully dry and sanded. You’ll guarantee smooth drywall repair and proper paint preparation for a seamless finish.
Conclusion
You’ll wait minutes or days, depending on the spackle: lightweight dries fast, setting compounds take longer — both need to be solid, not gummy, before paint. Don’t rush; impatience yields flaking, pride yields a smooth finish. Keep notes and photos for contractors or warranties, but trust touch and time over the clock; a firm, sandable patch beats a blind faith “dry” label every time. Reapply if it’s soft, sand if it’s hard.