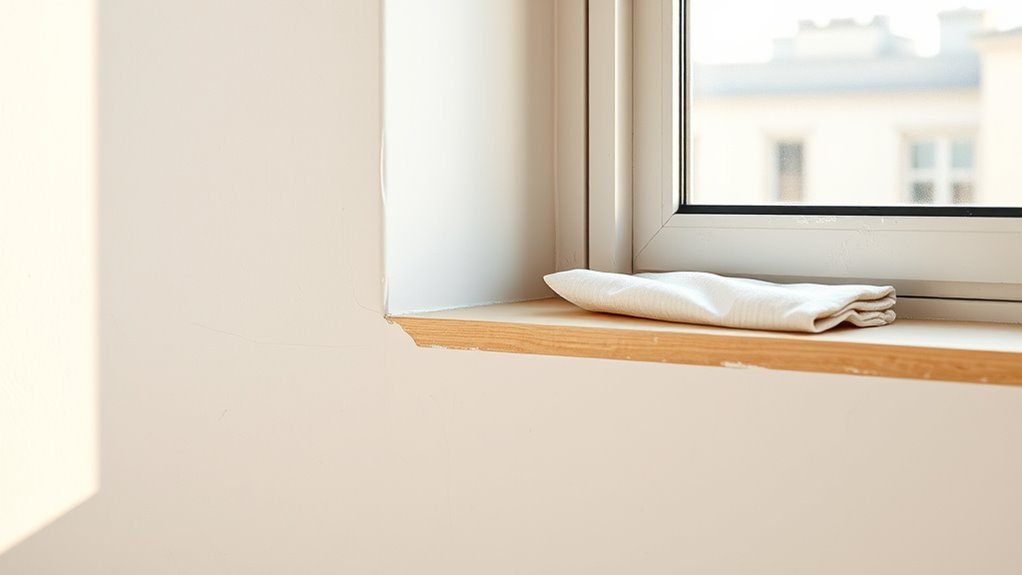
How Long to Dry Plaster Before Painting
You should wait until plaster is fully dry before painting: thin gypsum skim coats typically take 1–2 weeks, thicker gypsum or cement finishes 3–4 weeks, and lime or very damp applications often need 4–8+ weeks. Check for uniform, light color, no cold or tacky spots, and consistent low moisture-meter readings (about 1.5–2% or lower for gypsum/lime). Prime only when stable and dry; continue for tips on testing, priming, and speeding safe drying.
Quick Answer: When to Paint Plaster
If your plaster’s dry to the touch and shows no dark patches, you can usually paint after 1–2 weeks for a single skim coat. But allow 3–4 weeks for thicker applications or very damp conditions.
You’ll check firmness and consistent color before priming.
Consider plaster texture—rougher surfaces may need a mist coat and extra drying time to avoid trapped moisture.
If you’re restoring older rooms, remember historical techniques used lime-based mixes that dry slower than modern gypsum.
Test small areas with a moisture meter or tape; when readings are stable and surface feels cool, you’re ready to proceed.
How to Use This Guide
Now that you know when plaster is typically ready for painting, use this guide as a step-by-step checklist. Follow each stage in order: inspect surface, measure moisture, allow curing time, perform touch tests, and apply primer.
Use the timing ranges given, but adjust for room humidity and plaster thickness. For Plaster art or textured walls, take extra drying time before decorative work.
When planning Decorative finishes, test a small area to confirm adhesion and color. Tick boxes as you go, note any anomalies, and only proceed to paint when tests show dryness and stability to avoid rework and guarantee lasting results.
What “Dry” Really Means for Plaster
When you check if plaster is dry, look at both measured moisture levels and simple surface cues.
You’ll want a moisture meter reading within the standard range for your material, not just a dry-looking finish.
Also watch for consistent color, lack of powdery residue, and no cold or damp spots before you paint.
Moisture Content Standards
Although plaster may look dry to the touch, “dry” has a specific meaning: it must reach a low, measurable moisture content before you paint. You should measure with a calibrated moisture meter or follow manufacturer specs—typically below 1.5% to 2% for lime and gypsum plasters, though standards vary.
Consider substrate, ambient humidity, and any salts that affect readings. For decorative finishes or when using historical techniques, stricter thresholds prevent failures and respect original material behavior.
Document readings across the surface, wait longer where readings stay high, and only apply primers or paint once readings consistently meet the chosen standard.
Surface Cure Indicators
If you want to know whether plaster is truly ready for paint, look beyond surface dryness and check specific cure indicators: color uniformity (a consistent, lightened tone often signals evaporation and chemical set), a firm, non-tacky touch, and the absence of cooling moisture on the surface in humid conditions.
You’ll also test small areas with a damp-free cloth and press gently; no darkening should occur. Understand how color psychology in interiors reacts to subtle tone shifts as plaster cures, and remember historical techniques used to judge readiness—artists and plasterers long relied on touch, time, and visual cues rather than instruments.
Plaster Types and Drying: Overview
Because different plasters have distinct compositions and curing methods, you need to know which type you’re working with before judging drying time. You’ll assess base mixes, thickness, ambient conditions, and how the surface will be finished.
Know your plaster type—mix, thickness, and conditions dictate drying time; test surfaces before finishing.
Plaster finishes and decorative textures change moisture retention and may lengthen cure time, so plan accordingly.
- Cement-based: durable, slower drying in cool or humid spaces
- Lime plaster: breathable, cures chemically over weeks
- Clay/earth: thin coats dry faster but absorb humidity
- Ready-mix gypsum: convenient, sensitive to thickness and ventilation
Identify type, control environment, and test before painting.
Gypsum Plaster: Expected Drying Times

Gypsum plaster usually feels dry to the touch within 1–2 days but can need up to a week or more to fully cure depending on coat thickness.
You’ll speed or slow that timeline with factors like humidity, temperature, ventilation, and how thickly you applied the plaster.
Before painting, test for full dryness by checking moisture with a meter, tap/knock for a hollow sound, or tape a plastic sheet to look for trapped condensation.
Typical Drying Timeline
When you apply gypsum plaster, expect most of the surface to feel dry within 24–48 hours. You’ll see a predictable progression: tack-free surface, deeper moisture retreating, then readiness for light sanding. Historical techniques and cultural influences shaped how builders judge stages, so you’ll notice traditional checks like thumb tests still used.
- Day 1–2: surface dry, avoid painting.
- Day 3–7: deeper drying, plaster firms up.
- Week 2: near full cure for thin coats.
- Week 3–4: ready for final priming and topcoat on standard applications.
Follow these stages before painting to guarantee adhesion.
Factors Affecting Drying
Although drying follows the typical timeline, several key factors change how long gypsum plaster actually takes to reach paint-ready hardness. You’ll see differences based on temperature, humidity, and airflow: warmer, drier rooms with steady ventilation speed curing.
Coat thickness matters — thin layers dry faster than heavy applications. Substrate type and porosity influence moisture draw; dense surfaces slow drying.
Additives and mixes affect set time, and historical techniques used before modern gypsum can mean different expectations. Using eco-friendly materials like low-VOC binders or natural retarders alters drying behavior too, so adjust timing for your specific mix and conditions.
Testing For Full Dryness
Knowing the factors that change drying times helps you judge when a plastered wall is truly ready for paint. You’ll use simple tests to confirm gypsum plaster is dry: check plaster texture for firmness, inspect color consistency across the surface, and verify no cold or damp spots remain.
Tap lightly for a solid sound and run your hand to feel temperature changes. If unsure, measure moisture with a hygrometer or moisture meter before priming.
- Visual inspection for uniform color consistency
- Gentle scratch to assess plaster texture
- Tapping to listen for hollow sounds
- Moisture meter reading within recommended ranges
Lime Plaster: Realistic Wait Times
Because lime plaster dries by carbonation rather than just losing moisture, you should expect longer, more variable wait times before painting. You’ll often wait weeks to months depending on coat thickness, ambient CO2, humidity, and temperature.
Historical techniques and cultural influences shaped thinner multi-coat applications that speed carbonation; modern thick fills take longer. You can accelerate curing with stable temperatures, moderate ventilation, and avoiding rapid drying that cracks the surface.
Test carbonation with phenolphthalein or punch tests before priming. Plan conservatively: allow at least 4–8 weeks for typical interior lime plaster, longer in cool or poorly ventilated spaces.
Cement-Based Plaster: Realistic Wait Times
When you use cement-based plaster, expect relatively predictable but sometimes lengthy wait times before painting since it dries by both moisture loss and chemical hydration. You’ll typically wait 7–28 days depending on thickness, humidity, and curing conditions. Don’t rush decorative finishes; trapped moisture causes adhesion problems. Test dryness with a moisture meter and visual checks before applying primers or executing texture techniques.
- Thin coats (up to 10 mm) often dry within a week in warm, dry conditions.
- Thicker applications need several weeks to reach safe painting levels.
- Accelerate curing with ventilation and gentle heat.
- Delay painting if any dampness registers.
Skim Coat vs Full Base Coat: Timing Differences
If you’ve been waiting out a cement-based base coat, you’ll find skim coats and full base coats behave quite differently regarding drying and paint timing.
With a skim coat, you apply a thin plaster application layer that dries faster. You’ll usually be ready for primer and Decorative finishes within days under good ventilation.
A full base coat holds much more moisture and needs longer cure time before sanding, sealing, or painting. You’ll pace checks by touch and moisture meter readings, and always let the base coat reach consistent dryness to avoid adhesion problems or trapped moisture beneath Decorative finishes.
How Plaster Thickness Affects Drying
Thicker plaster holds more moisture, so you’ll find base coats take far longer to dry than thin skim coats. Expect drying time to vary by several days or even weeks depending on coat thickness and environmental conditions.
If you apply plaster too thickly in one pass, you’re also risking drying-related cracking as the surface hardens faster than the interior.
Coat Thickness Impact
Because moisture has farther to travel through a thicker coat, a heavy plaster application will take substantially longer to dry than a skim or thin layer. You’ll notice thicker coats retain water, slow cure times, and affect plaster texture, so you’ll plan longer waits before finishing.
Color matching can also be trickier if you paint too soon, since residual dampness darkens tones. Manage coat thickness to control drying and final appearance.
- Thicker coats increase internal moisture and risk of uneven drying.
- Thin coats dry faster and reveal final texture sooner.
- Multiple thin layers outperform one thick layer.
- Monitor moisture before painting.
Drying Time Variance
When you apply a thicker plaster coat, moisture has more material to pass through so drying times rise sharply compared with thin or skim layers. You’ll notice larger mass holds water longer, so full cure can take days to weeks depending on thickness and environment.
Control temperature, humidity, and ventilation to speed drying without forcing cracks. Different plaster textures influence surface evaporation; coarse textures dry unevenly versus smooth finishes.
In historical restoration you must respect original materials and allow extended drying to prevent damage. Measure moisture with a meter and wait for stable readings before priming and painting.
Thickness-Related Cracking
If you apply a deep coat of plaster, it won’t dry uniformly and is far more likely to crack as the outer layer shrinks while the inner core stays wet. You should keep thickness consistent to prevent stress fractures and avoid sealing wet plaster too soon.
Thicker areas extend drying time, can alter plaster color, and complicate decorative finishes. Monitor moisture and consider multiple thin coats rather than one heavy application. Use controlled ventilation and avoid heat blasts that cause surface curing.
- Thin, uniform coats reduce shrinkage stress
- Patch thin spots to balance drying
- Test decorative finishes on cured sections
- Measure moisture before painting
Rule of Thumb: Drying Time Per Mm
As a quick guideline, expect most plaster to need about 1 day to dry for each millimetre of thickness under typical indoor conditions; you’ll use this rule to estimate when painting’s safe.
Remember plaster color can signal moisture—darker patches usually mean wetter areas—while surface texture changes as it cures.
Darker plaster patches usually indicate moisture; watch how the surface texture changes as it cures.
Measure thickness at the deepest spot, calculate days, then inspect color and texture before deciding.
Thinner skim coats dry faster, deep fills take longer.
Use the rule as a baseline, not an absolute: verify dryness by touch and visual checks, and allow extra time for uneven or high-absorbency substrates.
How Temperature Affects Drying Speed
Because temperature speeds up the chemical and moisture-evaporation processes in plaster, warmer rooms will dry noticeably faster than cold ones—typically accelerating drying by roughly 10–15% for every 5–10°C increase within a practical range.
You should monitor room temperature to manage temperature effects and drying acceleration without overheating, which can cause cracking or uneven cure. Aim for steady, moderate warmth and avoid sudden swings.
Use a thermostat, gentle heat sources, and insulating measures to keep conditions stable.
- Maintain consistent temperature during the entire curing period
- Avoid direct, intense heat on fresh plaster
- Use controlled ventilation plus mild heat
- Track temperature and adjust gradually
How Humidity Affects Drying Speed
High humidity slows moisture evaporation, so your plaster will take noticeably longer to dry and may stay tacky.
In contrast, low humidity speeds evaporation and helps plaster cure more quickly, though very dry air can cause surface cracking.
Monitor humidity and adjust ventilation or use a dehumidifier to keep drying on track.
High Humidity Effects
When humidity rises, moisture in the air slows the evaporation of water from fresh plaster, so your walls will take noticeably longer to dry than they’d in drier conditions. You’ll need to factor in room ventilation and active humidity control to avoid tacky surfaces and delayed curing.
Plaster composition matters too: gypsum mixes absorb and release moisture differently than lime-rich blends, so check manufacturer guidance. Monitor surface feel and moisture meter readings rather than relying on time alone.
Consider these practical effects:
- Longer wait times before sanding or priming
- Increased risk of blistering or mildew
- Need for dehumidifiers or fans
- Variable paint adhesion outcomes
Low Humidity Benefits
Although dry air speeds water evaporation from fresh plaster, you should still monitor conditions to avoid over-rapid drying that can cause cracking.
In low humidity you’ll finish faster, so you can plan sanding and priming sooner, but you must prevent surface shrinkage. Use gentle misting or cover with breathable sheets to slow loss if joints craze.
When restoring with vintage plaster techniques, balance drying to protect old lath and layers.
If you use plant-based adhesives or natural binders, they may cure differently in dry air; test small areas and adjust ventilation so adhesion and finish remain consistent.
Ventilation’s Role in Drying Plaster
Why does ventilation matter so much for drying plaster? You control air movement to speed evaporation and prevent moisture traps that slow cure.
Use targeted ventilation strategies to balance temperature and airflow without creating drafts that crack fresh plaster.
- Open windows on opposite sides to create gentle cross-ventilation.
- Use fans to circulate air, pointing them to move humid air out.
- Install temporary extractor fans in high-humidity rooms.
- Avoid directing strong airflow at one spot to prevent uneven drying.
You’ll monitor humidity with a hygrometer and adjust ventilation until plaster reaches the manufacturer’s recommended dryness.
Sunlight: Helpful or Harmful for Drying
You can use direct sunlight to speed surface drying, since warmth and air movement help moisture evaporate.
But don’t rely on intense, prolonged heat—rapid drying can cause cracking or weak bonding.
Balance sun exposure with moderate temperatures and airflow to protect the plaster’s strength.
Direct Sunlight Benefits
When plaster’s drying, direct sunlight can speed surface evaporation but it can also create problems you mightn’t see at first. Rapid drying often leads to surface skinning, cracking, and uneven cure because the interior stays damp while the exterior hardens.
You can use sunlight benefits selectively: it helps reduce visible moisture faster and can reveal uneven plaster textures so you can correct them before painting. Aim for moderated exposure and monitor surfaces.
Consider these actions:
- Rotate panels or adjust blinds to avoid constant full sun
- Use short, controlled sunlight periods
- Check moisture with a meter often
- Address revealed texture defects promptly
Risks Of Rapid Heating
Direct sunlight can help spot surface issues, but rapid heating carries real risks for drying plaster. You’ll cause uneven moisture loss, cracking, and weak bonding if you blast walls with sun or heaters.
Historical techniques show craftsmen letting plaster cure slowly to avoid hairline fissures; you should follow that wisdom.
Rapid surface drying can trap moisture underneath, ruining decorative finishes and causing delamination later.
If you need faster drying, increase gentle airflow, control temperature swings, and use moderate humidity reduction.
Monitor moisture with a meter and delay painting until readings are stable and consistent across the entire surface.
Substrate Differences: Brick, Block, Drywall
Although all three substrates accept plaster, brick, block, and drywall each dry at different rates and demand distinct preparation and moisture-control steps before you paint. You’ll adjust plaster application and surface preparation: porous brick soaks water fast, concrete block retains moisture longer, and drywall’s gypsum board dries quickest but needs careful taping. Check moisture with a meter and wait for consistent readings.
- Brick: pre-wet then monitor drying to avoid rapid suction.
- Block: allow extra curing time; consider reduced coat thickness.
- Drywall: prime after joint compounds are fully set.
- Universal: control ventilation and ambient humidity.
Wet-Room Walls: Special Drying Strategy
In wet rooms you’ll need to check plaster moisture with a meter or by touch before you think about painting.
If readings are high, don’t rush—boost drying with continuous extraction fans and a dehumidifier.
Proper ventilation and confirmed low moisture are essential to prevent paint failure.
Assess Moisture Levels
When you’re dealing with wet-room walls—like in bathrooms, laundries, or shower enclosures—you need to measure moisture more carefully because plaster and underlying substrates absorb water differently and stay damp longer.
You should check relative humidity, surface dampness, and substrate moisture before applying any primer or decorative finish; plaster color changes can indicate trapped moisture or salts.
Use a moisture meter and surface probe, and document readings across the room.
Follow manufacturer limits for paint and plaster types, and retest after repair or drying cycles.
- Take multiple readings at varying heights
- Compare surface and in-depth readings
- Note plaster color and efflorescence
- Record ambient conditions
Use Enhanced Ventilation
If your moisture readings show elevated levels or uneven drying across a wet-room, boost air movement and exhaust to speed evaporation and prevent mould. You’ll set up axial fans and inline extractors to create directed airflow, placing them near damp zones and openings.
Use dehumidifiers with controlled airflow to avoid over-drying delicate decorative textures or cracking fresh plaster. Monitor readings hourly, moving equipment as needed to equalize drying.
For older buildings focused on historical preservation, choose gentle settings and avoid heat spikes that stress substrates. Document progress so you know when levels are safe for priming and painting.
Calculating Drying Time for Your Job
Want to know how long your plaster will need before you can paint? Calculate drying time by evaluating thickness, environment, plaster type, and substrate. Use historical techniques as a reference for traditional lime plasters, but adjust for modern mixes and eco-friendly materials.
Estimate days per coat and add a buffer for humidity spikes.
- Measure coat thickness and total wet depth.
- Check room temperature and relative humidity; raise ventilation if needed.
- Identify plaster type (lime, gypsum, cement) and manufacturer guidelines.
- Factor in substrate porosity and previous moisture; allow extra drying on dense or cold surfaces.
Visual and Touch Tests to Check Dryness
Although you can’t rely on a calendar alone, you can judge plaster dryness quickly with simple visual and touch checks. Look for even color consistency and a uniform plaster texture; damp areas look darker and feel cool. Lightly press with your fingertip—don’t dig in—and note whether the surface springs back and feels dry. Run your hand across seams and corners where moisture hides. If dust lifts easily from a gentle rub, it’s drying. Use the table below to guide quick assessments.
| Sign | What it means |
|---|---|
| Even color | Likely dry |
| Cool/dark spots | Still wet |
| Powdery feel | Surface-dry, proceed cautiously |
Using Weight Tests to Assess Dryness
You can use a simple weight test to check if plaster has finished drying by placing a small, known-weight object on a thin square of plasterboard taped to the wall and measuring any change.
If the board gains weight or feels markedly heavier after 24–48 hours, the plaster is still holding moisture.
Little or no change indicates it’s likely dry.
This method gives a measurable way to interpret results alongside visual and touch checks.
Weight Test Method
When you need a quick, reliable check that plaster has released most of its moisture, the weight test gives a simple, hands-on way to assess dryness: you measure the plaster’s weight at regular intervals and watch for consistent readings over several days.
You’ll cut a small, representative sample area (including any plaster texture or decorative finishes), label it, and weigh it on a precise scale. Keep conditions steady—temperature and humidity—so readings reflect moisture loss, not environmental shifts.
- Use a digital scale with 0.1 g accuracy.
- Record weight, date, and room RH.
- Seal samples between weighings.
- Compare like-for-like samples only.
Interpreting Results
If the sample’s weight stabilizes over several consecutive measurements, you’ve got a good indication the plaster has lost most of its moisture. You should then compare texture and appearance.
Check plaster texture for firmness—no crumbly spots or soft indentations—and confirm color consistency across samples and the larger surface.
If weight, texture, and color align, the plaster is likely ready for primer. If weight hasn’t stabilized but texture and color look right, wait and retest to be safe.
Record measurements and conditions so you can spot trends.
Use those combined cues to decide confidently when to proceed with painting.
Tap/Sound Tests Explained
Although it seems simple, tapping the plaster gives you a quick, reliable read on dryness and adhesion: you’ll listen for a clear, ringing sound that means well-bonded, dry plaster versus a dull thud that suggests moisture or delamination.
You’ll also watch for changes in plaster texture and slight color matching shifts as it dries. Use consistent, gentle taps across the surface to compare spots.
- Tap near edges and center to detect hollow areas.
- Note variation in pitch; higher pitch = firmer substrate.
- Compare taps on new plaster vs. known-dry areas.
- Mark suspect spots for further inspection or delay.
Using a Moisture Meter Correctly
Choose a moisture meter that’s suited for plaster—either a pin-type for depth readings or a non‑invasive model for surface checks.
Hold the meter steady, take multiple readings across the wall, and compare them to the manufacturer’s plaster moisture thresholds.
Don’t rely on a single spot reading—average the results and retest areas that seem high before you paint.
Choosing The Right Meter
When you’re ready to measure plaster moisture, pick a meter that matches the job: pin-type meters give deep, spot readings by probing the surface, while pinless meters scan broader areas without piercing the plaster.
You’ll choose based on access, surface sensitivity, and whether you’re doing plaster repair or checking decorative finishes before painting. Consider meter features and limitations so your readings help decisions.
- Prefer pin meters for targeted checks in repaired spots
- Use pinless for quick scans across whole walls
- Look for models with plaster-specific settings or calibration
- Choose durable probes and clear display for reliable use
Proper Measurement Technique
Now that you’ve picked the right meter, you need to use it correctly to get reliable readings. Hold the meter flat against various plaster textures, testing high and low spots, corners, and near windows or plumbing.
Calibrate per manufacturer instructions and zero between readings.
Take multiple measurements across the wall and average them; don’t rely on a single point.
Note surface temperature and ambient humidity—both affect results.
For painted samples, remove loose paint to test substrate moisture.
Use readings to time paint application so color matching won’t be compromised by moisture-driven discoloration.
Record measurements and dates for reference.
Moisture Meter Thresholds Safe to Paint
If you’ve got a moisture meter handy, it’ll give you a clear numeric target to aim for before painting: most interior gypsum plaster should read between about 5% and 12% depending on the instrument and the plaster type.
You’ll use those thresholds to decide when decorative finishes or traditional applications tied to historical techniques are safe. Aim lower for hygroscopic finishes, higher for well-ventilated rooms.
Consider meter type, substrate, and local climate when interpreting numbers.
- Pin-probe vs. non-invasive readings differ by a few percent
- New plaster often needs weeks despite acceptable percentages
- Lower readings suit solvent-based primers
- Account for surface vs. core moisture
When a Reading Is Reliable Enough to Paint
Because a moisture reading only tells part of the story, you should confirm meter results with simple, practical checks before painting. You’ll trust a reading when multiple indicators align: low meter values, dry touch, stable humidity, and no visible damp spots. Consider historical techniques and cultural influences that affected ventilation and plaster composition when judging older buildings. Record readings over days; consistent lows beat a single spot check. If unsure, wait or consult a pro. Use this quick checklist to decide.
| Check | Pass/Fail |
|---|---|
| Meter consistency | |
| Surface dry to touch | |
| Stable RH for 48h | |
| No stains/odour | |
| History/context known |
Why Priming Matters on New Plaster
Before you paint new plaster, you should prime it to seal the surface and prevent uneven absorption. Priming lets you control moisture levels so paint dries consistently and lasts longer.
It also improves paint adhesion, giving a smoother, more durable finish.
Seal New Plaster
Why should you bother priming new plaster? You seal porous surfaces so paint adheres evenly, prevent blotchy color shifts, and set a neutral base for Color theory to work—so your chosen hues read true.
Priming also locks in loose dust and stabilizes the surface for consistent finish and texture enhancement.
- Creates uniform absorption for even sheen and color
- Improves adhesion to reduce peeling and flaking
- Minimizes the number of paint coats needed
- Enhances final texture clarity and paint durability
Seal new plaster with a quality sealer or PVA primer before painting for reliable results.
Control Moisture Levels
How much moisture stays in your new plaster matters—seal it promptly so dampness doesn’t sabotage paint adhesion or cause bubbling and mold later. You’ll prime to lock residual moisture and create a uniform surface; untreated plaster absorbs water unevenly, altering plaster texture and risking streaks.
Choose a primer designed for new plaster and apply evenly; it’ll reduce porosity and stabilize drying. That consistency helps decorative finishes sit correctly without blotching or lifting.
Monitor humidity and allow recommended drying time before priming. By controlling moisture with proper priming, you protect the substrate and set a reliable base for whatever finish you choose.
Improve Paint Adhesion
Wondering what a primer actually does on fresh plaster? You’ll want one because plaster composition varies, and primer evens out porosity so paint grips uniformly.
On new lime or gypsum surfaces—especially if influenced by historical techniques—primer seals, prevents flash drying, and reduces suction that ruins finish. Apply after full drying and follow manufacturer directions for best adhesion.
- Seals porous plaster composition for consistent sheen
- Bridges differences from historical techniques like lime wash
- Prevents excess paint absorption and blistering
- Improves long-term paint durability and ease of recoating
Primer’s simple step guarantees a stable finish.
Primers That Work on Newly Dried Plaster
When your plaster’s just dried, choosing the right primer determines adhesion, moisture control, and final finish, so pick one formulated for new or fresh plaster rather than a general-purpose latex.
When plaster has just dried, use a primer made for fresh plaster—not a basic latex—for best adhesion and finish
You’ll want a primer that seals residual alkalinity and evens porosity while aiding color matching to avoid patchy topcoats. Look for breathable, water-based bonding primers or specialist plaster primers that offer stain blocking and grip.
For slightly uneven surfaces, choose products that assist texture smoothing without filling—follow with a light sand if needed.
Always test a small area to confirm adhesion and appearance before committing to full coverage.
Mist Coats vs Full Primers: When to Use Each
When plaster’s newly dried you’ll usually start with a mist coat to seal the surface and guarantee even paint absorption.
Use a mist coat on fresh, absorbent plaster or skimmed walls before applying topcoats.
Save a full primer for patched areas, very porous surfaces, or when you need extra stain-blocking and adhesion.
Mist Coat Purpose
Although both seal new plaster and prepare surfaces for paint, a mist coat and a full primer serve different jobs and you should pick the one that matches the condition of your walls.
You’ll use a mist coat to gently seal fresh plaster, control suction, and provide a key for topcoats without obscuring plaster texture or historical techniques evident in older finishes. Apply diluted emulsion thinly, let it dry fully, then assess adhesion.
A mist coat won’t hide stains or uneven substrate—those need heavier treatment. Use it when you want subtle sealing before decorating.
- Reduces plaster suction for even coverage
- Preserves surface detail
- Speeds drying of subsequent coats
- Economical first-stage protection
When To Use Primer
If your plaster is fresh and porous, choose a mist coat to gently seal and equalize suction; it’s thin, so it soaks in and prevents patchy topcoats. Use a mist coat when new lime or gypsum plaster shows high suction, varied plaster textures, or when you’ll apply water-based emulsion.
Opt for a full primer if the surface is previously painted, stained, smooth, or has historical finishes requiring stronger adhesion and stain blocking. Full primers are thicker, blocking tannins and unifying sheen.
Inspect and test: mist coats for absorbent, raw plaster; full primers for coated, contaminated, or specialty-surface scenarios.
Paint Types and Readiness: Latex, Acrylic, Oil
Because different paint bases cure and adhere differently, you’ll want to match your timing and surface prep to whether you’re using latex, acrylic, or oil-based paint. You’ll check plaster dryness, choose compatible primers, and consider decorative finishes or historical preservation needs when selecting a finish.
Match your prep and timing to latex, acrylic, or oil—check plaster dryness, use compatible primers, and plan finishes.
Each base has readiness cues: touch dry vs. full cure, odor, and tackiness.
- Latex: dries fast, good for most interiors, needs less waiting.
- Acrylic: similar to latex, flexible, bonds well to properly primed plaster.
- Oil: takes longest to cure, offers durability and smooth sheen.
- Primer choice affects adhesion and final appearance.
How to Adapt Timing for Humid Climates
When humidity’s high, plan for longer drying times and adjust your schedule so you don’t rush painting wet plaster. You’ll monitor moisture with a meter and prioritize humidity control—run dehumidifiers, increase ventilation, and time work during drier hours.
Expect at least 25–50% longer curing compared with dry conditions; mark milestones by consistent meter readings rather than calendar days. If you use approved drying accelerators, follow product guidelines carefully and allow extra cure time afterward.
Always test small areas before full painting. Staying patient and basing decisions on measurements prevents adhesion problems and uneven finishes in humid climates.
Safe Ways to Speed Drying (No Cracking)
Longer drying in humid climates doesn’t mean you have to accept weeks of waiting; you can safely speed cure times without causing cracks by controlling evaporation and avoiding rapid surface drying. You’ll manage moisture gently, keep consistent temperatures, and preserve plaster cohesion for later color blending and texture matching when you paint.
- Use a dehumidifier to lower room humidity gradually.
- Maintain steady, moderate heat; avoid direct heaters on the plaster.
- Promote slow air movement with fans set low to equalize drying.
- Keep plaster covered with breathable sheets to prevent skinning while releasing moisture.
These steps shorten cure time without stressing the plaster.
How to Avoid Drying Too Fast and Shrinkage
If you want to prevent plaster from drying too fast and shrinking, slow the surface evaporation and keep moisture moving out evenly so internal stresses don’t form and cause cracks. You’ll control draft, humidity, and temperature; use damp hessian or breathable covers and avoid heaters blasting the surface. Learn from Historical techniques and regional Cultural influences — old lime plasterers kept walls shaded and ventilated. Use gradual drying: mist lightly, maintain 40–60% RH, and air exchange.
| Action | Why | When |
|---|---|---|
| Shade | Prevents rapid surface loss | Always |
| Cover | Evens moisture | First days |
| Ventilate | Removes vapor | Continuously |
Fixing Hairline Cracks After Painting
Although hairline cracks might seem minor, you’ll want to address them promptly to stop moisture, dirt, and paint failure from spreading. Start by cleaning the crack, then widen slightly with a scraper so filler bonds.
Use a fine joint compound or acrylic filler, smooth to match plaster texture, and sand lightly when dry. Prime repaired area before repainting to guarantee adhesion and uniform sheen.
For color matching, test small patches and feather paint outward.
- Clean and dry the crack thoroughly
- Apply filler and recreate texture
- Sand carefully for a seamless join
- Prime, test color matching, then paint
What to Do If Plaster Blisters After Paint
When paint blisters on plaster, don’t ignore it—you’ll want to act quickly to prevent further damage and uncover the root cause. Scrape loose paint, note plaster texture and any moisture. Sand smooth, dry thoroughly, and test for dampness. If plaster’s sound, prime with a suitable sealer; if not, repair with plaster patch. Recreate plaster texture or match decorative finishes before repainting. Monitor humidity to avoid recurrence.
| Step | Action | Tip |
|---|---|---|
| 1 | Remove blisters | Wear mask |
| 2 | Check moisture | Use meter |
| 3 | Repair & prime | Match texture |
How Long to Wait Between Paint Coats
Because drying times depend on paint type, temperature, and humidity, you should check the manufacturer’s recommended recoat window before brushing or rolling on the next coat. Wait until the first layer is dry to the touch and not tacky; latex often needs 2–4 hours, oil-based 24 hours.
You’ll also consider color theory—lighter tints often need fewer coats than deep hues—and paint textures, since textured finishes can hide thin spots but may need extra passes. Follow these tips:
- Test a small area for adhesion and appearance
- Sand lightly between coats for smoothness
- Maintain recommended ventilation
- Allow extra time in high humidity
Drying External Plaster Before Exterior Paint
If you’ve just finished an external plaster job, don’t rush to paint—new render needs to breathe and dry thoroughly to avoid trapped moisture and premature paint failure. You should wait weeks to months depending on thickness, weather, and substrate; check moisture with a meter and feel.
Drying’s faster in warm, dry, windy conditions; cold or humid weather extends time. Choose breathable exterior paints respecting color theory to avoid heat absorption that can stress render.
Protect surfaces from rain during curing. Keep your tools clean and in good condition—Tool maintenance prevents contamination and ensures even application once the plaster’s fully dry.
How Professionals Estimate Drying Time
While experienced plasterers rely on rules of thumb, they also measure and monitor to give you a reliable drying-time estimate. You’ll get a tailored projection based on plaster type, layer thickness, ambient conditions, and whether eco friendly materials were used.
Professionals combine instinct with instruments and records, often referencing historical techniques to adjust expectations for traditional mixes.
- Moisture meters for surface and internal readings
- Hygrometer and temperature logging for environment
- Sample patches to verify adhesion and dryness
- Timed trials with the specific plaster mix
You’ll be advised conservatively to prevent paint failures.
Planning a Painting Schedule Around Drying
As you schedule painting, map the drying timeline against your project milestones so coats and trades don’t collide. You’ll block time for drying, testing moisture with meters, and allowing extra days after damp readings.
Coordinate painters, decorators, and electricians to avoid rewetting plaster. Factor in ventilation, temperature, and humidity controls; choose eco-friendly materials that cure predictably and won’t force delays.
When working on older properties, consider historical techniques that affect substrate moisture and curing—document sequences and set conservative buffers.
Communicate the timeline to all trades, update it after tests, and keep contingency days for unexpected slow drying.
Renovation Timelines: Factoring Plaster Drying
Because plaster drying sets the pace for many downstream tasks, you should build clear buffer zones into your renovation timeline and treat drying as a critical path activity. You’ll map sequence, monitor humidity, and coordinate trades so delays don’t cascade.
Treat plaster drying as a critical path: build buffers, monitor humidity, sequence trades, and prevent cascading delays.
Consider how historical techniques inform modern expectations and how eco-friendly materials may change drying times. Communicate realistic milestones to clients or household members, and plan contingencies if conditions vary.
- Sequence work to avoid rework from premature painting
- Allocate extra days after using lime or gypsum plasters
- Schedule ventilation and gentle heat as needed
- Coordinate painter and finisher arrival windows
Documenting Drying Conditions for Warranties
When you document plaster drying conditions for a warranty, record temperature, relative humidity, ventilation measures, and the date and time of key milestones so you can provide clear, verifiable evidence if a claim arises.
You should note substrate type, plaster mix, application thickness, and curing schedule, plus photographs timestamped during each stage.
Include any deviations from manufacturer instructions and references to historical techniques if used, since those affect expectations.
For artistic finishes, document when decorative layers were applied and how drying overlapped.
Keep organized logs and signed checklists so you can substantiate claims quickly and professionally.
Tools to Verify Dryness (Moisture Meters, Probes)
If you need a reliable read on plaster moisture, use the right tools: pin-type meters that penetrate the surface, non‑destructive dielectric meters for quick scans, and hooded infrared or relative-humidity probes that measure conditions at depth.
You’ll validate dryness before applying modern or plant based finishes, and respect historical plaster techniques by checking gently. Choose meters with calibration, log readings, and avoid shortcuts.
- Pin-type for core moisture but avoid damage on delicate historic work
- Dielectric meters for fast, noninvasive mapping
- Hooded RH probes for depth/temperature correlation
- Infrared for spotting cold, damp areas
Final Checklist: Confirm Plaster Is Ready to Paint
Before you pick up a brush, run through a focused final checklist to confirm the plaster’s truly ready to paint. Check moisture meter readings in several spots; they should match manufacturer guidelines. Feel the surface—no coolness or damp patches.
Inspect for hairline cracks, flaking, or powdery residue; sand and repair as needed. Verify plaster techniques used (skim, wet lime, or gypsum) have cured per expected times.
Confirm ventilation and temperature are stable. Review historical applications if working on older walls to match repair materials.
Finally, wipe surfaces with a tack cloth, then test a small paint patch.
Frequently Asked Questions
Can I Paint Plaster Over Old Wallpaper Without Stripping It First?
You can, but you shouldn’t: proper surface preparation matters. Wallpaper removal is usually best; if you paint over old wallpaper you risk peeling, poor adhesion, and trapped moisture. Strip or prime thoroughly before painting for reliable results.
Will Heating the Room With a Space Heater Harm Drying Plaster?
Yes — you can use a space heater, but juxtaposing quick warmth with slow Plaster curing shows risk: Room heating speeds surface drying and can cause cracking, so you’ll want gentle, consistent warmth and controlled humidity to protect the plaster.
Can Painted Plaster Be Re-Dried After Water Damage?
Yes, you can re-dry painted plaster after water damage; you’ll monitor plaster moisture, remove loose paint, then accelerate drying with ventilation and dehumidifiers. Drying time varies by severity, so check moisture levels until they’re stable.
Does Plaster Type Affect Paint Adhesion Long-Term?
Yes — plaster type affects paint adhesion long-term: you’ll find plaster curing rates and surface composition change paint bonding, so you’ll need correct priming and compatible paints to guarantee durable adhesion across different plaster types.
Are VOCS From Paint Affected by Residual Plaster Moisture?
Like a Roman scout spotting smoke, you’ll find residual plaster moisture can elevate VOC emissions by hindering paint cure; you’ll need lower moisture levels to minimize off-gassing, improve adhesion, and reduce long-term VOC-related problems.
Conclusion
You’ve got the info to know when plaster’s truly dry and ready for paint, so don’t rush it — measure and document conditions, and wait until moisture readings are in the safe zone. Match drying times to the plaster type, check with a moisture meter or probe, and follow the final checklist before priming. Take your time now and you’ll avoid problems later; a stitch in time saves nine, and your finish will look great.