How Long to Let Drywall Mud Dry Before Painting
You should wait until joint compound is fully cured before priming or painting — usually about 24 hours for thin ready‑mix coats and 48–72 hours (or more) for thicker or multiple layers, longer in cold or humid conditions. Quick‑set mud can cure in minutes to hours depending on the bag time. Check firmness, even color, and no tack before sanding or priming. Keep going for tips on testing, speeding drying, and avoiding common mistakes.
Quick Answer: When to Paint Drywall Mud (Short Checklist)
If you want quick guidance, follow this short checklist before you paint.
Check that the drywall mud is fully dry to touch and consistent in color; damp spots darken, dry areas won’t. Wait at least 24 hours for thin coats, 48–72 for thicker layers or cool, humid conditions.
Sand smooth, remove dust, and use a primer compatible with your paint.
Consider color theory when choosing primer tint and topcoat to achieve true hues.
Pick a paint finish that hides minor imperfections—eggshell or satin—unless you want a sheen that highlights flaws.
Test a small area first.
Ready‑Mix vs Quick‑Set: Which Affects Drying?
You’ll notice ready‑mix mud dries by losing moisture to the air, so it can take several hours to days depending on thickness and humidity.
Quick‑set compounds cure through a chemical reaction and set much faster, often within minutes to an hour.
Knowing which type you used helps you judge when the surface is truly ready to sand and paint.
Ready‑Mix Drying Time
When choosing between ready‑mix and quick‑set drywall mud, remember that the type you pick directly changes how long you’ll wait before sanding or painting. Ready‑mix dries by evaporation, so humidity and temperature matter; you’ll typically wait longer than with quick‑set.
You should also consider color matching and paint sheen effects when planning primer and finish coats.
- Expect tackiness for several hours; full dryness can take 24–48 hours.
- Thin layers dry faster; multiple coats extend total time.
- Use ventilation and moderate heat to speed evaporation safely.
- Test dryness by light sanding before priming or painting.
Quick‑Set Curing Speed
How fast do you need your drywall repairs to be ready for sanding and painting? You’ll choose quick‑set for speed: it cures chemically in minutes to hours, unlike ready‑mix that air‑dries slowly. Quick‑set’s fast bond suits urgent jobs, but it’s less forgiving and needs proper measuring. Consider ventilation and temperature; they still affect curing. If you prefer eco friendly materials or nod to historical drywall techniques, test mixes and spot practice. Use quick‑set for rapid turnaround, ready‑mix for ease and touchups.
| Feel | Speed | Trust |
|---|---|---|
| Relief | Minutes | Confidence |
| Pride | Control | Calm |
Ready‑Mix Basics: What to Expect After One Thin Coat
After you apply one thin coat of ready‑mix mud, expect it to feel dry to the touch in a few hours. But take longer to cure fully depending on humidity and thickness.
Run your hand gently over the surface to check for smoothness and any low spots or ridges that need light sanding.
If it’s still tacky or you can see depressions, wait longer and recheck before priming.
Dry Time Expectations
Because ready‑mix joint compound contains more water and less shrinkage agents than powdered mixes, a thin coat will often feel dry to the touch long before it’s fully set. Expect about 24 hours under typical indoor conditions for a true cure on a single thin skim. You’ll rely on climate, coat thickness, and ventilation.
Use proper Drywall tools and gentle texture techniques to avoid overworking the skim. Monitor humidity and temperature, and don’t rush sanding or priming.
- Keep room humidity below 60%
- Provide airflow without direct drafts
- Thin coats dry faster than thick ones
- Wait a full day before light handling
Surface Smoothness Check
When the skim coat feels dry to the touch, run your hand lightly over the surface and look closely for high spots, ridges, or tiny air bubbles that mean the compound hasn’t seated smoothly.
If you feel imperfections, mark them and sand gently with fine grit until the plane reads even.
Use color testing by wiping a damp rag or applying a small bit of primer to reveal thin areas or patches that reflect light differently.
Do a texture comparison between the repaired area and surrounding wall under varied lighting.
Repeat skim, sand, and test until the surface matches visually and by touch.
Ready‑Mix: Drying After Multiple Coats
Ready-mix joint compound usually needs longer to dry the more layers you apply, so plan for increasing wait times between coats. You’ll notice surface temperature, humidity, and coat thickness slow drying; thinner layers speed cure. Consider how eco-friendly coatings and historical plaster techniques emphasized thin, breathable layers — the same idea helps modern ready-mix.
After each coat, check firmness and dryness before sanding or recoating.
- Allow 24 hours for typical thin coats in moderate conditions.
- Add 12–24 hours per additional heavier coat.
- Use ventilation and low humidity to accelerate drying.
- Sand lightly only when fully dry.
Quick‑Set Mud: Bag Times (5–90 Min)
Quick‑set mud bags give you choices from about 5 to 90 minutes of working time, so you’ll pick a set based on how fast you need it to harden.
You’ll control those times by the water ratio when you mix—less water speeds setting, more water slows it.
Once set, you can sand earlier than with ready‑mix but remember full cure takes longer than initial set, so avoid painting until the joint is fully cured.
Setting Time Ranges
If you’re using bagged setting-type drywall mud, know that the labeled times—usually 5, 20, 45, or 90 minutes—refer to how long the compound chemically hardens, not how long you’ll need to wait before painting. You’ll still check cure depth, ambient conditions, and coat thickness before priming.
Shorter times suit small repairs; longer times handle thicker fills and higher temperatures. Also consider color matching and decorative accents when planning sequencing so finish coats don’t trap moisture.
- Pick a time that matches job size
- Monitor temperature and humidity
- Test a small area for hardness
- Allow extra time for deep fills
Mixing Water Ratios
Because bagged setting-type mud hardens by chemical reaction, you’ll want to measure water precisely: too much water lengthens working time and weakens the set, while too little makes the mix stiff and hard to feather. For quick‑set mud (5–90 min) follow manufacturer ratios; use a scale or measuring cup. You’ll control open time and final strength, and you’ll choose mixes that work with eco friendly materials and finish choices—consider color psychology for final paint over quick repairs. Test small batches. Use this quick reference:
| Bag Time | Water Ratio |
|---|---|
| 5 min | 2:1 |
| 20 min | 2.5:1 |
| 45 min | 3:1 |
| 90 min | 3.5:1 |
Sanding And Cure
When you work with bagged setting-type mud that sets in 5–90 minutes, remember that curing and sanding are distinct steps. You can sand once the compound has hardened to the touch, but full cure for maximum strength and paint adhesion takes longer.
You’ll sand lightly to smooth joints, avoiding over-sanding which weakens edges. After sanding, wait the remainder of the cure time before priming for best adhesion.
Consider how texture and color theory affect final paint choices in your drywall design decisions.
- Test hardness with a fingernail
- Use fine-grit sanding pads
- Vacuum dust before priming
- Match primer to paint
Coat Thickness and Drying Speed
Although a thin skim coat dries quickly, thicker layers of drywall mud can hold moisture for days. So you should apply each coat as thinly and evenly as possible to speed curing and prevent cracking.
You’ll learn to feather edges and use proper texture techniques to match surrounding surfaces without adding bulk. Avoid treating joint compound like a moisture barrier; it isn’t waterproof and trapped water slows drying.
Apply multiple thin coats, sanding lightly between them, and let each coat feel dry to the touch before proceeding. That approach minimizes shrinkage, reduces sanding work, and helps you achieve a smooth, paint-ready finish.
Temperature: How Cold and Hot Change Drying
Thin, even coats speed drying, but temperature also has a big impact on how quickly joint compound cures. You’ll notice cold slows chemical setting, risking longer wait times and potential hardness issues, while heat speeds evaporation and can cause cracking or poor texture consistency if too rapid. You should aim for moderate, stable temperatures to protect finish and color matching later.
- In cold (below 50°F) expect much longer cure times.
- In hot, dry conditions open windows or lower heat to avoid surface cracking.
- Use gentle heat rather than blasts from heaters.
- Check hardness before sanding or priming.
Humidity: How It Slows Drying and How to Measure It
High humidity slows the water evaporation from your drywall mud, so joints can take much longer to set.
Use a hygrometer to check relative humidity and aim for 40–50% for faster drying.
If your levels are high, run a dehumidifier, increase ventilation, or use a heater to pull moisture out of the room.
Humidity’s Effect On Drying
When humidity rises, it slows the evaporation that lets drywall mud harden, so you’ll see longer tack times and delayed curing. That means you can’t rely on the usual dry-times when the air’s muggy.
You should monitor surfaces for color contrast and texture variation as clues: darker patches or shinier spots mean moisture’s still present.
Adjust expectations and ventilation accordingly to avoid trapping moisture under paint.
- Look for darker seams and soft spots before sanding.
- Expect additional sanding passes if texture variation appears.
- Use fans and dehumidifiers to speed surface drying.
- Wait for uniform color before priming and painting.
How To Measure Humidity
Because moisture in the air directly affects how drywall mud dries, you’ll want a reliable way to measure humidity before you start sanding or painting. Use a hygrometer to get accurate relative humidity (RH) readings; digital models are fast and easy.
Check RH in several spots and at different heights since pockets of moist air form near bathrooms or kitchens. Aim to understand how RH interacts with temperature—both change drying time and can affect color theory perceptions and texture techniques when paint goes on.
Record readings over a day; consistent data helps you time sanding and painting for best results.
Reducing Moisture For Faster Drying
Although moist air slows drywall mud drying, you can speed things up by actively lowering humidity in the room. You’ll measure humidity with a hygrometer, aim for 40–50% relative humidity, and use ventilation to move moist air out so joint compound skins and bonds faster.
Lower humidity helps preserve your desired wall texture and avoids blotchy paint that ruins color coordination.
- Run a dehumidifier until the hygrometer reads target humidity.
- Open windows and use fans to create cross-ventilation.
- Heat the room moderately to encourage evaporation.
- Avoid spraying water or high-humidity activities nearby.
Airflow and Ventilation to Speed Drying
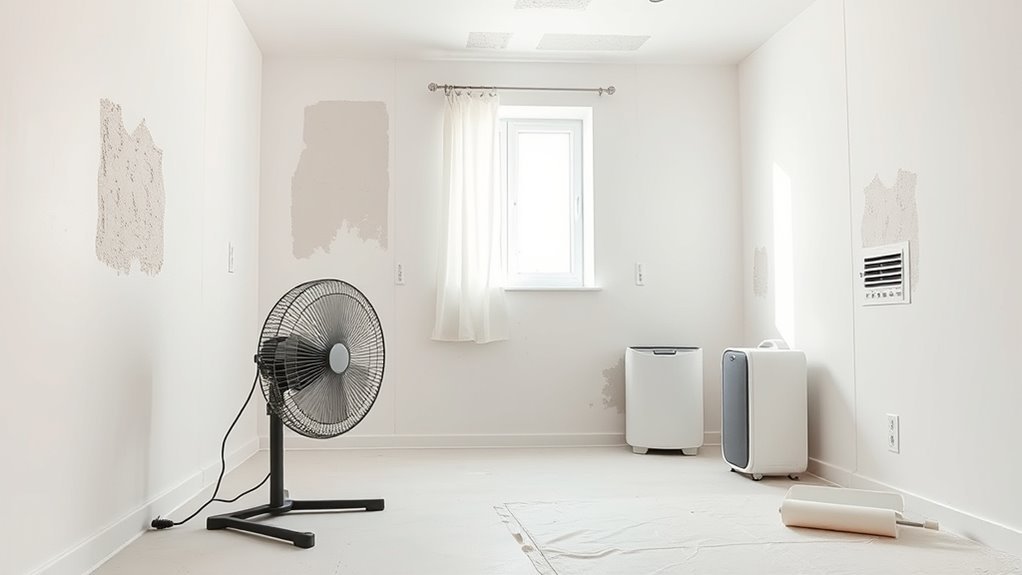
If you want your joint compound to dry faster, get air moving through the room and out of it—ventilation cuts drying times by carrying away moisture and preventing the humid layer that slows curing. Open windows, run box fans toward an exit, and use an exhaust or inline fan if possible.
Aim for gentle cross-breeze rather than blasting air directly on seams to avoid cracking and texture inconsistency. Maintain steady airflow and moderate temperature; dehumidifiers help when humidity’s high.
While you focus on speed, preserve color coordination of finished surfaces by keeping dust controlled and avoiding uneven drying that can alter paint appearance.
Substrate and Drywall Paper: Impact on Absorption
Different substrates and the type of drywall paper you use considerably affect how quickly joint compound soaks in and dries, so you should match your mud choice and prep to the wall. You’ll notice porous gypsum boards and paperless panels absorb water faster, changing texture consistency and drying time. Adjust mix hydration, apply thinner coats on thirsty surfaces, and check primer compatibility before painting. Light sanding between coats helps adhesion without overworking mud.
- High-absorption gypsum: dry faster, thin coats
- Paper-faced drywall: moderate absorption, standard mud
- Paperless: variable, test first
- Painted surfaces: low absorption, adjust primer compatibility
Joint Tape Types and Readiness for Paint
Knowing how your substrate soaks up joint compound helps you pick the right tape and judge when seams are ready for paint. You’ll choose paper tape for flat seams and fiberglass mesh where moisture control or speed matters; each affects joint tape adhesion and drying time.
Press tape firmly, feather compound thinly, and let layers dry fully—often 24 hours per coat in normal conditions—before sanding. Test readiness by touch: no tack, firm edges.
Consider texture techniques only after tape and mud are cured; premature texturing traps moisture and weakens adhesion, forcing rework and longer overall drying.
Cold‑Weather Drying Tips
When temperatures dip below about 50°F (10°C), you’ll need to control heat, humidity, and air movement to keep drywall mud drying on schedule.
You’ll use gentle heat, avoid direct infrared on seams, and keep humidity balanced so joints cure evenly.
Plan drying before choosing color coordination or installing decorative accents to prevent trapping moisture.
Plan and finish drying before selecting colors or accents so moisture won’t get trapped under finishes.
- Use a small space heater with thermostat; keep it off walls.
- Run a dehumidifier to lower room humidity gradually.
- Circulate air with fans to prevent cold pockets, not to blast seams.
- Keep doors closed and monitor surface hardness before sanding or painting.
Hot, Dry Conditions: What to Watch For
If temperatures and humidity drop too low, your joint compound can skin over before it bonds, so in hot, dry conditions you’ll need to slow evaporation and keep the mud workable. Work shorter sections, mist lightly with water, and cover open buckets to prevent crusting.
Use fans for airflow but avoid direct blasts that speed drying unevenly. Watch your own hydration and schedule breaks—heat exhaustion is real when you’re sanding or troweling in warm spaces.
Avoid overworking damp areas; improper timing affects final texture and can change how paint sheen reads. Cool the room slightly if possible to steady drying.
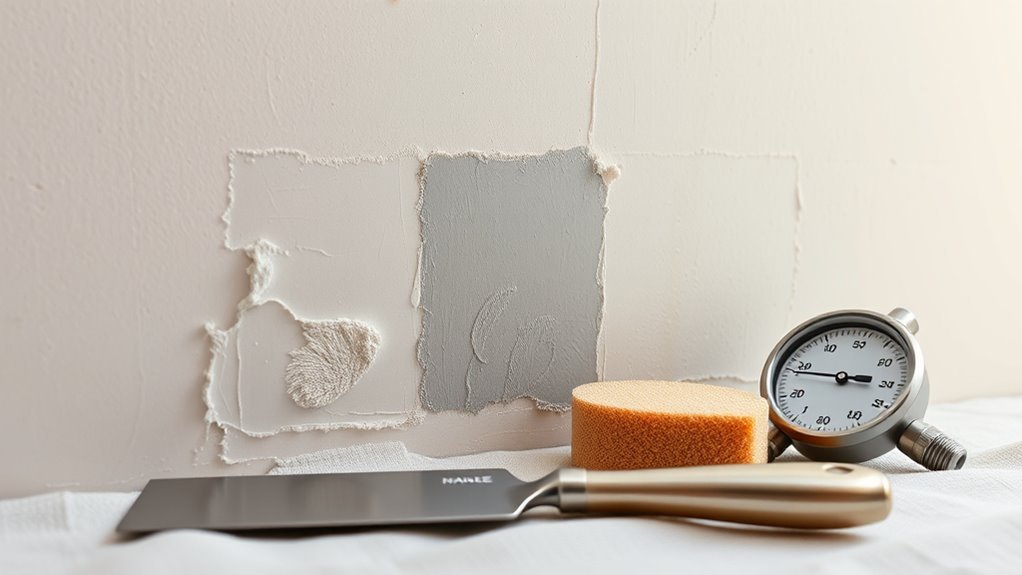
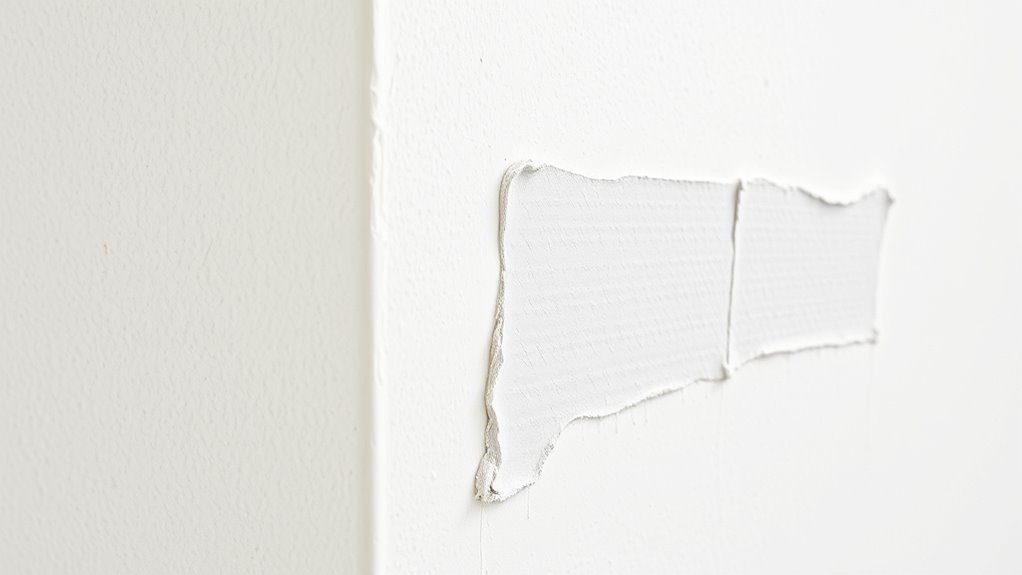
Visual Signs That Mud Is Dry
Because moisture leaves the compound from the surface first, you’ll notice several clear visual cues that tell you the mud’s ready for the next step. Check the finish across the repair: it should show even color matching with surrounding drywall and no darker wet spots. Look for uniform sheen—matte, not glossy—and consistent texture without glossy streaks. Edges should blur into the wall without raised ridges.
- Surface shifts from darker to lighter tone
- No glossy or damp patches
- Cracks or shrinking lines are absent
- Compound blends visually with surrounding paint or primer
Touch Tests: Fingernail and Putty‑Knife Checks
Visual cues give you a good start, but you’ll want to confirm dryness with touch tests before sanding or painting. Gently press a clean fingernail into a small, inconspicuous spot; if it leaves no mark and feels firm, the mud’s likely dry.
Use a putty‑knife edge to scrape lightly—dry compound resists gouging and flakes minimally. Compare results to areas using historical techniques you may know; modern joint compounds behave differently than old mixes.
If you’re using eco friendly materials, expect similar tactile checking. When in doubt, wait longer rather than risk sanding damp mud and creating problems.
Using a Moisture Meter on Taped Joints
How do you know for sure the taped joints are dry enough to sand or paint? Use a moisture meter to get objective readings before you proceed with painting techniques or color matching.
Use a moisture meter to confirm taped joints are dry before sanding or painting, avoiding finish problems.
Pin-type meters stab near the tape edge; non-contact meters read surface moisture. Aim for readings similar to surrounding drywall and the manufacturer’s recommended moisture percentage.
- Calibrate the meter per instructions.
- Measure multiple spots along each taped joint.
- Record readings and wait if levels are elevated.
- Use results to time primer and final coat decisions.
A meter saves guesswork and helps you avoid adhesion or finish issues.
When to Sand Drywall Mud
After your moisture readings match the surrounding drywall and the compound feels firm to the touch, it’s time to sand. You should confirm edges are flush and no soft spots remain before you begin.
Work steadily, removing high ridges and feathering seams so primer and paint lay smooth. Use light passes and check progress visually and by touch; over-sanding creates dips.
Once surfaces are even, wipe away dust and inspect under good light—this step affects final appearance and how painting techniques perform. Proper sanding also helps with accurate color selection, preventing uneven absorption that can alter hue after painting.
Sanding Grit by Coat and Dryness
When choosing sanding grit by coat and dryness, match the grit to the compound layer and how firm it feels. You’ll adjust grit based on whether it’s a soft, still-curing skim or a firm topcoat to preserve drywall aesthetics and enable proper painting techniques.
- First coat (soft): start with 80–100 grit to shape without tearing paper.
- Second coat (firmer): move to 120–150 grit for smoothing seams.
- Final topcoat (fully dry): use 180–220 grit for a fine finish before primer.
- Spot touch-ups: 240 grit for tiny imperfections without over-sanding.
Trust feel and visual cues over timing alone.
Feathered Edges and Recoat Timing
Because feathering blends the new compound into the old surface, you’ll want each pass to dry just enough to hold an edge but still allow seamless reworking. You check edges after 20–60 minutes for light tack, then wait fully (usually 24 hours) between heavier coats. Aim for consistent color matching and subtle texture blending as you build coats. Keep tools clean and overlap feathered areas to avoid ridges. Use this quick reference:
| Coat | Dry Time | Action |
|---|---|---|
| First | 20–60 min | Light feather |
| Second | 12–24 hr | Shape |
| Final | 24 hr | Smooth and inspect |
When to Prime New Drywall Mud
Wait until the joint compound is fully cured before priming—usually 24–72 hours for thin coats, longer for thicker fills.
You can check moisture with a fingertip (it should feel dry) or use a moisture meter for a precise reading.
If any tackiness or damp spots remain, hold off on priming until they’re gone.
Cure Time Before Priming
If you’re prepping newly applied drywall mud for paint, you need to know the difference between dry and fully cured—taping compounds can feel dry to the touch long before they’ve reached full strength and low moisture.
Cure time varies with compound type, thickness, temperature, and humidity, and you shouldn’t prime until mud has reached recommended cure. Consider eco-friendly materials or learning from historical drywall techniques for slower-setting mixes.
Wait manufacturer-specified hours or days, and remember that thinner coats cure faster. Check seams for hardness and uniform color before priming.
- Confirm manufacturer cure time
- Inspect hardness, not touch
- Allow extra time in cool/humid rooms
- Use suitable primer
Moisture Check Methods
When you’re ready to decide whether to prime, use objective moisture checks rather than relying on touch alone: a moisture meter gives quick, quantifiable readings.
A calcium carbide tester provides lab-accurate moisture content for stubborn cases.
Simple visual/hardness inspections (uniform color, no dark spots, firm seams) act as a useful secondary check.
You should test multiple spots, especially near joints and behind fixtures.
Record readings, compare against manufacturer limits, and avoid priming if moisture exceeds recommendations.
Maintain tool maintenance—clean meters and carbide cups after use.
Proper checks help guarantee consistent color matching and prevent adhesion or staining problems.
Best Primers for Fresh Drywall Mud
Because fresh drywall mud soaks up paint differently than existing surfaces, you’ll want a primer that seals, evens porosity, and promotes adhesion without raising the nap or causing flash drying.
Fresh drywall mud absorbs paint unevenly—use a primer that seals, evens porosity, and promotes adhesion without raising nap.
You’ll also consider texture patterns and paint color considerations to prevent sheen or hue shifts. Choose a high-quality drywall or universal primer, and match primer type to finish.
- Oil-based or alkyd for stubborn patch areas
- PVA primers for large, uniform surfaces
- Stain-blocking primers for discoloration
- Bonding primers for slick joint compounds
Apply evenly, follow manufacturer instructions, and avoid over-thinning.
How Long to Wait Between Priming and Painting
After the primer has sealed and evened the drywall mud, you’ll need to let it cure to the manufacturer’s recommended time before painting to guarantee proper adhesion and an even finish. Generally that’s 1–24 hours depending on primer type and temperature; wait at least the minimum, or longer if humidity is high.
Check touch and tackiness before starting. Allow full cure for deep or tinted topcoats to aid accurate color matching—premature painting can shift hue.
Factor drying times into your schedule and budget considerations; faster primers cost more but speed up completion, while slower cures may save money but delay progress.
Paint Adhesion: Failures If Mud Isn’t Dry
If drywall mud hasn’t fully dried, paint won’t properly bond and you’ll see problems like peeling, blistering, and flaking within days or weeks. You risk compromised drywall aesthetics and uneven paint color, so wait until the mud is fully cured before coating.
Wet or tacky mud traps moisture, preventing adhesion and causing weak spots that fail under normal use.
Wet or tacky mud holds moisture, blocking adhesion and creating weak spots that fail under everyday use.
- Blister formation where trapped moisture expands
- Paint lifting from seams and fastener spots
- Patchy sheen and inconsistent paint color
- Accelerated wear around high-touch areas
Addressing adhesion now saves you time and preserves drywall aesthetics.
Preventing Bubbling, Peeling, and Blistering
Having paint fail on damp mud shows you what to avoid, so take steps now to prevent bubbling, peeling, and blistering before you paint.
Check that the joint compound is fully dry and sanded smooth; trapped moisture breaks adhesion and creates blisters.
Use a quality primer designed for new drywall to seal porous areas and promote color matching across repairs.
For textured finishes, feather edges and replicate texture before priming so the topcoat bonds uniformly.
Avoid heavy coats of paint; apply thin, even layers and allow full drying between coats to maintain adhesion and finish integrity.
Speed Drying Safely With Fans and Heaters
When you need to speed up drying, use fans and heaters thoughtfully to avoid damaging the joint compound or creating uneven drying. You’ll keep airflow gentle, avoid directing intense heat at one spot, and monitor humidity so the mud cures evenly. Consider compatibility with Eco friendly paints and respect historical drywall techniques when restoring older homes.
- Position fans to circulate air across the surface, not blast it.
- Use a thermostat-controlled heater to maintain steady warmth.
- Check dryness with a fingertip and a moisture meter.
- Ventilate to remove moist air and prevent condensation buildup.
Follow these steps for safe, faster drying.
Avoiding Over‑Drying and Cracking From Heat
Because intense, uneven heat dries the surface too fast and pulls moisture out of the compound, you should keep temperatures moderate and consistent to prevent cracking. You’ll avoid hairline splits by maintaining steady warmth, avoiding direct heater blasts, and rotating fans gently.
Monitor humidity and let joint compound cure naturally; rapid surface set can ruin texture patterns and force reworking. If cracks appear, don’t rush to skim—rehydrate and reapply properly.
Remember that uneven drying can affect how primer accepts paint color, producing blotchy results. Controlled conditions protect finish integrity and reduce touchups.
Plan a Multi‑Day Drywall and Paint Schedule
Map out a clear project timeline so you know which stages take one day and which stretch over several. Use drying time benchmarks—like 24 hours for a skim coat or 48–72 hours for thicker fills—to slot tasks realistically.
Sequence daily work so sanding, touch‑ups, priming, and painting don’t clash with wet mud.
Project Timeline Overview
If you’re planning a multi‑day drywall and paint schedule, start by blocking out time for each coat, drying, sanding, and touchups so delays don’t derail the project. You’ll map tasks across days, account for humidity, and factor in color contrast decisions and other aesthetic considerations before final coats.
Prioritize critical-path items and allow buffer time for repairs.
- Day 1: Patching and first coat of mud
- Day 2: Drying, sanding, and second coat
- Day 3: Final skim, inspection, touchups
- Day 4: Primer, paint, and final evaluation
Stick to the timeline, adjust for conditions, and finish confidently.
Drying Time Benchmarks
When planning your multi‑day schedule, use drying‑time benchmarks for each joint compound type and coat thickness so you know when you can sand and apply the next layer without compromising finish quality.
Track drying windows: light skim coats often dry in 1–4 hours, standard all‑purpose compounds 12–24 hours, and heavy fills 24–72 hours.
Factor temperature, humidity, and ventilation; accelerate drying with fans and low humidity but avoid heat that cakes the surface.
Use benchmarks to coordinate sanding, priming, and final coats so drywall aesthetics stay consistent and your paint color selection shows true, even coverage after finishing.
Daily Task Sequencing
Now that you’ve got drying benchmarks for each compound and coat thickness, use them to build a concrete multi‑day plan that tells you what to do each morning and evening. Outline tasks, adjust for humidity, and slot decorative finishes or acoustic treatments after final sanding. Each day has a clear goal so you won’t rush coats.
- Morning: inspect studs, check moisture, prep joint areas.
- Evening: sand dry mud, vacuum dust, wipe surfaces.
- Next morning: apply next coat or spot-fill; note dry times.
- Final evening: sand, prime, and set up for paint or specialty finishes.
Stick to the schedule; quality follows patience.
Choosing Quick‑Set Formulas for Fast Projects
Because you’re on a tight timeline, quick‑set joint compounds let you finish taping and sanding in hours instead of days. You choose a setting time—5, 20, 45, 90 minutes—based on room size and skill. Mix only what you can finish; faster sets stiffen quickly.
Work in small sections, tool seams cleanly, and sand lightly when firm to avoid reworking. Use compatible primers and follow recommended cure times before painting.
Adjust your painting techniques to account for slightly different surface absorbency, and confirm color matching after priming. Quick‑sets speed projects but demand planning and careful mixing.
Ready‑Mix Benefits for Low‑Stress Timelines
If you want a smoother schedule, ready‑mix joint compound speeds up jobsite turnaround by letting you move to sanding and painting predictably. You’ll get consistent dry times across batches, so you’re not guessing when a coat is ready.
And because it spreads evenly, touch‑ups are easier and take less rework.
Faster Jobsite Turnaround
When you’re racing against weather windows and client deadlines, ready‑mix mud lets crews move faster without cutting corners. You’ll save setup time and reduce mixing errors, so finishers focus on quality — preserving drywall aesthetics while following soundproofing techniques where required. Faster turnaround lowers labor costs and keeps schedules tight.
- Faster application with consistent texture
- Reduced rework from mixing mistakes
- Simplified inventory and fewer tools on site
- Easier coordination between trades for painting
You’ll still monitor humidity and ventilation, but ready‑mix options help you hit tight timelines while maintaining professional results.
Consistent Dry Times
Though jobsite conditions vary, ready‑mix drywall mud gives you predictable dry times so scheduling stays straightforward. You can plan painting and decorative finishes with confidence because manufacturers formulate ready‑mix for consistent curing under normal humidity and temperature ranges.
That reliability reduces guesswork when coordinating crews and materials. You still monitor moisture and avoid sealing surfaces too soon, since substrate moisture and structural support needs can influence final strength.
Easier Touch-Up Work
Besides predictable dry times, ready‑mix drywall mud makes touch‑ups quicker and less stressful by staying workable and matching the original finish more consistently. You’ll find repairs blend in better because color matching is easier on damp‑to‑dry edges, and texture consistency reduces sanding and repainting. That saves time and keeps stress low when you’re finishing a room.
- Use small amounts to preserve workability.
- Feather edges for seamless texture consistency.
- Match lighting when checking color matching.
- Sand lightly only after full set to avoid overworking.
These habits let you touch up confidently and finish painting sooner.
Applying Texture Over Fresh Mud: Timing Tips
If you want your texture to bond and look consistent, wait until the joint compound is firm enough to hold an impression but still has a little dampness so it won’t crumble under your tool. You’ll get cleaner peaks and valleys for decorative finishes and avoid tearing that ruins patterns.
Test a small patch: press, lift, and watch for slight give. For acoustic treatments, timing prevents over-absorption or weak adhesion that affects sound-dampening performance.
Work in sections to maintain uniform moisture, and adjust drying with fans or humidity control if needed. Let final cure complete before sanding or painting to preserve texture integrity.
Repairing Areas Painted Before Fully Dry
When you discover paint applied over mud that wasn’t fully dry, act quickly to minimize peeling, bubbling, or soft spots before they spread. You’ll assess the damage, remove loose paint, and let the underlying mud dry completely.
Sand rough edges, apply a thin skim coat if needed, and prime the repaired area. Use careful painting techniques to blend edges and avoid buildup. Match sheen and color using color matching tools or swatches, feathering strokes for a seamless finish.
Keep humidity and temperature steady during repair to ensure proper curing.
- Remove loose or bubbled paint
- Sand and clean the surface
- Skim, prime, and feather
- Color matching and final paint
Dealing With Moisture Behind Drywall First
Before you repaint or patch further, check for moisture behind the drywall—paint and skim coats will fail if the substrate stays damp. You’ll inspect for stains, soft spots, and musty odors; use a moisture meter to pinpoint moisture intrusion sources like leaks, condensation, or poor ventilation.
Stop the leak, dry structural elements, and replace any panels showing drywall warping or mold; compromised gypsum won’t hold compound. After repairs, verify humidity and wall dryness before mudding.
Document repairs and monitor the area for recurrence. Addressing hidden moisture first prevents wasted effort and guarantees new finishes adhere and last.
Drying Strategy for High‑Traffic Rooms
In high-traffic rooms you’ll want to use faster drying techniques like fans, dehumidifiers, and thin skim coats to cut wait time without compromising bond.
Plan your work around room use — schedule mudding and drying when the space will be least occupied.
Wait to apply a durable topcoat until the compound is fully dry and cured to avoid premature wear or adhesion problems.
Faster Drying Techniques
Because high-traffic rooms need quick turnarounds, you’ll want a drying strategy that speeds mud curing without sacrificing finish quality. You’ll control air, temperature, and humidity, use fast-setting compounds selectively, and test small patches to protect color matching and texture smoothing before full application.
- Increase ventilation with fans and vents to move moist air out.
- Raise temperature moderately to hasten chemical set times without baking the mud.
- Use quick-set joint compound on small repairs; sand gently once hard.
- Monitor humidity; employ a dehumidifier to keep levels around 40–50%.
These steps cut wait time while preserving finish integrity.
Scheduling Around Use
When you’re working in a high-traffic room, plan drying windows around peak use times so mud can cure uninterrupted and occupants can move freely without tracking dust or wet seams. You’ll schedule sanding and coats when traffic is low—nights or weekends—so surfaces set fully before people return.
Block off the area with clear signage and temporary barriers, and ventilate to control humidity without creating drafts that slow curing. Check seams under varied lighting effects to spot imperfections; strong light can reveal ridges unseen in diffuse light.
Consider paint color contrast when planning touchups so repaired areas blend once topcoats are applied.
Durable Topcoat Timing
You’ve scheduled sanding and paint around low-traffic windows; now plan the timing for a hard-wearing topcoat so it can handle daily use without peeling or marking. You’ll wait until mud is fully cured, then prime, checking for consistent Color matching with existing walls.
Choose a Paint sheen suited to traffic—satin or semi-gloss—to resist scuffs. Apply topcoat when humidity is low and temperature is stable, allowing manufacturer-recommended recoat intervals.
- Confirm joint compound is dry to the core before priming.
- Test a small patch for Color matching in different light.
- Use a durable brush or roller recommended for the sheen.
- Allow full cure before heavy use.
Contractor vs DIY: Realistic Drying Timelines
If you’re weighing whether to hire a pro or tackle mudding yourself, expect different drying rhythms. You’ll notice contractors speed projects with controlled climate, thin consistent coats, and refined texture techniques that reduce rework; DIYers often apply thicker layers and wait longer. Pros factor in color matching and finish touch-ups before paint; you should plan extra time if you’re learning. Below is a simple table to evoke how each path feels emotionally during drying:
| Stage | Contractor | DIY |
|---|---|---|
| Initial | Calm | Anxious |
| Mid-dry | Confident | Impatient |
| Ready | Relieved | Hopeful |
| Touch-up | Exact | Trial |
Reading Product Labels: Dry Time vs Cure Time
Those contrasts in pace and patience matter because knowing what a product label actually says about dry time versus cure time will keep your schedule realistic.
You’ll read dry time as when mud feels touch-dry; cure time is when it’s fully hardened and can handle sanding, joint stress, and final coatings.
Look for manufacturer notes about temperature and humidity, since they shift both timelines.
Consider color coordination and Paint sheen choices only after cure to avoid finish defects.
Check label warnings about recoat windows and substrate prep.
- Note listed dry time
- Note listed cure time
- Verify environmental conditions
- Plan paint test patches
Interpreting Technical Data Sheets for Drying
When you read a technical data sheet for drywall mud, focus on the specific drying metrics—set time, tack-free time, and full cure—rather than the general “dry time” headline, because each term dictates different next steps like sanding or priming.
You’ll scan for temperature, humidity, and thickness guidelines that change those numbers. Note any notes about texture consistency and how that affects sanding aggressiveness.
Check recommended wait times before applying primer or paint, and look for cure-related warnings about trapping moisture.
Use the sheet’s testing conditions as your baseline, then adjust expectations for your jobsite environment.
Common Mistakes That Prolong Drying
You’ll slow drying when you apply mud in layers that are too thick, so stick to recommended coat thicknesses.
Poor ventilation and high humidity also keep moisture trapped, so run fans and a dehumidifier if needed.
Fixing those two issues is the fastest way to get mud ready for sanding and painting.
Using Too Thick Layers
If you apply joint compound too thickly, it traps moisture and can take days longer to dry than several thin coats would. You should spread thin, even layers so each dries fully before the next goes on.
Thick application also makes color matching harder and risks uneven texture consistency, forcing extra sanding and rework.
- Apply 1/16–1/8 inch per coat and let dry completely.
- Feather edges to minimize sanding and speed curing.
- Use setting-type compound for deeper fills, applied in layers.
- Sand lightly between coats; avoid cutting corners with heavy single passes.
Poor Ventilation And Humidity
Because joint compound releases moisture as it cures, poor ventilation and high humidity can turn a quick-dry job into a multi-day headache. You’ll stall drying if you don’t move damp air out and lower moisture levels. Open windows, run fans, and use a dehumidifier for ventilation improvements that speed curing.
Monitor humidity—aim for 40–50%—and avoid heating without airflow, which traps moisture. If you notice tacky or soft spots, don’t paint; improve ventilation and humidity control, wait, and check again.
Taking these steps prevents rework, saves time, and ensures paint bonds to a fully cured surface.
Quick Checklist to Confirm Mud Is Paint‑Ready
Before you paint, run a quick checklist to confirm the drywall mud is fully dry and ready. Check for uniform color and texture so drywall aesthetics aren’t compromised, and verify mud consistency feels firm, not tacky. Use simple sensory checks and visual cues to decide.
Before painting, confirm drywall mud is fully dry: even color, firm texture, smooth sanded seams.
- Press lightly; no imprinting or tackiness.
- Look for even color with no dark, glossy patches.
- Sand smoothly; dust should be fine, not gummy.
- Ascertain seams and feathered edges blend with surrounding wall.
If any item fails, wait longer—rushing ruins finish and forces rework. Only paint once all four pass.
Tools and Supplies to Test and Speed Drying
When you want to confirm drying and speed the process, gather a few simple tools and supplies that give reliable feedback and controlled airflow, heat, or humidity management.
Use a moisture meter to spot-check joint compound; it tells you when areas reach paint-ready moisture levels.
A small fan and portable dehumidifier accelerate drying without overheating the mud.
For small spots, a hairdryer on low helps, but keep it moving to avoid cracking.
Keep paint swatches for color coordination and sample mud patches for texture matching so finished repairs blend.
Use clean trowels, sanding blocks, and tack cloths to finish before painting.
When to Call a Pro for Persistent Drying Problems
If humidity stays high despite your efforts, call a pro to diagnose ventilation or structural moisture issues before you keep reapplying mud.
Also contact an expert if your compound keeps cracking, shrinking, or failing repeatedly, since that can signal improper mixing, substrate problems, or hidden water damage.
A pro can pinpoint the root cause and recommend fixes so your paint job doesn’t fail.
Persistent High Humidity
Because high humidity can stall drying for days, you’ll want to recognize when DIY fixes aren’t enough and call a pro. If moisture keeps mud tacky despite dehumidifiers, heaters, or increased ventilation, a specialist can assess causes like hidden leaks, HVAC issues, or inadequate insulation.
They’ll advise on safe timelines before painting, especially with decorative finishes or rooms with acoustic treatments where moisture can ruin texture or sound control. Expect targeted solutions rather than more sanding.
- Persistent tackiness after 72 hours with equipment running
- Visible condensation or mold growth
- Multiple rooms affected, not just one patch
- Suspected structural moisture sources
Repeated Compound Failures
Although occasional tacky spots are normal, repeated compound failures—where mud stays soft, crumbles, or separates after multiple applications—signal it’s time to call a pro.
You’ve checked humidity, ventilation, and drying times, yet problems persist; a pro can diagnose underlying issues like improper joint prep, contaminated compound, or structural moisture.
They’ll assess substrate integrity, fix framing or insulation problems, and verify ladder safety during repairs.
Professionals also help with skim coats and finishing so your surface accepts primer and paint reliably, avoiding wasted trips for paint color matching.
Call before you repaint repeatedly and compound failure ruins your finish.
Frequently Asked Questions
Can I Paint Over Drywall Mud if the Room Smells Musty?
You shouldn’t paint over drywall mud if the room smells musty; you’ll need to address the odor first. For proper drywall repair and paint preparation, eliminate moisture, clean or replace affected material, dry thoroughly, then prime before painting.
How Do Additives (Retarders/Accelerators) Change Final Paint Appearance?
Like a chef tweaking stew, you’ll use additive effects to slow or speed the drying process, which can alter sheen, texture, and adhesion; don’t expect miracles—accelerators tighten finish, retarders mellow it for smoother paint.
Will Wood Framing Behind Drywall Extend Mud Drying Time?
Yes — wood framing can slow drying because it absorbs moisture and reduces airflow; if framing insulation or a moisture barrier is present, you’ll often see even longer cure times, so you’ll allow extra drying before painting.
Can Wallpaper Be Applied Over Newly Dried Joint Compound?
About 70% of failed wallpaper jobs involve poor surface prep; yes, you can apply wallpaper over newly dried joint compound if you guarantee proper wallpaper adhesion by fully curing, sanding smooth, and using a quality joint compound sealing primer before hanging.
How Does VOC Level of Primer Affect Mud Cure and Paint Timing?
VOC influence matters: lower-VOC primers slow moisture escape, so you’ll need longer before painting; Primer effects include sealing mud and altering cure time, so you’ll choose higher-VOC or allow extra drying to avoid adhesion or finish problems.
Conclusion
Think of your drywall mud as a sleeping guest—don’t rush waking it. If you used quick‑set, it’s often ready in 20–90 minutes; ready‑mix needs several hours to a day between coats and longer after the final skim. Check for firmness, no tackiness, and consistent color; use fans, dehumidifiers, or thin coats to encourage a polite, timely wakeup. If it keeps sulking, call a pro before you disturb the decor’s peace.