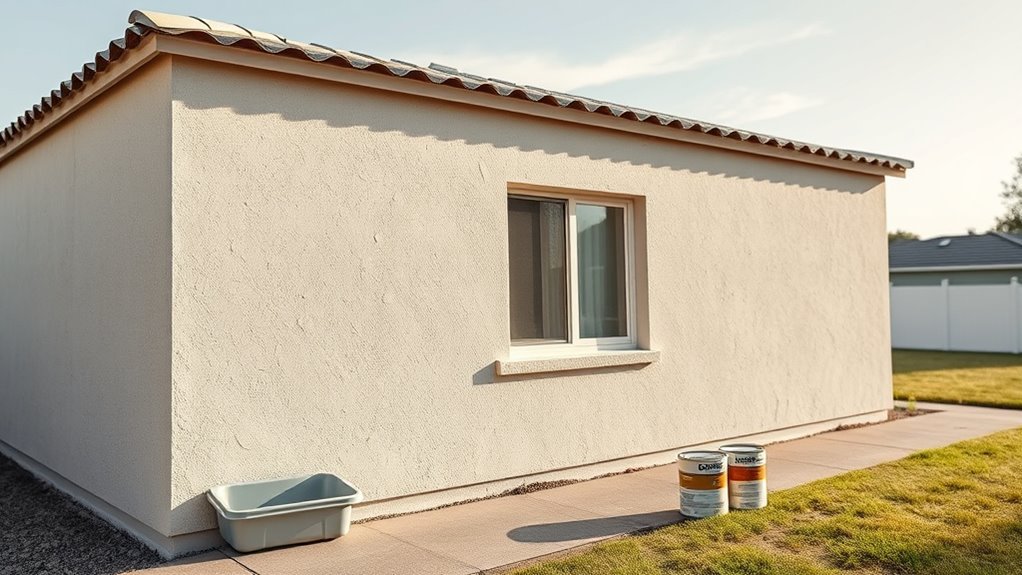
How Much Does It Cost to Paint Exterior Stucco House
You can expect to pay about $1.50–$4.50 per sq ft to professionally paint exterior stucco, which typically totals $2,250–$11,250 depending on home size, height and complexity. Prep, repairs, texture and deep or specialty colors raise labor and material needs, and premium or low‑VOC paints cost more up front but last longer. Measure each wall minus openings for accurate bids. Keep going and you’ll find details on estimating, timing, and maintenance to stretch your investment.
How Much Does Painting Exterior Stucco Cost?
If you’re wondering how much it’ll cost to paint exterior stucco, expect a range rather than a single figure: most homeowners pay between $1.50 and $4.50 per square foot for professional work, which typically covers surface prep, primer, and two coats of exterior elastomeric or acrylic paint.
You’ll factor condition, texture, and access—higher porosity or rough finishes need more material and labor.
You can choose premium pigments for better fade resistance; color choices affect price if you pick specialty or deep-base tints.
Ask contractors about eco friendly options like low‑VOC paints to limit fumes and meet codes.
Typical Cost Range by House Size
For a quick budget check, expect exterior stucco painting to scale with your home’s square footage: small homes (under 1,500 sq ft) typically run $2,250–$6,750, medium homes (1,500–2,500 sq ft) about $3,750–$11,250, and large homes (over 2,500 sq ft) $3,750–$11,250 or more depending on complexity. You’ll factor in height, trim work, historical preservation requirements, and choices influenced by color psychology. Use the table below to visualize ranges.
| Size | Typical Range | Notes |
|---|---|---|
| Small | $2,250–$6,750 | Single story, simple trim |
| Medium | $3,750–$11,250 | Two stories, moderate detail |
| Large | $3,750–$11,250+ | Complex facades, preservation needs |
Cost Per Square Foot Explained
When you look at cost per square foot, you’ll see labor versus materials can swing the price a lot.
You’ll also need to account for surface preparation—repairs and texture can raise costs.
Finally, higher-quality paints cost more up front but usually last longer, lowering long-term expense.
Labor Versus Materials
Although materials like primer and paint set the baseline cost, labor usually makes up the bigger share of your per-square-foot price—so you’ll want to understand what painters charge, how prep work affects time, and which tasks are billed separately.
You’ll pay hourly or per-square-foot rates that reflect skill, access difficulty, and regional wages. High-end finishes, attention to trim, and matching current color trends can raise labor costs.
Choosing eco-friendly options may change material cost but rarely lowers labor.
Get itemized bids so you see labor versus materials, know what’s included, and can compare value accurately.
Surface Preparation Needs
You’ll want to translate those itemized labor and material figures into a per-square-foot surface-prep number, since prep often drives cost as much as paint does. Calculate cleaning, pressure washing, crack repair, and skim-coat labor per sq ft, plus materials like patch compound and primers.
Note that intricate textures or high elevations raise rates. Factor in masking, trim protection, and disposal.
If you’re choosing eco friendly options, expect slight premium for low-VOC primers or biodegradable cleaners.
Also consider color psychology if you plan major color changes—more prep may be needed for deep hues to guarantee consistent coverage and adhesion.
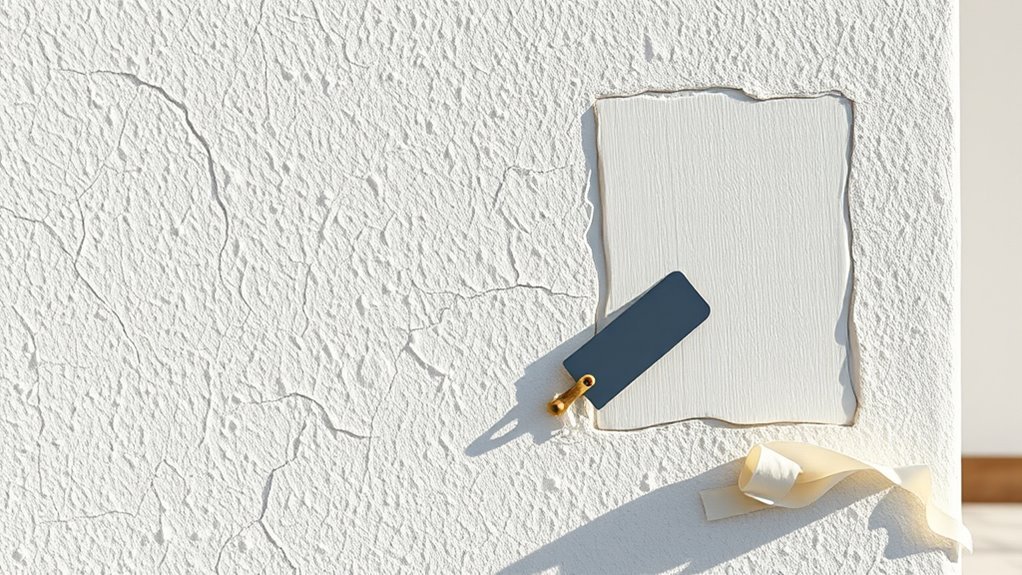
Paint Quality Impact
How much you spend per square foot depends heavily on paint quality: cheaper paints cut upfront costs but need more coats and wear out sooner.
While premium acrylics or elastomeric coatings raise the per-square-foot price, they lower long-term maintenance and touch-up frequency. You’ll pay more for higher-grade resins, UV blockers, and mildewcide, but you’ll also get better coverage and fewer repaints.
Your color selection affects cost slightly—deep, saturated pigments can require extra coats.
Decide on paint sheen carefully; flat hides imperfections but won’t clean as well as satin or semi-gloss, which can cost more but last.
Measuring Your Stucco Area Accurately
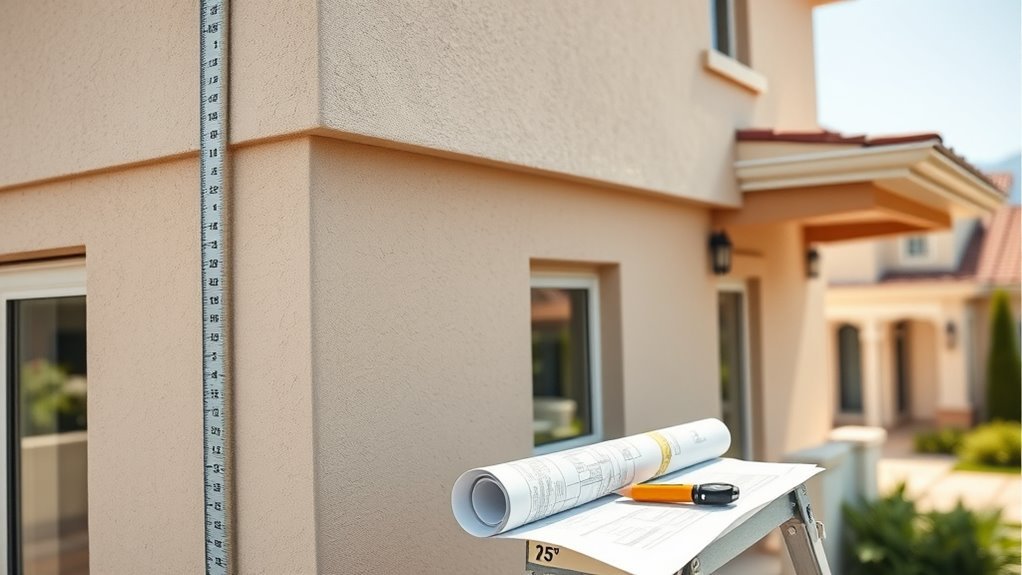
Start by measuring each exterior wall’s surface area so you know the base square footage you’re painting.
Subtract windows, doors, and other openings to avoid overestimating materials and labor.
Then add in bays, trim, and other architectural features since they change the total area and prep time.
Measure Wall Surface Area
Before you order paint or estimate labor, get precise measurements of every stucco wall you’ll coat so your material and time estimates stay accurate. Walk each exterior face, measure height and width, and multiply for area; note irregular sections and sketch dimensions. Use a tape, laser measure, and ladder for high spots.
Total wall square footage helps calculate paint, primer, and whether eco-friendly paints meet coverage specs. Record measurements digitally to avoid errors.
With exact areas, you can consider color psychology effects on perceived size and light, plan coats, and produce a reliable materials and labor estimate.
Account For Openings
When you measure stucco walls, subtract doors, windows, vents, and other openings from your total square footage so your paint and primer estimates aren’t inflated.
After subtracting, measure any irregular openings individually and note trim separately if you’ll paint it.
Multiply net wall area by coverage rates on your chosen primer and paint, factoring in color selection—darker colors may need extra coats.
Consider weather conditions when scheduling work; humidity and temperature affect drying and how many coats you can apply per day.
Keep a small contingency for touch-ups around openings and to account for measurement tolerances.
Include Architectural Features
If your home has eaves, chimneys, columns, arches, or decorative bands, include those architectural features in your stucco measurements so your paint and primer estimates are accurate. You’ll measure each element separately, noting height and width, and factor in Architectural detailing that needs extra coats or touch-ups. Columns and arches often require scaffold access; add labor for Color coordination if trim differs from walls. Use this quick tally to avoid surprises and get precise quotes.
| Feature | Height (ft) | Width (ft) |
|---|---|---|
| Eaves | ||
| Chimney | ||
| Column | ||
| Arch |
How Stucco Condition Changes Your Estimate
Because stucco condition determines how much prep and repair you’ll need, it directly affects your painting estimate. You’ll notice that stucco texture variations demand different labor and materials; rough or patterned surfaces take longer to clean and prime.
Cracks, delamination, or mold from weather effects raise costs because you’ll need patching, sealing, or replacement of damaged sections. If the substrate’s sound, you’ll save on time and materials; if it’s compromised, expect higher charges for skilled repairs and durable coatings.
Evaluating condition upfront helps you budget realistically and choose appropriate paint systems for longevity.
Prioritizing Repairs Before Painting
Now that you’ve assessed stucco condition, prioritize repairs that prevent further damage and guarantee a durable paint job. Start by addressing moisture sources—flashing, gutters, and seals—so new paint won’t fail.
Patch delaminated areas and replace loose trim before choosing color or decorative finishes. Get a contractor to inspect underlying lath and insulation if you suspect water intrusion.
Factor in surface preparation: cleaning, sanding, and priming matter more than paint brand. If you prefer eco friendly options, ask about low-VOC primers and paints.
Proper sequencing saves money and guarantees the finish endures.
How Crack and Hairline Repair Adds to Cost
Before painting, you’ll need to assess the extent of cracks and hairline fractures because larger or numerous defects raise the bill.
Expect higher material costs for specialized stucco patching compounds and primers.
Longer labor time for prepping and repairing will also add to your overall cost.
Extent Of Damage
If your stucco has widespread cracks or lots of hairline fissures, expect repair costs to rise because technicians must prep, patch, and often texture-match a larger area rather than touch up a few spots. You’ll pay more for labor and extended prep time, and your choice of color options or eco friendly paints can factor into final matching and finish decisions. Assess severity: isolated hairlines need minimal work; structural cracks need more. Use the table below to visualize scope vs. impact.
| Damage Scope | Likely Impact |
|---|---|
| Minor hairlines | Low cost, quick patch |
| Moderate cracks | Medium cost, texture work |
| Widespread failure | High cost, extensive prep |
Repair Material Costs
Because small cracks and hairlines need different materials and quantities than large fractures, your material costs can vary considerably depending on the scope of repairs. You’ll pay more if you need specialized stucco patch, bonding agents, and flexible caulks for hairline stabilization versus bulk fillers for wide gaps.
Primer, texture blends, and touch-up pigments add cost if you want seamless results that respect color psychology and curb appeal. Choosing eco-friendly paints and low-VOC primers raises upfront material expenses but can lower long-term maintenance and health risks.
Budget for miscellaneous items like tape, sandpaper, and mixing tools to avoid surprises.
Labor Time Added
How much extra time will repairing cracks and hairlines add to your painting job? You’ll spend additional hours prepping, filling, sanding, and curing before any color blending happens.
Small hairline repairs might take a few extra hours. Larger cracks or widespread damage can add a day or more.
Skilled crews work faster but still need time for patch drying and texture matching, which affects labor cost.
If you choose eco-friendly paints, curing and application steps can differ slightly, influencing schedule.
Plan on allocating contingency time for retexturing and touch-ups to guarantee a seamless, long-lasting finish.
Pricing Stucco Patching and Re‑Texturing
Wondering what drives the cost to patch and re-texture stucco on your home? You’ll pay for patch size, texture match complexity, access difficulty, and whether you want color selection or eco friendly paints included. Small holes and simple re-texturing are inexpensive; large areas or custom textures cost more. Labor skill for seamless blends raises prices. Ask for samples and warranties.
| Item | Typical Cost | Impact |
|---|---|---|
| Small patch | $50–$150 | Low |
| Large patch | $200–$800 | High |
| Full re-texture | $800–$2,500 | Very High |
| Paint upgrade | +$100–$600 | Moderate |
When Hidden Substrate Damage Raises Expenses
If crews uncover rot, mold, or deteriorated lath beneath your stucco, expect costs to climb quickly since repairs go well beyond surface patching. You’ll pay for demolition, substrate replacement, flashing repair, and reattachment of new lath or sheathing where hidden substrate has failed.
Contractors will trace moisture infiltration sources—leaky windows, roof issues, or poor drainage—and fix them before refinishing. That diagnostic work, plus ordering specialty materials and ensuring proper drying, adds labor hours.
Get written scopes and line-item estimates so you know which charges address structural repair versus cosmetic repainting, and factor contingency for surprises uncovered during work.
Mold, Mildew, and Remediation Costs
Why does mold on stucco drive up costs so quickly? You’ll face added labor, testing, and containment before painting. Mold remediation steps remove spores; you’ll pay more if damage is hidden. Mildew prevention treatments cut recurrence risk but add to upfront cost. Consider these typical line items:
| Task | Typical Cost Range | Notes |
|---|---|---|
| Inspection | $100–$400 | Finds extent |
| Testing | $150–$600 | Identifies species |
| Remediation | $500–$5,000+ | Includes containment |
| Preventive treatment | $50–$300 | Mildew prevention chemicals |
Plan for remediation early to avoid surprises and delays in your paint project.
Waterproofing and Sealing: Cost and Benefits
Because stucco absorbs moisture over time, waterproofing and sealing become essential steps before you paint. You’ll evaluate waterproofing techniques like exterior-grade water repellents, elastomeric coatings, and breathable membranes to block moisture while letting vapor escape.
Costs vary by product and labor—expect higher upfront prices for long-lasting systems. Sealing benefits include reduced water intrusion, less mold risk, longer paint adhesion, and lower maintenance frequency.
You should budget for surface prep, crack repair, and professional application for best results. Investing in proper waterproofing and sealing saves repainting and remediation costs down the road, improving overall durability and appearance.
How Many Coats a Stucco House Needs?
After you’ve handled waterproofing and sealing, you’ll want to decide how many paint coats your stucco needs to get lasting coverage and protection. You’ll typically apply two coats: a base coat for adhesion and an additional coat for uniform color and durability.
Textured stucco might need extra touch-ups in crevices. If you’re changing color schemes drastically, allow extra coverage to prevent show-through.
Use quality exterior formulas and consider eco-friendly paints to reduce VOCs and environmental impact. Allow proper drying between coats, follow manufacturer recoat times, and inspect for thin spots before declaring the job done.
Does Stucco Require Special Primers?
If your stucco is new, chalky, patched, or particularly porous, you’ll want a specialty primer formulated for masonry or cementitious surfaces to guarantee proper adhesion and even coverage. You’ll choose primers that block stains, seal texture, and promote longevity; they also influence final color, so consider color psychology when picking hues. Eco friendly paints and low-VOC primers work well with breathable stucco systems. Quick-reference:
| Surface | Purpose | Benefit |
|---|---|---|
| New stucco | Seal pores | Even finish |
| Patched areas | Bonding | Prevent flaking |
| Chalky | Stabilize | True color |
Always test a small area before full application.
Primer Options and Their Price Differences
Now you’ll compare common primer types for stucco—acrylic, latex, and bonding primers—and how their performance differs.
You’ll also look at typical cost per gallon so you can weigh upfront price against longevity and coverage. That way you can pick the primer that fits your budget and the job’s needs.
Primer Types Compared
While choosing a primer might seem like a small step, it plays a big role in how your stucco finish looks and lasts. You’ll weigh adhesion, sealing, and breathability against color trends and environmental impact.
Pick acrylic for flexibility and mildew resistance, oil-based for stain blocking, or shellac for tough stains.
Compare benefits and prices:
- Acrylic — breathable, UV-stable, mid-price.
- Oil-based — excellent block, less breathable, pricier.
- Shellac — strong stain seal, low tolerance for moisture, variable cost.
Match primer type to your stucco condition and long-term color goals to get the best value.
Cost Per Gallon
Picking the right primer affects more than performance—you’ll also see a big difference in price per gallon.
You’ll find basic acrylic primers around $15–$25 per gallon, offering good adhesion and fair coverage for stucco.
Masonry or block primers run $25–$40, sealing porous textures better.
High-build or stain-blocking primers cost $35–$60, worth it if you’re covering repairs or heavy stains.
Specialty eco-friendly paints and primers cost more, often $40–$80, but they reduce VOCs and help with sensitive occupants.
Remember color selection can affect how many coats you need, changing total primer volume and cost.
Which Paint Types Work Best on Stucco?
Which paint will hold up best on stucco depends on the surface’s porosity and your climate; you’ll usually get the best results with high-quality acrylic latex or elastomeric coatings. You’ll pick based on breathability, flexibility, and longevity.
Consider these options:
- Acrylic latex — breathable, resists fading, good for varied Color schemes.
- Elastomeric — seals hairline cracks, great for wetter climates.
- Masonry or mineral paints — durable for highly porous stucco and resist efflorescence.
Also look for Eco friendly paints with low-VOC formulas if you want lower odor and environmental impact.
Prep and primer remain critical for adhesion.
Price Differences: Premium vs. Budget Paints
When you compare premium and budget paints, you’ll notice differences in coverage and hiding power that affect how much paint you need.
Premium formulas usually offer better durability and weather resistance, so they protect stucco longer.
That higher upfront cost can pay off through fewer repainting cycles and lower long-term expenses.
Coverage And Hiding Power
Because stucco’s textured surface soaks up paint unevenly, coverage and hiding power matter more than you might expect — and that’s where premium and budget paints really diverge. You’ll notice premium formulas cover in fewer coats, saving time and labor despite higher upfront cost.
Budget paints often need extra coats, especially with drastic color changes or porous patches. Consider finish, pigment quality, and available color options, including eco-friendly paints if you prefer low-VOC choices.
Compare these three factors when estimating cost:
- Coats required
- Pigment concentration
- Application efficiency
Choose the option that fits your budget and goals.
Durability And Weather Resistance
If you want paint that stands up to sun, rain, and temperature swings, premium stucco paints will usually outperform budget options in longevity and weather resistance. You’ll get tougher binders, better UV inhibitors, and flexible films that resist cracking on textured stucco.
Budget paints may look fine short-term but can chalk, fade, or peel faster, forcing touch-ups. Choose premium if you value consistent performance across varied climates; consult local weather forecasting before application to avoid trapping moisture.
Premiums also keep color palettes truer longer, so your chosen tones stay vibrant without frequent repainting or extensive prep.
Long-Term Cost Efficiency
Although premium stucco paints cost more up front, they’ll often save you money over time by lasting longer, holding color, and cutting down on repairs and repaint cycles. You’ll weigh upfront price against maintenance, fade resistance, and warranty support.
Premium options usually resist chalking and moisture, so you repaint less often. Budget paints might tempt you, but frequent touch-ups add labor costs and disruption.
Consider your Color choices and whether Eco friendly paints matter to resale value or regulations. Compare lifecycle cost, not just sticker price. Estimate total cost over 10–15 years, including materials, labor, and expected repaint frequency.
- Longer lifespan
- Fewer repairs
- Better resale impact
How Paint Lifespan Affects Long‑Term Value
When you choose longer‑lasting exterior paint, you lower maintenance costs, preserve curb appeal, and protect your stucco against moisture and UV damage for years, which all add measurable long‑term value to your home.
Choosing longer‑lasting exterior paint cuts maintenance, protects stucco, preserves curb appeal, and boosts long‑term home value.
You’ll save on frequent repainting and repairs, freeing funds for other upgrades that boost resale appeal. Durable coatings resist staining and cracking, keeping surfaces sound and reducing warranty and insurance headaches.
Select finishes that support color psychology to influence buyer perception and consider eco-friendly paints to appeal to green-minded purchasers while minimizing VOC exposure.
In short, lifespan equals reduced expense and stronger marketability over time.
Color Choice: Labor, Material, and Heat Effects
Because color affects more than curb appeal, you should factor labor, material, and heat implications into your stucco paint choice. You’ll use color psychology to influence perception, but cost and effort vary with shade and finish.
Dark tones may need more coats and touchups; light tones can hide imperfections yet show dirt differently. Consider heat reflection and its effect on interior temperature when picking hues.
- Dark colors: higher labor (more coats), slightly higher material usage.
- Light colors: easier coverage, lower touchup frequency.
- Midtones: balance of cost and maintenance.
Reflective and Energy‑Saving Coatings Cost
If you want to cut cooling costs and protect stucco, reflective and energy‑saving coatings add an upfront premium but deliver measurable savings over time. You’ll pay more per square foot for specialized formulations and professional application, yet lower HVAC loads can recoup that cost in years.
Choose eco friendly coatings with high solar reflectance and emissivity ratings to maximize benefit. Reflective finishes often require primer compatibility checks and occasional recoat schedules different from standard paint.
Get contractor estimates that project energy savings and lifespan so you can compare payback periods and decide if the upgrade fits your budget.
Spray vs. Brush‑And‑Roll: Cost and Finish Tradeoffs
Choosing reflective coatings can affect application method, so you’ll want to weigh spray versus brush-and-roll choices before committing. You’ll balance speed, coverage, and finish while considering color psychology and eco-friendly paints.
Choosing reflective coatings influences application—balance spray vs. brush-and-roll for speed, coverage, finish, and eco-friendly color choices.
- Spray: faster, thinner coats, better uniformity on complex areas, may need more material and masking.
- Brush-and-roll: slower, thicker coverage, easier edge control, less overspray and waste.
- Hybrid approach: spray broad areas, cut in with brush for detail and touch-ups.
Pick spray for speed and seamless look; choose brush-and-roll if you prioritize material efficiency, control, and lower cleanup impact.
How Stucco Texture Affects Labor Time and Price
Your stucco’s texture directly shapes how much prep work you’ll need, since rough or heavily textured surfaces take longer to clean and patch.
The finish you choose—smooth, sand, or heavy knockdown—also changes the time it takes to apply paint and the tools required.
That extra effort on textured walls usually shows up in higher labor costs.
Texture Determines Prep Time
Because stucco textures range from smooth to heavily broomed or knockdown, they directly change how much prep time you’ll need before painting. You’ll spend more time cleaning, patching, and masking on rough textures, and your chosen color schemes and paint sheen affect layering decisions.
Estimate labor increases for deep crevices and repairs; contractors charge accordingly. Consider these prep steps:
- Power-wash and mildew removal for porous textures.
- Fill and sand cracks on broomed or rough stucco.
- Masking and priming for precise color schemes and desired paint sheen.
Knowing texture up front helps you budget realistic labor time and costs.
Finish Type Alters Effort
When you pick a finish—flat, satin, or high-gloss—the texture of your stucco dictates how much labor and finesse the crew will need, since smoother finishes hide imperfections while glossy or specialty coatings demand flawless prep and steadier application. You’ll pay more for glassy or specialty finishes because crews sand, prime, and apply with tighter tolerances. Color psychology can push choices toward richer pigments, affecting coats needed. Eco friendly paints may cost more but often require similar labor. Consider texture plus finish when budgeting: smoother = more prep, textured = careful coverage.
| Finish Type | Typical Effort |
|---|---|
| Flat/Textured | Moderate |
| Satin | Higher |
| High-Gloss/Specialty | Highest |
Re‑Texturing vs. Matching Existing Finish: Costs
If you’re weighing re-texturing against matching the existing stucco finish, cost differences often hinge on labor time and material needs. You’ll face choices: a full texture re‑texture to modernize surfaces or precise color matching to preserve the original look. Each affects price differently.
- Re‑texture: more labor, higher material volume, higher cost.
- Color matching: skilled blending, modest materials, moderate cost.
- Partial touch-up: limited scope, lower labor, lowest cost.
You should get quotes detailing texture technique, paint type, and color matching methods so you can compare true costs and outcomes.
Accessibility, Scaffolding, and Equipment Pricing
While the surface area and finish matter, accessibility and the equipment needed often drive a large portion of your stucco painting bill. You’ll pay more if crews need specialized lifts, multiple scaffolding sections, or extended setup for tight corners and steep grades.
Narrow access or landscaping protection raises labor and gear costs. Plan for prep equipment, pressure washers, and high-reach tools if you want uniform coverage.
Ask contractors about warranties for work done at height. Also discuss color trends and eco-friendly options—low-VOC paints and recyclable masking materials can add upfront cost but lower long-term impact.
Multi‑Story Homes: Lifts, Scaffolds, and Costs
If your home has multiple stories, you’ll likely need a lift or boom rental to reach high stucco safely.
Scaffolding setup adds labor and rental fees that can considerably affect your total cost.
You’ll also have to account for safety gear and trained operators to meet regulations and protect the crew.
Lift And Boom Rental
Need to reach the second or third story? You’ll likely need a lift rental to work safely and efficiently. Choose based on boom height, platform capacity, and job duration. Compare rates and operator availability so you don’t pay for idle time.
- Rent time: hourly vs. daily rates affect total cost.
- Boom height: match reach to roofline and eaves, add margin for maneuvering.
- Safety extras: harnesses, training, and delivery fees add to the bill.
You can save by scheduling contiguous work and confirming site access; lifts beat ladders for speed and safety on multi‑story stucco.
Scaffolding Setup Costs
When you’re painting a multi‑story stucco house, scaffolding setup often becomes the biggest single equipment expense after paint and labor; you’ll weigh costs for frame, decking, and labor to erect.
You should get quotes that separate daily rental, delivery, and assembly so you can compare true costs. Follow rental procedures closely—permits, site access, and scheduling affect price.
Inspect the rig and confirm scaffolding safety features before work starts; trained crews assemble and adjust heights efficiently.
Budget for teardown and transport too, since multi‑story projects often run longer and require more complex staging than single‑story jobs.
Safety Equipment Requirements
After you’ve compared scaffolding quotes and inspected rigs, it’s time to plan the safety gear that protects your crew and meets code on multi‑story jobs. You’ll follow Safety protocols and equipment standards to minimize risk and liability.
Budget for certified lifts, guardrails, harness systems, and trained operators. Consider inspection logs, fall‑protection anchors, and PPE replacement. Typical costs vary by height, duration, and rental vs. purchase.
- Certified boom or scissor lift rental plus operator training.
- Scaffolding with guardrails, toe boards, and inspection fees.
- Personal fall‑arrest systems, anchors, helmets, and regular inspections.
Landscaping and Masking: Protective Prep Costs
How will you protect plants, hardscaping, and outdoor fixtures before painters arrive? You’ll invest in landscape barriers and masking techniques to shield shrubs, flower beds, patios, and lighting.
Expect costs for heavy-duty tarps, breathable plant covers, stakes, and professional-grade masking film and tape. Labor includes careful placement and secure fastening so wind won’t expose surfaces.
If irrigation heads or delicate ornamentation need removal or wrapping, factor that in. Proper prep prevents paint damage and cleanup time, often saving money by avoiding plant replacement or surface restoration.
Budget typically ranges modestly but varies with yard size and complexity.
Window, Trim, Soffit, and Fascia Pricing Details
Because these elements sit at visible junctions and endure weather, you’ll pay close attention to windows, trim, soffits, and fascia—both for material quality and labor precision.
You’ll face higher costs for scraping, caulking, and priming tight joints; delicate work around glass needs time.
Choices like color selection and paint sheen affect price only slightly, but specialty finishes or higher-sheen paints cost more.
Typical pricing factors:
- Labor intensity — detail work raises hourly rates.
- Materials — primers, elastomeric for soffits/fascia, sealants.
- Accessibility — ladders or lifts add to cost.
Get itemized bids to compare.
Trim and Accent Painting Priced Separately
When you separate trim and accent painting from the main stucco job, you’ll usually see a different pricing structure because these areas demand finer prep, more precise brushwork, and sometimes specialty paints.
You’ll pay more per linear foot or hour for detailed work like window casings, decorative mouldings, and columns. Expect extra costs for sanding, priming bare wood, and cutting in tight joints.
Discuss color selection carefully—contrasting hues can accentuate architectural features. Also confirm paint sheen for durability and desired look; satin or semi-gloss often gets recommended.
Get written line-item estimates to avoid surprises.
Safety, Fall Protection, and Insurance Costs
When you budget for exterior stucco painting, don’t forget fall arrest systems and other fall protection gear—they can add significant labor and equipment cost.
You’ll also need to weigh scaffolding versus ladders for safety, access, and time efficiency.
Finally, ask contractors about how these safety measures affect their insurance premiums and whether that cost is passed to you.
Fall Arrest Systems
How will you keep crews safe on tall stucco jobs? You’ll invest in certified fall arrest systems and train workers to inspect and use safety harnesses every time. Proper equipment lowers accidents and insurance costs.
- Anchor points: install rated, inspected anchors for secure tie-offs.
- Harnesses and lanyards: provide fit-tested safety harnesses with shock-absorbing connectors.
- Rescue plan: maintain a practiced retrieval procedure and emergency communication.
Document inspections and training to satisfy insurers and reduce liability. Prioritize reliable gear and routine checks so crews stay protected and your project stays on schedule without costly incidents.
Scaffolding Versus Ladders
Although ladders can seem quicker and cheaper for small jobs, choosing scaffolding for tall stucco work usually gives you safer, more efficient access and lower long-term risk.
You’ll appreciate scaffolding safety: stable platforms, guardrails, and easier tool staging reduce fatigue and slips while you paint large elevations. Ladders may work for brief touch-ups, but ladder stability depends on proper setup, footing, and constant repositioning, increasing exposure to falls.
Using scaffolding lets you maintain a steady pace and minimizes repeated climbs. Weigh rental and setup costs against reduced accident likelihood and productivity losses when planning your exterior stucco painting project.
Insurance Premium Considerations
Why does fall protection matter for your insurance rates? You’ll keep costs down by showing proper fall protection reduces claims. Insurance considerations weigh safety plans, training, and equipment when setting premiums.
- Documented training and PPE lower liability exposure.
- Using scaffolding with guardrails beats ladder-only work for insurer confidence.
- Regular equipment inspection and incident logs demonstrate risk control.
You should communicate these premium factors to prospective contractors and your insurer before work begins. Clear records and contractor compliance often translate into lower insurance costs and smoother claims handling if accidents occur.
Seasonal Scheduling and Weather Impacts on Price
When you schedule exterior stucco painting, the season and local weather largely determine timing, cost, and the likelihood of delays. You’ll see seasonal pricing spikes in spring and fall when demand and mild temperatures align.
Winter or rainy seasons often reduce availability and raise mobilization fees. Weather delays—rain, high humidity, freezing temps—force re-coats, extend timelines, or require special primers and sealants that add labor and materials.
You can lower risk by choosing shoulder seasons, monitoring forecasts, and booking flexible windows. Contractors may charge a weather contingency; get that spelled out in your contract to avoid surprises.
Regional Labor Rates and What to Expect
Season and weather affect scheduling, but where you live has an even bigger say in what you’ll pay for labor. Regional differences drive cost variability: urban centers and high-cost states typically charge more per hour than rural areas.
Season and weather influence timing, but location—city versus rural—most strongly determines labor rates and scheduling.
You’ll want to factor in travel time, local licensing, and union rates if applicable.
Expect clear patterns:
- High-demand metros: premium hourly rates, faster timelines.
- Suburban areas: moderate rates, more competitive bids.
- Rural regions: lower rates but possible travel surcharges.
Get multiple local quotes, compare line-item labor, and confirm estimated hours so you can budget accurately.
Contractor Overhead, Profit, and Typical Margins
When you get estimates, know that contractors build in overhead—rent, insurance, equipment, and office costs—which you’re indirectly paying for. They’ll also add a profit margin, commonly between 10–25%, depending on company size and local competition.
Those two factors together can shift the final price considerably, so ask for a simple breakdown to see where your money goes.
Overhead Components Breakdown
Because overhead and profit drive how contractors price a stucco repaint, you should know what those line items cover and how they’re typically calculated. You’ll see costs beyond labor and materials—permits, insurance, equipment, and office expenses—and choices like eco-friendly paints or color psychology can affect material cost.
Typical overhead components include:
- Administrative: permits, office, taxes, and insurance.
- Jobsite: scaffolding, safety gear, cleanup, and waste disposal.
- Materials markup: paint, primers, and specialty coatings.
Knowing these lets you question estimates and compare contractors fairly without confusing profit with necessary overhead.
Typical Profit Margins
Now that you know what overhead covers, you’ll want to understand how contractors set profit on top of those costs. You’ll typically see profit margins between 10–25% depending on project risk, demand, and specialty finishes like historical styles or eco friendly paints that command premiums. Higher margins cover warranty risk, crew availability, and certification costs. Ask for itemized bids so you can spot markup versus legitimate extra expenses. Compare quotes and check references to verify margins align with local norms rather than gouging.
| Scenario | Typical Margin | Notes |
|---|---|---|
| Standard job | 10–15% | Competitive |
| Specialty finish | 15–25% | Historical styles, eco friendly paints |
Impact On Final Price
Although overhead and profit might seem like small line items, they directly shape the bid you’ll pay and the options a contractor offers. You’ll see base labor, insurance, equipment, and admin wrapped into overhead, while profit funds business viability.
Recognize typical margins of 10–25% paid on top of costs; higher margins often mean more reliable crews and warranties.
- Lower margin bids may cut corners on prep or materials.
- Mid-range margins balance quality and price for most homeowners.
- Higher margins provide extras like color consultation blending with interior decor and even minor gardening tips to protect plants during work.
Adjust expectations accordingly.
How to Request Comparable Written Contractor Quotes?
When you ask contractors for written quotes, give each the same project brief, timeline, and material specs so you can compare apples to apples.
Ask for color selection details, including brand and finish, and whether they’ll supply swatches.
Include color choices with brand and finish, and ask whether the contractor will provide physical swatches.
Request labor hours, prep steps, primer type, and paint brand with VOC levels so you can evaluate eco friendly options.
Insist on start/end dates, payment schedule, warranty length, and change-order terms.
Specify cleanup and disposal responsibilities.
Tell them to itemize extras like repairs or scaffolding.
Require signatures and a validity date.
Keep communications in writing for clear comparisons.
Comparing Itemized Estimates for Stucco Painting
With comparable written quotes in hand, you’re ready to compare itemized estimates for stucco painting line by line. Check scope, materials, and prep so you’re not comparing apples to oranges. Note color trends that affect pricing for specialty finishes and ask if pigment-heavy shades carry upcharges. Prioritize durable primers and eco-friendly paints if low-VOC options matter to you.
Watch labor hours, warranty length, and waste disposal fees. Use this quick checklist to decide:
- Prep and repair details
- Paint brand, finish, and eco-friendly paints listed
- Labor, timeline, and warranty coverage
Vetting Contractors: Questions and Red Flags
Before you sign a contract, make sure the contractor has current licenses and liability and workers’ comp insurance so you won’t be on the hook for accidents or code violations.
Ask for references, proof of past stucco work, and a clear written scope and timeline.
Watch for red flags like vague estimates, high-pressure sales, or lack of paperwork—they usually mean trouble ahead.
License And Insurance
Why should you care about a contractor’s license and insurance? You need proof they meet local codes, handle claims, and respect special requirements like historical preservation or eco-friendly options on older homes. Ask for documents and verify them with licensing boards and insurers.
- Confirm active license and scope covers stucco work.
- Verify general liability and worker’s comp limits.
- Request certificates naming you as additional insured for project duration.
Insist on written confirmation before work starts so you won’t inherit liability, fines, or uncovered damages—especially on delicate or regulated exteriors.
Red Flags To Watch
Knowing a contractor has the right license and insurance is only the start; now watch for warning signs that suggest you might be taking on risk.
If they dodge questions about experience with historical textures or share no portfolio, pause. Avoid crews that demand large upfront cash, won’t provide a written estimate, or lack a clear timeline.
Be wary if they dismiss substrate prep, glaze compatibility, or offer ultra-low bids—these often skip necessary repairs.
Ask about eco-friendly pigments and request product data sheets.
Check references, confirm permits, and trust your instincts if communication is evasive or inconsistent.
How to Check References and Past Stucco Jobs?
When you call a contractor for references, ask for recent stucco jobs in your area and follow up with the homeowners they provide. You’ll get the clearest picture by seeing the work in person, asking about adhesion, cracking, color consistency, and how the crew handled prep and cleanup.
Also ask whether they respected any historical preservation rules and if color psychology guided the choices.
- Visit sites: inspect texture, seams, and flashing.
- Ask homeowners: punctuality, warranty, and cleanup.
- Request permits/photos: confirm proper prep, substrate repair, and final coat quality.
Negotiating Price Without Cutting Quality
Although you want the best price, don’t trade quality for savings; start by getting three detailed bids that break out prep, repairs, materials, and labor so you can compare apples to apples.
Ask contractors to justify costs and suggest alternatives—different color palettes may affect labor and material needs.
Negotiate by removing nonessential upgrades or scheduling during slower seasons to lower labor rates, but insist on specified warranties and surface prep standards.
Request eco-friendly coatings as options; they can be cost-competitive and add resale value.
Pay for proven skills, documented repairs, and clear timelines rather than the lowest bid.
DIY Stucco Painting: Realistic Cost Comparison
If you’re thinking about painting stucco yourself, compare the upfront cost of materials like primer, elastomeric paint, rollers, and scaffolding rentals to professional quotes.
Factor in the time you’ll spend—DIY saves on labor costs but can eat weekends and delay other projects.
Also consider long-term maintenance: poor prep or application can increase repainting frequency and overall lifetime cost.
Cost Of Materials
Because you’ll be buying everything—from primer and elastomeric paint to caulk, mesh tape, and brushes—the material list drives most of your DIY stucco painting budget.
You’ll weigh product choices: primer quality, elastomeric vs. standard paint, Color selection impact on coverage, and Eco friendly paints premium pricing.
Typical material items and rough cost ranges:
- Primer, caulk, mesh tape: $80–$200
- Elastomeric paint (gallons) + rollers/brushes: $200–$800
- Misc supplies (ladders rental, drop cloths, cleaners): $30–$150
Total usually falls between $310 and $1,150 depending on size and choices.
Labor Time Savings
Material costs give you a clear baseline, but labor time is where most DIY savings actually show up — or evaporate. You’ll save if you’re efficient and already own scaffolding, sprayers, and safety gear; otherwise rental and setup chew hours.
Factor prep: power washing, patching, masking around exterior lighting, and protecting garden landscaping add time. Working solo extends hours; recruiting help speeds things but cuts savings.
Estimate realistic daily productivity—surface area, weather limits, and curing times pace you. Compare that multiplied labor-hours to pro quotes; often the real decision hinges on time value, not just dollars.
Long-Term Maintenance
When you factor long-term maintenance into a DIY stucco painting decision, the upfront savings can evaporate if you don’t account for periodic upkeep—crack monitoring, touch-ups, resealing, and repainting every 7–10 years depending on climate and product quality.
You’ll inspect seams, repair hairline cracks, and refresh coatings to protect substrate and preserve color coordination and desired paint sheen. Budgeting saves surprises.
- Annual inspection costs
- Patch and caulk supplies
- Full repaint cycle
If you skip routine care, degradation accelerates, raising labor and material costs and undermining the aesthetic and protective value you hoped to keep.
Tools, Rentals, and Supply Costs for DIYers
If you’re tackling stucco painting yourself, you’ll need a clear list of tools, possible rentals, and typical supply costs so you can budget accurately.
You’ll choose paint based on color schemes and account for how exterior textures affect coverage. Essential purchases include high-quality masonry or elastomeric paint, primer, caulk, brushes, rollers with nap suited for stucco, extension poles, drop cloths, masking tape, and safety gear.
Rent a pressure washer for cleaning and a scaffold or articulating lift for height work; ladders suffice for single-story homes.
Expect total DIY supply and rental costs to range widely—plan realistically and buy durability.
When to Hire Pros vs. Repainting Yourself?
Decide whether the job’s scope and complexity is something you can handle or better left to pros. Think about the time and skill required—large surfaces, repairs, or tricky textures often need experienced crews.
Weigh the raw cost against the long-term value of a durable, properly applied finish before you commit.
Scope And Complexity
Because exterior painting ranges from a weekend refresh to a multi-week renovation, you should match the job to your skills, time, and tolerance for risk.
Assess scope: cracking stucco, height, trim detail, and whether you’re changing colors that require multiple coats or primer.
Consider color psychology and historical styles if you’re altering curb appeal or staying period-appropriate.
If structural repairs, extensive patching, or high scaffolding are needed, hire pros.
If it’s low, single-story touch-up, DIY can work.
- Minor touch-ups: DIY
- Moderate repairs: Pros recommended
- Full overhaul/color change: Hire pros
Time And Skill
When you’re weighing whether to tackle stucco repainting yourself or call in pros, match the job’s timeline and technical demands to your available hours and skill level.
If you’ve painted before and can prep cracks, pressure-wash, and mask trim, DIY saves money. Consider color selection carefully—complex palettes or matching existing tones may warrant a pro’s eye.
Pros manage scaffolding, textured application, and monitor paint drying in variable weather to ensure adhesion and uniform finish.
Hire professionals if the job’s large, requires repairs, or you lack time; DIY when scope is small, conditions are good, and you’re confident.
Cost Versus Value
If your goal is to balance upfront cost with long-term value, weigh what you can realistically handle against the risks of cutting corners: DIY saves labor expenses but can cost more later if improper prep, wrong coatings, or missed repairs lead to peeling or water damage.
You should hire pros when structural repairs, high scaffolding, or complex textures demand skill. Do it yourself if you’re confident in patching, choosing breathable stucco primers, and selecting eco-friendly paints.
Also consider color psychology for curb appeal and resale.
Decide based on safety, warranty need, and expected lifespan.
- Safety risk
- Warranty
- Lifespan
Permits, Local Rules, and Color‑Change Approvals
Before you grab a paintbrush, check local permits and rules so your exterior refresh won’t be delayed or fined. You’ll need to learn the permits process for your city or HOA; some areas require a simple permit, others need detailed plans.
If you live in a historic district or under an HOA, submit a color approval request with swatches or samples. Expect review timelines and possible revision requests.
Budget time and modest fees into your project schedule. Follow local rules for working hours, scaffolding, and disposal to avoid citations and keep the job running smoothly.
Lead Paint Testing and Remediation Costs
Worried about old paint hiding lead? You’ll need lead testing before repainting, especially with historical preservation concerns. Testing pinpoints hazards; remediation adds cost and time.
Consider these steps and typical cost drivers:
- Hire certified inspectors for paint and dust testing.
- Get containment, specialized scraping, and HEPA cleanup if lead’s found.
- Factor in disposal, repaint prep, and possible temporary relocation.
Expect testing from $100–$400; simple remediation runs $500–$2,500, major abatement can exceed $8,000.
Budget extra for contractor compliance and permits tied to historical preservation rules, and insist on clear documentation of results.
Warranties, Workmanship Guarantees, and Value
When you hire a contractor, make sure their warranty spells out what’s covered, for how long, and who’s responsible for fixes—because a strong workmanship guarantee protects your investment and gives you leverage if problems arise.
You’ll want clear warranty coverage that names materials, paint performance, and moisture-related failures. Ask how subcontractors are covered and whether repairs or repainting are included.
Verify workmanship guarantees in writing, including timelines and remedies. Strong guarantees can justify higher bids by reducing your long-term risk, while weak or vague promises may cost you later.
Keep records and get everything signed before work begins.
Budgeting for Unexpected Stucco Repairs
A solid workmanship warranty gives you confidence, but you still need to plan for unexpected stucco repairs that warranties mightn’t cover. When budgeting, include contingency for hidden cracks, substrate damage, and matching existing finishes.
Use cost estimation to set a realistic reserve and factor in partial patching versus full resurfacing. Consider how color selection can affect repair visibility and whether you’ll need blending or full repainting.
- Allocate 10–20% of the painting quote for surprises.
- Get a pros inspection to refine cost estimation.
- Ask about touch-up guarantees and color selection matching.
Financing Options for Large Exterior Paint Jobs
Because large exterior paint projects can run far beyond initial estimates, you’ll want clear financing options before work begins. You can tap savings, a home equity line, or a contractor payment plan; compare rates, terms, and penalties.
Ask contractors about staged payments tied to milestones so you’re not overpaying upfront. Consider a low-interest personal loan if you want predictable monthly payments.
Keep a buffer for repairs that affect garden landscape or for matching new exterior tones to existing interior accents.
Get written quotes, verify license and insurance, and choose the financing route that keeps your budget and timeline intact.
Common Pricing Mistakes Homeowners Make
If you skip the details in bids or focus only on the bottom-line price, you’ll likely pay more in surprises and change orders. You should read scopes carefully, confirm substrate repairs, and verify if premium primers or specialty coatings for stucco are included. Don’t assume color trends choices won’t affect labor or coats needed.
Ask if eco-friendly paints cost extra or require specific application. Watch for these common pricing pitfalls:
Ask whether eco-friendly paints add cost or need special application, and beware common pricing pitfalls.
- Vague scope — missing prep or trim work.
- Hidden fees — disposal, permits, or scaffold rental.
- Lowball bids — contractor cuts corners or omits warranty.
How to Time Your Project for Best Value
When you schedule exterior stucco painting during the shoulder seasons—late spring or early fall—you’ll get the best blend of moderate temperatures, lower humidity, and contractor availability. This combination cuts down on drying issues and rush premiums.
You should plan so contractors can prep and prime without weather delays, which often lowers labor costs. Book estimates early to lock rates and align paint delivery.
Ask about color matching early to avoid delays from special orders, and specify Eco friendly paints if you want low-VOC options—these can sometimes be cheaper off-season and reduce ventilation concerns during application.
Post‑Paint Maintenance Checklist to Extend Life
Once the paint has cured, you’ll keep your stucco looking fresh and protect your investment by following a simple, regular maintenance routine.
Once cured, maintain your stucco with a simple, regular routine to keep it fresh and protected.
Check annually for cracks, blisters, or peeling and repair promptly to avoid moisture intrusion.
Clean gently with low-pressure wash and mild detergent; avoid harsh chemicals to preserve color psychology effects and finish.
Inspect caulking around windows and trim; reseal as needed.
If you used eco-friendly paints, follow manufacturer care guidelines to maintain breathability.
- Wash surfaces every 1–2 years.
- Spot‑repair cracks immediately.
- Recaulk and touch up trim yearly.
How Long a Stucco Paint Job Typically Lasts
Keeping up with annual checks and gentle cleaning helps extend your finish, but you’ll eventually wonder how long a stucco paint job actually lasts.
Typically, quality exterior paint on stucco endures 8–15 years depending on climate, sun exposure, and prep work. Harsh UV and moisture accelerate color fading, so if you see uneven tones or chalking earlier, address it.
Spot repairs and touchups can preserve appearance, though perfect paint matching may be hard as original pigments age. Keep records of the product and batch to improve future matching, and schedule inspections to catch issues before they shorten the coat’s life.
When Repainting Is Better Than Re‑Stuccoing
If the stucco surface has mostly cosmetic issues—fading, minor peeling, or isolated hairline cracks, you’ll usually save time and money by repainting rather than re‑stuccoing. You should choose repainting when the substrate is sound, moisture tests pass, and you want to respect historical preservation guidelines or reduce environmental impact.
Consider these quick checks:
- Surface integrity: no deep cracks or delamination.
- Moisture level: dry and stable beneath the finish.
- Aesthetic goal: color change or protective coating only.
Repainting’s lower cost, faster turnaround, and reduced waste make it the sensible first option.
Frequently Asked Questions
Will Painting Stucco Improve My Home’s Resale Value?
Yes — you’ll boost curb appeal and resale value if you choose color durability and guarantee texture matching; buyers appreciate fresh, consistent finishes, and durable paints reduce maintenance concerns, so your home’ll sell faster and often for more.
Can I Change Stucco Color Dramatically Without Re-Texturing?
Like repainting a weathered canvas, yes—you can achieve dramatic color transformation while preserving texture. You’ll need quality masonry primer and elastomeric or acrylic stucco paint, and contractors who’ll match hue boldly without altering the surface feel.
How Soon After New Stucco Installation Can I Paint It?
You can usually paint new stucco after 28–45 days; you’ll check moisture, cure, and use stucco surface preparation plus paint adhesion techniques like priming and etching to guarantee paint bonds and prevents peeling or blistering.
Are Volcanic Ash or Lime-Based Stucco Types Paintable?
Like holding ancient earth in your hands, you can paint volcanic ash and lime based stucco, but you’ll need proper prep: allow curing, use breathable, mineral or lime-compatible paints, and prime to avoid peeling and efflorescence.
How Do Nearby Trees or Salt Air Affect Paint Longevity?
Nearby trees and salt air shorten paint life: you’ll get damage from tree growth rubbing surfaces, increased shade and moisture, plus salt corrosion eating finishes and causing flaking, so you’ll need more frequent cleaning, inspections, and repainting.
Conclusion
You’ve seen the numbers, figured the measurements, weighed repairs and timing — now decide. Don’t rush: the wrong paint or poor prep will cost you more than patience. Pick quality materials, schedule when the weather cooperates, and commit to maintenance. Do that, and your stucco will look great for years; skip it, and peeling, stains, and surprise repairs will force your hand. Which future do you want to pay for?