How to Dry Paint Fast on Wood (Quick Methods)
Want paint on wood to dry fast? Use thin, even coats, sand lightly between layers, and work in a warm, steady-temperature room (65–80°F) with low humidity. Boost gentle cross‑ventilation with fans and a dehumidifier, choose fast‑dry primers or acrylic lacquers when appropriate, and test tack‑free stages before handling. Avoid thick layers or high heat that cause defects. Follow manufacturer’s recoat times and tips below to learn practical tricks and fixes.
Fastest Ways to Dry Paint on Wood (Quick Answer)
If you’re short on time, use thin coats, good airflow, and warm, low-humidity conditions to speed drying. Thin layers dry faster than one thick one, a fan or open windows remove moisture, and a space heater or warm room cuts drying time.
You’ll thin paint slightly for faster curing, watch color mixing to keep opacity predictable, and pick fast-drying formulas like acrylic or alkyd depending on finish.
Use proper brush selection—synthetic for water-based, natural for oil—to lay smooth, even strokes that dry uniformly.
Choose the right brush—synthetic for water-based, natural for oils—to lay smooth, evenly drying strokes.
Monitor temperature and humidity, avoid overworking wet edges, and let each thin coat set before recoat.
When to Speed Drying and When to Wait
When you’re racing a deadline or working in a damp environment, speed-drying techniques can save a project—but you should slow down when finish quality, adhesion, or long-term durability matter most.
Use fast methods for touch-ups, temporary pieces, or when multiple thin coats are planned.
Wait when exploring color mixing, complex blends, or restoring antiques, since rushing can muddy pigments and spoil layering.
Prioritize waiting if you’re using delicate brush techniques that leave texture or if sanding between coats is required.
Balance urgency with purpose: pick speed only when acceptable, otherwise let proper drying preserve appearance and longevity.
How Paint Type (Latex, Oil, Lacquer) Changes Drying
Different finishes dry at very different speeds, so you’ll want to match your drying strategy to the paint type.
Latex usually skins over in an hour but needs more time to cure. Oil takes longer to dry but tolerates cooler, low-humidity conditions. Lacquer dries fastest in warm, well-ventilated air.
Consider those dry times when you choose temperature, humidity, and airflow to speed curing without harming the finish.
Dry Time By Paint Type
Although wood dries at its own pace, the paint you choose largely controls how quickly the job finishes—latex, oil, and lacquer each dry by different chemistry and on different timelines. You’ll notice drying affects sanding, recoating, and how color mixing behaves; your brush techniques also influence film thickness and evaporation. Choose thinner coats and proper application to speed curing.
- Latex: water-based, dries fast to touch (30–60 minutes), full cure in weeks.
- Oil: solvent-driven, feels dry in 6–8 hours, cures slowly (days–weeks).
- Lacquer: solvent evaporates rapidly, dries within minutes, sensitive to overapplication.
Best Conditions Per Finish
Because each finish responds to temperature, humidity, and airflow in its own way, you’ll want to match your workspace conditions to the paint type you’re using.
For latex, keep temps 60–80°F, moderate humidity, and steady airflow to speed film formation; avoid direct heat that ruins color mixing.
Oil needs warmer, drier air and gentle circulation to oxidize without skinning; thin coats and proper paint storage limit tackiness.
Lacquer dries fastest with warm, low-humidity, high-ventilation setups—use respirators.
Always condition new cans before use, label mixtures, and store sealed in a cool, dark place to preserve consistency and prevent contamination.
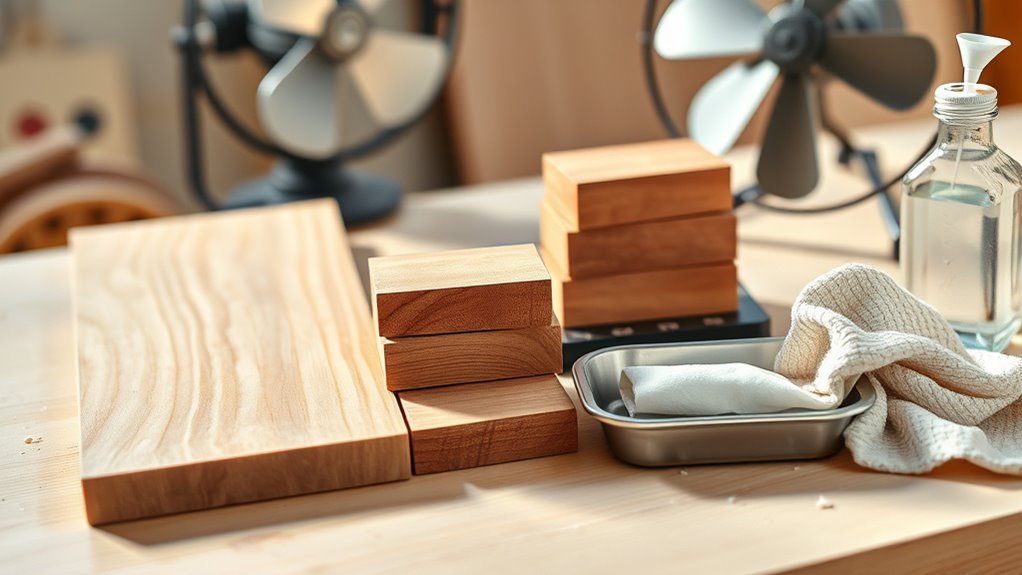
How Wood Species and Grain Affect Drying Speed
When you pick a wood species, you’re also choosing its drying behavior. You’ll notice species effects: open-grained woods like oak absorb more paint and solvent, slowing cure, while tight-grained maple sheds finish and speeds surface drying.
Grain orientation also matters — end grain drinks faster than face grain, creating uneven drying. Adjust expectations by recognizing how Wood grain and species effects interact so you can plan coats and drying time.
- Open-grained woods increase soak-in and extend tack time.
- Tight-grained woods promote quicker surface set.
- End grain dries fastest, causing darker, faster-drying spots.
Prep Steps That Speed Drying and Improve Finish
If you want faster drying and a smoother result, prep your wood carefully: sand to a consistent grit, remove dust, and seal bare end grain. Start with a progressive sanding plan, ending at the grit suited to your paint type.
Wipe with a tack cloth, then use a primer or sanding sealer to promote adhesion and speed moisture escape.
Patch holes and fill open grain where needed to avoid uneven absorption that slows drying and ruins color blending.
Lightly scuff between coats for texture enhancement and adhesion.
Proper temperature, ventilation, and clean tools round out efficient, professional prep.
Thin Coats vs Thick Coats: Drying Explained
Although tempting to glob on a thick coat to finish faster, you’ll actually slow drying and risk runs, tackiness, and uneven curing. You should apply thin, even layers so solvent evaporates uniformly and binders cure properly.
Thin coats let you control color mixing subtly between layers and reduce visible brush strokes, while thick coats trap solvents and stay soft longer. Wait recommended recoat times, sand lightly between layers, and build opacity with multiple passes.
Use these principles to keep finish durable and smooth:
- Layer thinly to avoid sagging and long cure times
- Feather edges to hide brush strokes
- Space coats for proper solvent release
Using Heat Safely: Hair Dryer, Heat Gun, Heater Tips
Pick a safe heat source—use a hair dryer or space heater on low for gentle warmth, and reserve heat guns for small, controlled areas.
Keep the tool moving and hold it at a safe distance to avoid scorching or blistering the paint.
Watch the temperature and the wood closely so you stop at the first sign of softening or smoke.
Choose Safe Heat Source
When you’re trying to speed up drying, choosing a safe heat source matters as much as the paint and ventilation. The wrong tool or technique can scorch the wood, bubble the finish, or create a fire risk.
Pick a method matching paint type and space. Use safety gear, follow ventilation tips, and keep combustible materials away.
Electric hair dryers work for small spots. Heat guns offer power but need care. Portable heaters can dry rooms but raise humidity and risk.
Monitor continuously, never leave devices unattended, and have a fire extinguisher nearby.
- Match tool to task
- Monitor temperature and time
- Prioritize protective gear
Maintain Proper Distance
Now that you’ve chosen the right heat source and taken safety precautions, keep a safe distance between the device and the wood so you don’t scorch the finish or cause blistering.
Hold a hair dryer about 6–12 inches away, a heat gun 8–12 inches on low, and a room heater farther back. Move steadily to avoid hot spots.
Test on scrap to see how paint responds before working on visible pieces.
Maintain distance also preserves subtle color mixing and prevents varnish breakdown.
When finished, let paint cool fully before handling and do brush cleaning away from heat to avoid burns or warp.
Monitor Temperature And Movement
Keeping a close eye on temperature and motion will prevent overheating and uneven drying, so watch the heat source and keep it moving. You’ll use a hair dryer, heat gun, or space heater sparingly; adjust heat to avoid blistering finish or altering paint color. Keep airflow steady, maintain distance, and never concentrate on one spot. Rotate the piece or sweep across the surface in smooth passes.
Combine controlled heat with proper brush techniques to avoid lap marks and streaks. Safety matters: monitor device temperature and ventilate the area to disperse fumes and reduce fire risk.
- Sweep heat across panels evenly
- Pause frequently to cool surface
- Check paint color under natural light
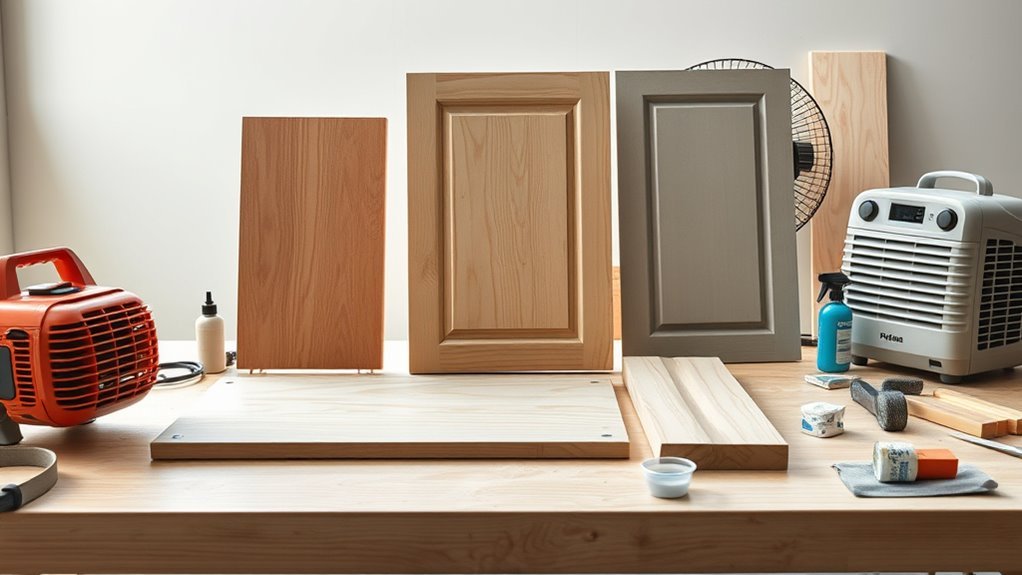
Boost Airflow: Fans, Cross‑Ventilation, Placement
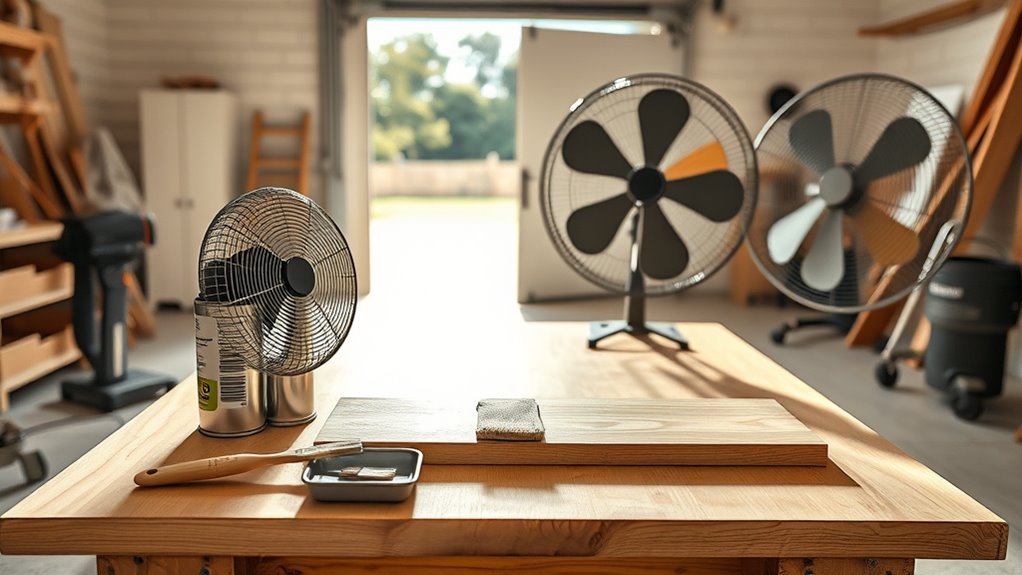
Because paint dries as solvents evaporate, speeding airflow around a project cuts drying time considerably. You’ll get the best results by combining fans, cross‑ventilation, and smart placement.
Position a box or oscillating fan to sweep air across surfaces without blasting paint. Gentle steady flow prevents dust specks and helps even color matching by avoiding puddling.
Open opposing windows or doors to create cross‑ventilation, directing drafts parallel to the grain to limit airborne debris settling into wood grain.
Elevate pieces on sawhorses or blocks so air reaches all sides. Rotate or flip items when tack-free to expose wet areas evenly to moving air.
Control Humidity: Dehumidifiers and Home Fixes
If the air in your workspace stays damp, paint will take far longer to cure, so use a dehumidifier or simple home fixes to speed evaporation and prevent tacky finishes. You’ll control moisture to protect Color matching and preserve the desired Finish sheen.
Run a portable dehumidifier during and after painting, empty it regularly, and set it for moderate extraction.
Run a portable dehumidifier while and after painting—empty it often and set it to moderate extraction to speed drying.
For low-tech fixes, use desiccant packs, silica, or rock salt in breathable containers.
Monitor humidity with an inexpensive hygrometer and adjust ventilation accordingly.
These steps help layers harden evenly, avoid bloom or blushing, and keep your woodwork looking right.
Optimal Room Temperatures for Fast Drying
Humidity and temperature work together, so once you’ve controlled moisture, set the room temperature to help paint cure quickly and evenly.
Aim for 65–75°F (18–24°C) for most latex paints; oil-based needs slightly warmer 70–80°F (21–27°C).
Keep temperatures steady—fluctuations slow curing and can affect Color matching as pigments settle differently.
Good airflow without drafts helps; use fans to circulate air gently.
Avoid heating that dries the surface too fast, which can cause tackiness or brush marks; adjust Brush selection and technique for warmer conditions to prevent streaks.
Monitor with a thermometer and adjust gradually.
Additives and Accelerators: Benefits and Risks
You can speed up drying with chemical accelerators or water-based additives, each designed for specific paint types.
Know the risks—accelerators can alter finish, reduce working time, or cause cracking if misused.
Always follow manufacturer instructions, wear proper PPE, and test on scrap wood before applying to your project.
Types Of Accelerators
Wondering which additives actually speed up paint drying on wood? You’ll encounter solvent thinners, fast-evaporation extenders, and catalytic hardeners.
With smart paint mixing and proper brush selection, you control consistency and application thickness, helping accelerators work as *meant*ed. Choose based on paint type: waterbased accept glycol-based driers; alkyds take solvent-based additives; two-part systems use catalysts.
Follow manufacturer ratios for predictable cure times. Accelerators alter viscosity and drying chemistry, so test on scrap wood first to confirm appearance and adhesion.
- Rapid evaporation: shortens surface tack
- Catalysts: boost chemical cure
- Viscosity modifiers: aid leveling
Risks And Precautions
After learning how different accelerators speed drying and change handling, it’s important to weigh the risks before you add them to paint. You’ll gain faster cures but also face lowered open time, altered finish, and potential brittleness.
Some additives release VOCs or hazardous byproducts, so consider environmental concerns and local regulations. Always wear gloves, goggles, and a respirator when mixing; work in ventilation; test on scrap wood.
Don’t overdo dosing—follow manufacturer rates. For leftover mix, follow proper paint disposal rules; never pour down drains.
When in doubt, consult the product SDS and choose low‑VOC options.
Fast‑Dry Primers and Paints for Wood Projects
When speed matters, choosing the right fast‑dry primer and paint can cut curing time from days to hours without sacrificing durability. You’ll want acrylic or alkyd fast‑dry primers and water‑borne or quick‑set enamels for top layers; they adhere well to wood and dry rapidly. Pay attention to manufacturer’s recommended recoat times, and avoid thick coats.
Good color mixing practices prevent extra sanding and repainting, and proper paint storage preserves fast‑dry properties between uses. Follow safety and ventilation guidance.
- Pick primers labeled “fast‑dry” and compatible with your paint
- Thin sparingly to maintain coverage
- Test a small panel first
Quick‑Dry Clear Coats and Topcoat Choices
If you need a fast, protective finish, choose quick‑dry clear coats formulated for wood—water‑borne urethanes and fast‑dry acrylic lacquers give you durable clarity in hours instead of days.
You’ll apply thin coats, sanding lightly between each to avoid tackiness and speed cure times. Pick satin, semi‑gloss, or gloss to control sheen and minimize recoat time; thinner coats dry faster.
Consider how topcoat choice affects color mixing appearance and how sheens reveal or hide grain. Use additives sparingly to accelerate drying.
For texture enhancement, opt for finishes that level well so your surface stays smooth and protective.
Drying Painted Furniture vs Exterior Wood
Although both need ventilation and thin coats to dry quickly, drying painted furniture and exterior wood demand different priorities: indoor furniture benefits from controlled temperature and low humidity to prevent tackiness and odors.
While exterior wood requires finishes that cure through UV exposure and moisture cycling and may need longer open times for penetration.
You’ll focus on protecting woodgrain patterns and using primers that promote paint adhesion indoors; outside, you’ll pick flexible, UV‑stable finishes that follow movement.
Consider these quick distinctions to choose method and product wisely:
- Indoor: temperature control, low humidity, smooth finish.
- Outdoor: UV cure, flexibility, water resistance.
- Prep: sanding, primer, compatibility.
Best Tools to Speed Drying (Fans, Meters, Heaters)
You’ve covered the why and what; now you’ll look at the tools that actually speed drying. Use fans for airflow to reduce tackiness without disturbing paint texture; position gently. Use a heat lamp or space heater on a low setting to accelerate cure evenly, watching for softening. A moisture and humidity meter lets you time recoats precisely and protect color matching. Combine tools carefully: airflow + mild heat + meter feedback keeps finish consistent and vibrant.
| Tool | Feeling |
|---|---|
| Fan | Relief |
| Heater | Confidence |
| Meter | Control |
Common Mistakes That Slow Drying or Ruin Finish
Don’t slap on thick or uneven coats—you’ll trap solvent and slow drying or cause runs.
If you skip sanding, cleaning, and priming, the paint won’t adhere properly and the finish can peel or bubble.
And don’t paint in high humidity, because moisture will extend drying times and mar the surface.
Thick, Uneven Coats
When you slap on thick, uneven coats, paint takes forever to cure and often leaves drips, sags, and a textured finish that ruins the look and adhesion. You should apply thin, consistent layers so solvent evaporates evenly; that prevents tacky spots and reduces sanding later.
Thin coats also let color blending appear smooth without muddiness and avoid accidental texture enhancement from brush overload. If a heavy area appears, thin it with light sanding and a follow-up thin coat instead of piling more paint on.
- Aim for even strokes and light pressure
- Wait full flash time between coats
- Use proper thinner for the paint type
Poor Surface Preparation
If you skip proper surface prep, paint won’t bond well and drying will slow as solvents get trapped by dust, oils, or old finish — so take the time to clean, sand, and degrease before you paint.
You’ll avoid peeling, blotches, and extended tack times by removing contaminants and loose fibers. Focus on surface preparation: strip flaking paint, perform paint removal where needed, sand to smooth edges, and wipe with a solvent or degreaser.
Use tack cloths for dust. Prime porous or repaired areas to equalize absorption.
Doing prep right speeds drying and gives a durable, even finish.
High Humidity Exposure
Ever wondered why paint stays tacky for days after you think you’ve finished? High humidity traps moisture, slowing solvents and water-based paints, and it can gum up your finish. You’ll need active humidity control—dehumidifiers or climate timing—to speed cure and avoid blushing or milky films.
Don’t assume proper surface preparation alone solves it; damp wood or humid air defeats good sanding and priming. Check forecasts and drying conditions before starting, and pause if humidity’s high.
- Monitor humidity and temperature; don’t paint above recommended RH.
- Use dehumidifiers or heat to lower moisture.
- Allow wood to dry fully first.
How to Test Tack‑Free, Dry, and Fully Cured Paint
Although paint can look dry, you’ll want to verify three distinct stages—tack‑free, surface‑dry, and fully cured—because each affects how soon you can handle, topcoat, or use the piece.
Check tack‑free by lightly touching an inconspicuous edge; no sticky residue means you can dust or apply delicate masking without ruining color matching or texture enhancement.
For surface‑dry, press a fingertip firmly; no transfer indicates light handling is safe.
Fully cured takes time—consult manufacturer cure times, then try a gentle stress test: small bend or light abrasion in a hidden spot. If no cracking, scuffing, or tack returns, it’s cured.
Fixing Runs, Bubbles, or Tacky Spots After Rushing
Once you’ve checked for tack‑free, surface‑dry, and cure, you’ll sometimes find imperfections from rushing—runs, bubbles, or sticky spots that didn’t finish properly. You can correct them without redoing the whole piece. Sand lightly with fine grit, remove dust, and use a slow, controlled wipe to test tacky areas.
If you spot runs, bubbles, or tacky spots, sand lightly, clean, and feather thin touch‑ups until tack‑free.
Thin touch‑ups blend better when you match color mixing ratios and keep the brush thin. For texture smoothing, feather edges and apply thin coats, letting each become tack‑free. If bubbles recur, strip to sound paint, sand, and recoat under proper humidity.
- Assess severity before fixing.
- Sand, clean, retouch.
- Match mix and finish.
Time‑Saving Workflow: Painting Sequence for Rapid Drying
When you plan your sequence—surface prep, primer, sanding, then thin topcoats—you cut total wait time and avoid rework.
Start by cleaning and deglossing so primers bond; choose quick-dry primers for wood. While primers cure, prep next pieces and mix small batches for Color mixing to avoid waste and inconsistent drying.
Sand between coats with fine grit to promote adhesion, then remove dust with a tack cloth.
Use proper Brush selection—synthetic for water-based, natural for oil—to apply thin, even strokes.
Work in manageable sections, rotate pieces when possible, and allow recommended flash times for fastest, reliable drying.
Safety Checklist: Fire, Fumes, and Surface Damage
Before you rush through fast-drying techniques, check for fire risks by keeping rags, solvents, and heat sources separate and in metal containers.
Make sure you ventilate well and wear a respirator or mask to control fumes.
Cover nearby surfaces to prevent accidental damage.
These simple precautions will keep your workspace safe and your finish intact.
Fire Risk Prevention
Worried about sparks, fumes, or scorched wood while trying to dry paint faster? You’ll want to minimize fire hazards and follow practical ventilation tips. Keep ignition sources away, use approved heat tools, and never leave a heater or torch unattended. Monitor temperature and humidity to avoid overheating the wood.
- Clear the workspace of rags, solvents, and combustible debris.
- Use electric fans and open windows for ventilation tips; avoid running engines or gas heaters indoors.
- Keep a fire extinguisher nearby and test it beforehand; know emergency exits.
Stay alert and prioritize safe drying over speed.
Fume and Surface Protection
Although speeding up drying is tempting, protect yourself and the workpiece from fumes and surface damage first. Ventilate the area thoroughly to disperse VOC emissions; open windows and run a fan to exhaust air away from you.
Wear protective gear—respirator rated for organic vapors, gloves, and eye protection—when using solvents or fast-dry additives.
Shield nearby surfaces with drop cloths and painter’s tape to prevent splatter and heat damage from lamps or heaters. Keep combustibles distant, and avoid enclosed heat that intensifies fumes.
If you notice dizziness or headache, stop, get fresh air, and reassess your method immediately.
Frequently Asked Questions
Can Painting in Direct Sunlight Speed Drying Without Harming Finish?
Yes—you can speed drying in direct sunlight, but it’s risky: higher heat can trap paint odor, cause blistering or uneven cure. You should guarantee proper surface preparation and use heat-tolerant paint to avoid finish damage.
Will Sanding Between Coats Still Be Necessary if Using Fast‑Dry Products?
Absolutely — you’ll still want to sand between coats: even with fast‑dry products, paint thickness and environmental humidity can trap imperfections, so you’ll sand lightly to guarantee adhesion, smoothness, and a flawless, durable finish.
How Do Paint Pigments or Colors Affect Drying Time?
Darker pigments often slow drying because paint chemical composition and pigment particle size affect solvent evaporation and film formation; you’ll notice larger particles and heavy pigments retain solvent longer, while lighter, finer pigments let paint cure faster.
Can I Layer Different Paint Types (Latex Over Oil) to Speed Project?
No — you shouldn’t layer latex over oil without proper prep; for example, a renovator stripped, sanded, and used a bonding primer, then applied latex successfully. Check paint compatibility and consider drying additives only per manufacturer instructions.
Does Substrate Moisture Content Alter Recommended Drying Accelerators?
Yes — you should adjust accelerators based on substrate moisture and overall moisture content. If the substrate moisture’s high, don’t use strong solvents; you’ll choose slower, moisture-tolerant additives to avoid adhesion failures and bubbling.
Conclusion
You’ve sped paint-drying like a pit crew, but don’t let haste become havoc: trust the paint type, prep the wood, and use gentle heat, airflow, and thin coats to coax fast results without wrecking the finish. Test for tack‑free and fully cured before stacking or handling. When problems pop up, sand or spot‑repair calmly. With care and a smart workflow, your project’ll go from tacky to triumphant—dry, smooth, and ready to show off.