How to Estimate a Painting Job Exterior Easily
You can estimate an exterior paint job quickly by pacing the house to get the footprint, multiplying perimeter by average wall height for gross wall area, and subtracting windows and doors for net paintable area. Adjust for texture, porosity, number of coats, and primer needs to convert area into gallons and labor hours. Add allowances for repairs, scaffolding, and waste, then apply local rates. Keep going and you’ll find step-by-step formulas and checklists to refine the quote.
One-Line Exterior Paint Estimate Answer
When you need a quick ballpark for an exterior paint job, use a one-line estimate that states total cost, what’s included, and the project timeline—e.g., “$4,200 for two coats on 2,000 sq ft, includes minor prep and materials, 5 days.”
You’ll give a clear single sentence that covers scope, exclusions, and turnaround.
Mention whether color matching is included or billed separately and specify chosen paint sheen so expectations match reality.
Keep it factual: total price, number of coats, surface area, basic prep, materials, color or matching note, sheen, and days.
That’s all a client needs upfront.
When to Give a Ballpark vs. a Detailed Estimate
You’ve already seen how a one-line exterior paint estimate quickly sets expectations; now decide whether a client needs that quick ballpark or a detailed line-item quote.
You’ll choose a ballpark when clients want rough Budget considerations, limited time, or basic scope.
Offer a detailed estimate when schedules, permits, Material sourcing, or warranty terms matter.
When timelines, permits, materials, or warranties affect the job, provide a detailed, line-item estimate to avoid surprises.
Detailed quotes protect you and the client from surprises.
- A sun-faded siding test patch
- A ladder against peeling trim
- Buckets and labeled color swatches
- A calendar with staged work phases
- A shopping list of primers and brushes
Match estimate depth to project risk and client needs.
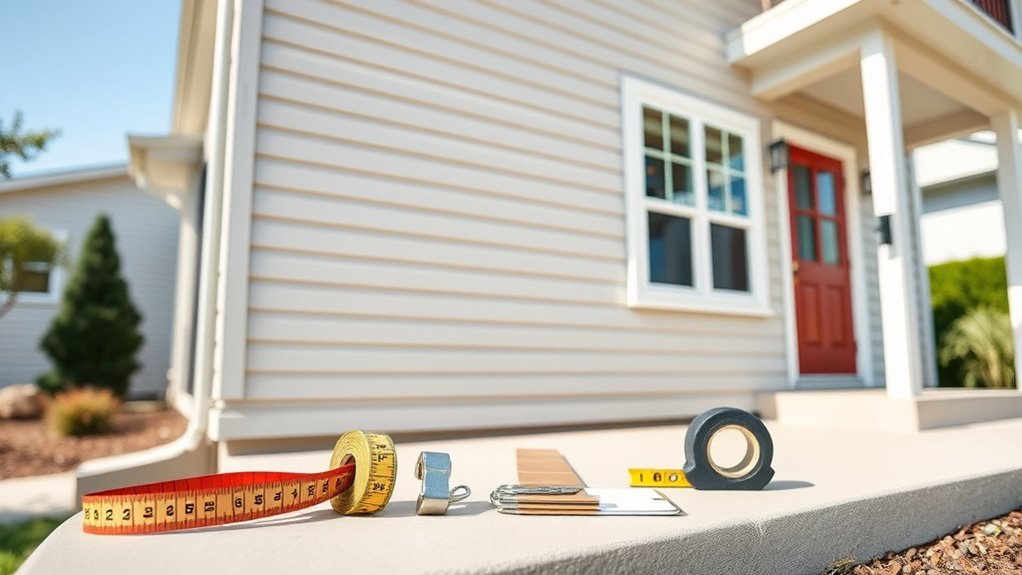
Quick Method: Measure House Footprint and Wall Area
If you need a fast exterior estimate, measure the house footprint and multiply by wall height to get gross wall area—this gives a reliable starting point for paint quantity and labor.
You’ll pace around the property, note simple rooflines, and skip detailed trim counts; this rapid approach gets you close enough for ballpark bids.
Use that area to estimate gallons and labor hours, then adjust for porches or big openings later.
Mention color matching needs to the client—complex matches or specialty coatings affect time and cost.
Also discuss Environmental impact briefly so choices reflect both budget and sustainability.
Convert Footprint to Exterior Wall Square Footage
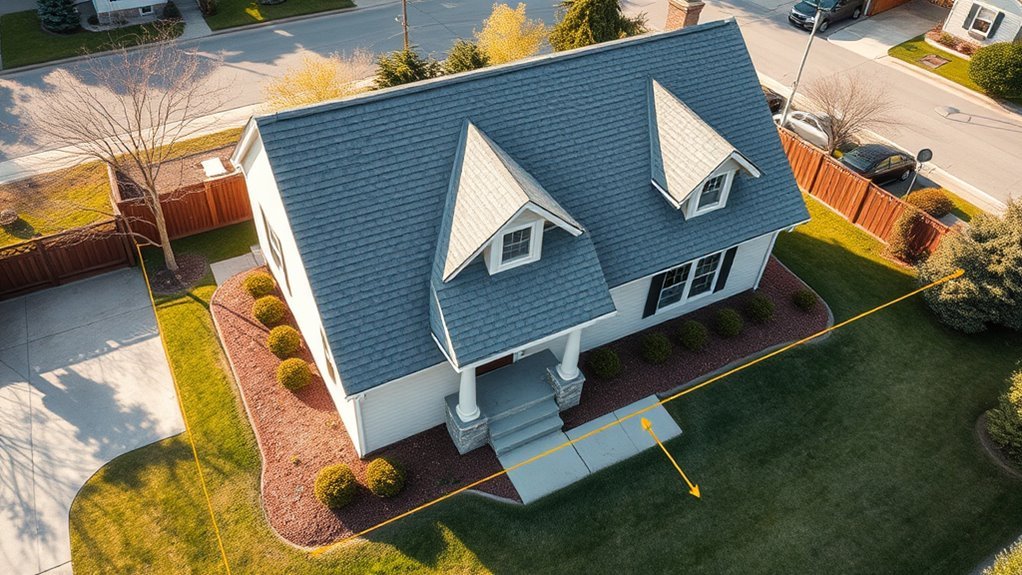
Now that you’ve got the house footprint and an approximate wall height, convert that footprint into exterior wall square footage by multiplying the perimeter by the average wall height. Measure each side, add lengths for total perimeter, then multiply by height to get gross wall area. Subtract openings later. This gives you paintable square footage for estimating materials, time, color matching trials, and surface prep needs. Keep notes on overhangs or porches separately.
Convert your footprint to paintable wall area: total perimeter × average height, then subtract openings and note porches.
- Walk the perimeter with a tape
- Jot corner angles and offsets
- Visualize eaves and gutters
- Note rough patches for surface prep
- Imagine test swatches for color matching
Measure Windows, Doors & Trim for Area Deductions
When you measure openings for deductions, focus on each window, door, and major trim piece so your gross wall area becomes an accurate net paintable area. Measure height and width of windows, note window framing depth if thick trim exists, and subtract that area. For doors, measure panels and account for door hardware protrusions. Include significant trim runs around bays and entries; small mouldings can be ignored if under your minimum. Record each opening clearly in your worksheet and total deductions before applying coverage rates.
| Item | Typical Deduction |
|---|---|
| Window | 15–30 sq ft |
| Door | 15–20 sq ft |
| Trim run | Variable |
Calculate Surface Area for Gables, Dormers & Porches
As you move beyond flat walls, calculate gables, dormers, and porches separately because their shapes and exposures change paint quantities and prep needs. Measure each plane, note slopes and overhangs, and treat multi‑facet dormers and open porches as distinct components so your area totals reflect actual surfaces to be coated. You’ll sketch each element, record heights and angles, and factor in railing and ceiling areas for porches.
Include extra for fascia and soffit access. Surface prep differences and potential Color matching needs affect time and materials, so list items separately to avoid underestimating labor or paint.
- Triangular gable face with vent
- Multi‑plane dormer roofline
- Open porch ceiling and railing
- Sloped soffit under overhang
- Narrow fascia and trim around openings
Adjust Measurements for Stucco, Brick & Siding Textures
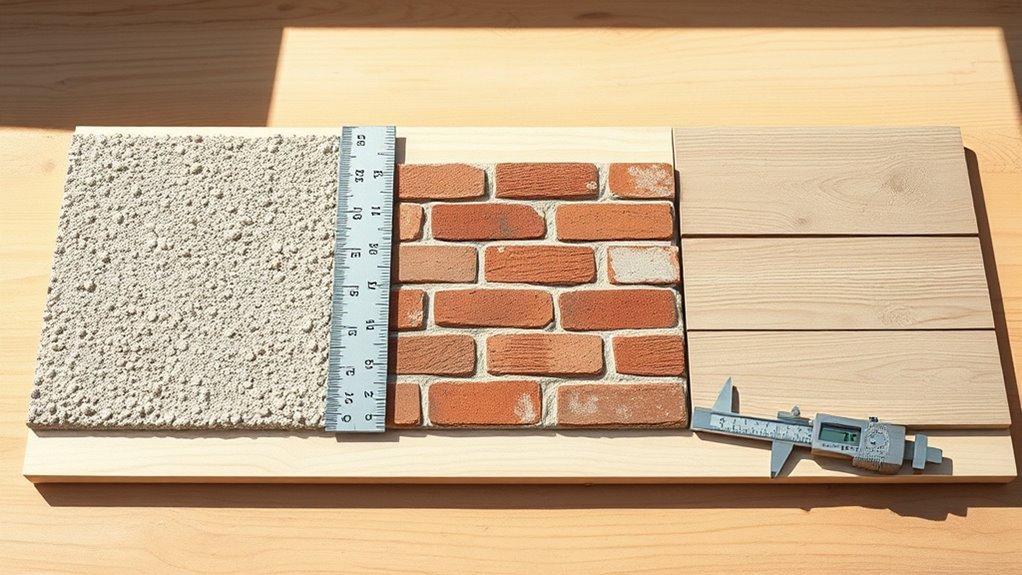
Measure the depth and profile of stucco, brick and siding so you know how much extra paint the texture will hold.
You’ll increase coverage estimates for porous materials and tighter profiles, and factor in overlap where boards or bricks meet.
Finally, add a small percentage for waste and missed spots to avoid coming up short on the job.
Measure Surface Texture Depth
Because texture changes how much paint you’ll need, check depth across stucco, brick, and siding before you total your square footage. You’ll perform a quick surface texture assessment and use a simple depth measurement tool (ruler or depth gauge) to record averages per wall section.
Note variations near corners, trim, and damaged areas. Multiply area by adjusted coverage based on those depths, and mark sections needing extra primer or fill.
- Rough stucco peaks and valleys under sunlight
- Brick mortar recesses catching shadow
- Wood siding grooves and lap overlaps
- Deep pitted spots at foundation level
- Smooth trim contrasting textured fields
Adjust Coverage For Porosity
When you’re planning paint quantities, account for porosity differences in stucco, brick, and siding since porous surfaces can soak up far more primer and paint than smooth ones. Test a 1 ft² area with a water drop or quick primer coat to gauge absorption. Then convert that result into an adjusted coverage rate (gallons per 100 ft²) for each wall section.
Use measured surface porosity to scale the manufacturer’s coverage numbers: multiply by the absorption factor you observed. For textured materials, apply a Texture adjustment percentage (e.g., +25–100%) depending on depth.
Record adjusted rates per material and calculate gallons per elevation.
Account For Overlap And Waste
After you’ve adjusted coverage for porosity and texture, allow additional paint for overlap and unavoidable waste—especially on stucco, brick, and heavily textured siding where brushing, back-brushing, and edge overlap consume extra material.
You’ll factor in Overlap considerations and Waste management by adding a percentage buffer—typically 10–20% for smooth surfaces, 20–35% for textured masonry.
Measure by section, note angles and trim, and track used versus estimated gallons as you go.
Be conservative on first coats and when back-rolling.
Visualize problem areas:
- Deep stucco nooks holding wet paint
- Brick mortar joints soaking primer
- Overlapped trim seams
- Shadowed eaves needing extra passes
- Rough siding edges snagging rollers
Estimate Paint Quantity for Each Exterior Surface
If you’re estimating paint for each exterior surface, start by measuring every plane—walls, trim, doors, soffits, and fascia—and convert those dimensions into square footage so you know how much area you’ll actually cover.
Calculate coats needed for each surface: one or two for trim and doors, two for bare or patched siding after proper surface prep.
Use manufacturer coverage per gallon to divide area by spread rate, then round up.
Add a small percentage for overlap and touchups.
For color matching, reserve extra gallons when matching existing shades or ordering custom tints to avoid running short.
Choose Paint Type and How It Changes Coverage & Cost
You’ll want to pick a paint type first, since latex, acrylic, and oil-based formulas behave differently.
Check the coverage per gallon on the label because some higher-quality paints cover more square footage and cut down on how much you need.
Finally, weigh cost versus durability—cheaper paint might save money upfront but could mean more frequent repainting.
Paint Type Basics
Because the paint you pick affects both how much surface a gallon will cover and what you’ll pay per square foot, it’s important to match type and quality to the job—acrylic latex, 100% acrylic, elastomeric, and oil-based formulas all perform differently on exterior surfaces, vary in VOCs and durability, and consequently change coverage rates, recoat timing, and total material cost.
You’ll consider adhesion, flexibility, weather resistance, and how paint color shows imperfections. Choose finishes for trim versus siding, and match brush types to viscosity so application is efficient.
Visualize the result:
- Satin sheen gliding over clapboard
- Thick elastomeric sealing stucco
- Smooth oil on metal railing
- Bright primer under bold paint color
- Nylon brush cutting crisp trim lines
Coverage Per Gallon
How much will a single gallon actually cover? You’ll see ranges: 250–400 sq ft for latex, less for textured surfaces. Choose paint type carefully—high-opacity latex covers more, oil-based soaks less. Factor Surface prep and color matching: priming dark walls or matching bold hues reduces coverage per gallon. Use the table below to compare typical coverage and recommended coats.
| Paint Type | Coverage (sq ft/gal) | Notes |
|---|---|---|
| Latex (smooth) | 350 | Good general use |
| Latex (textured) | 250 | More absorption |
| Oil | 300 | Tends to need fewer coats |
| Primer | 200 | Essential for color matching |
Cost Versus Durability
While selecting paint, weigh upfront cost against long-term durability so you don’t pay more overall for frequent repainting. You’ll choose between cheaper acrylics and premium elastomeric or 100% acrylics; a clear cost comparison helps.
Consider durability factors like UV resistance, mildew protection, and flexibility for siding movement. Higher-quality paint often covers better, so you may need fewer coats and less labor.
Estimate gallons by coverage, then apply price per gallon plus labor to compare lifecycle cost. Balance warranty and expected years between coats to decide if upfront investment lowers total repainting expense.
- Sun-faded clapboard needing UV defense
- Peeling trim demanding flexible coating
- Damp basement wall with mildew resistance
- Rough stucco requiring thicker build
- Smooth siding where high-hide paint saves coats
Estimate Primer Needs and When Primer Is Required
Before you pick up a can, identify the surfaces and conditions that actually need primer so you can estimate coverage and cost accurately. Inspect siding, trim, bare wood, metal, and patched areas for primer requirements tied to surface porosity and adhesion.
High-porosity masonry soaks up lots of primer; smooth, previously painted surfaces may not need it unless you’ve stripped or stained. Spot-prime repairs, knots, and rust, and prime any color-change jobs or stained wood.
Calculate primer gallons from primable square footage and manufacturer coverage, allowing for extra on porous substrates. Record choices and costs for your estimate.
Calculate Labor Hours From Exterior Square Footage
Start by converting your exterior square footage into realistic labor hours, accounting for both prep and painting.
Estimate surface preparation time separately—sanding, scraping, caulking, and repairs often take as much or more time than the actual paint application.
Then apply your painting productivity rates (square feet per hour per painter) to get a clear labor total.
Surface Preparation Time
When you know the exterior square footage, you can convert it into surface-prep labor hours by accounting for access, condition, and the specific tasks—like scraping, sanding, caulking, and priming—that the job requires.
You’ll estimate time per 100 sq ft, adjust for ladders or scaffolds, and add minutes for surface sealing and primer application where bare wood or repairs exist.
Factor crew skill and weather. Use a simple chart: hours = (base rate × area) × condition multiplier. Confirm on-site to refine.
- Scaffolding around a two-story porch
- Peeling paint being hand-scraped
- Rotten wood cut out
- Caulk lines smoothed
- Primer application rolling panels
Painting Productivity Rates
Now convert your prepared surface area into painting labor hours by applying productivity rates tied to the task, crew, and conditions. Estimate square footage per hour for brushing, rolling, and spraying—adjust for complexity like trim, multiple coats, and color matching challenges.
Factor crew size and skill: a two-person team will be faster than one. Include time for setup, breaks, cleanup, and safe paint storage between shifts.
Multiply adjusted rates by total area to get labor hours; add contingency for weather delays and substrate issues.
Divide total hours by crew hours per day to schedule days and calculate labor cost.
How Crew Size & Skill Affect Labor Cost
Because crew size and skill change how fast and well the work gets done, you’ll see a direct impact on labor cost. You’ll weigh crew efficiency and skill level against schedule and budget: a small, highly skilled crew may finish faster with fewer mistakes; a larger, less skilled crew might need supervision and redo work.
When estimating, factor hourly rates, overlap time, and error rates. You’ll choose the mix that minimizes total hours and touch-ups while matching project complexity and timeline.
- Two pros on scaffolding tackling trim precisely
- Four helpers rolling broad siding quickly
- Lead painter correcting edges
- Apprentice patching small dents
- Crew coordinating ladder swaps
Price Common Prep Tasks: Scraping, Sanding, Power Wash
Although prep work doesn’t show on the final invoice like paint does, you’ll want to price scraping, sanding, and power washing carefully because they set the stage for durability and finish quality. You’ll assess surface texture to choose methods: coarse scrape for peeling, fine sanding for smoothness, and power wash to remove grime. Price by time, equipment, and disposal; factor material durability—older wood or masonry needs gentler approaches. Communicate rates per hour or per square foot so clients see value. Use the quick reference below to justify estimates.
| Task | Typical Rate | Notes |
|---|---|---|
| Scraping | $0.20/ft² | Peeling paint |
| Sanding | $0.15/ft² | Smooth finish |
| Power wash | $0.10/ft² | Removes grime |
Estimate Caulking & Minor Wood Repair Time & Cost
Start by walking the exterior to assess the extent of caulking gaps and minor wood damage so you can prioritize repairs.
Measure linear feet of joints and count damaged boards to calculate how much caulk, filler, and replacement trim you’ll need.
From those quantities, estimate the labor hours and material cost for the caulking and minor wood repairs.
Assess Damage Extent
How badly is the trim and siding affected — and what’ll it take to fix it? You’ll inspect rot, gaps, and loose trim, noting where caulking and minor wood repair are needed. Prioritize areas affecting adhesion and Color matching later; good Surface preparation prevents repeat work.
Time and cost depend on extent: small gaps take minutes, replaced trim takes hours. Estimate labor per linear foot and parts per damaged piece.
Visualize the fixes:
- Hairline gaps requiring fresh caulk along window trim
- Flaking paint around eaves exposing bare wood
- Soft spots in baseboards needing patch or replacement
- Split corner trim with loose nails
- Peeling edges revealing raw siding
Calculate Materials Needed
Once you’ve mapped the damaged areas, tally the caulk, filler, and fasteners you’ll need and convert that into material quantities and costs so you can price labor accurately.
Next, size repair tasks: linear feet of joints for caulking, cubic inches of filler for rot, and number of new trim pieces. Estimate time per unit—caulk bead, minor wood patch, sanding—and add cure times.
Price materials using local supplier rates, include sealers and primer. Note color matching costs if custom tinting’s required and factor brush selection for touch-ups versus full coats.
Sum totals for a reliable job estimate.
When to Add Costs for Major Repairs or Replacements
When you find structural damage, widespread rot, or failed systems during your inspection, add separate line items for major repairs or replacements rather than folding those costs into your paint bid. You’ll list Major repairs and Replacement costs clearly so clients see scope and responsibility.
Price labor, materials, permits, and contingency for each repair. Explain timelines and how repairs affect painting sequence. Don’t assume unseen issues won’t emerge.
- Sagging fascia with wood rot
- Cracked foundation near siding
- Rotted window frames leaking
- Damaged gutters causing overflow
- Peeling stucco exposing lath
Show itemized estimates for transparency and approval.
Estimate Scaffolding & Access Equipment Costs
Because safe, efficient access drives both cost and schedule, estimate scaffolding and access equipment separately and early in your bid. You’ll factor rental vs. purchase, setup labor, permits, and scaffolding safety inspections into a clear line item. Do access planning per elevation and surface; note limited-entry zones or parking impacts. Use the table below to visualize common setups and quick cost drivers.
| Equipment | Typical Use | Cost Driver |
|---|---|---|
| Frame scaffold | Low-rise walls | Assembly time |
| Rolling tower | Window/trim work | Mobility needs |
| Suspended scaffold | High façades | Rigging/licensing |
| Ladders | Detail work | Safety compliance |
Factor Masking, Tarps & Drop-Cloth Materials
Although masking and drop cloths might seem minor, you’ll want to budget them deliberately since they protect finishes, speed cleanup, and prevent rework. You’ll plan masking techniques to cover trim, windows, and outlets precisely, choosing quality tape and paper for clean lines.
Tarp selection matters for ground protection and for shielding plants and HVAC units; heavier poly tarps resist tears, lighter ones save cost. Estimate quantity by square footage and job complexity, and include replacement for worn pieces.
Durable canvas drop-cloths reduce slipping and paint bleed-through, lowering rework risk and cleanup time.
- folded paper over sills
- taped window edges
- poly tarp over shrubs
- canvas drop-cloth on walkways
- secured roof-edge tarp
How Weather & Season Affect Timeline and Pricing
How will rain, temperature swings, and seasonal light changes shape your schedule and costs? You’ll plan around weather considerations: avoid painting during rain, high humidity, or freezing temps that ruin adhesion and extend drying times.
Temperature windows determine material choice and crew productivity, so cold or hot spells add labor hours or require specialty coatings.
Seasonal impacts like shorter daylight in winter slow daily progress, pushing project length and overhead up. Account for contingency days, faster-drying primers, and heat or shelter rentals when estimating.
Clear communication with the client about possible weather delays keeps expectations realistic and protects your margin.
Estimate Travel, Disposal & Permit Fees
When you tally up a painting estimate, don’t forget travel, disposal, and permit fees—they’re small line items that can bite your margin if you skip them.
You’ll add travel expenses for drive time, fuel, and vehicle wear, factor Disposal fees for old paint and waste, and check local permit costs.
Be transparent with clients: list each charge and why it’s required.
Estimate conservatively but fairly so surprises don’t erode trust.
- Dawn drive to a distant suburban job
- Full trash bin of scraped lead paint
- City hall counter paying for a permit
- Nighttime trip for forgotten supplies
- Return haul to the rental dumpster
Add Overhead & Profit Using a Simple Markup Method
Because your direct costs don’t cover rent, insurance, office time, or a buffer for slow periods, you should apply a simple markup to capture overhead and profit; pick a single percentage that reflects your fixed costs plus the margin you need, then multiply your total job cost (labor, materials, travel, disposal, permits) by that markup to get the final price. Use a clear markup strategy and document your profit calculation so bids stay consistent. Quick reference:
| Item | Base Cost | Marked Price |
|---|---|---|
| Labor | $1,200 | $1,560 |
| Materials | $300 | $390 |
Adjust percent by business needs.
Price Trim, Fascia & Soffit as Separate Line Items
After you’ve applied a consistent markup for overhead and profit, break out trim, fascia, and soffit as separate line items so clients see exactly what they’re paying for and you can price specialized work accurately.
You’ll estimate Trim pricing by measuring linear feet, noting profile complexity, and adding prep/primer time.
Fascia costs depend on height, access, and rot repair.
Soffit often needs vented vs. solid assessment.
List each with unit rates and minutes per linear foot so quotes stay transparent and consistent.
- crisp corner trim with caulked gaps
- ornate crown profiles
- high fascia behind gutters
- vented soffit panels
- ladders and scaffolding access
Estimating Color Changes & Multi-Color Exteriors
If you’re changing colors or planning multiple hues on an exterior, you’ll need to account for additional prep, masking, and edge-work that single-color jobs don’t require. You’ll estimate extra labor for careful caulking, sanding, and priming where darker over lighter—or vice versa—occurs.
Factor time for precise taping, multiple coats at clean gradations, and touch-ups along trim. Discuss color coordination with the client to settle contrasts and avoid costly reworks.
Also confirm paint sheen choices early; different sheens can highlight flaws and affect coverage, so adjust material quantities and labor rates accordingly.
Estimating Maintenance Coatings & Warranty Add-Ons
When you’re estimating multi-color or color-change work, also outline options for ongoing maintenance coatings and warranty add-ons so the client understands long-term protection and costs up front.
You’ll list choices, frequency, and who’s responsible for touch-ups. Explain benefits of maintenance coatings for durability, UV resistance, and mildew prevention.
Break warranty add-ons into clear tiers with response times and coverage limits. Show transparent pricing and schedule impacts so clients can weigh upfront cost versus lifecycle savings.
- Annual inspection and spot touch-up
- Biannual soft wash and sealant
- Five-year enhanced warranty plan
- Color-retention booster application
- On-call emergency repair service
How to Price Historic or Specialty Finishes
Because historic and specialty finishes demand extra care and expertise, you should price them based on conservation-grade materials, skilled labor, and the time needed for research and mock-ups. You’ll evaluate substrate condition, source authentic pigments, and plan test patches. Factor in specialty coatings that replicate patina or limewash, and charge for artisan hours and contingency for delicate removal. Provide clear scope: number of mock-ups, drying times, and protection strategies. Use a visual checklist to explain costs:
| Task | Material | Time |
|---|---|---|
| Assessment | Conservation materials | 2–4 hrs |
| Mock-up | Specialty coatings | 4–8 hrs |
| Repair | Matching pigments | 6–12 hrs |
| Finish | Protective layer | 2–6 hrs |
Account for Landscaping Protection & Post-Job Cleanup
While planning your exterior paint job, factor in landscaping protection and post-job cleanup as line items—these prevent plant damage, staining, and homeowner disputes. You’ll set up landscaping barriers, cover beds and hardscape, and schedule a Post job inspection to confirm nothing’s missed.
Factor landscaping protection and post-job cleanup into estimates to prevent plant damage, stains, and homeowner disputes.
Include labor, materials, and time for debris removal in estimates so clients know the scope.
- Tarped flower beds edged with sandbags
- Shrub frames protecting branches from overspray
- Drip pans under ladders and caulking stations
- Wheelbarrow hauling paint cans and scrapings
- Final walkthrough with client and checklist for touch-ups
Benchmark Local Rates Without Underbidding Yourself
If you want steady work and fair profit, start by benchmarking local rates so you don’t undercut yourself—research competitors’ pricing, factor in your overhead and skill level, and adjust for neighborhood demand.
Use Market research to collect real bids for similar exterior jobs, note material and labor splits, and spot seasonal shifts.
Compare your costs against those benchmarks, then test Pricing strategies like tiered packages, value-based pricing, or bundled services.
Communicate clear scope and exclusions to clients so quotes stay accurate.
Revisit rates quarterly to reflect inflation, demand changes, and increased experience without sacrificing profitability.
Common Estimating Mistakes That Lose Money
Benchmarking local rates gives you a solid pricing foundation, but even well-informed contractors can still bleed profit through common estimating mistakes. You’ll lose money when you ignore surface prep time, underestimate materials, or misjudge crew efficiency.
Skimping on paint quality to win a bid backfires, especially when painting techniques and color psychology affect coats and touchups. Don’t assume every job matches past ones; each facade has hidden work.
- Peeling trim needing sanding and primer
- Multiple coats for deep color changes
- Hard-to-reach gutters and eaves
- Weather delays forcing rescheduling
- Extra sealant for porous siding
Handle Change Orders & Unexpected Job Issues
When unexpected issues pop up or a client asks for extras, you need a clear process to capture scope changes, document costs, and get written approval before proceeding.
Describe the unexpected issue, list affected surfaces, materials, labor, and schedule impacts.
Describe the unexpected issue and list affected surfaces, materials, labor, and schedule impacts for clear change documentation.
Prepare a concise change order with itemized costs and a deadline to accept.
Explain contingencies and any warranty effects, then get the client’s signature or email approval.
Track revisions in your project file and communicate updates to crew and suppliers.
Charging fairly and documenting promptly prevents disputes, preserves profit, and keeps the job moving without surprises.
Create a Clear, Itemized Exterior Paint Quote
Because clients need confidence and you need to avoid disputes, your exterior paint quote should be concise, itemized, and transparent. Break costs into labor, materials, surface prep, and contingencies, noting timelines for paint drying and steps ensuring color consistency. Specify brands, sheen, primer, coats, and warranty terms so expectations align. State start and completion dates, site access needs, and payment schedule. Use clear units (sq ft, hrs) and include change-order procedure.
- Scrape/repair areas before priming
- Primer coat, paint coats, and drying windows
- Trim, soffits, and fascia listed separately
- Cleanup and waste disposal
- Warranty and touch-up policy
Give Clients Three Options: Basic, Standard, Premium
Offering three clear packages—Basic, Standard, and Premium—lets you match pricing and features to each client’s priorities and budget, so they pick what fits without confusion.
Describe Basic as essential prep, single-coat coverage, limited color matching, and standard paint durability.
Make Standard include thorough prep, two coats, guaranteed color matching, and mid-range durability.
Present Premium with full prep, primer, high-end color matching, specialty finishes, and superior paint durability plus warranty.
List inclusions, exclusions, and turnaround for each.
Use simple pricing tiers so clients compare value quickly and choose confidently without back-and-forth.
Use Templates & Estimating Apps for Faster Quotes
If you want faster, more consistent quotes, use templates and estimating apps to standardize every estimate and cut manual math. You’ll pick preset line items—surface prep, primer, coats—then tweak for square footage, chosen paint brands, and selected color palettes.
Apps reduce errors, store client notes, and export professional proposals you can email immediately. Use templates as checklists so you don’t forget trim, gutters, or special finishes.
Apps cut mistakes, save client details, and produce ready-to-send proposals—use templates as checklists for trims and special finishes.
Rely on app calculators for labor and material totals, but review before sending.
- Front elevation measured, prep needed
- Trim and fascia paint type
- Deck and railing details
- Window and door counts
- Special finishes requested
Quick Estimator Formulas Every Painter Should Memorize
When you’re quoting jobs on the fly, memorize a handful of quick formulas—square footage × coats to estimate paint needed, gallons = (sq ft × coats) / coverage, and labor hours = (sq ft / 200) × coats—so you can produce fast, consistent numbers without fumbling for a calculator.
Use a standard coverage value (350–400 sq ft per gallon) for rough bids, then adjust for trim and textured surfaces.
Multiply labor hours by your crew rate to get labor cost.
Keep a short list of preferred paint brands and typical yields, and note color palettes that require extra coats so your estimates stay accurate.
Turn a Homeowner’s Description Into an Accurate Estimate
When a homeowner describes what they want, you first assess the property details—square footage, siding type, trim complexity, and any repairs needed.
Then you translate their needs into measurable tasks, materials, and labor hours so the estimate matches reality.
Clear follow-up questions will close gaps and keep your bid accurate.
Assess Property Details
Because homeowners often describe their needs in vague terms, start by translating their words into measurable details. Walk the site with them, note siding type, square footage, trim complexity, and any damage. Check property landscaping that affects access and protect plants. Record exterior lighting locations that may need removal or special care. Photograph everything and mark measurements on a sketch so you can quantify labor, materials, and time.
- Narrow driveway with overhanging trees
- Tall gables requiring scaffolding
- Sun-faded siding patches and peeling paint
- Decorative trim and shutters
- Ground-level landscaping close to walls
Translate Homeowner Needs
If a homeowner says they want the exterior refreshed, ask specific questions and convert their answers into measurable items you can price.
Clarify surfaces to paint, desired finish, and longevity expectations so you can factor material durability into product choices and labor estimates.
Ask about existing damage, trim detail, and preferred timeline to scope prep and access needs.
Confirm color choices and whether you’ll handle color matching or supply custom tints, which affects cost and testing.
Summarize agreed tasks, paint types, and exclusions in writing, then convert each line item into unit prices and total estimate for approval.
Quick Checklist to Verify an Estimate Before Sending
Before you send an estimate, run a focused checklist to catch costly omissions and clear up any client confusion. You’ll confirm scope, line-item quantities, Painting materials and labor rates, and note any assumptions about prep or repairs. Verify Color matching details, finish sheen, and brand so expectations align. Check permit or disposal fees and site access constraints. Guarantee timing, payment terms, and warranty are explicit.
- Sketch of work areas and measurements
- Listed paint brand, sheen, and color codes
- Prep and repair tasks with estimated hours
- Equipment and disposal plans
- Clear payment schedule and exclusions
Simple Follow-Up Steps After Delivering the Estimate
After you send the estimate, confirm your availability and the client’s preferred timeline so you can lock in dates if they accept.
Follow up with a clear, itemized email that restates the scope, pricing, and any conditions to avoid misunderstandings.
Ask if they’ve questions and offer a quick call to finalize details.
Confirm Timeline And Availability
When you’ve delivered the estimate, follow up promptly to confirm your client’s timeline and your own availability so everyone’s expectations line up. Ask about preferred start dates, discuss contingency plans for scheduling conflicts and material shortages, and set clear windows for work. Confirm who’ll grant access and any weather constraints.
Agree on communication methods for updates.
- A calendar invite with start and end dates
- A short phone call to lock details
- A plan for delays and backup dates
- A list of required materials and lead times
- Clear access instructions and parking spots
Send Detailed Estimate Follow-Up
If you’ve just handed over the estimate, follow up promptly with a clear, concise message that confirms the numbers and next steps so nothing’s left ambiguous. Outline scope, material durability choices, color coordination options, and payment terms. Ask if they want samples or a site visit. Offer a deadline for acceptance and a start-date window.
| Item | Action |
|---|---|
| Scope | Confirm areas, coats |
| Materials | Note durability, brands |
| Colors | Provide swatches, coordination |
| Timeline | Set response and start dates |
Close by inviting questions and stating you’ll call if you don’t hear back.
Frequently Asked Questions
Can I Include Warranty Terms Directly in the Estimate?
Yes, you can include warranty policies and liability clauses directly in the estimate; you’ll clarify coverage, exclusions, duration, and responsibility, so clients see protections and limits upfront, reducing disputes and setting clear expectations from the start.
How Do I Handle Client-Supplied Paint in Pricing?
You can accept client-supplied paint, but beware—if color selection’s off or surface preparation’s inadequate, you’re liable. State clear terms: inspect, test, refuse unsuitable paint, charge for extra prep and wasted materials, and get sign-off.
What Payment Schedules and Deposits Should I Require?
You should require a clear payment structure: a 25–50% deposit before starting and staged payments tied to milestones, with final payment on completion. Your deposit policies should specify refunds, holdbacks for punch lists, and accepted payment methods.
Do I Need Business Insurance Proof on the Quote?
Yes — you should include insurance documentation and proof requirements on the quote. You’ll protect yourself and reassure clients, clearly stating liability and workers’ comp coverage, policy numbers, limits, and how long the proof remains valid.
How Should I Document and Photograph Pre-Existing Damage?
Like a map marking every crater, you’ll photograph and log all pre-existing damage: note locations, take wide and close shots, record Surface preparation needs, timestamp images, write a clear Damage assessment, and get client initials for proof.
Conclusion
You’ve got the tools to turn a quick homeowner description into a reliable exterior paint estimate—no math phobia required. Use a ballpark for early talks and a detailed takeoff before you commit. Measure footprint, convert to wall square footage, subtract windows/doors, and apply your go-to formulas. Do the quick checklist, follow up promptly, and you’ll win trust (and jobs) faster than a paintbrush on steroids. Keep practicing; accuracy becomes second nature.