How to Fix Dry Paint Drips the Easy Way
You can fix dry paint drips fast by shaving the raised bump with a sharp plastic scraper or a shallow razor at a low angle, then smoothing the area with fine sandpaper (220–320) and wiping away dust. Match and touch up the spot with the same paint, feathering edges for a seamless blend. Work carefully on drywall, wood, metal, or trim and use proper protection; keep going for more tips on tools, tests, and prevention.
Quick Fix: Safely Scrape a Dried Paint Drip
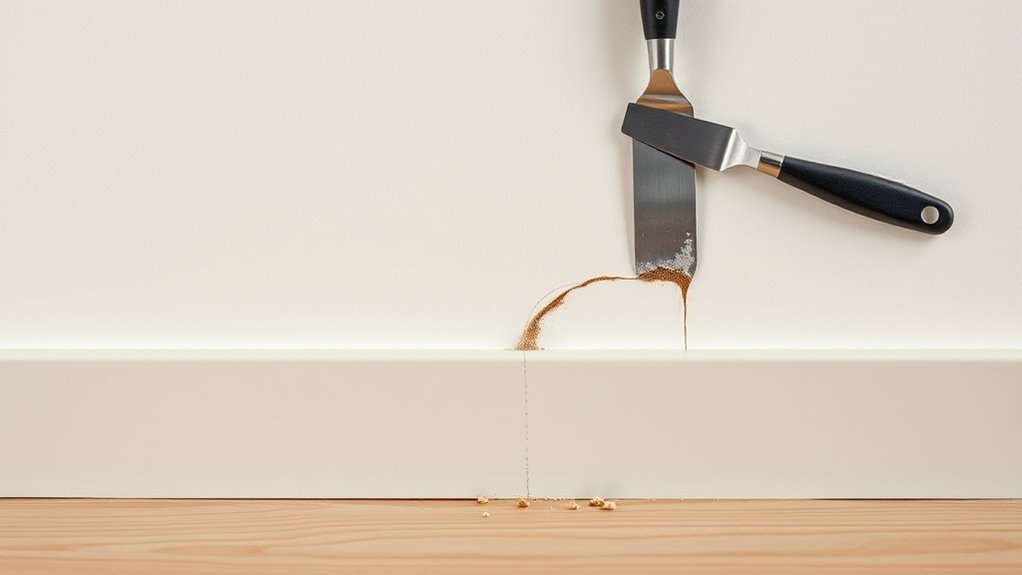
When a paint drip has fully dried, don’t panic—grab a sharp plastic scraper or a single-edge razor blade held at a shallow angle and gently shave away the raised paint until it’s level with the surface.
If a paint drip is completely dry, gently shave it level with a sharp plastic scraper or shallow razor blade
You’ll start with drip identification: inspect edges, shadow, and height to confirm it’s dry and ready.
Work slowly, keeping the blade flat to avoid gouging.
Check paint consistency visually; brittle, cracked drips flake easier than flexible ones.
After shaving, sand lightly with fine-grit paper to blend, then wipe clean.
If you see underlayers or softness, stop and reassess before proceeding.
Quick Test: Judge Drip Hardness and Paint Type
Before you start scraping or sanding, check how hard the drip has become and what kind of paint you’re dealing with—this determines whether you should shave, sand, or soften it first.
Lightly press the center with a fingernail or a plastic scraper to gauge drip hardness; a dent means it’s still soft, a snap means it’s cured.
Smear a tiny amount of mineral spirits or water (depending on oil- or water-based paint) in an inconspicuous spot to test paint consistency and reaction.
Note texture, sheen, and adhesion.
Record results mentally so you choose the least invasive removal method.
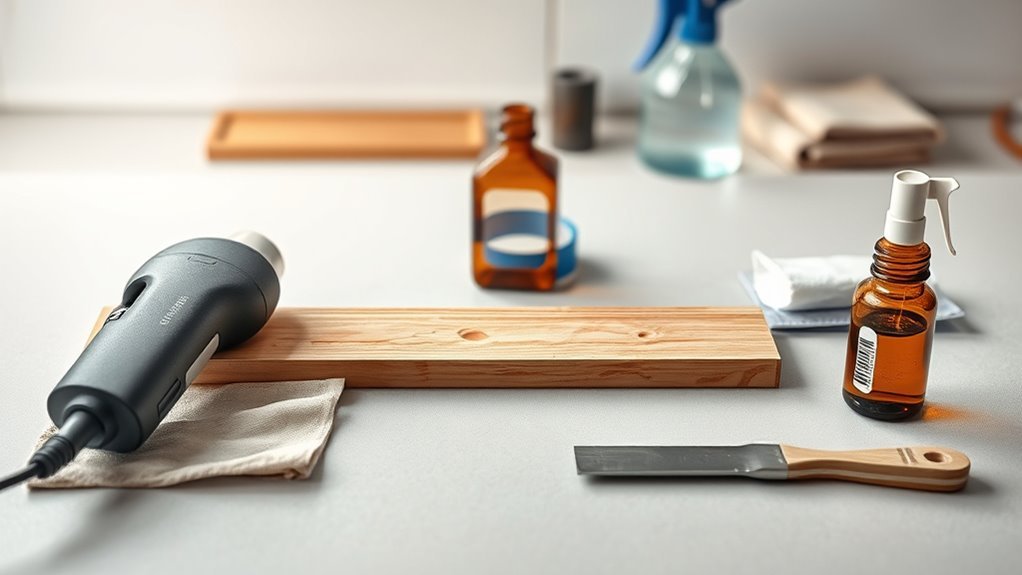
Gather the Right Tools
Now that you’ve assessed the drip, gather the right tools so you can remove it cleanly and without damaging the surrounding finish. You’ll need a sharp razor blade or scraper, fine-grit sandpaper, a putty knife, and lint-free cloths.
Have matching paint, thinner, and a small artist’s brush for precise touch-ups; understanding color mixing helps you match repaired spots. Keep a magnifier and good light to inspect brush strokes and edges.
Use painter’s tape later, but not now. Arrange items within reach, test blades on scrap, and work deliberately to avoid scratches or uneven texture.
Prep: Protect Nearby Surfaces and Yourself
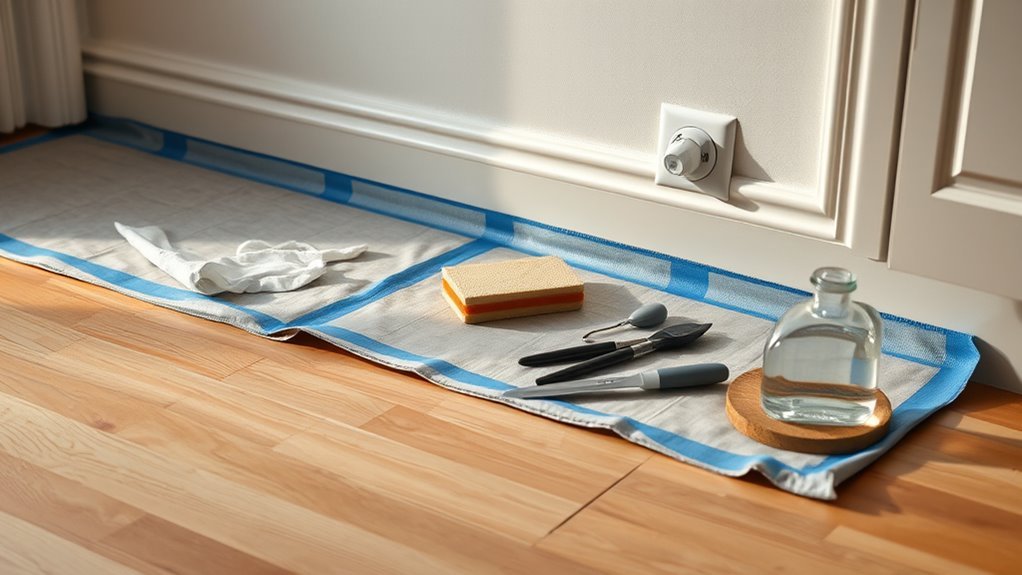
Since you’ll be scraping and sanding, shield floors, furniture, and trim with drop cloths or plastic sheeting and secure edges with painter’s tape so dust and stray paint don’t spread. You should also wear safety gear—gloves, goggles, and a dust mask—and keep ventilation open. Protect surfaces beyond the drip area and move small items away. Use a small trash bin for debris and label wet rags. Keep a damp cloth handy for immediate cleanup.
| Item | Purpose | Tip |
|---|---|---|
| Drop cloth | Catch debris | Overlap seams |
| Tape | Seal edges | Press firmly |
| Goggles | Eye safety | Fit snugly |
| Mask | Dust control | Replace as needed |
Sand Small, Shallow Drips Smooth
With your work area protected and safety gear on, you can start smoothing small, shallow drips with light sanding. Assess each drip size and confirm the paint consistency is fully cured; soft or gummy spots need more drying time.
Use fine-grit sandpaper (220–320) wrapped around a small block or fingertip to evenly abrade peaks, keeping strokes parallel to the surface. Check frequently to avoid sanding through surrounding paint.
Wipe dust with a tack cloth, then inspect under good light. If the surface feels smooth and uniform, feather edges before touching up with matching paint and a thin brush.
Scrape Thicker Drips With a Putty Knife
If a drip’s too thick to sand without gouging the surface, grab a flexible putty knife and carefully shave off the excess paint. You’ll assess paint consistency and perform drip identification first, so you know which edges to lift. Hold the knife at a low angle, push gently, and work from the drip’s outer edge toward the center. Clean residue with a damp cloth, let it dry, then sand lightly if needed. Replace any lost texture before repainting.
| Tool | Angle | Result |
|---|---|---|
| Putty knife | 15° | Smoothed drip |
| Cloth | 30° | Clean edges |
| Sandpaper | 45° | Feathered surface |
When to Use Heat or Solvent : And Safety
Decide whether to apply gentle heat or a solvent based on the paint type and how stubborn the drip is. Pick a solvent rated for your paint—water for latex, mineral spirits or paint thinner for oil-based—and test it in an inconspicuous spot first.
Always prioritize safety: work in a ventilated area, wear gloves and eye protection, and keep heat sources and flammable solvents well controlled.
When To Apply Heat
Although solvents can dissolve stubborn drips, you’ll usually reach for heat first when the paint is fully cured and the surface can tolerate warmth. You inspect the area, confirm no finish or nearby material will warp, then plan your heat application.
Use a heat gun on low, an adjustable hair dryer, or a warm iron with a cloth barrier; keep moving to avoid scorching. Heat softening makes the drip pliable so you can smooth or scrape it away gently with a plastic scraper.
Pause often, wear gloves and eye protection, and ventilate the space to avoid fumes and burns.
Choosing The Right Solvent
When should you reach for a solvent instead of heat? Use solvents when drips are brittle, on heat-sensitive surfaces, or when heat risks run.
For effective solvent selection, check the paint compatibility first: solvent type must match paint chemistry—water-based, lacquer, enamel, or oil—so you dissolve without spreading or damaging the substrate.
Test a tiny area to confirm reaction and drying time.
Apply sparingly with a soft cloth or cotton swab, working from the drip edge inward.
Neutralize or rinse as recommended for that solvent and paint.
If unsure about compatibility, consult product data sheets or a pro before proceeding.
Safety Precautions First
Before you reach for a heat gun or solvent, make sure you’ve assessed the risks and prepared a safe workspace: heat can ignite fumes or damage plastics and varnishes, while solvents can emit toxic vapors and harm skin or finishes.
You’ll wear proper safety gear—gloves, eye protection, and a respirator rated for organic vapors—when using chemicals or heat.
Work outdoors or in a well-ventilated area and follow ventilation tips like positioning a fan to pull fumes away and opening windows.
Keep a fire extinguisher nearby, read product labels, test on a hidden spot, and avoid sparks or open flames.
Repair Gouges and Restore Texture
If the dried paint drip left a deep gouge or uneven surface, you’ll need to fill and texture it so the repair blends with the surrounding finish. Start by removing any loose paint and sanding the area smooth to a stable edge.
For gouge restoration, apply a high-quality lightweight spackling compound or wood filler with a putty knife, slightly overfilling the depression. Let it dry fully, then sand flush.
For texture repair, match the existing finish by stippling wet compound with a brush, sponge, or comb before it sets. Clean dust, inspect for low spots, and repeat filling if needed.
Feather and Blend Paint for an Invisible Patch
Once the surface is smooth and textured to match, you’ll want to feather and blend paint so the repair disappears into the surrounding finish. You’ll apply thin, overlapping strokes from the patch outward, working wet edges into the old paint. Feather blending reduces ridges and softens gradations, creating an invisible patch when done carefully. Light pressure and a slightly loaded brush help you control paint flow. Check edges in different light and add tiny amounts rather than heavy coats. Patience and small adjustments beat overworking the area.
| Step | Tip |
|---|---|
| 1 | Thin coats |
| 2 | Overlap edges |
| 3 | Light pressure |
| 4 | Inspect light |
Touch-Up Painting: Brush, Roller, and Finish Tips
When you touch up paint with a brush or roller, work deliberately so your repair matches the surrounding finish. Use small, controlled strokes and feather the edges to avoid ridges.
Test color matching on a hidden spot; let test patches dry to reveal true paint sheen.
For small spots, use a high-quality brush and minimal paint on the tip. For larger areas, a mini roller gives even coverage and blends texture.
Match application direction to existing strokes.
After drying, assess under natural light and apply a second thin coat if needed.
Clean tools promptly to preserve crisp results.
Fix Dry Paint Drips on Drywall, Wood, Metal, and Trim
Even with careful touch-ups, dried drips can steal the smooth look you worked for, but you can remove them cleanly from drywall, wood, metal, and trim without starting over.
For drywall, sand the drip flat with fine-grit paper, wipe dust, prime spot, then repaint.
On painted wood finish, gently sand curved areas with a sanding sponge, clean, and touch up with matching paint.
For metal, remove loose paint with a plastic scraper, sand lightly to feather edges, wipe with solvent, and repaint with metal-appropriate paint.
On trim, sand and blend edges, then use a small brush for precise touch-up.
Prevent Drips: Best Painting Habits and Tips
To prevent drips, pick a roller with the right nap for your surface so paint spreads evenly instead of pooling.
If your paint feels too thick, thin it according to the manufacturer’s guidelines so it flows smoothly without sagging.
Those two choices alone will cut down on runs and make touch-ups far easier.
Choose The Right Roller
Which roller you pick makes a bigger difference than you might think: choose the wrong nap and you’ll be fighting drips, uneven coverage, and extra sanding later. You should match nap to surface—short nap for smooth walls, medium for lightly textured, long for heavy texture—so you’re choosing texture with intent.
Consider paint consistency when picking pile: thicker paint needs a denser roller to spread evenly, thinner formulas soak differently.
Use quality rollers to avoid shedding and overloading. Hold the roller at a steady angle, apply even pressure, and reload less often to prevent puddles. The right roller minimizes drips and saves touch-ups.
Thin Your Paint Properly
If your paint’s too thick, it won’t level out and you’ll get drips and lap marks. Thinning it just enough helps it glide, self-level, and bond without running. You’ll test paint consistency by stirring, then dipping a brush or roller—it should coat without sagging.
Add the manufacturer’s recommended thinner in small increments, mix thoroughly, and re-test. Keep viscosity consistent during the job; temperature and humidity affect flow. Proper thinning reduces the need for aggressive drip removal later.
If you see runs while painting, stop, smooth immediately, and adjust thinner amounts to maintain even coverage throughout.
Emergency Quick Fixes Before Guests Arrive
When guests are about to arrive, you can hide or minimize dry paint drips fast with a few sharp, immediate moves. You’ll focus on quick concealment and preserving overall color matching and paint durability until you can properly repair later. Use gentle, precise actions to avoid making drips worse.
Quick, gentle fixes to hide dry paint drips—sand, feather, dab matched paint, then blend the sheen for temporary concealment.
- Lightly sand rough drip edges with fine-grit sandpaper.
- Feather the drip with a small artist brush and thin topcoat.
- Dab a matched touch-up paint, blot excess with tissue.
- Apply a satin or matte finish to blend sheen differences.
These steps buy time without committing to full rework.
Troubleshooting Stubborn Drips and Common Mistakes
First, figure out what caused the drip so you can choose the right fix—too-thick paint, poor technique, or bad drying conditions all call for different approaches.
When you sand, use the proper grit and light pressure to remove the hump without gouging the surface.
Finally, adjust your prep and application methods—thin coats, proper thinning, and controlled brush/stroke habits will help prevent future drips.
Identify The Cause
Because paint drips almost always have a mechanical or technique-based cause, you can usually track them down quickly by inspecting your setup and recent actions. Check paint consistency and do a careful drip identification to narrow causes. Look at tools, environment, and how you applied the coat.
Once you know the source, you can correct technique or equipment.
- Overloaded brush or roller
- Thick or improperly mixed paint
- Slow-drying conditions (humidity, temperature)
- Uneven surface or poor primer coverage
Address the specific cause you find, then plan a targeted repair so you won’t repeat the same mistake.
Safe Sanding Techniques
If you’ve tried scraping and solvent work without success, carefully sanding the drip is the next safe move. You’ll remove the excess build-up while keeping surrounding finish intact by choosing the right grit, tools, and pressure.
Start with fine grit (220–320) and progress only if needed; coarse grit risks visible valleys. Use a sanding block or flexible pad to keep even pressure, and sand with the grain on wood or following texture on other surfaces.
Observe sanding safety: wear a dust mask, goggles, and ventilate. Confirm paint compatibility before touching underlying layers to avoid chemical reactions or adhesion loss.
Prevent Future Drips
Want to stop drips before they start? You can. Check paint consistency—thin paints run, thick paints may drag. Mix to the manufacturer’s recommendation, test on scrap, and adjust with proper thinner or reducer. Improve drip detection by inspecting against light as you paint; catch runs early and wipe them. Use right tools, proper angle, and steady strokes to control flow.
- Keep paint consistency uniform; stir often.
- Work in thin, even coats; don’t overload the brush.
- Watch for drips immediately with good drip detection habits.
- Allow proper drying between coats to prevent buildup.
Frequently Asked Questions
Can Paint Drips Contain Lead if the Paint Is Old?
Yes — if the paint’s old, it can contain lead; you’re risking lead contamination and toxic exposure when sanding or scraping drips. Wear tested respirators, wet-sand, and follow lead-safe work practices to protect yourself and others.
Will Sanding Release Harmful Dust Without a Respirator?
Yes — sanding can release harmful dust without a respirator, especially from old paint. You should prioritize paint safety, use dust mitigation like HEPA vacs, wet sanding, and wear a proper respirator to protect yourself.
Can I Paint Over Drips on Wallpaper?
Yes — you can paint over drips on wallpaper; it’s like patching a scar. You’ll risk hiding flaws unless you consider wallpaper removal first, and you’ll need careful paint color matching to blend the repaired area seamlessly.
How Long Should I Wait Before Reapplying Finish on Wood?
You should wait until paint curing completes—typically 24–72 hours for light handling, and 7–30 days for full cure—before finish reapplication; don’t rush, test a hidden spot, and follow manufacturer’s specific recommendations.
Do Insurance Policies Cover Damage From Paint-Removal Tools?
Generally, you’ll check your policy: insurance claims for paint-removal tool damage may be covered under property or liability, but coverage questions depend on cause, negligence, and endorsements, so you’ll contact your insurer and document the damage promptly.
Conclusion
You’ve turned a sloppy splash into a smooth finish, trading panic for patience. While the mess once shouted “ruin,” your steady scrape and light sanding now whisper “ready.” Small effort, big change—what looked stubborn becomes subtle. Keep the right tools, test the paint, and work gently: a few careful minutes prevent future headaches. So next time a drip appears, remember: quick calm beats frantic fixes every time.