How to Get Latex Paint Off Wood Without Damage
Start by testing the finish on a hidden spot so you know what you’re working with. For fresh paint, blot excess, wash with warm soapy water, then lift gently with a plastic scraper along the grain. For dried paint, soften with warm water, mild solvent, or vinegar steam and scrape slowly at a low angle to avoid gouging. Rinse, neutralize any stripper, and repair or sand minor spots before sealing. Keep going for step‑by‑step techniques and tips.
Quick Safe Method: Remove Latex Paint From Wood
When you need to remove fresh latex paint from wood quickly and safely, start by softening the paint with warm, soapy water and a sponge so it lifts without harming the finish. Then gently rub with a soft cloth or nylon scrub pad until the paint comes away.
You’ll work along the wood grain to avoid scratches, checking the paint color contrast so you can spot residue. If spots persist, dampen a cloth with isopropyl alcohol and blot, testing an inconspicuous area first.
Wipe dry, then condition the wood with appropriate oil or polish to restore sheen and protect the grain.
Test the Finish and Paint Type First
Before you start scraping or applying solvents, test both the wood finish and the paint type so you don’t damage the surface. You’ll identify finish compatibility and estimate a realistic paint removal timeline by performing small checks. Try a corner or underside, observe absorption, sheen change, and any finish softening. Note whether latex sits over varnish, shellac, or bare wood; each reacts differently.
- Rub a damp cloth to see color lift and finish reaction.
- Use a mild solvent on an inconspicuous spot for 10–30 seconds.
- Sand a tiny area with fine grit to reveal layers.
Record results before proceeding.
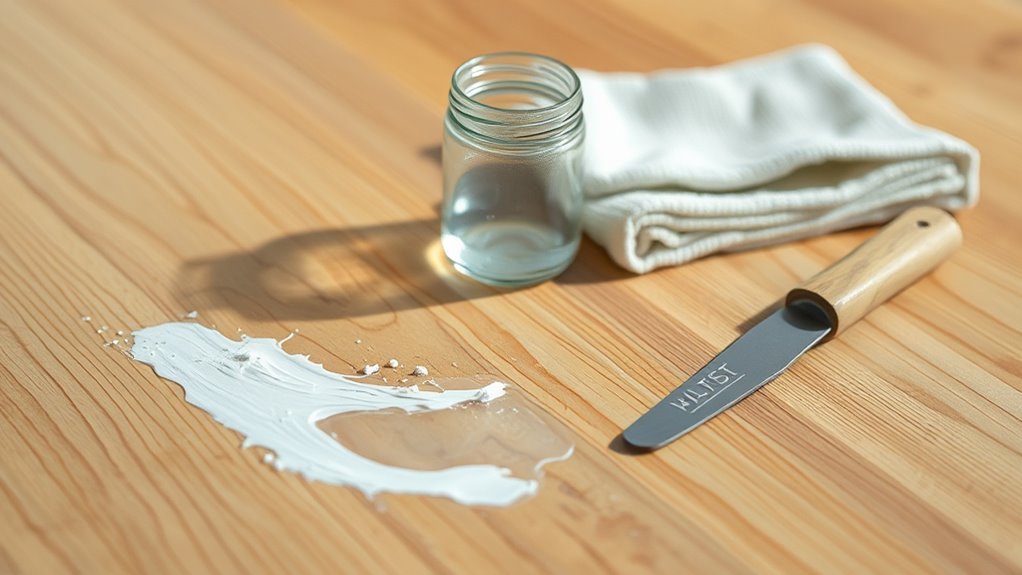
Tools and Materials for Gentle Removal
Before you start, gather soft scraping tools like plastic scrapers and nylon brushes.
Choose safe solvents such as mild dish soap, rubbing alcohol, or a commercial latex remover rated for wood.
Put on protective gear like gloves and eye protection.
You’ll use gentler tools first to avoid gouging the wood and only escalate solvents if needed.
Keep ventilation in mind and follow product instructions to protect both the finish and yourself.
Soft Scraping Tools
Looking for a gentle way to lift latex paint without gouging the wood? Use soft scraping tools that preserve grain and surface finish while prepping for any color matching or paint blending touch-ups. You’ll work deliberately, removing flakes and edges without harsh abrasion.
- Plastic putty knife — flexible, thin edge slips under paint without digging into wood.
- Rubber-edged scraper — cushions contact, ideal for curved moldings and delicate veneers.
- Wooden palette knife — firm but forgiving, reduces risk of sharp gouges when prying lifted paint.
Work with light pressure, test on an inconspicuous area, and keep blades clean.
Safe Solvent Choices
Which solvent should you reach for when removing latex paint from wood? Start with water and mild dish soap for fresh spills.
Then try rubbing alcohol or denatured alcohol for small stubborn spots. Test any solvent on an inconspicuous area to check color matching and finish effects before wider use.
For thicker or older paint, consider a commercial latex remover labeled safe for wood or eco-friendly options like citrus-based solvents; they cut paint without harsh fumes.
Apply sparingly, work with a soft scraper, and rinse residue promptly to protect the wood’s appearance and grain.
Protective Gear Essentials
When you’re removing latex paint from wood, wearing the right protective gear keeps you safe and prevents damage to the finish. You’ll want basic protective equipment and follow safety precautions so solvents, scrapers, or heat don’t harm you or the wood.
Pick gear that fits, resists chemicals, and lets you work precisely.
- Nitrile gloves for chemical resistance and tactile control.
- Safety goggles and a respirator rated for organic vapors when using solvents or heat.
- Knee pads, a dust mask, and protective clothing to keep paint chips and dust off surfaces.
Use and store gear properly.
Remove Fresh or Wet Latex Paint Quickly

If the paint’s still wet, act fast to prevent it from soaking into the wood—wipe up excess with a clean, lint-free cloth or paper towel, working outward from the spill to avoid spreading. Blot gently rather than rub to lift pigment without smearing; change cloths as they fill.
Lightly dampen a cloth with warm, soapy water for remaining residue, then dry immediately.
For small edges, use a plastic scraper or credit card at a low angle.
Keep samples for color matching and touch-ups if you thinly sand the spot later; proper paint blending restores finish seamlessly after repair.
Remove Dried Latex Paint With Household Remedies
Because dried latex bonds differently than fresh paint, you’ll need a gentler, more patient approach that uses common household items to soften and lift it without damaging the wood. Start by testing an inconspicuous area, then work with small sections following painting techniques that respect the wood grain. Use a plastic scraper and avoid metal.
- Warm, soapy water: soak a cloth, press to soften, then scrape lightly.
- Vinegar steam: heat vinegar, hold cloth to spot to loosen paint, blot.
- Rubbing alcohol: apply sparingly, rub along grain, then rinse and dry.
Work slowly to preserve finish and texture.
Use Wood-Safe Commercial Strippers on Latex Paint
When household remedies won’t cut it, you can try a wood-safe commercial stripper — pick a non-toxic formula to protect yourself and the finish.
Test it on a hidden spot first to make sure it won’t discolor or raise the grain.
Then follow the manufacturer’s instructions exactly for application, dwell time, and cleanup.
Choose Non-Toxic Formula
Since you’ll be working on wood and likely indoors, pick a non-toxic, wood-safe commercial stripper to remove latex paint without harming the substrate or your health. You’ll want products labeled low-VOC and biodegradable to address environmental concerns and provide eco friendly solutions.
Look for catalytic or soy-based formulas designed for wood; they soften latex without swelling or bleaching grain. Follow label directions, use gloves, ventilate, and dispose of residues per local rules. Compare manufacturer notes on contact time and neutralizer needs so you can plan gentle, effective removal.
- Soy-based, low-VOC stripper
- Citrus/safe solvent blend
- Water-based gel stripper
Test On Hidden Area
Want to be sure the stripper won’t damage your wood? Test on a hidden area first. Apply a small amount of the wood-safe commercial stripper, let it sit the recommended short time, then remove per product guidance.
Inspect grain, finish, and color change under good light. Check how the surface accepts stain or finish afterward — it should allow proper color matching and show no uneven absorption that could complicate paint blending later.
If the wood looks altered, stained, or softened, try a milder product or a different method. Only proceed when the test patch meets your expectations.
Follow Manufacturer Instructions
If you choose a commercial stripper, follow the manufacturer’s instructions exactly to protect the wood and get the best results. You’ll preserve paint durability assessments and avoid harming the wood grain by using recommended dwell times, temperatures, and removal methods.
Wear gloves and ventilate as directed; rinsing and neutralizing steps matter. Test a small area first, then proceed methodically to prevent uneven removal or raised grain.
- Apply evenly, respecting dwell time.
- Use plastic scrapers and soft brushes per guidance.
- Neutralize, rinse, and let the wood dry completely before refinishing.
Use Heat Tools (Heat Gun/Infrared) Safely
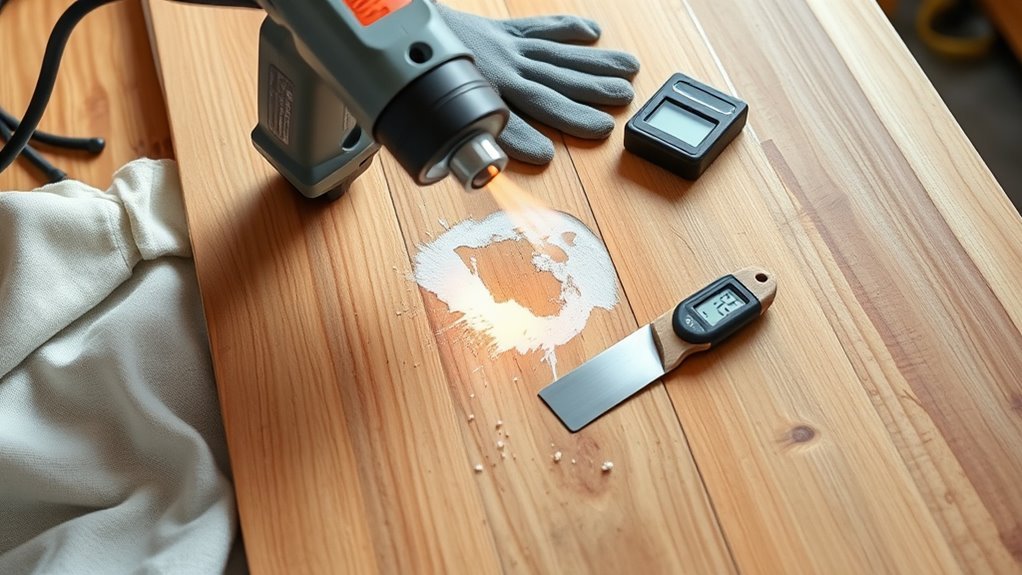
When you use a heat gun or infrared heater to lift latex paint from wood, keep the tool moving and the temperature controlled to avoid scorching the surface or driving paint deeper into pores.
You’ll wear gloves, eye protection, and a respirator for heat safety, and work in a well-ventilated area to avoid fumes.
Test a hidden spot to find the lowest effective setting. Hold the tool several inches away, sweep steadily, and peel softened paint with a cloth or scraper edge only after it loosens.
Infrared benefits include gentler, more even heating that lowers scorch risk on delicate woods.
Scrape and Lift Paint Without Gouging Wood
Before you start scraping, choose the right tools and position them to protect the wood: use a sharp, flexible putty knife or paint scraper held at a low angle. Work with the grain, and support the blade so you lift paint instead of digging into the surface.
Before scraping, use a sharp, flexible scraper at a low angle and lift with the grain to protect wood.
You’ll work methodically, testing pressure on an inconspicuous spot so you don’t gouge. Thin layers lift easier; stubborn edges may need repeated gentle passes. Keep chips off the wood to avoid dents.
Consider how underlying color matching or altered paint adhesion will affect later refinishing and adjust technique accordingly.
- Scrape with grain, low angle
- Use light, repeated passes
- Clear debris frequently
Clean Residue and Neutralize Stripper
After stripping or scraping, wipe the surface with clean rags and a mild solvent or soapy water to remove paint residue and dissolved stripper. Work along the wood grain so you don’t push softened particles into pores.
Rinse repeatedly until runoff is clear, changing rags or buckets as needed. Neutralize chemical strippers per product instructions—usually a water rinse or a neutralizing solution—to stop continued action.
Dry completely, then inspect for any tacky spots and repeat cleaning if necessary. Avoid aggressive scrubbing that disturbs wood grain.
Once clean, ventilate the area before proceeding to paint mixing or finishing.
Repair Surface Damage and Stain Bleed
Once the paint’s gone, assess how deep the damage runs so you know whether sanding or a wood filler is needed.
Gently remove any remaining surface paint with fine-grit sandpaper, working with the grain to avoid more harm.
If you see stain bleed, treat it promptly with a wood bleach or stain blocker before refinishing.
Assess Damage Extent
If the paint came off in flakes or you can still see dark tannin stains seeping through, don’t assume the surface is ready for repainting—you need to assess and address both physical damage and stain bleed first.
Inspect the wood closely: note gouges, raised grain, and discoloration. Decide if sanding, filler, or a stain blocker is needed. Consider color matching to any repaired areas so repairs blend with existing wood grain.
- Map damaged zones: size, depth, stain spread.
- Test a small filler/sand patch for adhesion.
- Probe for rot or soft spots beneath finish.
Remove Surface Paint
When paint sits loosely or you spot stain bleed, start by removing the compromised finish so repairs will stick and stains won’t resurface. Use a plastic scraper and fine-grit sandpaper to gently lift flaky latex without gouging wood.
For small areas, a chemical remover formulated for latex can help; follow directions and ventilate. After removal, clean residue with a damp cloth and let the wood dry.
Note grain and original tone for accurate color matching later. Keep aesthetic considerations in mind—feather edges for smooth gradations and minimal sanding to preserve character while preparing for stain treatment and refinishing.
Treat Stain Bleed
How do you stop old stains from bleeding through new finishes? You’ll neutralize tannin and seal damaged areas before repainting. Sand lightly, clean, then apply a stain-blocking primer to lock tannins. Test small spots for color matching and paint blending to ensure a seamless repair.
- Clean and sand damaged wood to bare fiber, removing loose paint and contaminants.
- Apply a high-quality stain-blocking primer; let it cure fully before topcoat.
- Feather edges and blend new paint into surrounding finish, checking color matching under natural light.
This prevents bleed-through and restores the surface without overpainting.
Refinish and Seal Wood After Paint Removal
Once you’ve stripped the latex down to bare wood, take a moment to inspect the surface for gouges, glue residue, or tannin stains before refinishing.
After stripping to bare wood, inspect for gouges, glue residue, or tannin stains before refinishing.
Repair dents or gouges with wood filler, sand smoothly, and remove dust.
Do finish sanding progressively finer grits for an even surface.
If you’ll repaint or stain, test color matching on a scrap or hidden area to confirm tone.
Apply a compatible stain or sealer, following manufacturer drying times, then protect with a clear topcoat—polyurethane or oil-based finish—appropriate for the wood and use.
Maintain ventilation and follow safety instructions.
When to Call a Pro for Stubborn Latex Paint
If you’ve done all the prep—stripping, sanding, and repairing—but stubborn latex paint still won’t budge, it’s time to contemplate professional help. You should call for professional assistance when the paint covers intricate trim, historical wood that could be damaged, or fumes and dust are beyond your control.
Pros bring specialized equipment and experience to remove paint faster and safer. Consider these scenarios:
- Extensive lead-risk or unknown coatings on old wood.
- Large surfaces or deep-penetrated paint that resists DIY methods.
- Structural or valuable wood requiring preservation and cosmetic expertise.
Hire someone licensed, ask for references, and get a clear estimate.
Frequently Asked Questions
Can I Remove Latex Paint From Veneered or Laminate Wood Safely?
Yes — you can remove latex paint from veneered or laminate wood safely if you use gentle methods; you’ll test solvents, scrape carefully to avoid veneered damage, and choose techniques that prioritize laminate preservation and finish integrity.
Will Removing Paint Affect Existing Lead Testing Results or Require Retesting?
Yes — paint removal can affect lead testing results, so you should retest after removing layers; when you remove paint, lead testing must confirm substrate safety, especially if prior tests targeted surface-only samples.
Can I Use Pressure Washing on Exterior Painted Wood Without Damage?
You can, but test first: high pressure can gouge wood, so use low PSI and wide fan, control pressure considerations, and do thorough surface preparation; you’ll prevent damage by adjusting nozzle, distance, and technique.
How Long Should Wood Dry Before Refinishing After Paint Removal?
You should wait 24–72 hours for wood to reach proper drying time before refinishing; longer for thicker or denser wood. Follow refinishing steps: sand smooth, clean dust, apply primer, then finish coats, allowing recommended cure times.
Are There Eco-Friendly Disposal Methods for Paint Waste and Stripper Residue?
Yes — you can manage eco friendly disposal by using household hazardous waste programs, recycling centers, and approved disposal services; you’ll label containers, neutralize water-based residues, and follow local paint waste management rules to prevent contamination.
Conclusion
You’ve peeled back the paint like lifting a sun-warmed blanket to reveal the grain beneath—careful tests and gentle tools kept the wood smiling. If fresh, you wiped it away; if stubborn, you softened and eased each layer until the surface breathed again. After cleaning, neutralizing, and touching up stains or dents, seal the wood so it can shine for years. When damage or mystery chemicals worry you, call a pro to finish the job right.