How to Know If My House Has Mold
You’ll know mold’s likely if you smell persistent mustiness, see discoloration or fuzzy/slimy patches on walls, ceilings, grout or behind appliances, or notice water stains, peeling paint, or spongy spots under carpets and flooring. Watch for worsening allergy or respiratory symptoms indoors, condensation or humidity above 60%, and hidden growth in HVAC, attics, crawlspaces, or behind wallpaper. If you spot these signs, act promptly — keep going to learn practical detection and next steps.
How This Guide Helps You Find Mold Fast
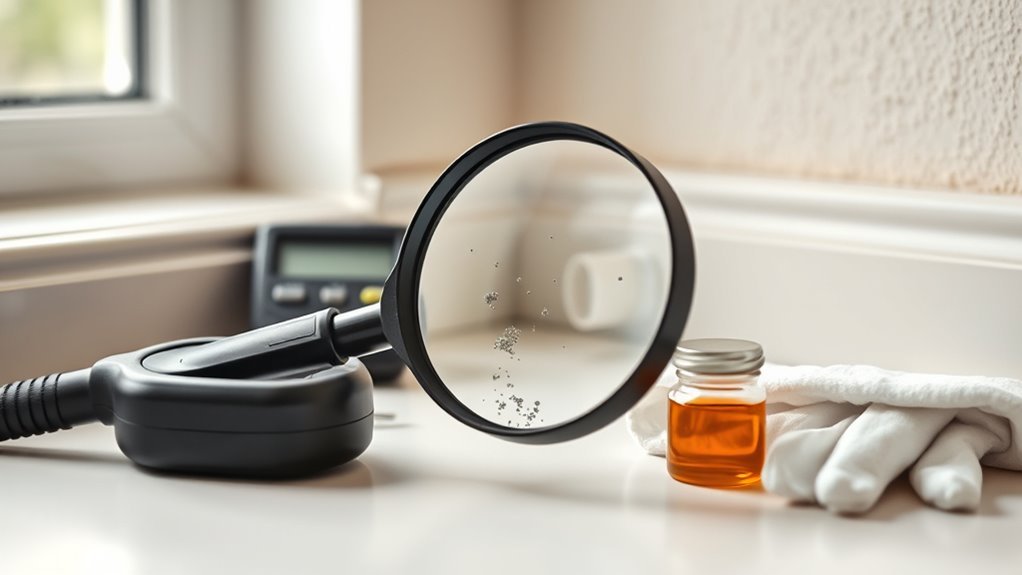
Because spotting mold early saves time and money, this guide gives you clear steps and quick checks to find it fast. You’ll learn where mold hides, how to inspect suspicious areas without special tools, and when to call a pro.
Pay attention to damp spots near plumbing, basements, and window seals, and to musty odors that even air purifiers don’t remove.
Check soil and leaves of indoor plants for fuzzy growth and avoid overwatering.
You’ll get practical actions: dry wet areas, improve ventilation, and document findings.
Follow these focused steps to catch mold before it spreads.
Quick Checklist: Do I Have Mold Now?
Check for visible mold growth on walls, ceilings, or around windows and pipes.
If you notice a musty odor that won’t go away, that’s another strong sign.
Also pay attention to new or worsening health symptoms like sneezing, coughing, or throat irritation that clear up when you’re away from home.
Visible Mold Growth
If you can see fuzzy spots, dark streaks, or discolored patches on walls, ceilings, window sills, or around pipes, you very likely have visible mold.
Check edges, grout, and behind furniture; mold spores colonize porous materials after moisture exposure. Take photos for records, note size and color variations, and avoid touching or disturbing growth to limit spread.
Improve indoor ventilation and fix leaks before cleaning small areas with appropriate cleaners and protective gear.
For widespread growth, porous material damage, or recurring patches despite repairs, call a professional for assessment and safe removal to protect your health and your home.
Musty Odor Present
When you notice a persistent musty, damp smell that doesn’t go away after airing the room, it’s a strong sign mold may be growing somewhere out of sight. You should trace the odor to likely sources—basements, behind appliances, or inside walls—and act quickly. Use dehumidifiers and improve ventilation for mold prevention, and clean small areas promptly. For larger problems, call a pro.
| Location | Typical Smell | Action |
|---|---|---|
| Basement | Stale, earthy | Dehumidify, inspect |
| Behind fridge | Damp, sour | Move, dry, clean |
| Bathroom | Mildew-like | Ventilate, scrub |
Also consider odor elimination products cautiously.
Health Symptoms Noticed
Because mold can trigger a range of reactions, pay attention to new or worsening symptoms that appear while you’re at home or improve when you leave. You might notice persistent sneezing, nasal congestion, itchy eyes, coughing, headaches, or unexplained fatigue that eases away from the house.
Asthma or allergy sufferers can get more severe attacks indoors. Check rooms with indoor plants and overwatered soil, which can hide mold, and inspect basements, bathrooms, and crawlspaces.
Also consider exterior landscaping that directs water toward foundations. If symptoms align with these clues, get a professional mold inspection and address moisture sources promptly.
When To Call a Mold Inspector
Although some mold can be handled with cleaning and ventilation, call a mold inspector when you spot persistent growth, smell a musty odor that won’t go away, notice water damage or recurring leaks, or experience unexplained health symptoms like persistent coughing, sneezing, or worsening allergies. You’ll also want an inspector if mold affects sensitive areas tied to home decor or outdoor structures after landscaping tips changed drainage. An inspector assesses scope, suggests remediation, and documents findings for insurance.
| Area inspected | Typical clue |
|---|---|
| Walls/ceilings | Stains, soft drywall |
| Crawlspaces | Damp, visible mold |
| HVAC systems | Dusty coils, odor |
| Attics | Past leaks, staining |
Common Smell Signs That Point to Mold
If you notice a persistent musty or damp smell that won’t go away after cleaning, that’s a strong sign mold may be present somewhere in your home. You’ll often detect a stale, earthy odor in basements, crawlspaces, or near plumbing.
Pay attention to sudden increases in mustiness after rain or when HVAC runs; mold spores can circulate through ventilation systems and spread scent. Other smells—sharp, sour, or rotten—can signal specific microbial growth.
If occupants have unexplained allergies or headaches along with odors, don’t ignore it. Locate the source, improve airflow, and consider testing or professional remediation.
Visible Mold Indicators on Walls and Ceilings
Look for discolored patches on walls and ceilings that form irregular rings, streaks, or clustered spots.
You might also see fuzzy or slimy growths that feel different from paint or dust.
If you spot either pattern, check moisture sources nearby and consider testing or professional removal.
Discolored Patch Patterns
Noticing irregularly shaped, discolored patches on walls or ceilings? You’ll often see discolored patches that differ from normal staining: gray, green, brown, or black areas with uneven edges. These spots may follow moisture paths, clustering near windows, plumbing, or roof leaks.
Paint discoloration can signal underlying mold growth when color changes persist despite cleaning or repainting without addressing moisture. Inspect by tapping the area for softness and checking nearby humidity sources.
Document locations and sizes, then fix leaks and dry the area. If patches return or cover large areas, call a professional for evaluation and remediation.
Fuzzy Or Slimy Growth
When you see fuzzy or slimy growth on walls or ceilings, it’s a clear sign mold is actively colonizing the surface rather than just staining it. You’ll notice fuzzy growth that looks like cottony tufts or powdery specks in colors from white to green to black.
Slimy patches appear wet, shiny, and darker than surrounding paint or plaster. Both indicate moisture and ongoing biological activity—don’t just paint over them.
Wear gloves and a respirator before touching, increase ventilation, and locate the moisture source.
Small areas you can clean with appropriate cleaners; larger or persistent infestations need professional removal to protect your health.
How To Spot Mold Under Carpets and Flooring
If you suspect mold under your carpet or floorboards, start by checking for damp spots, musty odors, and areas that feel cooler or spongy underfoot—these are the most reliable early clues.
Pull back a corner of carpet where safe and wear gloves; inspect padding and subfloor for discoloration, staining, or visible mold spores clinging to fibers.
Look for carpet damage like buckling, staining, or chronic dampness that signals ongoing moisture.
Use a flashlight; mold often appears as dark specks or fuzzy patches.
If you find signs, stop using the area, dry thoroughly, and consult a professional for removal.
Detecting Mold Behind Wallpaper and Paint
Because wallpaper and layers of paint can trap moisture against walls, mold can grow out of sight and show few obvious clues at first. You’ll notice musty odors, bubbling or discoloration of wallpaper, or paint that blisters and peels.
Tap suspect areas; a hollow sound or softness suggests decay. Carefully peel a corner to inspect behind coverings, wearing gloves and a mask.
If you find dark spots or fuzzy growth, photograph and test or consult a pro. Improve indoor ventilation and address leaks immediately as part of mold prevention to stop hidden infestations from spreading.
Bathroom Mold: Where to Look and What It Looks Like
Bathrooms are a top spot for mold since warm, humid conditions and frequent water splashes feed growth; check grout lines, shower corners, caulk seams, behind toilet bases, under sinks, and around vents and light fixtures.
| Location | Signs |
|---|---|
| Grout & tile | Black specks, fuzzy patches |
| Caulk & seams | Discoloration, musty odor |
| Behind fixtures | Stains, peeling paint |
You’ll spot black, green, or brown patches that may feel slimy or dusty. Smell’s key: persistent musty odors mean hidden colonies. Treat promptly; unchecked mold attracts garden pests and can spread to other areas. Avoid contact with Kitchen appliances when cleaning; ventilate well.
Identifying Mold in Kitchens and Around Sinks
Now that you know where mold hides in the bathroom, turn your attention to the kitchen and sink areas, which face similar moisture challenges but show mold in different ways. Check under sinks, around faucet bases, behind dishwashers, and in grout or caulk for discoloration—black, green, or fuzzy patches.
Musty or food-like odors, persistent drain clogs, or unexplained allergy symptoms signal trouble and degraded air quality. Fix leaks, dry surfaces, and use ventilation to aid mold prevention.
Clean small spots with appropriate cleaners; for extensive growth, call a professional to protect health and prevent recurrence.
Signs of Mold in Basements and Crawlspaces
When damp soil, poor drainage, or a leaky foundation keeps moisture lingering, mold often takes hold in basements and crawlspaces. You’ll notice musty odors, especially after rain, and dark or fuzzy patches on concrete, wood joists, insulation, or stored items.
Watch for peeling paint, warped wood, and recurring condensation on pipes. Increased allergies or respiratory irritation when you’re near the area can signal hidden growth.
Keep indoor plants out of damp crawlspaces—they can worsen humidity. Improve ventilation, fix drainage, and consider air purification for occupied basements.
If mold covers large areas or keeps returning, call a professional promptly.
Check Attics and Roof Spaces for Mold
Because warm, moist air rises, your attic and roof spaces are prime spots for hidden mold growth, especially after roof leaks, poor ventilation, or ice dams. Inspect rafters, sheathing, and attic insulation for dark spots, musty odors, or water stains.
Look near roof venting, chimneys, and plumbing stacks where leaks often go unnoticed. Use a bright flashlight and wear a mask and gloves; avoid stirring spores.
Check insulation for dampness or compression—wet insulation loses effectiveness and fosters mold. If you find extensive growth, contaminated insulation, or structural damage, call a professional for safe evaluation and remediation.
Mold Clues Inside Closets and Behind Furniture
If you store items tightly against walls or leave closets poorly ventilated, mold can grow unnoticed behind clothing, boxes, and furniture. Check for musty smells when you open doors and look for faded spots, water stains, or black speckles on walls, baseboards, and closet floors.
Pull furniture away from walls periodically to inspect hidden surfaces; poor furniture placement traps moisture and reduces airflow. Improve closet ventilation by adding vents, using moisture-absorbing products, and leaving gaps between stored items.
If you spot mold, dry the area, clean with appropriate cleaners, and consider professional help for persistent or extensive growth.
How HVAC Systems and Ducts Hide Mold
Though tucked out of sight, your HVAC system and ducts can harbor mold for months before you notice it, since they circulate moist, warm air and spread spores throughout the house. You might smell musty odors in rooms or notice unexplained allergy symptoms as the system redistributes contaminants.
Condensation, leaks, or clogged drip pans create ideal spots inside plenums and flexible ducts. For mold prevention, control humidity, schedule professional inspections, and keep condensate lines clear.
Consider whole-house air purification to reduce airborne spores and volatile compounds. Addressing hidden HVAC growth protects indoor air quality and prevents widespread contamination.
Detecting Mold in Air Filters and Vents
When you inspect vents and air filters, look for visible colonies, dark streaks, or fuzzy growths along the pleats and grille edges—these are often the first, most reliable signs of mold.
Check filters monthly; if you spot discoloration or musty odors, replace them and wear a mask because trapped mold spores can release during handling.
Inspect vent interiors with a flashlight; moisture or staining suggests poor indoor ventilation that encourages growth.
Clean grills and accessible ducts with a HEPA vacuum and detergent, and improve airflow and humidity control.
If growth is extensive or recurring, call a professional for testing and remediation.
Recognizing Mold in Appliances and Laundry Areas
Check the backs and seals of your washer, dryer, and dishwasher for visible mold spots or black streaks.
You’ll also notice a persistent musty smell around laundry areas or inside appliance compartments even after cleaning.
If you spot growth or odors, address moisture sources and clean or replace affected parts promptly.
Visible Mold Growth
Ever noticed dark spots on your washer drum, behind the dryer, or around the gasket of your front-loading machine? You can spot visible mold as black, green, or gray patches on rubber seals, detergent drawers, vents, and laundry baskets. Address it quickly to protect fabrics and maintain mold prevention practices that preserve indoor air quality.
Clean small areas with appropriate cleaners, dry surfaces, and run vents or dehumidifiers. Watch for spreading or recurring growth.
- Check door seals and detergent trays regularly
- Inspect hoses and behind machines
- Launder damp items promptly
- Use ventilation during and after cycles
Musty Odors
Although you mightn’t see mold right away, a persistent musty or damp smell in your laundry area often signals hidden growth in appliances, vents, or damp fabrics. Follow your nose and investigate seals, hoses, drains, and nearby laundry piles to locate and remove the source.
Check washer gaskets, detergent drawers, and dryer vents for trapped moisture. Clean and dry surfaces, replace faulty hoses, and run cleaning cycles with appropriate cleaners.
Keep laundry sorted and aired to prevent odors. Be aware that mold attracts garden pests and can spread to indoor plants, so address humidity and ventilation promptly.
Health Symptoms That Suggest Household Mold Exposure
If you’re noticing persistent respiratory issues, worsening allergies, or unexplained headaches and fatigue, mold in your home could be the cause. You might also see increased irritation or symptoms that improve when you leave the house. Addressing mold prevention and improving air quality can reduce risks.
If persistent respiratory problems, worsening allergies, or unexplained headaches improve when you leave home, hidden mold may be the cause.
- Persistent coughing or throat irritation that’s worse indoors
- Frequent sinus congestion or watery eyes without other cause
- New or worsening skin irritation or rashes
- Ongoing headaches, brain fog, or unusual fatigue tied to time at home
If symptoms match, check for hidden mold and consider professional testing.
Which Allergy or Respiratory Symptoms Point to Mold
Those general symptoms can hint at mold, but pinpointing which allergy or respiratory signs most strongly suggest mold exposure helps you decide when to inspect your home.
You’ll notice persistent sneezing, itchy or watery eyes, and nasal congestion that flare indoors but ease away from your house.
Chronic coughing, wheezing, or shortness of breath without another diagnosis can indicate sensitivity to mold spores.
Skin rashes or worsening eczema after being inside also signal allergic reactions.
Track timing and location: symptoms that recur at home, after cleaning damp areas, or in specific rooms point toward household mold as a likely trigger.
When Unexplained Illness Means You Should Suspect Mold
If you keep getting respiratory problems like coughing, wheezing, or sinus trouble that don’t respond to treatment, you should consider mold as a possible cause.
You should also watch for new or worsening neurological or cognitive changes—like headaches, memory lapses, or brain fog—that come on at home and improve when you’re away.
Those patterns together are a strong reason to investigate your living environment for hidden mold.
Persistent Respiratory Symptoms
When you keep getting coughs, congestion, wheezing or unexplained sinus infections despite treatment, think about mold as a possible cause—especially if symptoms worsen at home or improve when you’re away.
Check for hidden dampness, musty smells, or visible mold near vents and windows. Consider removing indoor plants if soil stays damp; they can harbor spores.
Run HEPA air purifiers and change filters regularly to reduce airborne particles.
See a doctor for allergy testing and tell them about home exposures.
- Persistent cough or wheeze tied to time at home
- Recurrent sinus infections
- Symptoms easing on trips
- Visible mold or damp spots
Neurological And Cognitive Changes
Breathing problems aren’t the only clue that your home might be exposing you to mold—subtle changes in thinking, mood, or coordination can also be signs. You might notice memory lapses, trouble concentrating, headaches, dizziness, or worsening mood without other explanations.
Chronic exposure can trigger neuroplasticity effects that alter neural pathways, making symptoms persist even after the source is removed. Watch for accelerating cognitive decline or new clumsiness, especially if multiple household members are affected.
Keep a symptom log, check for dampness, and consult a physician familiar with environmental illness. If mold is suspected, get a professional inspection and remediation promptly.
How Moisture and Humidity Create Mold-Friendly Conditions
Because mold needs water to grow, even modest increases in indoor moisture and humidity can make your home hospitable to spores that were always around. You’ll notice damp corners, musty smells, or condensation on windows where moisture lingers.
Poor air circulation and lots of indoor plants can raise local humidity, creating microclimates mold prefers. Control sources and move air to disrupt growth.
- Check areas with persistent damp or condensation.
- Limit clusters of indoor plants in small rooms.
- Use fans or vents to improve air circulation.
- Dry wet materials quickly and keep relative humidity below comfortable levels.
Simple Moisture Checks to Find Hidden Mold Sources
You’ve checked for damp spots and improved airflow—now make a few quick moisture checks that’ll point to hidden mold sources. Inspect behind appliances, under sinks, and along baseboards for warping or staining; use a flashlight and feel for cold, clammy surfaces.
Smell for musty odors that signal poor air quality even if mold isn’t visible. Check attic and crawlspace vents to verify ventilation systems aren’t blocked and that soffit vents draw air.
Run toilets and showers briefly while you watch adjacent walls and ceilings for leaks. Note any recurring wetness and address it promptly to prevent mold growth.
Using a Humidity Meter: What Readings Indicate Risk?
When indoor humidity stays above about 60% for extended periods, mold can take hold quickly, so you should aim to keep relative humidity between 30% and 50%. Use a humidity meter in bedrooms, basements, and bathrooms to monitor risk.
Readings consistently above 60% mean you should act: improve air circulation, use dehumidifiers, and consider professional mold remediation if mold appears. Check after showers or cooking and log trends.
Readings above 60% require action: boost ventilation, run a dehumidifier, and address any mold promptly.
- 30–50%: safe zone
- 51–59%: watch, increase ventilation
- 60%+: high risk, take action
- Sudden spikes: investigate leaks or poor airflow
Spot Past Water Damage That Hides Mold
Look for water stain patterns on ceilings, walls, and floors—ringed or irregular discoloration often marks prior leaks that can hide mold.
Press or gently probe suspect areas; hidden structural softness or spongy drywall is a red flag.
If you find stains or give way spots, investigate further or call a pro to check for concealed mold.
Water Stain Patterns
If water stains mar your ceilings or run down walls in irregular rings or feathered edges, they can be hiding mold colonies beneath paint or drywall—so don’t assume the surface discoloration is the only problem.
Use pattern recognition to map stains: repeat shapes, streaks from a single source, or clustered halos often mean ongoing moisture. Water stains signal where to inspect more closely and when to test for spores.
- Note size changes over time
- Check adjacent surfaces for spreading
- Smell musty odors near stains
- Photograph patterns for tracking and repairs
Hidden Structural Softness
Water stains often point to more than cosmetic issues; you should also probe for hidden structural softness where past water damage has weakened materials and hidden mold growth.
Check floors, joists, drywall, and baseboards for sponginess by pressing or tapping; creaks, sagging, or indentations signal compromised structural integrity.
Use a flashlight and moisture meter to detect damp pockets and inspect behind trim and under flooring for hidden cavities that harbor mold.
If you find soft spots, limit disturbance to avoid spreading spores and call a professional to assess repairs, remove contaminated material, and restore safe, dry conditions.
Do-It-Yourself Surface Tests: What They Show and What They Miss
When you swipe a visible stain with a store-bought test or tape and get a result, you’ll know whether that spot likely has mold on the surface—but not much more. DIY surface tests tell you presence, not species, spread, or hidden colonies. Use them as a quick check while focusing on mold prevention and air quality improvements. Remember limitations and follow-up steps.
- Identifies surface spores quickly
- Doesn’t reveal airborne concentrations
- Can miss mold behind walls or under flooring
- Positive result signals remediation or professional inspection needed
When to Use Home Mold Test Kits and How to Interpret Results
Because home test kits are affordable and easy to use, you’ll want to reach for one when you spot visible staining, smell persistent mustiness, or suspect mold after a leak—but remember they’re screening tools, not definitive answers. Use kits to decide if further action’s needed: collect air or surface samples, follow instructions, and compare spore counts to kit baselines. High indoor counts or unusual species suggest professional assessment and mold remediation planning to protect health and air quality. Treat results as indicators. Document locations, dates, and photos to guide next steps and to share with a pro if needed.
| Location | Sample Type | Impression |
|---|---|---|
| Basement | Air | Elevated |
| Bathroom | Surface | Visible |
| Attic | Air | Low |
| Bedroom | Surface | Suspect |
| Crawlspace | Air | High |
Pros and Cons of DIY Versus Professional Mold Testing
You can save money with DIY mold tests, but they’re cheaper for a reason—results can be limited or misleading.
If you need accurate species identification, hidden-source detection, or proof for landlords or insurers, a professional inspection and lab testing will be more reliable.
We’ll compare costs, accuracy limits, and clear signs that it’s time to hire a pro.
DIY Testing Costs
Deciding between a DIY mold test and hiring a pro comes down to cost, accuracy, and how quickly you need reliable results.
You’ll pay $10–$50 for basic kits, $50–$200 for air or surface tests, while lab analysis adds fees.
Pros cost more but often bundle inspection and remediation planning.
Consider ongoing prevention expenses like eco-friendly solutions and mold-resistant paints when budgeting.
- DIY: low upfront cost, fast answers
- Lab analysis: moderate cost, more detail
- Professional inspection: higher cost, extensive
- Prevention supplies: variable cost, long-term savings
Accuracy And Limitations
While DIY mold tests can give you a quick sense of a problem, they’re limited in what they can reliably show, and professionals provide far more accurate, actionable information. You’ll get cheap kits that confirm spores but miss hidden sources, species, and concentration.
DIY can perpetuate mold myths when results are misread or out-of-context, and you might confuse common terminology like “mold spores” versus active growth.
Pros use calibrated equipment, air and surface sampling, and lab analysis to quantify risk and identify species.
Use DIY for initial checks, but understand its limits before making remediation choices.
When To Hire Professionals
When should you call in a professional instead of relying on a DIY kit? You should hire pros when health risks, hidden growth, or persistent odors worry you.
DIY kits help spot visible issues, but professionals offer thorough sampling, mold species ID, and remediation plans.
Consider costs versus certainty: professionals cost more but save time and risk; DIY is cheaper but less reliable.
- Severe allergy or respiratory symptoms present
- Large contamination or repeated dampness
- Unclear source after DIY testing
- Needed for insurance or resale documentation
Also balance testing with simple fixes like gardening tips and kitchen organization to reduce moisture.
What a Professional Inspection Includes and Costs to Expect
If you’re worried about mold, a professional inspection will give you a clear picture of where mold is, how extensive it is, and what caused it. You’ll get a visual survey, moisture readings, and targeted air or surface samples; inspectors also advise on cleanup scope so you can protect belongings like home decor and avoid spreading spores to areas used for gardening tips or storage. Expect basic inspections to cost $200–$600, with detailed testing or thermal imaging up to $1,000+. Prices vary by home size and local rates.
| Service | Typical cost |
|---|---|
| Visual + moisture | $200–$600 |
| Testing/thermal | $300–$1,000 |
Why Species Testing Can Matter for Health and Remediation
Because different mold species pose different health risks and respond to different cleanup methods, identifying the specific type matters for both your family’s safety and for planning remediation. You’ll want testing when symptoms persist, when vulnerable people live there, or when visible growth looks unusual.
Lab results can reveal Mold species and flag Toxic strains, guiding protective gear, containment, and disposal. Tests also help document hazards for contractors or insurers.
- Confirms if mold is allergenic or toxic
- Directs appropriate remediation techniques
- Helps prioritize areas needing clearance
- Provides evidence for medical or insurance claims
Immediate Steps to Take If You Find Mold Yourself
Should you spot mold in your home, act quickly to protect your health and limit spread. First, leave the area if you have breathing issues, and ventilate adjoining rooms by opening windows.
If you find mold, leave if you have breathing issues and ventilate nearby rooms by opening windows.
Contain the zone: close doors and turn off HVAC to prevent spores moving housewide.
Avoid touching mold with bare hands; wear gloves and a mask if you must enter briefly.
Photograph the growth for records and note moisture sources.
Contact a qualified mold remediation professional for assessments that consider allergy triggers and structural risk.
Keep children and pets away until a specialist confirms it’s safe to return.
Safe Small-Scale Mold Cleanup Methods Homeowners Can Do
Small-scale mold cleanup you can safely handle focuses on small, non-porous surfaces and dry, contained areas—think bathroom tiles, painted drywall spots under a sink, or window frames. You’ll wear gloves, an N95 or better mask, and goggles, ventilate the area, and use detergent or a 1:10 bleach solution sparingly.
After cleaning, dry thoroughly to prevent recurrence; this is key to mold prevention and maintaining good air quality.
- Isolate the area with plastic sheeting
- Scrub with detergent, rinse, and dry
- Discard contaminated porous items in sealed bags
- Monitor for odor or return within days
When You Need a Licensed Remediator
If mold covers more than about 10 square feet, has penetrated porous materials like drywall or insulation, or keeps coming back despite your efforts, call a licensed remediator — they’ve got the training, equipment, and containment methods to handle large, hidden, or hazardous growth safely.
You should also hire pros if you smell persistent mustiness, have health symptoms, or suspect contamination of HVAC systems. Don’t rely on indoor plants or air purifiers as fixes for extensive infestations; they can’t remove mold sources.
A remediator assesses structural damage, handles hazardous materials, and coordinates repairs so you can return to a healthy home.
How Pros Contain and Remove Mold
When professionals handle mold, they’ll seal off the affected area with containment barriers so spores don’t spread through your home.
They’ll also use HEPA filtration and negative air machines to control airflow while they work.
For removal, they’ll apply safe methods—like HEPA vacuuming, controlled demolition of contaminated materials, and antimicrobial treatments—so you won’t be left with hidden contamination.
Containment Barriers Setup
Although sealing off the work area takes extra time up front, pros set up containment barriers to stop mold spores from spreading to the rest of your home. You’ll see plastic sheeting, zipper doors, and taped seams creating a controlled space focused on mold containment.
They also use negative air pressure to keep spores inside the barrier while technicians work. You should stay out of the containment zone and follow posted instructions until it’s cleared.
- Plastic sheeting taped to walls and floors
- Temporary zipper doors for access
- Sealed vents and HVAC covers
- Negative air machines with HEPA filters
Safe Removal Methods
Because mold can spread quickly and hide in building materials, professionals follow strict removal steps to protect your home and health. You’ll see containment, HEPA vacuums, and careful removal of contaminated materials. Pros use PPE, negative air machines, and avoid cross-contamination so you won’t get re-exposed. After removal, they clean, dry, and test to confirm clearance. Consider keeping indoor plants out of treated zones and running air purifiers after work is done to improve air quality.
| Step | Tool | Purpose |
|---|---|---|
| Contain | Barriers | Prevent spread |
| Remove | HEPA vacuum | Capture spores |
| Restore | Drying | Prevent regrowth |
Preventing Mold Return: Humidity Control Strategies
If you want mold to stay away for good, control indoor humidity—keeping it below about 50% cuts off the moisture mold needs to grow. Use dehumidifiers, run exhaust fans during showers and cooking, and ventilate basements and attics.
You should monitor humidity with a hygrometer, maintain HVAC filters, and consider whole-house ventilation systems to improve air quality.
Empty and clean dehumidifiers regularly, set them to maintain 40–50% RH, and run fans during high-humidity activities.
Consistent drying after spills prevents regrowth.
- Monitor humidity with a reliable hygrometer
- Use dehumidifiers strategically
- Run exhaust fans during activities
- Maintain ventilation systems and filters
Fixing Leaks and Structural Issues That Lead to Mold
Start by checking your roof for missing shingles, damaged flashing, or sagging spots and get any leaks repaired promptly to keep moisture out.
Inspect visible plumbing for drips, loose fittings, or corrosion and fix or replace faulty pipes and seals.
Addressing these roof and plumbing problems quickly cuts off the moisture sources that let mold grow.
Repair Roof Leaks
When you notice water stains, missing shingles, or damp attic insulation, act quickly to find and fix roof leaks—these openings let moisture into your home and create prime conditions for mold growth. You should inspect flashing, chimney seals, and valleys; perform timely roof repair to replace damaged shingles and seal penetrations.
Prioritize leak prevention by clearing gutters and trimming overhanging branches that damage roofing. If damage is extensive, hire a licensed roofer.
- Inspect attic after storms
- Replace cracked flashing
- Seal around vents and pipes
- Keep gutters and downspouts clear
Prompt action limits mold spread and structural harm.
Fix Plumbing Failures
Roof and attic repairs help, but leaks from pipes, appliances, or foundation cracks can bring steady moisture that feeds mold in walls, under floors, and behind cabinets.
You should locate plumbing leaks quickly: check under sinks, around water heaters, and near appliances. Fix small leaks yourself with replacement parts or tighten fittings; call a plumber for persistent issues or hidden pipe failures.
Dry and repair any wet building materials, replace damaged drywall or insulation, and seal foundation cracks to stop groundwater intrusion. Removing damp conditions prevents mold spores from colonizing.
Document repairs and monitor regularly to catch recurrence.
Cleaning and Maintenance Habits to Reduce Mold Risk
Because moisture and dust give mold the conditions it needs, keeping your home clean and well-maintained is one of the best ways to prevent growth before it starts. You should control humidity, vacuum and dust regularly, and spot-clean spills immediately.
Choose color schemes that make dirt and damp spots obvious so you catch problems early, and balance ventilation with energy efficiency—use timers or smart controls for fans. Regularly inspect seals, gutters, and under-sink areas.
Simple habits reduce risk and detection time:
- Vacuum with HEPA filters weekly
- Wipe bathroom tiles after use
- Check attic and basements monthly
- Clean HVAC drip pans quarterly
Materials and Upgrades That Resist Mold Growth
When you pick materials for wet areas, choose options that handle moisture without breaking down, like cement board or closed-cell foam instead of regular drywall.
Use mold-resistant paints, primers, and sealants to create surfaces that dry faster and discourage spores.
These upgrades cost more upfront but can cut down on mold problems and maintenance over time.
High-Moisture Building Materials
If you want to keep mold from taking hold, choose building materials and finishes that resist moisture and dry quickly—think cement board instead of drywall in bathrooms, pressure-treated or composite decking in humid areas, and water-resistant backer boards for tile.
You’ll reduce hidden damp spots and improve moisture control by selecting suitable materials and using proper installation techniques. Consider upgrades that prevent water intrusion and speed drying.
- Cement board in wet rooms
- Closed-cell foam insulation in crawlspaces
- Metal or composite trim where water contacts surfaces
- Pressure-treated or composite decking for outdoor moisture
These choices cut mold risk long-term.
Mold-Resistant Finishes
Want finishes that actually slow mold instead of just masking it? Choose mold resistant finishes like antimicrobial paints, moisture-barrier primers, and mildew-resistant grout to cut spores’ foothold.
Install water-resistant drywall in damp areas and use sealed concrete or tile with proper sealants.
Select trim and cabinetry made from treated or nonporous materials to limit absorption.
Pair products with good ventilation and dehumidification for best results.
Consider eco friendly solutions—low-VOC antimicrobial coatings and sustainably sourced, treated wood—to reduce chemicals and environmental impact.
You’ll get durable surfaces that resist mold while keeping indoor air healthier and maintenance easier.
Cost Considerations: DIY Cleanup vs Professional Remediation
Because mold cleanup ranges from a few hours of scrubbing to weeks of containment, you’ll want to weigh DIY costs against professional remediation carefully.
Weigh DIY savings against professional remediation—small scrubs may suffice, but larger infestations demand expert containment and care.
You can save money doing small, nonporous surface cleanups, but mold prevention investments and indoor air testing may make professionals worthwhile for large or hidden infestations.
Consider time, safety gear, and potential health risks when deciding.
- Cost of supplies versus service fees
- Time commitment and disruption to your home
- Health risks and protective equipment needs
- Long-term effectiveness and warranties
Choose based on scope, budget, and your comfort handling contamination.
How To Document Mold Damage for Insurance and Refunds
When you decide between DIY cleanup and hiring pros, you’ll also need to document any mold damage thoroughly for insurance claims or refund requests. Take dated photos, keep receipts, note affected rooms, and record visible growth and water sources. Include mold prevention steps you took and any air quality tests.
| Photo | Date | Location |
|---|---|---|
| Before cleanup | 2026-03-01 | Basement wall |
| Test result | 2026-03-02 | Living room air |
Submit organized files, written logs, and contractor estimates. Prompt, clear documentation speeds claims and supports refund demands.
Signs You Solved the Problem: How To Verify Mold Is Gone
After you’ve cleaned or had professionals remediate the mold, look for clear, measurable signs that the issue’s been resolved rather than relying on a vague sense that it’s “better.” Check that visible stains, musty smells, and health symptoms are gone; test humidity and monitor for regrowth.
Keep an eye on areas near plumbing, HVAC, kitchen pests attract spots, and exterior moisture from garden landscaping changes. Consider follow-up air or surface testing if you’d heavy contamination.
Maintain dryness and ventilation, and document results with photos and dates so you can prove the problem stayed fixed.
- No visible stains or fuzzy growth
- No persistent musty odor
- Stable humidity below 50%
- Clear follow-up test results
Frequently Asked Questions
Can Mold Grow Inside Furniture Upholstery or Mattresses?
Yes — mold can grow inside upholstery and mattresses if they’re damp or neglected; you should choose mold resistant fabrics, get professional upholstery cleaning, dry items quickly, and replace severely infested pieces to protect your health and home.
Can Mold Colonize Books, Paper, or Cardboard Stored Indoors?
Yes—you can get mold on books, paper, and cardboard indoors; even if they seem dry, spores thrive where humidity rises. Don’t ignore Mold in kitchen or Mold in basement signs; isolate, dry, and clean affected items promptly.
Do Certain Paint Types or Finishes Inhibit Mold Growth?
Yes — certain paint types, like mold-resistant and antimicrobial paints with satin or semi-gloss finishes, help prevent spores; you’ll choose paint types labeled for mold resistance and keep surfaces clean and dry to maximize effectiveness.
Can Indoor Plants Contribute to Mold Problems in Homes?
Yes — indoor plants can boost indoor humidity and, if overwatered or crowded, encourage mold; you should space pots, avoid standing water, improve air circulation, and monitor soil moisture to prevent fungal growth indoors.
How Long Does Mold Take to Develop After a Minor Leak?
Like a sprout after rain, mold growth can appear within 24–48 hours after a leak; you should prioritize leak detection and dry the area quickly, because moisture lingering beyond 48–72 hours invites more extensive mold development.
Conclusion
You’ve learned how to spot mold, when to call a pro, and what materials help prevent regrowth—so act now. Start with the quick checklist, trust your nose like a detective with a pocketwatch, and document damage for insurance. If cleanup seems beyond you, hire a certified inspector. After remediation, verify with moisture checks and follow-up inspections. Stay vigilant; fixing mold early saves money and keeps your home healthy.