How to Paint a Wall Properly (Beginner Guide)
Start by clearing the room, patching holes, sanding rough spots, and wiping dust so paint sticks. Tape trim, protect floors, and remove outlet covers. Prime patched or bare areas and any stains. Use angled brushes to cut in, then roll in overlapping N-patterns, keeping a wet edge and blending sections. Apply 1–2 finish coats as needed, sanding between if required, then remove tape at a 45° angle. Keep going for tips on tools, finishes, and troubleshooting.
Quick 6-Step Process to Paint a Wall
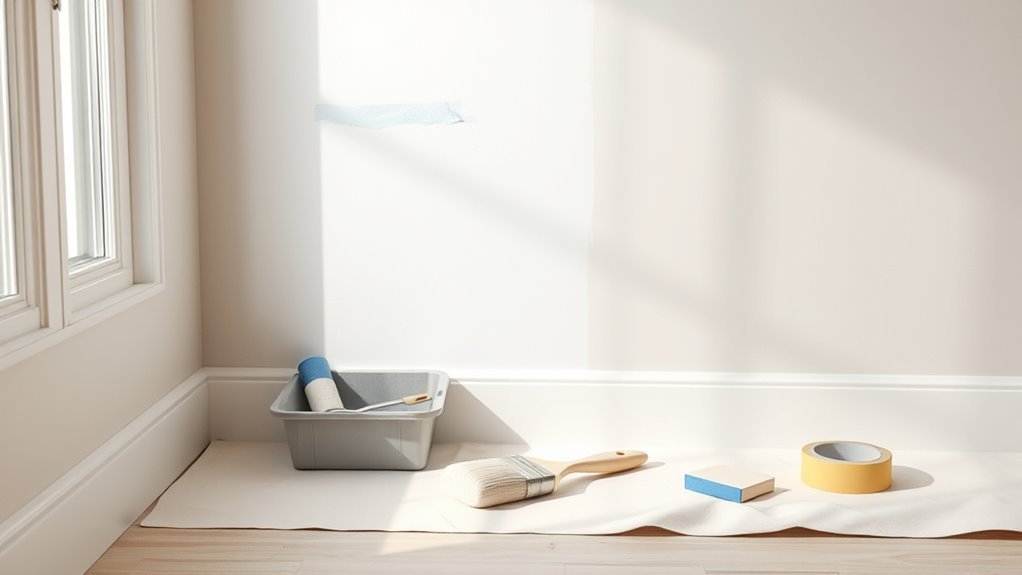
Before you start, gather your supplies and prep the area so you won’t be stopping mid-job: tape, drop cloths, primer, paint, rollers, brushes, and a ladder.
First, clean and patch the wall so paint sticks.
Second, sand rough spots and wipe dust away.
Third, apply primer for uniform coverage and improved paint longevity.
Fourth, cut edges with a brush, then roll broad sections with even strokes.
Fifth, let coats dry fully before adding another; thin, multiple coats beat one thick coat.
Sixth, remove tape carefully and ventilate while considering color psychology to set the room’s mood.
What You’ll Need for One Room (Tools & Budget)
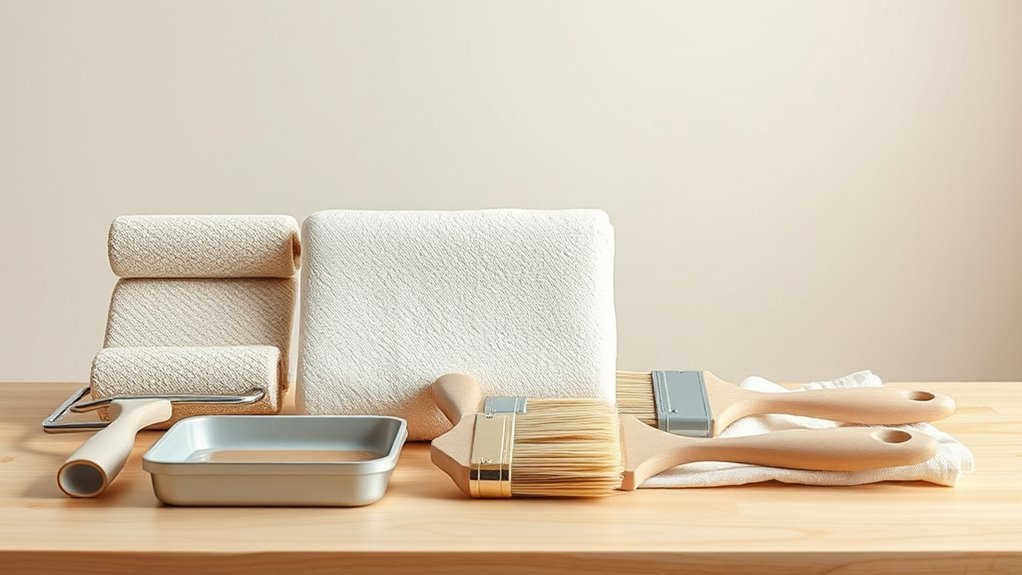
When you’re planning to paint a single room, gather a compact kit that covers prep, application, and cleanup so you don’t make extra trips mid-job. Pick paint after considering color psychology to set mood; sample swatches first.
For a one-room paint job, assemble a compact kit, sample swatches, and choose color to set the mood.
For budget planning, list quantities, primer, and tools to avoid surprises. You’ll need quality basics but stick to what’s essential for one room.
- 1–2 gallons of paint plus primer (sample first)
- Roller, angled brush, tray, painter’s tape
- Drop cloth, sanding block, spackle, and clean-up rags
This keeps costs controlled and the workflow efficient.
Essential Safety and Protective Gear
You’ll want a small set of protective gear that keeps you safe without slowing the job: a respirator or N95 mask for fumes and dust, chemical-resistant gloves, safety goggles, and slip-resistant shoes.
Add a disposable coverall or old clothing, and knee pads if you’ll work low. Use eye wash and a first-aid kit nearby.
Verify ventilation and keep solvents sealed. Inspect gear before use and replace damaged items.
Follow Personal protective equipment guidelines on labels and local regs. These safety precautions reduce inhalation, skin contact, and slips, letting you focus on neat, efficient painting without unnecessary risk.
Choose the Right Paint for Interior Walls
Before you start rolling, pick a finish that suits the room—flat hides flaws, eggshell and satin are easier to clean, and semi-gloss works well for trim and high-traffic areas.
Choose colors that match the room’s light and mood, testing samples on the wall to see them at different times of day.
Also check coverage and durability ratings so you get the fewest coats possible and a finish that stands up to wear.
Paint Finish Options
Although the finish you pick might seem like a small detail, it changes how your walls look, feel, and hold up over time. You’ll choose between matte, eggshell, satin, semi-gloss, or gloss based on durability and desired paint texture.
Matte hides imperfections and feels velvety; satin and semi-gloss resist scrubbing in high-traffic areas; gloss adds sheen for trim. Consider color psychology—finish can deepen or brighten tones without changing hue.
Match finish to room use, lighting, and maintenance needs. Visualize results with small samples:
- Matte for cozy, low-traffic rooms
- Satin for living areas
- Semi-gloss for kitchens and bathrooms
Color Selection Tips
Since color sets mood and perception, pick hues that suit a room’s purpose, light, and scale rather than choosing what’s merely trendy. Consider color psychology: cool tones calm bedrooms, warm tones energize kitchens, and neutrals anchor multipurpose spaces.
Test large swatches on different walls to see shifts with daylight and lamps. Factor room size—lighter colors open small rooms; darker shades add depth to large areas.
Use paint color trends as inspiration, not rule: combine a timeless base with one trendy accent for flexibility. Always view samples at several times of day before you commit.
Coverage And Durability
When you choose paint for interior walls, focus first on coverage and durability so you don’t waste time repainting or chasing touch-ups. Higher-quality paints hide previous colors and require fewer coats, while durable formulas resist scuffs, stains, and frequent cleaning.
You’ll want a finish that matches use: eggshell or satin for living areas, semi-gloss for trim and kitchens. Consider paint texture and how it hides imperfections, and remember color psychology—hardwearing neutrals feel calm while bold hues show wear differently. Choose based on room traffic and maintenance needs.
- High-hide, low-odor options
- Washable, scrub-resistant finishes
- Test patches for texture and tone
Pick the Best Paint Finish Per Room
Choosing the right paint finish matters because it affects durability, sheen, and how easy surfaces are to clean.
Choosing the right paint finish matters — it influences durability, sheen, and how easily surfaces can be cleaned.
For high-traffic rooms like kitchens and hallways, pick a satin or semi-gloss for durability and simple maintenance.
Living rooms and bedrooms benefit from eggshell or matte to soften light and hide imperfections; consider color psychology when selecting warmer or cooler tones to set mood.
Bathrooms need moisture-resistant semi-gloss or gloss for trim and walls near water.
Use flat finishes on low-traffic ceilings to minimize glare.
Test a small swatch to confirm appearance under your room’s lighting before committing.
Estimate How Much Paint to Buy
First, measure each wall’s width and height so you know the exact square footage you’ll paint.
Check your paint can’s coverage per gallon and multiply by the number of coats you plan to apply.
That way you’ll buy enough paint without wasting money.
Measure Wall Area
Ready to figure out how much paint you’ll need? Measure each wall’s width and height with reliable measurement tools—tape measure or laser—for accuracy. Multiply width by height to get area per wall, then add areas together.
Subtract windows and doors to avoid overbuying. Note wall texture: rough surfaces absorb more paint, so plan accordingly when estimating coverage per gallon from the paint can.
- Smooth drywall: standard coverage, easier to calculate.
- Textured plaster: increase estimated usage for absorption.
- Large windows/doors: subtract their area to refine totals.
Record numbers, then consult the paint can’s square-foot coverage.
Account For Coats
Now that you’ve totaled your wall area, factor in how many coats you’ll need—most rooms require at least two for even coverage and true color depth. Decide based on surface porosity and color change: moving from dark to light often needs a primer plus two coats.
Check the paint can’s stated coverage per gallon, then add 10–15% for waste and touchups.
Compare finishes during a paint brand comparison to see which gives better hide and durability; cheaper options may need extra coats.
Also consider color psychology: richer hues may require more layers to achieve the desired intensity and mood.
Select Brushes and Rollers for Wall Painting
Wondering which tools will give you the cleanest finish? You’ll focus on brush selection and roller types to match paint and surface. Choose a synthetic-bristle angled brush for trim and a flat sash brush for cutting in; they hold edge and release paint smoothly.
Pick roller types that suit smooth walls or slightly textured finishes and work with your paint sheens. Keep one tray, an extension pole, and a paint grid handy to reduce drips.
Clean brushes and rollers promptly to preserve nap and bristles. Store tools properly between coats so your next session’s efficient and tidy.
- angled synthetic brush
- smooth-wall roller
- paint tray and pole
Roller Nap and Brush Sizes Explained
When you pick the right roller nap and brush size, you’ll get a more even coat with fewer touch-ups.
Choose roller textures by wall surface: smooth (1/4″–3/16″) for plaster or drywall, semi-smooth (3/8″) for lightly textured, and rough (1/2″–3/4″) for textured stucco.
Match brush sizes to trim and cutting-in: 1–2″ angled sash brushes for tight corners, 2.5–3″ for windows and doors, and 3–4″ for wider trim.
Know brush types—synthetic for latex, natural for oil—and keep a narrow angled brush for edges and a wider flat for broader trim to control paint and reduce strokes.
Primer: When and Why to Use It on Walls
You’ll want to prime when you’re covering bare drywall, patched areas, drastic color changes, or stained surfaces to guarantee even adhesion and hide imperfections.
Priming improves paint coverage, boosts durability, and can reduce the number of finish coats you need.
Knowing when to prime saves time and gives you a more professional result.
When To Prime
If your wall has stains, drastic color changes, or bare drywall, prime it before painting to guarantee even coverage and better adhesion. You’ll prime when surfaces are porous, patched, or when switching from dark to light shades, despite priming myths that say it’s optional.
Consider color psychology: a true base helps your chosen hue read accurately, avoiding unexpected mood shifts. Prime after repairs, before sealing tannin or smoke stains, and when using high-contrast alterations.
Use quick-drying, stain-blocking primers on problem areas, and spot-prime if most wall already matches.
- Fresh drywall seams and patches
- Water or smoke-stained areas
- Dramatic color changes
Benefits Of Priming
Because primer seals, evens out porosity, and hides imperfections, it makes your topcoat look truer and last longer. You’ll get better adhesion, fewer coats, and more even coverage, which saves time and paint.
Primer blocks stains and tannins, preventing bleed-through that ruins finish and color. It’s especially valuable when switching drastic hues or covering repaired drywall.
Don’t buy priming myths claiming it’s always optional; sometimes it’s essential. Primer also helps with tinting and supports color psychology by ensuring the shade you choose reads accurately under light.
Use a quality primer for predictable, durable results.
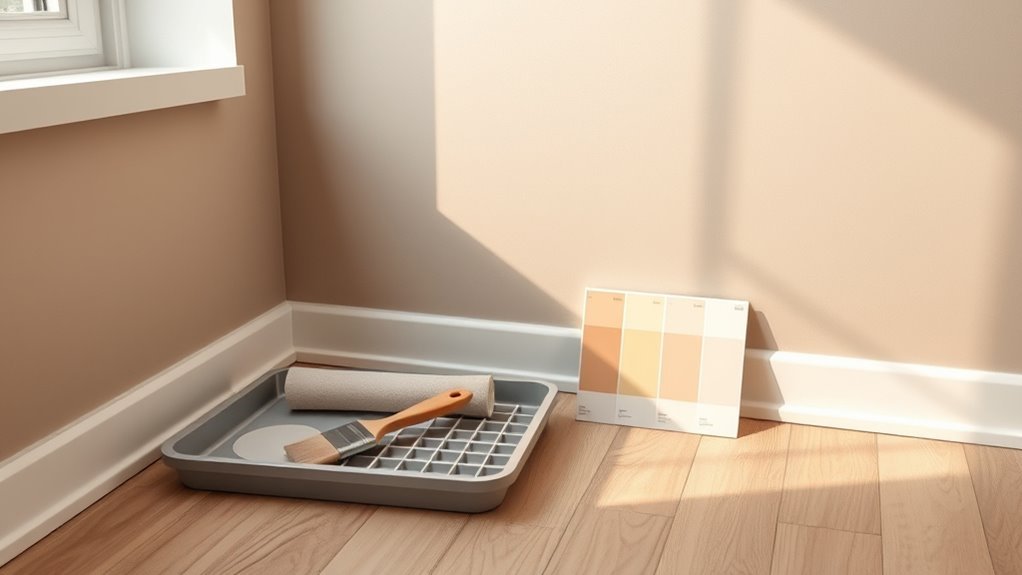
Test Paint Colors and Check Light at Home
Wondering how that swatch will actually look on your wall? Test paint colors and check light at home before you commit. Paint sample cards on poster board, tack them in different spots, and evaluate how natural and artificial light changes hue and intensity.
Consider color psychology—warm tones energize, cool tones calm—and how paint texture affects reflectivity. Live with samples for a few days, morning to night. Note undertones against furniture and flooring.
- Tape three large swatches in sun, shade, and under lamps.
- Observe gloss vs. matte on the same color.
- Photograph samples at different times.
Plan Your Painting Schedule and Breaks
Plan your painting schedule so you work when you’re freshest and take regular short breaks to avoid fatigue.
Factor in the recommended drying times between coats so each layer cures properly before you add the next.
That way you’ll get smooth, even coverage without rushing or wasting time.
Optimal Work And Rest
How long will you work before taking a break? Decide on a routine that keeps energy steady: aim for focused 45–60 minute painting bursts with short rest intervals to stretch, hydrate, and check edges. Good work balance prevents fatigue and sloppy lines.
Use a timer, rotate tasks (cutting in, rolling, touch-ups), and plan a longer break after several cycles to eat and rest your eyes.
- 50-minute painting, 10-minute rest: steady pace, fewer mistakes
- Change posture: climb ladder less, alternate tasks
- Longer 30–60 minute break every 3–4 cycles for recovery
Timing For Paint Layers
When you schedule paint layers, factor in drying times, humidity, and the type of paint so each coat cures properly before you recoat. Plan work in blocks: prime, two finishes, touch-ups. Check manufacturer recommended recoat intervals—paint branding matters for solvents and cure speeds.
Allow longer gaps in cold or humid conditions, and use a moisture meter if unsure. Take breaks between coats to rest and reassess color choices; color psychology can influence how many coats you need for true saturation.
Keep tools covered, label wet edges, and resume when surface feels dry to the touch and resists fingerprinting.
Clear the Room and Protect the Floor
Before you open a can of paint, remove furniture and décor from the room or push items to the center and cover them with drop cloths so you have clear access to every wall. You’ll decide furniture placement afterward and roll up window treatments or remove them to avoid splatters.
Clear the room: remove or center and cover furniture, and roll up or take down window treatments before painting.
Tape baseboards and trim, seal vents, and protect floors with layered drop cloths or rosin paper.
Walk the room to spot obstacles, then secure coverings with painter’s tape so nothing shifts.
Keep a trash bin handy for debris and a small toolbox for quick fixes.
- covered sofa and chair
- folded curtains and rods
- taped floor seams
How to Clean Walls for New Paint
Although cleaning might seem tedious, preparing your walls properly is essential for a smooth, lasting finish. Start by doing furniture relocation so you can access all surfaces. Remove loose wallpaper and scrape remnants during wallpaper removal, then sand rough patches. Dust walls with a broom or microfiber cloth, then wipe with a mild detergent solution from bottom to top. Rinse with clean water and let walls dry completely before priming. Inspect for remaining debris or flaking paint and address it. Use the table below for a quick checklist.
| Task | Tool | Timing |
|---|---|---|
| Move furniture | Dolly/blankets | Before cleaning |
| Strip paper | Scraper/solvent | Early step |
| Wipe walls | Sponge/water | After stripping |
Remove Grease, Stains, and Mold Spots
Before you paint, inspect the wall for greasy spots and visible stains so you know what needs special cleaning.
Use a degreaser or trisodium phosphate on oily areas, then rinse thoroughly.
For mold and mildew, scrub with a bleach solution or a mold cleaner and let the surface dry completely before priming.
Identify Grease And Stains
How can you tell if a wall has grease, stains, or mold spots? Look closely: grease often feels slick and darkens paint. Stains soak in and blur edges. Mold shows fuzzy spots that may be discolored.
Run your fingers gently (wear gloves) and sniff for musty odors.
Use a bright light at an angle to reveal sheen differences before choosing colors or prepping.
Select appropriate cleaning brushes for test scrubs: soft for paint-safe wiping, stiff for textured walls, and a small brush for corners.
Document locations and sizes so you can remove or treat each spot precisely during prep.
Treat Mold And Mildew
When you find mold, mildew, grease, or stubborn stains, treat them promptly so your new paint will adhere and look even. Start by isolating the area and protecting floors and furniture with drop cloths. Wear gloves and a mask.
Then, scrub grease with degreaser or trisodium phosphate. For mildew treatment, mix one part bleach to three parts water, test a small spot, then scrub and rinse thoroughly.
Remove loose paint and dry the surface completely. Apply a mold-killing primer where needed to seal and prevent return.
Improve ventilation and fix leaks as part of mold prevention before painting.
Repair Holes, Cracks, and Textured Walls
If you spot holes, cracks, or uneven texture, tackle them now so your paint will lay smooth and last longer. You’ll inspect textured walls for loose material, widen tiny cracks so filler bonds, and clean dust.
For hole repair, press in patching compound or a mesh patch for larger openings, then feather edges so repairs blend. Use a flexible filler for hairline cracks and follow manufacturer drying times.
Don’t skip priming patched areas. Once dry and checked, you’ll move to sanding (next section) to guarantee an even surface before painting.
- Small dent with skimmed filler
- Mesh patch over big hole
- Feathered edges on crack
Sand Smart: Tools, Grit, and Dust Control
Before you paint, sand smart so the surface’s smoothness actually shows through the finish. Choose the right tools: sanding block for flat areas, detail sponge for corners, and a palm sander for large sections. Match grit to the job—start 80–120 for repairs, finish 150–220 for priming—and sand with the grain. Use gentle, even pressure to avoid gouges.
Adopt proven sand techniques: keep movements consistent, check progress often, and wipe with a tack cloth between steps.
For Dust management, work with a vacuum-attached sander, seal off the room, and use a respirator and drop cloths.
When to Repaint or Replace Trim and Baseboards
Although trim and baseboards can last decades, you’ll want to repaint when paint peels, yellows, or shows scuffs, and replace them when they’re warped, rotten, insect-damaged, or so gouged that sanding won’t restore clean lines. You’ll evaluate condition, match new trim style to room decorative accents, and consider wall textures that meet modern tastes.
When paint peels or scuffs, repaint; replace trim only if warped, rotten, insect-damaged, or gouged beyond repair.
Repainting fixes wear and refreshes contrast; replacing corrects structural issues and lets you change profiles. Check seams, nail pops, and water stains before deciding.
- Scuffed, chipped paint around doorways
- Warped sections near moisture sources
- Deep gouges or rot beyond sanding
Tape Edges Without Peeling Paint
Before you tape, make sure the surface is clean, dry, and free of dust or loose paint so the tape can stick properly.
Press the tape down firmly along edges and run a putty knife or your fingernail over it to seal the adhesive.
After painting, remove tape slowly at a 45-degree angle to avoid lifting fresh paint.
Prep Surface Thoroughly
When you’re prepping a wall, tape carefully so you protect trim and avoid peeling paint later. You’ll clean, sand, and fix imperfections as part of surface preparation so tape sticks to sound paint. Remove loose flakes, fill holes, sand smooth, and wipe residue away.
Test tape on a hidden spot to confirm it won’t lift existing paint. After repairs, consider primer application on bare or patched areas to unify porosity and improve adhesion.
Press tape edges firmly before painting, but don’t seal them with solvents here—that’s the next step.
- scrape loose paint
- sand and dust off
- spot-prime patches
Seal Tape Edges
If paint is going to look crisp, you’ve got to seal the tape edges so paint can’t bleed under them. Press painter’s tape firmly along the trim, smoothing with a plastic card for edge sealing.
For extra protection, run a thin bead of clear caulk or watered-down base coat along the tape edge and wipe excess toward the tape—this fills gaps that invite bleed.
Paint the wall as usual. Wait until paint is tacky but not fully dry, then remove tape at a 45° angle toward the painted surface to avoid lifting.
Proper tape removal preserves crisp lines and prevents peeling.
How to Cut in Corners and Trim With a Brush
Although edging looks small, cutting in corners and trim sets the tone for a clean, professional paint job, so you’ll want to work deliberately with the right brush and steady strokes.
Use Brush techniques that load the tip lightly, hold the angle, and pull away from tape lines. For corner cutting, paint a crisp vertical line first, then fill toward the wall. Steady your wrist and breathe between passes.
- Short, controlled strokes along trim
- Feathered edges where wall meets trim
- Clean brush, minimal paint on ferrule
Check for drips and smooth with a light second pass.
Use an Edging Tool: When It Saves Time
After you’ve cut in with a steady brush, reach for an edging tool to speed the rest of the job without losing a clean line. You’ll align the tool against trim or ceilings and run the roller or brush flush to its guide, letting the shield protect edges.
Edging tool benefits include consistent straight lines, reduced touch-ups, and less risk of accidental overlap. For small rooms or long runs, it’s one of the best time-saving techniques—faster than painstaking hand work yet precise.
Practice once on a scrap surface, then use steady pressure and smooth strokes for crisp, efficient results.
How to Load a Roller to Avoid Splatter
When you’re gearing up to roll, load the nap evenly so you get solid coverage without fling—dip the roller into the tray’s shallow well, roll it back and forth across the ridged slope to distribute paint, then spin it lightly on the tray’s edge to remove excess. You want even paint loading to prevent roller splatter and drips.
Keep a steady rhythm: dip, roll, check. If the roller looks heavy, squeeze excess on the tray groove. Change rollers when saturations vary. Use quality nap for consistency and a shield or drop cloth to catch any stray specks.
- damp nap holding paint evenly
- tray ridges removing surplus
- light spin to stop drips
Rolling Technique for Even, Streak‑Free Walls
If you want a smooth, streak-free finish, start by keeping a wet edge and working in consistent, overlapping strokes.
Begin with a loaded roller, apply an N or W pattern, then fill in without pressing hard. Maintain steady speed and light pressure to avoid ridges and lap marks.
For color blending, slightly feather edges where wet paint meets dry to hide shift. Check frequently for thin spots and reload before the roller drags.
Practice good roller maintenance—clean thoroughly between coats and replace nap when worn—to preserve even pickup and release, ensuring streak-free, professional results.
Work in Sections: Step‑by‑Step Painting Order
Because tackling a whole wall at once invites drips and uneven drying, work in manageable sections—typically 3×3 to 4×4-foot areas—so you can keep a wet edge and maintain consistent coverage. Begin by cutting in corners and edges, then fill each section with a W or M roll pattern, finishing with light vertical passes.
Move methodically across the wall so adjacent sections blend while still wet. Consider how color psychology affects placement—lighter tones near trim brighten, darker hues anchor. Historical paint techniques like glazing inform layered looks but save specialty finishes for last.
- Cut in corners first
- Roll center areas next
- Blend adjacent sections immediately
How Many Coats You Need and Why
How many coats you’ll need depends on the paint’s opacity, the surface’s condition, and the color change you’re making. You’ll usually apply one coat of primer (if needed) then one or two finish coats.
Dark-to-light or drastic paint color shifts often need three coats for full coverage. Smooth, well-primed drywall may take fewer coats than rough wall texture, which soaks and hides coverage.
Check after the recommended dry time; hold a light at an angle to spot thin areas. Don’t over-apply wet paint to hide flaws—let each coat dry fully before adding the next for even results.
Blend Wet Edges to Hide Lap Marks
When you work with a loaded roller or brush, keep a wet edge and join new sections to it immediately so strokes feather together and lap marks disappear. You’ll practice edge blending by overlapping 2–3 inches, maintaining consistent pressure, and blending freshly painted strips before they skin over.
Keep a wet edge, overlap 2–3 inches, and blend freshly painted strips with even pressure to avoid lap marks.
For lap mark concealment, watch drying speed and work across one wall in manageable panels. If paint starts to set, stop and restart from a fresh wet edge. Clean tools and correct thinning help uniform flow.
Move steadily; avoid reworking tacky paint, which creates uneven sheen and visible laps.
- Overlap 2–3 inches
- Maintain even pressure
- Work in panels
Paint Ceilings and Tall Walls Safely
When you paint ceilings or tall walls, pick a stable work platform like a quality ladder or scaffold and check its footing before you climb.
Wear eye protection and secure drop cloths or overhead shields to catch drips and protect fixtures.
Move the platform as needed instead of overreaching, and have a partner spot you when possible.
Use Stable Work Platforms
Because falling or tipping is the biggest risk when you work above shoulder height, always set up on a stable platform before you paint ceilings or tall walls. You should prioritize ladder safety and platform stability: inspect feet, locks, and level ground; never overreach.
Use a scaffold or rolling platform when you need extended reach, and keep tools within arm’s length to avoid leaning. Wear slip-resistant shoes and keep the work area clear of paint cans and drop cloth bunching that could trip you.
- A firm ladder on level ground with locked spreaders
- A wide scaffold with guardrails
- A rolling platform with brakes engaged
Secure Overhead Protection
After you’ve set up a stable platform, protect yourself from falling debris, paint splatter, and overhead hazards before you raise your arms to paint ceilings or tall walls. Wear a hard hat or bump cap and safety glasses, and use a dust mask if sanding overhead.
Secure overhead safety with drop cloths taped at edges and a lightweight canopy if needed. Position ladders on firm, level ground and check ladder stability before climbing.
Extend ladders three rungs above work where possible and lock spreaders. Keep tools on a belt or secured tray.
Never overreach—move the ladder or platform to maintain balance and control.
Paint Around Outlets, Switches, and Fixtures
How do you paint neatly around outlets, switches, and fixtures without making a mess? Turn off power, remove outlet covers and switch plates, and keep screws in a labeled container. Use painter’s tape to protect wiring and edges, and install plastic guards for protruding fixtures.
Cut in with a steady angled brush, working from the protected edge toward the center, and feather strokes to avoid buildup.
- Visualize clean edges where tape meets paint.
- Picture removed outlet covers stacked and ready.
- Imagine smooth shifts around light fixtures and sockets.
Paint Doors, Trim, and Windowsills Efficiently
When you tackle doors, trim, and windowsills, work methodically and use the right tools so edges stay crisp and finish time drops. Start by removing hardware and masking nearby surfaces; lay drop cloths for furniture protection. Sand lightly, clean dust, and prime bare wood.
Use a sash brush for trim and a mini-roller for flat door panels to keep strokes uniform; feather edges to avoid lap marks. For windowsills, paint toward the exterior edge to prevent drips.
If matching new paint, test small patches for color blending under room light. Inspect for runs, touch up, and reinstall hardware.
Manage Drying Times and Recoating Windows
Although humidity and temperature affect drying, you can control recoating windows by checking the paint’s touch-dry time, keeping airflow steady, and waiting the manufacturer’s minimum before a light second coat.
You’ll monitor drying times, avoid heavy layers, and plan work in stages so each coat bonds properly. Use a fan and open windows for ventilation, but avoid direct cold drafts that slow curing.
Test a small area before full recoating. Keep records of times and conditions to repeat success.
- Light, even coats for quicker drying
- Consistent airflow without temperature shocks
- Manufacturer times guide safe recoating windows
Fix Drips, Runs, and Paint Sags
Even with careful coats and proper drying, you’ll sometimes spot drips, runs, or sags—those glossy trails where gravity pulled wet paint downward. Act quickly: while paint’s still tacky, smooth small drips with a clean brush or foam brush, pulling excess toward the surrounding wet area.
For larger runs, let paint firm slightly, then level with a putty knife or scraper held flat, sanding lightly after it fully dries. Recoat thinly to blend.
To prevent repeats, practice drip prevention: load less paint, use even strokes, and keep a light touch at edges to avoid future paint sags.
Repair Uneven Coverage and Patchy Spots
Notice uneven coverage? You can fix patchy spots by feathering edges, reloading the roller, and using thin, even coats.
Check lighting and move furniture placement to inspect all angles. If color looks inconsistent, consider slight color mixing with the same tint to match previous coats before repainting.
Sand glossy or rough edges lightly, remove dust, then apply a light touch with a brush for corners, blending into roller strokes.
For stubborn patches, apply a second full coat after the first dries.
Work methodically across the wall, keeping overlap consistent so the finish reads uniform.
Dealing With Glossy Surfaces and Adhesion
If you’re painting over glossy surfaces you’ll need to scuff and clean them first so the new paint can stick.
Use a suitable primer designed for slick finishes to improve adhesion and block stains.
Doing proper surface prep and choosing the right primer will give you a durable, even coat.
Prepare Surface Properly
When you’re working with glossy paint or trim, proper prep is essential because new paint won’t stick well to slick, shiny surfaces. You’ll focus on surface preparation to boost paint adhesion: clean, scuff, and prime as needed.
Remove grease with trisodium phosphate or a degreaser, sand gloss lightly with fine-grit paper to dull the finish, and wipe away dust. If the surface has chips or bare spots, use a bonding primer designed for glossy surfaces.
- Clean with a strong degreaser, rinse, and dry thoroughly.
- Sand lightly until the sheen is reduced.
- Apply a suitable bonding primer before topcoat.
Improve Paint Adhesion
How can you get new paint to cling to slick, glossy surfaces? Scuff glossy finishes with fine sandpaper or a scuff pad until the surface feels dull. Clean thoroughly to remove dust, grease, and silicone residues. Use a high-quality bonding agent if the substrate resists abrasion.
Test a small area to guarantee adhesion before full coverage. Consider how color psychology affects perception—darker, matte tones hide imperfections, while bright gloss highlights texture—so choose a finish and paint texture that suit the room’s mood and surface condition.
Work patiently; proper prep prevents peeling and promotes long-lasting results.
Use Appropriate Primers
Although glossy surfaces resist new paint, the right primer makes adhesion reliable and long-lasting. You’ll prep by sanding gloss lightly, cleaning thoroughly, and choosing a primer formulated for slick finishes.
Match primer type to substrate—adhesion primers for glossy latex, oil-based primers for difficult spots. Use proper priming techniques to guarantee an even bond, and check paint consistency before topcoating; thin or thick paint alters coverage and adhesion.
Apply primer in thin, uniform layers, allow full cure, then sand lightly. This approach prevents peeling and flashing, so your finish lasts and looks professional.
- Light sanding and degreasing
- Thin, even primer coats
- Sand, cure, then topcoat
Touch‑Up Tips That Match the Original Finish
If you want your touch-ups to disappear, match not just the color but the sheen, texture, and application technique of the original paint. You’ll test Color blending on scrap, feather edges, and thin multiple coats. Confirm paint sheen from the can and mimic roller or brush strokes. Work in good light, keep areas slightly larger than the ding, and dry-check before more coats. Use the same brand or a matched formula; note age-related fading. Finish by gently buffing to blend.
| Step | Quick tip |
|---|---|
| Test | Blend on scrap |
| Sheen | Match label |
| Tool | Use same |
| Light | Inspect |
| Dry | Recoat if needed |
Clean Brushes, Rollers, and Reusable Tools
After you’ve finished touch-ups and confirmed the final coat looks right, don’t let tools sit with wet paint—cleaning brushes, rollers, and other reusable items right away keeps them performing and saves you money.
Rinse water‑based paint under warm running water, using a brush comb to remove bristles’ residue.
For oil‑based, use the recommended solvent safely and then soap and water.
Squeeze rollers thoroughly and spin or roll on scrap cardboard to dry.
Dry and reshape brushes before storing. Good brush maintenance extends life; proper tool storage prevents damage and contamination.
- Comb out bristles and rinse
- Spin rollers and squeeze dry
- Hang tools to air out
Store Leftover Paint for Future Touch‑Ups
When you plan to keep a little paint for touch-ups, label the can with the room, wall location, date, and the paint’s batch or color code so you’ll grab the right one later. Seal the can tightly, pressing the lid with a mallet or tap cloth to avoid dents that leak.
Store cans upright in a cool, dry place away from direct sunlight and freezing temps to preserve color and consistency.
For easy future use, pour a small amount into a labeled airtight jar. These paint storage and touch-up tips help you match finish and minimize waste when repairing chips.
Dispose of Paint and Hazardous Materials Safely
Keeping leftover paint properly stored helps, but you’ll eventually need to get rid of cans you won’t use. Check local rules for paint disposal; many communities treat leftover paint and solvents as hazardous waste. Don’t pour paint down drains or throw liquid cans in regular trash.
Dry small amounts with kitty litter or absorbent material, then seal cans for collection. For larger quantities, take them to a household hazardous waste facility or scheduled collection event.
Label containers and keep lids tight. Follow instructions for oil-based vs. water-based products to avoid fines and environmental harm.
- sealed cans labeled clearly
- dry paint with absorbent material
- take to hazardous waste facility
Speed Tips: Paint a Room in One Day
Although it feels ambitious, you can paint a standard room in a single day if you plan smart, gather the right tools, and work efficiently.
Start by clearing furniture, taping edges, and laying drop cloths so you won’t waste time mid-project.
Clear the room, tape edges, and lay drop cloths to avoid last‑minute delays.
Choose a quick-dry primer and high-hide paint from trusted paint branding to cut coats.
Use a 9″ roller with extension for walls and an angled brush for trim; work top to bottom and keep a wet edge.
Limit breaks, coordinate drying times, and test color on a small patch—remember color psychology to set mood instantly.
Budget Upgrades That Transform a Room
After you paint, you can stretch your budget further with a few smart changes. Try an affordable accent wall to add character.
Switch to smart lighting to change mood on the fly, and update fixtures and hardware for a polished look. These small moves make the room feel refreshed without a major remodel.
Affordable Accent Walls
Looking to refresh a room without breaking the bank? You can create an affordable accent wall that makes a big impact. Use color psychology to choose hues that set mood—calming blues, energizing yellows, or cozy terracotta. Pick budget friendly options like sample pots, washable eggshell finishes, or adhesive wallpaper.
Prep carefully: clean, sand, and tape edges for crisp lines. Try one focal wall behind a bed or sofa to transform the space without repainting everything.
- Bold solid color for drama
- Two-tone block for modern flair
- Peel-and-stick panels for texture and ease
Smart Lighting Swaps
Swap just a few fixtures and bulbs and you’ll change how a room looks and feels without blowing your budget. Start by adding smart lighting bulbs or simple smart switches so you control brightness and scenes from your phone.
Choose warmer temperatures for cozy spaces and cooler whites for work areas—color psychology matters when setting mood. Use dimming to layer light rather than relying on a single overhead source.
Install a few plug-in smart lamps to test effects before committing. These small swaps let you experiment with ambiance, save energy, and accent your freshly painted walls with minimal expense.
Update Fixtures And Hardware
When you replace dated fixtures and hardware, you’ll give a room an instant facelift without a major renovation. You’ll swap tarnished knobs, tired light plates, and builder-grade faucets for cohesive finishes that complement your wall texture and fresh paint.
Keep paint storage minimal and organized while you work so spills won’t ruin new metal or wood. Choose finishes that match trim and switches for a polished look.
- Matte black knobs, modern switch plates, and streamlined faucets
- Coordinated finishes to highlight trim and painted surfaces
Temporary paint storage tips: sealed trays, labeled cans, and drop cloths
When to Call a Professional Painter
If your walls show extensive damage, complex trim, or you want a flawless finish quickly, call a professional painter. You should hire pros when repairs exceed basic patching, when unique wall textures demand specialty tools, or when color matching across surfaces needs expertise with specific paint brands.
Professionals speed prep, handle lead or mold concerns, and deliver uniform coats where DIY might struggle. Get written estimates, check references, and confirm warranties.
If time constraints, large areas, or high-end finishes matter, don’t hesitate to hire help. For small touch-ups or practice, tackle it yourself, but know when to bring in a pro.
Common Beginner Mistakes and How to Avoid Them
Ever wondered why your paint job looks uneven or messy? You likely skipped prep, used wrong painting techniques, or rushed drying times. Fixing these stops drips, streaks, and patchy coverage. Also remember color psychology: test swatches in real light before committing.
- Poor surface prep: dust, holes, or glossy old paint causes poor adhesion.
- Wrong tools/technique: cheap brushes, overloaded roller, or inconsistent strokes create marks.
- Skipping primer or inadequate drying: results in bleed-through and uneven sheen.
Take time to sand, clean, choose proper tools, and let coats dry; you’ll get professional-looking results.
Low‑VOC and Eco‑Friendly Paint Options
When you pick low‑VOC paints, you’ll cut down on fumes and protect indoor air quality for everyone in your home. Look for formulations with natural ingredients like clay, lime, or plant‑based oils to avoid harsh chemicals.
Even with eco‑friendly options, you should still ventilate the room well while painting and as the finish cures.
Low‑VOC Paint Benefits
Because low‑VOC paints give you cleaner air and fewer odors, they’re one of the easiest upgrades you can make for a healthier home. You’ll notice less headache and irritation after painting, and guests will appreciate the minimal smell.
Choosing low‑VOC options supports Eco benefits by cutting harmful emissions and VOC reduction during application and curing. You’ll also spend less time ventilating and can reoccupy rooms sooner.
Consider durability and finish to match your needs; performance has improved a lot.
- Faster reentry with minimal odor
- Lower indoor air pollutants
- Comparable durability and coverage
Natural Paint Ingredients
If you want a greener paint choice that still performs, natural and low‑VOC paints swap synthetic chemicals for ingredients like plant oils, clay, lime, milk protein (casein), and mineral pigments. You’ll find finishes with natural pigments and plant based dyes that offer muted, earthy tones and good coverage.
These formulas often breathe better, resist mold, and reduce odors, so you won’t mask smells with chemicals. Apply primer suited to the substrate, test swatches for true color, and follow manufacturer drying times.
Expect slightly different handling than conventional paints, but many DIYers appreciate the safer indoor air and simpler cleanup.
Proper Ventilation Practices
How will you keep fresh air moving while using low‑VOC or natural paints? You’ll improve indoor air quality by planning airflow and using appropriate ventilation equipment.
Open windows crosswise, run exhaust fans, and place box fans to push fumes out.
If you’re sensitive, work during cooler hours when draft’s stronger, and wear a mask. Monitor odors; natural paints still release compounds.
After painting, leave fans on and windows open until the room smells neutral. Clean brushes outside when possible.
- Window-to-window cross ventilation for steady airflow
- Exhaust fan or portable HEPA/ventilation equipment
- Temporary door fans to direct air outward
How Humidity and Temperature Affect Paint
Wondering why your fresh paint sometimes dries tacky or cracks days later? You’ll need to manage humidity levels and temperature control before and during painting.
High humidity slows drying, causes tackiness, and can lead to mildew. Low humidity makes paint skin over too fast, causing brush marks or crawling.
Too-cold conditions prevent proper curing; too-hot speeds evaporation and promotes blistering. Check forecasts, use heaters or fans carefully, and run a dehumidifier or humidifier as needed to hit the paint manufacturer’s recommended range.
Monitor conditions while the paint cures to guarantee even drying and long-lasting results.
Final Inspection Checklist and Next Projects
Once the paint’s dried and cured under the right humidity and temperature, perform a careful final inspection to catch any imperfections before you move on. Check walls in different interior lighting, touching up thin spots, drips, or roller texture with a small brush or fine sandpaper. Note repairs and clean edges. Plan next projects: trim, outlet covers, or another room. Store leftover paint properly for future touch-ups.
After curing, inspect walls in varied light, touch up flaws, clean edges, and store labeled leftover paint.
- Walk the room at morning and evening light to spot flaws.
- Test repaired areas after 24 hours to ensure blend.
- Label cans with date, room, and paint storage instructions.
Frequently Asked Questions
Can I Paint Over Wallpaper Without Removing It First?
Yes — you can paint over wallpaper sometimes, but you’ll want to think about wallpaper removal first; proper surface preparation matters. Fix loose seams, clean, prime with a bonding primer, and expect less durable, less smooth results unless removed.
How Do I Prevent Paint From Yellowing Over Time?
Use quality, non-yellowing latex or acrylic paints and a primer; control humidity and UV exposure, clean surfaces, avoid oil-based coatings in low-traffic areas, and use proper ventilation to maximize paint durability and slow aging paint discoloration.
Can I Use Interior Paint Outdoors in a Pinch?
Yes — you can, if you enjoy living dangerously: interior paint won’t love the weather, so expect compromised paint durability and dodgy color matching over time; use sealers and quick outdoor topcoats to delay the inevitable.
What Paint Cleanup Is Safe for Septic Systems?
You should use septic safe cleaning methods: pick water-based, low-VOC cleaners and non toxic paint removal like soap, vinegar, and biodegradable detergent; avoid solvents, pour waste into sealed containers, and dispose via hazardous-waste facilities.
Will Paint Fumes Affect Pets Long-Term?
Like a slow fog rolling in, paint fumes can harm pets long-term: you’ll risk respiratory, neurological, or behavioral issues. Prioritize pet safety by ventilating, using low-VOC paints, and keeping animals away until fumes fully dissipate.
Conclusion
Think of your freshly painted wall as a garden you’ve planted: at first it’s just soil and promise, but with the right tools, patience and gentle care it blooms into a space that reflects you. You’ve learned the steps, chosen the shades, and protected your work—now stand back and let it breathe. Every brushstroke is a seed; nurture it, and your room will keep growing warmth, color and calm for years to come.