How to Paint a Wood Door Exterior Step-by-Step
You’ll prep, prime, paint, and reattach hardware for a durable exterior wood door finish. Start by removing or masking hardware, cleaning, stripping loose paint, filling damage, and sanding smooth. Apply exterior primer, sand lightly, then lay down two thin finish coats with a brush, roller, or sprayer, allowing proper dry and cure times between coats. Reinstall weatherstripping and hardware, test operation, and touch up as needed. Keep going to get tips on timing, tools, and troubleshooting.
Quick Answer: Paint an Exterior Wood Door in 7 Steps

If you want to refresh an exterior wood door quickly, follow these seven clear steps to get a durable, weatherproof finish.
Remove door hardware and label pieces, then clean and sand the surface to remove loose paint and smooth blemishes.
Remove and label hardware, then thoroughly clean and sand the door to strip loose paint and smooth flaws
Fill cracks with exterior wood filler, sand again, and wipe dust away.
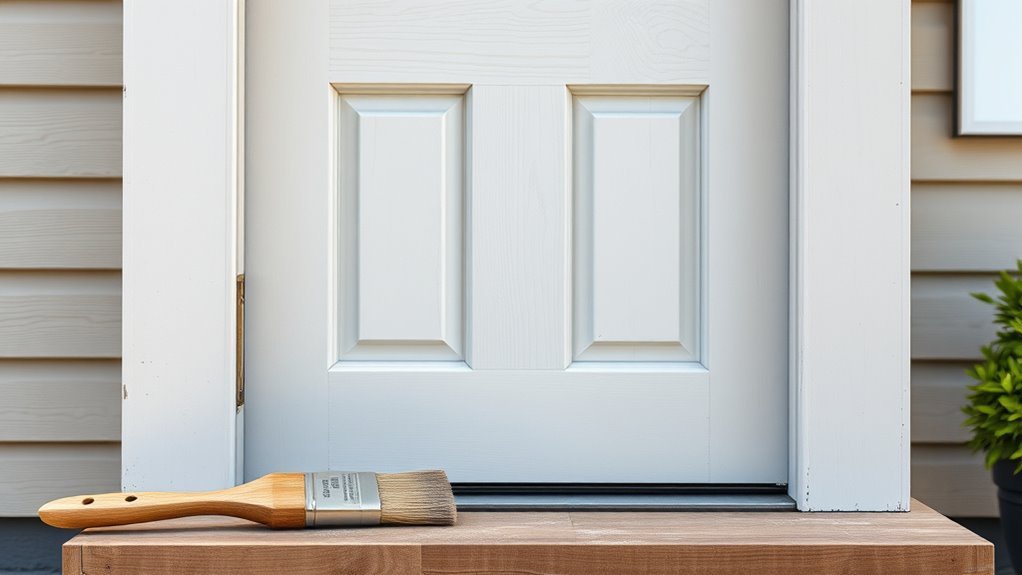
Prime the door with an exterior-grade primer, let it dry, then apply two thin coats of your chosen paint color, sanding lightly between coats for adhesion.
Reinstall hardware after full cure, check seals and weatherstripping, and enjoy a refreshed, protected entryway.
What Repainting Your Door Achieves
Repainting your exterior wood door instantly boosts curb appeal, giving your home a fresher, more polished look. It also renews the protective finish, sealing the wood against moisture, sun, and temperature changes.
With the right paint and prep, you’ll both improve appearance and extend the door’s lifespan.
Improved Curb Appeal
When you give your exterior door a fresh coat of paint, it instantly sharpens the look of your whole house and makes a stronger first impression on visitors and passersby. You’ll update your facade without major renovations, and neighbors notice.
Choosing colors that echo Historical designs or modern palettes helps your home fit its era or stand out tastefully. Simple Artistic techniques—like a two-tone, block color, or subtle glazing—add character and depth.
A well-painted door signals care, boosts resale appeal, and frames landscaping and hardware choices. You’ll attract positive attention and feel pride every time you come home.
Enhanced Weather Protection
Beyond boosting curb appeal, a fresh coat of paint also protects your exterior door from the elements. You’ll seal wood pores, block moisture, and reduce cracking, extending the door’s life. Use weather resistant coatings for superior defense against rain, sun, and temperature swings.
Don’t forget hardware: regular door hinge maintenance prevents rust and keeps the seal tight.
- Prevents rot and swelling with proper primer and topcoat
- Shields finish from UV and water with weather resistant coatings
- Keeps operation smooth by combining paint care with door hinge maintenance
Repainting is a simple, proactive investment.
When to Repaint: Signs to Look For
If your exterior wood door starts showing flaking paint, peeling edges, or exposed bare wood, it’s time to act before moisture and rot set in.
Check for bubbling, chalky residue, faded color, or sticky finish after rain—these mean the topcoat failed.
Look at threshold and bottom edges for swelling or soft spots signaling water intrusion.
Inspect around hardware and decorative trim; cracked caulk or gaps around door decoration let moisture in.
Also watch for uneven wear from frequent use.
Repaint when multiple signs appear, and combine maintenance with weatherproofing techniques to extend the new finish.
Tools and Materials for a Pro Finish
To get a pro finish, you’ll need the right tools and high-quality materials. Start with essentials like a good bristle brush, angled sash brush, roller, sandpaper, and a scraper.
Choose exterior-grade primer and paint formulated for wood to guarantee durability and a smooth finish.
Essential Painting Tools
Before you lift a brush, assemble the right tools so the job goes faster and the finish looks professional. You’ll need quality brushes, rollers, scrapers, sandpaper, caulk gun, drop cloths, painter’s tape, and a sturdy ladder. Choose tools that let you execute sharp edges for color combinations and clean lines for decorative accents.
- Good angled sash brush (cutting in)
- Short-nap roller (smooth doors)
- Sanding block and scraper (prep)
Keep tools clean, replace worn brushes, and arrange them within reach. Proper tools save time and give a durable, polished result.
Recommended Paint Materials
Although you’ve already gathered the basics, picking the right paints and primers will determine how long your exterior wood door lasts and how it looks up close. Choose an exterior-grade acrylic latex for durability and flexibility. Use an oil-based primer for bare wood or stubborn stains.
Pick semi-gloss or gloss for easy cleaning and to highlight details. Match paint color to the architectural context—use color psychology to influence curb appeal and mood. Consult historical styles for authenticity on period homes.
Have high-quality brushes, foam rollers, and a respirator. Buy a test sample, stir thoroughly, and plan two thin coats.
Choose the Right Paint for Exterior Wood Doors
Since your exterior door faces weather and heavy use, pick a paint that’s built for durability and protection. You’ll want a finish that resists fading, chipping, and moisture while complementing door hardware and sealing edges against drafts.
Consider acrylic latex for flexibility, oil-based for toughness, or specialty weatherproof coatings for extreme exposure.
- Acrylic latex — fast-drying, easy cleanup, UV resistant.
- Oil-based/enamel — durable, smooth finish, great for high-contact areas.
- Weatherproof coatings — highest moisture and temperature resistance; ideal for coastal or harsh climates.
Match sheen to maintenance needs and always protect surrounding door hardware.
Primer Types and When to Use Them
When you’re prepping an exterior wood door, choosing the right primer matters because it bonds paint, blocks tannin bleed, and improves durability. Pick one that matches the wood type and topcoat.
Use oil-based or shellac primers for dense woods and knotty pine to seal tannins.
For dense woods and knotty pine, seal tannins with oil‑based or shellac primers.
Water-based acrylic primers are suitable for stable, previously painted surfaces.
Latex primers work well for easy cleanup and flexible adhesion on exterior panels.
Spot-prime bare patches and repairs to maintain uniform absorption.
Consider your door’s style and interior decor so exterior choices don’t clash when seen from inside, aiding subtle furniture matching.
Best Paint Sheens for Exterior Doors
If you want a door that looks great and stands up to weather, pick a sheen that balances appearance with durability. You’ll choose based on exposure, maintenance, and how visible door hardware will be.
Semi-gloss resists wear and wipes clean; satin hides imperfections while offering good paint durability; high gloss highlights details but shows scratches and fingerprints. Consider:
- Satin — versatile, forgiving, good for most exteriors.
- Semi-gloss — best for heavy-use doors and visible door hardware.
- High gloss — dramatic look, higher maintenance.
Test a small area first, and clean and prep properly to maximize longevity.
How to Pick a Color That Suits Your Home
How do you choose a door color that complements your home and boosts curb appeal? Use color psychology to match mood—calm blues, energetic reds, or grounding greens. Consider architectural style and Historical colors for authenticity. Test swatches in daylight and against siding, trim, and landscaping.
| Style | Mood | Tip |
|---|---|---|
| Colonial | Traditional | Use muted Historical colors |
| Modern | Bold | Pick high-contrast accents |
| Cottage | Cozy | Choose soft, welcoming tones |
Pick a color that harmonizes with materials, reflects your personality, and reads well from the street.
Ideal Weather and Timing for Outdoor Painting
Pick a day when the temperature is between about 50°F and 85°F so paint can cure properly.
You’ll want low humidity windows to prevent long dry times and poor adhesion.
Avoid painting if rain or heavy dew is expected within 24 hours.
Best Temperature Range
Aim to paint on days when temperatures stay between about 50°F and 85°F, since paint adheres and cures reliably in that window and you’ll avoid problems like poor drying, wrinkling, or blistering. You’ll also plan timing around door security tasks and hardware upgrades to avoid handling wet surfaces. Check local forecasts for daytime highs and overnight lows; sudden dips can stall curing.
- Start mid-morning after dew evaporates and before peak heat.
- Avoid painting if temps will drop below 50°F within 24 hours.
- Pause if heat exceeds 85°F or direct sun bakes the door.
Low Humidity Windows
When you can, schedule exterior door painting during stretches of low humidity—ideally below about 60%—because drier air speeds solvent evaporation and helps paint form a smooth, durable film without trapping moisture.
Choose days when forecasts show consistent lows in humidity for the full curing window, and start early so coatings dry before evening temperature shifts.
Use simple humidity control like portable dehumidifiers in enclosed porches and avoid working right next to fresh water sources.
Check that window sealing is intact so moisture won’t wick through frames during cure. That minimizes bubbles, adhesion issues, and the need for premature touch-ups.
Avoid Rain And Dew
Although you don’t need perfectly clear skies, avoid painting if rain is likely within 24 hours or if heavy dew forms overnight, since moisture can ruin wet paint and interfere with adhesion.
Plan mornings when dew prevention is evident and check forecasts for rain barriers like approaching fronts. You’ll want surfaces dry for several hours before coating and avoid painting late afternoon when temps drop.
Use temporary rain barriers—tarps or a canopy—if weather shifts, but don’t rely on them for prolonged storms.
Follow this quick checklist to time the job:
- Check forecast 24–48 hours.
- Confirm dry surface for 4–6 hours.
- Set up rain barriers.
Safety and Protective Gear Checklist
Before you start sanding, stripping, or spraying, gather the right safety and protective gear so you’re ready for every task; this keeps you comfortable and prevents injuries.
Before sanding, stripping, or spraying, gather proper safety gear to stay comfortable and prevent injuries.
Create a concise safety checklist: respirator or mask rated for paint fumes, safety goggles, and hearing protection if you’re using power tools.
Wear nitrile gloves for solvents and durable work gloves for sanding.
Use knee pads or a padded mat when working low, and non-slip shoes for stability.
If sanding lead paint is possible, follow lead-safe practices and use a HEPA vacuum.
Keep a first-aid kit and fire extinguisher nearby.
How to Remove Door Hardware Safely
Before you start, turn off power to any electronic locks so you don’t short anything or set off alarms.
Remove knobs, deadbolts, and hinges carefully, labeling each piece and its screws as you go.
Store everything in a labeled bag or container so reassembly is quick and mistake-free.
Turn Off Door Lock Power
If your door has an electronic or smart lock, cut its power before you start removing hardware so you don’t trigger the latch or short the electronics. Turn off the breaker or remove batteries, and confirm the door lock is inert.
Check any nearby wiring for weatherproofing covers before you proceed. Follow these steps:
- Remove batteries or unplug transformer.
- Flip circuit breaker and test lock won’t respond.
- Tape exposed wires and reseal weatherproofing boot temporarily.
With power off, you’ll avoid accidental locking, sparks, or damage to the lock’s electronics while you remove screws and plates.
Label And Store Hardware
With the lock powered down, you’re ready to remove knobs, deadbolts, hinges, and strike plates—just don’t toss them in a box and forget where they go. Label each part and its screws with masking tape and a fine-tip marker: front knob, exterior deadbolt, top hinge, bottom hinge.
Group matching pieces in small zip bags to preserve hardware selection decisions and to keep finishes together for color coordination later. Photograph assembled groups against a plain background so you can confirm placement at reinstallation.
Store labeled bags and photos in a dedicated container sealed against moisture, and keep it near the door until painting’s done.
Should You Remove the Door From Its Hinges?
Removing your door from its hinges makes painting much easier, though it isn’t always necessary. You’ll decide based on weight, weatherstripping, and how tidy you want edges to be. Removing helps prevent drips on thresholds and lets you reach both sides evenly, while hinge maintenance and Door security must be considered—label hardware and keep pins safe.
- Remove: take pins, lift door with help, set on sawhorses.
- Paint in a well-ventilated area, finish both faces before rehanging.
- Reinstall: check hinge screws, test latch alignment, confirm Door security.
Protecting Surrounding Areas and Landscaping
Now that the door’s off the hinges (or you’ve decided to paint it in place), protect the surrounding area and landscaping before you start. Lay drop cloths over steps and soil, secure edges with weights, and shield shrubs from drips. Tape plastic around outdoor lighting and remove fixtures if possible. Plan Landscaping integration so paint lines align with beds and hardscape. Keep pathways clear for ladders and ventilation. Clean spills immediately with water or mineral spirits as appropriate.
| Area | Protection | Tip |
|---|---|---|
| Steps | Drop cloth | Weight edges |
| Plants | Plastic wrap | Avoid sprays |
| Lights | Tape/cover | Remove bulbs if possible |
When and How to Strip Old Paint Safely
Before you strip paint, check for lead: if your home was built before 1978, assume the old finish may contain lead and use testing kits or hire a certified contractor. You’ll protect health, choose appropriate methods, and respect historical restoration needs.
Select a chemical stripper or heat gun rated for exterior use and work outdoors with PPE. Follow these steps:
- Contain debris with drop cloths and tape.
- Apply stripper per instructions; scrape gently and collect waste.
- Clean residue, neutralize surface, and dispose of hazardous material properly.
Consider color psychology when choosing a new finish; document original tones for accuracy.
Sanding a Wood Door: Grit and Technique
Although sanding takes patience, it’s the step that guarantees new paint adheres smoothly and hides imperfections. Start with 80–120 grit to remove loose finish, then progress to 150–180 grit for a uniform surface.
For softwoods, be gentler; for hardwoods, you can abrade slightly more. Sand with the grain, keep pressure even, and use a sanding block for flat panels and folded sandpaper for profiles.
Finish with a light 220 grit scuff for maximum adhesion. Clean dust thoroughly before priming.
Proper attention to door material and grit sequence extends paint durability and guarantees a professional-looking result.
Repairing Cracks, Gouges, and Rot Before Painting
Sanding will get the surface ready, but any cracks, gouges, or rot left untreated will show through paint and shorten its life, so you’ll want to repair those defects first. Remove loose wood and old filler, pry off or mask door hardware, and expose rot to assess extent.
Treat minor gaps with exterior-grade wood filler; for deep gouges or rot, cut back to sound wood and epoxy or replace the section. Seal repairs and sand smooth.
Follow basic weatherproofing techniques—primer, flexible caulk at joints, and proper overlap—so paint adheres and protects the door long-term.
- Assess damage
- Remove rot
- Fill and seal
Cleaning and Degreasing for Proper Adhesion
Start by wiping the door with a stiff brush or damp cloth to remove surface dirt and loose debris.
If the door feels greasy or has fingerprints, wipe it down with a solvent like mineral spirits or a trisodium phosphate (TSP) solution.
Let the wood dry fully before sanding or priming so paint will stick properly.
Remove Surface Dirt
Before you apply primer or paint, thoroughly remove dirt, grease, and grime so the finish will stick and look even. For effective surface cleaning, start by brushing loose debris, then wash the door with mild soap and water, focusing on grooves and edges. Rinse and let dry fully before proceeding. Dirt removal prevents bumps and adhesion failures.
Follow these quick steps:
- Sweep with a soft-bristle brush to remove cobwebs and dust.
- Wash panels and trim with a sponge and soapy water.
- Rinse thoroughly and allow at least 24 hours to dry completely before priming.
Degrease With Solvent
Once you’ve removed surface dirt, tackle grease and oils with a solvent so paint will bond properly; grease attracts dirt and repels primer, leading to peeling and uneven coverage. Use solvent degreasing as part of surface preparation: wear gloves, work outside or ventilate, test a hidden spot, wipe with lint-free cloth, and let dry. Don’t soak wood—light passes remove contaminants. After degreasing, sand any raised grain and clean dust before priming.
| Step | Action | Tip |
|---|---|---|
| 1 | Test solvent | Choose mild first |
| 2 | Wipe | Use lint-free cloth |
| 3 | Dry | Air-dry fully |
| 4 | Sand | Smooth grain |
| 5 | Prime | Start within hours |
How to Apply Wood Filler and When to Sand Again
If the door has dents, gouges, or gaps, you’ll want to fill them now so the surface reads smooth under paint. Choose an exterior wood filler matched to wood grain and apply with a putty knife, pressing firmly into defects. Let it cure per instructions; shrinkage means you may need a second pass.
When ready, sand with 120–180 grit to blend edges, then finish with 220 grit for a fine profile that won’t ruin paint consistency.
- Remove dust.
- Reinspect for low spots.
- Wipe before priming.
Masking Trim, Glass, and Hardware Correctly
Mask trim, glass, and hardware carefully so paint goes only where you want it—use low-tack painter’s tape for wood trim, specialized foil or vinyl tape for glass, and cover hardware with plastic or removable tape tabs to keep screws and moving parts protected.
Mask trim, glass, and hardware carefully—use low‑tack tape for wood, foil for glass, and protect hardware with plastic tabs.
Check edges for gaps and press tape firmly to prevent bleed. Remove doorknob components if possible, or tape around them to simplify hardware maintenance later.
For intricate trim masking, cut tape with a sharp blade for clean lines. Label removed pieces and keep screws in a container.
Peel tape while paint is tacky, not fully cured, for crisp edges.
How to Prime an Exterior Wood Door Step‑by‑Step
Start by sanding and cleaning the door so the primer will bond to bare wood and any old finish is removed.
Fill cracks and wipe away dust, then mask edges and hardware you didn’t already cover.
Apply a thin, even coat of exterior-grade primer, let it dry, and sand lightly before a second coat if the surface still looks patchy.
Surface Preparation Steps
Before you prime an exterior wood door, gather the right supplies and make sure the surface is clean, dry, and free of loose paint so the primer can bond properly.
Sand smooth with 120–220 grit, fill cracks with exterior wood filler, then sand again. Remove dust with a tack cloth and wipe with a damp rag; let dry.
Mask hardware and nearby trim. Consider how color combinations and decorative accents will affect edges and detail work so you prep accordingly.
Store primer at recommended temperature.
Quick checklist:
- Sand and fill
- Clean and dry
- Mask and inspect
Applying Primer Coats
Once you’ve prepped and inspected the door, apply a high-quality exterior primer in thin, even coats so it bonds properly and sheds moisture. Work top to bottom, brush recessed panels and roll flats, keeping primer off door hardware or masking it. Let each coat dry fully, sand lightly between coats for adhesion, and apply a second coat where grain or bare wood shows. Proper priming boosts paint durability and prevents peeling.
| Step | Action |
|---|---|
| 1 | Mask hardware |
| 2 | Brush panels |
| 3 | Roll flats |
| 4 | Dry fully |
| 5 | Light sand and repeat |
Brush vs. Roller vs. Sprayer: Pick the Best Method
When you’re choosing between a brush, roller, or sprayer, think about the door’s condition, your desired finish, and how much prep you’re willing to do. Each method has clear trade-offs in speed, control, and appearance.
You’ll also consider color coordination and paint durability when selecting technique. Choose based on texture, detail, and time.
- Brush: Best for edges, panels, and precise control; slower but great for tight detail.
- Roller: Fast for flat surfaces, smooth finish with minimal texture; good for consistent coverage.
- Sprayer: Fastest, ultra-smooth finish, needs masking and experience to avoid overspray.
How to Paint a Wood Door: Cutting‑In and Coat Order
After you’ve chosen your application method, plan the cutting‑in and coat sequence so you keep edges sharp and avoid lap marks. Start by removing or masking door hardware; expose trim and jambs for neat lines.
Plan your cutting‑in and coat sequence first; remove or mask hardware and expose trim for sharp, clean edges
Cut in along panels, rails, and stiles before rolling or spraying larger surfaces. Work top to bottom and tackle one face at a time to control drips.
Apply a thin, even first coat; let it dry fully per manufacturer directions, then sand lightly if needed.
Follow with a second coat for durability, and seal contact points with weatherproofing techniques around thresholds and exterior seams.
Tips to Achieve a Smooth, Brush‑Mark‑Free Surface
Start by choosing the right brush — a high-quality synthetic-bristle brush for water‑based paints or natural bristles for oil‑based will lay down an even film.
You’ll also want to prepare the surface carefully: sand smooth, remove dust, and fill any cracks so the paint can level properly.
With the proper brush and a well-prepped door, you’ll cut down on brush marks and get a professional finish.
Choose The Right Brush
Although the right brush might seem like a small detail, it determines how smooth and mark-free your finish will be, so pick carefully. You want a high-quality synthetic bristle for latex or natural for oil; match brush type to paint.
Consider size: a 2–2.5″ sash for panels, 3–3.5″ for flat faces. Don’t forget finish effects and surrounding choices like choosing hardware and door decoration that influence edge work.
- Pick bristle material for your paint.
- Choose width for panels vs flats.
- Inspect for loose hairs and taper.
Work with steady, even strokes and keep paint thin.
Prepare The Surface Carefully
Now that you’ve picked the right brush, prepare the door so the paint can lay down smoothly and without brush marks. Start by removing hardware and cleaning grime with mild detergent, then rinse and dry.
Sand with 120–150 grit to remove old gloss, follow with 220 grit for a smooth tooth; wipe dust with a tack cloth.
Fill cracks and holes with exterior wood filler, sand flush, and prime bare or repaired areas.
Proper surface preparation boosts paint adhesion and paint durability.
Work in mild, dry weather, apply thin, even coats, and avoid heavy brushing that leaves marks.
Recommended Drying Times and How to Test Them
Wondering how long you’ll need to wait between coats? You’ll usually wait 2–24 hours depending on paint type, temperature, and humidity. Quick tests help avoid smudging and preserve color coordination if you plan decorative techniques later.
- Check tack: lightly touch an inconspicuous edge — dry to the touch in 2–4 hours.
- Film set: press with fingernail; no indentation indicates 6–12 hours for latex, longer for oil.
- Full cure: expect 3–7 days before heavy use; colder or humid conditions extend this.
Record conditions and test spots so you don’t rush finishing steps.
Applying a Second Coat and Final Finishing Touches
Wait until the door is fully dry to the touch and passes the light-press test before you start the second coat.
Apply a thin, even second coat, working with the grain and watching for drips or buildup.
Finish with a protective seal—clear satin or gloss—once the paint is cured to lock in durability.
Drying Time Check
After the first coat feels dry to the touch, check the manufacturer’s recommended recoat time and the door’s surface—humidity and temperature affect curing—before applying a second coat.
You want ideal paint durability, so use proper drying techniques: keep airflow steady, avoid direct sunlight, and control humidity.
Inspect for tackiness by lightly touching an inconspicuous edge; if it lifts, wait longer. Use a moisture meter if conditions seem uncertain.
Follow this quick checklist to decide when to proceed:
- Temperature and humidity within manufacturer specs.
- Surface non-tacky and fully cured to the recommended depth.
- No visible imperfections or debris.
Even Second Coat
Once the first coat is fully set, apply the second coat with the same methodical strokes you used before so coverage stays even and drips are avoided. Work top to bottom, keeping a wet edge and using thin, consistent passes to build opacity without texture.
Inspect in good light for missed spots, feathering edges to blend. Consider color psychology when choosing intensity—deeper tones read richer with a second coat, while pastels may need careful layering.
Think about historical styles you’re echoing; replicate traditional sheen and application for authenticity. Let the finish rest thoroughly before hardware reinstallation.
Protective Final Seal
Ready for the finishing layer? Apply the second coat evenly, following the grain and respecting drying times. Check the door layout and edges for full coverage. Protect decorative hardware with low-tack tape or remove it.
Finish steps:
- Lightly sand between coats, remove dust.
- Apply thin, even topcoat; avoid drips.
- Inspect seams, thresholds, and hardware fit.
Let the final coat cure fully before rehanging or touching hardware. Test the latch and alignment, and adjust if paint has built up.
A durable seal boosts weather resistance and appearance, preserving your paint job and maintaining the intended door layout and hardware function.
Reinstall Hardware and Weatherstripping Without Damage
When you’re reinstalling hardware and weatherstripping, handle each piece gently and follow the original alignment marks so you don’t warp the door or tear the seals.
Start with door hardware: tighten screws by hand first, then snug with a driver to avoid stripping. Reuse original screws when possible; replace corroded fasteners with stainless steel equivalents sized to the hole.
Align strike plates and hinges to the marks so gaps remain even.
Press weatherstripping firmly into the groove, trimming excess with a sharp blade.
Test the door for smooth operation and an even weather seal, adjusting as needed.
Maintain and Touch Up Your Painted Exterior Door
If you want your painted exterior door to keep looking good and protect your home, perform simple maintenance and quick touch-ups every season. Inspect for chips, cracks, and worn seals; clean dirt with mild soap; and sand feathered edges before repainting small areas. Keep an eye on areas near hardware and thresholds. Use matching paint and the same decorative techniques you originally used so finish and sheen align with interior accents.
- Clean and dry surfaces.
- Sand, prime, and touch up chips.
- Reseal edges and hinges.
Store leftover paint for future touch-ups and note color codes.
Common Mistakes and How to Avoid Them
After regular maintenance and timely touch-ups, you’ll want to avoid mistakes that can undo your work or shorten the paint’s lifespan. Don’t skip surface prep, ignore weather forecasts, or pick finishes that clash with color theory or local historical styles. Sand, clean, and prime properly. Use quality brushes and thin coats; rushing causes drips and peeling. Test color in different light. Seal edges and hardware to prevent moisture damage. Follow curing times before heavy use.
| Mistake | Fix |
|---|---|
| Poor prep | Sand, clean, prime |
| Wrong color | Test, consider color theory |
| Thick coats | Thin, multiple coats |
| Ignoring weather | Paint in mild, dry conditions |
Cost and Time Estimate for a DIY Door Paint Job
Because you can often handle a single exterior wood door in an afternoon, the DIY cost is mostly materials and a bit of your time: expect to pay $30–$80 for paint and primer (depending on brand and quality), $10–$30 for sandpaper, tape, and cleaner, and $10–$40 for brushes or rollers, plus optional $20–$60 to rent or buy a small sprayer.
Refinishing a single exterior wood door is an afternoon DIY—expect $60–$200 in supplies and a few hours.
So a basic job typically runs $60–$200 in supplies and 3–6 hours of work, while a full prep, multiple coats, and hardware refinishing can push total time to a full weekend and costs toward the higher end.
- Supplies: paint, primer, sandpaper
- Tools: brushes/roller or sprayer, tape
- Extras: replacement door hardware, sealer for durable paint texture
Plan for drying between coats and modest cleanup time.
When to Hire a Pro Instead of DIY
Knowing the time and cost involved helps you decide whether to tackle the job yourself or call in a pro.
Hire a pro if the door has structural rot, extensive peeling, or requires precise color matching to existing trim for interior decorating continuity.
Call a specialist when you lack tools, time, or steady weather windows.
If you’re restoring antique doors or coordinating with furniture restoration, professionals protect historical finishes and use correct primers and sealants.
Also consider a pro for complex hardware removal, multi-pane glazing, or warranty-backed work.
DIY when damage is minor and you’re confident in prep and painting skills.
Eco‑Friendly Paints and Disposing of Old Materials
When you choose eco-friendly paints and handle leftovers responsibly, you reduce harmful emissions and protect local waterways. Pick low-VOC, water-based primers and topcoats labeled “Eco friendly paints.” Use only what you need, and store sealed cans cool and dry.
- Return: Take unused paint to community recycling or take-back programs.
- Solidify: Mix paint with kitty litter or commercial hardener for safe landfill disposal.
- Hazard: Drop off solvents, thinners, and contaminated rags at hazardous waste facilities.
Label containers, don’t pour liquids down drains, and follow local Material disposal rules so you leave no toxic trace.
Troubleshooting: Peeling, Blistering, and Gloss Issues
After choosing eco-friendly products and disposing of leftovers properly, you’ll still need to watch for common finish problems that can develop over time.
If you spot peeling issues, scrape loose paint, sand edges smooth, feather primer into bare wood, and repaint with high‑adhesion exterior paint.
For blistering problems, determine whether moisture or heat caused trapped vapor; remove blisters, dry the door thoroughly, repair any leaks, and use breathable primers and topcoats.
For uneven gloss, lightly sand and clean before recoating, and pick a consistent sheen suitable for exterior wear.
Inspect annually and address defects promptly to prevent bigger repairs.
Door Style and Finish Ideas for Inspiration
If you want your exterior door to make a strong statement, start by matching style and finish to your home’s architecture and climate. Choose durable paints and consider stain for natural grain. Coordinate door hardware for contrast or cohesion.
Balance gloss: satin hides flaws; semi-gloss resists wear. Use weatherproofing techniques—proper primers, sealants, and thresholds—to protect finish and frame.
Choose satin to hide imperfections or semi-gloss for durability, and seal edges with proper primers, sealants, and thresholds.
- Bold color with matte finish for modern homes.
- Deep stain and oil finish for traditional styles.
- Two-tone paint with accent trim for curb appeal.
Pick maintenance-friendly options so your door stays striking year after year.
Frequently Asked Questions
Can I Paint a Door With Lead-Based Paint Still Present?
You can, but you shouldn’t; lead paint hazards make it risky. You’ll need to use certified safe removal techniques or encapsulation, wear PPE, contain dust, and hire a lead-safe contractor if you’re unsure or the paint’s damaged.
How Do I Paint Decorative Glass Inserts on a Door?
You clean and mask decorative glass, then use painting techniques like sanding frames, priming metal or wood, and applying enamel or glass-safe paint with thin coats. You’ll remove tape, touch up edges, and cure per instructions.
Will Painting a Door Affect My Home Insurance or HOA Rules?
Will painting your door affect insurance or HOA rules? You should check policies and covenants, because alterations can matter. Protect door hardware, use proper weatherproofing techniques, and get approvals to avoid fines or coverage disputes.
Can I Change a Painted Door’s Color Back to Natural Wood Without Stripping?
You can’t fully reveal a natural finish without removing paint; color removal methods like chemical strippers or sanding expose wood, though careful gel strippers plus light sanding can retain detail while restoring a believable natural finish.
How Do I Prevent Painted Door Edges From Swelling in High Humidity?
You’ll stop swelling by sealing edges, controlling humidity, and ensuring paint adhesion: sand, apply a solvent-based primer, caulk seams, topcoat edges, and use dehumidifiers or ventilation so damp air contrasts with dry, protected wood.
Conclusion
You’ve now got a clear, seven-step path to a weatherproof, beautiful exterior wood door—and by following it you’ll likely avoid the very problems that made you start (peeling paint, sticky panels). Coincidentally, the same careful prep that prevents trouble also gives you the smooth finish you wanted. If you take your time, choose proper paint, and spot‑repair early, the door will look great and keep doing its job for years—so don’t rush it.