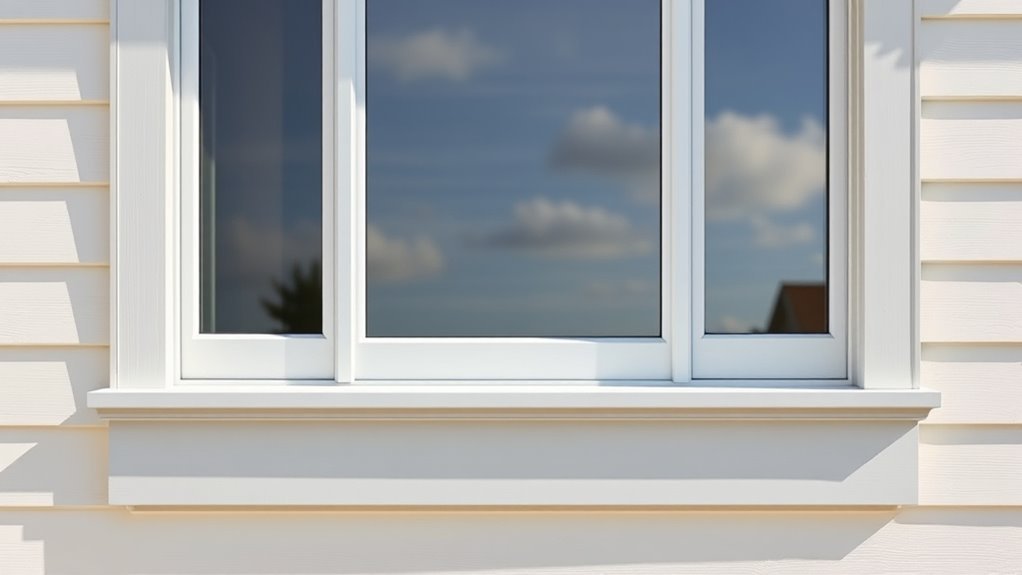
How to Paint an Exterior Window (Step-by-Step)
You’ll get a durable, pro-looking finish by prepping, repairing, priming, painting, and finishing in clear steps. Start by cleaning, stripping loose paint, repairing rot, and masking glass and hardware. Prime bare wood or metal, let it dry fully, then apply thin even topcoats with appropriate brushes and mini rollers, feathering edges and checking for drips. Recoat after recommended drying, inspect for flaws, touch up, and remove tape at the tacky stage — continue for detailed tips and troubleshooting.
What This Guide Covers and How to Use It

Wondering what you’ll learn here and how to apply it? You’ll get clear steps for prepping, stripping, sanding, and protecting exterior frames, plus tips for managing window hardware so you won’t damage locks or hinges.
You’ll learn how to choose the right paint sheen for durability and weather resistance, when to remove glass or mask it, and how to avoid drips and lap marks.
Safety, timing with temperature, and cleanup are covered.
Use this guide as a checklist: follow steps in order, pause at inspection points, and reference troubleshooting sections when paint adhesion or finish problems appear.
Quick Answer: Paint an Exterior Window in 8 Steps
If you want a durable, professional-looking result, follow these eight concise steps.
1) Clean frames and sills thoroughly.
2) Remove loose paint and sand smooth.
3) Repair gaps with exterior filler and let dry.
4) Prime bare wood or metal with appropriate exterior primer.
5) Mask glass and surrounding trim with tape.
6) Apply two thin topcoats, brushing with the grain for even coverage.
7) Check color mixing before you start to guarantee consistent hue across coats.
8) Label cans and follow proper paint storage to preserve leftover paint for touch-ups.
Should You Paint or Replace the Window?
When deciding whether to paint or replace a window, weigh its condition, energy performance, and long-term costs.
If the frame is sound and only the finish is failing, you can paint to protect wood and improve curb appeal.
Choose replacement when rot, warped sashes, or persistent drafts undermine window insulation; new units often save on heating and cooling.
Consider glass replacement if panes are cracked, fogged, or single-pane—upgrading to insulated glass improves comfort and value.
Factor labor, materials, and lifespan.
You’ll save money by painting when the structure’s intact; replace when performance or safety’s compromised.
Best Weather and Timing for Exterior Window Painting
Because paint needs consistent temps and low humidity to cure properly, you’ll get the best results on dry days with daytime temperatures between about 50°F and 85°F and relative humidity below 70%. Plan painting during a multi-day stretch without rain or heavy dew; morning warmth helps, but avoid direct midday sun that can skin the paint. Consider Color matching in natural light before you start, and factor in Weather considerations for primer and topcoat cure times.
- Choose a 48–72 hour dry window.
- Paint in mild, overcast conditions when possible.
- Avoid high winds and pollen season.
Safety Checklist: Ladders, PPE, and Fall Protection
Before you start painting, check ladder placement—set it on firm ground, angle it properly, and lock any spreaders.
Wear the right PPE like gloves, eye protection, and a dust mask so you’ll be protected from paint and debris.
If you’re working above ground level, use appropriate fall protection and never lean outside the ladder’s safe zone.
Ladder Placement Basics
Although you might be enthusiastic to get started, set up your ladder with care so it won’t shift, tip, or overload. Position the base one foot away from the wall for every four feet of ladder height. Make sure both feet sit on firm, level ground, and lock any spreaders or rung locks before you climb.
You’ll prioritize ladder stability and height safety by checking angle, contact, and surroundings. Inspect for damage, clear debris underfoot, and tie off or have a spotter.
Follow this quick checklist:
- Angle: 4:1 rule
- Contact: secure top and base
- Surroundings: clear hazards
Personal Protective Equipment
With your ladder set and spotter ready, focus next on the personal protective equipment you’ll wear and any fall-protection gear you’ll use. You’ll don protective clothing, gloves, eye protection, and respiratory masks when sanding or painting. Secure a harness or guardrail if you’re above shoulder height, and inspect all gear before climbing. Keep tools tethered and a first-aid kit nearby. Follow manufacturer’s limits for ladders and PPE, and replace damaged items.
| Item | Purpose | Check |
|---|---|---|
| Harness | Fall arrest | Buckles intact |
| Respiratory masks | Fume protection | Seal test |
| Gloves | Skin protection | No tears |
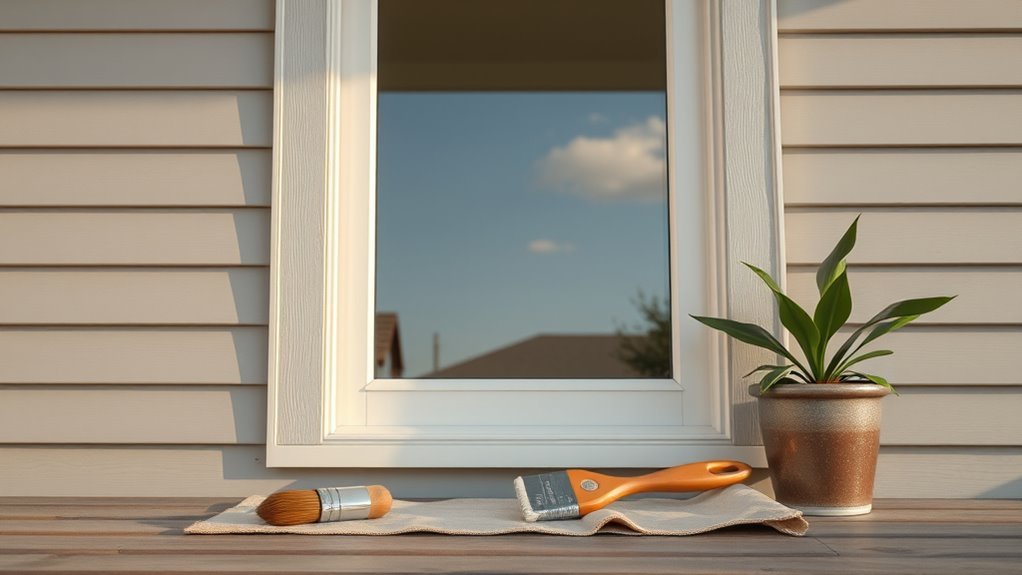
Tools You’ll Need for Exterior Window Painting
You’ll want the right painting tools—brushes, rollers, high-quality exterior paint, and a good primer—to get smooth, lasting results.
Prep supplies like sandpaper, putty, caulk, and cleaners will make sure the surface bonds properly.
Don’t forget safety and access gear—a stable ladder, gloves, eye protection, and a harness if you’re working high up.
Essential Painting Tools
Before you start, gather a compact kit of reliable tools so the job moves quickly and the finish lasts. You’ll need quality brushes (angled sash and small trim), a roller for broad areas, and a mini tray; pick brushes for smooth application and easy color mixing, and plan paint storage to keep cans sealed between sessions.
Keep a sturdy ladder, painter’s tape, and a clean cloth handy. Carry a small bucket with a mild solvent for cleanup. Use this focused kit to control edges, maintain sheen, and reduce downtime while you work safely and efficiently.
- Brushes
- Roller & tray
- Ladder & tape
Surface Preparation Supplies
Although cleaning and repairing may seem like the dull part, getting the surface right makes the paint stick and the finish last.
You’ll need a stiff-bristle brush, a putty knife, and assorted scrapers to remove loose paint and old glazing.
Have sanding blocks (coarse and fine) to feather edges and control paint texture.
Use a quality wood filler or epoxy for rot and a flexible exterior caulk for seams.
Keep tack cloths and degreaser on hand for dust-free surfaces.
Finally, bring a small sample for color matching so touch-ups blend seamlessly with existing trim.
Safety And Access Gear
When working on exterior windows, prioritize safety and reliable access gear so you can reach every area without risking a fall or injury. Use proper fall protection, stable ladders, and non-slip footwear; remove or secure loose Window hardware and protect Exterior decor nearby. Inspect gear before use, and set up on level ground.
- Ladder: extension or platform, rated for your weight and tools.
- Harness: tie-off points and anchor if you’re above one story.
- Scaffold or rolling platform: for long jobs, reduces fatigue and improves precision.
Stay focused, work methodically, and don’t improvise with unsafe equipment.
Paints and Primers That Work Best for Exterior Windows
If you want a durable, attractive finish on exterior windows, choose paint and primer that resist moisture, UV, and temperature swings. You’ll want an exterior-grade acrylic latex or oil-based primer for adhesion and rust inhibition, then a topcoat formulated for trim. Prioritize color matching to existing frames and substrates; test small areas. Paint durability matters: look for mildew resistance, flexing properties, and long-term warranty. Clean and sand before priming. Use compatible products to avoid peeling.
| Type | Best Use | Notes |
|---|---|---|
| Acrylic Latex | Wood, vinyl | Easy cleanup |
| Oil-Based | Metal, chalky | Strong adhesion |
| Bonding Primer | Glossy surfaces | Promotes grip |
| Rust-Inhibitor | Metal frames | Prevents corrosion |
Choosing a Finish: Satin, Semi-Gloss, or Gloss
Now that you’ve picked compatible primers and topcoats, decide on sheen: satin, semi-gloss, or gloss will affect appearance, durability, and maintenance. You’ll pick based on style and function—satin softens imperfections, semi-gloss balances shine and cleanability, gloss maximizes reflection and resilience.
Consider color coordination with siding and trim plus paint durability for exposed sills and casings.
- Satin: subtle sheen, hides flaws, moderate paint durability.
- Semi-gloss: versatile, easier to clean, good weather resistance.
- Gloss: highest durability, highlights detail, shows imperfections.
Choose the sheen that matches aesthetics and expected wear.
How to Match Existing Exterior Trim Color
Start by taking paint chip samples from the existing trim so you can compare them at the store. If you have access to one, use a colorimeter device to get an exact match and save time.
Once you’ve selected a formula, test it on a small, inconspicuous trim area to confirm the color in different light.
Take Paint Chip Samples
When matching existing exterior trim, take paint chip samples from several spots around the window so you capture how light and weather have altered the color. You’ll peel tiny flakes or sand discreetly to reveal original layers, then press paint chip samples to clean, flat cards. Label each with location and lighting notes. Send multiple chips to the store or compare them at home under different light.
- Exterior corner — sun exposure
- Shaded sill — less UV fade
- Beneath eaves — sheltered tones
This method improves color matching and guarantees the new coat blends seamlessly.
Use A Colorimeter Device
If you want a faster, more precise match than paint chips, use a handheld colorimeter to read the exact color of your existing trim. You’ll position the device on clean, flat trim, taking multiple readings in different light and averaging results.
Check colorimeter calibration before use to guarantee accuracy; follow the manufacturer’s steps and recheck periodically. Record the device’s color code and share it with your paint supplier for reliable paint color matching.
Keep in mind surface finish affects perception, so note gloss level when ordering. This method speeds matching and reduces guesswork compared with visual selection alone.
Test Small Trim Area
Want to be sure the new paint will blend? Test a small trim area first. Pick an inconspicuous spot, clean it, and apply your candidate color using the same paint sheen as the existing trim. Observe in different light across a day.
- Match: use color matching tools or sample swatches to narrow choices.
- Apply: paint a 2×3 inch patch with the chosen sheen to mirror reflections.
- Wait: let it cure fully; view from several angles and distances.
If it reads wrong, adjust tint or sheen and retest until the trim looks seamless.
Removing Loose or Peeling Paint From Frames
Ready to tackle the flaky paint? You’ll start by scraping loose sections with a putty knife, then sanding edges to a feathered transition. Remove dust, wipe with a damp cloth, and let dry. Check exposed wood for damage and prime bare spots. Keep paint sheen and color matching in mind before repainting so repaired areas blend. Use a small brush for tight corners and a scraper for larger flakes. Follow with a light sand, clean, and prime.
| Task | Tool | Tip |
|---|---|---|
| Scrape | Putty knife | Angle for leverage |
| Sand | 120–220 grit | Blend edges |
| Clean | Damp cloth | Dry thoroughly |
Strip Paint vs. Feather-Sand Edges: When to Do Each
If the existing paint is badly bubbled or the bare wood is exposed, you’ll want to strip the paint completely to guarantee a stable base.
For small chips or feathered edges where the old paint is sound, sand the edges smooth and blend the changeover before priming.
Choose the method that best addresses the damage so your new finish will adhere and look seamless.
Strip Paint Completely
When old paint is cracked, flaking, or several layers thick, you’ll need to strip it completely rather than just feather-sand the edges. Stripping removes all unstable coatings down to sound wood so new paint can adhere properly.
You’ll choose between chemical paint stripping, heat, or mechanical methods based on lead-paint risk and wood condition. Remove all residue, sand smooth, and repair rot before priming.
Consider color matching only after primer and fillers are cured so final swatches are accurate.
Follow safety precautions: ventilation, mask, and drop cloths.
- Assess hazards
- Choose method
- Clean and prep
Feather And Blend
Now that you’ve stripped any unsound layers and repaired the wood, decide whether to feather-sand the remaining paint or strip it down to bare wood.
If paint adheres well and layers are thin, choose feather-sand edge blending to smooth transitions; you’ll save time and preserve historic profiles. Use fine-grit sandpaper and light pressure, blending edges until the surface reads uniform.
If paint is failing, thick, or leads to hidden rot, strip to bare wood for a reliable bond.
After either method, clean dust, prime exposed wood, and inspect for smooth feather blending before topcoating.
Repairing Rot and Damaged Wood Before Painting
Before you pick up paint, address any rot or soft spots so your repairs don’t fail under a fresh coat. You’ll inspect jambs, sills, and stops; probe with a screwdriver and mark soft areas.
Before painting, inspect jambs, sills, and stops; probe and mark soft spots so repairs hold.
Preserve Historical styles by matching replacement moulding profiles when visible, and prioritize paint durability with proper priming and moisture control.
Remove rotten wood, let remaining wood dry, and cut back to solid grain. Use epoxy consolidant or wood patch for small areas; splice in new wood for larger damage.
Finish by sanding, priming, and sealing to ensure long-lasting adhesion and protection.
- Examine
- Replace
- Seal
Filling Cracks and Holes in Window Frames
After you’ve removed rot and spliced in sound wood, tackle remaining imperfections by filling cracks and holes so paint can adhere evenly and joints stay weatherproof. Inspect the frame for hairline cracks and gouges.
Clean debris, let the surface dry, then use a paintable exterior-grade filler or epoxy for structural spots; apply with a flexible putty knife and press firmly.
Sand smooth once cured, feathering into surrounding wood. For visible repairs, choose filler and primer with color matching in mind so final coats blend.
Consider weather considerations: avoid filling when rain or high humidity could prevent proper curing.
Caulking Seams for a Weatherproof Seal
How tightly do the window joints need to seal to keep out wind and moisture? You want a continuous bead with no gaps or voids. Use proper caulking techniques: cut the tip to match gap size, apply steady pressure, and smooth with a wet finger or tool. Choose a quality exterior silicone or polyurethane for longevity.
Combine these weatherproofing methods with backer rod for wide seams. Inspect and remove old caulk first, then prime bare wood. Let cure fully before painting.
Regular checks each season catch failures early, keeping drafts and water out while preserving your painted finish.
- Prepare
- Apply
- Inspect
Prepping the Glass: Cleaning and Protection
Since glass shows every speck and drip, prep it thoroughly so your paint lines stay crisp and your panes don’t get permanently stained. You’ll remove dust, grease, and old residues using targeted cleaning techniques: a mild detergent, vinegar solution, and a microfiber cloth. Rinse, dry, and inspect for streaks. Apply low-tack painter’s tape to frames and lay protective coverings over sills and surrounding trim. Replace coverings if damp. Work from top to bottom and change cloths often to avoid recontamination.
| Step | Product | Tip |
|---|---|---|
| 1 | Detergent | Warm water |
| 2 | Vinegar | 50/50 mix |
| 3 | Cloth | Microfiber |
| 4 | Tape | Low-tack |
| 5 | Cover | Drop cloth |
Removing or Masking Hardware and Window Stops
Before you paint, remove hardware carefully so you don’t bend or strip screws.
If you leave stops in place, mask them precisely with low-tack tape to keep clean lines.
Label and store small pieces so reinstallation is quick and accurate.
Remove Hardware Carefully
When you’re ready to work, take time to remove or mask window hardware and stops so paint doesn’t gum up moving parts or create uneven edges. You’ll focus on careful hardware removal and note paint matching for reassembly. Work methodically.
- Remove screws in a consistent order; store parts labeled and photographed.
- Loosen sash hardware gently to avoid bending; wrap latches in paper if not removed.
- Clean and degrease surfaces before painting; keep samples for color and finish comparison.
Handle components gently, avoid forcing, and keep fasteners together so reinstalling matched hardware and paint finishes is straightforward.
Mask Stops Precisely
If you want crisp paint lines and easy reassembly, mask or remove the stops precisely so paint can’t seep into movable parts or create lumpy edges. First, decide whether to remove sash stops or mask them in place; removing gives cleaner access, masking preserves fit.
Use low-tack painter’s tape cut to size, press edges firmly, and cover hardware with tape or paper. Label removed pieces for fast reinstallation and note color matching needs if parts will be repainted separately.
After painting, peel tape at a 45° angle while paint is tacky for the sharpest lines and to avoid lifting fresh paint.
Best Masking Techniques for Glass and Siding
Although masking seems simple, getting clean paint lines on both glass and siding takes the right tape, careful placement, and a steady hand. You’ll choose low-tack painter’s tape for glass and sturdier exterior tape for siding; test adhesion first so you don’t lift trim finish.
Although masking looks simple, the right tape and careful placement are key to crisp paint lines.
Press edges firmly, remove dust, and overlap corners precisely. Account for color matching at trim joints and reconcile differing paint sheens to avoid obvious seams.
Work outward from the frame, keeping sheets taut to catch drips. Remove tape while paint’s tacky for crisp lines.
- Plan
- Protect
- Peel promptly
Selecting Brushes and Rollers for Tight Profiles
When you’re working on tight window profiles, choosing the right tools makes the job cleaner and faster.
Reach for narrow angled brushes for corners, mini foam rollers for flat narrow sections, and thin trim brushes for fine edges.
We’ll compare their uses and show when each one shines.
Narrow Angled Brushes
Because tight window profiles demand control, narrow angled brushes are your go-to tool for crisp edges and access into grooves where wider brushes can’t reach. You’ll use narrow brushes with angled techniques to follow trim contours, cut in beside glazing, and remove excess without dragging paint.
Pick a high-quality synthetic or mixed-bristle brush sized to the channel, keep a light wrist, and work from wet edge to finished corner. Clean frequently to preserve the angle and maintain tip integrity.
- Choose size for profile.
- Master short, precise strokes.
- Maintain a consistent paint load.
Mini Foam Rollers
If you need smooth, even coverage in tight sash channels and recessed trim, mini foam rollers are the fastest way to lay paint without brush marks.
You’ll pick a 1.5–2-inch roller for narrow profiles and a 3/16-inch nap to control paint texture.
Roll lightly, keep strokes parallel to the profile, and reload sparingly to avoid drips.
Use foam for smooth finishes and avoid high-nap sleeves that add texture.
Replace rollers often; they compress and leave lines.
Clean or discard after each coat to maintain crisp edges.
Mini foam rollers speed work and produce consistent results.
Thin Trim Brushes
Want crisp lines in narrow sash and delicate moldings? You’ll use thin trim brushes to reach tight profiles after Window frame sanding prepares the surface. Choose quality angled bristles for control and sash sizes under 1/2 inch. Focus on steady wrist movement and avoid overloading the brush.
- Pick a 1/4″–1/2″ angled thin trim brush for sash and bead work.
- Match synthetic bristles to latex, natural to oil-based paints for smoother edges.
- Keep a damp rag and a small holder nearby to remove drips and maintain a clean tip.
Practice short strokes for even coverage and crisp edges.
How to Thin Paint and Load a Brush Properly
When the paint’s too thick it won’t level properly and you’ll see brush marks, so thin it just enough for smooth flow without losing coverage. Check the manufacturer’s thinning recommendations and remember color matching can change slightly with added solvent, so test on a scrap.
Consider weather considerations: warmer temps speed drying, colder or humid conditions may need slower-drying thinner or extender.
Dip the brush about one-third into the paint, tap off excess on the can rim, and load evenly along the bristles. Work with small amounts to maintain control, reloading frequently to avoid globs and maintain a consistent finish.
Brush Technique: Clean Cutting In and Corners
Because crisp edges make the whole job look professional, start cutting in with a steady hand and a properly loaded brush—about one-third to half the bristles damp—so you can paint narrow strips without dragging paint into the glass or trim. Work from sash to frame, using light, confident strokes.
For corners, pivot the brush tip and feather edges for seamless joins; check color matching at each seam to avoid surprises once paint drying alters sheen.
Follow this checklist:
- Angle brush slightly for control.
- Use short strokes into corners.
- Remove excess with a dry edge for clean lines.
Apply Primer: Coverage and Drying Time
Before you paint, apply a high-quality exterior primer evenly so you get the coverage the wood or metal needs without wasting product.
Check the label for recommended spread rate and plan for an extra coat on bare or weathered surfaces.
Let the primer fully dry to the manufacturer’s specified time before topcoating to guarantee proper adhesion and a smooth finish.
Primer Coverage Tips
If you want a durable, even base for your exterior window paint, apply primer in thin, consistent coats and watch the manufacturer’s recommended coverage and drying times. You’ll improve primer coverage and paint adhesion by working methodically: load the brush lightly, maintain wet edges, and avoid puddles.
Check the substrate for bare spots and recoat those areas immediately. Use the following checklist to stay efficient and precise:
- Inspect for full coverage, feathering into edges.
- Smooth runs with a light brush stroke before curing.
- Remove dust between coats to prevent adhesion failures.
Primer Drying Times
How long should you wait before painting over primer? You’ll typically wait 1–4 hours for touchable dryness, but full cure can take 24 hours depending on temperature, humidity, and primer type.
Work in temperatures the label recommends; cooler or humid conditions lengthen drying. Check adhesion by lightly pressing a corner—no tackiness means you can proceed.
Consider color matching: some primers change slightly as they cure, so confirm true color before final coats. Also note paint sheen won’t affect primer cure, but it influences final appearance.
If unsure, wait the full 24 hours for best results and durability.
First Coat: How to Paint Evenly
When you’re ready to apply the first coat, load your brush or roller evenly and work from the top of the window down in smooth, overlapping strokes so the paint lays flat and avoids lap marks. Keep a light, steady pressure and watch for drips along edges.
Check color matching against trim in good daylight and confirm paint sheen is consistent. Focus on thin, even layers rather than heavy coverage.
If you hit bare wood or knots, feather the edges to blend.
Follow this quick checklist:
- Maintain overlap and direction.
- Smooth out excess immediately.
- Verify uniform sheen and color.
How Long to Wait Between Coats?
Because drying time depends on paint type, temperature, and humidity, you should always check the manufacturer’s recommended recoat window and use it as your baseline. Wait the minimum recoat time, then test a small section by touch; if tacky, wait longer. Proper wait improves color matching and paint durability. Don’t rush in cold or humid conditions. Use short, controlled intervals when in doubt—30 minutes to several hours for fast-dry, 24 hours for latex in cool weather, longer for oil-based.
| Feeling | Patience | Reward |
|---|---|---|
| Anxious | Wait | Perfect |
| Proud | Resist | Lasting |
Second Coat: Inspection and Touch-Ups
After the recommended recoat time has passed, inspect the whole window under good light so you can spot thin areas, drips, or missed edges; touch up any flaws with a small brush or roller before the paint fully cures. You’ll check for texture consistency, proper adhesion, and even coverage. Focus on color matching where panels meet and use paint blending techniques to soften gradual shifts.
Follow these steps:
- Smooth out drips and level edges with a light stroke.
- Feather touch-ups into surrounding paint for seamless joins.
- Reassess under varied light, correcting any remaining spots promptly.
Painting Sashes and Meeting Rails Without Drips
As you paint the sashes and meeting rails, work deliberately and keep your brush load light so paint doesn’t pool in corners or on edges; a thin, even coat reduces drips and gives cleaner lines at the meeting rails. Use short, controlled strokes toward edges, wipe excess on a rag, and tip out edges before film forms. Check color matching under daylight and account for weather considerations—paint viscosity and drying time change with temperature and humidity. Move methodically along one rail, then the adjacent sash.
| Tool | Purpose |
|---|---|
| Slim brush | Precise edges |
| Rag | Remove excess |
| Masking tape | Protect glass |
| Light | Inspect finish |
Painting Multi-Pane Grids and Muntins Neatly
When you tackle multi-pane grids and muntins, work slowly with a slim brush and light loads so you can follow the narrow profiles without overpainting the glass or pooling at the joints. You’ll steady the brush with your pinky against the frame, feather edges, and wipe excess on a rag between strokes.
Consider color matching to existing trim and keep the paint sheen consistent for a uniform look. Clean crisp lines come from patience and small strokes.
Follow this checklist:
- Inspect and sand seams lightly.
- Load brush sparingly; stroke along muntin length.
- Remove smudges immediately with a damp cloth.
Touch-Up Tips for Hardware and Tight Joints
Before you touch up, clean around hinges, locks, and handles so paint will stick and hardware won’t gum up.
Use a small brush and steady hand to paint into tight joints without flooding the gap. If paint pools, wipe excess with a rag and feather the edge for a smooth finish.
Clean Around Hardware
Although hardware can be covered quickly by paint, you’ll want to clean around it carefully so hinges, locks, and weatherstripping keep working smoothly. You’ll perform hardware cleaning before any touch-up so moving parts won’t stick and paint matching won’t hide defects. Use a small brush, solvent-safe cloth, and a wooden pick to remove dirt and old paint flakes.
- Remove loose paint and grime gently.
- Degrease pivot points; dry thoroughly.
- Test operation; repeat if binding persists.
Mask or use low-tack tape during touch-up and retouch with matching paint in thin coats for durable results.
Paint Tight Joints
After you’ve cleaned and tested the hardware, focus on sealing and painting the tight joints where sashes, frames, and weatherstripping meet. These spots trap dirt and shed paint poorly, so they need careful handling. Use a small, angled brush and thin coats to avoid drips and buildup.
Prep joints with solvent and a scraper, then prime bare wood or metal. Choose compatible paint types for durability—exterior acrylic for wood, corrosion-resistant enamel for metal—and match existing finish with precise color matching.
Paint slowly, feather edges, and allow full cure between coats to keep hardware operating smoothly.
Removing Tape and Film Without Peeling Paint
If you want to avoid peeling fresh paint, remove masking tape and protective film while the paint is still tacky but not wet. Pull each strip back on itself at a 45-degree angle and keep steady, even pressure.
Use gentle heat from a hair dryer if adhesive resists, testing a hidden corner first.
Consider historical techniques and eco-friendly pigments when choosing products so removal won’t react with the finish.
Follow these steps:
- Score edges lightly with a razor for stubborn film.
- Pull slowly, keeping the angle consistent.
- Clean residue with mild solvent, then let cure.
Clean-Up: Wash Brushes, Dispose Rags, Store Leftovers
Once you’ve removed tape and film carefully, wrap up by cleaning your tools and handling leftovers responsibly so your next job starts smoothly. Rinse brushes in the appropriate solvent until water runs clear, reshape bristles, and hang them to dry.
Fold used rags into a metal container with a tight lid to prevent unpredictable combustion, or follow local hazardous-waste rules. Label leftover paint cans with color, sheen, and date; store them sealed in a cool, dry spot away from heat.
Keep decorative accents separate and wrapped to protect finish. Preserving materials helps maintain historical accuracy when matching future touch-ups.
Spot-Checks: Adhesion and Finish Quality Tests
Though you’re finished painting, don’t assume everything’s perfect—perform targeted spot-checks to confirm adhesion and finish quality. Inspect edges, corners, and sills for lifting, pooling, or uneven sheen. Test small areas gently with fingernail or putty knife to confirm adhesion. Compare wet and cured areas for color matching and uniform finish. Note weather considerations that might affect curing before final judgment.
- Adhesion: scrape light to verify paint bonds without flaking.
- Finish: check gloss consistency under daylight.
- Touchups: mark spots for prompt correction to prevent future peeling.
Seasonal Maintenance for Painted Exterior Windows
Why check your painted exterior windows seasonally? You’ll catch weather-driven issues early and extend paint durability.
Each season, inspect frames, sills, and caulk lines for gaps, moisture, or dirt. Clean gently with mild soap, rinse, and let dry before touching seals.
Trim nearby plants and clear gutters to reduce splash and abrasion.
Reapply flexible exterior caulk where joints loosen, and lightly scuff areas that attract wear before revitalizing touch-up coats.
Keep a log of observations and dates so you notice trends. These seasonal precautions prevent small problems from becoming bigger maintenance jobs.
Fixing Paint Failures: Peeling, Blistering, Chalking
When paint starts to peel, blister, or chalk, you should address it quickly to prevent moisture and rot from spreading into the wood or frame.
Inspect the failure: scrape loose paint, note adhesion issues, and test for underlying rot.
Sand to sound material, prime bare wood, and choose a high-quality exterior paint for improved paint durability and weather resistance.
Match the existing hue using careful color matching or bring a sample to match exactly.
Then repaint with appropriate coats, feathering edges to blend.
Maintain regular checks to catch recurrence early and preserve the window’s integrity and appearance.
When to Hire a Pro Instead of DIY
If the job involves extensive rot repair, complex sash restoration, or work high above the ground, you should hire a pro rather than tackle it yourself.
You should also call a specialist if the window uses historical techniques or decorative motifs that need preservation; improper methods can destroy character and lower value.
Hire someone when structural issues, lead paint, or hidden water damage appear, or when scaffolding and safety gear are required.
A pro will assess substrate integrity, match period finishes, and guarantee weatherproofing.
If you’re unsure, get an inspection—it’s smarter than risking costly mistakes or losing historic detail.
Cost Breakdown: DIY Materials vs. Professional Quotes
Though you can save money by doing the work yourself, you should compare the real costs of DIY—materials, tools, and your time—against professional quotes to see which option makes sense for your budget and skill level.
Weigh DIY savings against real costs—materials, tools, and your time—before choosing a pro or DIY approach.
Tally paint, primer, caulk, brushes, sandpaper, and any ladder or scaffold rental. Factor in time for prep, color matching, and drying delays from weather considerations.
Pros often include warranty, speed, and quality control. Consider:
- DIY: lower upfront cost, higher time investment.
- Pro quote: higher price, less hassle.
- Hybrid: hire for tricky parts, DIY the rest.
Low‑VOC Paints and Safe Disposal Options
Because low‑VOC paints release far fewer harmful fumes, you’ll breathe easier during and after the job and reduce indoor air pollution for your household. Choose eco friendly coatings labeled low‑ or zero‑VOC for trim and sash; they dry cleanly, resist yellowing, and minimize odor.
Test a small patch to confirm adhesion and finish before painting larger areas. Store leftover paint sealed and upright; write the color and date on the can.
For safe disposal options, follow local hazardous‑waste guidelines: many municipalities accept leftover paint or offer drop‑off events. Never pour paint down drains or into soil—protect your family and the environment.
10 Common Exterior Window Painting Problems and Fixes
When you tackle exterior window painting, common problems like peeling, blistering, and uneven coverage can slow you down—knowing why they happen and how to fix them saves time and money. You’ll inspect surfaces, remove loose paint, sand glossy spots, and choose compatible primers to prevent recurrence. Address moisture by sealing gaps and improving drainage around sills.
Match decorative accents and trim to preserve historical accuracy when restoring older windows. Follow this quick checklist:
- Peel/blister: strip, sand, prime.
- Thin/uneven: use proper brush/paint, apply thin coats.
- Sticky finish: allow full cure, check ventilation.
Bonus Tips to Make Painting Faster and Neater
Fixing common paint problems gets your windows sound, but a few smart habits will make the whole job faster and neater. Use quality brushes, load less paint, and keep a wet edge to improve paint durability. Prep once: sand, clean, and primer. Practice color mixing on scrap to match frames before you start. Tape carefully and remove it while paint’s tacky. Work top-to-bottom, section-by-section, and wipe drips immediately.
| Tip | Action |
|---|---|
| Prep | Sand, clean, prime |
| Brushwork | Thin coats, wet edge |
| Tape | Remove while tacky |
| Color | Test mixing first |
Frequently Asked Questions
Can I Paint Over Vinyl or Aluminum Window Frames?
Yes — you can paint vinyl and aluminum frames if you prep properly. You’ll clean, scuff, prime for vinyl durability, use a corrosion-inhibiting primer for aluminum, then apply exterior paint made for each material to bond and last.
How Do I Prevent Paint From Sticking to Weatherstripping?
You prevent paint sticking by masking weatherstripping with painter’s tape and plastic, cleaning surfaces for Weatherstripping maintenance, and using low-tack tape plus Paint adhesion techniques like primer only on frames, avoiding contact with sealant edges.
Will Painting Windows Affect My Home Insurance or Warranty?
Unlikely—painting windows won’t trigger armageddon for coverage, but you should check your policy and warranty. You’ll want proper window frame prep to guarantee paint adhesion, or you might void touch-up clauses or cause disputes.
Can I Use a Sprayer on Multi-Story Homes Safely?
Yes — you can safely use a sprayer on multi-story homes if you follow sprayer safety and multi story techniques: secure ladders or scaffolding, use harnesses, mask nearby surfaces, work with a partner, and test spray patterns first.
How Do Painted Windows Impact Historic Preservation Rules?
About 70% of local commissions require approval; you’ll need to follow historic guidelines, because painted windows can alter original fabric. Preservation considerations force color, finish, and material choices, so get permits and document changes beforehand.
Conclusion
You’ve got the steps and safety basics to tackle exterior window painting confidently. Before you start, note this: homeowners who maintain painted trim regularly can extend its life by up to 50%, cutting long‑term costs and replacement hassle. With proper prep, the right weather window, and low‑VOC paint, you’ll boost curb appeal and durability. Take your time on prep and use the checklist—good prep saves time and money later.