How to Paint Cement Block House Exterior
You’ll start by inspecting and repairing cracks, spalls, and mortar joints, then clean off dirt, efflorescence, and mildew so paint will stick. Damp-mix and patch repairs, prime with a masonry or bonding primer, then apply high-quality acrylic or elastomeric paint using a sprayer plus back-rolling or a thick-nap roller for texture. Work in mild, dry weather, allow proper cure times, and budget for materials and labor—keep going to learn detailed prep, tools, and troubleshooting.
Why Paint a Cement Block House : Benefits and Timing
Although concrete block is durable, painting it improves protection, appearance, and value—so you’ll want to contemplate it sooner rather than later. You’ll seal pores against moisture, reduce staining, and extend lifespan while choosing colors that tie exterior walls to interior decoration themes.
A fresh coat boosts curb appeal, makes maintenance easier, and can increase resale value. Timing matters: paint after repairs and during dry, moderate weather for proper adhesion.
Coordinate hues with landscaping ideas—trim, planters, and pathways—to create cohesive visuals. You’ll also cut long-term costs by preventing deterioration and limiting expensive repairs later.
Inspecting Cement Block Walls: What to Look For
Before you start painting, closely inspect every wall so you catch problems that would ruin a finish or let moisture in later. Walk each exterior face, noting cracks, spalled blocks, efflorescence, and mortar joint gaps. Tap suspect areas; hollow sounds mean delamination.
Check for previous coatings peeling or chalking and test moisture with a hygrometer or tape test. Observe how cement wall textures vary—smooth, split-face, or ribbed—since prep differs by texture and affects coverage.
Consider shadowing and architectural features when choosing paint color schemes. Document issues, prioritize structural repairs, and plan surface cleaning before any painting begins.
Tools, Materials, and Checklist for Painting a Cement Block House
Before you start painting, you’ll want a clear list of essential tools—rollers, brushes, sprayers, ladders, and scrapers—and the right surface materials like masonry primer, elastomeric paint, patching compound, and sealant.
You’ll also need a prep and safety checklist covering cleaning, repairs, masking, ventilation, and protective gear.
Follow that checklist to keep the job efficient, safe, and long-lasting.
Essential Tools List
When you’re tackling a cement block exterior, having the right tools and materials makes the job faster and delivers a longer-lasting finish. You’ll also better execute chosen color schemes and respect historical preservation where applicable.
Essential tools include masonry brushes, rollers with ¾”–1″ nap, extension poles, high-pressure washer or hose with surface cleaner, scrub brushes, wire brushes, and putty knives. Bring a masonry patching trowel, caulk gun with exterior-grade sealant, respirator, safety goggles, gloves, drop cloths, painter’s tape, ladder or scaffolding, paint buckets, and a pump sprayer if using masonry paint.
Keep a checklist and inspect tools before starting.
Required Surface Materials
You’ve got your tools lined up; now gather the right surface materials to make the paint adhere and last. Choose a masonry primer, breathable elastomeric coatings, and patching compounds suited for block pores.
Consider color schemes that work with your home’s style and lighting, and pick texture options—smooth, stippled, or heavy-bodied elastomeric—based on block condition.
Don’t skip a masonry cleaner and mild acid etch for efflorescence removal.
Use quality brushes, rollers, and a sprayer rated for thick coatings.
Keep replacement caulk and masonry patch on hand to repair cracks before priming.
- Primer, cleaner, patch
- Coating and texture options
- Brushes, rollers, sprayer
Prep And Safety Checklist
Although prepping a cement block exterior takes work, getting your tools, materials, and safety gear organized up front cuts mistakes and keeps everyone safe. Gather pressure washer, wire brushes, masonry cleaner, patching compound, primer, masonry paint, rollers, brushes, extension poles, drop cloths, ladders, respirator, gloves, goggles, and ear protection.
Check scaffolding and ladder stability, label paint for color coordination, and test a swatch. Plan for weather and ventilation. Keep a first-aid kit and fire extinguisher handy.
If the house has historical preservation concerns, consult local guidelines before altering finishes. Review checklist before starting and document steps.
Primer and Paint Choices for Exterior Cement Block
Before you paint, you’ll need to clean, repair, and dry the block so primer and paint will bond properly.
I’ll explain the common primer types—masonry, acrylic, and bonding primers—and when to use each one.
Then we’ll cover paint choices and tips for durability, breathability, and finish.
Surface Preparation Essentials
Because cement blocks soak up moisture and vary in texture, picking the right primer and paint matters more than color alone. You’ll clean, repair, and test adhesion before coating, and consider how color schemes or historical styles influence sheen and finish. Focus prep on creating a stable, dry surface so coatings perform.
- Power-wash and neutralize efflorescence; let blocks fully dry.
- Patch cracks and replace spalled mortar; sand rough edges for uniform porosity.
- Spot-test primer/paint adhesion and color on different block areas; adjust based on texture and exposure.
Thorough prep prevents peeling and uneven appearance.
Primer Types Explained
When you’re choosing a primer for exterior cement block, pick one that matches the block’s porosity, moisture conditions, and the topcoat you plan to use.
Use a penetrating masonry primer for high-porosity block to seal and reduce suction.
Choose a moisture-blocking primer where dampness or efflorescence risk exists.
Block-fill primers smooth uneven texture before topcoats.
Use stain-blocking formulas for tannins or repairs.
For color coordination, select a tinted primer to reduce topcoat coats and ensure accurate hue, especially in historical restoration projects where authenticity matters.
Match primer chemistry to your chosen topcoat—acrylic to acrylic, alkyd to alkyd.
Paint Selection Tips
Now that you’ve matched primer type to block porosity and moisture conditions, you’ll pick paints that work with that primer and stand up to exterior exposure. Choose a high-quality acrylic or elastomeric exterior paint for paint durability and flexibility on uneven block surfaces.
Test color matching on a small, sealed area — view at different times of day.
Match sheen to use (flat hides imperfections; satin cleans easier). Consider UV resistance and mildew inhibitors.
Follow manufacturer compatibility with your primer to avoid peeling.
- Test samples for color matching and adhesion
- Prioritize paint durability and weather resistance
- Confirm primer-paint compatibility
Cleaning Block Walls for Reliable Paint Adhesion
Before you prime or paint, give the block a thorough cleaning so the new coating will stick properly and last. Start by removing loose dirt, cobwebs, and peeling paint with a stiff brush or pressure washer on low to medium pressure to avoid surface damage.
Treat mold or mildew with a diluted bleach solution, rinse thoroughly, and let the wall dry completely.
Clear efflorescence with a masonry cleaner following label instructions.
Mask and protect areas for color schemes and decorative accents before cleaning to prevent overspray or chemical stains.
Good preparation guarantees consistent adhesion and a professional finish.
Repairing Cracks, Spalls, and Mortar Joints on Block Walls
Before you paint, check each wall for cracks, spalls, and damaged mortar so you know what needs fixing.
You’ll remove loose material, fill spalls with patching compound, and tuckpoint or replace mortar where joints are failing.
Doing these repairs now prevents moisture problems and gives your paint a stable surface to stick to.
Assessing Damage Extent
When you inspect block walls, focus on identifying and categorizing cracks, spalls, and damaged mortar so you can prioritize repairs accurately. Note size, depth, and pattern; map areas needing immediate stabilization versus cosmetic attention.
Consider how planned color combinations or historical preservation guidelines affect repair timing and materials. Photograph and label each defect, linking to moisture sources or structural movement.
Use simple severity codes: low, moderate, high.
Create a materials list and schedule based on urgency, budget, and paint timeline. Keep records for contractors and permits so repairs fit your overall painting plan.
- Record defects
- Rank severity
- Plan logistics
Repairing Mortar And Spalls
Now that you’ve documented and prioritized defects, start repairing mortar joints, cracks, and spalls so the wall will hold paint and resist moisture.
Clean loose debris, then rake out deteriorated mortar to a consistent depth. Dampen the block, apply new mortar or tuckpointing mix, and tool joints flush.
For hairline cracks, use masonry sealant; for spalls, fill with patching compound or hydraulic cement, shaping to match the block face.
Let cures fully before sanding or priming.
Plan color coordination with your chosen paint and any decorative finishes so repairs blend seamlessly and protect the exterior long-term.
Priming Cement Block Walls for Even Coverage
Even if the blocks look clean, you should always prime cement block walls to seal porous surfaces and guarantee even paint adhesion. You’ll choose a masonry primer compatible with your topcoat and local climate.
Primer evens out texture options differences and helps color schemes read true. Work methodically from top to bottom, filling pores and smoothing seams.
Let primer dry fully per instructions before any paint. Inspect for missed spots and recoat thinly where needed.
A good prime reduces paint coats and improves durability, so don’t skip it—proper priming saves time and prevents uneven finish later.
- Choose compatible masonry primer
- Apply uniformly, top-to-bottom
- Inspect and touch up missed pores
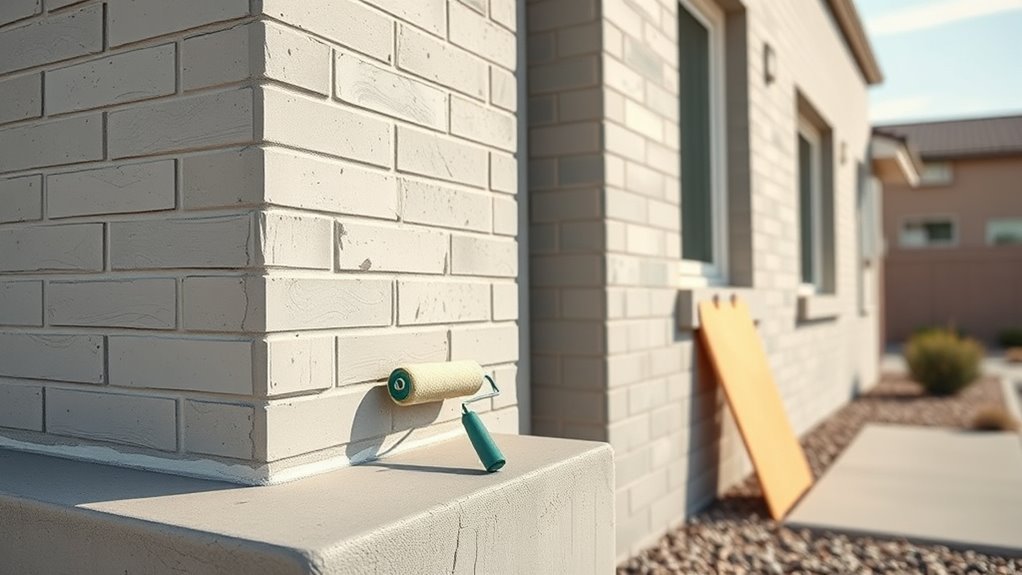
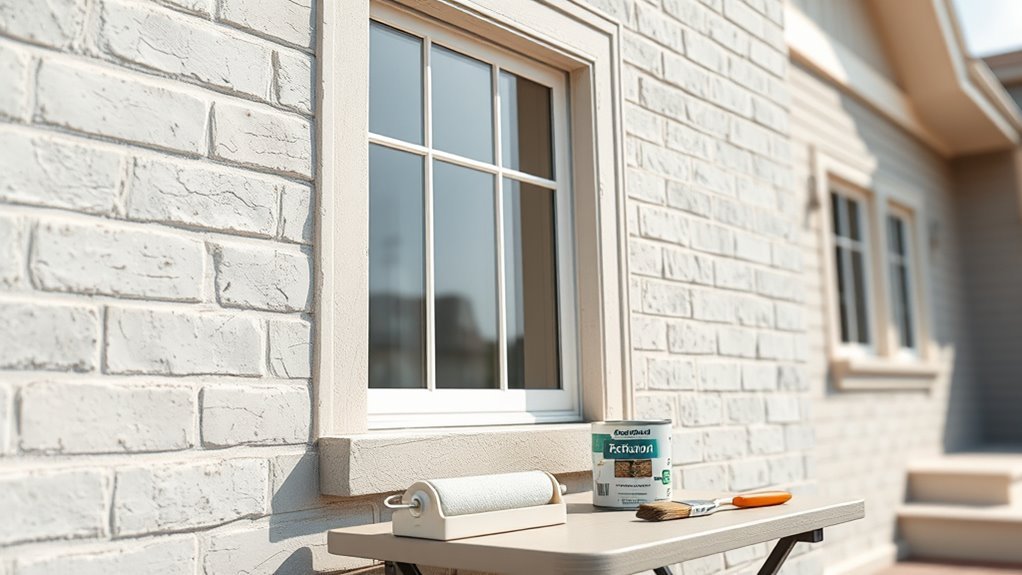
Applying Masonry Paint: Rollers, Sprayers, and Brush Tips

Once you’ve primed and prepped the surface, pick the right tools—roller, sprayer, or brush—based on texture, job size, and finish you want.
Use a thick-nap roller for cinderblock pores and to apply masonry paint evenly; work in sections and keep a wet edge.
A sprayer speeds coverage on rough façades but requires masking and back-brushing to force paint into crevices.
Reserve brushes for corners, mortar joints, and trim.
Test color choices on a small area to see how texture techniques alter appearance.
Clean tools promptly and touch up any missed spots for a seamless result.
Weather, Drying Times, Schedule, and Cost Expectations
Because paint cures best in mild, dry conditions, you should schedule exterior masonry work for days with temperatures between about 50°F and 85°F and low humidity. Avoid painting in direct midday sun, during rain, or when dew or frost is likely.
Plan primer, first coat, and second coat with 4–8 hours between coats for quick-dry acrylics, longer for enamels. Full cure can take 7–30 days.
Factor weather delays into a multi-day schedule.
Budget for primer, paint, tools, and labor; expect moderate cost for quality masonry products.
Consider landscape design and color coordination when timing and budgeting.
- Weather window
- Drying times
- Cost items
Common Problems After Painting and How to Fix Them
Good scheduling and the right products cut down on problems, but you’ll still sometimes see issues after the paint dries.
Good scheduling and proper products minimize issues, but occasional post-paint problems still occur — expect and address them promptly.
If you spot blistering, peel loose paint with a scraper, let the block dry fully, then prime and repaint with a breathable masonry paint.
For efflorescence, scrub with a stiff brush and a mild muriatic solution, rinse, and let the wall dry before sealing.
Uneven color or fading? Check your color schemes and repaint with UV-resistant pigments; test a small area first.
If chipping or mortar stains clash with historical styles, match trim and touch up to preserve character.
Frequently Asked Questions
Can I Paint Over Old Brick or Stucco to Match My Block Walls?
Yes — you can paint over old brick or stucco to match your block walls, but you’ll prep surfaces, use proper primers and breathable masonry paint; Brick restoration and Stucco maintenance steps will guarantee lasting adhesion and cohesive appearance.
Will Painting Change the Insulation or Thermal Performance of the Blocks?
Briefly: painting won’t considerably shift thermal performance. You’ll choose Color selection wisely and consider paint durability; reflective or insulating coatings can mildly improve efficiency, but block insulation and airtightness primarily determine overall heat retention.
Are There Eco-Friendly or Low-Voc Masonry Sealers for Block Exteriors?
Yes — you can choose eco friendly sealers and low VOC coatings for block exteriors. You’ll find water-based silane/siloxane, acrylic, and mineral silicate options that breathe, resist moisture, and minimize odors and environmental impact.
Can I Pressure-Wash Painted Block Without Damaging the Finish?
By golly, yes—you can pressure wash painted surfaces if you use a low-pressure nozzle, keep the wand 3–4 feet away, test a small area first, avoid peeling edges, and let paint fully cure to prevent finish damage.
Do Block Walls Need Repainting After Foundation Settling or Structural Repairs?
Yes — you should repaint after foundation cracks or structural repairs because you’ll want to restore paint adhesion, cover patched areas, and prevent moisture intrusion; you’ll prep, prime patched masonry, then apply compatible exterior paint for durability.
Conclusion
You’ve learned how to give your cement block house a new skin; now step back, breathe, and become its careful gardener. Like tending a stubborn stone garden, your prep, primer, and paint will coax color and protection into every pore. Weather the setbacks, patch the cracks, and paint with patience—each brushstroke is a quiet promise that your home will stand brighter, stronger, and more welcoming for seasons to come.