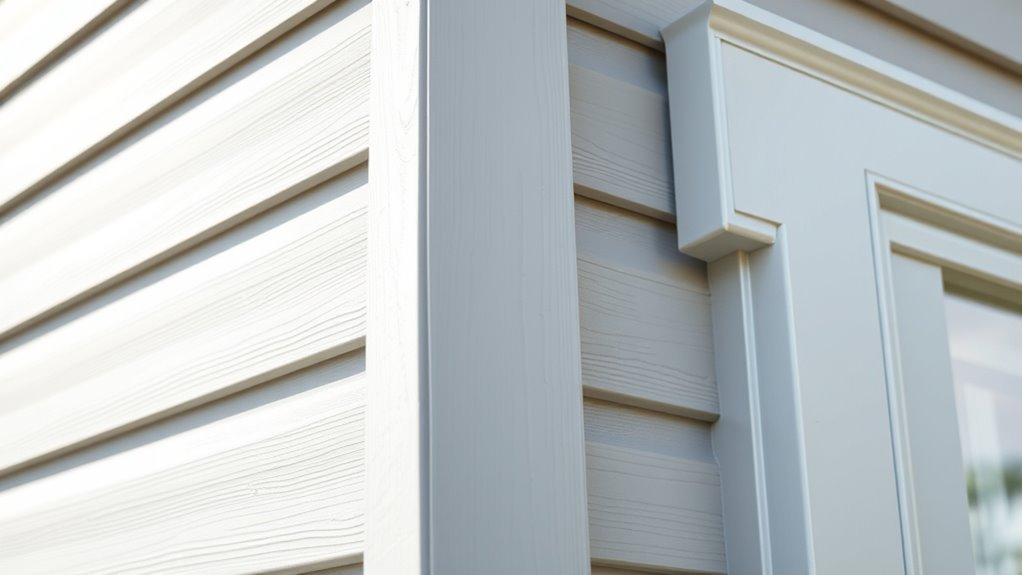
How to Paint Exterior Aluminum the Right Way
You can get factory-quality results by cleaning and deoxidizing the aluminum, sanding or etching to remove chalk and corrosion, then applying a primer made for non‑ferrous metal. Use compatible exterior topcoats—satin or semi‑gloss works best—applied in thin, even coats with brush, roller, or spray in calm, moderate weather. Wear PPE, protect landscaping, and follow flash and cure times. Keep going and you’ll find step‑by‑step prep, product choices, and troubleshooting tips.
Why Paint Exterior Aluminum?
Although aluminum resists rust, you’ll want to paint it to boost durability, curb appeal, and protection against weathering. You’ll slow oxidation, hide scratches, and add a UV-resistant layer that extends service life.
Painting also refreshes aging trim influenced by historical trends—matching period-appropriate palettes for restorations keeps authenticity. You’ll control temperature effects with lighter or darker finishes and use color psychology to influence perceived size, warmth, and style of your home.
With targeted primers and proper prep, paint becomes a maintenance strategy and design tool, letting you protect surfaces while expressing aesthetic choices without replacing the metal.
Paint Or Replace Aluminum: Quick Decision Guide
When you’re weighing options for worn or dated exterior aluminum, decide fast by comparing condition, cost, and long-term goals. Inspect for dents, corrosion beyond surface oxidation, or structural issues — replace if integrity’s compromised.
If aluminum aesthetics matter and the metal’s sound, painting saves money and refreshes style. Factor paint durability: higher-quality coatings cost more but extend intervals between rework.
Estimate labor and disposal for replacement versus prepping and coating. Also consider energy efficiency, matching trim, and resale impact.
Make a decision matrix: condition, upfront cost, maintenance timeline, and desired look to pick replacement or repaint.
What Causes Paint Failure On Aluminum?
You’ll see paint fail on aluminum mainly when the surface wasn’t prepped properly, leaving dirt, oils, or old coatings that prevent adhesion.
Corrosion and oxidation under the paint will lift or powder the finish over time.
Using incompatible primers or topcoats also causes peeling and poor durability.
Poor Surface Preparation
If you skip or rush surface preparation, the paint won’t bond properly and will fail prematurely. You need clean, dry aluminum to guarantee paint adhesion; even slight surface moisture undermines primers and topcoats.
Degrease, remove contaminants, and abrade glossy areas so coatings grab. Mask and protect surrounding materials, and only paint when the substrate meets manufacturer moisture and temperature specs.
Test adhesion with a small patch before committing to large areas. Handle edges and seams carefully to avoid peeling starts.
- Clean thoroughly: oils, dirt, and salts remove adhesion points
- Dry fully: surface moisture kills primer bonding
- Scuff or etch to promote mechanical grip
Corrosion And Oxidation
Even with proper cleaning and scuffing, aluminum can still betray your paint job through corrosion and oxidation, which undermine adhesion from the metal side. You’ll see whitish powder, pitting, or dulling as aluminum corrosion progresses, lifting paint and creating flaking.
Moisture, salt, pollutants, and galvanic contact accelerate deterioration, so you must control exposure and treat affected areas promptly. Use appropriate cleaners, neutralize salts, and apply corrosion-inhibiting primers to block further attack.
For lasting results, combine good surface prep with routine inspection and Oxidation prevention measures like sealers and sacrificial coatings to keep paint bonded.
Incompatible Paint Systems
When incompatible paint systems meet aluminum, they often fail because the layers can’t bond or expand together. You’ll see cracking, peeling, or blistering as different chemistries, film thicknesses, or curing mechanisms fight each other.
You should inspect existing coatings, remove loosely adhered layers, and choose a compatible primer and topcoat based on paint chemistry. Test adhesion on a small area and follow manufacturer recommendations for surface prep, drying times, and overcoating windows.
Beware mixing solvent- and water-based systems without a tie-coat. Use compatible systems to guarantee uniform flexibility and adhesion.
- Check substrate and coating history
- Verify chemical compatibility
- Conduct adhesion tests
Who Should Paint: DIY Vs. Pro?
You can weigh whether your skills and experience match the prep, priming, and spray or brush techniques aluminum needs.
Consider that hiring a pro usually costs more but gives higher-quality, longer-lasting results.
While DIY can save money if you have the time and patience.
Also factor in time and safety—scaffolding, ladders, and solvent exposure can make a pro the smarter choice.
Skill And Experience Needed
Although painting exterior aluminum is something many homeowners can tackle, it still demands careful prep, the right tools, and steady technique. You should know basic surface prep, compatible primers, and proper application to avoid peeling. Understanding aluminum history and its role in metal architecture helps you respect coatings and thermal movement.
If you’re unsure, hire a pro.
- You’ve got time, patience, and steady hands for sanding and masking.
- You understand dew point, adhesion tests, and correct primer choice.
- You’ll accept small repairs or hire for structural issues beyond painting.
Cost Versus Quality
Having the skills and patience to prep and paint aluminum helps you save money, but cost and quality trade-offs will decide whether you tackle the job or hire a pro.
You can cut costs by doing prep, sanding, priming, and spraying yourself, but factor in materials, tools, and time.
A pro brings expertise in color matching and selects coatings for maximum paint durability, reducing future maintenance.
If you want a flawless finish and long life, hiring a pro often pays off.
If budget limits you and results can be acceptable, DIY saves cash but may mean compromises.
Time And Safety Tradeoffs
When’s the last time you balanced a ladder, masked trim, and a paint sprayer while watching the weather? You weigh time, risk, and skill: DIY saves money but demands strict safety precautions and clear weather considerations.
If you’re comfortable with heights, prep, and patience, you’ll finish on your schedule. If not, hire a pro to cut time and liability.
- DIY: control schedule, learn techniques, accept physical risk.
- Pro: faster, insured, expertise in tricky weather windows.
- Hybrid: hire for high or complex areas, do touch-ups yourself.
Tools And Safety Gear You’ll Need
Before you start, gather the right tools and safety gear so the job goes smoothly and you stay protected: a pressure washer or stiff brush, sandpaper and a sanding block or orbital sander, deglosser or chemical etcher, high-quality exterior primer and paint formulated for metal, brushes and rollers suited to smooth surfaces, painter’s tape and drop cloths, and a sprayer if you plan to spray. Use PPE: gloves, eye protection, respirator rated for solvents, and knee pads. Remember aluminum alloys affect adhesion and paint durability. Visualize gear:
| Tool | Purpose |
|---|---|
| Pressure washer | Clean surface |
| Respirator | Protect lungs |
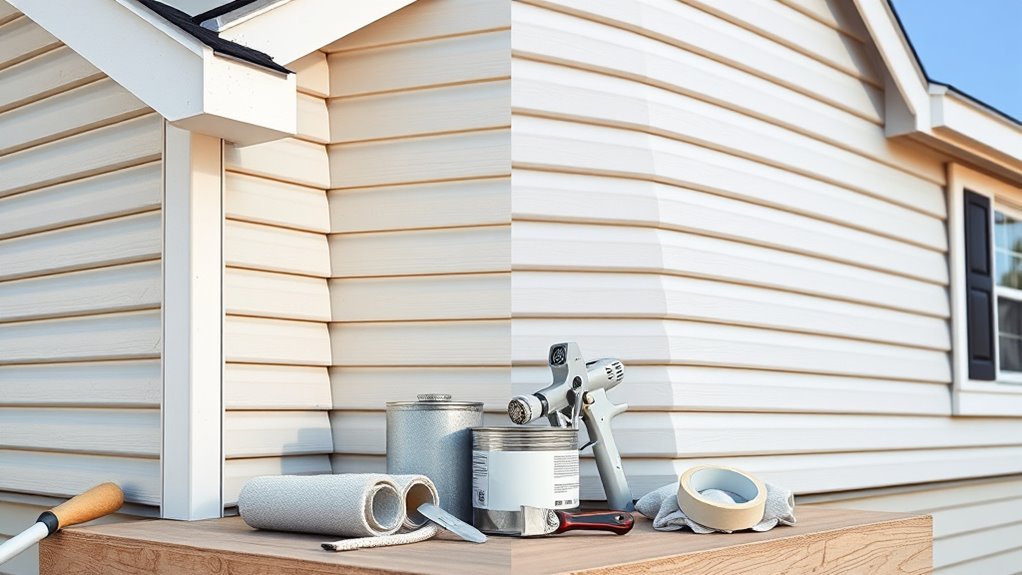
Best Exterior Paints For Aluminum Siding & Trim
If you want durable, long-lasting results on aluminum siding and trim, choose paints specifically formulated for metal and exterior exposure. You’ll pick coatings that bond to aluminum alloys, resist chalking, UV fade, and offer superior paint durability in wet and variable climates.
Look for acrylic elastomeric or 100% acrylic latex options labeled for metal; they flex with thermal movement and shed water. For corrosion-prone areas, consider formulations with corrosion inhibitors.
Match sheen to use—satin or semi-gloss for trim. Balance appearance and performance, and always follow manufacturer surface prep and application instructions.
- Acrylic elastomeric: flexibility, waterproofing
- 100% acrylic latex: UV resistance
- Corrosion-inhibiting finishes: long-term protection
Choosing A Primer For Aluminum Surfaces
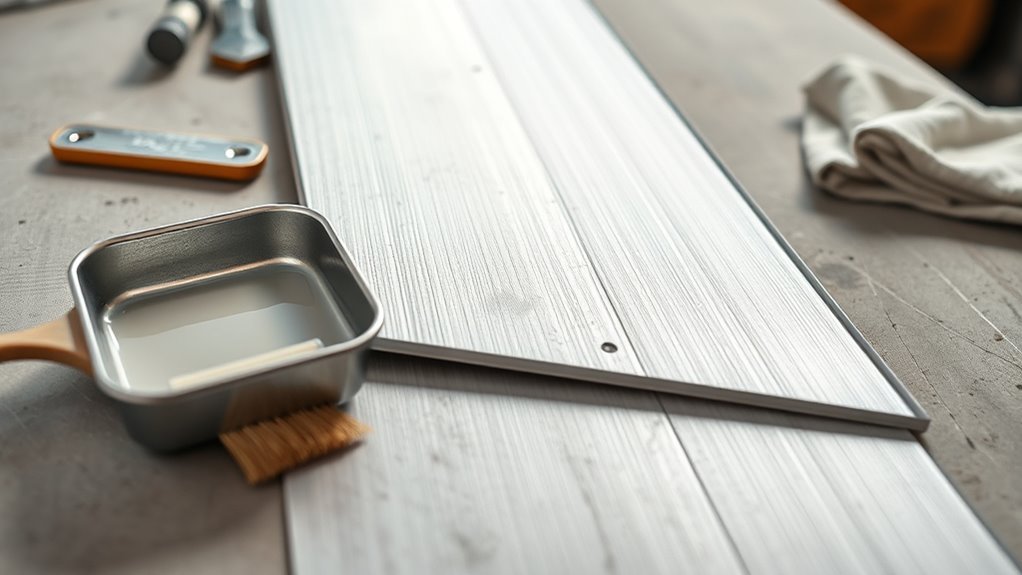
Although aluminum can look smooth, it needs a primer that promotes adhesion and prevents oxidation before you paint. Pick a product formulated for non-ferrous metals or labeled specifically for aluminum. You’ll clean and degloss the surface, then test adhesion with a small patch.
Choose etching or self-etching primers for bare alloy and zinc-rich or epoxy primers for heavily corroded pieces. Match primer flexibility to the substrate to accommodate thermal expansion and varied aluminum textures.
A proper primer improves paint durability, resists peeling, and creates a uniform base so your topcoat bonds evenly and lasts longer.
Selecting Paint Sheen For Frames, Trim, And Gutters
Now that you’ve prepped and primed your aluminum, you’ll want to pick the right sheen for frames, trim, and gutters because sheen affects both appearance and performance. Choose satin or semi-gloss for trim and gutters where Sheen durability matters; they resist weathering and wipe clean.
Use a low-luster satin on frames to minimize reflections and highlight Color contrast without glare. Matte can hide surface flaws but sacrifices cleanability.
- Satin/semi-gloss: durable, easy to clean
- Low-luster satin: subtle contrast, reduced reflection
- Matte: conceals imperfections, less durable
Match sheen to exposure and maintenance needs.
Testing Existing Finishes For Compatibility
Before you paint, check the surface for corrosion, chalking, or loose coatings so you know what needs repair.
Do a solvent rub to see if the existing finish softens or dissolves.
Perform an adhesion crosshatch test to confirm paint will bond.
If coatings fail either test, strip or sand to bare metal before proceeding.
Surface Condition Check
If the aluminum already has a factory or aftermarket coating, you’ll want to test it for adhesion and chemical compatibility before you paint — a quick solvent wipe and a tape pull test will tell you whether the finish is hard, chalky, or well-bonded.
A small-area primer/paint trial will confirm that your chosen products will stick and cure properly. Check for surface oxidation, pitting, or loose mill scale on the aluminum alloy. Remove contaminants and note substrate variations. Record findings and choose prep methods accordingly.
- Identify peeling, chalking, or brittle coatings
- Note anodized versus painted areas
- Map corrosion hotspots
Solvent Compatibility Test
How will the existing finish respond to your chosen solvents? You’ll perform solvent testing to determine whether cleaners or strippers affect paint, primer, or underlying metal.
Pick an inconspicuous spot, apply the solvent with a clean cloth, rub for a few seconds, then inspect for softening, discoloration, or lift.
Repeat with any other products you plan to use. Record results and label each solvent’s effect.
This compatibility verification prevents chemical damage and guides product selection.
If a solvent harms the finish, stop and choose a milder cleaner or consult manufacturer recommendations before proceeding with further surface preparation.
Adhesion Crosshatch Test
When you need to confirm that the existing finish will hold new coatings, perform an adhesion crosshatch test: score a small grid through the topcoat, apply standardized tape, then peel it off to see whether flakes or squares of coating lift away.
You’ll evaluate crosshatch adhesion against standards (e.g., ASTM D3359), note any cohesive failure, and check for Aluminum oxidation at cut edges. If adhesion’s poor, strip or abrade to bare metal and treat oxidation before priming.
Record results and location to guide preparation.
- Document adhesion class and failure type
- Address oxidation before repainting
- Retest after surface prep
Estimating Paint And Primer Quantities
Before you start buying cans, measure the areas you’ll paint and calculate surface square footage so you can match product coverage to the job. Multiply length by height for each panel, add trim and posts, and round up for waste and touchups.
Check primer and paint labels for square-foot-per-gallon coverage; factor in porous or previously bare spots that need extra primer. Account for color blending when shifting shades—buy slightly more than calculated to avoid batch variation.
For textured finishes, allow additional coats for texture enhancement. Note sprayers use more material than rollers; include that in your totals.
Picking Colors That Hide Flaws And Resist Fading
Which tones will best disguise dings and sun damage? You’ll pick mid-tones and muted shades that use subtle color blending to hide imperfections and slow visible fading.
Choose mid-tone, muted shades—low-sheen, subtly blended colors that disguise dings and slow visible fading.
Matte or low-sheen finishes help with flaw concealment by reducing glare that highlights texture.
Choose UV-resistant paints in slightly warm neutrals or cool greys to balance reflected light and minimize contrast against scratches.
Test samples on small panels in sunlight to confirm long-term performance.
Pay attention to matching trim and hardware to avoid drawing eyes to patched areas.
Proper selection saves repainting and keeps aluminum looking consistent over time.
- Mid-tones reduce contrast
- Low sheen masks texture
- UV-resistant pigments prevent fade
Job Planning & Timelines
Plan each step and set realistic timeframes so you and your crew stay on schedule and avoid costly rework. You’ll map prep, priming, painting, and curing phases, allocating buffer time for inspections and supply delays.
Assign clear roles, list required tools, and sequence work to prevent wet-on-wet mishaps.
Coordinate color coordination decisions with procurement so batches match and touch-ups blend seamlessly.
Factor in cleanup and disposal procedures to minimize environmental impact, using low-VOC products and proper waste handling.
Communicate milestones to clients, confirm access and protections, and document progress to keep timelines transparent and accountable.
When To Postpone Painting: Temperature & Humidity Limits
You should aim to paint aluminum when temperatures sit in the manufacturer’s recommended window—usually between about 50°F and 85°F—to guarantee proper adhesion and curing.
Don’t paint if humidity is high (generally above 85%) or if dew, fog, or rapid temperature drops could cause condensation on the metal.
Also avoid windy conditions that spray dust or accelerate cooling, both of which can ruin the finish.
Ideal Temperature Range
If conditions drop outside the ideal window, delay the job—paint cures properly only when temperatures and humidity are within specific limits. You should follow temperature guidelines: most exterior aluminum coatings perform best between 50°F and 85°F (10°C–29°C).
Avoid painting during rapid daytime temperature swings; substrate and paint need steady warmth. Consider humidity factors but don’t go into specific thresholds here—save detailed humidity limits for the next section.
Also, plan around overnight lows and strong sun that can overheat surfaces.
- Pick a stable, mild day.
- Avoid early morning dew or late-day chill.
- Monitor forecasts before you start.
Humidity Thresholds To Avoid
Because moisture can prevent proper adhesion and slow cure times, hold off on painting exterior aluminum when relative humidity stays high or dew forms on the surface.
You’ll want to postpone work if humidity exceeds 65% for oil-based paints and 50-55% for water-based formulas; check forecasts and surface dryness before starting. Morning dew or forecasted overnight humidity spikes can ruin adhesion and leave tacky finishes.
Plan jobs for dry afternoons with stable humidity, and avoid painting right before rain.
Consider environmental impacts like aluminum recycling when choosing products, and select paint color trends that perform well in your climate.
Wind And Condensation Risks
High humidity isn’t the only weather issue that can sabotage a paint job; strong winds and surface condensation pose separate risks you’ll want to watch for. Wind turbulence can blow dirt and disrupt even coats, while condensation ruins adhesion by forming moisture on cool aluminum.
You should postpone work if sustained gusts exceed 10–15 mph or if overnight temperatures risk dew formation. Prioritize condensation control: paint when surfaces are dry for several hours and air temps are stable above the paint’s minimum.
Use windbreaks and monitor forecasts to avoid rework and ensure lasting results.
- Use barriers to reduce wind turbulence
- Wait after dew, ensure dry surfaces
- Choose calm, stable temperature windows
Protecting Landscaping, Windows, And Adjoining Surfaces
Wondering how to keep your plants and siding spotless while you paint? You’ll start with landscaping protection: lay breathable drop cloths or plastic sheeting over beds, secure edges with rocks or stakes, and trim plants away from surfaces to reduce splatter risk.
For windows, use proper window masking—apply painter’s tape to frames and plastic film over glass, pressing seals tight. Protect nearby siding, trim, and fixtures with tape and cardboard shields.
Work from top to bottom so drips don’t ruin protected areas. Check protections frequently and replace any damp or shifted coverings to maintain a clean jobsite.
Removing Dirt, Mildew, And Chalk Safely
Before you prime or paint, you’ll need to prep the surface by removing loose dirt and chalk with a soft brush or pressure-wash on low.
For mildew, use a diluted bleach or commercial mildew remover and scrub gently, taking care not to damage the aluminum.
Rinse thoroughly and neutralize any cleaning solution so the surface is clean and ready to accept primer.
Surface Cleaning Prep
Because aluminum picks up grime and chalky residue over time, you’ll want to clean the surface thoroughly before any painting—dirt, mildew, and chalk can prevent primers and paints from adhering properly. Prepare by rinsing loose dirt with a hose, then use a mild detergent and soft brush to remove chalky film without abrading aluminum alloys, which affects paint durability.
Work in shade and cool temperatures. Rinse thoroughly and let dry. Avoid harsh abrasives that gouge the substrate.
- Test a small inconspicuous area first.
- Use biodegradable cleaners when possible.
- Wear gloves and eye protection.
Mildew Removal Techniques
After rinsing and removing loose grime, tackle mildew and chalked residue with a targeted cleaning method that won’t damage the aluminum. You’ll mix a mild cleaning solution—one part bleach to three parts water or a commercial mildew cleaner—apply with a soft brush, and let it dwell briefly.
Scrub gently along seams and textured areas, avoiding aggressive abrasion. Rinse thoroughly afterward (see next section). For stubborn patches, repeat once; don’t over-bleach.
After drying, consider mildew prevention: improve ventilation, trim nearby plants, and use mildew-resistant primers or paints formulated for metal to reduce recurrence.
Rinse And Neutralize
Once you’ve loosened grime and treated mildew, rinse the surface thoroughly to remove residues and neutralize any cleaning agents. Use a garden hose with moderate pressure or a low-pressure washer held 3–5 feet away to avoid denting the aluminum.
You’ll perform rinse neutralization to prevent chemical reactions that interfere with adhesion. Work top to bottom, overlapping passes, and check for chalky residue by drying a small area.
Proper surface preparation guarantees primer and paint bond well. Finish by letting the metal air-dry completely before sanding or priming.
- Remove all soap and mildew traces
- Confirm even drying and inspection
- Verify no remaining chalk or film
Removing Oxidation And White Corrosion Correctly
If your aluminum has that chalky white buildup—often called white rust or oxidation—you’ll need to remove it before painting so the coating can stick and last.
Treat different aluminum alloys appropriately: mild detergents and soft brushes work on light surface oxidation, while stronger etchants or commercial aluminum cleaners suit heavier corrosion.
Rinse thoroughly and neutralize per product instructions.
Wear gloves and eye protection, and test cleaners on a hidden spot first.
After cleaning, let the metal dry completely and inspect for residual deposits.
Proper removal restores adhesion and prevents future flaking, ensuring your paint job endures.
Sanding Aluminum Without Gouges
Start with the right grit—begin coarse enough to remove oxidation but fine enough to avoid deep scratches. Use smooth, even strokes and let the abrasive do the work so you don’t over-press and create gouges.
Protect the soft metal by changing pads often, working with a backing block, and checking your progress frequently.
Choose The Right Grit
Pick the right abrasive grit to remove oxidation and old paint without digging into the aluminum’s soft surface. You’ll focus on grit selection and abrasive compatibility to balance material removal with surface preservation.
Start with a medium grit to strip corrosion, then refine to a finer grit for a smooth profile that promotes adhesion. Match abrasive type to aluminum—silicon carbide or fine-grit aluminum oxide work well. Avoid coarse grits that gouge.
Inspect frequently and swap disks when loaded.
- Begin with 120–180 grit for removal
- Refine with 220–320 grit for texture
- Use non-metallic pads to prevent contamination
Use Proper Sanding Technique
When you sand aluminum, work with steady, even strokes and light pressure to remove oxidation and old finish without digging gouges into the soft metal. Let the abrasive do the work and move the tool constantly so you don’t wear one spot too deep.
Use a sanding block for flat panels and wrap sandpaper around contours to maintain consistent angles. Check progress frequently and switch grits progressively to blend scratches for better color matching when priming and painting.
Clean debris to avoid embedded particles. Be mindful of environmental impact—collect and dispose of dust and used abrasives responsibly to protect surroundings.
Prevent Soft Metal Gouges
Although aluminum is soft and easy to sand, you can avoid gouges by controlling pressure, motion, and abrasives from the outset. You’ll keep aluminum texture consistent by using light, even strokes and progressively finer grits. Hand-sanding lets you feel changes; orbital sanders need low speed and a light touch. Clean dust often so grit doesn’t cut deeper. Test on a scrap piece before committing your chosen paint color.
- Use 220 then 320 grit for a smooth base.
- Maintain steady, overlapping passes; don’t stop abruptly.
- Replace worn sandpaper to prevent scratches and uneven sheen.
When To Use Chemical Cleaners Or Etchers
If the aluminum has oxidation, heavy dirt, or an old clear coat, you’ll need a chemical cleaner or etcher to strip contaminants and prepare the surface for paint.
Use chemical cleaning when visible oxidation, chalking, or grease won’t come off with detergent and scrubbing.
If detergent and scrubbing can’t remove visible oxidation, chalking, or grease, use a chemical cleaner to prepare the aluminum.
Choose aluminum etching for bare or mildly oxidized metal to create a micro-rough surface that improves adhesion.
Follow product instructions, work outdoors or in ventilation, wear gloves and eye protection, and rinse thoroughly to neutralize residues.
Test a small area first to confirm compatibility with your paint system and avoid unnecessary over-etching that weakens thin sections.
Repairing Dents, Seams, And Minor Damage
Before you paint, fix dents, seams, and minor damage so the finish lays flat and lasts; small repairs prevent peeling and visible imperfections later. You’ll assess aluminum textures, tapping to find low spots and checking seams for gaps.
For small dents repair, gently massage metal or use a body filler rated for aluminum where needed. Smooth edges and feather gradations so paint sits evenly. Seal seam gaps with a compatible flexible sealant to stop water intrusion.
Sand repaired areas flush with surrounding metal, keeping grit fine to avoid scratches before painting.
- Inspect for hidden corrosion or loose trim
- Choose repair materials matched to aluminum
- Test a small area first to confirm adhesion
Priming Raw Or Repaired Aluminum For Best Adhesion
Now that dents and seams are fixed, prime any bare or repaired aluminum to guarantee paint bonds and resist corrosion.
You should clean the surface, removing oils and oxidation with a degreaser and scuff it lightly to create a uniform aluminum texture.
Choose a primer labeled for bare aluminum or metal etching primer; these promote paint adhesion and block stains.
Apply thin, even coats, allowing recommended flash times between layers.
Inspect for missed spots and sand lightly if the primer shows runs.
Once cured, the primed surface will accept topcoat evenly, delivering durable adhesion and protecting against future corrosion.
Thinning & Mixing Paint And Primer: Ratios And Tools
When you’re ready to mix, follow the manufacturer’s thinning ratios exactly and use clean measuring tools so the paint flows and cures as designed. You’ll measure thinner and primer or paint precisely, stir with a clean paddle, and avoid over-thinning which can ruin adhesion or alter paint gloss.
For color matching, mix matched batches thoroughly and keep records of ratios and batch codes. Use graduated cups, calibrated syringes, and a mechanical stirrer for consistency. Protect mixed material from contamination and label containers.
- Consistency prevents color shift.
- Tools ensure repeatable gloss.
- Cleanliness preserves adhesion.
Applying Primer: Brush, Roller, And Sprayer Tips
Because a good primer layer dictates adhesion and durability, you’ll want to choose the right application method—brush for edges and detail, roller for flat expanses, and sprayer for even coverage—and use each tool with techniques that minimize runs, lap marks, and overspray. Work wet edges, keep brush strokes light, and use a short-nap roller for texture. Hold the sprayer steady, overlap passes by 30%, and back-roll if needed. Check primer tint for color matching before starting to guarantee uniform undertone and maximum paint longevity.
| Tool | Tip |
|---|---|
| Brush | Light strokes |
| Roller | Even pressure |
Applying Topcoats For Uniform Coverage
Ready to lay down the topcoat? You’ll want even strokes, the right sheen, and attention to paint texture so light reads consistently. Work in thin, overlapping passes, maintain wet edges, and pause for manufacturer-recommended flash time. Consider color psychology when choosing sheen—gloss highlights flaws; satin softens them. Check humidity and temperature; they affect flow and cure. Finish with inspection under varied light to spot thin spots or runs.
- Keep layers thin to avoid orange peel.
- Smooth out brush marks with a light roller pass.
- Address missed spots immediately for uniform coverage.
How To Spray Paint Aluminum Like A Pro
Before you pull the trigger, prep and clean the aluminum thoroughly so paint bonds and runs are avoided.
Pick a paint formulated for metal and one-coat coverage to save time and guarantee durability.
When spraying, keep a consistent distance and overlap each pass for a smooth, professional finish.
Prep And Clean Thoroughly
When you’re spraying aluminum, thorough prep and cleaning make the difference between a lasting finish and flaky paint. You’ll remove oxidation, grease, and old loose coating with a degreaser, scuff pad, and a rinse. Let it dry fully; moisture ruins adhesion. Consider how Color psychology affects your choice later—clean surfaces preserve the hue and consistency.
Think about Environmental impact by using low-VOC cleaners and collecting runoff. Tape and mask adjacent areas tightly, and wear appropriate PPE. Follow with a tack cloth just before spraying to capture dust.
- Remove contaminants completely
- Control moisture and dust
- Minimize runoff and fumes
Choose The Right Paint
Which paint will stick and last on aluminum? You’ll want a metal-specific acrylic latex or a 100% acrylic exterior coating formulated for non-ferrous metals. Use a primer labeled for aluminum—etching primers work well—then topcoat with UV-resistant, low-VOC paint.
Consider paint color selection carefully: lighter shades reflect heat, reducing thermal expansion and longevity issues. Pick quality brands with rust-inhibiting and flex additives.
If sustainability matters, check for products compatible with aluminum recycling practices and low-solvent formulas. Read technical data sheets, follow recommended dry times, and buy enough to ensure consistent batches for a uniform, durable finish.
Use Proper Spray Technique
Ready to spray like a pro? You’ll master spray technique by controlling distance, speed, and overlap. Keep the spray gun perpendicular, move steadily, and start and finish each pass off the edge to avoid buildup.
Check paint consistency—thin only as the manufacturer recommends so coverage stays even and adhesion improves.
- Maintain 6–10 inches from the surface for HVLP; adjust for nozzle size.
- Use smooth, overlapping passes (50% overlap) to prevent streaks and runs.
- Test on scrap, adjust air pressure and fluid flow until atomization looks uniform.
Practice guarantees a durable, professional finish on aluminum.
Rolling And Brushing Trim And Details
Because trim and small details take most of the eye, you’ll want to roll the broad surfaces and brush the edges for a crisp, professional finish.
You should use a high-density foam roller for even coverage on panels, then switch to a quality sash brush for corners, grooves, and hardware.
Work wet-on-wet to aid color blending between rolled and brushed areas so blends stay invisible.
Apply thin, consistent coats to boost paint durability and reduce drips.
Lightly feather brush strokes into rolled areas, keep a wet edge, and clean brushes promptly to maintain control and a sharp final appearance.
Avoid Runs, Orange Peel, And Lap Marks
To prevent paint runs, work with thin, even coats and stop before the edge of a wet area to avoid excess buildup.
Keep a wet edge and smooth overlapping passes so you eliminate lap marks as you go.
If you spot a run or textured orange peel, lightly sand and feather the area, then recoat with a thin, uniform layer.
Prevent Paint Runs
When you spray or brush aluminum, control and consistency matter most to prevent runs, orange peel, and lap marks. Keep a steady distance, maintain an even speed, and overlap each pass by about 30–50% so the paint lays down uniformly. Use thin, even coats, allow proper flash time between layers, and sand lightly if needed to knock down imperfections.
Keep humidity and temperature in recommended ranges to aid paint durability and guarantee color matching stays consistent. Inspect under good light and correct small sags immediately.
- Thin coats reduce gravity-driven runs.
- Proper flash time builds even film.
- Light sanding evens texture.
Eliminate Lap Marks
How can you eliminate lap marks and get a smooth, uniform finish on aluminum? Start by working wet-on-wet: keep a consistent wet edge and maintain even speed to avoid overlaps that cause marks or orange peel. Thin coats dry uniformly, reducing lap visibility and preventing runs that hide aluminum corrosion concerns.
Choose products with proven paint compatibility—primers and topcoats formulated for aluminum bond better and level out. Sand lightly between coats with fine grit for feathered blending, then wipe dust away.
Use proper temperature and humidity ranges so coatings flow and cure smoothly, yielding a seamless, professional finish.
How Many Coats You Need And Dry Times
Although exterior aluminum takes paint well, you’ll usually need more than one coat to get durable, even coverage. Plan for two standard coats: a primer plus one topcoat, or two topcoats if the primer is integrated. Allow manufacturer dry times between coats—typically 1–4 hours for touch-dry, 24 hours for handling. Longer waits improve color matching and paint durability, so don’t rush.
- First coat anchors and evens tone; inspect for thin spots.
- Second coat builds film thickness and improves weather resistance.
- Light scuff sanding between coats boosts adhesion and smooths flaws.
Curing, Temperature Shifts, And Weather Effects
After you’ve applied and allowed the recommended dry times, you’ll need to let the paint fully cure before exposing the aluminum to heavy use or harsh weather.
Pay close attention to temperature swings and humidity during the curing window, since cold or wet conditions can slow or ruin the cure.
I’ll cover how different temperatures and weather patterns affect cure times and how to protect your finish.
Proper Curing Times
When you paint exterior aluminum, proper curing determines the coating’s durability and resistance to chalking, peeling, and moisture intrusion. You’ll let films set under recommended temps and humidity to achieve full paint durability; rushing risks tacky surfaces and poor adhesion, which exaggerates color contrast and hides flaws.
Follow manufacturer recoat and service times, and avoid early stress like cleaning or heavy rain. Check touch, hardness, and solvent resistance before use.
Cure longer in cool or damp conditions.
- Wait specified hours before light handling.
- Confirm full cure before power washing.
- Record ambient conditions during curing.
Temperature And Weather Effects
If temperatures drop or humidity climbs during curing, the paint will slow, tack up, and bond poorly, so plan work for stable, moderate conditions and monitor forecasts closely.
You’ll avoid problems by painting when dew point, temperature fluctuations, and wind are minimal. Work during daylight hours with steady temps and apply thin coats to promote even cure.
Protect wet surfaces from sudden gusts to preserve wind resistance and prevent dust contamination. If a cold front or storm approaches, pause work and cover coated areas.
Follow manufacturer temperature and cure-time specs, and don’t force-dry—proper ambient conditions guarantee durable adhesion.
Inspecting Painted Aluminum Before Final Touches
Before you apply final touches, give the painted aluminum a thorough, systematic inspection to catch any runs, missed spots, or debris embedded in the finish. You’ll evaluate color blending across panels, check for consistent texture effects, and confirm uniform sheen. Work in good light, at different angles, and at arm’s length and distance. Note imperfections, mark them subtly, and plan targeted corrections.
Don’t confuse minor texture variation with adhesion issues—those are addressed later. Record findings so touch-ups match original technique and cure time. A careful inspection saves time and keeps the finish professional.
- Check progressions and edges
- Verify surface cleanliness
- Confirm consistent gloss
Fixing Blisters, Peeling, And Adhesion Failures
Although adhesion failures can look minor at first, you’ll need to address blisters, peeling, or lifting promptly to prevent corrosion and larger repair jobs. Scrape loose paint, sand to sound edges, clean with a mild solvent, and prime bare aluminum to counter aluminum weathering. Use flexible, marine-grade primers and topcoats for blister prevention.
| Problem | Action | Time |
|---|---|---|
| Small blister | Cut, dry, prime | 1–2 hrs |
| Peeling strip | Remove, sand, prime | 2–4 hrs |
| Widespread lift | Strip, etch, prime | 1–2 days |
| Recoat fail | Test adhesion, change system | Variable |
Maintaining Painted Aluminum To Extend Lifespan
Now that you’ve repaired blisters and fixed adhesion issues, keep painted aluminum in good shape with a few regular maintenance steps that prevent future damage and extend the coating’s life.
Inspect surfaces seasonally for chips, scratches, and changes in aluminum texture that can trap moisture.
Inspect your painted aluminum each season for chips, scratches, or texture changes that can trap moisture.
Clean gently with mild detergent, rinse thoroughly, and dry to avoid mineral stains that accelerate color fading.
Address minor damage promptly to stop corrosion from spreading.
- Remove dirt and pollen before they abrade the finish.
- Touch up small chips with matching exterior paint.
- Monitor seams and fasteners for trapped moisture.
Refreshing Or Repainting Without Full Stripping
If the existing finish is sound, you can refresh it without stripping by starting with a thorough surface cleaning to remove dirt, oxidation, and wax.
Lightly scuff the paint with fine-grit abrasive to promote adhesion, then wipe away dust before priming.
Choose a primer compatible with aluminum and a high-quality exterior paint formulated for metal to guarantee lasting results.
Surface Cleaning Prep
When you’re revitalizing or repainting aluminum without stripping it down, start by removing dirt, oxidation, and loose paint so the new coating can bond properly; clean with a mild detergent, rinse, and let dry.
Inspect for metal rust around fasteners and aluminum hardware; sand or treat rusted spots, and mask hardware you won’t remove.
Use a solvent wipe to decontaminate before priming.
- Remove surface oils and airborne grime to improve adhesion.
- Treat corrosion promptly to prevent spread and staining.
- Protect or remove movable hardware to avoid sticky paint and ensure clean lines.
Mild Paint Scuffing
Since you’re not removing the existing finish, mild scuffing preps the surface enough for new paint to stick without a full strip. Lightly abrade gloss and feather edges of peeling areas, clean off residue, and spot-prime bare metal or exposed substrate before topcoating.
You’ll work with a fine abrasive pad or 220–320 grit sandpaper, using even pressure to avoid gouges. Focus on progressions between old and intact finish so the mild paint layer bonds uniformly.
Wipe with solvent to remove dust, let it dry, and inspect for missed flakes. Only proceed to paint when the surface feels uniformly dull and clean.
Primer And Paint Selection
Wondering which primer and paint will bond best to scuffed but intact aluminum? You’ll choose an etch or bonding primer formulated for aluminum, then a high-quality exterior acrylic or urethane topcoat.
Prep by cleaning and scuffing; guarantee surface is dry so paint drying proceeds evenly.
For color matching, bring a sample or use a spectrophotometer for consistent results. Test a small patch to confirm adhesion and finish.
- Select primers labeled for non-ferrous metals.
- Pick topcoats rated for exterior durability and UV resistance.
- Allow full cure between coats, following manufacturer paint drying times.
Handling Gutters, Downspouts, And Hard-To-Reach Areas
Although gutters and downspouts sit out of the main sightline, you’ll want to treat them with the same prep and paint care as larger aluminum surfaces to guarantee a consistent, durable finish. You’ll clean, sand, prime with a product suited to aluminum fabrication, and pick paint color selection that matches trim. Use extension poles, ladder stabilizers, and brush/roller combos for corners. Mask plants and fascia.
| Task | Tool | Frequency |
|---|---|---|
| Clean & degloss | Pressure rinse | Once before painting |
| Prime | Rust-inhibiting primer | Every repaint cycle |
| Detail | Small brush | As needed for seams |
Estimating Cost & Getting Accurate Contractor Quotes
Once you’ve handled gutters, downspouts, and tight spots, it’s time to figure out what the whole job will cost and how to get reliable contractor quotes. You’ll itemize surface prep, primers, topcoat, labor hours, and masking. Ask bidders for line-item estimates, color matching procedures, and expected paint durability. Verify references and on-site measurements to avoid surprises. Compare warranties separately.
- Require written, itemized bids with timelines.
- Confirm color matching process and sample approval.
- Check labor rates, crew size, and cleanup scope.
Use consistent specs when soliciting bids so comparisons stay accurate and fair.
Choosing Warranty-Friendly Products And Contractors
When you pick paint products and contractors with warranties in mind, you protect your investment and simplify future claims. Check manufacturer warranty considerations: coverage length, what triggers voiding, and required prep or primers. Choose paints with documented exterior aluminum performance and get warranty terms in writing.
For contractors, verify contractor licensing, insurance, and references; ask how they document surface prep and follow manufacturer specs. Insist on a written contract tying workmanship guarantees to product warranties and specifying remedy steps for failures.
Keep all receipts, photos, and contract copies so you can file a clean, supported warranty claim if needed.
VOCs, Disposal, And Eco-Friendly Options For Exterior Paint
You’ve already protected your investment by checking warranties and contractor practices; now consider how the paint itself affects health, the environment, and cleanup. Choose low-VOC or zero-VOC coatings to reduce VOC emissions and odor, and verify performance for exterior aluminum.
Protect your investment further by choosing low- or zero-VOC coatings suited for exterior aluminum to reduce fumes and cleanup.
Store and handle cans to avoid spills, and follow local guidelines for Eco friendly disposal of leftovers and contaminated rags. Consider water-based alkyd or acrylics for durability with lower toxins.
- Prioritize products certified for low VOC emissions and exterior durability.
- Plan purchases to minimize leftovers and waste.
- Use community hazardous-waste programs for Eco friendly disposal.
Best Months And Weather Windows For Exterior Painting
Although paint can bond in a wide range of conditions, you’ll get the best, longest-lasting results by working within specific seasonal and daily weather windows. Aim for mild, dry months—typically late spring and early fall—when temperatures sit between 50–85°F and humidity stays below 60%.
Avoid early mornings with heavy dew and late afternoons when temperatures drop quickly. Watch forecasts for rain and wind; a 24–48 hour clear stretch after painting is ideal.
Consider historical trends for your region to pick reliable months, and factor in color psychology when choosing hues, since light and temperature alter appearance.
Final Checklist: Finish Painting Exterior Aluminum Right
Before you close up the job, run through a concise checklist to make sure the finish on your exterior aluminum looks great and lasts. You’ll confirm adhesion, even coverage, and cleanup while considering color coordination and environmental impact.
Check for missed spots, runs, or texture differences. Verify caulking and seals are intact and paint edges are crisp. Dispose of waste responsibly and store leftover paint per label instructions. Document color codes and batch numbers for future touch-ups.
If anything’s off, address it now rather than later so your finish stays durable, attractive, and eco-conscious.
- Confirm adhesion and even coverage
- Inspect seals, edges, and texture
- Record color codes and handle waste responsibly
Frequently Asked Questions
Can Painted Aluminum Attract Pests or Insects Into Siding Cavities?
No, painted aluminum itself won’t attract pests; you’ll prevent infestations by using pest deterrent measures and proper insect prevention like sealing gaps, maintaining ventilation, and applying caulks or screens so cavities don’t become attractive harborage.
Will Painting Aluminum Affect Nearby Solar Panel Performance?
A homeowner I know repainted trim near panels and saw no drop in output. You won’t harm panels if you use proper aluminum surface preparation and paint adhesion techniques, avoiding overspray and shading during application.
Can I Paint Over Vinyl-Coated Aluminum Gutters Safely?
Yes—you can paint vinyl-coated aluminum gutters safely if you use proper aluminum paint preparation: clean, scuff, prime with adhesion promoter, and choose paint for siding compatibility so color and expansion rates match nearby surfaces.
Do Building Codes or HOA Rules Restrict Exterior Aluminum Paint Colors?
Yes — you may be limited: picture a neat row of homes, paint choices muted by rules. You’ll need to check building code compliance and HOA color restrictions, and you’ll follow their approved palettes and approval process.
How Long After Painting Can I Caulk or Apply Exterior Sealants?
You can caulk or apply exterior sealants once paint curing time reaches tack-free and adheres fully—typically 24–72 hours. During painting preparation, check manufacturer specs and weather; if unsure, wait a week for complete cure.
Conclusion
You can make old aluminum look new again — and it’s worth the effort: studies show properly prepped aluminum can keep paint adhered for up to 15 years, cutting replacement and maintenance costs by a surprising margin. If you follow the steps here, pick the right products, and paint in the proper weather window, you’ll avoid premature failure and extra expense. Trust the prep, respect safety, and enjoy a long-lasting, beautiful finish.