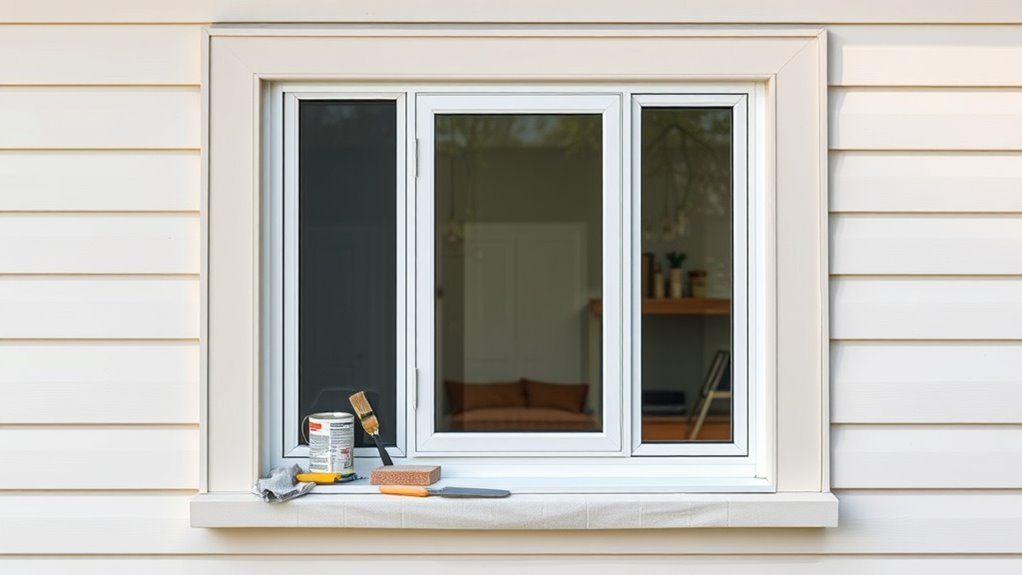
How to Paint Exterior Aluminum Window Frames
You can refresh exterior aluminum window frames by stripping loose paint, degreasing, and lightly sanding to dull the shine. Etch with a metal prep if bare aluminum, then apply an aluminum-bonding primer matched to your topcoat. Paint with two thin coats of exterior-grade acrylic or enamel, keeping temps moderate and humidity low, and mask glass carefully. Allow proper cure times, inspect for adhesion, and touch up chips as needed — keep going for tips on tools, timing, and when to replace frames.
Quick 6-Step Process to Paint Aluminum Window Frames
Before you start, gather all materials and set aside a clear, dry day—painting aluminum needs a clean surface and time to cure.
You’ll strip loose paint, clean with degreaser, and sand lightly to promote adhesion. Wipe residue, mask glass and trim, and prime with an aluminum-specific primer.
Apply two thin coats of exterior acrylic or polyurethane paint, allowing full drying between coats.
Remove masking, inspect for missed spots, and touch up as needed.
Consider Historical preservation needs when matching color and finish, and minimize Environmental impact by using low-VOC products and disposing of wastes responsibly.
DIY or Hire a Pro? How to Decide
Deciding whether to tackle painting your aluminum window frames yourself or hire a pro comes down to your comfort with prep work, the job’s complexity, and how much time you’re willing to commit.
Decide between DIY or a pro based on prep comfort, job complexity, and available time.
If you’re confident sanding, cleaning, priming, and masking, DIY saves labor costs and lets you explore color options freely. Choose DIY when frames are few, accessible, and you enjoy project work.
Hire a pro if frames are numerous, high, or require repair, or if you need guaranteed durability and a quick finish.
Weigh budget considerations against time, skill level, warranty needs, and desired finish quality.
Tools and Materials Checklist for Aluminum Window Frames
Before you start, gather the right tools and materials so the job goes smoothly. You’ll need essential tools like screwdrivers, sandpaper, a wire brush, and a good-quality scraper.
Plus, surface-prep supplies such as degreaser, primer, and tack cloths.
Finish the list with suitable exterior paint, brushes or a sprayer, painter’s tape, and drop cloths.
Essential Tools Checklist
If you want a smooth, long-lasting finish on aluminum window frames, gather the right tools and materials before you begin so you won’t stop mid-job hunting supplies. You’ll need quality brushes and rollers made for metal, a paint sprayer if you prefer speed, fine-grit sandpaper, a wire brush, painter’s tape, drop cloths, a respirator, and nitrile gloves.
Include corrosion-inhibiting primer and exterior-grade acrylic or oil-based paint chosen with both the historical significance of the building and environmental impact in mind. Also have a paint tray, stirring sticks, a putty knife, and a small heat gun or blow dryer for stubborn areas.
Surface Preparation Materials
You’ve gathered the main painting tools, so now focus on the materials that get aluminum ready to accept coating. Gather a degreaser or trisodium phosphate substitute, nonmetallic scrubbing pads, fine-grit sandpaper (320–400), a tack cloth, and a quality etching primer specified for aluminum.
Use rust converter if any corrosion exists and painter’s tape and drop cloths to protect glass and trim. Keep a small brush and cotton swabs for seams.
Include a color coordination swatch and note historical accuracy for older homes when matching finishes. Inspect and clean thoroughly before moving to painting.
Paints And Accessories
While you’ve already prepped the frames, choosing the right paints and accessories will determine how durable and true the finish looks. Pick a high-quality exterior acrylic or 100% acrylic latex formulated for metal, or a marine-grade enamel for maximum weather resistance, and pair it with an aluminum-specific etching primer.
You’ll need sandpaper (220–320 grit), tack cloths, rust-inhibiting primer for any spots, quality synthetic-bristle brushes, foam rollers for smooth application, solvent and clean rags, painter’s tape, drop cloths, and a respirator.
Consider color coordination with trim and siding to boost curb appeal while prioritizing paint durability for long-term performance.
When to Paint: Ideal Weather and Timing
Because paint cures best in stable, moderate conditions, plan your exterior aluminum window-frame project for days with temperatures between about 50°F and 85°F and humidity under 70%. Check forecasts for several clear, consecutive days so primer and topcoat dry fully.
Plan exterior aluminum window-frame painting on clear days with temperatures ~50–85°F and humidity below 70% for proper curing.
Consider time of day—start in the morning to avoid evening dew—and avoid windy or rainy periods that blow debris or add moisture.
For color selection, remember darker hues absorb heat and may affect drying; test a small area.
If temperatures dip overnight or humidity spikes, postpone.
Good weather considerations reduce failures and help coatings adhere and last longer.
Inspecting Frames: Damage and Corrosion to Watch For
Before you paint, closely inspect every frame for damage and corrosion so you’re sure the surface can hold primer and topcoat.
Check for pitting, flaking anodizing, and white powdery oxidation along sills and corners.
Look for gaps in sealant, cracked caulk, or loose mullions that compromise frame insulation and allow moisture intrusion.
Test for soft spots indicating rot in surrounding trim or substrate.
Note paint adhesion failures and areas needing sanding or metal prep.
Prioritize corrosion removal and targeted repairs before coating.
Record problem locations and choose weatherproofing techniques and materials that match the frame’s condition.
Removing Hardware and Masking Glass Safely
Start by removing locks, handles, and stops carefully so you don’t bend parts or strip screws.
Label and store each piece in a clear container so reassembly’s quick and mistake-free.
Cover the glass with low-tack painter’s tape and kraft paper or plastic, pressing edges firmly to prevent paint bleed.
Remove Hardware Carefully
When you’re ready to paint, remove all movable hardware—locks, handles, hinges, and rollers—so you can work quickly and avoid paint buildup. Begin hardware removal systematically: photograph each piece, note screw locations, and store components in labeled bags to simplify reassembly.
Use the correct screwdriver or hex key to prevent stripping fasteners. If parts are corroded, apply penetrating oil and wait before turning. Keep removed pieces on a padded surface to avoid damage.
For glass masking, tuck tape edges carefully against the frame to protect seals without stretching. Handle glass gently to prevent chips while you work.
Mask Glass Thoroughly
Because paint bleeding or overspray will ruin clean sightlines and seals, mask the glass precisely after you’ve removed hardware and cleaned the frames. Use low-tack painter’s tape along the aluminum edge, pressing firmly to seal; overlap tape slightly for continuous coverage.
Cover large panes with plastic sheeting or paper, securing edges with tape but avoiding adhesive on seals. Label removed hardware and store screws safely so you can refit components later.
Check for gaps by running a finger along tape lines. For glass protection on windy days, weigh corners to prevent shifting. Replace tape immediately if it peels.
Cleaning Frames: Degreasing and Oxidation Removal
Before you paint, thoroughly degrease and remove oxidation so the primer and paint will bond properly; you’ll protect aluminum durability and ensure paint longevity. Use a mild degreaser, rinse, then apply a dedicated oxidation remover or white vinegar for light corrosion. Work in small sections, scrub with a nylon brush, and rinse fully. Dry completely before priming.
| Step | Tip |
|---|---|
| Degrease | Use an ammonia-free cleaner |
| Oxidation removal | Apply remover, scrub gently |
| Rinse & dry | Ensure no residue remains |
Wear gloves and eye protection; avoid harsh acids that can damage the metal.
How to Sand Aluminum Window Frames for Adhesion
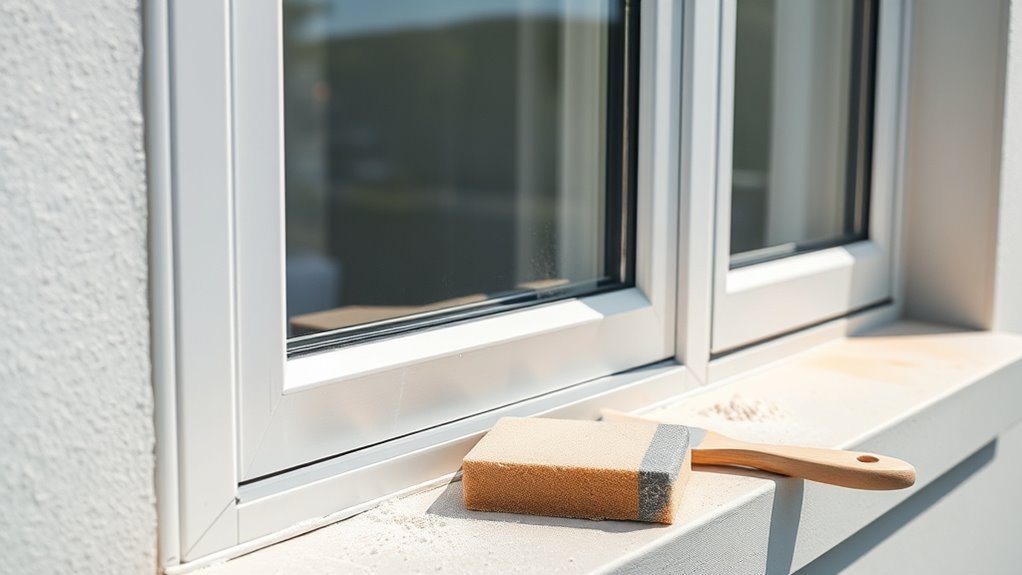
After you’ve degreased and removed oxidation, sand the aluminum to create a keyed surface that primer can grip. Use 120–220 grit sandpaper or a non-woven abrasive pad and work with light, even strokes along the frame.
Focus on dulling shine and removing any loose flakes or surface rust without gouging the metal. Wipe frequently with a tack cloth to inspect progress.
Feather sanding marks at edges and around hardware to avoid visible shifts. Clean off dust before priming.
Proper sanding ensures consistent paint adhesion and helps your primer and topcoat last longer in exterior conditions.
Use Chemical Etching or Metal Prep: When and How
If you want the best long-term adhesion on bare or heavily weathered aluminum, use a chemical etch or dedicated metal prep to micro-etch the surface and neutralize residual oils.
You’ll apply according to label directions, usually by wiping or brushing on, letting dwell, then rinsing thoroughly. Wear gloves, eye protection, and work in a ventilated area.
Test a small inconspicuous spot first to confirm compatibility.
After etching or metal prep, let the frame dry completely and avoid touching the treated area.
This prep removes oxidation and improves paint bond so primers and topcoats perform reliably.
Choosing the Right Primer for Outdoor Aluminum
While a good metal prep sets the stage, picking the right primer is what actually locks paint to outdoor aluminum and prevents peeling, chalking, or corrosion.
Choose a primer formulated for non-ferrous metals—etching or bonding primers and epoxy-based or urethane-modified primers work well.
Match primer flexibility to the topcoat to avoid cracking.
Consider color options: a tinted primer can improve coverage and final hue, especially with light or bold topcoats.
Account for weather considerations—select fast-dry or low-temp formulas if you’ll prime in cool, damp climates.
Always confirm compatibility with your chosen topcoat before you buy.
Primer Application: Technique and Coverage Tips
Because proper application determines how well the primer bonds and protects, you’ll want to work methodically and avoid common mistakes that compromise adhesion.
Start with clean, degreased surfaces and sanded edges; mask glass and seals. Stir primer thoroughly—color mixing matters if tinting—then strain to remove lumps.
Use a quality brush for corners and a short-nap roller for flats, keeping a wet edge to prevent lap marks. Apply thin, even coats; avoid runs.
Allow full paint drying time between coats as manufacturer recommends. Inspect for missed spots, feather edges, and guarantee 100% coverage before moving to topcoat.
Best Topcoats for Aluminum Window Frames
When you choose a topcoat for aluminum window frames, pick one formulated for metal and exterior exposure so it resists corrosion, UV fading, and weathering.
You’ll favor high-quality acrylic urethane or two-part polyurethane finishes for durability and color retention.
For historic or Historical restoration projects, select low-VOC, color-matched systems that respect original profiles while offering modern protection.
Consider satin or semi-gloss for easy cleaning and balanced reflectivity.
Use specified metal primers beneath for adhesion.
Incorporate weatherproofing techniques like sealing joints and choosing flexible coatings to accommodate thermal movement, ensuring long-lasting performance without compromising appearance.
Applying Topcoat: Coats, Drying Times, and Recoat Rules
Choose a durable exterior topcoat like 100% acrylic latex or a polyurethane formulated for metal, and plan on two thin coats for even coverage.
Expect surface dry in 1–2 hours, recoat windows after 4–6 hours in mild conditions, and allow full cure for 7–14 days before heavy cleaning or closing windows.
Always follow the manufacturer’s recoat window and sand or scuff between different product types to guarantee proper adhesion.
Recommended Topcoat Types
If you want durable, attractive results, pick a topcoat formulated for metal and exterior use—acrylic latex for easy cleanup and flexibility, or 100% acrylic or urethane-modified enamel for tougher, longer-lasting protection. You’ll consider durability, sheen, and maintenance; also note historical significance of traditional enamel finishes and modern choices’ environmental impact. Apply two thin coats for even coverage and follow manufacturer recoat guidance. Use rust inhibitors on bare spots. Choose low-VOC formulas when possible. Table below helps you visualize choices and benefits.
| Type | Strength |
|---|---|
| Acrylic latex | Flexible, low-VOC |
| 100% acrylic | Tough, colorfast |
| Urethane-modified | Extremely durable |
| Enamel | Classic finish, hardy |
Drying And Cure Times
Because weather and coating chemistry both affect how a topcoat dries and cures, you’ll want to plan your work around the manufacturer’s specified dry, tack-free, and recoat times so each layer bonds properly.
Check temperature and humidity windows; colder or humid conditions lengthen cure times and can alter color options slightly until fully cured.
Apply thin, even coats to speed drying and improve paint durability.
Note flash times between coats, and wait for full cure before subjecting frames to heavy use or sealing.
Keep records of batch numbers and conditions so touch-ups later match original performance and hue.
Recoat And Overcoat Rules
With your coats drying on schedule and cure windows noted, you’ll next focus on how many topcoats to apply, how long to wait between them, and when an overcoat is warranted. Apply two topcoats for durability; a third for high-traffic or harsh weather considerations. Wait manufacturer-specified recoat times—usually 2–4 hours between thin coats, 24 hours before heavy handling. Check color coordination to ensure uniform gloss and tint before final curing. Recoat if adhesion tests fail or surface shows wear. Use the table below for quick guidance.
| Situation | Recommended Coats | Recoat Wait |
|---|---|---|
| Normal | 2 | 2–4 hrs |
| Harsh climate | 3 | 24 hrs |
| Touch-up | 1–2 | As needed |
Brush, Roller, or Spray: Which to Use and Why?
When choosing between a brush, roller, or sprayer, consider the frame’s size, profile, and how much prep you want to do—each method gives different control, coverage, and finish.
You’ll pick a brush for tight profiles and touchups where control matters, and a roller for flat, wider sections to speed coverage with minimal texture.
A sprayer delivers the smoothest finish and works fast on large jobs, but needs masking and practice.
Match method to paint type and desired Color options or to replicate Historical styles—satin sheen via spray, or brush marks for authenticity.
Balance speed, finish, and prep.
Getting Crisp Lines at Glass and Trim Without Bleed
If you want razor‑sharp paint lines where the frame meets glass and trim, prep and masking are your best friends—clean the edges, degrease, and apply high‑quality low‑tack painter’s tape, pressing it down firmly so paint can’t creep underneath.
Use a thin paint film and a quality sash brush or mini-roller to control coverage; remove excess from the brush before working near tape. Score the tape edge with a utility blade after paint skins over, then pull it back at a 45° angle.
Consider color coordination and historical accuracy when choosing trim hues, testing small areas before committing.
How to Paint Sliding or Operable Frames Without Impairing Function
Because moving parts demand careful attention, you’ll want to isolate and protect tracks, rollers, locks, and weatherstripping before you paint so nothing binds or fills with paint. Mask sliding channels with low-tack tape and cover rollers; remove sash where possible.
Clean aluminum thoroughly to remove dirt and signs of aluminum corrosion, then use a primer formulated for aluminum to guarantee paint compatibility.
Apply thin, even coats, avoiding buildup in mating surfaces. Reinstall or unmask only after full cure time.
Test operation gently, adjusting or lubricating with a silicone-based lubricant rated for painted surfaces if any stiffness appears.
Mistakes That Cause Bubbling or Peeling (And How to Avoid Them)
If your frame isn’t cleaned and scuffed properly, paint won’t stick and you’ll get bubbling or peeling.
Using the wrong primer or paint chemistry for aluminum can cause adhesion failure even on a well-prepared surface.
I’ll show how to prep correctly and choose compatible coatings so your finish lasts.
Poor Surface Preparation
When you skip proper cleaning, sanding, or priming, paint won’t bond to aluminum and you’ll end up with bubbling or peeling later on.
You must remove dirt, oil, and any surface rust before painting; otherwise moisture traps under the film and accelerates paint peeling.
Sand or scuff the frame to create a keyed surface, then clean with a solvent or trisodium phosphate substitute.
Apply a compatible primer in thin, even coats and let each dry fully.
Skip shortcuts like painting over contaminants or glossy finishes.
Proper prep takes time, but it prevents failures and gives a durable, smooth result.
Incompatible Paint Or Primer
Though you’ve prepped the frames perfectly, using the wrong primer or paint will still cause bubbling and peeling, because incompatible products can’t form a proper bond. You’ll want an aluminum-specific primer; an incompatible primer or generic interior primer won’t promote paint adhesion on metal.
Match primer chemistry to topcoat—oil-based primer with oil or compatible acrylic, or a bonding primer labeled for aluminum with most latex paints. Test a small area, follow manufacturer dry times, and avoid mixing brands with different bases.
Properly chosen products guarantee the coating flexes, cures, and adheres, preventing blisters and premature failure.
Troubleshooting Poor Adhesion and How to Fix It
Because aluminum presents a slick, nonporous surface, paint can sometimes fail to bond and start peeling or flaking; you’ll want to identify the cause quickly so you can choose the right fix.
Inspect for poor surface prep, incompatible primer, old chalky finish, or trapped moisture.
Sand to bright metal, clean with solvent, and use a metal-etching primer designed for aluminum.
Recoat only after proper drying; test adhesion with tape.
Consider how color matching and environmental impact affect paint choice—low-VOC formulas exist that still adhere well.
If problems persist, strip to bare metal and restart with correct products and technique.
Touch-Up Guide: Matching Color, Prep, and Blending
If you’re fixing small chips or scuffs, start by matching the original finish and prepping the area so the repair disappears into the frame. Clean with mild detergent, sand lightly with fine grit, and remove dust with a tack cloth.
Test color matching on a scrap or hidden spot; adjust tint or sheen until it blends. Use fine brushes or a toothpick for precise touch-up techniques, apply thin layers, and let each dry fully.
Feather edges by lightly sanding between coats and finish with the original sheen. Inspect in natural light and repeat until the repair is seamless.
Long-Term Maintenance to Preserve the Finish
Once your touch-ups blend and the sheen matches, keep that appearance by adopting a simple maintenance routine you can stick with. Inspect frames seasonally for chips, corrosion, and seal failures; address small issues immediately to avoid larger repairs.
Clean gently with mild detergent and a soft brush to remove grime without harming the topcoat. Use compatible touch-up paint for chips, and reseal joints when caulk shows cracks.
If you’re working on historical restoration, document original colors and methods to preserve authenticity. Also consider low-VOC products to reduce environmental impact while maintaining durability and appearance.
Color and Sheen Choices for Exterior Aluminum Frames
While choosing color and sheen for exterior aluminum frames, think about how they’ll interact with your home’s style, climate, and maintenance needs. You want color coordination that complements siding, trim, and landscaping while minimizing visible dirt and fading.
Sheen selection affects durability and touch-ups; flatter sheens hide imperfections, glossier finishes resist grime and scrub clean more easily.
- Match frame tones to architectural accents for cohesive curb appeal.
- Pick a sheen that balances weather resistance with ease of repair.
- Test small swatches in sunlight to judge long-term appearance.
Decide deliberately; the right combo boosts curb appeal and longevity.
Cost: DIY vs. Contractor-Materials, Labor, and Time Estimates
Because you can save money but spend more time and effort, deciding between DIY and hiring a contractor comes down to your budget, skill level, and schedule.
For a clear cost comparison, list material costs (primer, paint, brushes, tape, caulk) and rent or buy tools. DIY often costs $50–$300 for materials per window set, plus your time.
Contractors charge higher overall—labor drives prices—typically $200–$800+ per window set depending on prep and finish.
Factor in time: you’ll spend weekends; pros finish faster.
Get multiple quotes, check references, and weigh savings against your available time and confidence.
Safety First: Ventilation, PPE, and Proper Disposal
Before you start painting, make sure you’ve got good airflow by opening windows, using fans, or working on mild, breezy days to avoid breathing fumes.
Wear a respirator or mask rated for paint vapors, gloves, and eye protection, and choose coveralls or old clothes that protect your skin.
Collect leftover paint, rags, and solvent waste in sealed containers and follow local guidelines for proper disposal or hazardous-waste drop-off.
Adequate Ventilation Practices
If you’re working with solvent-based primers or paints, make sure you ventilate the area well to keep fumes from building up—open windows and doors, use fans to create cross-ventilation, and run an exhaust fan or a respirator with the right cartridge whenever possible.
You should paint when outdoor air is fresh, and remove indoor plants from the work zone to prevent contamination. Keep occupants, especially kids and pets, away. Monitor odor levels and take breaks to breathe fresh air.
Dispose of rags and waste per local rules. Consider window cleaning after paint cures to avoid smudging. Maintain airflow until smells dissipate.
- Open windows and doors
- Use cross-ventilation
- Remove indoor plants
Essential Personal Protective Equipment
Good ventilation limits your exposure to fumes, but you still need proper personal protective equipment to keep your skin, eyes, and lungs safe while painting aluminum frames.
Wear chemical-resistant gloves rated for solvents to prevent skin contact with primers or cleaners that react with aluminum alloys.
Use safety goggles or a face shield to stop splatter from reaching your eyes.
Wear a respirator with appropriate organic vapor cartridges whenever you’re sanding or using solvent-based coatings to protect lung health and maintain paint durability.
Long sleeves, pants, and a disposable coverall reduce skin contamination.
Keep PPE clean and replace cartridges or gear per manufacturer guidelines.
Safe Paint Waste Disposal
Wondering what to do with leftover paint, used rags, and solvent-filled trays? You must handle them responsibly: ventilate the area, wear PPE, and separate hazardous from nonhazardous waste.
Follow local environmental regulations and use labeled containers to avoid spills. Take unusable solvents to a hazardous waste facility; donate or store sealed cans for later use.
Consider waste recycling programs for empty metal cans and plastic trays, and never pour solvents down drains.
- Seal rags in metal tins to prevent inadvertent combustion.
- Use absorbents for small spills, then dispose per guidelines.
- Document disposal for compliance and future reference.
When to Replace Aluminum Frames Instead of Repainting
Although repainting can refresh frames, you’ll want to replace aluminum when damage goes beyond cosmetic issues. If frames are bent, corroded through, leak, or have compromised thermal breaks, replacement guarantees safety, performance, and preserves historical significance in older homes where matching profiles matters.
You’ll also weigh environmental impact: replacement has higher upfront footprint, but severely damaged frames may waste energy and require more maintenance, offsetting that cost.
Inspect seals, hardware, and structural integrity; test for trapped moisture or rot in surrounding materials.
Choose replacement when repairs are temporary, costly, or would fail to restore original function and efficiency.
Frequently Asked Questions
Can Painted Aluminum Frames Affect Energy Efficiency or Insulation?
Yes — painted aluminum frames can slightly improve thermal insulation and contribute to energy savings by reducing radiant heat transfer; you’ll still need proper glazing and seals because paint alone won’t substantially change overall window insulation.
Can I Paint Over Powder-Coated Aluminum Without Stripping First?
You can, but you shouldn’t skip prep: scuff the powder-coated surface, clean thoroughly, apply an aluminum primer to promote paint adhesion, then use quality exterior paint so the finish bonds and lasts.
Will Paint Hide Scratches or Dents in Aluminum Frames?
Like a knight’s quill sketching a flaw, no — paint won’t hide deep dents, though it can mask minor scratches if you’re thorough: surface preparation improves paint adhesion, so sand, clean, prime, then apply thin, even coats.
Are There Eco-Friendly or Low-Voc Paint Options Suitable for Aluminum?
Yes — you can pick eco friendly options and low VOC choices like water-based acrylics or high-quality acrylic latex primers and paints. You’ll get durable, low-odor finishes that stick well to properly prepped aluminum frames.
Can Exterior Paint on Aluminum Withstand Extreme Coastal Salt Exposure?
Yes — you can: use marine grade coatings with proven corrosion resistance, prep and prime thoroughly, and expect long-lasting protection if you maintain seals and touch up scratches promptly to prevent salt-driven deterioration.
Conclusion
So you’ve wrestled with grimy tracks and sanded away the sins of old paint — bravo. Now, picture your aluminum frames dressed in a fresh coat like a reluctant superhero putting on a suit: sleek, weatherproof, and ready to fight rain and rust. Whether you DIY or call in reinforcements, you’ll end up with windows that smugly reflect compliments. Just don’t forget the caulk — even heroes need a good costume seam.