How to Paint Exterior Stairs for Long-Lasting Finish
You can get a long-lasting, slip-resistant finish by first identifying material (wood, concrete, metal), then cleaning, repairing rot or rust, and sanding to sound substrate; prime with a compatible, rust- or masonry-inhibiting primer; use quality exterior acrylic or enamel paint and thin, even coats; add non‑skid grit where needed and allow full cure between coats. Work in dry, mild weather, protect nearby areas, and follow product instructions—keep going to learn materials, tools, and timing.
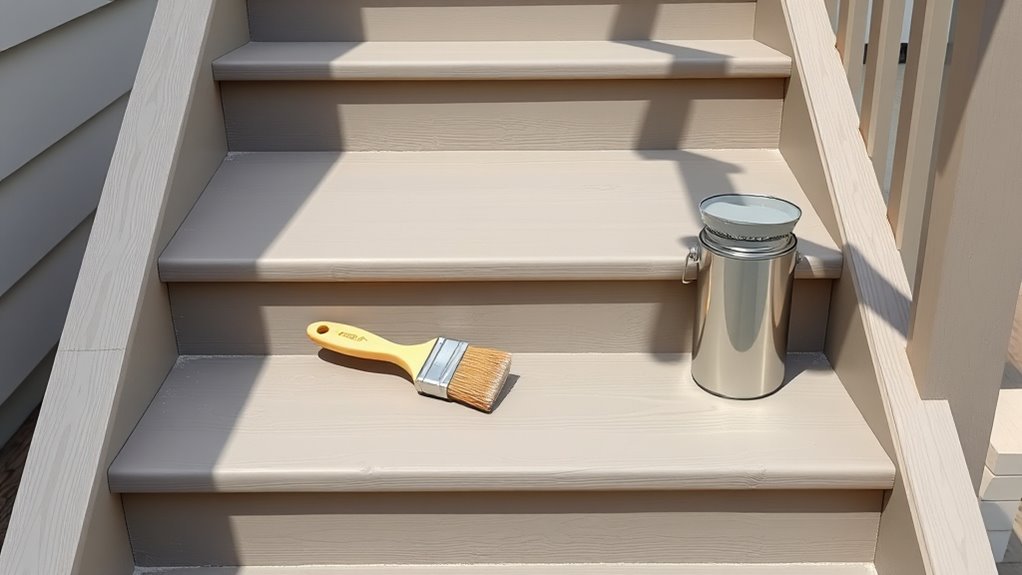
Quick Step-By-Step: Painting Exterior Stairs
Before you start, clear the stairs and check for loose boards or peeling paint so you won’t trap dirt or miss repairs. A clean, sound surface gives paint the best chance to stick.
You’ll scrape, sand, and vacuum dust, then apply primer suited for exterior wood or concrete. Use painter’s tape to protect edges, work top-down, and lay even coats with a brush for treads and a roller for risers.
Let each coat dry fully and sand lightly between coats. Consider historical references for color choices and borrow artistic techniques like layering glazes to achieve depth and durability.
Why Painting Exterior Stairs Matters for Safety and Longevity
Because painted stairs shed moisture and resist wear, they’ll stay safer and last longer than untreated wood or concrete. When you paint, you create a barrier that reduces rot, corrosion, and slippery algae growth, so every tread gives reliable footing.
Proper coatings also reflect UV and minimize cracking, cutting maintenance cycles and costs. Beyond protection, paint lets you honor historical design or add modern accents driven by artistic inspiration, keeping your stairs both functional and attractive.
You’ll spot problems earlier on painted surfaces, too, since chips and discoloration reveal wear before structural issues develop, letting you act promptly.
How to Identify Your Stair Material: Wood, Concrete, or Metal
Start by looking for visual cues like grain, aggregate, or rust to tell you if your stairs are wood, concrete, or metal.
Tap the surface—wood sounds hollow or warm, concrete is dense and dull, and metal rings or vibrates.
Check hidden areas like undersides, fasteners, and exposed framing for structural clues that confirm the material.
Visual Material Cues
When you look at your exterior stairs, focus on texture, weight, and fasteners to tell wood, concrete, or metal apart.
Visually, wood shows grain, nail or screw heads, and can be painted in varied color schemes or left stained. Decorative accents like trim or balusters often match.
Concrete looks solid, porous, and may have form lines, aggregate flecks, or patched areas. It accepts masonry paints and simple color schemes.
Metal displays smooth or corrugated sheets, welds, rust spots, and bolt heads. It suits bold color schemes and decorative accents like wrought-iron scrollwork.
Note finishes before choosing paint and prep.
Surface Sound Test
Curious how a tap can tell you what your stairs are made of? Use a simple surface sound test: tap gently with a coin or small hammer across several spots.
A hollow, ringing tone usually means metal or hollow-core wood; a dull, flat thud points to solid wood; a dense, low clunk suggests concrete.
Compare sounds across treads and risers to spot mixed materials.
Note results before choosing coatings and non-slip solutions, and consider paint color coordination after identifying material to guarantee proper primer and finish.
Record findings so you select compatible products and avoid wasted effort.
Hidden Structural Clues
If you’re unsure what your exterior stairs are made of, look for subtle structural clues that reveal the material—wood shows grain, joinery, and fastener patterns; concrete has form lines, aggregate specks, and occasional hairline cracks; metal displays welds, rivets, or thin plate edges and may have hollow sections or corrosion at seams.
You’ll inspect to assess structural integrity and spot hidden damage before painting. Check these visual and tactile signs:
- Wood: split ends, rot at joints, exposed screws.
- Concrete: spalling, hairline cracks, efflorescence.
- Metal: rust seams, loose rivets, thin plate warping.
- Hollow sections: tap for hollowness.
Inspect Exterior Stairs for Rot, Rust, and Structural Issues

Before you grab a paintbrush, thoroughly inspect the stairs for rot, rust, and structural problems so you won’t cover up issues that’ll get worse later.
Check wooden treads and stringers for soft spots and discoloration—use a screwdriver for rot detection. Probe metal components for deep pitting or flaking that indicate rust compromise.
Look for loose bolts, sagging steps, or shifted posts; these signal the need for structural reinforcement. Note hairline cracks and separated joints that could widen.
Document problems, prioritize repairs, and don’t paint until you’ve fixed or temporarily stabilized defects. Painting over damage shortens lifespan and hides hazards.
When to Repaint Exterior Stairs
You’ll know it’s time to repaint when you see peeling, flaking, or bare spots and when rust or rot starts to show.
Aim to repaint in mild, dry weather—typically spring or early fall—so paint adheres and cures properly.
Before you start, make sure the surface is clean, dry, and any damaged areas are repaired or primed.
Signs Of Wear
When colors start fading and paint chips under your shoes, it’s a clear sign your exterior stairs need attention. Look for flaking, peeling, soft spots, or exposed bare wood, and check for rust on metal treads and loose or creaking steps that indicate structural or protective coating failure.
- Faded color dulls your garden aesthetic and signals UV damage.
- Chips and cracks collect moisture, accelerating rot and corrosion.
- Soft spots underfoot mean compromised wood — replace before repainting.
- Rust streaks and loose fasteners show the protective layer failed.
You’ll want to address these signs before they worsen and affect safety or lighting near stair lighting.
Seasonal Timing
If you want a durable, attractive finish, pick a stretch of warm, dry days—ideally when temperatures stay between about 50°F and 85°F and humidity is low—so paint can cure properly without trapping moisture or drying too fast. Plan around Seasonal delays like spring rains or early freezes; repainting during stable weather maximizes paint durability. Aim for consecutive dry days and avoid windy conditions that blow debris. Use this quick timing checklist:
| Season | Risk | Ideal Window |
|---|---|---|
| Spring | Rain | Late spring dry spells |
| Summer | Heat/humidity | Early summer mornings |
| Fall | Frost | Early fall warmth |
| Winter | Freeze | Avoid repainting |
Surface Preparation Needs
After you pick the right weather window, check the stairs for wear so you know exactly what prep they’ll need before repainting. Inspect for peeling, rot, and loose nails; sand glossy spots; replace damaged treads. You’ll decide repaint timing by visible wear, water absorption, and slipped finishes.
Think about color schemes and decorative accents when prepping—strip to a stable base for crisp lines. Visualize the steps:
- Flaking paint and exposed wood
- Soft spots and structural movement
- Deep stains or mold patches
- Sanded, clean, dry surfaces ready for primer
Repaint when repairs are done and surfaces stay dry 24–48 hours.
What Weather and Climate Mean for Paint Choice
Because your stairs face the elements every day, you’ll need paint that matches your local weather patterns and seasonal extremes. Consider weather considerations like rain, sun, freeze-thaw cycles, and humidity when selecting finish and durability.
In hot, sunny areas pick UV-resistant, flexible coatings; in wet or coastal zones favor mold- and salt-tolerant formulations.
For cold climates choose products that resist cracking during temperature swings. Think long-term: climate effects determine adhesion, expansion, and lifespan.
Check product specs for temperature application range and resistance ratings, and match sheen for slip resistance and maintenance needs to your typical conditions.
Choosing Primer for Exterior Stair Materials
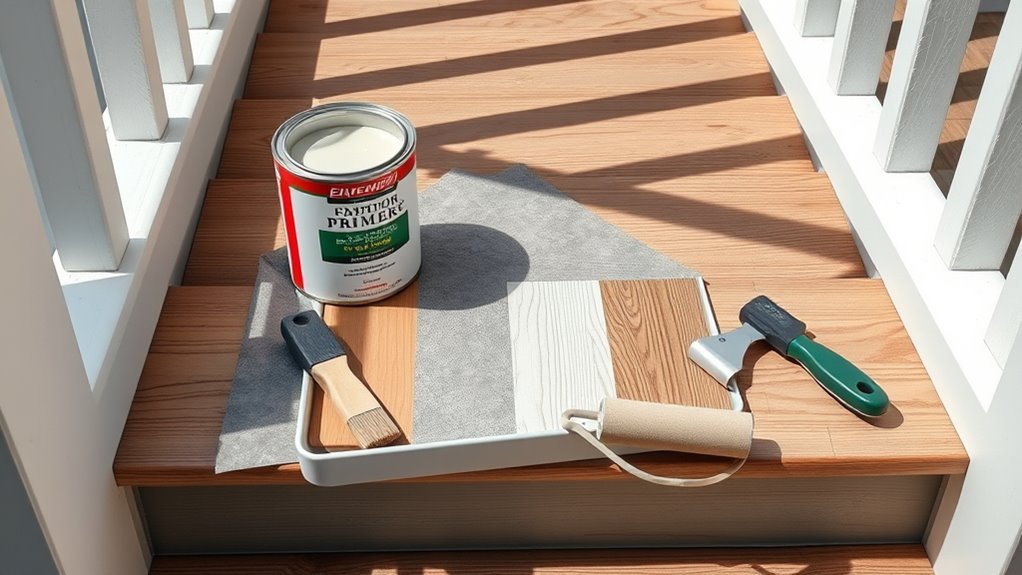
When prepping exterior stairs, you’ll pick a primer based on the material—wood, concrete, or metal each need different formulations.
Choose a primer that boosts adhesion and resists moisture and abrasion to improve long-term durability.
That choice sets the foundation for paint that sticks and holds up to foot traffic and weather.
Primer Type For Surface
Which primer you pick will determine how long your exterior stairs’ paint holds up and how well it bonds to the material beneath.
Match primer to surface: wood needs a sealing latex or oil-based primer; metal wants a rust-inhibiting, etch or zinc-rich primer; concrete benefits from a masonry or acrylic primer; composite often needs a specialty bonding primer.
Think of color psychology and historical styles when planning finishes.
Visualize results:
- Warm wood with amber undertones
- Cool metal with slate tones
- Neutral concrete with earthy hues
- Composite with crisp modern contrasts
Choose the primer that complements material and desired look.
Adhesion And Durability
How tightly do you want your paint to grip the stair surface—and for how long? You’ll pick primer by material: oil-based or bonding primers for metal, high-adhesion acrylic primers for concrete, and stain-blocking primers for weathered wood.
Match primer to topcoat and local climate to resist peeling, moisture, and abrasion. Apply thin, even coats and sand between layers for mechanical tooth.
Consider color psychology when choosing primer tint to boost coverage and influence mood through your artistic design. Proper primer choice maintains finish longevity, reduces maintenance, and guarantees your stairs stay safe, attractive, and durable under heavy use.
Selecting Exterior Paint Types That Resist Wear and Moisture
Because exterior stairs take constant foot traffic and face rain, snow, and sun, you’ll want paints formulated for abrasion resistance and moisture protection. Choose 100% acrylic latex for flexibility and longevity, or oil-modified enamel where extra toughness is needed. Match sheen to use—satin hides wear without showing dirt.
Consider mildew-resistant formulas and primers that block tannins. Use color combinations thoughtfully to define risers and treads and add visual safety, and apply decorative accents sparingly.
- Deep charcoal treads
- Contrasting white risers
- Subtle trim highlight
- Matte slip-resistant border
Picking Non-Slip Paint and Additives for Safe Treads
When you paint exterior stairs, pick a paint with a built-in non-slip texture or a finish that accepts grit additives so your treads grip when wet.
Test the texture on a scrap piece to make sure it’s not too coarse or too smooth for bare feet and shoes.
If you add grit, follow the manufacturer’s mixing ratios and spread it evenly for consistent traction.
Choosing The Right Texture
- Fine sand for subtle grip and smooth look.
- Coarse aggregate for pronounced traction in snow.
- Ribbed or grooved paint patterns to channel water.
- Rubberized coatings for cushioned, slip-resistant steps.
Test samples in sunlight and rain, then choose a texture that suits climate and style.
Mixing Grit Additives
After you’ve settled on a texture, pick the right non-slip paint and grit to match it and the stair material.
You’ll choose grit additives sized for the surface texture and traffic: finer grit for painted wood, coarser for concrete or metal. Mix according to manufacturer ratios, stirring thoroughly to avoid clumps that cause uneven wear.
Test a small area to confirm adhesion and feel, then adjust grit amount if it’s too abrasive or slick.
Apply evenly with the recommended roller or brush, keeping a consistent thickness.
Let each coat cure fully before adding more traffic or another topcoat.
How to Estimate Paint, Primer, and Material Quantities
Because accurate estimates keep your project on schedule and under budget, start by measuring each stair component—treads, risers, stringers, and landings—and calculate their surface areas in square feet.
Multiply total area by paint coverage (usually 350–400 sq ft/gal) to get gallons needed, then add 10–15% waste.
Choose primer with similar coverage, and plan one coat for primer plus one or two finish coats.
Consider color schemes and decorative accents when ordering specialty paints or trims.
Visualize materials:
- Tread surface areas
- Riser vertical faces
- Landing expanses
- Stringer sides and ends
Tools and Supplies Checklist for Painting Exterior Stairs
When you get ready to paint exterior stairs, gather the right tools and supplies so the job goes smoothly and safely. Start with quality exterior paint, primer, and non-slip additive.
Bring brushes, an angled sash brush, rollers with a 3/8–1/2″ nap, extension pole, and a paint tray. Include a scraper, wire brush, sanding blocks, and patching compound for repairs.
Have painter’s tape, drop cloths, and a respirator or dust mask. Gloves, knee pads, and sturdy work boots protect you.
For specialized projects like historical preservation or artistic murals, add fine brushes, stencils, and archival-grade materials.
Plan the Job and Safety Setup Before You Start
Before you pick up a brush, map out the job and set up your work area so every step’s organized and safe. Walk the stairs, note damaged treads, and plan paint stages. Position drop cloths and tape off rails. Check weather and timing so coats cure properly. Gather safety gear and arrange material storage near the work but off walking paths. Keep tools handy and trash bin accessible.
- Clear pathway and mark hazards.
- Place ladders and lighting for visibility.
- Organize paints, brushes, and cleaners.
- Secure materials against wind and moisture.
How to Repair Soft or Rotten Wood on Exterior Stairs
If you find soft or rotten wood on your exterior stairs, tackle it promptly to keep the structure safe and your paint job lasting. Probe affected areas with a screwdriver, remove decayed sections, and cut back to solid wood.
For small spots, use epoxy wood filler; for larger damage, replace treads or stringers with treated lumber. Seal exposed ends, sand smooth, and prime before painting.
In historical restoration projects, match profiles and materials, and preserve original artistic detailing where possible.
Check fasteners and supports, then paint with exterior-grade products. Inspect yearly to catch issues early and protect your work.
Treating and Rust-Proofing Metal Stair Components
Though wood often gets the spotlight, metal components on exterior stairs need just as much attention to prevent rust and guarantee safety. You’ll start by removing loose rust with a wire brush, then clean with degreaser and dry fully.
Apply a rust converter on stubborn spots, prime with a metal-specific primer, and finish with weatherproof paint. For decorative accents or historical restoration, match original profiles and use appropriate coatings.
Picture the process:
- Wire-brush flaky rust.
- Degrease and rinse.
- Convert and prime.
- Topcoat with durable enamel.
Inspect annually and touch up chips promptly to stop corrosion.
Patching Cracks and Spalling on Concrete Steps
When concrete steps develop hairline cracks or spalling, you’ll want to address them quickly to prevent water infiltration and further breakdown. Small repairs keep the stairs safe and extend their service life.
Inspect each tread and riser, remove loose material with a wire brush, and clean dust and debris.
For hairline fissures, use a flexible crack sealing product designed for exterior concrete.
For deeper spalls, chip back unsound concrete to sound edges, then fill with a polymer-modified patching mix following manufacturer directions.
Cure patches properly, then sand or profile surface so paint will bond and finish uniformly.
How to Remove Old Paint Safely and Effectively
Before repainting, strip away loose or peeling paint so the new coating can adhere and look even. You’ll work safely: wear goggles, a respirator, and gloves. Use a scraper, wire brush, or heat gun; test a small area first. Sand edges smooth for seamless blending.
- Visualize flakes falling like autumn leaves.
- Picture a smooth plane ready for fresh color palettes.
- Imagine crisp edges where primer meets risers.
- See decorative accents revealed after careful removal.
Contain waste, avoid power tools on lead paint, and prep the surface for primer and paint.
Best Cleaning Methods for Wood, Concrete, and Metal Stairs
Start by prepping each stair type for cleaning: you’ll use gentler cleaners and sand or spot-prime wood.
Stronger degreasers and pressure-washing are suitable for concrete.
For metal stairs, use rust remover plus a wire brush.
Remove all loose debris, mildew, and oil stains before you paint so the coating bonds properly.
Work methodically, treating stubborn stains with targeted cleaners and rinsing thoroughly.
Prep According To Material
Because each material soaks up dirt and holds stains differently, you’ll want tailored cleaning methods for wood, concrete, and metal stairs to get a sound surface for paint. Think color psychology and historical styles when planning finish and prep so your cleaning complements the final look.
For each material:
- Wood: sweep, wash with mild detergent, rinse, dry; sand glossy spots.
- Concrete: remove loose debris, scrub with a stiff brush and trisodium phosphate solution, rinse thoroughly.
- Metal: degrease, remove rust with a wire brush or converter, wipe with solvent.
- Inspect for damage before priming.
Remove Stains And Debris
Now that you’ve inspected and prepped the surface, it’s time to focus on removing stains and debris so paint will adhere evenly.
For wood, scrub mildew and dirt with a mild detergent or oxygen bleach, rinse, sand raised fibers, and let dry—this mirrors furniture maintenance routines.
For concrete, use a stiff brush, trisodium phosphate solution, or a pressure washer for oil and grime; patch spalled spots.
For metal, remove rust with a wire brush or grinder, apply rust converter, then clean with solvent.
Sweep and vacuum all surfaces, then wipe with a tack cloth so dust won’t mar the finish.
How to Sand Different Stair Surfaces for Proper Adhesion
When preparing exterior stairs for paint, you’ll want to match your sanding method to the material—wood, metal, concrete, or composite—so the new finish bonds well and lasts.
Use proper sand techniques to remove loose coating and create consistent surface textures without over-sanding. For each material:
- Wood: sand with 80–120 grit grain along the tread to brighten fibers.
- Metal: remove rust with a wire wheel, then 120–150 grit for keying.
- Concrete: use diamond cup or coarse grit to open pores.
- Composite: scuff with fine-grit or synthetic abrasive to avoid glazing.
Clean dust thoroughly before priming and painting.
When and How to Use a Wood Preservative or Sealer
Before you paint, you’ll want to apply a wood preservative or sealer to dry, clean stairs—especially if the wood is new, knotty, or has any signs of rot.
Choose a sealer formulated for exterior use and compatible with your topcoat (water- or oil-based).
Follow the manufacturer’s cure times before painting.
Proper timing and product choice will extend the life of your stairs and improve paint adhesion.
When To Apply
Although exterior stairs can look fine at first, you should apply a wood preservative or sealer as soon as the wood has fully dried after installation or after any repair. Then, reapply on a regular schedule based on product instructions and local weather exposure.
You’ll seal before painting, after sanding, and anytime water beads instead of soaking in.
Picture your steps:
- Fresh boards drying in sun.
- Rain-soaked wood needing emergency coat.
- Seasonal touch-ups before winter.
- A finished stair with color combinations and decorative stencils waiting for paint.
Follow timing on the label and inspect yearly.
Choosing The Right Sealer
If you want your exterior stairs to last and look great, pick a sealer that matches the wood species, exposure level, and the finish you plan to apply.
You’ll choose between penetrating preservatives, film-forming sealers, or water repellents based on rot risk and traffic.
Test sealer compatibility with your paint or stain—apply a small treated patch, let it cure, then topcoat.
Consider environmental impact: prefer low-VOC, copper-free options and follow disposal rules.
Apply when wood is dry and temperature ranges match label instructions.
Reapply per manufacturer intervals or when water no longer beads on the surface.
Applying Primer Correctly for Each Stair Material
When you’re priming exterior stairs, match the primer to the material and the conditions so paint will stick and last. Choose oil-based or latex for wood, masonry primer for concrete, metal primer for iron, and rust-inhibiting options for fasteners.
Consider color options early so primer tone supports your topcoat and decorative techniques like staining or stencil work—select primers that won’t show bleed-through.
Pick a primer color early so it complements your topcoat and prevents bleed-through during staining or stenciling.
Prep, dry, and sand between coats.
Visualize the finish:
- Weathered wood, sealed and smoothed
- Smooth concrete, bonded and even
- Rust-free metal, treated and primed
- Fasteners sealed, edges clean
Painting Stair Risers and Stringers Without Drips
Because risers and stringers get vertical paint runs, you’ll want to control buildup and dry times to stop drips before they start. Work top-down, brush off excess paint, and use thin, even coats so gravity won’t pull globs.
Lightly back-brush each stroke to level edges and check for thin tails before they sag. Allow proper flash time between coats and choose fast-flash primers or additives to speed curing.
For neat results, mask edges and rotate sanding between coats. Think about color coordination and artistic patterns early so your layout avoids correcting run-prone areas later.
Finish with a wipe for clean lines.
Painting Stair Treads for Even Coverage and Durability
While risers demand careful control of drips, treads need a different approach: you’re painting a high-wear, horizontal surface that must be both even-looking and tough. Start by sanding and cleaning; fill cracks and prime for adhesion.
Choose color palettes that hide dirt yet reflect light for safety. Use paint accessories—roller with short nap, angled brush, and non-skid additive—for durability.
- Scotch-brite sanding pad for profile
- Tack cloth to remove dust
- Smooth roller for consistent film
- Non-skid additive mixed into topcoat
Apply thin coats, allow full cure, and inspect for thin spots.
Techniques for Painting Stair Railings and Balusters
Before you paint railings and balusters, make sure surfaces are clean, dry, and free of loose paint or rust so your finish will adhere properly.
Sand and prime metal or wood where needed, and use a corrosion-resistant primer on iron or steel.
Choose a durable exterior-grade paint or enamel designed for high-touch areas to keep the railing looking good and standing up to weather.
Proper Surface Preparation
When you’re tackling stair railings and balusters, start by thoroughly cleaning and inspecting every piece so paint will adhere and the finish lasts; remove dirt, loose paint, and rust, then note nicks that need filling.
Sand glossy surfaces, degrease metal, and prime bare wood or metal. Decide on a color palette and where decorative accents will go before masking. Sand between coats for smoothness.
Follow this quick prep checklist to visualize the steps:
- Scrape and wire-brush flaking areas.
- Sand smooth, feather edges.
- Clean with solvent and let dry.
- Fill, sand, and prime repaired spots.
Choosing Durable Finishes
Now that the railings and balusters are prepped, pick finishes that stand up to hands, weather, and cleaning without hiding your workmanship. You’ll choose satin or semi-gloss for durability, sparing high-gloss unless it suits Historical styles. Use exterior acrylic latex or marine enamel; seal bare wood with primer. Apply thin, even coats and sand between. Use Color theory to balance railings with treads and surroundings. Protect metal with rust-inhibiting primer. Maintain by touching up chips quickly.
| Finish | Effect |
|---|---|
| Satin | Hides flaws, easy cleaning |
| Semi-gloss | Durable, slight sheen |
| Enamel | Hardwearing |
| Primer | Adhesion, sealing |
How to Create a Consistent Finish Across Mixed Materials
If your exterior stairs combine wood, metal, and concrete, plan a unified approach so the finish looks intentional rather than patched together. You’ll pick primers and compatible topcoats, balance color contrast, and add subtle artistic accents to tie surfaces together.
Follow these steps visually:
- Choose a dominant color for large surfaces to anchor the look.
- Use a complementary shade on rails and risers for contrast.
- Apply appropriate primer on each material for adhesion and longevity.
- Add small artistic accents—stenciled motif or trim—to repeat the palette and unify progressions.
Adding Non-Slip Texture: Aggregates, Tapes, and Paints
Because safety matters as much as appearance, add non-slip texture to exterior stairs using aggregates, tapes, or textured paints to prevent slips in wet or icy conditions. You’ll choose Non slip aggregates for durable grip, textured tapes for quick retrofit, or anti-slip paints for even coverage. Clean, prime, and follow product instructions; test a small area. Maintain visibility with contrasting colors on nosing. Replace worn tapes and recoat annually in high-traffic zones. Use the table below to compare options.
| Option | Durability | Ease of Install |
|---|---|---|
| Aggregates | High | Moderate |
| Textured tapes | Medium | Easy |
Best Brush, Roller, and Sprayer Techniques for Stairs
When painting exterior stairs you’ll get the best results by matching tools and techniques to the tread shape and traffic pattern. You’ll pick brushes for edges, rollers for flats, and a sprayer for quick coverage. Consider how outdoor lighting and garden design affect visibility and wear so you prioritize high-traffic edges.
- Use angled sash brush for nosing and tight corners.
- Choose a short-nap roller for smooth, even flats.
- Apply a handheld sprayer for railings and balusters.
- Brush backcut into pooled areas to prevent runs.
Work from top step down, keeping strokes consistent and edges crisp.
Paint Application Order to Minimize Blocking and Mess
Although it might seem tempting to rush, plan your sequence so you paint low-traffic, hard-to-reach areas first and finish with high-touch edges to avoid blocking and cleanup headaches.
Start by cutting in risers, underside details, and rail bases, then roll treads from back to front. Work outward along each step so you don’t walk over wet edges; use tack cloths and edge guards to keep lines crisp.
Save railings and top edges for last to protect fresh surfaces. Thoughtful order preserves your Color selection and boosts overall aesthetic appeal while minimizing drips, smudges, and rework.
Drying Times and Ideal Conditions Between Coats
If you want durable, blemish-free results, respect the paint’s specified drying and recoat times and the conditions that affect them. You’ll work smarter by checking label times, waiting longer in cool or humid weather, and avoiding direct sun that accelerates skinning.
After paint stripping or sanding, remove dust so coats bond; don’t rush color mixing into a cold can. Visual cues matter:
- Surface feels dry to the touch.
- No tackiness after firm press.
- Film clears any hazy bloom.
- Smell of solvent has faded.
If unsure, wait an extra 24 hours to guarantee proper cure.
How Many Coats You Actually Need for Long-Lasting Protection
Now that you’ve let each coat dry properly and checked for tackiness, decide how many coats will give the protection your exterior stairs need.
Typically, two coats of high-quality exterior paint suffice: a durable primer (if needed) plus one topcoat, or two topcoats over suitable bare wood or previously painted surfaces.
If stairs face heavy traffic, abrasion, or harsh weather, add a third topcoat for extra durability.
Consider paint sheen—higher sheens resist scuffs and shed moisture better but highlight imperfections.
Also weigh color psychology; darker or brighter hues may need extra coats for true coverage and consistent appearance across steps.
Tips for Neat Edges and Clean Transitions to Adjacent Surfaces
Start by taping crisp masking lines to protect railings and adjacent trim.
When you remove the tape, pull it back slowly at a 45° angle while the paint is still slightly tacky to keep edges clean.
For smooth progressions between surfaces, feather the paint with a lightly loaded brush or roller to blend the new coat into old finishes.
Clean Masking Lines
When you want crisp, professional-looking edges on exterior stairs, clean masking lines make all the difference; they prevent paint bleed and give a sharp shift to adjacent surfaces. You’ll plan masking with attention to Color combinations and Decorative accents so contrasts look intentional. Use quality tape, press edges firmly, and remove it at the right time.
- Smooth tape along riser joints.
- Trim excess with a sharp blade.
- Seal seams where paint could seep.
- Peel slowly at a 45° angle.
These steps keep progression neat and guarantee your stairs’ finishes read as deliberate, durable design.
Feathered Paint Transitions
After masking gives you sharp lines, you’ll want to feather paint where surfaces meet so edges look smooth and natural. Work wet into wet: pull a loaded brush from the main field toward the trim, then lighten pressure as you blend outward. Use a dry brush or small roller to soften any ridge before paint skins.
Match sheen and substrate prep to avoid visible seams. Consider color psychology when choosing shift tones—muted blends feel calm, high-contrast edges feel intentional.
For historical styles, replicate period transitions by studying original details and using compatible pigments and stroke techniques for authentic, neat results.
Weatherproofing Exposed Edges and Underside Areas
Because exposed edges and undersides take the brunt of moisture and temperature swings, you’ll need to seal and protect them before painting the rest of the staircase. Start by sanding and wiping, then apply an exterior-grade primer to end grain and undersides.
Use caulk on joints and a waterproofing membrane for open risers. Think about nearby gardening tips and furniture placement to prevent splash and abrasion.
- Sand rough edges
- Prime end grain
- Caulk seams
- Apply membrane
Finish with two coats of flexible exterior paint and check hidden areas for missed spots before returning traffic.
How to Maintain Painted Stairs Seasonally
If you want your painted exterior stairs to keep looking good and stay protected, schedule simple seasonal checks and touch-ups: sweep debris, rinse off salt and pollen, and inspect for chips, peeling, or soft spots.
In spring, remove accumulated grit, trim seasonal plantings that brush treads, and wash surfaces with a mild detergent.
Summer brings UV concerns—clean regularly and reposition decorative lighting to avoid heat concentration.
In fall, clear leaves and check drainage.
Before winter, apply non-abrasive deicers sparingly and store planters off stairs.
Keep a checklist and address issues promptly to extend the finish without major work.
Spot Repairs and Touch-Ups That Blend Invisibly
Seasonal checks will catch most wear, but you’ll still hit small chips, scuffs, and worn spots that need quick, invisible repairs to keep the stairs looking uniform.
Clean the area, sand feather-edge, and apply matching primer before thin layers of touch-up paint. Use small brushes or a cotton swab for precision.
Consider surrounding decorative accents and overall color coordination so repairs disappear.
- Tiny chip: sand, primer, dab paint
- Scuff: gentle scuff-sand, one coat
- Edge wear: feather, multiple thin coats
- Accent trim: match sheen, blend carefully
Troubleshooting Peeling, Blistering, and Flaking Paint
When paint peels, blisters, or flakes on your exterior stairs, don’t ignore it—you’ll need to find the root cause before you repaint. Inspect for adhesion failures: old paint, contamination, or incompatible primers.
Sand loose areas, remove blistered layers, and clean with a deck cleaner or mild detergent. Let the surface fully dry, then prime with a compatible exterior primer.
Match paint type to previous coating to avoid future delamination. After finishing, consider updating color schemes or adding subtle decorative accents only once repairs cure.
Test a small area to confirm adhesion before repainting the entire staircase.
Preventing Mold, Mildew, and Algae on Painted Stairs
Before you paint, make sure the stairs are thoroughly cleaned, dried, and any loose material or organic matter is removed so paint can adhere properly.
Choose paints or topcoats with anti-microbial or mildewcide additives to discourage mold, mildew, and algae growth.
Regularly inspect and touch up high-moisture areas to keep those protective layers effective.
Proper Surface Preparation
Good preparation beats repeated repainting, so you’ll want to remove any mold, mildew, and algae before applying paint to exterior stairs. Start by scrubbing with a mild detergent or oxygen bleach, rinse thoroughly, and let the surface dry completely.
Protect nearby plants for garden integration and avoid runoff. Repair cracks and loose material, then sand glossy areas to promote adhesion.
Visualize the finished look with:
- damp stair treads drying in sun
- a stiff brush scraping stains
- neat edge lines ready for primer
- subtle artistic motifs reserved for later detailing
Follow these steps to *guarantee* paint bonds to a clean, stable substrate.
Use Anti-Microbial Coatings
Although molds and algae thrive outdoors, you can keep them from returning by choosing paints and topcoats with built-in anti-microbial additives. You’ll extend finish life, reduce cleaning, and protect artistic stencil techniques and creative color schemes from staining. Apply per manufacturer specs, ensuring dry, clean surfaces and proper primer. Recoat intervals matter—many formulations last years but need renewal in high-moisture areas.
| Benefit | Tip |
|---|---|
| Resistance | Pick labeled anti-microbial paints |
| Longevity | Follow recoat schedule |
| Appearance | Test colors and stencils |
| Maintenance | Clean gently, avoid harsh scrubbers |
Cost-Saving Choices That Don’t Sacrifice Durability
If you want to save money on exterior stair painting without cutting corners, focus on smart material and prep choices that extend the life of your work. Choose quality primer and durable exterior paint, balancing cost and longevity.
Preserve details if you value historical preservation or want artistic embellishments—strip only where needed. Seal joints and fix rot spots to avoid costly rework.
Picture the steps:
- Clean, degrease, and sand for adhesion.
- Spot-prime bare wood and metal.
- Use an exterior acrylic latex topcoat for flexibility.
- Add non-slip additive in high-wear zones.
Regular touch-ups beat full recoats.
When to Hire a Pro: Complex Repairs and High-Traffic Stairs
Saving money on materials and upkeep can keep your exterior stairs looking great, but some situations call for a professional’s skills—especially when repairs are complex or the stairs see heavy daily use.
If you spot structural rot, uneven treads, or persistent water pooling, hire a pro to assess load-bearing issues and recommend repairs that meet code.
Professionals also integrate features like slip-resistant coatings, coordinate garden design shifts, and add or adapt outdoor lighting for safety.
Choose someone licensed with references, insist on a written estimate and timeline, and prioritize contractors experienced with high-traffic exterior stairs to guarantee lasting results.
Eco-Friendly Paint and Disposal Tips for Exterior Jobs
When you’re prepping exterior stairs, choose low-VOC or water‑based paints and stains to cut fumes and reduce environmental impact. You’ll protect workers and nearby plants, and cleanup uses soap and water instead of harsh solvents.
For leftover materials, follow local guidelines for Recycling paint cans and Eco friendly disposal. Picture proper steps:
- Seal and label cans before storage.
- Donate usable paint to community programs.
- Dry small leftovers for curbside trash per rules.
- Take hazardous waste to a municipal drop-off.
You’ll leave stairs durable and your site cleaner by choosing greener products and disposal.
Realistic Timeline: Prep to Finished Exterior Stairs
Now that you’ve picked eco-friendly paints and planned proper disposal, map out a realistic timeline so the job finishes on schedule.
Day one, clear debris and remove loose paint; allow drying overnight.
Day two, sand, repair cracks, and prime; prime for recommended cure time.
Day three, apply first coat; wait specified recoat window.
Day four, apply second coat and add non-slip texture if desired; let cure.
Factor weather: avoid rain and high humidity.
Reserve a day for touch-ups.
Compare methods used for garden pathways and avoid using interior paint formulations outdoors.
Stick to plan and check cure before use.
Quick Checklist to Inspect Painted Stairs Annually
Before you step onto the porch, walk the stairs and scan for obvious issues—peeling paint, flaking edges, water stains, loose balusters, and worn treads—and note any spots that need immediate attention. Use this quick checklist annually to keep finishes lasting and attractive, considering Garden integration and Artistic patterns near entryways.
- Check tread grip and paint adhesion—look for slick or bare patches.
- Inspect risers and nosing for cracks, rot, or bubbling.
- Test railings and balusters for wobble or rust at fasteners.
- Examine junctions where planters or patterns meet paint for moisture intrusion.
Recommended Products and Finishes for Each Stair Material
Although every stair material has unique needs, you can choose products that balance durability, safety, and appearance.
Although stair materials differ, choose finishes that balance durability, safety, and attractive appearance for lasting curb appeal
For wood, use an oil-based primer, exterior enamel or acrylic-urethane topcoat, and anti-slip additive on treads. Stain and sealer combos work for natural looks that match garden furniture.
For concrete, apply a masonry primer, epoxy or elastomeric paint, and textured coatings for traction.
For metal, remove rust, use a zinc-rich primer, and finish with high-build enamel.
For composite, use manufacturer-approved cleaners and acrylic latex paints.
Tie finishes into landscaping ideas for cohesive curb appeal and long-lasting results.
Frequently Asked Questions
Can I Paint Exterior Stairs Myself if They’Re Steep or Narrow?
Yes — you can, but prioritize DIY safety: assess stair width considerations, secure sturdy ladders or scaffolding, use non-slip paint, work with a helper, wear fall protection, and stop if conditions feel unsafe or unstable.
How Long Before Foot Traffic Is Safe on New Non-Slip Paint?
Quickly, cautiously: you’ll generally wait 24–48 hours before light traffic, but full curing time can take 72 hours to a week depending on temperature and product. Use safety precautions—keep area clear and test before regular use.
Will Paint Hide Uneven or Mismatched Stair Colors Permanently?
No, paint won’t permanently hide uneven or mismatched stair colors; you’ll need proper color matching and multiple coats for good paint coverage. You’ll also address underlying texture or stain issues first to get a durable, uniform result.
Can I Stain Stairs Instead of Painting for Similar Durability?
Yes — you can stain stairs instead of painting and still get durability, but you’ll need regular stain maintenance, proper sealing, and sanding; use color matching techniques to blend new and old boards so finishes look uniform and long-lasting.
Are There Paint Warranties Specific to Outdoor Stair Applications?
Like a safety net, yes — you’ll find manufacturers offering paint durability guarantees and warranty coverage for outdoor stair applications, but they’re often conditional on specific prep, product lines, and professional application, so read terms closely.
Conclusion
You’ve learned the steps, picked materials, and prepped carefully — but the test isn’t done yet. Walk the stairs slowly after the final coat dries, checking for slick spots, missed edges, or loose treads. If something unsettles you, don’t ignore it; fix it now before wear and weather make it worse. Do annual checks, touch up as needed, and you’ll keep those stairs safe and looking great for years — if you stay vigilant.