How to Paint New Concrete Wall Properly
You can paint new concrete, but wait until it’s fully cured and dry—typically about 28 days—then test for moisture with a meter or tape test. Clean thoroughly, removing efflorescence, salts, oils, and old paint; neutralize contaminants and let the surface dry. Prime with a masonry primer suited to your paint, follow manufacturer drying times, and apply topcoats under proper temperature and humidity. Follow these steps and you’ll learn the detailed prep, timing, and product choices that guarantee lasting results.
Can You Paint New Concrete Now? Quick Answer and Conditions

If the concrete’s fully cured and dry, you can paint it now; otherwise wait. You’ll check cure time (usually 28 days), moisture with a meter or tape test, and surface cleanliness.
If efflorescence, salts, or oils appear, clean and neutralize first. Prime with a masonry primer suited to your paint choice to guarantee adhesion and longevity.
Pick color options that suit exposure and maintenance needs—lighter for heat reflection, darker for hiding stains.
Consider texture techniques like stippling or roller naps to match surface roughness.
Follow manufacturer drying times before applying topcoats for best results.
Who This Guide Is For and What You’ll Learn
This guide is for homeowners, DIYers, and contractors who want clear steps for painting new concrete walls. You’ll learn how to assess curing time and surface prep, choose the right primer and paint, and avoid common mistakes.
Who Should Read
Wondering whether this guide fits your project? If you’re prepping a new concrete wall and care about durability, appearance, or simple upkeep, this guide’s for you. You’ll find practical advice that helps with things like color matching and choosing decorative finishes without getting lost in jargon.
- Homeowners tackling a driveway, basement, or exterior wall who want a professional result.
- DIYers comfortable with basic tools who want clear steps and material choices.
- Remodelers and painters seeking concise guidance on surface prep and paint selection.
Read this if you want efficient, reliable painting outcomes.
What You’ll Learn
When you follow this guide, you’ll learn exactly how to prepare, prime, and paint new concrete so the finish lasts and looks professional. You’ll see step-by-step surface cleanup, moisture testing, and repairing hairline cracks so paint adheres reliably.
You’ll learn primer selection and application, plus which paint types resist efflorescence and wear. You’ll get clear instruction on tools, coverage rates, and proper dry times.
Practical tips include color mixing for accurate hues, simple texture techniques for hiding imperfections, and sealing options for longevity.
How Long To Cure New Concrete Before Painting?
You should wait at least 28 days for new concrete to cure before painting to allow most of the hydration to finish.
Before painting, check moisture with a moisture meter or a simple plastic sheet (tape a 2 ft square, wait 24 hours, and look for condensation).
If readings are high, hold off and use a moisture-tolerant primer or allow extra drying time.
Recommended Cure Time
Because fresh concrete keeps drying and strengthening for weeks, you should wait before painting to avoid adhesion and moisture problems. Aim for a minimum 28 days for basic cure, though thicker or colder pours need longer.
You’ll plan finishes—color schemes and texture options—after confirming the slab feels dry and hard. Don’t rush; premature paint can blister or peel.
- Standard cure: 28 days for typical mixes and climates.
- Extended cure: 45–60 days for dense, cold, or high-slump pours.
- Visual check: surface hardness and uniform color guide timing before priming and finishing.
Moisture Testing Methods
After the concrete has reached its basic cure, moisture testing tells you whether it’s truly ready for primer and paint. You’ll use a moisture meter (pin or pinless), plastic sheet (ASTM D4263), or relative humidity probe to confirm levels under manufacturer limits.
Test multiple spots, especially near floors and exterior walls, and record results. If moisture’s high, wait, improve drying, or add a vapor barrier before painting.
Proper testing protects your chosen color schemes and decorative finishes from peeling, blistering, or efflorescence. Always follow product specs and retest after repairs so your paint job lasts and looks professional.
How To Test Wall Moisture Before Painting?
Wondering whether the new concrete has cured enough to accept paint? You’ll check moisture before deciding on color selection and texture finishing approaches. Use simple tests to confirm dryness.
Wondering if new concrete is dry enough for paint? Test moisture first, then choose color and finish.
- Plastic-sheet test: tape a 2 ft square of clear plastic to the wall for 24–48 hours; if condensation appears, it’s too wet.
- Moisture meter: use a non-destructive pinless meter across areas you’ll paint; follow manufacturer thresholds for concrete.
- Relative humidity probe: for precise readings, drill a small hole and insert a probe to measure in-situ moisture before priming or painting.
Why Control Moisture Before Painting Concrete
You need to control moisture before painting to prevent water from getting into the concrete and undermining the finish. Doing so helps the paint adhere properly so you won’t get peeling or bubbling later.
It also reduces the risk of mold growth that can damage the wall and your health.
Preventing Moisture Intrusion
Why test for moisture before you paint? You need to stop water from undermining finish and causing blistering or mold. Preventing moisture intrusion starts with identifying sources and sealing them so your concrete textures and color blending stay true.
- Fix drainage: redirect runoff, repair cracks, and add grading to keep water away.
- Apply vapor barriers: breathable membranes or waterproof coatings let moisture escape while blocking liquid entry.
- Seal joints and penetrations: use appropriate caulk and backer rod to close gaps that invite water.
Do these steps before painting to protect appearance and longevity without harming adhesion.
Ensuring Paint Adhesion
How will paint stick if moisture keeps working against it? You must test and dry the new concrete, use a suitable primer, and verify that relative humidity is low before painting. Control moisture to prevent adhesion failure, bubbling, and peel. Choose proper Brush selection for primer and finish coats to achieve uniform coverage; consider Color mixing compatibility with primers and paints to avoid uneven tones. Follow cure times and recheck moisture with a meter. The table below helps prioritize steps and tools.
| Step | Tool | Goal |
|---|---|---|
| Test moisture | Moisture meter | Confirm dryness |
| Prime | Bonding primer | Seal surface |
| Paint | Quality brush | Even coverage |
| Wait | Time/temp | Proper cure |
Avoiding Mold Growth
Ever wondered what happens when moisture stays trapped behind a fresh paint film? You’ll get peeling, stains, and mold growth that ruins finishes and indoor air.
For mold prevention, control moisture first: test for dampness, fix leaks, and make sure proper drainage.
Surface preparation matters—clean, dry, and allow full curing before priming. Follow these three steps:
- Measure moisture with a meter; don’t paint if readings are high.
- Repair cracks, improve ventilation, and redirect water away from walls.
- Use breathable primers and mildew-resistant paint to let residual vapor escape and prevent spores.
Signs Your Concrete Is Too Damp To Paint
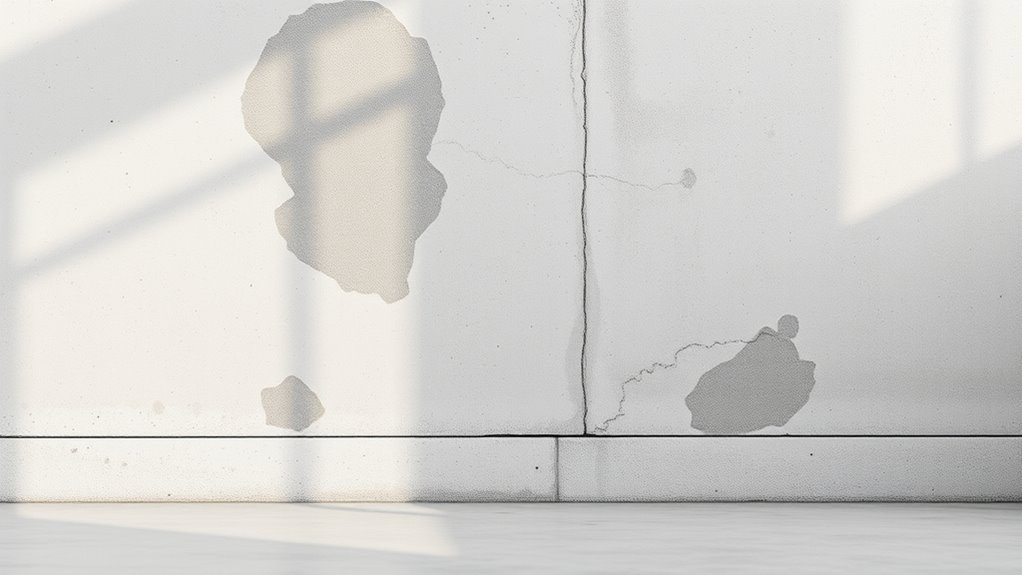
If your paint keeps peeling, bubbling, or failing to adhere, the concrete is likely too damp to accept a finish. Look for persistent dark patches, a musty smell, or salt deposits (efflorescence) on the surface as clear indicators.
You’ll also notice uneven concrete aesthetics—patchy sheen or blotchy coloration that ruins your color selection choices.
Touch the wall: a cold, damp feel or visible condensation means high moisture.
Tap for hollow sounds indicating delamination.
Check after rain or in the morning; recurring dampness signals a moisture source.
Don’t paint until the wall stays dry for several days to guarantee adhesion and longevity.
How To Check For Efflorescence and Salts
Check the wall for powdery white deposits or streaks—those are classic signs of efflorescence. You can rub a damp cloth on a suspicious spot and see if salts transfer or reappear after drying.
Also, perform a simple water absorption test to gauge surface porosity.
Finally, verify with a moisture meter reading to confirm underlying dampness before you paint.
Look For White Deposits
Notice any powdery white crust or streaks on the new concrete—those are likely efflorescence or salt deposits and they’ll prevent paint from adhering properly. You should inspect the wall closely for white deposits, especially near joints and the footing where moisture concentrates.
These salts signal moisture movement and high surface porosity that’ll undermine coatings. Remove loose powder with a dry brush and note recurring areas that suggest ongoing moisture entry. If deposits reappear, address the moisture source before painting.
Follow this quick checklist:
- Scan entire wall for streaks and patches.
- Brush off loose residue and inspect substrate.
- Mark persistent spots for repair.
Perform Simple Water Test
Want to know whether those white crusts are active salts or just surface dust? Wet a small area with distilled water and let it sit five minutes; dab with a clean cloth.
If white residue transfers or reappears after drying, salts are active and need cleaning before painting. Test several spots, especially near baseboards and masonry joints.
Active salts mean you should address moisture sources and consider waterproofing membranes or specialist treatments before applying decorative finishes.
If residue doesn’t transfer, it’s likely inert dust; you can proceed with normal prep.
Record results so you know which areas need extra attention.
Use Moisture Meter Readings
Before you paint, use a moisture meter to pinpoint damp spots that can drive efflorescence and salt migration. You’ll avoid moisture contamination by mapping readings across the wall, focusing on bases, joints, and behind fixtures.
Guarantee testing accuracy by calibrating the meter and using consistent pressure and grid spacing. Interpret results: high readings mean drying or vapor barriers are needed; low readings let you proceed.
Confirm with a follow-up reading after remediation.
- Scan systematically: mark hotspots.
- Calibrate first: check manufacturer steps.
- Recheck after fixes: verify reduced readings.
Tools and Materials: What You’ll Need For Prep and Painting
To get a clean, durable finish on new concrete, you’ll need the right tools and materials for both prep and painting. Gather a stiff-bristled brush, pressure washer or hose with nozzle, concrete cleaner or trisodium phosphate, patching compound, putty knife, and a masonry primer and paint rated for concrete.
Use rollers with a thick nap and angled brushes for edges. Have drop cloths, painter’s tape, and safety gear: gloves, goggles, mask.
Choose color schemes that suit light exposure and note environmental impact when selecting low-VOC, eco-friendly paints and cleaners to reduce fumes and runoff.
When To Call a Pro For Moisture or Structural Issues
If you spot persistent water stains on your new concrete wall, don’t ignore them—those are signs you’ll want a pro to evaluate.
Similarly, hairline cracks are one thing, but wide or growing structural cracks need an expert’s assessment right away.
Calling a professional can pinpoint the source and prevent bigger, more expensive damage.
Visible Water Stains
Noticing dark, crusty, or spreading water stains on a new concrete wall? You should inspect quickly: water stains often mean persistent moisture, not just surface porosity.
If stains reappear after drying, call a pro to locate leaks, check flashing, or test vapor drive. Don’t ignore efflorescence or peeling paint — they signal ongoing dampness that will ruin finishes.
- Hire a pro if stains persist after sealing or drying.
- Ask for moisture mapping and source diagnosis, not just cosmetic fixes.
- Get recommendations for breathable coatings and repair of water entry points before painting.
Structural Cracks
When should you call a pro for cracks in a new concrete wall? You should call one if cracks are wide (more than 1/8 inch), run diagonally, repeat, or let water seep through.
A pro will assess whether cracks are cosmetic or signal movement, foundation problems, or persistent moisture. They’ll recommend structural reinforcement when movement threatens stability, or targeted crack sealing for non-structural gaps.
Don’t try extensive repairs if you see sagging, bulging, or active leaks. Document changes, avoid painting until a pro clears the wall, and get written repair and moisture-control plans before applying any finish.
How To Clean a New Concrete Wall Effectively
Before you paint, give the new concrete a thorough cleaning so paint will adhere properly and the finish lasts. You’ll remove dust, salts, and loose particles that affect concrete texture and hinder color matching later.
Start by sweeping and vacuuming, then wash with mild detergent and water, scrubbing with a stiff brush. Rinse thoroughly and let the surface dry completely.
For stubborn mildew, use a diluted bleach solution, then rinse well. Inspect for efflorescence and brush it off.
Finally, test a small patch to confirm texture and color matching before you prime and paint.
- Sweep and vacuum
- Wash and rinse
- Spot test
Removing Form Oil and Curing Compounds
Because form oil and curing compounds can leave a slippery, film-like residue that prevents paint from bonding, you’ll need to remove them thoroughly before priming.
Start by testing for form release and curing compounds with a small water droplet—if it beads, contaminants remain.
Use a stiff brush and a suitable alkaline cleaner or concrete degreaser to scrub affected areas, working in sections.
Rinse thoroughly with clean water and allow full drying.
For stubborn film, repeat treatment or use mechanical abrasion like light grinding or shot blasting.
Only proceed to priming when the surface accepts water evenly and feels matte.
Best Cleaners For Grease, Mildew, and Efflorescence
Although concrete’s porous surface resists paint when contaminated, you can restore it quickly by choosing cleaners targeted to the problem—use a degreaser or trisodium phosphate (TSP) solution for oil and grease, a diluted bleach or commercial mildew remover for mold, and a muriatic-acid rinse or specialized efflorescence cleaner for salt deposits.
Although concrete’s porous surface resists paint when contaminated, targeted cleaners—degreaser/TSP, bleach for mold, or muriatic/efflorescence treatments—restore it.
Pretest cleaners, wear protection, and rinse thoroughly.
For areas near garden decor or structures, protect plants and consider pest control when using strong chemicals.
Choose biodegradable degreasers where possible.
- Degreaser/TSP: remove oil, then neutralize.
- Bleach/mildew remover: treat mold, rinse well.
- Muriatic/efflorescence cleaner: dissolve salts, neutralize.
How To Pressure Wash Without Damaging the Wall
Want to pressure wash the new concrete wall without scarring it? Use a wide-angle nozzle, keep pressure under 1500–2000 psi, and hold the wand at a 45° angle 2–3 feet away.
Test a small area first to check effects on concrete textures and avoid etching. Work top-to-bottom in overlapping passes, rinsing detergent thoroughly.
Protect adjacent surfaces and plants, and wear PPE. Let the wall fully dry before inspecting for stains or paint readiness; note that pressure washing can reveal color variations you’ll address during color matching later.
Don’t concentrate on one spot or use a pencil jet.
When And How To Mechanically Abrade For Adhesion
When the wall’s surface still looks smooth or has residual laitance after washing, you’ll mechanically abrade it to create a profile that paint can grip; do this once the concrete is fully dry and any efflorescence or loose material has been removed.
Use a grinder with a diamond cup or a stiff wire brush on a rotary tool, keeping dust control and PPE in place.
Use a diamond cup grinder or stiff rotary brush, and always control dust and wear proper PPE.
Aim for uniform texture without overcutting.
- Start with low-speed grinding to assess profile.
- Vacuum and wipe, then test adhesion.
- Choose primer selection based on porosity revealed during surface preparation.
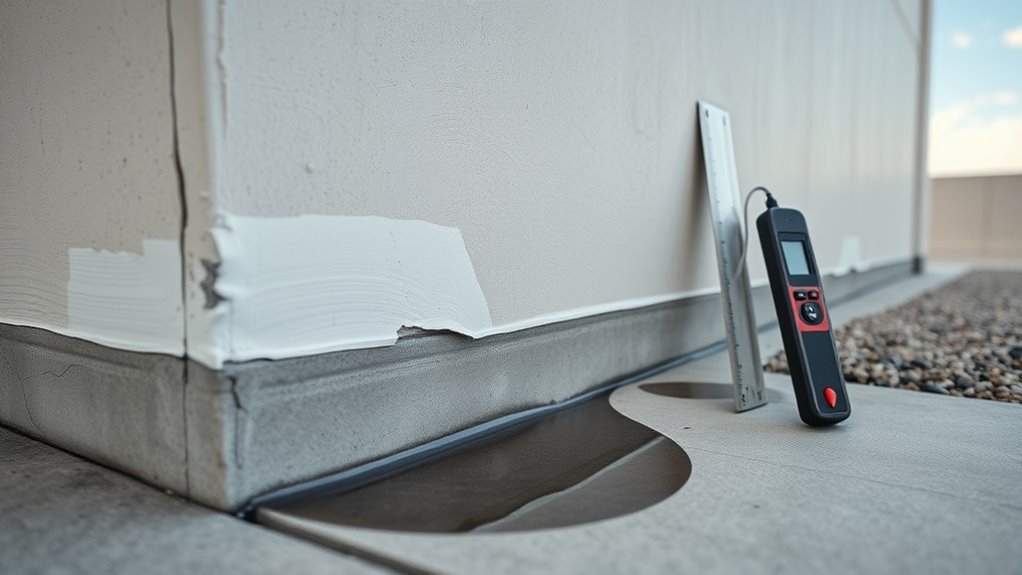
How To Repair Hairline Cracks and Small Spalls
If your concrete has hairline cracks or small spalls, you’ll want to address them before priming so the finish stays smooth and bonded. Clean the area with a stiff brush and mild detergent, removing dust, loose particles, and any graffiti removal residues.
For hairline cracks, use a low-viscosity epoxy or acrylic concrete repair sealer injected or brushed in; smooth with a putty knife.
For small spalls, chip back loose edges, dampen, then fill with a polymer-modified repair mortar, compacting and feathering edges.
Allow full cure, recheck adhesion, then proceed to primer and decorative finishes for an even result.
How To Patch Larger Voids and Honeycombing
Small hairline repairs set the stage for tackling more substantial damage: larger voids and honeycombing require a different approach to restore structural integrity and a smooth painting surface. You’ll remove loose material, clean the cavity, and dampen the area before patching.
Choose a compatible patch mix and apply in layers, compacting to avoid future voids. Use color matching and texture techniques after curing so repairs blend with the wall.
- Prep: chisel, clean, dampen.
- Pack: layer, compact, cure.
- Finish: feather edges, match color, replicate texture.
Choosing Patching Compounds: Cementitious, Polymer, and Epoxy Options
Before you pick a patching compound, understand how cementitious mixes, polymer-modified mortars, and epoxies differ in strength, adhesion, cure time, and finish so you can match the product to the damage and the final paint system.
You’ll choose cementitious for deep, structural repairs; it’s economical but may need a primer for paint.
Polymer-modified mortars offer better bonding and flexibility for hairline cracks and thin patches.
Epoxies provide highest strength and chemical resistance for critical spots, though they can be rigid.
Consider surface texture for decorative finishes and plan color matching before you finish and paint.
How To Level Uneven Concrete Surfaces Before Painting
First, you’ll assess surface irregularities to mark cracks, holes, and high spots so you know what needs fixing.
Next, you’ll prepare and clean the area thoroughly—remove dust, loose concrete, and any contaminants for good adhesion.
Finally, you’ll apply the appropriate patching compound and smooth it flush with the wall before sanding and priming.
Assess Surface Irregularities
How uneven is your concrete wall, and what kind of fixes will it need? You should inspect for chips, high spots, and hollows, since surface texture affects paint adhesion and long-term paint durability.
Measure variations with a straightedge and mark areas needing work. Decide whether to skim, grind, or fill based on depth and location.
- Use a 6‑ft straightedge to find high/low zones.
- Map defects and prioritize structural or visible areas.
- Estimate materials and tools for grinding, patching, or skim coat.
This assessment guides precise leveling choices and guarantees consistent texture before you proceed.
Prepare And Clean Surface
With your defects mapped and tools estimated, get the surface clean and ready so repair materials bond properly and grinding or skim-coating goes smoothly.
Remove loose debris with a stiff broom, then wash with trisodium phosphate or mild detergent; rinse thoroughly and let fully dry.
Use a wire brush or grinder to expose sound concrete where needed.
Address oil stains with degreaser or poultice; efflorescence requires acidic cleaner, neutralize afterward.
Check humidity and temperature before proceeding.
While preparing, consider color psychology for final paint choices and review historical techniques for surface prep insights, adapting proven methods to modern materials.
Apply And Smooth Patch
Before you patch, score the perimeter of low spots and remove any loose material so the repair bonds solidly. Then mix a polymer-modified concrete patch or leveling compound to the manufacturer’s consistency and apply it to the uneven areas with a trowel or gauge rake, pressing firmly to eliminate voids.
Let the compound set partially, then float or trowel to smooth, feathering edges for seamless progression. Consider how color options and texture techniques will affect the final look; you can blend pigments or use stippling for subtle variation.
Seal dry patches before priming to guarantee adhesion.
- Clean and dampen surface
- Apply patch in thin layers
- Finish with matching texture
How To Roughen Smooth Cast Concrete So Primer Sticks
If your cast concrete is glass-smooth, you’ll need to add texture so primer can grab and form a lasting bond. Begin by cleaning the surface with a degreaser and rinse; contaminants prevent adhesion.
Choose texture options like light acid-etching, sandblasting, or mechanical abrasion with a diamond cup grinder or wire brush attachment. Work evenly, keep dust controlled, and rinse thoroughly after etching.
Let the wall dry completely before testing adhesion with tape. Consider color matching later when selecting paint—not now.
These methods create micro-roughness for primer to penetrate, ensuring a durable finish without compromising the concrete.
When Do You Need A Masonry Primer On New Concrete?
You’ll need a masonry primer when new concrete is highly porous or has been smoothed so paint can’t penetrate evenly.
Also prime if the surface has contaminants like form-release oil, curing compounds, or efflorescence that would block adhesion.
If the slab is dense, clean, and absorbency-tested as low, you can often skip the primer.
New Concrete Porosity
Because new concrete soaks up paint like a sponge, you’ll usually need a masonry primer to seal the surface before topcoating. Check porosity: rough concrete texture or visible aggregate exposure soaks primer and paint unevenly, so you’ll want a higher-build primer. Smooth, dense pours may need less.
Test with a small water drop—if it disappears quickly, prime.
- High porosity: heavy primer, maybe two coats.
- Moderate porosity: one quality masonry primer.
- Low porosity: light sealer or bonding primer.
Proper priming evens absorption, improves adhesion, and prevents wasted finish coats.
Surface Contamination Levels
When new concrete has surface contaminants—like dust, form-release agents, oil, efflorescence, or curing compounds—you’ll need a masonry primer after proper cleaning to guarantee adhesion and uniform finish. You should test spots: if water beads or stains persist, prime. Clean with degreaser, acid etch, or pressure wash, then let dry. Primer locks in contaminants you can’t remove and evens porosity for paint, helping your color choices and texture options stay true. Choose a breathable masonry primer for exterior walls; use alkali-resistant types for new pours.
| Condition | Action |
|---|---|
| Dusty | Sweep/pressure wash |
| Oily | Degrease |
| Cured film | Strip/etch |
| Efflorescence | Neutralize |
| Unknown | Test & prime |
How To Pick The Correct Primer For Interior Vs. Exterior
Although both interior and exterior concrete need a good primer, the right choice depends on exposure, substrate condition, and your topcoat. You’ll pick water-based acrylic for interiors when moisture is low and you want easy cleanup and compatibility with varied color schemes and decorative techniques.
For exteriors, choose elastomeric or masonry primers that resist weather and UV and bridge hairline cracks. If substrate is dusty or alkaline, use a bonding primer.
Consider penetration depth, adhesion, and VOC limits for indoor spaces.
- Interior: acrylic bonding
- Exterior: elastomeric/masonry
- Problem substrates: high-adhesion primer
Why Breathable Primers Matter For Some Concrete Walls
After you’ve chosen a primer that matches interior or exterior needs, consider whether the concrete needs to breathe: breathable primers let moisture vapor escape from the slab or wall while still providing adhesion and a uniform surface for your topcoat.
You’ll pick breathable primers when concrete porosity and moisture movement could trap vapor under paint, causing blistering or peeling. They work on newer or damp-prone walls, letting humidity pass without sacrificing coverage.
Test moisture levels first, repair cracks, then apply according to instructions. Using the right breathable primer prevents paint failures and extends finish life, especially in basements and exterior walls.
How To Choose Paint Types For New Concrete Walls
Which paint will stand up to your concrete’s conditions and give the finish you want? You should evaluate surface porosity, exposure (sun, moisture), and desired sheen before picking a product. Match paint durability to traffic and weather, and consider how concrete texture affects coverage and application method.
Match paint to concrete: consider porosity, exposure, sheen, texture, and durability—test a small area first.
- For smooth interior walls: choose a low-odor, durable latex for easy cleaning and good adhesion.
- For rough or textured surfaces: use higher-build formulas to fill voids and preserve texture without sanding.
- For high-moisture or exterior exposure: pick moisture-resistant, long-lasting finishes rated for concrete.
Test a small area to confirm adhesion and color.
Acrylic Latex Vs. Elastomeric Coatings: Which To Use?
When you’re deciding between acrylic latex and elastomeric coatings, focus on flexibility, thickness, and the wall’s movement and moisture exposure.
You’ll pick acrylic latex for smoother concrete textures, easy application, and good paint durability on stable walls.
Choose elastomeric when hairline cracks, more movement, or higher moisture risk exist—its thicker film bridges cracks and resists water intrusion better.
Remember elastomeric needs careful surface prep and may alter appearance more than acrylic.
For most interior or sheltered exterior walls use acrylic; for porous, shifting, or damp exteriors opt for elastomeric to maximize longevity and protection.
Using Masonry Paint On A Basement Concrete Wall
If your basement concrete is relatively dry and free of efflorescence, you can use masonry paint to improve appearance and add a layer of moisture resistance, but you’ll need to prep the surface properly and pick the right product for the conditions.
You’ll clean, etch, and repair cracks so the concrete texture is uniform and paint bonds well. Choose masonry paint rated for basements for long-term paint durability and mild vapor permeability. Apply a suitable primer if recommended. Follow manufacturer drying times and apply two thin coats.
- Clean and etch.
- Repair and smooth texture.
- Apply paint per instructions.
Does Tinting Primer Or Paint Affect Adhesion?
Curious whether tinting primer or paint will change how well it sticks? You’ll find tinting impact is usually minimal if you use high-quality, masonry-rated products. Small colorant additions seldom alter binder performance, but heavy tints can modify viscosity and drying time.
Focus on adhesion factors: surface profile, cleanliness, moisture content, and product compatibility. Always follow manufacturer limits for tint load and test a small area when using deep or custom colors.
If adhesion issues appear after tinting, strip and reapply an untinted primer designed for concrete, then topcoat with your chosen tinted paint following recommended cure times.
How To Calculate Paint And Primer Quantities For Concrete Walls
Start by measuring the wall’s length and height to get the exact surface area you’ll be painting.
Check the primer and paint manufacturer’s coverage rates and add 10–15% for wastage, texture, and touch-ups.
That’ll give you the total liters or gallons of primer and paint to buy.
Surface Area Measurement
Because accurate measurements reduce waste and save money, you’ll want to measure every wall and opening before buying paint or primer. Measure height and width of each wall, subtract doors and windows, and record square footage. Note textured surfaces—they may need more primer. Keep a running total and round up slightly.
- Use a tape measure, laser measure, and calculator for speed and accuracy.
- Account for trim zones separately if you plan different colors or detailed color mixing.
- Inspect and clean tools; tool maintenance ensures measurements and application stay consistent.
Convert total square feet to gallons using manufacturer’s coverage data.
Coverage And Wastage
With your total square footage in hand, you can determine how much primer and paint you’ll actually need by comparing that number to the manufacturer’s stated coverage and factoring in wastage for textured concrete.
First, divide square footage by coverage per gallon to get base gallons for primer and paint.
Add 10–20% for texture variation and cutting in around edges; rougher surfaces need more.
If you’re doing color blending or switching shades, budget extra for test patches and touch-ups.
Round up to the nearest available can size and keep leftover sealed for repairs—it’s cheaper than running out mid-job.
Preparing Surrounding Areas: Masking And Protection
Before you pick up a brush, protect everything around the wall so paint mistakes won’t become costly repairs later. You’ll prep floors, fixtures, and plants; tape edges precisely to allow color matching for trim and avoid bleed under when you try decorative techniques. Work from top down, keeping tarps taut and weighted.
- Cover floors and nearby plants with drop cloths; secure edges with tape.
- Mask windows, trim, and hardware with painter’s tape rated for concrete paint.
- Create clean breaklines using straightedge and tape so your decorative techniques stay crisp and accidental splatter is contained.
Best Brushes, Rollers, And Sprayers For Concrete
When you’re ready to apply paint, choosing the right tools makes the job faster and gives a more durable finish. Use stiff nylon or polyester brushes for edges and textured areas; they’ll hold up to masonry paints and help with color matching at corners.
For large flat surfaces, pick a ¾” to 1″ nap roller made for masonry—it loads thicker coats and reaches into pores.
For textured or high walls, a pneumatic or electric airless sprayer speeds work and creates even decorative finishes when controlled.
Clean and maintain equipment after each use to preserve performance and color fidelity.
How To Apply Primer To New Concrete: Step By Step
After you’ve chosen the right brushes, rollers, or sprayer, prepping and priming the new concrete is the next step to guarantee paint adheres and lasts. Sweep and wash the wall, repair cracks, then let it dry fully.
Choose a masonry primer suited to concrete; consider how it interacts with your color options and planned texture finishes. Apply in even coats, working top to bottom. Follow manufacturer dry times before recoat.
- Use a nylon brush for edges.
- Roll large areas with a short-nap roller.
- Lightly mist with a sprayer for porous spots.
How To Apply Topcoat Paint For Even Coverage
Since you’ve prepped and primed the concrete correctly, apply the topcoat with steady, overlapping strokes to make certain even coverage and avoid lap marks. Work in manageable sections, maintaining a wet edge so the paint levels uniformly.
Thin coats dry faster and reduce texture differences; wait recommended dry times between coats.
Monitor color blending at joins to prevent visible gradients, feathering slightly to merge areas. Check for drips and back-roll any seams while paint’s wet.
Choose a topcoat with the desired finish sheen and apply consistent pressure. Inspect under varied light and add a final light coat if needed.
Proper Roller Technique To Avoid Lap Marks
Although lap marks can ruin an otherwise smooth finish, you can prevent them by using the right roller technique and maintaining a wet edge as you work. Start each section with a fully loaded roller, overlap each pass by 50%, and keep a consistent pressure so texture and color matching stay uniform.
Roll in a “W” pattern, then fill without lifting to avoid abrupt edges that break a pattern design. Work in manageable areas so paint doesn’t skin over. Clean and replace rollers when they clog to preserve finish. Check progress often in natural light to catch laps before they set.
- Load roller evenly
- Overlap 50%
- Maintain wet edge
Spray Application Tips And When To Choose Spraying
If you’re covering a large, textured concrete wall or need fast, even application, spraying can save time and improve coverage. Choose a sprayer rated for masonry or thick coatings, pick the right tip size, and thin the paint only as the manufacturer recommends.
Use steady passes, maintain consistent distance and overlap, and practice on scrap so you get uniform coverage without runs.
When To Spray
When you’re tackling a large, flat concrete wall or need a smooth, factory-like finish, spraying can save time and give more even coverage than brushes or rollers. You’ll choose spraying when speed, consistent texture, and tight color matching matter, especially for large areas or repairs that must blend.
Spraying also helps uniform paint durability across porous surfaces. Consider these triggers:
- Big surface area where rollers are too slow.
- Projects requiring seamless color matching between panels or patches.
- Jobs demanding a thin, even coat for maximum paint durability and reduced film buildup.
Spray Equipment Selection
Because choosing the right sprayer determines finish quality and job speed, you’ll want to match equipment to wall size, paint type, and surface texture.
For small walls, use a handheld HVLP or airless mini; for large exterior walls, choose a high-capacity airless sprayer for steady atomization.
Consider tip size and pressure to handle thicker masonry paints.
Check compatibility with solvent or water-based formulas, and plan color mixing in batches to maintain consistency.
Bring proper filters and hoses, and set up secure paint storage on site to prevent contamination or curing.
Rent if occasional; buy for frequent, large jobs.
Technique And Coverage
Although spraying speeds up large jobs, you should pick the method that matches the wall’s size, texture, and the paint’s viscosity. When you spray, keep the nozzle moving evenly to avoid drips and guarantee texture consistency; overlap passes by about 30% for uniform coverage.
For detailed areas, switch to brush or roller to control color blending and reach crevices. Monitor spray pressure and thin paint only as manufacturer recommends to maintain adhesion.
- Test spray pattern and adjust distance for even laydown.
- Use back-and-forth passes with 30% overlap.
- Finish edges with a brush for crisp lines and touch-ups.
Drying And Recoat Times In Different Climates
Since humidity and temperature directly affect how paint dries on new concrete, you’ll need to adjust your timing based on local climate conditions.
In cool, dry climates, allow longer open time before recoat—typically 24 hours—so paint bonds to variations in concrete texture and guarantees reliable color matching.
In warm, low-humidity areas, tack-free time shortens; you can often recoat within 4–8 hours, but watch for rapid flash drying that can trap solvents.
In humid or coastal regions, expect 48 hours or more; use touch tests and manufacturer specs.
Always test a small area to confirm proper adhesion before full recoating.
How Temperature And Humidity Affect Curing And Paint
You’ll want to aim for moderate temperatures—typically 50–77°F (10–25°C)—for proper concrete curing, because too-cold or too-hot conditions slow strength gain or cause cracking.
High humidity slows surface drying and can prolong recoat times, while very low humidity speeds evaporation and raises the risk of shrinkage and powdering.
Also watch for big temperature swings between day and night, since rapid fluctuation can stress curing concrete and affect how well paint bonds.
Ideal Curing Temperatures
When you cure new concrete, temperature and humidity control determine how quickly hydration completes and how well paint will adhere and look. Get them wrong and you risk weak, porous concrete or paint that peels, cracks, or blisters.
Aim for 50–70°F (10–21°C) for standard curing so strength and surface integrity develop. Extreme heat speeds hydration too fast, risking surface etching and poor concrete coloring, while cold stalls curing.
Protect from freeze or overheating, and use insulated blankets or shade. Monitor temps for first 7 days; adjust methods if conditions deviate.
- Maintain 50–70°F range.
- Avoid rapid temperature swings.
- Insulate when needed.
Humidity’s Impact On Drying
Although temperature sets the pace, humidity controls how moisture leaves the concrete and how paint bonds to it. You’ll notice high humidity slows drying, keeping the surface damp longer and risking poor adhesion or blistering.
Low humidity speeds evaporation, which can cause uneven curing and alter surface texture, making the finish look patchy. Monitor relative humidity and delay painting until concrete reaches recommended moisture levels.
Use a moisture meter and allow extra curing time in humid conditions. For consistent color matching, test small areas after proper drying; moisture-related variation can skew the final hue and ruin coordinated finishes.
Temperature Fluctuation Effects
Because concrete and paint cure through chemical reactions that depend on temperature and moisture, fluctuating conditions can derail both processes and show up as visible defects. You must control temperature fluctuations and humidity during curing to prevent weak bonds, cracking, blistering, and uneven sheen.
Rapid cooling slows cure; heat accelerates solvent loss and causes paint expansion, leading to blisters. Monitor conditions, follow manufacturer windows, and delay painting if swings exceed recommendations.
- Schedule work when forecasts predict stable temps and moderate humidity.
- Use heaters, coolers, or humidifiers to maintain consistent curing conditions.
- Allow extended cure times after extreme temperature swings.
Painting Exterior Retaining Walls: Extra Considerations
If your retaining wall faces soil, water, or varying sun exposure, you’ll need to plan differently than you’d for a standard exterior wall. You’ll assess drainage, water runoff, and moisture barriers before painting.
Clean efflorescence and repair cracks; use breathable, masonry-specific primers and flexible coatings to accommodate movement.
Remove efflorescence, patch cracks, then apply breathable masonry primer and flexible coating to accommodate wall movement.
Consider concrete texture when choosing application methods—spray for rough, brush/roller for smoother surfaces.
Prioritize color selection to minimize heat absorption and blend with landscaping.
Use mildew-resistant paint near damp soil, and schedule coats during stable, dry weather.
Regular inspections and touch-ups will extend the finish and protect the structure.
Painting Basement And Interior Concrete Walls: Key Differences
When you paint basement concrete, moisture control becomes your top priority because dampness can ruin primers and finishes.
Inside above-grade rooms, you’ll worry less about vapor barriers and more about choosing the right finish and texture for aesthetics and durability.
Knowing which areas need waterproofing versus which can use smoother, decorative coatings will guide your product and prep choices.
Moisture Control Differences
Although both basement and above-grade interior concrete can feel damp, controlling moisture is more critical in basements because they’re below ground and exposed to soil moisture and hydrostatic pressure.
You need to evaluate moisture sources before painting: unfinished curing can trap water, so check concrete curing time and use proper tests. Install or verify moisture barriers and drainage if needed.
If moisture testing passes, choose breathable primer and paint systems rated for masonry.
- Test: use a calcium chloride or relative humidity test.
- Seal: repair cracks, add moisture barriers where accessible.
- Monitor: recheck humidity before finishing.
Finish And TextureChoices
Because basements face higher moisture and potential efflorescence, you’ll want finishes and textures that hide imperfections but still breathe. For basements, choose breathable masonry paints or mineral silicate coatings that resist salt migration and offer modest texture to conceal hairline cracks.
Upstairs interior concrete can take smoother, low-VOC latex with satin or eggshell sheens for easy cleaning.
Consider color selection carefully: lighter tones open spaces, darker accents mask stains.
Prioritize finish durability where traffic or abrasion occurs—tougher coatings or clear sealers on lower walls.
Test samples on-site to confirm appearance, adhesion, and moisture compatibility before committing.
How To Paint Concrete Blocks Vs. Poured Concrete
If you’re deciding whether to paint concrete blocks or poured concrete, know that each surface needs a different prep and paint approach because of texture, porosity, and joint seams. You’ll choose primers, fill joints, and pick finishes with Color psychology and decorative finishes in mind to match mood and style. Address block cavities differently than smooth poured walls.
- Clean and etch: blocks absorb more; use stronger etch and masonry primer.
- Repair: mortar joints need patching; poured concrete may just need hairline crack repair.
- Paint choice: use breathable masonry paint on blocks; flexible acrylics suit poured concrete.
Dealing With Vertical Runs, Drips, And Sagging
After you’ve prepped and primed the surface, watch for vertical runs, drips, and sagging as you apply paint—these flaws stand out on concrete’s flat planes and won’t hide once the coat dries.
Work from top to bottom, using thin, even coats to control drips. Smooth any sagging immediately with a loaded brush or roller, feathering edges to prevent texture variation.
Inspect under good light for tiny runs before the paint skins over. Sand or scrape cured defects, then spot-prime and repaint.
Maintain steady speed and consistent pressure to preserve color consistency across the wall.
How To Add Water Repellents Or Sealers After Painting
Once your paint is fully cured, you’ll need to pick a sealer that matches the paint type and the wall’s exposure to moisture.
Choose breathable silane/siloxane or acrylic sealers for exterior concrete and water-based sealers for interior painted walls so you don’t trap moisture.
Apply the sealer at the manufacturer’s recommended timing and coverage rate to guarantee proper protection without harming the finish.
Choosing The Right Sealer
Wondering which sealer will actually protect your freshly painted concrete wall? You’ll want one that respects surface texture and preserves color matching. Choose breathable, UV-resistant, and appropriate gloss level to maintain appearance without trapping moisture.
- Silane/siloxane: Penetrates for water repellency, keeps texture natural, minimal sheen.
- Acrylic clearcoat: Enhances color matching and sheen, good for higher traffic areas, film-forming.
- Epoxy/polyurethane: Tough, glossy finish for protection where abrasion matters, may alter texture and color slightly.
Test a small area to confirm compatibility with paint and substrate before sealing the whole wall.
Proper Application Timing
Although you should let the paint cure fully before applying any water repellent or sealer, the exact wait depends on paint type and environmental conditions. Check the paint manufacturer’s cure time and confirm by touch and adhesion tests.
You’ll plan timing around humidity and temperature—typically 24–72 hours for latex, longer for oil-based or low-VOC formulations.
Test a small patched sealer area to guarantee no discoloration or finish change that could affect color psychology or long-term appearance.
For historic or decorative projects influenced by historical applications, document materials and wait longer to protect adhesion and preserve desired tones.
Maintenance Tips To Keep Painted Concrete Looking Good
Because painted concrete weathers differently than other surfaces, you’ll need a simple regular maintenance routine to keep the finish looking fresh and protected.
Because painted concrete weathers uniquely, establish a simple, regular maintenance routine to keep finishes looking fresh and protected.
Check monthly for dirt, mold, or efflorescence and clean gently with a mild detergent and soft brush. Rinse thoroughly and let dry before any touch-ups.
Preserve creative finishes and decorative techniques by using compatible touch-up paint and feathering edges to blend. Reapply a breathable sealer every few years if recommended for your paint type.
Monitor high-traffic areas and address chips promptly to prevent moisture intrusion.
- Inspect and clean
- Touch up and blend
- Reseal as needed
Common Painting Mistakes And How To Avoid Them
When you rush prep, skip primers, or use the wrong paint, the finish will fail fast and cost you time and money. You should clean, etch, and let concrete fully dry before painting.
Don’t apply paint in extreme temperatures or on damp surfaces. Choose a masonry primer and paint formulated for concrete; that prevents adhesion problems and uneven sheen.
Test color matching on a small area and view it in different light. If you want decorative finishes, practice techniques on a scrap panel first.
Use proper tools, follow manufacturer instructions, and allow full cure times to guarantee a durable, attractive result.
Troubleshooting Peeling, Blistering, And Flaking
If your paint is peeling, blistering, or flaking, you’ll want to tackle the root cause before patching — otherwise the problem will come back. Inspect for moisture, poor adhesion, or incompatible color mixing and finish choices. Use safety gear when testing surfaces and scraping loose paint.
- Check moisture sources (leaks, rising damp) and fix them before repainting.
- Test adhesion: sand glossy areas, clean with a concrete cleaner, then prime with a compatible primer.
- Avoid improper color mixing or incompatible systems; follow manufacturer specs and apply recommended coats.
Repair only when substrate is dry and stable.
How To Remove Old Paint From Concrete Surfaces Before Refinishing
Before you refinish, strip away loose or failing paint so the new coating can bond to sound concrete. Begin by evaluating areas with color testing to identify underlying stains or previous coatings that affect adhesion.
Use a stiff nylon brush, scraper, or pressure washer for large sections, and employ chemical strippers or a grinder only where necessary. After removal, rinse thoroughly and let dry.
Sand rough spots for texture smoothing, filling pits with appropriate patching compound. Vacuum and wipe surfaces to remove dust.
Inspect again; any remaining paint must be removed before applying primer and topcoat.
Eco-Friendly And Low-VOC Options For Concrete Paint Jobs
Because indoor air quality and environmental impact matter, you can opt for low-VOC and eco-friendly concrete paints that cut fumes and toxins without sacrificing durability. Look for EPA-certified or GreenGuard-rated eco friendly coatings and water-based acrylics for easy cleanup and VOC reduction.
Prep the surface well—cleaning and priming boosts adhesion so thin, low-VOC layers last. Apply in ventilated conditions and use proper respirators if needed.
Consider sealers labeled low-VOC to protect the finish without adding harmful emissions.
- Choose certified water-based acrylics.
- Use low-VOC sealers and primers.
- Confirm proper ventilation.
Cost Checklist: Budget Estimates And Time Requirements
When planning your concrete wall paint project, account for both upfront material costs and the time you’ll spend on prep, application, and drying so you don’t get blindsided by overruns.
First, do a cost analysis: estimate primer, paint, sealant, brushes, rollers, tape, patching compound, and protective gear. Factor in tool rental or contractor quotes if needed.
Start with a clear cost breakdown: primer, paint, sealant, tools, patching supplies, and any rental or contractor fees.
Next, use strict time management: block realistic windows for surface repair, priming, coats, and cure times so weather or delays won’t force rush jobs.
Add a contingency of 10–15% for unexpected repairs or extra coats to keep your budget and schedule intact.
Project Timeline: Step-By-Step Schedule For A Durable Finish
If you want a durable finish, follow a clear, day-by-day schedule that breaks the job into surface prep, priming, painting, and curing so you can avoid rushed steps and costly rework.
Plan three main phases over a week: inspect and repair on day one, clean and etch on day two, and allow 24 hours before priming.
Match concrete aesthetics with proper texture and your color selection early to order supplies. Stick to drying times on labels. Use light coats and full cure times before heavy use.
Track progress and note weather to prevent mistakes.
- Prep/repair
- Prime/paint
- Cure/inspect
Frequently Asked Questions
Can Painted Concrete Be Colored With Integral Pigment During Casting Instead?
Yes — you can use integral pigment during casting to achieve casting color throughout the concrete. You’ll get more uniform, durable color than surface paint, but plan mixes, dosage, and testing to guarantee consistent results and desired hue.
Will Radiant Heating in Walls Affect Paint Adhesion or Curing?
About 30% fewer coating failures occur when substrates are properly cured; you’ll find radiant heating can speed drying but may reduce paint adhesion if too hot or uneven, so you’ll control temperature and follow manufacturer curing guidelines.
Can You Paint Over Existing Waterproofing Membranes or Damp-Proof Coatings?
You can sometimes paint over waterproofing membranes or damp-proof coatings, but you’ll need to verify waterproofing compatibility and perform thorough surface preparation — clean, dry, sand, and use a recommended primer to guarantee adhesion and durable coating performance.
How Do You Prevent Efflorescence Recurrence After Painting?
You prevent efflorescence recurrence by addressing efflorescence causes, fixing water sources, cleaning salts, applying proper surface sealing techniques like breathable sealers or silane/siloxane treatments, and using vapor-permeable paints so moisture can escape.
Are Anti-Graffiti Coatings Compatible With Masonry Paints?
Yes — you can use anti-graffiti coatings over masonry paints, but you’ll check paint compatibility first. You’ll perform thorough surface preparation, verify cure times, and test adhesion to confirm the coating bonds and cleans graffiti effectively.
Conclusion
You can paint new concrete now—if you’ve let it cure, tested for moisture, and prepped the surface properly. Don’t worry if that sounds like a lot; taking the time to clean, etch, and prime prevents peeling and saves you time later. Pick low-VOC paint if you’re sensitive to fumes, budget for materials and curing time, and follow the step-by-step timeline. With patience and good prep, you’ll get a durable, attractive finish.