How to Paint Over Gloss Paint on Walls Easily
You can paint over gloss paint easily if you prep first: clean thoroughly to remove grease, scuff-sand or use a deglosser to dull the sheen, repair chips, then wipe away dust. Apply a high‑adhesion or bonding primer suitable for glossy surfaces, let it dry fully, and finish with two thin, even topcoats using a short‑nap roller and quality synthetic brush. Follow dry times and conditions for best results, and keep going to learn tips for tools, primers, and troubleshooting.
Quick Answer: Can You Paint Directly Over Gloss Paint?
If your gloss paint is in good condition, you can paint over it—but you’ll need to prepare the surface first. You’ll clean, sand lightly, and apply a quality primer to guarantee adhesion; glossy finishes repel new coats otherwise.
Choose paint with the right sheen and consider color psychology when picking hues—matte tones soften spaces, while brighter finishes energize them.
Pick the right sheen and hue—matte calms a room, brighter finishes lift energy and mood
If you want lower VOCs, pick eco friendly paints that still offer good coverage over primer.
You’ll test a small patch to confirm adhesion and final appearance, then proceed with thin, even coats for a durable, professional result.
Paint-Over vs Full Removal: Which Projects?
If the gloss is in good shape and you just want a color change, you can usually paint over after proper sanding and priming.
But if the surface is flaking, uneven, or you need a dramatic finish change, stripping to bare substrate is often worth the extra time and cost.
We’ll compare which projects suit a quick paint-over versus a full removal, and what the cost and time tradeoffs look like.
When To Paint Over
Wondering whether to paint over glossy walls or strip them down completely? If the surface is sound, without flaking or heavy staining, you can paint over gloss to save time and waste.
Choose primers and topcoats formulated for adhesion, and consider color psychology when selecting finishes—warmer tones soften shine, while cool hues can heighten it.
For low-impact choices, pick eco friendly paints with low VOCs to improve indoor air and simplify cleanup.
Paint-over suits budget updates, rentals, or quick style shifts.
Opt for removal only if gloss is damaged, layered, or you need a radically different texture.
When To Strip
Decide to strip glossy paint when the finish is compromised or you need a fundamentally different surface—peeling, severe yellowing, multiple thick layers, or deep stains usually mean painting over won’t give a durable, attractive result. You should strip when substrate integrity, adhesion, or desired aesthetics demand it.
Consider color psychology and how a fresh neutral base interacts with interior lighting before committing. Typical triggers include:
- Flaking or bubbling across large areas
- Multiple old layers creating an uneven profile
- Stains or smoke damage seeping through
- Desire for dramatic color shifts or true undertones
- Structural repairs exposing bare substrate
Strip when longevity and finish quality matter.
Cost And Time Tradeoffs
Choose paint-over when you want the quickest, cheapest refresh, and choose full removal when long-term durability or perfect results justify the extra work and expense.
You’ll weigh Cost analysis and Time management: painting over saves money on labor and materials and finishes in a day or two, ideal for rentals or quick updates.
Full removal costs more—strippers, sanding, repairs—and demands more time, but prevents peeling and guarantees flawless adhesion for high-end or high-traffic rooms.
Assess surface condition, timeline, and resale goals. If unsure, test a small area: results guide whether minimal effort or full restoration is worth it.
Why Glossy Paint Causes Adhesion and Finish Problems
Because glossy paint has a hard, smooth surface, new coatings struggle to grab onto it, which leads to poor adhesion and visible finish problems if you don’t prepare the surface properly. You need to understand why a gloss finish and light reflection expose flaws and resist new layers.
Glossy finishes are hard and smooth, so new coatings won’t stick well—prepare and scuff to avoid visible flaws.
Common issues include uneven sheen, peeling, and blotchy coverage. Addressing them starts with proper cleaning and scuffing so primers and topcoats bond.
- Smooth surface repels water-based primers
- High sheen shows brush marks and streaks
- Existing gloss hides porosity changes
- Oils and residues prevent adhesion
- Improper sanding creates shadowing
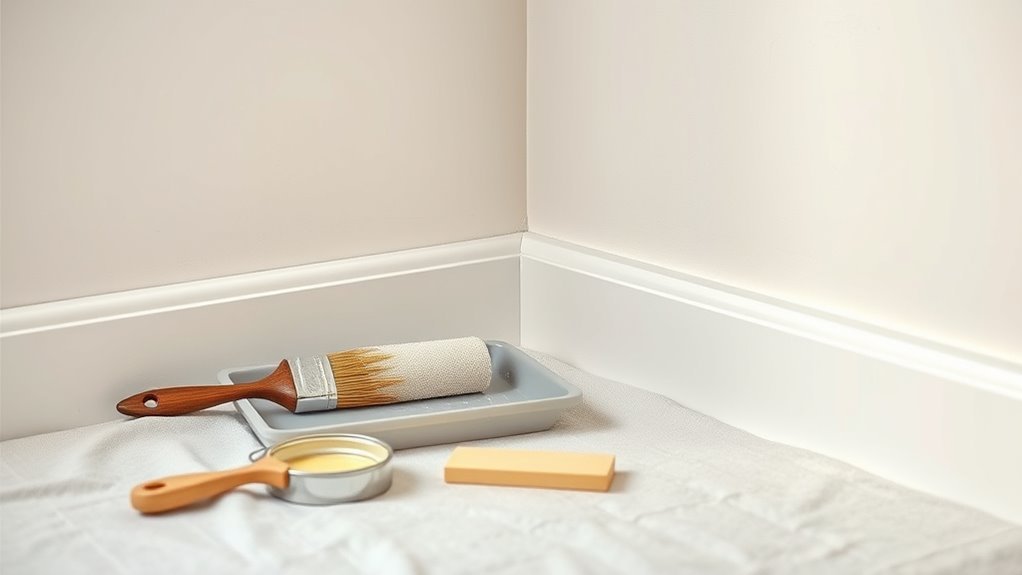
Tools and Materials to Gather Before You Start
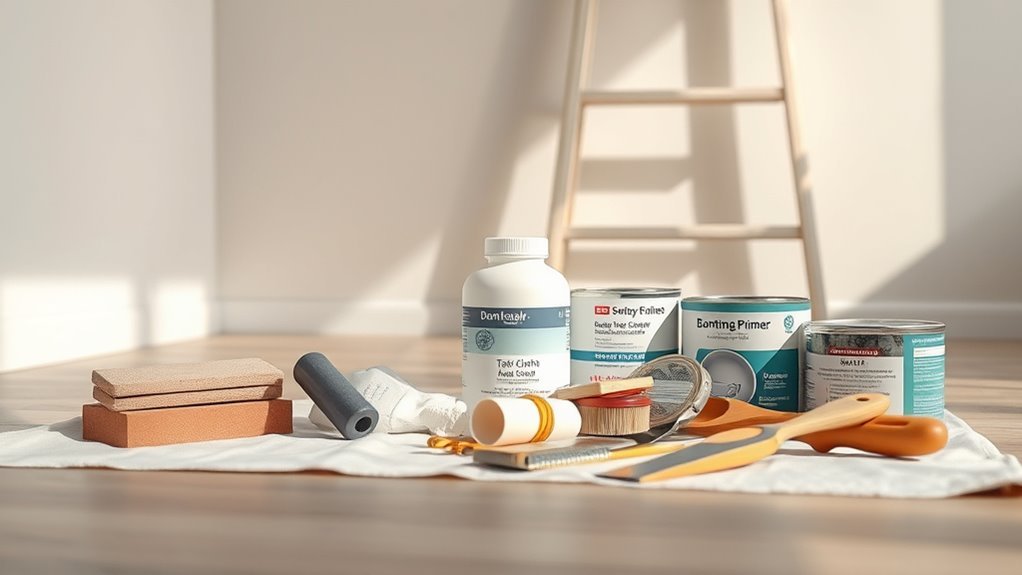
Now that you know why glossy surfaces resist new coatings, gather the right tools and materials to make the job go smoothly. You’ll need fine- and medium-grit sandpaper, a sanding block, tack cloths, high-quality brushes and rollers, drop cloths, painter’s tape, a sturdy ladder, and a respirator or mask.
Have a mild detergent, sponges, and rags for cleaning, plus a bucket for rinsing. Keep test swatches to evaluate color psychology on the wall and reference photos of historical finishes if matching texture or tone.
Organize supplies nearby so you work efficiently and safely without interruption.
How to Choose the Right Primer for Glossy Walls
Before you pick a primer, you’ll want to assess how much prep the glossy surface needs—cleaning, sanding, or deglossing can change your choice.
Consider primer types like bonding, shellac, or high-adhesion latex based on that prep and the topcoat you plan to use.
Check drying and recoat times so your schedule and ventilation match the primer’s requirements.
Surface Preparation Needs
When painting over glossy walls, pick a primer formulated to adhere to slick surfaces and block stains so your new finish won’t peel or show imperfections. You’ll prep carefully: clean, sand, and degrease to help adhesion and reveal flaws. Consider how color psychology affects final appearance; lighter primers can influence tinting. If you prefer eco friendly paints, confirm primer compatibility. Follow these steps:
- Wash walls with mild detergent, rinse thoroughly.
- Sand glossy sheen lightly, wipe away dust.
- Use a degreaser for oily spots.
- Repair dents and fill gaps smoothly.
- Allow proper drying before priming and painting.
Primer Type Options
Which primer should you pick to guarantee new paint bonds to glossy walls? Choose a high-adhesion bonding primer for slick surfaces; it chemically grips gloss and prevents peeling.
For stains or tannin bleed, use an oil-based or shellac primer.
If you prefer lower odor and easier cleanup, select a water-based bonding primer rated for glossy substrates.
Consider how primer affects color psychology: tinted primers can reduce the number of topcoats and influence final hue.
Also think about paint texture—some primers smooth imperfections while others leave enough tooth for better topcoat grip.
Match primer to substrate and your finish goals.
Drying And Recoat Times
Curious how long you’ll wait between coats? You’ll plan around primer type, humidity, and temperature to avoid tacky finishes and see true color.
Consider how drying affects color psychology—delays can alter perceived hue. Choose eco-friendly options if ventilation’s limited.
- Oil-based primers: longer cure, wait 24–48 hours.
- Shellac primers: quick tack-free, recoat in 1–2 hours.
- Water-based primers: 2–4 hours typical.
High humidity: add several hours to all times.
Cold conditions: extend recoat windows; test a small area first.
Always follow manufacturer times and do a touch test before recoating.
Bonding Primer vs Stain-Blocking vs Shellac: Which to Pick?
If you’re tackling glossy walls, choosing between a bonding primer, a stain-blocking primer, or shellac sealer can make or break your finish; each product targets different problems and prepares the surface in specific ways.
Pick a bonding primer when adhesion’s the main issue—you’ll get dependable grip for new paint and consistent color psychology effects when layering hues.
Use stain-blocking primer for tannin, water, or smoke stains to prevent bleed-through.
Reserve shellac sealer for stubborn stains or knots; it’s fast and effective but smells strong.
Consider eco-friendly options if ventilation or low-VOC needs matter to you.
How to Test Adhesion on a Small Glossy Patch
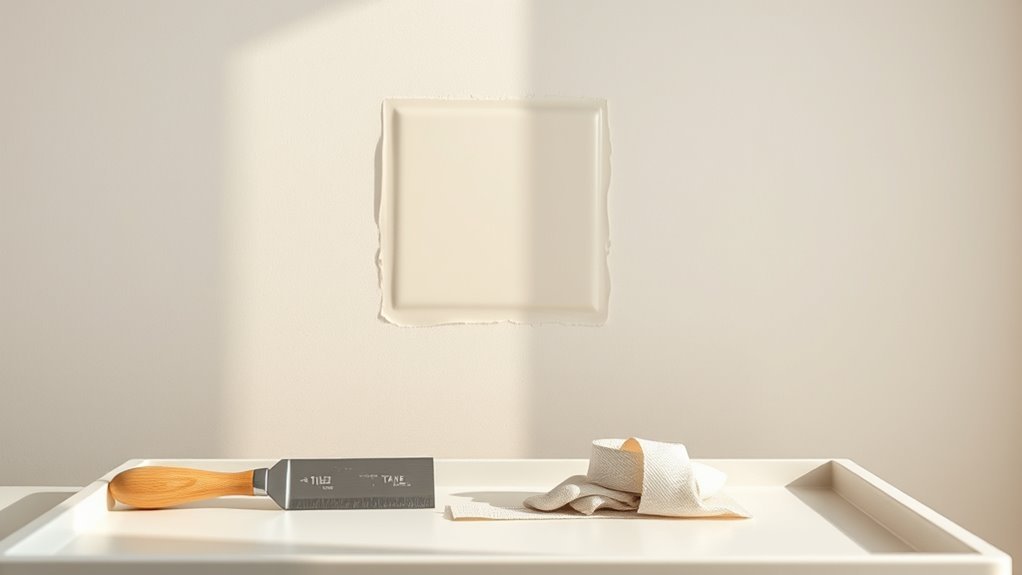
Want to know if your new paint will stick to a glossy patch? You’ll do a quick adhesion check before committing, combining simple tools and observation. Prep a small, discreet area and test one coat of your chosen primer or eco friendly finishes sample; wait, then assess.
Want to see if paint will stick to glossy spots? Test a small, sanded area with primer, cure, tape, and inspect.
- Lightly sand a 2″ square and wipe debris.
- Apply primer or finish swatch and let cure per instructions.
- Press tape firmly, then remove at 45°.
- Inspect for peeling or lifting.
- Note adhesion and color psychology impact on finish appearance.
If paint stays, proceed; if not, choose a stronger bonding solution.
How to Clean Glossy Surfaces for Best Primer Bond
Before you prime, you’ll want to remove all grease and grime so the new coating can stick.
Scuff or degloss the surface with a fine abrasive, then rinse thoroughly to remove dust and residue.
Let the wall dry completely before applying primer.
Remove Grease And Grime
Why bother cleaning glossy walls thoroughly? You want primer to stick, especially if you’re switching to eco friendly paints or matching historical finishes.
Start by removing grease and grime with simple steps that don’t damage the sheen.
- Wear gloves and ventilate the room.
- Mix mild detergent and warm water; test a hidden spot.
- Use a soft sponge; scrub visible oily spots gently.
- For stubborn grease, apply a diluted trisodium phosphate alternative sparingly.
- Wipe with a clean damp cloth and let dry completely.
Clean surfaces guarantee better adhesion and a smoother, longer-lasting topcoat.
Degloss And Rinse Well
Although glossy surfaces look smooth, they repel primer unless you dull them first; deglossing gives primer something to bite into. Start by sanding lightly with fine-grit sandpaper or use a chemical deglosser following manufacturer instructions.
Work evenly to avoid shiny spots that hurt texture blending later. After deglossing, wipe thoroughly with a damp cloth or tack rag to remove dust and residue; rinse with clean water and let dry.
Proper prep guarantees primer adheres and helps with color matching when you topcoat. Test a small area to confirm adhesion and finish before committing to the whole wall.
Why Degreasing Matters and Which Cleaners to Use
If you skip degreasing, your new paint may not stick and will show drips, peel, or develop shiny spots where oils remain. You need a clean, grease-free surface so primer and paint bond reliably.
Use products suited to the old finish and any sensitive substrates; consider eco-friendly solutions when possible, and be cautious around historical paint removal to protect original layers.
- Dish soap and warm water for light oily films
- TSP or TSP substitute for heavy kitchen grease
- Citrus-based cleaners for milder solvent action
- Alcohol or acetone for spot prep
Rinse thoroughly and dry before priming.
How to Repair Dents, Chips, and Uneven Gloss Before Priming
First, check the wall for dents, chips, and areas where the gloss is uneven so you know what needs fixing.
Use a suitable filler to repair holes and chips, then let it dry fully.
Finally, sand the patched and glossy areas smooth and even so the primer will bond properly.
Assess Surface Damage
Before you prime, take a close look for dents, chips, and areas where the gloss varies—you’ll want a smooth, even surface so the new paint adheres and looks uniform. Walk the room in good light and note spots affecting wall texture and how color psychology might shift with uneven sheen. Prioritize repairs that catch the eye.
- Scan walls under raking light.
- Mark high-contrast chips and dents.
- Feel for bumps and rough patches.
- Check trim and corners for gloss mismatch.
- Photograph trouble spots for reference.
Decide repair sequence and necessary tools before priming.
Fill Dents And Chips
Now that you’ve identified the trouble spots, you’ll want to tackle dents, chips, and areas of uneven gloss so the primer can bond and the finish looks uniform. Remove loose flakes, clean with a damp cloth, then apply a lightweight filler to dents and chips. Press filler in, let it cure, and trim excess. Use a small putty knife for precision. Consider primer-compatible, eco friendly paints later when choosing finishes; be mindful of color mixing if spot-repairing. Test a tiny area. After filling, wipe dust away and inspect for levelness before priming.
| Tool | Purpose |
|---|---|
| Putty knife | Apply filler |
| Cloth | Clean surface |
| Filler | Repair dents and chips |
Smooth And Sand Evenly
When the filler’s cured and the surface is dry, sand each repair and the surrounding glossy area until the shifts are seamless and the sheen is dulled enough for primer to bite. You’ll work gradually, checking edges and feeling for ridges. Avoid aggressive sanding that creates low spots.
- Start with 120–150 grit to shape repairs
- Finish with 220–320 grit for a uniform surface
- Feather edges so transitions vanish under paint
- Wipe dust and inspect under varied lighting effects
- Compare against nearby finish to judge color contrast
Once even, primer will adhere consistently and final paint will look smooth.
Scuff-Sanding Glossy Paint the Right Way
Although glossy surfaces resist paint, you can quickly create proper adhesion by scuff-sanding them with the right tools and technique. Start by cleaning the wall, then use 220–320 grit sandpaper or a sanding sponge to dull the sheen—light, even strokes work best.
Focus on feathering edges where old paint meets repaired areas to aid texture blending and avoid visible shifts. Remove dust with a tack cloth before priming.
When choosing primer and topcoat, consider color matching to prevent undertone surprises. Scuff-sanding preserves existing finish integrity while giving new paint a reliable surface to bond to.
Liquid Deglosser vs Sanding: When to Use It?
If you’re tackling glossy walls, choosing between a liquid deglosser and sanding comes down to the condition of the finish and how much prep you want to do. You’ll pick a deglosser for light shine and minimal scuffs; sand when the gloss sheen is strong, or the surface is uneven.
Consider these quick guidelines:
- Use a deglosser for smooth, intact gloss and minor adhesion needs.
- Sand when you see peeling, rough spots, or heavy buildup.
- Color contrast: sand more when switching to a much darker or lighter color.
- Deglossers save time but need proper ventilation.
- Sanding gives mechanical bite for primers.
How to Mask and Protect Trim, Floors, and Fixtures
Ready to protect the areas you’re not painting? Start by removing loose items and covering furniture protection with drop cloths. Tape trim with painter’s tape, press edges for crisp lines, and mask outlets and fixtures. Use plastic sheeting for floors; weight edges to prevent trips. For windows and hardware, wrap tightly and label removed pieces. Keep a small utility knife handy for cutting tape and trimming edges. Plan color mixing station away from masked areas to avoid spills. Follow the table below for quick reference.
| Item | Protection |
|---|---|
| Trim | Painter’s tape |
| Floors | Plastic sheeting |
| Fixtures | Zip bags |
| Outlets | Tape covers |
| Furniture | Drop cloths |
Choosing Between Brush, Roller, and Sprayer
You’ll pick a brush, roller, or sprayer based on surface texture, room size, and the finish you want.
A brush gives control for edges and trim.
A roller covers flat walls quickly but can leave texture.
A sprayer speeds large jobs and hides brush marks but needs more prep.
We’ll compare brush vs. roller advantages and go over the pros and cons of using a sprayer so you can choose the right tool.
Brush Versus Roller
While a brush gives you control for cutting in and tight spots, a roller covers large flat areas faster and a sprayer delivers the smoothest finish—so you’ll want to match your tool to the job and your skill level. You’ll choose based on surface texture, trim detail, and desired speed. Consider these quick points:
- Brush: precise edges, good for trim and corners.
- Roller: efficient on walls, pick nap based on texture.
- Technique: maintain a wet edge to avoid lap marks.
- Color mixing: stir thoroughly to keep consistency.
- Paint storage: seal cans between sessions to prevent skinning.
Pros And Cons Of Sprayer
Want the smoothest, fastest coverage? You’ll love a sprayer for large gloss walls—it gives an even finish, hides brush marks, and speeds up work.
You’ll need skill to avoid runs and overspray, and masking becomes essential. Prep matters: sand, prime, and ventilate.
Sprayers use more paint, so weigh cost and eco-friendly options like HVLP and water-based formulas to reduce waste and VOCs.
For detail or small patches, a brush or roller still wins.
Consider color psychology when choosing sheen and hue—spray delivers a consistent tone, which helps your final color read accurately across the room.
Best Roller Nap and Brush Types for Primed Glossy Walls
A smooth, even finish on primed glossy walls starts with the right tools: choose a short-nap roller (1/8″–3/16″) for slick, sealed surfaces and a high-quality synthetic brush—nylon or polyester—for cutting in and smoothing edges. You’ll work faster and cleaner when tools match the surface sheen and paint type; consider color theory for edge blending and keep cans tightly sealed for proper paint storage.
- Short-nap roller for minimal texture
- High-quality synthetic angled brush for crisp lines
- Mini-roller for tight spots and trim
- Foam pads for touch-ups on sheen
- Clean, lint-free cloths for final smoothing
Priming Glossy Walls: Step-by-Step
Before you apply primer, sand and clean glossy walls thoroughly so the new coat will adhere—scuffing with fine-grit sandpaper and wiping with a degreaser removes sheen and contaminants that block bonding.
Tape trim and cover floors, then repair chips with flexible filler. Stir a high-adhesion primer and test a small patch to confirm grip and compatibility with your chosen finish.
Use a brush for corners and a short-nap roller for smooth wall texture; work in overlapping sections for even coverage. Let the primer set per label instructions, then inspect for missed spots.
Consider color psychology when picking primer tint to influence the final hue.
How Long to Wait Between Primer and Topcoat?
Check the primer can for the manufacturer’s recommended drying time, but plan on at least 1–4 hours in warm, dry conditions before applying the topcoat.
If it’s cooler or more humid, you’ll need to wait longer and maybe use a fan or heater to speed drying.
You’ll know it’s ready when the primer is dry to the touch, not tacky, and holds light pressure without peeling.
Drying Time Guidelines
Most primers need 1–4 hours to become touch-dry and 24 hours to fully cure, so wait at least the manufacturer’s minimum before applying your topcoat and longer in cool or humid conditions. You’ll want consistent timing to avoid adhesion issues and visible flaws.
Consider primer type, paint system, and whether you chose eco-friendly options.
Use this checklist before coating:
- Confirm touch-dry time per label
- Verify recoat window to prevent lifting
- Allow full cure for heavy traffic areas
- Test a small patch before full topcoat
- Note color psychology effects after cure
Follow times precisely for best results.
Temperature And Humidity
Because temperature and humidity directly affect how primers cure, you’ll need to adjust your wait times when conditions stray from the label’s “ideal” range. If it’s cool or damp, add hours or even a day; if hot and dry, primer may be ready sooner but tackiness can persist. Check touch and adhesion rather than the clock.
Low humidity slows solvent evaporation; high humidity can cause blushing or poor bonding. Consider eco friendly options with low-VOC formulas that tolerate wider conditions.
Also think about color psychology—warm rooms dry slightly faster and may influence final sheen—so test a small area first.
Recoat Window Signs
Now that you’ve accounted for temperature and humidity, it’s time to contemplate how long to wait before applying your topcoat to window signs. You want adhesion, clarity for Color psychology effects, and a durable finish.
Generally, wait 1–4 hours for touch-dry primers, and 24 hours for full cure. Longer in cool or humid conditions.
Consider Eco-friendly options that dry differently; check the manufacturer’s recoat times.
Follow this quick checklist:
- Read product label for recoat window signs guidance
- Do a small test panel to confirm adhesion
- Use a ventilated area to speed drying
- Avoid heavy coats that trap solvent
- Wait extra time in high humidity
Best Paints to Use Over Primed Glossy Surfaces
When you’ve prepped and primed a glossy surface, picking the right topcoat matters: choose paints formulated for adhesion and durability so your finish stays smooth and chip-resistant. You’ll want acrylic latex for ease, alkyd for tough wear, or hybrid formulas for balance. Consider color psychology when selecting sheen and hue—mattes calm, gloss enlivens. Look for eco friendly options with low VOCs if indoor air matters. Compare coverage, dry time, and recommended primers.
| Type | Best Use | Notes |
|---|---|---|
| Acrylic latex | Interior walls | Fast drying |
| Alkyd | Trim | Durable |
| Hybrid | High-traffic | Balanced properties |
How to Apply Latex Paint Over Primed Gloss
Ready to roll? You’ll prep the primed gloss, let it cure fully, then sand lightly for tooth. Use a quality latex and a synthetic brush or roller for even laydown. Consider color psychology and historical trends when choosing hue—lighter shades hide imperfections, darker create drama.
Ready to roll: prime, cure, sand for tooth, then use quality latex with synthetic tools for smooth, dramatic finishes.
- Clean surface with mild detergent
- Sand with 220-grit and remove dust
- Apply thin, even coat; avoid drips
- Wait recommended dry time between coats
- Lightly scuff between coats for adhesion
Finish with two coats for durability. Work in consistent strokes and maintain proper ventilation throughout.
How to Apply Oil-Based Paint Over Primed Gloss
If you want a tougher, glossier finish than latex provides, oil-based paint is a good choice over properly primed gloss. You’ll sand lightly, clean thoroughly, and apply a solvent-based primer designed to bond to glossy surfaces.
Work in a well-ventilated area, wear a respirator, and stir the oil paint slowly to avoid bubbles. Use high-quality brushes or a short-nap roller for even coverage, and allow longer dry times between coats.
Consider color psychology when choosing hues—oil’s depth enhances rich tones and recreates historical finishes faithfully. Clean brushes with mineral spirits and cure fully before heavy use.
Preventing Visible Brush Marks and Roller Stipple
Although gloss paints can highlight every stroke, you can minimize brush marks and roller stipple by choosing the right tools and technique. You’ll control finish and paint texture while keeping color psychology in mind so sheen doesn’t alter perceived hue.
Use consistent pressure and maintain a wet edge. Try these steps:
- Use a high-quality nylon/poly brush for smooth laying off
- Choose a short-nap, high-density roller to reduce stipple
- Load tools properly; avoid overloading or skimping paint
- Sand light between coats with fine grit for uniform texture
- Work in even sections, blending overlaps before drying
These tactics give a seamless, professional result.
Preventing Drips, Runs, and Lap Marks on Glossy Walls
You’ve reduced brush marks and stipple, now focus on avoiding drips, runs, and lap marks that stand out on glossy walls. Work in thin, even coats and keep a wet edge to prevent overlaps; glossy surfaces show edges immediately.
Use a high-quality angled brush for trim and a short-nap roller for flats, loading tools moderately so excess paint doesn’t drip. Smooth out any small runs quickly with a light brush stroke while paint’s wet.
Match sheen and color matching carefully to hide passages, and choose finishes with good paint durability to resist future imperfections and simplify touch-ups.
How Many Coats You’ll Likely Need (And Why)
Because glossy surfaces reflect more light and show imperfections, you’ll usually need more than one coat to get full, even coverage. Expect at least two coats after proper priming; sometimes a third thin coat fixes streaks and uneven sheen.
Consider these factors:
- Surface prep quality affects how many coats bond.
- Paint quality and pigment load determine hiding power.
- Drastic color combinations (dark over light) often demand extra coats.
- Drying time between coats prevents lifting and imperfections.
- Furniture placement may influence how thoroughly you paint edges and touch up.
Plan for two to three coats, adjust based on test patches.
How Changing Sheen (Gloss→Matte) Affects Coverage and Touch-Ups
Switching from a glossy finish to a matte one changes how much paint you’ll need and how repairs show up. When you do a sheen transformation, matte paints often hide imperfections but need more pigment and coats for full opacity.
Expect slightly increased consumption and plan for consistent roller technique to maintain coverage consistency across the wall. Touch-ups behave differently: matte blends better for small repairs, yet dry spots and sheen differences from old gloss can still show edge lines.
Feather your edges, sand glossy areas, and use a quality primer to even out absorption so touch-ups sit and match.
Matching Color and Hiding Underlying Gloss Tones
When painting over glossy walls, plan for the gloss to influence both color and sheen—you’ll need to neutralize reflections so the new finish looks even. Test patches first: shine alters perceived hue, so you’ll do Color matching on-site.
Use a bonding primer to aid Gloss hiding and to create uniform absorption. Check samples under different light.
- Pick a neutral primer tint
- Apply small test panels
- Observe at morning and evening
- Adjust topcoat shade as needed
- Use a low-sheen finish for blending
Trust your samples; they reveal how gloss affects the final color.
Repainting Glossy Trim and Doors: Tips and Order of Work
If you want clean, durable results, start by planning the sequence: prep, prime, and paint in that order, tackling trim and doors separately so each surface gets the proper attention.
First, remove hardware and label hinges; sand gloss lightly, clean dust, and mask nearby walls.
Prime with a bonding primer suited for glossy surfaces.
Paint trim first with a sash brush for crisp edges, then do doors laid flat to avoid drips.
Choose sheen and hue with color psychology in mind—trim often anchors a room.
For period properties, respect historical accuracy when selecting profiles and finishes to preserve character.
Troubleshooting Adhesion Problems After Painting
If your new paint is peeling or lifting, first check surface prep—was the gloss properly sanded and cleaned?
Consider whether the primer you used was compatible with both the old gloss and your topcoat.
Also check environmental factors like humidity and temperature during application, since they can ruin adhesion.
Surface Preparation Checks
Because poor adhesion usually shows up soon after painting, you should run a quick set of surface-prep checks before blaming the paint itself. Inspect for dust, grease, or wax residues, and note any glossy spots that needed deglossing. Remember how Color psychology affects room use when choosing finishes, and consider Eco friendly finishes if ventilation or sensitivity is an issue.
Then follow this checklist:
- Wipe surfaces with a suitable cleaner and rinse thoroughly.
- Sand glossy areas until dull and remove dust.
- Check for peeling or flaking edges and feather them.
- Ensure wall is fully dry before repainting.
- Test a small patch for adhesion.
Primer Compatibility Issues
When primer and topcoat aren’t chemically compatible, your new paint can peel, blister, or fail to bond despite flawless prep, so you’ll want to verify compatibility before you paint.
Check labels: oil-based primers pair poorly with some water-based topcoats unless the primer is labeled “universal” or “bonding.” Do a small adhesion test patch and score it to assess gloss adhesion before committing.
If you see lifting, switch primer types or use a specially formulated bonding primer.
Correct pairing improves paint durability and prevents costly rework, so don’t skip manufacturer guidance or compatibility charts.
Environmental Condition Effects
Although paint adhesion often looks like a simple chemistry problem, environmental factors you can’t see during application—like humidity, temperature swings, and poor ventilation—frequently cause peeling, bubbling, or soft spots after the job’s done.
You can troubleshoot by checking conditions and adjusting practices to protect finish and reduce environmental impact. Mind the room’s air quality and seasonal shifts; they’ll tell you why issues appeared.
Try these steps:
- Pause painting when humidity’s high or temps fluctuate.
- Improve ventilation to speed curing.
- Use heaters or dehumidifiers for steady conditions.
- Allow longer dry times between coats.
- Inspect and correct condensation sources.
How Humidity and Temperature Affect Gloss-Covering Jobs
If your room’s humidity is high or the temperature’s too low, paint won’t dry or adhere properly to glossy surfaces, so plan your gloss-covering job for a day when conditions are within the paint manufacturer’s recommended range.
You should prioritize humidity control and temperature regulation before you start: run a dehumidifier, use fans, or heat the room to the suggested range.
Cooler temps lengthen dry time and attract dust; excessive humidity causes blistering and poor adhesion.
Monitor conditions with a hygrometer and thermostat, wait for stable readings, and don’t rush coats—proper environment ensures smoother, longer-lasting coverage.
Fixing Common Finish Issues: Peeling, Bubbling, Orange Peel
Because glossy paints show flaws more than flat finishes, you’ll want to tackle peeling, bubbling, and orange peel promptly and methodically. First, identify cause: moisture, poor adhesion, or wrong primer. Repair small areas, clean, degloss, and spot-prime before repainting. Consider how touch-ups affect Color psychology in room perception and choose Eco friendly options when replacing coatings.
- Scrape loose paint and sand edges smooth.
- Pop bubbles, dry area, and recoat with appropriate primer.
- Lightly sand orange peel texture and feather.
- Use high-adhesion bonding primer on glossy surfaces.
- Match sheen for minimal visible repairs.
When to Strip Paint or Sand to Drywall
Before you decide to strip paint or sand down to the drywall, check how well the existing gloss is sticking—if it flakes or peels easily, you’ll need to remove it.
Inspect the wall surface for bumps, old texture, or thick buildup that sanding won’t smooth out.
Finally, evaluate the extent of damage—small chips can be sanded, but widespread failure often means stripping back to the drywall.
Assess Paint Adhesion
When you run your hand and a rag across the wall, pay attention to flaking, powdery residue, or areas where the new paint won’t stick — these are clear signs the existing gloss isn’t adhering and needs removal.
Assess adhesion quickly so you can decide whether to strip to drywall or sand. Consider how finish and primer will interact with Color psychology choices and Eco friendly pigments when planning.
Check for:
- Loose or peeling patches
- Powdery chalking beneath the gloss
- Areas where tape lifts paint
- Bubbling or blistering spots
- Wide cracks exposing substrate
If several items appear, strip to drywall.
Check Wall Surface
How do you decide whether to strip glossy paint back to drywall or just sand it? Inspect closely: run your hand for loose flakes and look for heavy gloss patches. If paint sheen varies wildly or texture hides bubbles and drips, stripping to drywall gives a uniform base.
For consistent wall texture and only surface gloss, thorough sanding and deglosser usually work. Also consider edges, corners, and trims—hard-to-sand areas may need targeted stripping.
If you’re unsure, test a small spot: sand then prime a patch. That quick trial reveals adhesion, texture issues, and whether full stripping is necessary.
Evaluate Damage Extent
Because the extent of damage determines your approach, you’ll want to assess cracks, bubbling, peeling, and underlying drywall issues before deciding to strip or sand. Check how much old gloss is lifting and whether wall texture hides flaws. Consider color psychology if drastic change will affect room mood once repaired.
- Small hairline cracks: sand and spot-fill.
- Localized bubbling: scrape, dry, and prime.
- Widespread peeling: strip to sound surface.
- Damaged drywall paper: patch or replace.
- Texture mismatch: retexture or skim-coat for uniform finish.
Decide based on repair scope, time, and final appearance.
Pros and Cons: Bonding Primers vs Sand-and-Prime
If you’re deciding between a bonding primer and sanding then priming, weigh speed and surface prep: bonding primers stick to glossy surfaces with minimal abrasion and save time, while sanding and priming gives you a mechanically keyed surface that can be more reliable on badly chipped or uneven finishes.
Bonding primer: quick, less dust, good where furniture placement limits sanding. Sand-and-prime: better for severe defects, truer adhesion long-term. Consider paint behavior for color mixing and test small areas.
| Method | Best for | Drawback |
|---|---|---|
| Bonding | Light sheen | Less prep |
| Sanding | Damaged | More labor |
| Both | Prep test | Time trade-off |
Cost and Time Estimate for a Typical Gloss→Matte Repaint
Expect to spend a few hundred dollars and one to three days on a typical room when you convert glossy walls to matte. You’ll budget for primer, paint, and supplies, and schedule drying and possible sanding touch-ups.
Consider how color contrast and lighting effects change once the sheen drops.
- Primer and paint costs
- Tools: rollers, sandpaper, tape
- Prep time: cleaning and light sanding
- Drying and recoats over 24–48 hours
- Cleanup and touch-up
Plan efficiently: work in stages, check color samples under room lighting, and allow extra time for unforeseen repairs.
Low‑VOC and Eco-Friendly Primers/Paints for Glossy Walls
When you want lower odor and fewer emissions while repainting glossy walls, choose low‑VOC or eco‑friendly primers and paints designed to bond to slick surfaces.
You’ll find water based formulas that dry faster, clean up with soap and water, and reduce harmful fumes.
Look for products labeled for adhesion to enamel or glossy substrates; some use eco friendly pigments to maintain color vibrancy without toxic additives.
Apply according to manufacturer directions—often one coat of bonding primer then paint.
Test a small area first to confirm adhesion and finish.
These choices keep indoor air better and simplify cleanup.
Safety Tips for Sanding, Priming, and Painting Glossy Surfaces
Because sanding and priming glossy surfaces can release dust and fumes, protect yourself and your space with the right PPE and ventilation before you start. Use goggles, N95 or better masks, and gloves; open windows and run fans to exhaust fumes.
Mind surrounding finishes and furniture when testing primers or new colors—color psychology can influence how light reflects off shiny vs. matte areas.
Check wall texture; smooth gloss hides imperfections differently than textured walls.
Follow these quick safety steps:
- Wear respirator and eye protection
- Use drop cloths and tape off trim
- Sand lightly with dust extraction
- Choose low‑VOC primers
- Dispose of waste properly
How to Maintain Your New Finish and Extend Its Life
Now that your new finish is dry, keep it looking sharp with a simple maintenance plan. Wipe walls regularly with a soft cloth and mild cleaner.
Protect busy spots with chair rails or washable mats, and handle scuffs promptly with targeted touch-ups. A little routine care will keep the paint durable and fresh for years.
Regular Cleaning Routine
After you let the new paint cure, keep the finish looking fresh by dusting and spot-cleaning regularly—every two weeks for high-traffic areas and monthly elsewhere. You’ll preserve paint sheen and avoid build-up by using gentle cleaning solutions and a soft cloth. Follow this simple routine:
- Dust with a microfiber cloth top to bottom.
- Tackle smudges with diluted dish soap; rinse with clean water.
- Test any cleaner in an inconspicuous spot first.
- Dry surfaces immediately to prevent streaks or water marks.
- Avoid abrasive pads or harsh chemicals that can dull the sheen.
Stick to this schedule to extend the life of your finish.
Protect High-Traffic Areas
Keeping up with regular cleaning helps, but high-traffic areas need a bit more protection to keep your new finish looking its best. You can add washable rugs, chair pads, and clear protective mats to reduce scuffs where people, pets, or furniture concentrate.
Apply a sacrificial clear coat in corridors and around doorknobs to guard the paint film without altering hue or affecting the color psychology of the room.
Use durable trim guards near baseboards and stairs; they suit both modern tastes and historical styles when you pick unobtrusive profiles.
Inspect weekly and address grit or spills promptly to prolong your fresh paint.
Periodic Touch-Up Care
How often should you inspect your walls for nicks and wear? You should check monthly in high-traffic rooms and seasonally elsewhere to catch issues early.
Use short touch-ups to keep color consistent and maintain the mood you chose—color psychology matters for room feel. Prefer eco-friendly paints for low-odor, easy spot repairs.
- Keep a small, labeled sample pot of the exact paint.
- Clean scuffs gently before touching up.
- Sand and scuff gloss spots for better adhesion.
- Feather edges to blend new paint.
- Reapply a protective topcoat in key areas annually.
Simple care extends your finish and saves effort.
When to Hire a Pro vs Tackling It Yourself
Wondering whether you should tackle painting over gloss yourself or call in a pro? You can DIY for small rooms, basic prep, and when color psychology choices are simple. Hire pros for large spaces, complex surfaces, or when guaranteed paint durability matters.
| Scenario | DIY | Pro |
|---|---|---|
| Room size | Small | Large |
| Surface condition | Good | Damaged |
| Finish needed | Simple | Flawless |
| Time available | Limited | Flexible |
| Cost concern | Low budget | Value quality |
Assess skill, schedule, and risk. If imperfect results bother you or warranty’s needed, call a pro; otherwise, do it yourself.
Quick Checklist to Run Through Before You Start Painting
Before you pick up a brush, run through a short checklist to make sure the surface, supplies, and schedule are all ready—this saves time and prevents common mistakes. Check these points so you’ll finish faster and smarter, considering color psychology and environmental impact as you plan.
Run a quick prep checklist—clean, repair, prime, gather supplies, and time your paint for better results and lower impact.
- Clean and scuff-sand glossy areas; remove dust and grease.
- Repair cracks, fill holes, and prime with a bonding primer.
- Confirm paint type, sheen, and tester swatches for color psychology effects.
- Gather brushes, rollers, drop cloths, and ventilation equipment.
- Schedule painting around humidity and drying time; dispose of waste responsibly to limit environmental impact.
Frequently Asked Questions
Can I Paint Over Glossy Exterior Siding Safely?
Yes — you can paint over glossy exterior siding safely if you prioritize surface preparation and choose coatings for exterior durability. You’ll sand, clean, prime with a bonding primer, then apply durable exterior paint for long-lasting protection.
Will Primer Hide Glossy Paint Color Differences Completely?
No, primer won’t always hide glossy paint color differences completely; it’ll grip with strong primer adhesion but glossy underlying tones can peek through. You’ll want a high-build primer and match paint finish to fully even sheen and color.
Can Wallpaper Be Applied Over Primer on Glossy Walls?
Yes—you can apply wallpaper over primer on glossy walls if you do proper wall preparation first. You’ll sand gloss, clean thoroughly, then use a quality primer application to guarantee adhesion, smoothness, and long-lasting wallpaper results.
Does Gloss Removal Damage Underlying Wallpaper or Plaster?
Yes — removing gloss can damage wallpaper or plaster if you’re too aggressive; investigate gently first. You’ll prevent wallpaper damage with careful surface preparation, using mild solvents, scoring minimally, and testing small areas before proceeding broadly.
How Soon Can I Hang Pictures After Repainting a Glossy Wall?
You can hang pictures after about 24–48 hours for touch-dry gloss, but wait 7 days for full cure. Proper surface preparation speeds drying time and guarantees paint won’t dent or peel when you mount frames.
Conclusion
You’ve got the basics to transform shiny, stubborn walls into a fresh, durable finish—so why settle for sanding and priming shortcuts that’ll fail later? Take the time to scuff, clean, and use a high-adhesion primer, pick the right paint, and follow safety steps; those small efforts pay off with longer-lasting results and fewer touch-ups. If a surface still looks problematic or you’re short on time, call a pro to avoid wasted work.