How to Paint Over Permanent Marker on Walls
You can usually cover permanent marker by first testing and cleaning the area, then sealing with a stain‑blocking primer (shellac or oil‑based for stubborn ink) and repainting with thin, feathered coats to blend. Clean small marks with rubbing alcohol or a Magic Eraser, but repaint larger or porous stains after spot‑testing. Feather edges, match texture if needed, and let primer fully cure before topcoats. Keep going to learn practical tests, primers, and blending tips.
When to Paint Over Marker vs Clean It
Although you’ll often try cleaning first, decide whether to paint over permanent marker by evaluating stain size, wall finish, and how much time you want to spend. If the mark’s small and on semi-gloss or washable paint, you’ll likely remove it with solvents and skip repainting.
Larger stains, porous drywall, or multiple marks mean painting’s quicker and neater. Factor in color matching: you’ll need leftover paint or a sample to blend; otherwise expect touch-up visibility.
For paint routes, plan wall preparation—clean, sand, prime—so the new coat adheres and hides the marker without bleed-through.
Quick Answer: Clean First or Paint Immediately?
Wondering whether to clean first or just repaint? You’ll usually clean if the marker’s fresh, textured, or on primed surfaces. Cleaning removes oils and pigments that can show through paint; it’s also how restorers using historical techniques tackle stubborn stains. For quick fixes on smooth, sealed walls, you can prime and paint straight away, borrowing efficiency from modern art styles’ bold moves.
| Situation | Recommendation |
|---|---|
| Fresh mark on sealed wall | Prime & paint |
| Deep pigment on raw plaster | Clean then prime |
| Decorative/art surface | Consult techniques |
| Time-constrained repair | Quick prime |
Choose based on surface and severity.
Test Your Wall for Marker Bleed‑Through
Before you paint, check the wall for bleed patterns by looking for ghosting or discoloration around the marker.
Try a small patch: apply a stain-blocking primer on a discreet area and let it dry to see if the marker shows through.
If you still see bleed-through, plan to use a heavier-duty primer or an extra coat before repainting.
Check For Bleed Patterns
Want to know if the marker will show through your new paint? Check for bleed patterns by inspecting the mark’s edges and surrounding texture. Look for feathering, halos, or darker streaks that indicate ink saturation; these shapes predict how color theory and paint durability will interact once coated.
Press a clean white tissue lightly over the area—any transferred ink reveals active bleed. Note whether lines follow grout, seams, or porous spots; those areas need extra attention. Photograph problematic patterns for reference.
Mapping bleed behavior helps you decide primer type and coat counts without guessing, saving time and ensuring a cleaner finish.
Perform A Small Patch
Since marker bleed can hide beneath fresh paint, start by performing a small test patch on an inconspicuous spot to see whether the ink will ghost through. Choose a corner or behind furniture, clean the area, then apply primer and your chosen topcoat.
Observe for 24–48 hours under normal light to spot any ghosting or discoloration from color mixing with the marker ink.
Consider how wall texture affects absorption; rough surfaces may need more sealing. If bleed appears, apply a stain‑blocking primer and retest.
Repeat until the patch stays clean, then paint the visible area.
- Test location
- Drying time
- Texture check
What Wall Type Means for Your Approach (Drywall vs Plaster)
If you’ve got drywall, you’ll notice a smoother, more uniform surface that usually soaks up primer and paint predictably.
Plaster walls, however, can be rougher or more textured and may hold marker pigment in crevices or require extra sanding and sealing.
Knowing which you have will guide whether you need filler, sanding, or a stain-blocking primer before painting.
Drywall Surface Characteristics
When you’re deciding how to remove or paint over permanent marker, knowing whether your wall is drywall or plaster changes your approach.
Drywall has a consistent gypsum core with paper facing, so its wall texture tends to be smoother and surface porosity is moderate. Primers and light sanding usually work well. You’ll avoid heavy scraping and can spot-prime stains.
- Smooth vs sanded finish affects primer choice
- Porosity determines how much sealer you need
- Joint compound repairs blend easily on drywall
Treat drywall gently, seal marker bleed with an appropriate stain-blocking primer before repainting.
Plaster Texture Considerations
Because plaster is denser and often more textured than drywall, you’ll need a different prep and priming strategy to effectively cover permanent marker.
You’ll first assess surface texture and damage; small gouges need plaster repair before painting. Lightly sand glossy areas, clean stains with solvent, and let the wall dry.
Use a high-adhesion stain-blocking primer designed for dense substrates, applying thin coats into crevices so marker doesn’t bleed through.
For a seamless finish, match existing texture: use skim coats, texture matching techniques, or spray texture before priming.
Finish with two coats of quality paint for consistent coverage and durability.
Special Surfaces: Tile, Trim, and Metal
Though these surfaces—tile, trim, and metal—might seem tricky, you can paint over permanent marker on them with the right prep and products. Start by cleaning, deglossing, and lightly sanding glossy tile or metal.
Though tile, trim, and metal seem tricky, proper cleaning, deglossing, and light sanding let you paint over permanent marker.
On trim, sand toward smooth edges and fill gouges. Consider primer adhesion and use products for slick surfaces. Think about color mixing to blend repairs and texture matching for seamless changeovers.
- Tile: use liquid sandpaper, high-adhesion primer, and epoxy or enamel paint.
- Trim: use wood primer, flexible caulk, and semi-gloss for durability.
- Metal: use rust-inhibiting primer and enamel topcoat.
How Finish Affects Removal: Flat to Gloss
The type of paint finish changes how easily you can remove permanent marker. On flat or matte walls, the marker sits more on the surface, so you can usually scrub it off or cover it with primer and paint.
Glossy or semi-gloss finishes seal the wall and make marker harder to lift, so you may need stronger cleaners or more coating to hide it.
Flat Paint: Easier Removal
When you’re dealing with permanent marker, flat (matte) paint usually gives you the best chance of removing it without aggressive scrubbing. Its porous, non-reflective surface soaks up ink less uniformly than glossy finishes, letting cleaners lift pigment more easily.
You can test a small spot and choose a gentle solvent or detergent, working from edges inward to avoid spreading. Consider how color blending might hide faint stains after cleaning, and note that wall texture affects how ink sits and how you clean.
- Test cleaners on an inconspicuous area first
- Use soft cloths and gentle motions
- Repaint if staining persists
Glossy Surfaces: Harder Removal
If flat paint lets cleaners lift ink more easily, glossy finishes will give you a tougher fight: their smooth, non-porous surface holds marker on top instead of letting it sink in, so rubbing can smear rather than remove.
You’ll need gentler solvents, test spots, and patience to avoid spreading stains. When removal fails, prime with a stain-blocking primer designed for gloss, then repaint.
Pay attention to color matching to hide contrast and use fine sanding or skim coats for texture blending so the repaired area doesn’t stand out. Gloss shows imperfections, so prep thoroughly for a seamless finish.
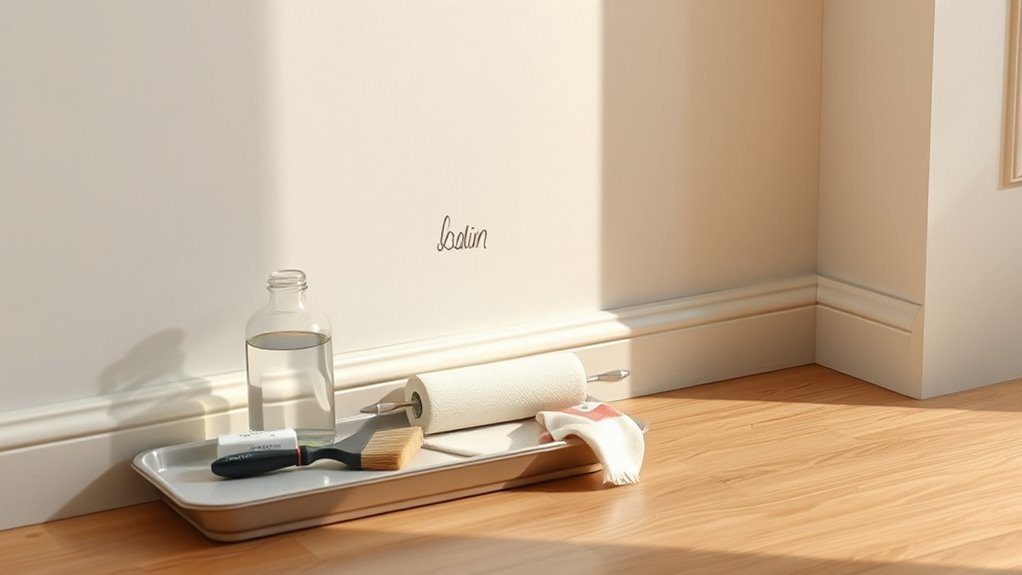
Cleaning Materials to Have on Hand
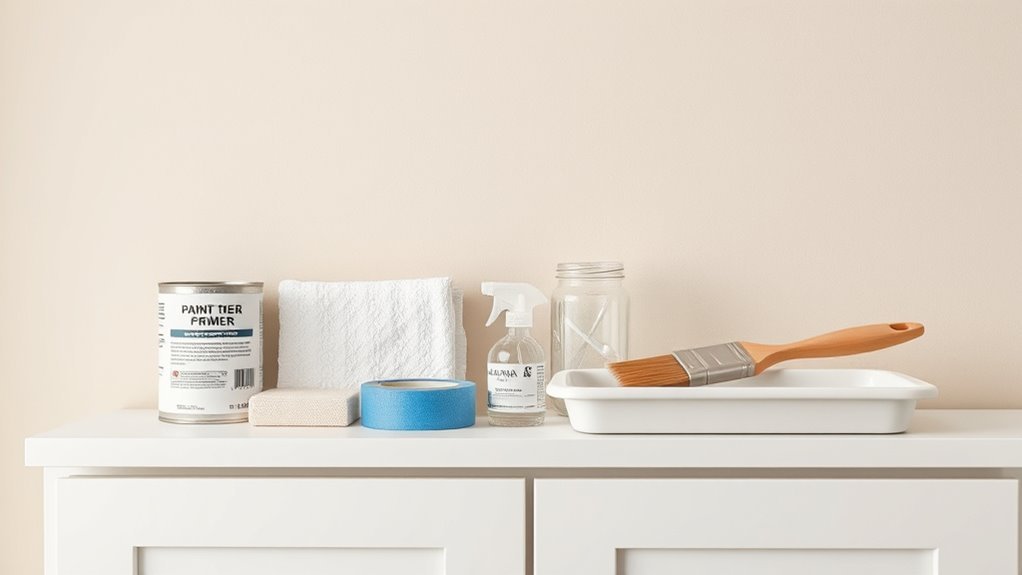
Before you start scrubbing, gather a few reliable cleaning supplies so you won’t interrupt your progress hunting for tools mid-job. You’ll want materials that remove marker without harming underlying finishes, especially if you’re preserving creative wall art or conducting a historical wall analysis before repainting.
Keep gloves and rags ready, plus a soft brush for textured areas. Choose items suited to the surface and test a hidden spot first.
- Microfiber cloths and soft-bristled brush
- Protective gloves and disposable wipes
- Small plastic scraper and painter’s tape
Safe Household Cleaners to Try First
Before you start scrubbing, test any cleaner on an inconspicuous spot to make sure it won’t damage the paint.
You can usually remove marker with rubbing alcohol applied gently on a cloth.
If that doesn’t work, make a paste of baking soda and water and rub it lightly to lift the stain.
Test Inconspicuous Spot
Even though many household cleaners work, you should always test a small, inconspicuous spot first to avoid damaging paint or finishes. You’ll see whether the cleaner alters color mixing effects on textured paint or harms sheen.
Pick a hidden corner near trim or behind furniture, try the cleaner gently, and wait for full drying before judging. Note any softening, bubbling, or gloss loss — signs you should stop and consider wall priming before repainting.
Keep a cloth and mild cleaner handy, document results, and only proceed with broader cleaning when the test area shows no adverse change.
- Test behind furniture
- Try near trim
- Wait fully dry
Try Rubbing Alcohol
If the small test area showed no damage, try rubbing alcohol next—it’s one of the safest, most effective household options for lifting permanent marker.
Dampen a soft cloth or cotton ball with isopropyl alcohol, blot gently, and work from the marker’s edges toward the center to avoid spreading. Use light pressure so you don’t strip paint or disturb creative wall art finishes.
On textured surfaces, follow wall texture techniques by rubbing along grooves, not across them.
Rinse with a damp cloth, let dry, and repeat sparingly.
If marks persist, stop and consider priming before repainting.
Use Baking Soda Paste
When rubbing alcohol doesn’t do the trick, mix baking soda with a little water to form a gentle paste you can use on marker stains. Apply with a soft cloth, rub gently in circular motions, then wipe clean. Test a hidden spot first to avoid dulling any finish.
If the mark persists, repeat once; aggressive scrubbing can harm paint. After removing stains, consider freshening the area with a small touch-up or explore creative wall designs to disguise imperfections.
For larger coverage, pair this cleanup with eco friendly paint options when repainting.
- Gentle paste application
- Spot-test first
- Touch-up or repaint
Remove Marker With Rubbing Alcohol and Acetone Safely
Want a quick, effective way to lift permanent marker from painted walls? You can use rubbing alcohol or acetone, but test a hidden spot first to protect finish and color.
Dab a cotton ball with solvent, blot gently, and don’t rub hard—you’re dissolving ink, not stripping paint. Ventilate the room and wear gloves; acetone is stronger and needs extra caution.
After removal, wipe with a damp cloth and let dry. If you plan creative wall designs or follow DIY mural tips, prime and repaint any softened areas to guarantee even coverage and long-lasting results.
Use Baking Soda, Toothpaste, and Gentle Scrubs
Try a gentle gel paste of baking soda and non-gel toothpaste to lift marker without harming paint.
Use a soft-bristle brush and light circular strokes so you’re scrubbing, not stripping, the finish.
Rinse the area and repeat as needed until the stain fades.
Gentle Gel Paste
If you prefer a low-chemical option, a gentle gel paste made from baking soda and toothpaste gives you mild abrasion plus cleaning power without harsh solvents. You’ll mix equal parts baking soda and non-gel toothpaste to form a spreadable paste.
Apply it sparingly, let it sit briefly, then wipe with a damp cloth. This Gentle gel paste fits well among Marker removal techniques when you want control and minimal odor.
- Use small amounts to avoid paint damage.
- Test a hidden spot first for finish safety.
- Rinse area and pat dry before repainting.
Soft Bristle Technique
When removing marker without harsh chemicals, mix a small amount of baking soda with non-gel toothpaste to form a gentle paste. Then use a soft-bristle brush to work it into the stain with light, circular motions so you lift ink without abrading the paint.
You’ll test a hidden spot first, since wall texture and old paint can react differently. Work patiently, focusing strokes on the mark rather than surrounding areas.
If color mixing from previous repairs shows through, note the tone shift. Pat excess paste with a damp cloth and allow the area to dry before deciding if further treatment or repainting is needed.
Rinse And Repeat
Although a single gentle scrub often lifts most marker, you’ll usually need to rinse and repeat the baking soda–toothpaste method to fully remove stubborn ink without damaging paint. You’ll wet a soft cloth, apply a small paste, and scrub lightly in circles, rinsing between passes.
Repeat until residue fades, then blot dry. If color shifts appear, consider how color psychology affects your repair choices before repainting.
For best results, follow wall painting techniques: test an inconspicuous spot, protect trims, and use thin layers when repainting over any ghosting.
- Test small area first
- Use gentle circular scrubs
- Rinse thoroughly between passes
When to Use Graffiti Removers or a Magic Eraser
Wondering whether to reach for a graffiti remover or a Magic Eraser? You should pick based on surface and mark severity.
For delicate wall murals or preserved graffiti art, avoid harsh solvents that strip paint; test a small hidden spot first.
Use a Magic Eraser for light, recent marker stains on semi-gloss or painted drywall—apply gently to prevent sheen loss.
Choose a graffiti remover for deep, porous stains on concrete, brick, or heavily marked areas, following product instructions and ventilation guidance.
Always rinse the area afterward and let it dry fully before priming and painting.
Neutralize Marker Odor and Solvent Residue Before Painting
How do you make sure marker fumes and leftover solvents won’t affect your new paint? You ventilate the room, blot up residue, and neutralize odors before repainting; this prevents solvent lifting and preserves DIY wall decor or creative wall art finishes.
Use odor absorbers and mild cleaners, let surfaces dry fully, and test a small primer spot.
Replace filters in HVAC or use a fan to exhaust fumes. If strong smell persists, repeat cleaning or use a shellac-based primer to lock in solvents.
Follow safety: gloves and mask, and avoid open flames while solvents remain.
- Ventilate thoroughly
- Clean and neutralize residues
- Test with primer
Sand and Feather Edges Around Stains
Before you prime or repaint, sand and feather the edges of the marker stain so the new finish blends smoothly with the surrounding wall. You’ll sand lightly with fine-grit paper, tapering into undamaged paint to avoid visible ridges. Feathering creates a subtle slope that helps color mixing appear seamless and improves wall anchoring for new coatings. Clean dust, inspect, and repeat if needed. Use gentle pressure to avoid gouging. Consult the quick reference below for grit and technique.
| Tool | Grit | Tip |
|---|---|---|
| Sandpaper | 220 | Light strokes |
| Sponge | N/A | Wipe dust |
| Brush | Soft | Blend edges |
When You Must Prime Marker Stains First
If the marker is fresh and very dark, you’ll often need a stain-blocking primer before painting.
The same goes for porous or already-stained surfaces that soak the ink into the wall.
Also prime when the mark has a strong odor or shows bleed-through to prevent ghosting and smells after you paint.
Fresh Dark Marker
Ever found a bold black marker streak and wondered whether you can skip priming? If the mark is fresh and dark, don’t assume paint will hide it. You’ll need a stain-blocking primer to prevent bleed-through, especially with solvent-based markers.
Treat the area quickly: clean, dry, then prime before applying finish coats. Think of primer like color mixing control in artistic techniques—it keeps underlying tones from shifting your final hue.
- Act fast to reduce penetration.
- Use a high-adhesion, stain-blocking primer.
- Apply thin, even coats and let dry fully before topcoating.
Porous Or Stained Surfaces
When a wall’s surface soaks up ink or already shows stains, you’ll have to prime before painting to stop the marker from bleeding through and discoloring your finish. You should clean the area, let it dry, and spot-sand rough patches so primer adheres evenly.
Use a stain-blocking primer designed for porous surfaces; it prevents ghosting and helps color blending when you topcoat. For textured walls, apply primer with a brush or roller that reaches crevices to ensure full texture masking.
After priming, inspect for remaining stains; if none show, proceed with your chosen paint for a clean, even result.
Strong Odor Or Bleed
Because some permanent markers keep releasing fumes or bleed through fresh paint, you’ll need to prime those spots before repainting to seal in odor and pigment. You’ll choose a stain-blocking primer designed for odor masking and bleed prevention, apply it over dry marker, and let it cure fully.
Test one small area before finishing the whole wall. Use light sanding between coats if texture differs, and follow manufacturer drying times to avoid solvent interactions with topcoat. Proper priming prevents reappearing marks and lingering smell, giving you a clean base for repainting.
- Choose a high-quality stain-blocking primer
- Test a small area first
- Sand lightly between coats
Choose the Right Stain‑Blocking Primer
Which primer you pick will make the difference between a clean, covered finish and ghosting from the marker; choose a high-quality, stain-blocking primer designed for ink and tannin bleed-through. You’ll want an oil‑based or shellac primer for toughest marks; water‑based stain blockers can work for light scribbles. Check product labels for “stain blocking” and ink resistance.
Consider how primer color affects final paint—Choosing colors ahead prevents surprises when topcoat goes on. For textured surfaces or bold Wall patterns, use a primer that seals crevices evenly.
Always test a small area to confirm coverage before committing to the whole wall.
Step‑by‑Step: Apply Primer Over Marker
Before you start rolling, make sure the marker stains are dry and the surrounding area is clean so the primer bonds evenly. Use a stain‑blocking primer and pour some into a tray. Load a roller for large areas and a brush for edges, applying smooth, even strokes. Work from top to bottom, feathering overlaps to avoid lap marks. Let the primer set according to label instructions before proceeding.
- Use thin coats to avoid drips and maintain texture.
- Check primer against nearby paint for subtle color matching before final paint.
- Consider how decorative techniques will interact with the primed surface.
How Many Primer Coats for Stubborn Marker?
If the first coat doesn’t fully hide the marker, plan for an extra coat or two—stubborn permanent ink often needs more than a single application. You’ll typically need one to three primer coats depending on ink saturation and wall porosity.
Let each coat dry fully and inspect under good light; damp or tacky layers trap pigment. Use a stain-blocking primer and apply thin, even coats with proper painting techniques to avoid drips.
Once concealed, check color matching by holding your topcoat sample against the primed area. If staining persists, add another thin primer coat and reassess before finishing.
Best Paint Types to Cover Marker: Water vs Oil
When you’re choosing paint to cover marker, water-based options are easy to work with, dry fast, and clean up with soap and water.
If you need extra hiding power and durability, oil-based paints offer stronger stain blocking and tougher finishes.
We’ll compare their pros so you can pick the best one for your wall.
Water-Based Paint Pros
Although oil-based paints can block stains, you’ll usually get better results faster with water-based paints, because they dry quickly, clean up with soap and water, and release fewer fumes. You’ll appreciate easier wall prep and quicker touch-ups, and water-based formulas accept color blending well so you can match surrounding paint.
They’re low-odor, kid- and pet-friendlier, and let you recoat sooner to hide marker. Choose a high-quality acrylic or latex with good pigment and stain resistance. Prep by cleaning the surface, spot-priming any bleed-through, then apply thin, even coats until concealed.
- Fast drying and low odor
- Easy cleanup
- Good for color blending
Oil-Based Paint Strength
Because oil-based paints form thicker, harder films, you’ll often get superior stain-blocking power against permanent marker compared with water-based options. You’ll find oil formulas resist bleed-through and seal pigments, so a single coat of oil primer or paint can outperform multiple water-based layers.
During wall preparation, clean and sand glossy areas for better adhesion. Oil tolerates tannin and marker better but still needs a stable surface.
Be mindful of color mixing—oil blends dry more slowly and shift less, so test small patches before committing. Use oil-based primer under a topcoat when marker stain severity demands reliable coverage.
Match Paint Sheen and Color for a Seamless Fix
If your touch-up is going to blend in, you’ll need paint that matches both the color and the sheen of the existing wall; you’ll avoid obvious patches by focusing on Color matching and Sheen consistency.
First, clean and let the area dry so the finish reads true. Test small swatches and view them in different light before committing. Use the same product line or manufacturer when possible to keep formulation similar.
- Compare swatches under natural light
- Match gloss level (flat, eggshell, satin, semi-gloss)
- Label the can with formula and location for future fixes
Tools for Small Spot Repair: Rollers, Brushes, Sprayers
When you’re fixing a small spot, choosing the right tool makes the job faster and less noticeable. For tiny marks, use a fine-bristle brush to control paint and keep edges crisp; it’s ideal after careful wall prep and for precise color matching.
A mini-roller covers slightly larger blemishes quickly and leaves texture similar to the surrounding finish. Reserve a hand-held sprayer for textured or porous surfaces where feathering is hard with brushes, and practice on scrap first.
Always clean tools between uses to avoid contaminating your matched color, and apply thin coats, checking drying times before deciding if more coverage’s needed.
Paint Touch‑Ups Without Visible Patches
Want your touch-ups to disappear rather than stand out? You’ll match sheen, feather edges, and use minimal paint to avoid raised patches. Prep with light sanding and a clean rag so strokes blend. Consider subtle texture tricks from Historical wall techniques—stippling or light rag-rolling—to disguise join lines without converting repairs into art statements.
If you prefer, incorporate Creative wall art only when covering large areas or embracing visible fixes as design elements.
- Use the original finish (matte, eggshell) and thin coats
- Feather edges with a dry brush or small roller
- Let each coat cure fully before evaluating
Blend Repaired Areas Into the Surrounding Wall
Although the patch is dry, you’ll still need to soften its edges and match texture so it disappears into the surrounding wall. Lightly sand feathering the repair into the existing paint, then clean dust away.
Apply thin coats of primer and paint, extending beyond the repair to blend tones. Check color matching under natural light; adjust by mixing small amounts until it’s indistinguishable.
If brush marks show, use a roller nap that matches wall texture and stipple gently to unify finish. Step back frequently, let each coat dry, and stop once the repair reads as part of the wall.
Fixes for Textured Walls and Popcorn Ceilings
Now that the repair is blended, you’ll need different techniques for textured walls and popcorn ceilings because their uneven surfaces hide and reveal repairs differently.
You’ll match texture with a stipple brush or spray, feathering edges so the patch reads like the original finish.
For stubborn marker stains, use stain-blocking primer before texture to prevent bleed-through.
Think of artistic techniques used for wall graffiti—blend color, vary pressure, and layer to mask boundary lines without adding shine.
- Use a sponge or stipple brush for manual texture
- Employ aerosol texture for popcorn ceilings
- Feather primer and paint gradients carefully
When Repainting the Whole Wall Is Better
If the marker damage is widespread, the finish is uneven, or matching the existing paint proves difficult, repainting the whole wall is usually the smarter choice. You’ll save time masking small patches and avoid uneven sheen or visible touch-up lines.
Strip damaged areas, prime with a stain-blocking primer, then apply two even coats of your chosen color. Repainting gives you a fresh base for future wall decoration or to incorporate artistic techniques like stenciling or accent washes.
It also guarantees consistent texture and durability, so the repaired surface blends seamlessly and resists future staining or fading.
Prevent Future Marker Stains and Protect Walls
Because little habits make a big difference, take simple preventive steps to keep markers from ever reaching your painted surfaces. You can limit accidents and preserve color blending when you plan activities and protect high-traffic areas.
Use washable markers for kids, designate art zones with drop cloths, and apply a clear, washable topcoat on sections prone to doodles — this also helps if wall texture traps ink.
Store permanent markers out of reach and label craft supplies so guests know what’s safe. Small routines cut cleanup time and keep repainting rare.
- Use washable alternatives
- Create protected art zones
- Apply a washable topcoat
Safety: Ventilation, Skin, and Surface Protection
When you tackle permanent marker removal, prioritize good ventilation, protect your skin, and shield nearby surfaces from cleaners and rubbing—those steps cut inhalation risks and prevent new damage. Open windows, run fans, and avoid confined spaces.
Wear nitrile gloves and eye protection so solvents don’t contact skin or eyes. Use drop cloths and painter’s tape to guard trim, furniture, and floors; plastic sheeting protects larger areas.
Test any solvent on an inconspicuous spot to check color mixing effects and finish changes—different cleaners can alter pigments.
Consider how wall texture affects absorption and choose gentle methods for porous surfaces.
Troubleshooting: What to Do If Marker Still Shows Through
Although stubborn marker can bleed through new paint, you can usually get a clean finish by isolating and sealing the stain first.
Although permanent marker may bleed through paint, you can usually get a clean finish by sealing the stain first.
Assess the mark under varied interior lighting so you see ghosting.
Test a primer rated for permanent ink on a small area that matches your wall material—drywall, plaster, or laminate behave differently.
If the mark persists after priming, apply a second coat or use a shellac-based sealer for heavy stains.
Finish with matching topcoat and inspect in different light angles.
If needed, repeat sealing before repainting to prevent future bleed-through.
- Test primer compatibility
- Use shellac for heavy stains
- Check under interior lighting
Frequently Asked Questions
Can Marker Bleed Through Oil-Based Primers?
Yes — markers can bleed through oil-based primers if pigments or solvents persist; you should perform marker removal first, then test primer compatibility on a small area, and use a stain-blocking primer if bleeding occurs.
Will Marker Damage Wallpaper Adhesives or Patterns?
It can—marker solvents may weaken adhesives and stain patterns, so you’ll avoid damage by testing first, using gentle cleaners, considering wallpaper removal if needed, and applying marker stain prevention like sealing or priming before repairs.
Can Children’s Washable Marker Permanently Stain Painted Trim?
Yes — you could swear the trim’s ruined forever, but you won’t be helpless. You’ll tackle Children’s markers with quick stain removal: blot, gentle cleaner, rubbing alcohol or baking soda, then repaint if any ghosting remains.
Does Sunlight or UV Exposure Make Marker Stains Worse Over Time?
Yes — sunlight fading and UV degradation can worsen marker stains over time, so you’ll notice colors fading, inks breaking down, and outlines spreading; protect surfaces from direct sun and use UV-resistant coatings to slow damage.
Are There Eco-Friendly Primers or Paints Safe for Marker-Covered Walls?
Think of a fresh leaf covering a stain: you’ll find eco friendly options like low-VOC, plant‑based primers and zero‑VOC paints that act as safe wall coatings, letting you seal marker stains while protecting health and the planet.
Conclusion
If you’ve got permanent marker on your walls, act fast: 90% of surface stains respond to cleaning or primer before repainting, so try cleaning first and only paint if needed. Test for bleed‑through, choose products for your wall type, and ventilate and protect skin. When in doubt, prime with a stain‑blocking primer, then repaint. Prevent future marks with washable paint and rules about markers. You’ll save time and keep walls looking fresh.