How to Paint Over Scratches on Wall Easily
You can hide wall scratches quickly by cleaning the area, sanding any rough edges, and filling shallow scratches with lightweight spackle or deeper gouges with a stronger filler. Smooth the patch, let it fully dry, then prime to lock in the repair. Use a small brush or mini roller to feather matching paint and rebuild texture if needed, applying thin coats until blended. Keep going for tips on tools, texture tricks, and color-matching.
Quick 5-Step Fix for Wall Scratches
When you spot a scratch, don’t panic—you can usually fix it in five straightforward steps.
First, clean the area so dust won’t interfere.
Start by cleaning the area thoroughly so dust and debris won’t interfere with repairs.
Second, lightly sand any rough edges to match the wall texture.
Third, apply a thin layer of spackle or filler, smooth it, and let it dry.
Fourth, sand again for an even surface and wipe away residue.
Finally, prime if needed and touch up with matching paint, blending by feathering to match paint sheen.
You’ll restore appearance quickly if you work carefully and use products suited to your wall’s finish.
How to Assess the Scratch Depth and Size
Now that you know the basic five-step repair, you’ll want to evaluate the scratch so you can choose the right materials and technique.
Start by running your fingertip over the mark: if you feel a groove, it’s deeper and needs filler; a surface scuff likely only needs light sanding.
Measure length and width roughly with a tape or eyeball for scope.
Note wall texture—smooth, orange peel, or heavy texture affects how you blend repairs.
Check Paint sheen; glossy areas show imperfections more, so sanding and feathering matter.
Record findings to pick filler, sandpaper grit, and touch-up approach.
Deciding: DIY vs. Hiring a Pro for Wall Repairs
Although you can handle many minor scratches yourself, choosing between DIY and hiring a pro comes down to time, skill, and the repair’s visibility.
You should consider how visible the scratch is after adjusting furniture arrangement and whether wall texture will hide or highlight imperfections. If scratches are shallow, in low-traffic areas, and you’re comfortable matching paint and texture, DIY saves money.
Hire a pro when damage is extensive, texture blending is tricky, or you lack time and steady hands. Pros also handle prep and larger repairs faster.
Weigh cost, convenience, and the finish you want before deciding.
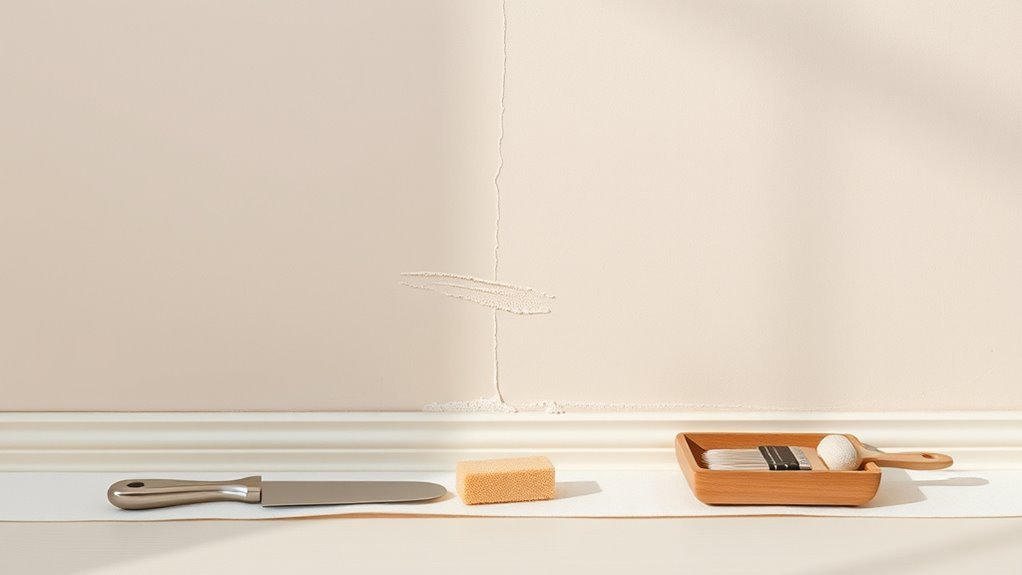
Tools and Supplies You Need for Wall Repairs
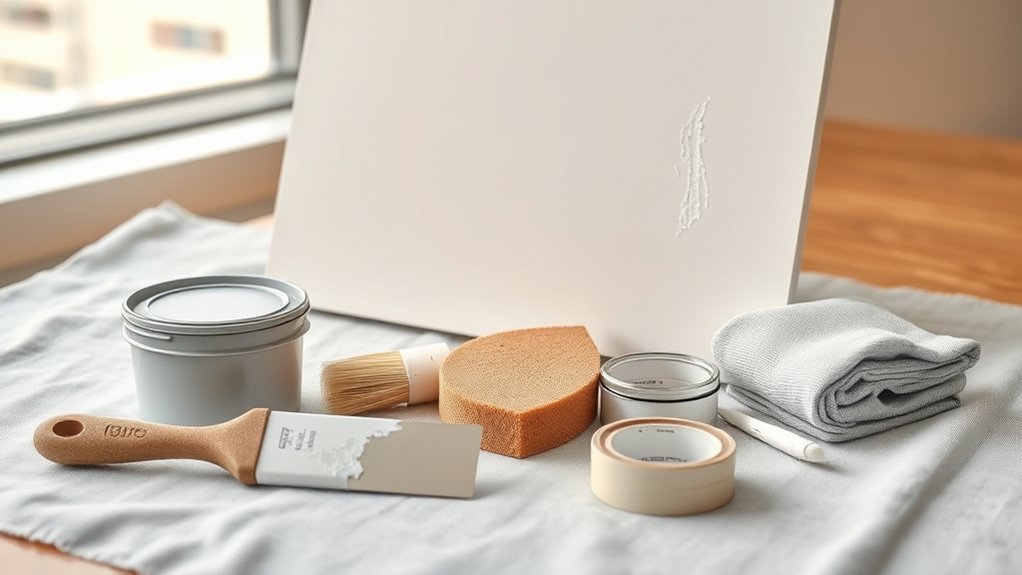
Before you start, gather the right tools and supplies so the repair goes smoothly and looks professional. You’ll need basic items for patching and painting, plus extras if you’ve done wallpaper removal recently or must safeguard nearby pieces. Essential supplies include spackling compound, sandpaper, putty knife, primer, matching paint, brushes or rollers, drop cloths for furniture protection, and a utility knife.
- Spackle, putty knife, sandpaper
- Primer, paint, brushes/rollers
- Drop cloths, tape, utility knife
Keep tools organized and within reach to finish efficiently and neatly.
How to Clean the Scratched Area Properly
Once you’ve gathered your supplies, wipe the scratched area with a damp microfiber cloth to remove dust and loose debris, then let it dry completely so spackle and primer will bond properly.
Next, run your fingers over the scratch to feel edges; you’ll know if light sanding is needed to smooth roughness without altering wall texture. Use a fine-grit sanding block gently, then dust with the cloth.
If grease or fingerprints remain, clean with a mild detergent solution, rinse, and dry. Match cleaning intensity to the existing paint sheen to avoid creating noticeable differences before you repair and prime.
How to Remove Loose Paint and Debris Safely
After the area is clean and dry, you’ll want to remove any loose paint and debris so repairs will sit flush with the wall. Work gently: don’t gouge the surface or alter wall texture more than needed. Wear a dust mask and goggles. Use a putty knife for flakes, a soft brush for dust, and a vacuum with a brush attachment to capture particles.
After cleaning and drying, gently remove loose paint and dust—use a putty knife, brush, and vacuum; wear a mask and goggles.
- Scrape loose paint at a shallow angle.
- Brush remaining dust into a dustpan; vacuum thoroughly.
- Wipe with a damp cloth to pick up fine residue.
Keep debris contained for tidy color mixing and smooth touch-ups.
How to Sand Scratches for a Smooth Base
How do you turn those visible scratches into a smooth, paint-ready surface? Start by assessing wall texture and paint sheen so you match sanding aggressiveness.
Use fine-grit (180–220) sandpaper for shallow scratches; medium (120–150) only if edges are raised. Sand lightly in circular motions, feathering the perimeter to blend with surrounding paint. Keep pressure even to avoid gouging.
Wipe dust with a damp microfiber cloth, then let dry and recheck the area under good light. If the surface feels smooth and consistent with the wall texture and paint sheen, you’re ready for priming and painting.
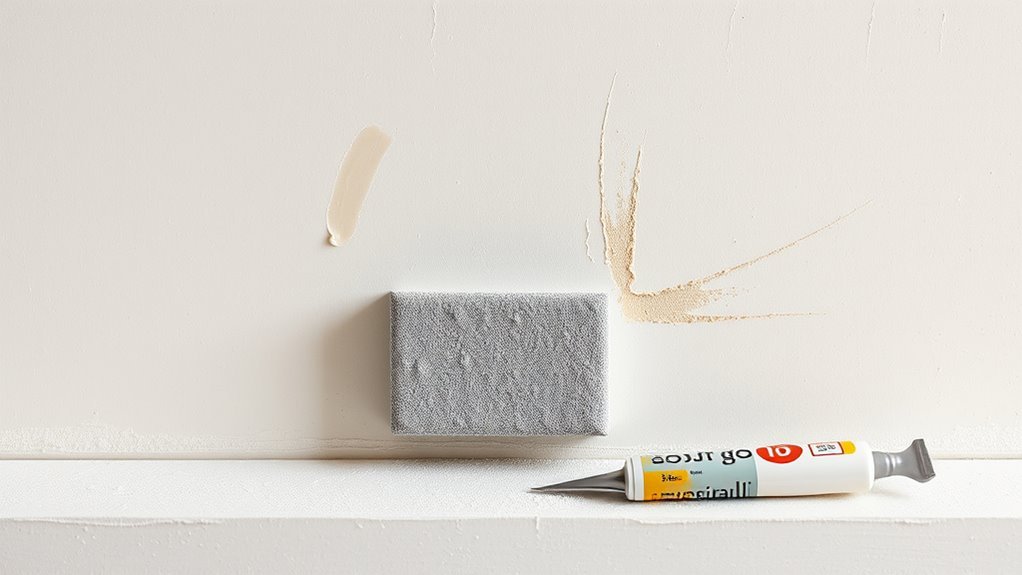
Best Filler for Hairline Scrapes
Start by checking how shallow the hairline scrape is so you know what level of filler you need. Pick a lightweight spackling compound or acrylic filler for very fine lines.
Use a paste filler only if the scratch is slightly deeper. Once filled and sanded smooth, prime the spot before repainting for an invisible repair.
Assess Scratch Depth
When you inspect a scratch, determine whether it’s just a surface mark or a tiny groove that needs filling. Hairline scrapes typically sit only in the paint or primer and can usually be repaired with a light coat of spackling or a paintable caulk.
You’ll check depth by running a fingernail over it and using bright light at an angle. If paint is only scuffed, avoid heavy fillers. Consider color matching and paint sheen when planning touch-up so the repair blends.
Quick assessment saves work.
- Fingernail test — surface vs. groove
- Angled light — reveal contours
- Magnifier — confirm no substrate damage
Choose Suitable Filler
Now that you’ve determined the scratch is a hairline surface mark, pick a filler that’s thin, paintable, and won’t shrink or crack.
Choose a lightweight spackling compound or acrylic-based filler made for fine gaps; they level smoothly and accept paint.
Match the filler’s drying time to your schedule so you can return to paint without delay.
When selecting, consider how your wall color and paint sheen will reveal texture—use minimal build-up and feather edges to avoid differing gloss.
Test a small patch, let it cure, then check under normal room light to ensure the repair blends invisibly.
Smooth And Prime
Before you paint, smooth the repaired area so the filler disappears into the wall and prime it to seal the patch. Use fine-grit sandpaper, feather edges, and wipe dust away so the repair blends with surrounding wall texture.
Apply a stain-blocking primer to prevent bleed-through and to help with color matching later. Let primer dry fully.
- Sand lightly until seamless.
- Clean surface and tack cloth.
- Prime with compatible product.
You’ll see how a smooth, sealed patch takes paint evenly; matching finish and texture ensures the scrape vanishes, leaving no shadow or sheen differences after painting.
Best Filler for Medium Wall Gouges
For medium wall gouges you’ll want a stronger filler like spackling compound or lightweight patching plaster that bonds well and sands smooth.
Apply it in thin layers, let each layer fully dry before sanding, and wipe away dust so the next coat adheres.
Finally, choose a filler and finish that match your paint’s sheen so the repaired spot blends in once you repaint.
Best Filler Types
When you’re repairing medium wall gouges, choose a filler that balances workability with strength so the patch holds up and sands smooth. You’ll pick based on surface, paint type, and any decorative accents nearby; consider color coordination when selecting tinted or paintable fillers.
- Acrylic/latex spackle — easy to sand, paint-ready, best for interior gouges.
- Lightweight polyester putty — stronger for deeper gouges, sands firm; good under decorative accents.
- Joint compound (setting type) — durable, excellent for larger repairs, accepts paint and tinting for color coordination.
Application And Drying
Now that you’ve picked the right filler, apply it with a firm putty knife, pressing into the gouge to remove air pockets and overfilling slightly so you can sand flush later. Work in thin layers for deep gouges, letting each cure per manufacturer times; rushing traps moisture and causes shrinkage.
Keep edges feathered to match the surrounding wall texture so repairs blend smoothly. After drying, sand with fine-grit paper until flush and wipe dust away.
Allow full cure before priming; cure affects adhesion and final paint sheen. Follow temperature and humidity guidelines to make sure predictable drying and a durable finish.
Matching Paint Finish
Although matching paint finish might seem minor compared to filling gouges, it’s essential for a seamless repair—you’ll want the filler and topcoat to reflect light the same way so the patch disappears. Choose a filler that sands smooth and takes paint evenly; test a small area to confirm desired sheen.
For Color blending, feather the edges of your topcoat and use thin layers. Consider these steps:
- Select filler compatible with wall material and desired sheen.
- Sand and prime repaired area, matching texture before painting.
- Apply desired sheen paint in light coats, blending outward until invisible.
Best Filler for Deep Holes and Cracks
If you’ve got deep holes or wide cracks, pick a filler that’s formulated for structural repair rather than a lightweight spackling paste. You’ll want a two-part epoxy or setting compound that bonds well and resists shrinkage. Consider substrate, paint adhesion, and whether you’ll need sanding or priming before repainting. Don’t forget color coordination if patches will show under thin paints, and finish wallpaper removal areas cleanly before filling. Choose a product rated for exterior use if needed. Compare options below for quick decisions.
| Filler Type | Best Use |
|---|---|
| Epoxy | Deep structural holes |
| Setting compound | Wide cracks |
| Polymer putty | Minor deep repairs |
| Exterior filler | Outdoor damage |
How to Apply Spackling Paste Step by Step
Before you grab the spackling paste, make sure the scratched area is clean, dry, and free of loose debris so the repair will bond properly.
Press the paste into the scratch with a putty knife, then smooth it flush with the wall and scrape off any excess.
Let it dry fully before sanding smooth and repainting.
Preparing Surface Properly
When you’re fixing scratches in drywall, applying spackling paste the right way makes the repair seamless and saves time later. Start by cleaning the area, removing loose paint or dust, and letting it dry so the paste bonds properly.
Check wall texture and match nearby paint sheen before you start. Lightly sand rough edges and wipe with a damp cloth.
If the scratch is deep, undercut loose drywall for better adhesion. Seal any bare gypsum with a thin primer coat.
Finish prep by taping or masking surrounding trim to avoid accidental smears.
- Clean and dry
- Sand edges
- Prime bare spots
Applying And Smoothing Paste
Since you’ve prepped the area, load a small putty knife with spackling paste and press it firmly into the scratch, forcing the compound to fill the void completely rather than just sitting on top.
Smooth the paste with a single, even stroke, feathering edges to blend with surrounding texture. Let it dry fully per product instructions, then sand lightly with fine-grit paper until flush.
Wipe away dust and inspect under good light—surface preparation affects final look. If needed, repeat for deeper gouges.
Match primer and paint for color matching, ensuring repaired spots disappear once painted.
Applying Patching Compound for Larger Damage
Need to fill a gouge or hole that’s too deep for just spackling? Use patching compound to rebuild the surface, then focus on color matching and texture blending so repairs disappear.
Prepare the area, remove loose debris, and dampen the cavity slightly.
Apply compound in layers, pressing firmly and shaping the final pass to match surrounding texture.
Sand lightly to refine edges once it’s set.
Prime the patched spot before painting to ensure adhesion and even sheen.
Follow this quick checklist:
- Clean and prep the damaged area.
- Apply patching compound in controlled layers.
- Shape texture and prime for paint.
How Long to Let Filler Dry Before Sanding?
If you want clean, durable results, give filler enough time to cure before sanding—usually 30 minutes to 24 hours depending on the product and layer thickness. You’ll check manufacturer directions, ambient temperature, and humidity. Thin skim coats dry fast; deep fills take longer. Test by gently pressing; no tack means ready. Proper drying preserves wall textures and assures paint adhesion, keeping your home decor looking seamless.
| Product Type | Dry Time |
|---|---|
| Fast-setting fillers | 30–60 min |
| Standard spackle | 1–4 hrs |
| Heavy-duty filler | 12–24 hrs |
| Deep repairs | 24+ hrs |
How to Feather-Sand Repairs for Invisible Edges
Start by checking the edges of the repair to see where the filler meets the original wall and note any high or low spots.
Smooth the filler so its profile matches the surrounding surface, working outward from the center of the repair.
Finish by feathering with fine sandpaper in light, overlapping strokes until the edges disappear.
Assess Damaged Edges
Before you sand, take a close look at the repair edges to see where the filler meets the existing paint—you’re checking for high ridges, low spots, and feathered shifts so you can plan your sanding approach.
You’ll assess how the edge reads against the surrounding surface; consider Color blending and Texture matching to determine how much tapering is needed. Use these checks:
- Run your hand to feel ridges and depressions.
- Sight along the wall at shallow angles to spot shadows.
- Note texture differences and mark areas needing finer sanding.
Decide grit progression and pressure to feather without creating hollows.
Blend Filler Smoothly
When you feather-sand the filler, work progressively and deliberately so the repair blends invisibly into the surrounding paint. Use a sanding block to keep pressure even and follow the plane of the wall so you don’t create low spots.
Check edges frequently under good light; stop when the filler meets the old paint without a ridge.
Match wall texture by lightly recreating any stipple or orange-peel before priming.
Consider color coordination when choosing primer and paint so sheen and hue align.
Clean dust, inspect for smooth progressions, and touch up only where the edge remains detectable.
Feather With Fine Sandpaper
After you’ve smoothed the filler to meet the surrounding paint, grab fine-grit sandpaper to feather the edges for an invisible finish. You want gentle, even strokes that follow the wall texture so gradual change disappear.
Sand until the repair blends visually, checking from different angles in natural light. Consider color psychology: softer edges make the patch read as part of the wall, avoiding attention.
Finish with a light dust wipe before priming and painting to seal the gradual transition area.
- Use 220–320 grit for minimal removal.
- Sand with the grain of texture.
- Inspect in varied light.
How to Prime Patched Areas Correctly
If you’ve filled and sanded a scratch, seal that repaired spot with primer so paint adheres evenly and the patch doesn’t show through. Use a stain-blocking, water-based or shellac primer depending on the filler and wall stains.
Apply a thin coat with a small brush or mini roller, feathering edges into surrounding wall. Let it dry fully, sand lightly for smoothness, then inspect for texture differences.
Consider the paint sheen you’ll use—primer should be compatible so the finish looks uniform. For color matching later, primed patches provide a neutral base that prevents undertone shifts when you topcoat.
How to Match Existing Wall Paint Color
Before you paint, take small paint samples from the wall or a hidden area so you can compare tones accurately.
Bring those samples to a paint store or use them to mix a close match, then test the mixed color on a discreet patch of wall.
If the test blends once dry, you’re ready to touch up the scratch; if not, adjust and retest.
Take Paint Samples
When you’re ready to match your wall’s color, start by collecting small paint samples from the room—either from a hidden spot on the baseboard, inside a closet, or from a leftover can tucked away in your garage. Bring samples to a paint store or use a color-matching app, and note how lighting alters tones.
Consider color coordination with trim and furniture, and account for wall texture when choosing sheen. Label each sample with location and lighting.
Then:
- Photograph samples in natural light.
- Note sheen and texture differences.
- Keep small sealed swatches to compare at home.
Test Small Areas
Since lighting and texture can change how paint reads on your wall, test small, inconspicuous patches before committing to a full touch-up. Pick a hidden spot near the scratch and apply your closest match in thin layers, letting each dry fully.
Observe at different times of day to check color coordination with surrounding areas and furniture. Pay attention to how wall textures reflect light; stippling or smoothing may alter appearance.
If the patch blends, proceed; if not, modify tint or finish and retest. Small trials save effort and ensure the repaired area matches both tone and texture.
How to Choose the Right Paint Finish
Although the color grabs attention, the finish determines durability and how well repairs blend, so pick one that suits the room’s wear and light levels. You’ll weigh sheen, traffic, and how light highlights imperfections; basic color theory helps you predict visual effects, while wall texture affects gloss visibility.
Consider:
- Matte: hides texture, forgiving over scratches, low sheen for low-traffic rooms.
- Satin/Eggshell: slight sheen, washable—good for hallways and living areas.
- Semi-gloss/Gloss: highly durable and cleanable, but shows texture and brush marks.
Choose the least shiny finish that still meets cleaning needs to mask repairs.
How to Test Paint Match With Small Swatches
Pick a few inconspicuous spots—like inside a closet or behind furniture—so you can test without creating visible patches. Apply small swatches and check them both wet and after they dry, since color and sheen can shift as paint cures.
Compare the dried swatches in different light to confirm the best match before you paint the scratch.
Choose Test Locations
Where should you place your test swatches to get the most reliable color match? You’ll want spots that reflect daily light and texture so color matching and texture blending read true.
Test small swatches in three strategic areas:
- Near the scratched area but out of direct view — checks localized match.
- On a wall section that gets natural light — reveals true hue.
- Close to corners or trim where sheen and texture differ — tests blend with existing finish.
Let the swatches dry undisturbed and inspect at different times of day.
Pick the spot that best mimics final viewing conditions before committing.
Compare Wet Vs. Dry
Want to know whether a swatch really matches? Test both wet and dry to see differences.
Apply a small dab of paint over your chosen spot and observe the wet sheen. Wet paint often hides subtle shifts in wall color and can mask paint texture.
Let it dry fully—follow manufacturer drying times—and recheck in different lighting.
Dry paint reveals true tone, finish, and how texture blends with the existing wall.
If wet looks right but dry doesn’t, adjust tint or try a different finish.
Repeat on an inconspicuous area until wet and dry readings match before committing to the repair.
How to Blend New Paint Into the Surrounding Wall
Once the patch is dry, feather the new paint into the surrounding wall so the repair disappears; work outward from the center with thin, overlapping strokes and slightly thin your paint at the edge to match the wall’s sheen and texture. You’ll focus on color matching and texture blending to make the fix invisible. Adjust paint consistency, light angle, and brush pressure as you go.
Try this quick checklist:
- Thin edge: dilute paint slightly for a softer boundary.
- Match sheen: test finish under room lighting.
- Texture mimic: use stippling or light rolling to replicate surface grain.
Step back and inspect from different angles.
How to Paint Over Repaired Scratches With a Brush
Pick a high-quality angled or sash brush that holds paint well and gives you control.
Use thin, matching paint and blend it into the surrounding wall, feathering the edges with light, overlapping strokes.
Build coverage in thin layers, letting each one dry before adding the next for a seamless finish.
Choose The Right Brush
While a roller’s great for large areas, a good brush gives you the control you need to feather paint into repaired scratches without leaving brush marks. You’ll pick a brush based on paint type and wall texture, and consider color theory when matching sheen and finish.
Choose a size that fits the scratch width, and pick synthetic filaments for latex or natural for oil. Clean, quality brushes lay down paint smoothly so you can feather edges.
- Angled sash brush — precision for narrow gouges
- Flat nylon brush — smooth coverage on painted texture
- Small round brush — detail touch-ups and feathering
Blend Paint Seamlessly
After your repair’s dried and sanded, load a small amount of paint onto the tip of your brush and work from the center of the scratch outward, feathering thin strokes into the surrounding wall so the new paint dissolves into the old. Use matching paint sheen and consider color theory—warmer rooms hide transitions differently than cool ones. Test a small patch, let it dry, then reassess. Keep strokes light and avoid overworking. Clean edges with a dry brush if needed. Relax; subtlety wins.
| Tool | Action | Tip |
|---|---|---|
| Brush | Light strokes | Match sheen |
| Rag | Blend edges | Test first |
| Paint | Small amount | Mind color theory |
Feather And Layer Strokes
Now that your repaired area is smooth and you’ve matched sheen and color, focus on feathering and building thin layers to make the repair disappear. Use a high-quality brush, load sparingly, and work outward from the repair with light strokes so you don’t create ridges. Match wall textures by varying pressure and stroke length. Keep paint sheen consistent by drying between coats and evaluating under the room’s light.
- Feather edges: drag bristles outward to thin paint edge.
- Thin layers: apply multiple light coats rather than one heavy one.
- Blend final coat: soften overlap with barely damp brush.
How to Paint Repaired Scratches With a Roller
When your repaired scratches are dry and sanded smooth, grab a small foam roller and the matching paint so you can blend the fix into the wall evenly. Pour a little paint onto a tray, roll off excess, and work from the repaired area outward with light, even passes.
Focus on color matching first, then use the roller to mimic surrounding texture—avoid heavy pressure that leaves ridges. Overlap each pass slightly for seamless coverage.
Let the first coat dry fully, inspect under good light, and apply a second thin coat only if needed to perfect texture blending and uniform color.
How to Use Touch-Up Kits for Small Marks
Pick a touch-up kit that matches your paint finish and color, and make sure it includes the right applicators.
Prep the damaged area by cleaning, sanding any rough edges, and priming if needed so the paint will stick.
Apply the repair paint in thin layers and blend the edges with a brush or sponge until it disappears into the surrounding wall.
Choose The Right Kit
Looking for a quick fix for small scratches? You’ll want a touch-up kit that guarantees color consistency and aids texture matching. Pick kits labeled for your paint finish (flat, eggshell, satin). Check sample swatches or small bottles against your wall in natural light before buying.
- Choose matched-color pens or mini cans for quick coverage.
- Opt for kits with micro-applicators and blending tools for seamless texture matching.
- Prefer kits including clear sealant or finish-specific topcoat for durability.
Keep it simple: the right kit saves time and reduces rework, letting you hide marks without a full repaint.
Prep The Damaged Area
Before you apply any product, clear loose paint, dust, and grease from the scratch so the touch-up will stick and blend.
Lightly sand jagged edges with fine-grit paper, then wipe with a damp cloth and let dry.
Fill deeper gouges with a small amount of spackling or putty from your kit, press smooth with a plastic scraper, and remove excess.
Match the repair’s profile to surrounding wall textures so touch-ups don’t stand out.
Test color matching on a scrap or hidden spot and let any sample dry before committing.
Keep tools clean and work in good light for best results.
Apply And Blend Paint
Once the prep’s dry, you’ll start applying paint with the smallest tool in your touch-up kit—usually a brush, pen, or mini roller—working from the center of the repair outward to feather the edges so the patch blends into surrounding paint.
You’ll match tones using basic color theory, testing on a scrap before touching the wall. Adjust pressure to mirror wall texture and avoid ridges. Work thin coats, letting each dry fully.
Finish by evaluating blend under different light angles to catch mismatches.
- Layer thinly for seamless blend
- Match finish and texture
- Check in varied lighting
How to Fix Textured Walls and Match Texture
If your wall has a texture—orange peel, knockdown, or popcorn—you’ll need to recreate that pattern before you paint so the repair blends in; matching texture is as important as matching color.
Start by cleaning the area, sanding loose edges, and applying joint compound or patching plaster.
Use appropriate tools—spray texture cans, stomp brushes, trowels, or a sponge—to mimic existing wall texture.
Practice on cardboard, then adjust compound consistency and tool pressure.
Feather edges to blend.
Once dry, lightly sand high spots, prime the patch, and paint to match sheen.
These repair techniques guarantee seamless results.
How to Repair Scratches on Drywall vs. Plaster
When you’re fixing scratches, know that drywall and plaster behave differently and need distinct approaches: drywall’s paper-faced gypsum sands and patches easily, while plaster—being harder and often layered over lath—requires more care to avoid cracking or mismatched finish.
- For drywall texture: clean, apply lightweight joint compound, feather edges, sand smooth, and prime before paint.
- For shallow plaster finish scratches: use a fine filler or plaster repair compound, match the layer thickness, and sand lightly.
- For deeper plaster over lath: secure loose areas, build in thin layers, allow full cure, then blend and prime for paint.
How to Prevent Paint Brushstrokes and Roller Lines
Although a smooth finish takes practice, you can cut visible brushstrokes and roller lines by choosing the right tools and techniques from the start. Use a high-quality angled brush for edges, a dense nap roller for your wall texture, and paint with long, even strokes. Keep a wet edge, thin coats, and sand lightly between coats. Consider color psychology when picking sheens—matte hides imperfections; eggshell balances durability and subtle reflection.
| Tool | Purpose |
|---|---|
| Angled brush | Precise cutting-in |
| Dense roller | Smooth coverage |
| Sandpaper | Feather edges |
| Thinner coats | Reduce lines |
Fixing Scratches in High-Traffic Spots
In high-traffic spots you’ll want to prep the area thoroughly by cleaning, sanding lightly, and filling any gouges so the repair blends with the wall.
Choose a durable, washable paint finish—like satin or semi-gloss—to stand up to bumps and scuffs.
With proper prep and a tougher finish, your touch-ups will last longer and look professional.
Prep High-Traffic Areas
Because you see the most wear there, start by clearing and protecting high-traffic zones before you touch up scratches. Move furniture and remove decorative accents so you can assess damage and avoid drips. Tape baseboards and lay drop cloths where kids or pets pass.
Sand lightly to blend scratches with wall textures, then clean dust with a damp cloth.
- Remove obstacles and accents.
- Mask edges and cover floors.
- Lightly sand and wipe surface.
Prep carefully so your touch-up blends smoothly and lasts longer; good prep prevents repeat damage without needing heavier interventions.
Durable Paint Finishes
Want the scratches you fix to stay gone? Choose a durable paint finish that suits the room’s use and wall texture.
For hallways and kids’ rooms pick satin or semi-gloss; they resist scuffs and wipe clean. Match sheen to existing trim and test on a small patch to verify uniform appearance.
If texture varies, use a paint-and-primer combo to hide imperfections and improve adhesion. Apply thin, even coats and allow full cure before heavy use.
For extreme wear, consider a high-durability enamel or protective clear coat to preserve the repair and maintain appearance.
Stop Furniture and Pets From Re-Damaging Walls
If you want your freshly repaired walls to stay scratch-free, take steps now to protect them from furniture and pets. Use targeted Furniture protection and simple Pet deterrents so repairs last.
Moveable felt pads, bumper guards, and corner protectors cushion contact; keep furniture slightly off the wall and use rug anchors to prevent sliding.
Train pets with deterrent mats, bitter sprays, and praise-based redirection to stop scratching or rubbing.
Establish a designated play or rest zone with durable bedding and toys.
Regularly inspect high-traffic areas and replace pads or refresh deterrents to maintain protection and avoid repeated repairs.
- Felt pads
- Bumper guards
- Deterrent mats
How to Deal With Paint That Peels Around Scratches
When paint peels around a scratch, you’ll need to remove loose flakes, feather the edges, and prep the surface so new paint will bond properly; skip any step and the patch will likely fail.
First, scrape and sand away all loose paint until edges are smooth. Clean the area with a damp cloth and a mild cleaner to remove dust and oils—good surface preparation prevents future lifting.
Apply a quality primer to the bare spots, let it dry fully, then skim with lightweight spackle if needed. Sand smooth, wipe clean, and finish with matching paint in thin, even coats.
How to Fix Scratches Near Trim and Corners
Because trim and corners see more bumps and have sharp edges, you’ll need a slightly different approach to repair scratches there than you’d on flat wall surfaces.
Clean the area, sand lightly, and use a fine filler that won’t shrink. Match the paint and finish carefully to the trim line.
- Feather filler into the scratch to preserve edge lines.
- Use small brushes and tape to guarantee precise Color matching at the junction.
- Apply thin coats, focusing on Texture blending so the repair reads as part of the wall.
Let each coat dry fully before removing tape and inspecting.
How to Repair Baseboard Scuffs and Paint Over Them
Although baseboards take the brunt of foot traffic and furniture bumps, you can restore scuffed areas quickly with the right prep and paint technique.
Start by cleaning scuffs with mild detergent, then sand lightly to smooth edges. Fill gouges with wood filler, let it dry, and sand flush.
Clean scuffs with mild detergent, sand lightly to smooth edges, fill gouges, dry, and sand flush.
Prime exposed material to guarantee adhesion and color consistency with surrounding trim. Use a small angled brush and thin coats of trim paint, matching sheen for texture matching.
Feather each coat into the wall edge to avoid visible lines. Inspect after drying, touch up any missed spots for a seamless finish.
How to Speed Up Drying and Curing Times Safely
Once your baseboards are prepped and painted, you’ll want the finish to set quickly without risking damage; you can speed up drying and curing safely by controlling temperature, humidity, and airflow. Use gentle Drying techniques and observe curing safety to avoid tacky finishes or paint failure.
Try these practical tips:
- Raise room temperature to the paint’s recommended range and keep doors closed.
- Lower humidity with a dehumidifier or run HVAC, avoiding direct heat on wet paint.
- Increase airflow with fans but don’t blow dust onto wet surfaces.
Check paint manufacturer’s cure times before heavy use.
How to Clean Tools and Store Leftover Paint
When you’re done painting, clean brushes, rollers, and trays right away to prevent dried paint from ruining them. Use warm soapy water for latex paints and the appropriate solvent (mineral spirits or paint thinner) for oil-based paints.
Rinse and spin brushes to remove excess, comb bristles, and let them dry flat. For rollers and trays, squeeze out paint, wash thoroughly, and stand to dry.
Pour leftover paint into labeled, airtight storage containers, wiping rims before sealing to prevent skinning. Store containers upside down briefly to seal lids, keep in a cool dry place, and note date and color on the label.
How Much DIY Wall Repairs Typically Cost
DIY wall repairs usually cost far less than hiring a pro, and you can expect to spend anywhere from a few dollars for patching small nail holes to $50–$150 for fixing larger dents or cracks with joint compound and basic tools.
DIY wall repairs cost a fraction of pro rates — from a few dollars to about $50–$150 for bigger dents and cracks.
You’ll pay for materials, tools, and maybe primer or matching paint. Consider wall texture and paint sheen when estimating—textured repairs take more time; matching sheen may require new finish.
Typical DIY budget items:
- Spackling/compound, sandpaper: $5–$30
- Putty knife, sanding block: $5–$40
- Touch-up paint/primer: $5–$60
Expected Lifespan of Wall Patching and When to Repaint
Although small patches can last for years if you prep and paint them properly, their lifespan depends on repair quality, wall traffic, and environmental conditions. You’ll typically get several years from a well-done patch—often five to ten—if you match wall texture and use compatible filler and primer.
High-traffic areas or rooms with moisture shorten that. Monitor for cracking, discoloration, or sheen differences where paint sheen no longer blends; those signals indicate that touch-up or repainting is needed.
When multiple spots show wear or the whole wall’s appearance fades, repainting the entire surface guarantees uniform texture, color, and long-term protection.
Common Mistakes That Make Repairs More Visible
If you skip proper prep or rush steps, your repair will stand out no matter how neatly you apply filler or paint. You’ll notice problems when color, finish, or texture don’t match. Avoid these common mistakes:
- Skipping sanding or feathering edges, which leaves visible ridges against existing wall texture.
- Using mismatched primer or paint sheen, ignoring color psychology that affects perceived uniformity.
- Overfilling or underfilling scratches, creating depressions or bumps that catch light.
Do a clean prep, match sheen and hue, and replicate texture in thin layers. That prevents patch outlines and keeps repairs discreet.
Quick Troubleshooting When Repairs Still Show
When a repair still shows despite careful prep, don’t panic—there are quick fixes that usually solve the problem.
First, check lighting and sightlines; angled light can highlight uneven patches, so view from different positions.
If texture mismatches, gently retexture the spot to match surrounding wall textures using a sponge or brush, then feather edges.
For color shifts, apply a thin glaze or mist coat before a full repaint.
If decorative accents nearby draw attention, blend repair edges into them or adjust the accent slightly.
Finally, let coatings cure fully and reassess—many flaws disappear after proper drying.
Pro Tips to Make Repairs Invisible Every Time
Because invisible repairs come down to careful technique and the right materials, start by matching texture and paint before worrying about seamwork. You’ll want to focus on color coordination and replicate wall textures so light reads the same.
Prep thoroughly: sand, clean, feather edges, and prime small spots.
- Match paint sheen and tint precisely; test swatches on the wall.
- Recreate texture with the right tool—brush, sponge, or spray—and let it cure.
- Blend edges by feathering and scuffing, then apply thin coats until seamless.
Follow these pro tips and your repair will disappear every time.
Frequently Asked Questions
Can I Paint Over Scratches on Wallpaper Without Removing It First?
Yes, you can often paint over wallpaper after minor scratch repair techniques like filling and sanding, but you’ll risk adhesion and finish issues; consider wallpaper removal for best results, especially with textured or loosely adhered paper.
Will Household Cleaners Damage Patched Areas Before Repainting?
Yes — strong cleaning agents can weaken patched areas if you don’t test first. For proper surface preparation, use mild detergent, rinse thoroughly, and let patches cure; avoid bleach or abrasive cleaners that could damage repairs.
Can Temperature and Humidity Affect Paint Adhesion on Repairs?
Like a mood swing, yes — you’ll find temperature fluctuation and humidity impact weakens paint adhesion; don’t paint when it’s too hot, cold, or damp, and let repairs fully cure so coatings bond properly.
Is It Safe to Sand Lead-Painted Walls Without Testing First?
No, you shouldn’t sand lead-painted walls without testing first; lead paint risks are real, so testing safety matters. Get a certified test kit or professional inspection, and use containment and PPE if remediation’s needed to protect you.
How Long After Painting Can I Hang Pictures Near Repairs?
Like a fresh bandage settling, wait 24–72 hours before hanging pictures near repairs. You’ll want to guarantee wall texture blends and paint color matching looks seamless; tougher finishes or cool temps can mean longer curing times.
Conclusion
You’ve got this—think of the wall as a canvas and each scratch as a quick sketch you’re about to erase. By evaluating the damage, cleaning, filling, sanding, and matching paint, you’ll transform flaws into flat, invisible strokes. Trust your tools, take your time, and step back to inspect like a critic. With practice, those repairs will fade into the background, leaving your room looking fresh and whole again.