How to Paint Panel Walls Like a Pro
You can get pro-looking panel walls by cleaning, sanding, filling gaps, and priming before you paint. Work in sections: cut in with a sharp angled brush, roll flat faces with a short-nap roller, and push paint into grooves for even coverage. Use two thin coats, keep a wet edge, and allow full drying between coats to avoid peeling. Expect some seams to show, but follow these steps and you’ll see much better results—keep going to learn the finer tips.
Can You Paint Paneling? Quick Outcome and Expectations

Even if the paneling looks dated, you can paint it—success just depends on preparation and realistic expectations. You’ll improve appearance and extend paneling durability if you clean, sand, fill grooves, and use primer suited to slick surfaces.
Choose painting techniques like brushing into grooves, rolling with a low-nap roller, or spraying for smooth results. Expect some seam visibility; textured or bowed boards may still show through paint.
Plan for two thin coats and proper drying time to avoid peeling. If you follow these steps, you’ll get a refreshed wall that lasts longer than a quick, careless paint job.
Decide If This Guide Fits Your Project
Before you start, check what your walls are made of so you know which prep and paint will work.
Match the project’s scope—single room, whole house, or specialty trim—to the techniques you’ll use.
Finally, be realistic about the time you’ll need for prep, coats, and drying so the plan fits your schedule.
Assess Wall Material
When you’re planning to paint panel walls, first check what material you’re working with—wood, MDF, plywood, or vinyl each need different prep and paint types. Identify surface condition, wall texture, and whether panels are solid or veneer. That affects primer choice, sanding, and compatible paint sheen.
For example, vinyl resists some primers; MDF soaks moisture and needs sealing; wood may show grain. Decide tools: sandpaper grit, deglosser, brushes or sprayer.
Visualize the finish with this quick checklist:
- Surface type and damage
- Required primer and sealing
- Desired paint sheen and application method
Check Project Scope
If your project is bigger than a single accent wall or involves damaged panels, you’ll want to confirm this guide matches your scope before you start. Decide whether you’re doing a straightforward repaint or pursuing decorative finishes that need special primers, fillers, or skilled application.
Check panel condition, room size, and how many surfaces you’ll treat. This guide covers smoothing seams, basic priming, and common texture techniques for subtle depth—not advanced plasterwork or full restoration.
If your plan stays within those limits, proceed. If you need structural repairs, extensive texture work, or custom finishes, consult a specialist.
Evaluate Time Commitment
Although painting panel walls can look straightforward, you should honestly estimate how much time you’ll need so the project doesn’t drag on, disrupt your household, or lead to rushed, sloppy work. Start with realistic Time estimation and solid project planning: count panels, factor drying times, and include prep and cleanup.
Consider these scenarios to visualize the commitment:
- Single accent wall: 4–6 hours (prep, two coats, dries).
- Small room: 1–2 days (sanding, priming, painting, touch-ups).
- Whole house: multiple weekends (stagger rooms, allow cure times).
If your schedule’s tight, hire help or scale the scope.
Identify Your Panel Type: Wood, Veneer, MDF, or Plastic
Before you reach for paint, figure out what kind of paneling you’re dealing with—wood, veneer, MDF, or plastic, because each needs a different prep and primer. You’ll identify panel material by weight, grain, and edges; touch reveals plastic slickness, veneer shows real wood grain over a substrate, and MDF is dense with no grain. Surface preparation varies: sand and prime wood, degloss and use bonding primer on plastic, fill seams on veneer-backed panels, and seal MDF to prevent swelling. Use the table to compare traits and primer choices quickly.
| Type | Feel | Recommended Primer |
|---|---|---|
| Wood | Grainy | Oil or latex |
| Veneer | Thin grain | Sand + bonding |
| MDF | Smooth, heavy | Shellac or PVA |
| Plastic | Slick | Acrylic bonding |
Inspect Paneling: Loose Seams, Gouges, and Rot

When you inspect your paneling, work methodically along each wall and pay close attention to seams, gouges, and any soft or discolored spots that signal rot. During your panel inspection, test seam security by pressing and tapping; note gaps and loose boards. Look for surface gouges, raised grain, and dark patches that suggest moisture damage.
Record repairs and prioritize safety. Consider these quick checks:
- Press seams for movement and separate if needed.
- Probe gouges and sand or fill shallow damage.
- Tap suspect areas; replace panels with soft, rotten cores.
These steps keep your prep efficient and durable.
Measure the Room and Calculate Paint and Supplies
Before you grab a brush, measure the room carefully so your square footage is accurate and you don’t run out mid-project.
Use those measurements to calculate how much paint you’ll need and whether a second coat or primer will be required.
Also list supplies—rollers, brushes, tape, sandpaper—and any primer or specialty products based on the paneling condition.
Room Measurements Accuracy
Although it might seem tedious, getting accurate room measurements is the foundation of a smooth paint job, so grab a tape measure, note every wall height and length, and record window and door dimensions too. You’ll avoid surprises, estimate materials smartly, and choose colors confidently—consider color psychology and historical styles when planning accents and trims.
Measure panels individually if sizes vary. Mark outlets, switches, and trim widths. Use a notepad or app and double-check each figure.
Finally, summarize totals for walls, deductions, and trim so you have a clear checklist before buying supplies.
- Measure walls
- Note openings
- Record trim
Paint Quantity Calculation
Now that you’ve got accurate wall, opening, and trim measurements, you’re ready to convert those numbers into paint and supply needs. Calculate total square footage, subtract doors and windows, then divide by the paint’s coverage rate per gallon to find needed gallons per coat.
Account for two coats on paneling unless a primer coat’s required. Add 10–15% extra for touchups and pattern work like color blending or panels with contrasting trims.
For textured surfaces, increase paint allowance for texture enhancement because rough surfaces absorb more. Round up to guarantee continuous batches and consistent color.
Supplies And Primer Needs
When you’ve measured walls and calculated paint needs, list the supplies and primer that’ll keep the job efficient and the finish durable. You’ll want quality tools and the right primer to guarantee color blending and texture enhancement work as designed.
Gather drop cloths, sanding blocks, tack cloths, angled brushes, a 9–12″ roller with medium nap, trays, and painter’s tape.
Choose a stain-blocking primer for knots or tannin bleed and a bonding primer for slick panels.
Estimate gallons plus 10% extra. Store supplies nearby and mark leftover paint for touch-ups; this keeps results consistent and professional.
- Rollers and brushes
- Primer and paint
- Prep and cleanup tools
Pick the Right Primer for Each Panel Material
Before you brush on paint, match the primer to the panel material so the finish bonds and lasts. If panels are raw wood, use a stain-blocking oil or shellac primer to seal tannins and knots.
Match primer to panel material before painting—use stain-blocking oil or shellac on raw wood to seal tannins.
For MDF or engineered panels, pick a high-adhesion acrylic primer designed for smooth surfaces.
Laminate or glossy panels need a bonding primer made for slick substrates.
Repair holes and sand before priming, and mask off lighting fixtures.
Consider how primer color affects coverage near corners and around trim, and move furniture arrangement to allow even drying and easy access while you work.
Choose Paint Color and Finish for Panel Walls
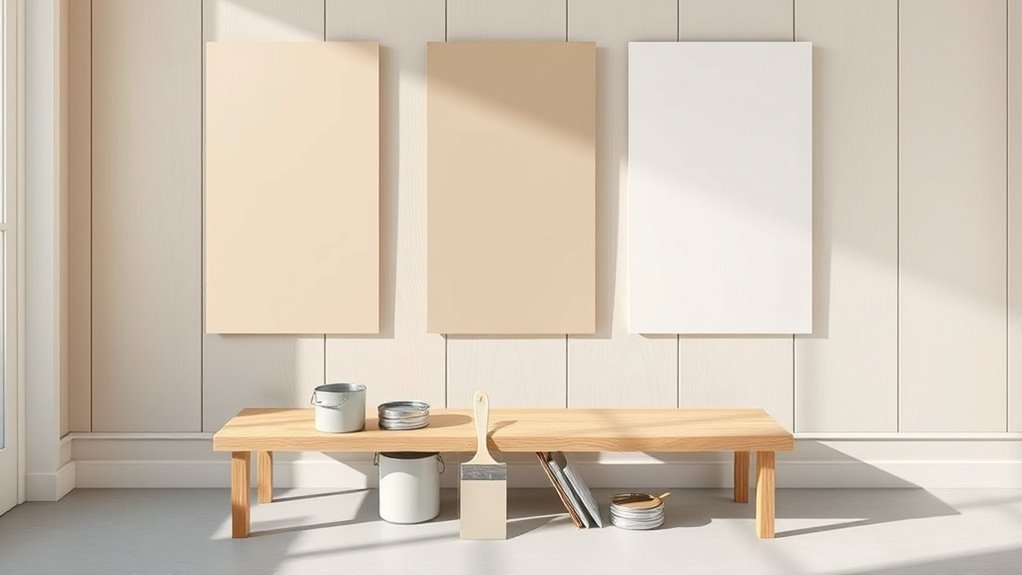
Look at the room’s natural and artificial lighting before you pick a color, since light will change how undertones read on the panels. Test paint swatches to be sure the undertone complements your flooring and furnishings instead of clashing.
Finally, choose a finish that either smooths or highlights the panel texture—flat or eggshell for hiding imperfections, satin for subtle sheen, or semi-gloss for pronounced texture and easy cleaning.
Assess Room Lighting
How bright is the room at different times of day, and how does that affect the paint you choose for panel walls? You’ll evaluate lighting effects and shadow casting to decide sheen and tone intensity. Walk the room morning, noon, and evening, noting glare or dim corners.
Consider:
- Morning light — cool, reveals cool undertones, low contrast.
- Midday sun — intense, shows imperfections, boosts gloss reflections.
- Evening/artificial — warm, deepens color, increases shadow casting.
Pick a finish that masks flaws where light’s harsh and lifts depth where it’s dim. Test samples at actual times before committing.
Choose Undertone Carefully
Because undertones steer how a color reads in different light, you’ll want to pick them as deliberately as you pick the main hue. You’ll test swatches on panel edges and observe at different times to catch lighting effects that shift warmth or coolness.
Match undertones to existing finishes and furnishings to preserve color harmony, or choose contrast intentionally for depth. Note that undertones can flatten or enliven panel grooves, so sample large areas.
Trust daylight and artificial light checks, and ignore trends if a swatch clashes. Decide based on how undertones interact across the room, not just on the chip.
Select Finish For Texture
Want your paneling to sing or to recede? You’ll pick finish and texture with purpose. Consider light, wear, and the look you want. Satin highlights grooves; matte hides flaws; semi-gloss cleans easily.
Try texture techniques like ragging or dry-brushing for depth, then seal. Balance sheen with color intensity so molding reads properly.
- Satin for subtle reflection and easy cleaning.
- Matte to minimize glare and make panels disappear.
- Semi-gloss to sculpt edges and resist scuffs.
Compare finish options on a test board, view in different light, and commit when it performs.
Clean and Degloss Paneling: Step-by-Step
Before you prime or paint, you’ll need to remove grime and the paneling’s glossy finish so paint will stick. Begin by vacuuming grooves, then wash panels with a degreaser or TSP substitute, rinsing thoroughly and letting them dry.
Test a small area to verify the cleaner won’t harm decorative finishes or reveal underlying textured effects you want to preserve.
Apply liquid deglosser with a lint-free cloth, working in sections and following manufacturer instructions. Wipe away residue and allow full drying time.
Finally, inspect for remaining shine; repeat deglossing where necessary before moving on to priming.
When to Sand Paneling and What Grit to Use
You’ll want to sand paneling when the surface is glossy, rough, or has a loose finish that will prevent primer and paint from sticking.
Use 120–150 grit to scuff glossy veneers and remove minor imperfections.
Step up to 80–100 grit only for heavier sanding or to remove damaged areas.
Always finish with a finer pass (150–220 grit) to smooth the surface before priming.
When To Sand
Even if the paneling looks smooth, you should sand before priming whenever the surface has gloss, visible imperfections, or loose paint; sanding gives primer and paint something to bite.
You’ll tackle Sand preparation and Surface smoothing by inspecting lighting, tapping for hollow spots, and testing adhesion with tape.
Sand when:
- You see glossy finish or shiny spots.
- You notice dents, scratches, or raised grain.
- Paint flakes or peels away.
Use gentle, controlled strokes to avoid gouging. Clean dust between steps and recheck trouble spots.
Sanding at the right time saves effort and ensures an even, long-lasting finish.
Choosing Sandpaper Grit
When prepping paneling, pick sandpaper grit based on how rough the surface is and what you’re trying to remove or smooth. You’ll assess paint flaking, glossy finishes, or raised grain, then choose Sandpaper types accordingly: coarse (40–80) for stripping, medium (100–150) for smoothing old paint, fine (180–220) for final prep, and extra-fine (320+) for delicate surfaces or between coats.
Grit selection matters—start coarser to remove defects, then progress finer to avoid visible scratches. Sand with the grain, use a sanding block or orbital sander for even pressure, and wipe debris before priming or painting.
Fill Grooves and Seams: Caulk and Wood Filler Techniques
Before you paint, seal every groove and seam so the finish looks continuous and professional. You’ll handle groove filling and seam sealing with the right products and technique: clean surfaces, apply caulk for gaps under 1/8″, use wood filler for deeper gouges. Smooth with a wet finger or putty knife, let cure, then sand flush.
Before painting, seal grooves and seams—caulk for hairline gaps, wood filler for deeper gouges, then sand smooth.
Check joints for movement; flexible paintable caulk prevents cracks. Clean dust before priming.
Visualize steps:
- Small gap: paintable caulk
- Deep damage: two-step wood filler
- Finish: sand, wipe, prime
This prevents paint sink and highlights, giving a seamless result.
Mask and Protect Trim, Floors, and Hardware
Since paint splatters and drips can ruin trim, floors, and fixtures, protect them carefully before you open a can. Start by removing outlet covers and hardware, labeling pieces for reassembly.
Use low-tack painter’s tape on decorative accents and along trim edges, pressing firmly to prevent bleed. Lay rosin paper or plastic sheeting over floors, taping seams so dust and paint don’t creep underneath.
Cover door handles and light fixtures with small plastic bags secured with tape. Keep a damp cloth and a putty knife handy for immediate touch-ups.
Proper masking preserves your surfaces and makes cleanup quick.
Cutting-In Around Grooves, Corners, and Trim
Now that your trim and floors are protected, focus on cutting-in around grooves, corners, and trim to create clean, professional lines. You’ll work slowly with a steady hand and a sharp angled brush to control paint flow and emphasize groove detailing and corner precision.
Now that trim and floors are covered, cut in slowly with a sharp angled brush for crisp grooves and corners.
Use light pressure and remove excess paint from the brush before approaching edges. Follow this simple sequence to keep lines crisp:
- Paint a thin bevel along trim and inside grooves first.
- Feather outward from the edge to blend with panel faces.
- Inspect and touch tiny gaps with a fine-liner brush for perfection.
Finish each section before moving on.
Paint Paneling: Best Rolling Methods to Avoid Lap Marks
Before you grab the roller, make sure the paneling is clean, sanded where needed, and primed so paint adheres evenly.
Choose a roller nap suited to the panel texture and load it evenly to prevent heavy spots.
Work in sections and keep a wet edge so coats blend without lap marks.
Prep The Surface
While you can’t fix uneven paint once it’s dry, you can prevent lap marks by prepping the paneling properly: clean dust and grease, fill gaps, sand glossy finishes, and prime where needed. You’ll assess surface texture, note seams, and consider Color psychology and Lighting effects when choosing sheen and primer. Prep guarantees consistent absorption so your final coat lays flat.
- Wash panels with degreaser and dry thoroughly.
- Caulk seams, fill dents, sand smooth with fine grit.
- Prime patched and glossy areas, feather edges for uniform porosity.
Do each step methodically so finish looks professional.
Use The Right Roller
Because roller choice and technique determine whether your paint lays down smooth or shows lap marks, pick a roller that matches the paneling’s texture and the paint’s sheen. Use a short-nap roller (1/4″–3/8″) for smooth panels and a slightly longer nap for textured surfaces so you don’t trap air or leave piles behind.
Load the roller evenly and test on scrap to confirm color matching across panels. A high-quality synthetic cover helps paint flow and improves paint durability, reducing touch-ups.
Replace worn covers mid-job to maintain consistent coverage and avoid streaks that mimic lap marks.
Maintain Wet Edges
If you keep a wet edge as you roll from panel to panel, you’ll blend new paint into still-wet paint and avoid the hard lap lines that show up where sections dry at different rates. Work steadily, keeping a full roller and a light pressure so you don’t overload edges. Watch drying time—temperature and humidity change how fast panels set.
Use matched batches and proper paint storage to preserve consistent sheen for Color mixing and application. When you reach a corner or pause, feather the edge outward.
Visualize this sequence while rolling:
- Load roller evenly
- Roll overlapping strokes
- Feather last pass to blend
Paint Beadboard and Raised Panels: Strokes and Tools
When you’re tackling beadboard or raised panels, choose brushes and strokes that follow the profile so paint settles evenly in grooves and over edges. Use a sash brush for narrow Beadboard patterns and a high-quality angled brush for Raised panel styles to cut cleanly along contours.
Light, overlapping strokes prevent lap marks; load brushes moderately to avoid drips. For flat faces, a short-nap roller speeds coverage without losing detail.
Work systematically, finishing each section before moving on so the finish stays uniform. Clean brushes between coats to maintain sharp edges and a smooth, professional result.
Handle Corners, Inside Seams, and Butt Joints
After finishing panels and grooves, tackle corners, inside seams, and butt joints with steady, deliberate strokes so paint bonds smoothly where surfaces meet. You’ll work near edges where Decorative finishes or Panel texture can read differently, so adjust pressure and brush angle. Use a small angled brush for tight seams, a flexible sash brush for inside corners, and a foam brush to feather butt joints. Clean excess, press paint into gaps, and keep strokes continuous.
After panels and grooves, carefully cut in corners, press paint into seams, and feather joints for a seamless finish.
- Cut in corners first.
- Push paint into seams.
- Feather joints toward panels for a seamless look.
Drying & Recoating: Timing and Humidity Tips
Because paint cures chemically as well as by evaporation, you’ll want to monitor both time and conditions before recoating to avoid trapping solvents or causing poor adhesion. Check manufacturer recoat windows and feel the surface—dry to the touch isn’t always ready.
Aim for lower humidity and moderate temperature; high moisture extends curing, risks tackiness, and hampers finish durability. Allow extra time for thick coats or deep color blending to prevent streaks.
Use thin, even layers and ventilate the room to speed safe curing. If unsure, wait an extra 24 hours rather than rushing a recoat and compromising the job.
Troubleshoot Painting Paneling: Bubbling, Peeling, and Marks
If your paint starts bubbling, peeling, or showing marks, don’t panic—you can usually diagnose and fix the issue without stripping all the paneling.
First, identify Bubbling causes: trapped moisture, poor adhesion from glossy surfaces, or painting over dirt.
For peeling prevention, always clean, sand, and prime; use a bonding primer on slick panels.
Assess marks—stains may need stain-blocking primer; dents and gouges require filler and light sanding.
Then follow targeted repairs:
- Clean, sand, prime affected spots.
- Fill, sand smooth, and prime repaired areas.
- Repaint with proper primer and paint, allowing full cure.
Quick Touch-Ups and When to Call a Pro
When you spot small chips, scuffs, or isolated peeling, you can usually fix them yourself with a few simple steps. Clean the area, sand lightly, apply primer, and touch up with matching paint. Use a fine brush for trim and a small roller for flat panels.
For decorative techniques like glazing or faux finishes, practice on scrap wood first. Consider color coordination — test swatches in different light before blending.
Call a pro if damage is widespread, panels are warped, or mold’s present. Pros handle structural repairs, complex textures, and seamless color matching faster and with lasting results.
Frequently Asked Questions
Can Painted Paneling Be Stripped and Reverted to Natural Wood Later?
Yes — you can strip paint from paneling and revert it to natural wood later. You’ll use panel removal techniques, sanding, and chemical strippers for effective wood restoration, and you’ll finish with staining and sealing.
Will Painting Paneling Affect Home Insurance or Resale Value?
Homebuyers report 80% prioritizing updated interiors, so painting usually helps resale; you’ll avoid insurance issues if you keep paneling maintenance and paint durability documented, since insurers care more about safety and moisture than color.
Can I Install New Trim or Molding After Painting Panels?
Yes — you can install new trim or molding after painting panels; trim installation often follows painting, but you’ll want to protect fresh paint, choose molding options that match style, and allow full drying to avoid scuffs or adhesion issues.
Are There Eco-Friendly or Low-Voc Primer Options Recommended?
Yes — you can: choose eco friendly primers that smell mild yet perform tough, and pick Low VOC options like water-based acrylic or shellac primers; you’ll protect surfaces, reduce fumes, and still get pro-level adhesion and coverage.
Can I Use a Paint Sprayer in Small, Tight Rooms With Paneling?
Yes — you can use a paint sprayer in small rooms with paneling, but you’ll need masking, ventilation, and a low-pressure sprayer to avoid overspray; practice first, use drop cloths, and work in controlled, overlapping passes.
Conclusion
You can absolutely transform paneling into a polished wall with the right prep, materials, and patience. Remember to test methods on a small section first. For example, a friend painted their dated oak-paneled den after filling seams, sanding lightly, priming with an adhesion primer, then applying two coats of satin—result: a bright, modern space that hid grooves and lasted years. Follow the steps, mind drying times, and you’ll get pro-looking results you’ll love.