How to Paint Patches on Wall Seamlessly
You can make a patch disappear by matching the repair material, texture, primer, and paint to the surrounding wall. Start by cleaning and sanding the damaged spot, choose spackle or joint compound sized to the hole, feather thin coats, and sand smooth between layers. Prime once fully dry, then use the same roller nap and paint sheen to blend outward with thin coats. Follow the step‑by‑step checklist below to get a flawless finish.
Quick Answer: Make Patched Paint Invisible

Even if you’re short on time, you can make patched paint disappear by matching texture and sheen, feathering the new paint into the old, and using the same paint type and color.
Start by sanding and cleaning the patch, then match wall textures with a light skim or a dabbed decorative techniques approach. Use a small roller or brush to blend edges, feathering outward so the repair fades into surrounding paint.
Apply thin coats, letting each dry fully to check sheen. Finally, view the repair in different light; adjusting texture or a thin glaze helps hide any remaining contrast.
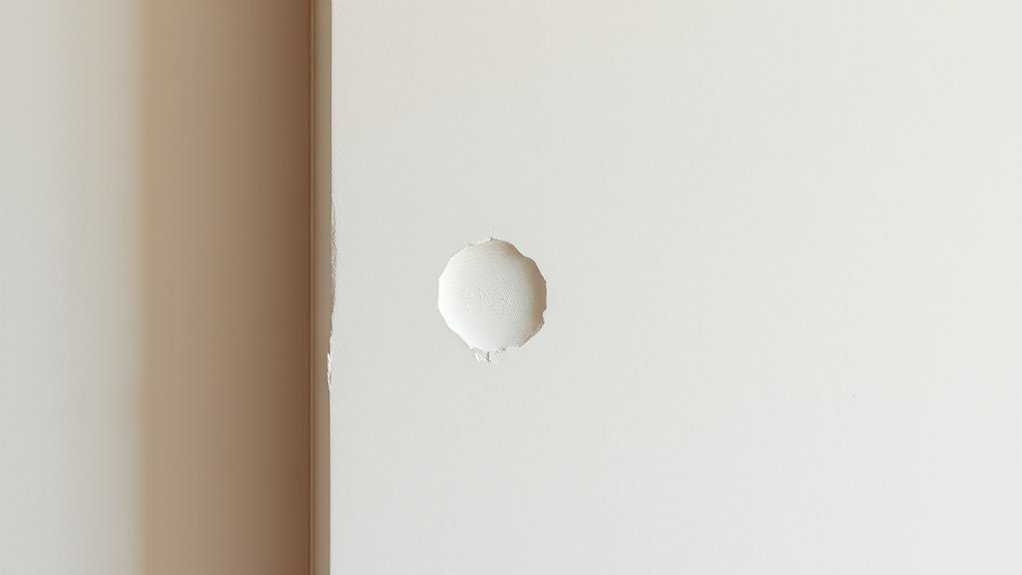
Identify the Damage: Nail Hole, Dent, or Gouge
Before you start patching, take a close look to determine whether you’re dealing with a nail hole, a shallow dent, or a deeper gouge. You’ll assess depth and edges: nail holes are small and shallow, dents are broader with intact surface, gouges cut into drywall or plaster. That guides filler choice and sanding. Keep color matching and texture blending in mind now so repaired areas won’t stand out later. Use the quick reference below to pick technique.
| Type | Depth | Repair action |
|---|---|---|
| Nail hole | Shallow | Spackle, sand, paint |
| Dent | Moderate | Fill, feather, texture |
When to Touch Up Vs. Fully Repaint
If the spot is small and your paint still matches, you can usually touch it up without repainting the whole wall.
When color, sheen, or texture varies across a larger area, you’ll want to repaint the entire section to avoid a patchy look.
We’ll cover how to decide which approach works best and how to blend either repair seamlessly.
Small Spot Matching
When a small nick or scuff appears, decide whether to touch up or repaint by checking size, surface texture, and how old the surrounding paint is.
For tiny spots under a square inch, you’ll likely touch up: clean, feather the edges, and apply thin coats so color blending looks natural. Match sheen and use a small brush or cotton swab for precision.
If texture differs—orange peel, stipple—focus on texture matching before color; build micro-texture with compound or stippling tools, then paint.
Always let primer and paint fully cure to confirm the repair disappears against the wall.
Broad Area Repainting
Although a single scuff can be fixed with a dab of paint, you’ll need to reconsider your approach when damage spans several square feet. You should assess color psychology — will a small patch stand out or make the room feel uneven?
Match wall texture first: smooth, orange peel, or knockdown affects blending. If multiple areas show sun-fade, stains, or inconsistent sheen, touch-ups won’t hide seams.
Repaint the whole wall or an entire side to guarantee uniform color and texture. When in doubt, feather edges and use the original paint finish, or commit to full repainting for seamless results.
Choose Patch Material by Hole Size
Pick your patching material based on the size of the damage so you get a durable, invisible repair.
Use lightweight spackle for tiny dents and nail holes.
Joint compound or patch kits are suitable for medium holes and cracks.
Drywall patches or new drywall are best for large holes and structural damage.
I’ll walk you through the right products and techniques for each size.
Tiny Dents And Nail Holes
If you’ve got tiny dents or nail holes, match the patch material to the size: use lightweight spackling for pinholes and shallow dings, vinyl-based filler for slightly larger nail holes, and a small drywall compound for anything approaching 1/2 inch. Pick the smallest effective product so you sand less and get better color matching and texture blending. Use a putty knife, feather edges, let dry fully, then sand smooth. Table of quick choices:
| Hole Size | Patch Type | Dry Time |
|---|---|---|
| Pinholes | Lightweight spackle | 30–60 min |
| Small nails | Vinyl filler | 1–2 hours |
| ~1/2″ | Drywall compound | 24 hours |
Medium Holes And Cracks
Moving from tiny dents to larger damage, you’ll want to match the repair method to hole size and wall type for a lasting, invisible fix.
For medium holes and cracks (roughly 1/2″ to 4″), pick a patch material like mesh tape with setting-type joint compound or a small drywall patch. Apply compound in thin layers, feathering edges so you can later blend texture without ridges. Sand lightly between coats, then prime.
When painting, focus on color matching and texture blending: sample paint, use the same sheen, and replicate wall texture with a brush or sponge before final coats for a seamless result.
Large Holes And Damage
How big is the damage and what’s behind it will determine the right patch—use self-adhesive mesh or a metal patch for holes up to about 4″.
A drywall plug or backing and new drywall piece are suitable for holes 4–12″.
A framed repair with new drywall is recommended for anything larger.
Inspect for moisture damage or mold and address leaks before repairing.
Remove loose paper or wallpaper removal remnants so compound bonds.
For medium-large repairs, screw a backing, fit a snug drywall patch, tape seams, and skim coat.
Sand, prime with stain-blocking primer, then paint to match texture and sheen for a seamless result.
Tools for Drywall Patching
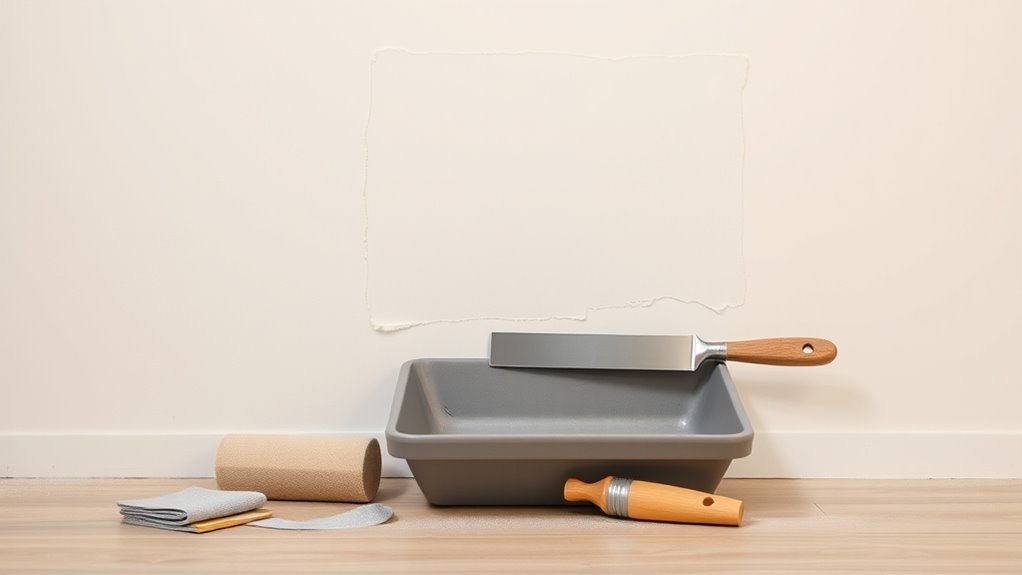
What tools will you need to patch drywall cleanly and efficiently? Gather a utility knife, drywall saw, and sanding block for precise cuts and smoothing. Use a tape measure and straight edge to size patches accurately.
You’ll want drywall compound, a hawk or mud pan, and a range of taping knives (4″, 6″, 10″) for feathering seams. Keep mesh or paper tape, screws, and a drill handy.
For finishing, have a sponge, primer, and quality paint brushes or roller. Use color mixing and texture matching tools—small test pots, texture sprays, and fine trowels—to blend the repair seamlessly with the wall.
Prepare the Wall: Clean, Sand, and Remove Loose Material
Before you apply any patching compound, clean the damaged area and remove loose material so the new drywall will bond properly. Scrape flaking paint, clear debris, and sand edges smooth; check for wall moisture or lingering wallpaper removal adhesive that can prevent adhesion. Wipe with a damp cloth and let dry. Use a utility knife to cut ragged paper, and a brush to clear dust. If you spot mold or dampness, address it before patching. Below is a quick checklist to guide you.
| Step | Tool | Tip |
|---|---|---|
| Clean | Rag | Remove dust |
| Sand | Sandpaper | Feather edges |
| Scrape | Knife | Cut loose paper |
| Check | Moisture meter | Test damp spots |
| Dry | Fan | Ensure dry surface |
Repair Small Nail Holes With Spackle
Now that the surface is clean and smooth, you can fix small nail holes with a bit of spackle. Apply a tiny amount with a putty knife, press to fill, and scrape flush. Let it dry, then sand lightly so the patch is level.
- Use lightweight spackle for small holes.
- Sand gently to preserve surrounding texture.
- Prime spots before painting for better color matching.
- Feather paint edges to achieve seamless texture blending.
You’ll avoid overfilling and excessive sanding; finish by painting with thin coats that match sheen and hue.
Fix Medium Dings and Shallow Dents
When dents are larger than nail holes but not deep enough for full drywall repair, you’ll use a slightly different approach—one that builds up material in thin layers and restores the surrounding texture.
Clean the area, remove loose paint, and apply a lightweight joint compound with a putty knife, pressing into the ding. Let each thin layer dry, sanding lightly between coats until flush.
Feather edges outward for smooth texture blending. Prime the patched area, then paint using small strokes, checking color matching under room lighting.
Finish with a light misting of paint to unify sheen and appearance.
Patch Large Holes: Mesh, Backing, and Kits
When you’re facing a large hole, choosing the right mesh patch or backing can make the repair much stronger and smoother.
You’ll want to match the mesh type to the wall material and use a backing or kit that supports the compound while you work.
In the next steps we’ll cover how to select mesh, install backing, and use kits for a durable, paint-ready finish.
Mesh Patch Selection
If you’re repairing a large hole, choosing the right mesh patch makes the job faster and gives a smoother finish. You’ll pick mesh based on hole size, wall type, and desired texture variations so the patched area blends during paint matching.
Cut a slightly larger patch, center it, and press firmly. Use setting compound over the mesh, feathering edges for a seamless skim coat.
- Open-weave fiberglass for flexibility and strength.
- Self-adhesive mesh for quick placement.
- Metal-reinforced mesh for irregular or deep damage.
- Pre-cut drywall patch for clean, consistent edges.
Backing And Kits
Although mesh handles surface support, backing provides the structural hold you need for large or deep holes. Kits bundle the right pieces so you won’t guess at materials.
You’ll choose rigid backing—wood, metal, or adhesive plates—when the cavity is deep or the patch needs screws. Kits combine backing, joint compound, and sometimes a finishing mesh so you get consistent supplies.
When installing, secure the backing flush, apply compound in thin layers, and sand between coats.
Finish by focusing on color matching and texture blending so the repaired area disappears. Proper backing plus a kit saves time and yields durable, seamless results.
Applying Joint Compound: Step‑By‑Step
Before you grab the knife, prep the area by removing dust and taping off surrounding surfaces so the compound adheres cleanly and you don’t create extra cleanup.
Before grabbing the knife, prep thoroughly: remove dust and tape off surrounding surfaces for cleaner adhesion and less cleanup
You’ll apply joint compound in controlled layers, aiming for smooth texture blending and preserving nearby paint for later color matching. Use a wide knife, press firmly, and smooth each pass.
Let each coat dry fully, sand lightly between coats, and remove dust before the next application.
- Load knife with thin compound.
- Fill low spots, overfill slightly.
- Smooth with long strokes.
- Sand, wipe, inspect for uniform surface.
Feather Edges for a Tapered Finish
Once your compound is smooth and sanded, feather the edges so the repair blends invisibly into the surrounding wall. Work outward with a wide knife, angling it slightly to taper the compound thinly at the perimeter. Keep strokes light and continuous to avoid ridges; wipe the blade between passes.
For texture matching, replicate the surrounding finish with a touch-up sponge, stippling brush, or light skim of compound as needed. Let the feathered area dry fully before priming.
When you prime and proceed to paint blending, use thin coats and extend paint beyond the repair to erase any visible transition.
Best Sanding Practices (No Gouges, Less Dust)
When you sand the repaired area, work with light pressure and a fine-grit block or sanding pad to remove highs without digging grooves. Keep the pad flat and move it in overlapping, even strokes so you smooth the surface rather than sculpt it. You’ll minimize gouges and dust by using a sanding block, vacuum attachment, and tack cloth. Stay patient and check from different angles.
Consider how texture affects color matching and final sheen when you prep for primer selection.
- Use 220–320 grit for final smoothing.
- Sand with the grain of texture.
- Attach a vacuum to capture dust.
- Wipe with a damp sponge before painting.
When and How to Prime Patched Drywall
Once your patched drywall is sanded smooth and fully dry, you’ll want to prime it before painting so the repair blends and the paint adheres evenly.
Choose a stain-blocking or PVA primer depending on the patch size and surface porosity.
Apply thin, even coats with a brush or roller, follow the manufacturer’s drying times, and sand lightly between coats if needed.
Timing To Prime
After your patched drywall feels completely dry to the touch and the joint compound has set hard, you should prime before painting to seal the repair and guarantee even paint absorption.
Wait long enough—often 24–48 hours—so moisture leaves the compound. Test with your finger; no dampness means it’s ready.
Consider priming techniques that match surrounding drywall textures to avoid visible progression. Use thin, even coats and let each coat dry fully.
When humidity is high, extend drying time.
If you sand after a tack coat, clean dust before final primer to assure uniform adhesion.
- Check dryness
- Match texture
- Apply thin coats
- Allow extended drying
Choosing The Right Primer
How do you pick the right primer for a patched drywall area so the repair disappears under paint? Choose a primer that seals joint compound and evens porosity, usually a high-quality acrylic or shellac-based product.
If you’ll be painting a deep or bright color later, use a tinted primer to aid color matching and cut coats needed.
For textured walls, pick a primer that won’t flatten the surface so texture blending stays consistent.
Spot-prime only the patched zone unless substrate varies across the wall.
Read labels for adhesion and stain-blocking properties, and match primer type to your finish paint.
Application And Drying Tips
When the patched drywall feels dry and smooth to the touch, prime it promptly so the sealer locks in the joint compound and evens surface porosity before you paint. You’ll prevent flashing and guarantee consistent color mixing later.
Apply a thin, even coat with a roller for matching wall texture, brushing edges. Let primer dry fully per label—usually an hour to overnight—then sand lightly if needed.
Check for absorption differences and re-prime porous spots. When painting, use the same sheen and blend outward to hide seams.
- Use quality primer
- Thin, even roller coats
- Respect drying times
- Light sanding between coats
Match Paint Color Without a Full Repaint
If you don’t want to repaint the whole wall, you can still get a nearly perfect match by sampling the existing paint, adjusting tint in small batches, and testing on a hidden spot under the same lighting.
Start by cleaning and photographing the area, then cut a small chip to take to a color match service or use a handheld spectrophotometer.
Mix tint slowly, keeping notes of ratios for color consistency.
Apply thin coats to a discrete patch, letting each dry before evaluating.
Match texture by replicating roller nap or brush strokes and feather edges so the repair blends seamlessly.
Choose the Right Sheen to Hide Repairs
Think about sheen as much as color—you’ll want to match the existing surface sheen so light doesn’t highlight the patch.
When possible, use a low-sheen or matte paint on repairs since it hides texture and imperfections better than glossy finishes.
Feather the edges of your touch-up so the new sheen blends smoothly into the old.
Match Sheen To Surface
Because light reflects differently off each finish, you’ll want to choose the same sheen as the surrounding wall so the patched area blends in visually. Match sheen to surface by testing small swatches, noting paint durability and gloss level to mirror the original. Feel the texture and observe from different angles before committing. Use a dry brush for feathering and thin coats to avoid buildup.
- Compare original sheen under natural light.
- Note paint durability needs for the room.
- Apply tiny test patch and let it cure.
- Step back and inspect at varying distances.
Use Low Sheen Paint
When you’re hiding repairs, choose low-sheen paint so light won’t spotlight small imperfections. Flat, matte, or eggshell finishes scatter reflections and make patched areas recede.
You’ll want to prioritize Color matching first—test swatches under the room’s lighting to verify tone and value match the surrounding wall.
Next, consider Texture blending at application: use the same roller nap and stipple technique the existing finish shows so the patch doesn’t read differently.
Apply thin, even coats, letting each dry fully before the next.
Low-sheen finishes tolerate slight surface variance, so focus on matching color and texture, not perfect gloss.
Blend With Feathering
After matching color and texture with a low-sheen finish, blend the repair into the surrounding wall by feathering the paint out from the patch so the edges disappear. You’ll work outward with a lightly loaded brush or roller, softening the border to match existing wall texture and avoid a sheen mismatch.
Pay attention to drying stages and recoat lightly if needed. Test in a hidden spot to confirm paint sheen continuity before finishing.
- Light brush strokes radiating outward
- Thin coats to build coverage
- Match nap and pressure with roller
- Check under different light angles
Brush, Roller, or Spray: Which Blends Best?
Choosing between a brush, roller, or sprayer comes down to the size of your repair, the texture of your wall, and how invisible you want the patch to be.
Choose brush, roller, or sprayer based on repair size, wall texture, and desired invisibility.
For tiny spots, use precise brush techniques to place paint and blend edges; you’ll control direction and amount.
For medium areas, rely on roller efficiency to match nap and apply even coats, working outward from the patch.
For large or heavily textured surfaces, a sprayer can create the most uniform finish but needs masking.
Choose tools to match scale and texture, feathering gradations so the patch disappears into the surrounding wall.
Painting Technique to Avoid Brush Strokes
To keep patches from showing brush marks, feather your strokes outward from the center of the repair so the paint thins at the edges.
Apply several thin coats rather than one heavy one to maintain a smooth, even finish.
Let each coat dry completely and lightly sand any raised ridges before the next pass.
Feathering Brush Strokes
While you’ve got the paint loaded on your brush, glide the bristles lightly outward from the patched area, tapering pressure so each stroke thins at the edges; this feathering blends new paint into the existing surface and prevents visible ridges or overlap lines.
You’ll work small sections, match tones using color theory to disguise edges, and maintain paint durability by avoiding heavy buildup. Keep strokes consistent, overlap slightly, and step back to check blending. Visualize the finish as seamless.
- Light outward strokes
- Taper pressure to edges
- Match hue and value
- Inspect and refine
Use Thin Coats
Because thin coats dry faster and level out better, you’ll get smoother results by applying several light layers instead of one heavy one. Start with properly matched paint after careful color matching so each coat blends seamlessly.
Use the right tool selection: a quality angled brush for edges and a short-nap roller for flats. Load sparingly, brush or roll in consistent directions, and let each coat fully tack over before the next.
Sand lightly with fine grit between coats if needed to remove ridges. Finish only when the surface looks uniform under varied light, avoiding overworking wet paint.
Blend New Paint Into Existing Texture
If your patch has a different texture than the surrounding wall, match that texture before you paint so the repair disappears once the color blends. You’ll assess texture, use matching compounds, and feather edges so light and shadow read consistently.
Consider color theory for how light alters perceived texture and choose a paint with similar sheen and paint durability to avoid future contrast. Use small test patches to confirm match.
- Inspect texture under varied light.
- Apply joint compound or spray texture to match.
- Feather edges and sand lightly when dry.
- Test paint samples for seamless integration.
Fix Glossy or Satin Finishes That Show Repairs
Glossy and satin finishes highlight every imperfection, so you’ll need to reduce sheen and match surface smoothness before repainting to keep repairs invisible. Start by scuffing the repair area with fine sandpaper to dull the sheen, then feather the edges so the surface blends.
Use a primer designed for glossy surfaces, letting it cure fully. For texture matching, replicate the surrounding finish with light stippling or spray techniques before topcoating.
Apply paint in thin, even layers, checking under varied angles. Make subtle lighting adjustments—view repairs under the room’s typical light—to confirm the sheen and texture read seamless.
Troubleshooting: Ridges, Flash, and Color Shifts
Once you’ve matched sheen and texture, turn your attention to common post-repair problems: ridges left by overfilled seams, flash where primer or paint dries differently, and subtle color shifts that reveal the patch. You’ll inspect, diagnose, and correct without redoing the whole wall. Focus on Color matching and Texture blending so repairs vanish.
Match sheen and texture, then refine seams, equalize absorption, and feather paint until repairs vanish seamlessly.
- Sand ridges smooth, feather edges, then wipe dust clean.
- Spot-prime glossy or porous areas to equalize absorption.
- Recoat with thin, overlapping passes to minimize flash.
- If color shifts persist, blend feathered strokes outward until tone transitions disappear.
Quick Fixes When Touch‑Ups Still Show
When touch-ups still show, don’t panic—start with targeted corrections that hide the flaw without redoing the whole wall. Inspect under natural light to pinpoint edges, then feather the paint outward with a damp sponge or a soft brush to improve texture blending.
If color looks off, re-evaluate color matching using tiny amounts of tint added to a sample pot; test on cardboard and dry before applying.
For raised seams or gloss differences, lightly sand and apply a thin coat of primer only on the spot, then repaint.
Work in small increments, let coats dry fully, and reassess until seamless.
Prevent Shrinkage and Future Cracks in Patches
If your touch-ups are holding but you want them to last, focus on preventing shrinkage and future cracks before you finish. You’ll prep, use compatible materials, and control drying to protect your patch and maintain texture matching for a seamless look and improved paint durability.
Apply thin, even fills; feather edges into surrounding drywall; sand lightly; and prime with a product suited to both compound and paint. Reinforce larger repairs with mesh tape or backing.
Control humidity and temperature while drying so compound cures slowly and evenly, reducing stress that causes shrinkage and hairline cracking later.
- Use mesh tape
- Feather edges
- Prime properly
- Control drying environment
Time and Cost Estimates for Common Patch Jobs
Because patch size and wall material vary, you’ll want realistic time and cost expectations before you start so you can plan labor, materials, and any contingency.
Small nail-hole repairs take 15–30 minutes and a few dollars for spackle, sanding, primer, and paint.
Nail-hole fixes: 15–30 minutes and a few dollars for spackle, sanding, primer, and paint.
Larger drywall patches often need a few hours across drying stages and $20–60 in materials.
Textured repairs to match Wall textures add time for blending and may require specialty tools or compound, raising costs.
Budget extra time for paint drying between painting techniques and coats.
Tackle straightforward jobs yourself; for unusual materials, factor in learning time or rental tools.
When to Hire a Pro (Complex Texture or Damage)
Since matching complex textures and repairing extensive damage often takes skill and specialized tools, you should call a pro when the patch involves heavy structural damage, intricate texture patterns, or large areas that would be costly to redo if done poorly. You’ll save time and avoid mismatched wall texture, poor surface prep, and visible repairs.
Consider hiring a pro if you face:
- Water or mold damage that weakened studs or drywall.
- Large sections where texture pattern must match seamlessly.
- Cracked or uneven plaster requiring skim coats and float work.
- Hidden electrical or structural issues behind the damaged area.
Invisible‑Patch Checklist: Step‑By‑Step Sequence
Now that you know when to call a pro, you can tackle smaller repairs yourself with confidence by following a clear, step‑by‑step checklist. Start by cleaning, sanding, and matching the wall texture; apply patch, feather compound, and sand smooth. Prime, match paint sheen, and blend feathered edges. Dry between coats and inspect in natural light.
| Step | Action | Tip |
|---|---|---|
| 1 | Clean & sand | Remove dust |
| 2 | Apply patch | Use compatible compound |
| 3 | Feather & sand | Match wall texture |
| 4 | Prime | Seal patch |
| 5 | Paint & blend | Match paint sheen |
Follow sequence, check edges, and touch up as needed.
Frequently Asked Questions
How Long Should I Wait Before Repainting After Patching?
Wait about 24 to 48 hours before repainting once the patch’s compound fully dries; if you’ve matched drywall texture, prime first so paint blending’s easier, then paint, and you’ll avoid visible seams and uneven finish.
Can I Patch Drywall Outdoors or in Damp Areas?
You’re better off avoiding outdoor or damp-area drywall; it’s as fragile as a soap bubble. You should choose products with enhanced Drywall durability and superior Moisture resistance, or use cement board/greenboard designed for wet environments.
Is It Safe to Patch Over Mold or Mildew Spots?
No, you shouldn’t patch over mold or mildew spots; you’ll first perform mold removal and fix moisture sources, then treat surfaces for mildew prevention, dry thoroughly, and only then repair and repaint to avoid recurrence.
What Primer Type for Patched Areas Over Oil-Based Paint?
Coincidentally, you’ll want a solvent-based or oil based primer; you’ll guarantee primer compatibility with existing oil paint so the patched areas bond properly. Use an oil based primer for stains, adhesion, and to block bleed-through before topcoat.
How Do I Repair Patched Corners and Trim Seams?
You’ll sand seams, apply drywall compound, and feather edges to achieve texture blending; prime, sand again, and paint, matching trim profiles so joints disappear and you’ll get a seamless finish that looks factory-perfect.
Conclusion
So you want the patch to vanish—how modest. You’ve sanded, skimmed, and feathered like a saint; now paint like a magician. Don’t freak if the color’s off—blend, thin, and layer instead of nuking the whole wall. If a small patch’s still tattling, step back: sunlight and time are mercy. And if it still stares at you, call a pro—because sometimes “invisible” is just expensive denial.