How to Paint Perfect Circles on a Wall Easily
You can paint perfect circles on a wall easily by marking centers with a level, using a string‑and‑pencil or spool jig to score a light guide, then masking with low‑tack tape or a cardboard stencil. Prep the wall—clean, spackle, sand, and prime—so paint lays flat. Use a dense angled brush for edges and a mini roller for fills, apply thin even coats, and remove tape at a 45° angle. Keep practicing; more tips and fixes follow if you want them.
Fast Way to Mark a Perfect Circle on a Wall
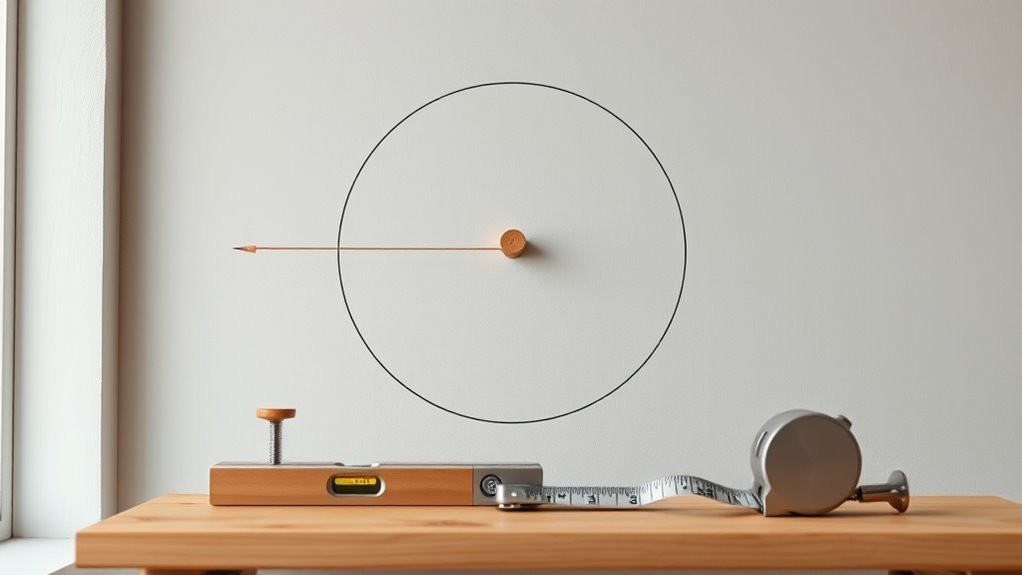
If you need a quick guide mark for a perfect circle on a wall, use a simple string-and-pencil jig. Tie one end of a string to a pencil and the other to a pushpin or nail at your center point.
Then keep the string taut while rotating the pencil to score a light circle. You’ll adjust for wall textures by using firmer pressure on rough surfaces or a softer touch on smooth drywall.
Test the jig on scrap material to match color schemes and edge crispness. This fast method gives a reliable guideline before you tape, prime, or paint.
Plan Circle Size, Placement, and Spacing
Now that you’ve marked the center and scored your guideline, decide how big each circle should be and exactly where they’ll sit on the wall. Measure diameter, sketch placement with painter’s tape, and consider Color coordination and lighting effects so circles read well from different angles. Balance sizes to avoid crowding; leave consistent margins for breathing space. Use a quick chart to compare options:
| Diameter | Spacing |
|---|---|
| 12 in | 6 in |
| 18 in | 9 in |
| 24 in | 12 in |
Stand back, view in natural and artificial light, then finalize spacing before painting.
Prep the Wall for Smooth Paint and Edges
Before you paint, clean and repair the wall so the circles will sit on a smooth, stable surface. You’ll check wall texture, fill holes, sand rough spots, and remove dust so edges stay crisp.
Before painting, clean, fill, sand, and dust the wall so your circles sit smooth and edges stay crisp.
Do primer preparation appropriate to the surface to improve adhesion and hide imperfections. Focus on continuity where circles will overlap background finishes.
- Wash with mild detergent and rinse
- Fill dents and nail holes with spackle
- Sand to uniform texture, feathering edges
- Vacuum and tack cloth to remove grit
- Apply primer coat, let it fully dry
Prep well so your circles look professional and clean.
Tools and Supplies for Crisp Wall Circles
Before you start, gather the essential painting tools like quality brushes, rollers, painter’s tape, and a level or compass for accuracy.
Choose between stencils, cardboard templates, or a laser-guided circle jig depending on how precise or repeatable you want the shapes.
Pick paints and finishes—flat, eggshell, satin, or semi-gloss—based on the wall surface and the look you want.
Essential Painting Tools
Because crisp, consistent circles start with the right gear, gather a few reliable tools that’ll make layout, masking, and painting quick and precise. You’ll want quality items that control edges, guarantee color matching, and let brush strokes stay smooth.
Essential tools include:
- Painter’s tape (thin and medium widths)
- A level and measuring tape for exact placement
- A compass arm or string-and-pin for accurate radii
- High-quality angled brushes for clean brush strokes
- Small foam rollers for uniform coverage
Choose good paints, a color-matched primer if needed, and a damp cloth for immediate cleanups.
Stencil And Template Options
When you need perfect, repeatable circles, choose the right stencil or template to match the size, surface, and finish you want. You’ll pick flexible vinyl for textured walls, rigid plastic for flat surfaces, and adjustable compasses for custom diameters. Use low-tack adhesive or magnets to prevent bleed without damaging paint. Practice color blending on a scrap to anticipate edges. Clean and store templates to keep crisp shapes. Below is a quick comparison to guide selection.
| Material | Best for | Notes |
|---|---|---|
| Vinyl | Wall textures | Flexible, low-tack |
| Plastic | Smooth walls | Durable, reusable |
| Cardboard | Quick projects | Cheap, replaceable |
| Metal compass | Custom sizes | Precise, adjustable |
| Adhesive film | Layered designs | Minimizes bleed |
Paint Types And Finishes
Now that you’ve picked the right stencil or template, choose paints and finishes that’ll give you sharp edges and the look you want. Pick a paint type suited to wall texture and traffic: flat hides flaws, eggshell balances sheen and washability, satin resists marks, semi-gloss pops color, and gloss offers max durability.
Consider color coordination with room accents and lighting. Test samples on the actual wall.
For crisp circles, use high-quality brushes or small rollers and thin masking edges with painter’s tape. Remember finish affects edge definition and cleanup.
- Flat
- Eggshell
- Satin
- Semi-gloss
- Gloss
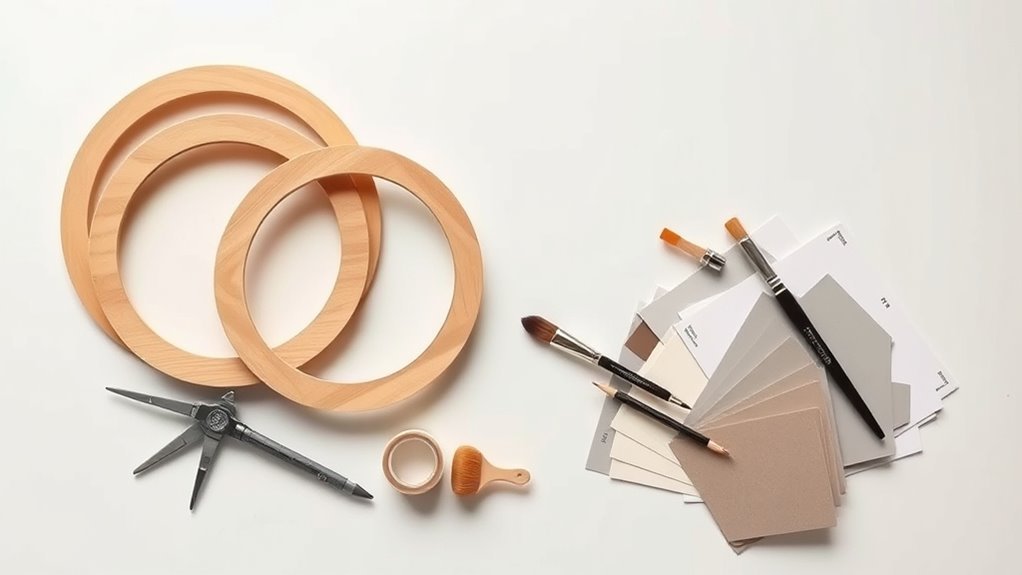
Cheap DIY Circle Templates: Cardboard, String, Spool
If you’re aiming to paint perfect circles without splurging on specialty tools, homemade templates using cardboard, string, and a spool give reliable results with minimal cost.
Cut concentric rings from sturdy cardboard to trace or mask edges; label diameters for repeatability. Tie a pencil to string, anchor at a center point with a pushpin or the spool’s hole, and rotate to mark smooth arcs.
Use the spool as a fixed-radius guide for small circles. Combine templates to draft stencils that suit your chosen color combinations and artistic patterns.
Test on scrap paper, then transfer and paint carefully on the wall.
Use a Laser Level or Circle Jig for Accuracy
Because precision matters for crisp circles, use a laser level or a circle jig to get consistent centers and true radii. You’ll set a clear pivot point, verify laser alignment, and trace steady arcs without guessing.
A circle jig saves time for repeat sizes, while a laser level guarantees the center sits plumb on the wall.
Follow these quick tips to stay accurate:
- Mount the laser so the beam hits your desired center.
- Clamp the circle jig securely to prevent drift.
- Check level and plumb before marking.
- Trace slowly, keeping consistent pressure.
- Recheck radii at multiple angles before painting.
Mask a Circle Precisely With Tape or Stencils
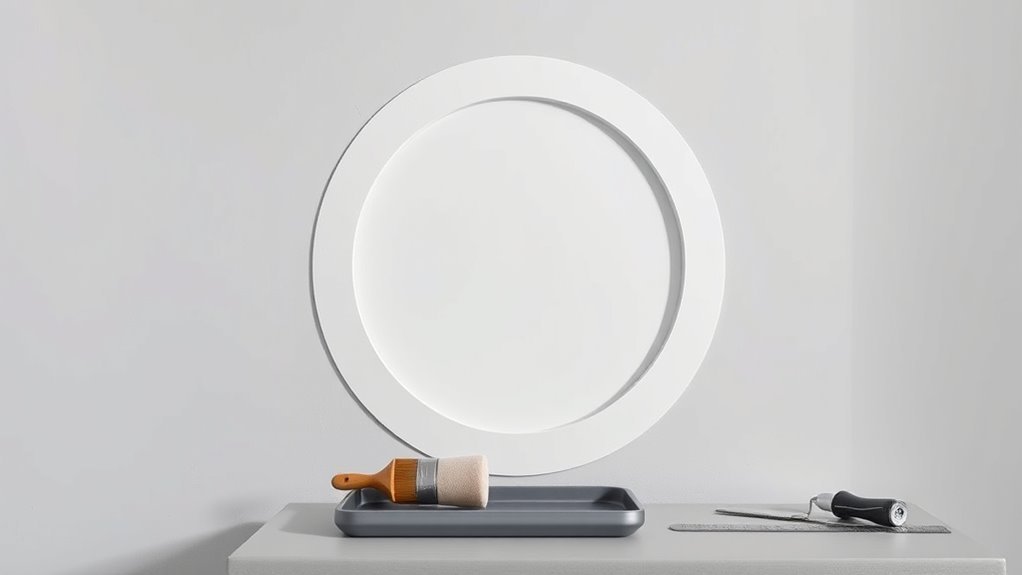
When you’re ready to mask, choose the right tape or stencil and align it carefully so the painted edge stays crisp; specialty low-tack painter’s tape or pre-cut circular stencils give the best results. Press tape firmly, sealing edges with a plastic card to prevent bleed, and test a small patch first.
For textured walls, flex the stencil gently to follow contours or use a spray adhesive to hold it flat. Consider color contrast when planning layers so underlying shades don’t show through.
Remove tape or stencil slowly after paint dulls slightly to avoid tearing. Clean reusable stencils for future use.
Best Paint, Rollers, and Brushes for Circles
Although the tools you pick won’t guarantee a perfect circle by themselves, choosing the right paint, rollers, and brushes makes crisp edges and even coverage much easier.
Pick high‑quality acrylic or latex for durability and true Color combinations; matte hides imperfections, satin pops colors.
Match nap length to wall texture: smooth walls use short nap, rough needs longer.
Use a dense angled brush for cutting edges and a small foam brush for touchups.
For larger fills, use a mini roller with thin nap to avoid ridges.
- Dense angled brush for edges
- Mini foam roller for fills
- Short nap for smooth walls
- Longer nap for textured walls
- Small brush for touchups
Paint Circles: One‑Coat Versus Multi‑Coat Technique
You can often get away with a one‑coat approach for bold, dark colors or small circles, saving time but risking uneven coverage.
Use multi‑coat painting when you need smooth, opaque color, crisp edges, or when covering light walls with pale hues.
We’ll compare the pros and cons and give simple timing tips so you know which method to pick.
One‑Coat Pros And Cons
If you want a quicker finish, one‑coat painting can save time and simplify cleanup, but it also demands high-quality paint, careful surface prep, and precise application to avoid streaks or thin spots.
You’ll appreciate fast results when color coordination and pattern mixing are subtle or when you use a strong, opaque paint.
Downsides include limited coverage on bold contrasts and visible flaws if your wall isn’t primed.
Consider these quick checks before committing:
- Choose an opaque, high‑coverage paint
- Prime if surface uneven
- Test a small circle first
- Use consistent brush or roller pressure
- Work in good light
Multi‑Coat When To Use
When your wall has uneven color, strong contrast, or you’re aiming for crisp, saturated circles, opt for a multi‑coat approach because it builds depth and hides imperfections better than a single pass.
You should plan thin, even layers, letting each coat fully cure during paint drying to avoid tackiness or peeling. Between coats, inspect edges and correct bleed or uneven opacity with light touchups.
Use proper color mixing for consistent hues across coats, remixing if you batch‑mix. Multi‑coat takes time but gives cleaner edges, truer color, and durability, so choose it when coverage or vibrancy matters.
Remove Tape and Touch Up Clean Edges
After the paint feels dry to the touch, peel the tape back slowly at a 45-degree angle to reveal crisp edges and prevent any fresh paint from lifting.
Peel the tape back slowly at a 45-degree angle once paint feels dry to reveal crisp edges.
You’ll inspect the perimeter for tiny gaps caused by wall texture or slight tape misalignment. If edges need refining, use a small angled brush and matching paint to touch up with controlled strokes.
Work in good light, feathering toward the circle to preserve color contrast. Keep a damp cloth handy for immediate cleanup.
Tips:
- Use minimal paint on the brush
- Match original edge curvature
- Steady your hand on the wall
- Blot excess paint
- Let touchups dry fully
Fix Bleeding, Uneven Edges, and Smudges Quickly
If you see paint bleeding or uneven edges, seal the area with fresh painter’s tape to guard the circle while you fix it.
Blot smudges right away with a damp cloth before the paint sets, then lightly feather the edge with a small brush.
That quick routine keeps your circles crisp and saves time on rework.
Seal Edges With Tape
Although tape won’t fix every mistake, sealing the circle’s edges with high-quality painter’s tape prevents most bleeding, uneven lines, and accidental smudges.
You press tape firmly along the curve for reliable edge sealing, smoothing out bubbles and gaps. Paint up to the tape, don’t overload the brush, and let the coat dry to touch.
Remove the tape at a 45° angle while paint is still slightly tacky for clean lines and easier tape removal.
Follow these quick tips:
- Clean surface first
- Use low-tack tape on fresh paint
- Burnish edges with a tool
- Apply thin coats
- Peel slowly and steadily
Clean Smudges Immediately
Notice a bleed or smudge? Act fast: blot excess with a damp cloth, then use a small brush to lift paint before it dries. When fixing edges, dip a fine brush in the correct color, feather outward for a seamless blend. Keep cleaning brushes handy for quick touch-ups. If colors run, pause and reassess choosing colors with similar tones for easier corrections. For stubborn smudges, gently sand once dry and repaint. Use steady pressure and minimal paint on the brush to avoid new drips.
| Problem | Immediate Action | Follow-up |
|---|---|---|
| Bleed | Blot | Feather |
| Smudge | Lift | Sand |
| Uneven edge | Fine brush | Repaint |
| Drip | Wipe | Thin paint |
| Color run | Pause | Tone-match |
Circle Design Ideas: Polka Dots, Rings, Overlaps
When you’re choosing circle designs for a wall, think about scale, spacing, and color to create distinct looks—polka dots bring playful rhythm, concentric rings add depth, and overlapping circles produce dynamic layers that can guide the eye across the room.
You’ll match color combinations to wall texture, varying sheen to emphasize contrast. Choose scales to suit furniture and sightlines. Try palettes that repeat or contrast for rhythm.
Consider masking techniques for sharp edges and softer blends for overlaps.
- Vary sizes for interest
- Repeat colors for cohesion
- Use negative space intentionally
- Layer translucent paints for depth
- Test samples before committing
Time‑Saving Tips and Safety for Tall Walls
Shifting from layout and color choices to tackling tall walls, plan to save time and keep yourself safe by preparing the right gear and sequence before you paint.
Use an extendable pole and roller for broad areas and a secure scaffold or ladder with a spotter for close work.
Check wall texture to pick brushes and adjust technique—rough surfaces need thicker nap and more paint.
Work top‑down in sections so paint drying won’t smear when you overlap.
Keep tools organized, use drop cloths, and wear goggles and gloves.
Take breaks to reassess height access and light for consistent circles.
Frequently Asked Questions
Can I Paint Perfect Circles on Textured or Popcorn Ceilings?
Yes — you can, but textured or popcorn ceilings complicate things. You’ll need texture concealment techniques, careful paint blending, flexible templates, and stippling brushes so your circles look smooth despite bumps and uneven surfaces.
How Do I Remove Paint From Wallpaper Without Damaging It?
You gently blot fresh paint with a damp cloth, test solvents on a hidden spot, and use wallpaper-safe solutions for paint stain removal; for stubborn spots, consider professional wallpaper removal to avoid tearing or adhesive damage.
Can I Create 3D or Raised Circle Effects on a Wall?
Yes — you can create 3D illusion circles by applying joint compound or textured plaster with stencils, then sanding and painting; you’ll build raised texture, highlight edges with paint or glaze, and seal for durable, sculpted effects.
What Indoor Lighting Best Shows Circle Imperfections?
Bright, low-angle directional lighting best shows circle imperfections; you’ll want strong lighting conditions that cast pronounced shadow effects across the surface, so raking light from adjustable spotlights or wall washers reveals bumps, gaps, and uneven edges.
Can I Use Spray Paint Safely for Crisp Indoor Circles?
Sure — you can, but cautiously. Spray paint safety matters: wear masks, ventilate well, and protect surfaces. For crisp results, use indoor spray techniques like low-pressure sprays, steady strokes, stencils, and quick multiple thin coats.
Conclusion
You’ve got this—perfect wall circles are doable with a plan, the right tools, and simple templates. Studies show 68% of DIYers say clear prep and masking saves the most time, so measure, prime, and tape carefully to cut mistakes. Finish by removing tape slowly and touching up bleeding spots. With practice, you’ll churn out crisp polka dots, rings, or overlaps faster and cleaner, even on tall walls—safer with a stable ladder.