How to Paint Tall Wall Like a Pro (Simple Methods)
You can paint a tall wall like a pro by planning, prepping, and using the right tools: measure the area, prime patched or porous spots, and clear furniture. Cut in along ceilings and trim with an angled brush, then use a roller on an extension pole for even vertical passes, keeping a wet edge to avoid lap marks. Work top to bottom, check from distance, and touch up thin spots; keep going and you’ll pick up pro tips and tricks.
Quick Plan: Paint a Tall Wall in Five Steps
Before you climb the ladder, map the job into five clear steps: prep the space, protect floors and furniture, prime if needed, roll the main area top to bottom, and touch up edges and trim.
Map the job in five steps: prep, protect, prime if needed, roll top-to-bottom, then touch up edges and trim.
You’ll gather tools, tape, drop cloths, and a sturdy ladder, then assess wall condition and choose a hue informed by color psychology to set mood.
Pick low-VOC, eco friendly paints for safety and easy cleanup.
Work from top down, maintain a wet edge, and use extension poles for even coverage.
Finish with careful trim work and spot repairs for a polished result.
Who This Guide Helps (Rooms, Ceilings, and Skill Levels)
You’ve got the basic five-step plan, now let’s clarify who’ll get the most from it. This guide helps you choose techniques based on room type, ceiling height, and desired wall color finish, so you’ll work smarter not harder.
- Living rooms: you’ll handle large wall color changes with rollers and poles.
- Bedrooms: focus on smooth, cozy finishes and modest ceiling height challenges.
- Entryways and stairwells: prepare for tall, awkward planes and safety-conscious setup.
- DIY beginners to intermediate painters: you’ll learn safe scaffold, ladder use, and pro tips without advanced trade skills.
Measure the Tall Wall and Calculate Paint Needed
Start by measuring the wall’s height and width so you know the exact area you’ll paint.
Multiply those dimensions to get square footage, subtracting windows and doors.
Then use the paint can’s coverage rate to calculate how many gallons or liters you’ll need.
Measure Wall Dimensions
When you measure your tall wall, work methodically: record the wall’s height and width, subtract openings like doors or windows, and note any irregular features that affect paintable area. You’ll want precise totals before planning decorative techniques or accounting for wall textures that change roller choice.
Follow these steps:
- Measure full wall height and width.
- Measure and subtract doors/windows.
- Account for alcoves, beams, or sloped ceilings.
- Note texture type and repair needs.
Keep measurements in a simple sketch with units. That clear foundation prevents waste and helps you choose tools and finishes confidently.
Calculate Paint Coverage
Before buying paint, measure the actual paintable area and convert that to how many gallons you’ll need so you don’t run short or overbuy. Measure height × width per wall, subtract windows/doors, then divide total square feet by the paint’s coverage (usually 350–400 sq ft/gal). Factor two coats for color consistency and to ensure paint durability. Round up for touch-ups.
| Item | Value | Notes |
|---|---|---|
| Wall area | Height × width | |
| Openings | Subtract doors/windows | |
| Coverage | Manufacturer spec | |
| Coats | 2 | For consistency |
| Gallons | Round up for safety |
Choose the Right Paint Finish for Tall Walls
Because tall walls draw the eye and show every flaw, choosing the right paint finish matters more than you might think. You’ll want a finish that balances hide, washability, and glare. Consider paint sheen and how it affects texture visibility; flatter sheens hide imperfections while satin or eggshell clean easier.
Test samples on the wall and evaluate color matching under morning and evening light. Think about durability in high-traffic areas and how much maintenance you’ll accept.
- Flat: hides flaws, low sheen.
- Eggshell: subtle sheen, easier to clean.
- Satin: durable, slight glow.
- Semi-gloss: best for trims and accents.
Pick Rollers, Brushes, and Extension Poles for Tall Walls

You’ll want to match roller nap to your wall texture—short naps for smooth surfaces and thicker naps for rough or textured walls.
Choose a sturdy extension pole that locks securely and a variety of brush sizes for cutting in and trim work.
The right combo of rollers, brushes, and poles will make painting tall walls faster and neater.
Roller Types Overview
When painting tall walls, choosing the right rollers, brushes, and extension poles makes the job faster and cleaner, so match tools to surface texture and height. You’ll pick roller types based on nap length, material, and the finish you want. Short nap for smooth surfaces, longer for textured. Consider synthetic for latex and natural for oil. Match finish options to sheen and application technique to avoid streaks.
- 1/4″ nap — ultra-smooth, gloss or satin.
- 3/8″ nap — smooth to light texture, eggshell.
- 1/2″ nap — medium texture, matte.
- 3/4″+ nap — rough surfaces, masonry.
Pole And Brush Choices
As you gear up to paint tall walls, pick extension poles and brushes that balance reach, control, and comfort so you can work longer with fewer touch-ups.
For pole selection, choose lightweight aluminum or carbon-fiber poles that collapse or twist-lock for storage and steady handling. Match pole length to ceiling height so you avoid overreaching.
For brush types, keep angled sash brushes for cutting in, a 3–4″ trim brush for edges, and a 4–6″ block brush for broad detail. Use synthetic bristles for latex and natural for oil.
Test tools briefly to confirm balance and paint pickup before starting.
When to Rent a Ladder and When to Use Scaffolding
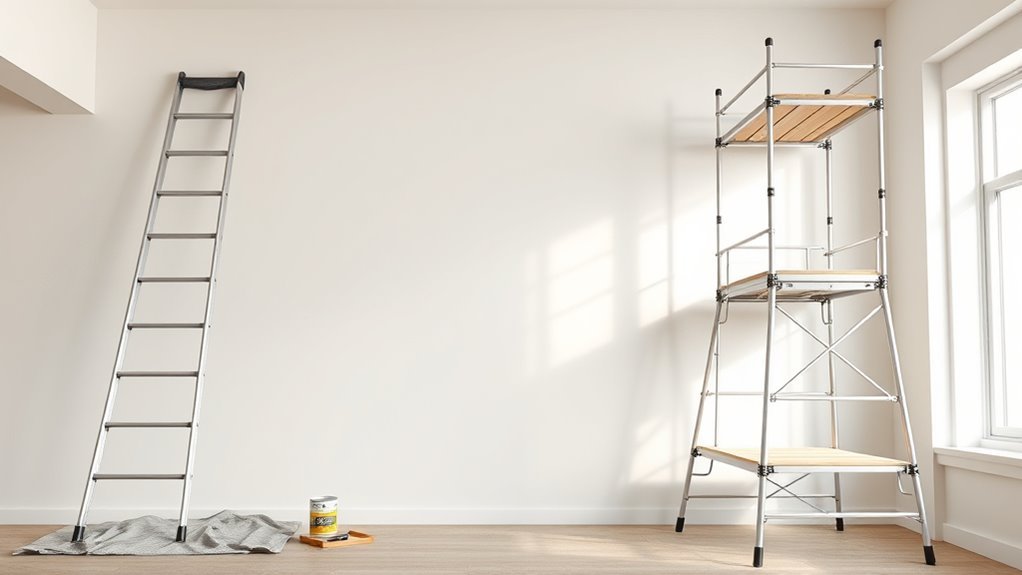
If your walls are only a single story or you’re working in short stretches, rent a sturdy extension ladder; it’s quicker to set up and lets you move along the wall with minimal fuss. You’ll choose based on scope, access, and comfort with ladder safety and scaffolding advantages.
Use a ladder when space is tight and tasks are brief.
Pick scaffolding when you need extended reach, stability, or a platform for tools.
- Short jobs: ladder for speed.
- Long runs: scaffolding for efficiency.
- Uneven ground: scaffold for stability.
- Heavy gear: scaffold to reduce fatigue.
Safety Checklist for Working at Height
Why double-check your setup before you climb? You’ll reduce risk by following clear safety protocols: inspect ladder or scaffold stability, secure locks, level feet, and confirm weight ratings.
Wear non-slip shoes, a tool belt, and eye protection.
Keep three points of contact, don’t overreach, and move the ladder instead.
Use guardrails or a harness when scaffolding requires it.
Test surfaces for paint slickness and remove loose debris.
Plan emergency access and have a partner nearby.
Prioritize fall prevention over speed—stopping to reassess saves you from accidents and keeps your tall-wall painting efficient and professional.
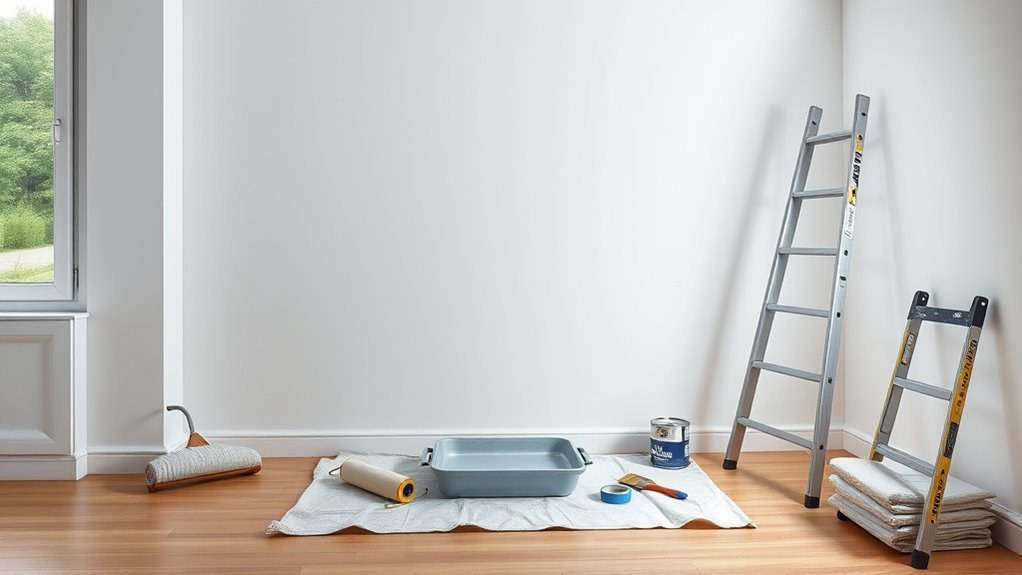
Prepare the Room for Mess-Free Painting
Because paint splatters and dust travel farther than you expect, you should prepare the room thoroughly before you start—clear furniture, cover floors and fixtures with drop cloths or plastic sheeting, and tape edges to prevent gaps.
Next, set up lighting and ventilation so you see true Color theory effects and smell fumes less.
Check paint branding labels for compatibility and coverage rates.
Follow this quick checklist:
- Remove wall hangings, outlet plates, and loosen curtains.
- Lay weighted drop cloths; seal seams with tape.
- Create a staging area for tools and used rollers.
- Ventilate and test lights before painting begins.
Repair Cracks, Holes, and Uneven Plaster
Before you pick up a brush, inspect every wall for cracks, nail holes, and uneven plaster so your finish will look smooth and professional. You’ll do quick crack repair with a utility knife, filler, and sandpaper. For larger gaps use a wall patch and joint compound; for hairline cracks use flexible caulk. Sand and clean dust before painting. Use a putty knife to level repairs so texture matches nearby plaster.
| Spot | Fix |
|---|---|
| Hairline crack | Flexible caulk |
| Small hole | Spackle |
| Large hole | Wall patch |
| Uneven plaster | Joint compound |
| Nail hole | Quick filler |
When and How to Prime High Walls
Before you grab paint, know when to prime: new plaster, patched areas, or stained spots always need a coat first.
Use a roller with an extension for even coverage, cutting in at the top with a brush and working section by section from top down.
Let the primer fully dry and check for absorption or uneven sheen before applying paint.
When To Prime
Wondering when you should prime your tall walls? You prime before painting when surfaces are porous, stained, patched, or drastically color-changed. Priming benefits include adhesion, uniformity, and reduced coats, so don’t skip it.
Avoid common priming mistakes like priming over damp surfaces or using the wrong primer type.
- After repairs: prime patched drywall before painting.
- On new drywall: always prime to seal paper and joints.
- For color changes: prime to block through colors and reduce topcoats.
- For stains or smoke: spot-prime then full-prime if stains show through.
Timing: prime only when surfaces are clean and dry.
Best Priming Techniques
Now that you know when to prime, let’s cover how to prime tall walls effectively so the job’s safe, fast, and long-lasting. Start by inspecting surface flaws, patching holes, and sanding glossy spots.
Choose primer types for your substrate—stain-blocking for marks, high-build for texture, and bonding primers for slick surfaces.
Work top-to-bottom with extension poles and a roller nap suited to texture; cut edges with a brush.
Use thin, even coats and allow full cure before painting.
Don’t fall for priming myths like “one coat always suffices”; test adhesion and spot-prime problem areas for durable results.
Cut In Cleanly Along Ceilings and Corners
Once you’ve rolled the main field, you’ll want to cut in along ceilings and corners with a steady hand and the right brush. Focus on ceiling detailing and corner moulding edges to keep lines crisp. Work in short, controlled strokes and keep a wet edge to avoid lap marks.
Follow this practical sequence:
- Load brush lightly and tap off excess.
- Paint a narrow strip along the ceiling first.
- Blend down a few inches to meet the rolled area.
- In corners, use the brush tip and turn the brush, not your wrist.
Step back often to check for straight, even lines.
Edger or Brush: Which to Use for Cutting In?
When you’re cutting in, choosing between an edger and a paintbrush comes down to whether you want speed or control.
An edger can speed things up on flat, smooth surfaces and with thicker paints.
A quality angled brush gives you the precision needed for textured areas and trim.
Consider the wall and paint type before you pick the tool so you don’t trade neat edges for faster work.
Edger Versus Paintbrush
Curious which tool will give you neater edges with less fuss? You’ll choose based on surface, comfort, and finish. Edger precision shines on straight lines and long runs; it cuts time when walls are smooth. Brush control wins on corners, trims, and textured spots where finesse matters.
Consider:
- Edger: fast, consistent film, less wrist strain.
- Brush: adaptable, better feathering, detailed touch.
- Combination: edger for main cuts, brush for corrections.
- Practice: either tool improves results quickly.
Pick the tool that matches the section you’re cutting in, then practice steady strokes for clean borders.
Precision And Speed
Now that you know the strengths of edgers and brushes, decide whether you need razor-sharp lines or faster coverage for cutting in. You’ll pick an edger for clean edges and speed on long runs, or a brush for tricky corners and blending Color combinations at trim transitions. Consider Brush maintenance: clean immediately, reshape bristles, and store properly to keep performance. Match tool to task—use edger when pace matters, brush when finesse matters. Practice both to gain control and efficiency.
| Tool | Best use |
|---|---|
| Edger | Long straight runs |
| Brush | Corners & detail |
| Both | Faster, precise results |
Surface And Paint Type
Because different wall surfaces and paint types behave differently, choose your cutting-in tool to match the texture and finish you’ll be painting. You’ll prefer an edger on smooth, sealed drywall for quick, consistent lines and improved paint durability.
Use a high-quality angled brush for textured or masonry walls after proper surface preparation to push paint into crevices. Match brush nylon or natural bristles to latex or oil-based paint respectively.
Consider these factors:
- Smooth drywall — edger for speed and even film.
- Textured surfaces — angled brush for control.
- High-gloss finishes — premium brush for crisp edges.
- Primer and curing — guarantee durability.
Roll the Wall Top to Bottom for Even Coverage
When you start at the top and work downward, you’ll get a more consistent finish because gravity helps the paint flow and you can quickly catch drips before they dry.
Keep a loaded roller ready and overlap each pass slightly to blend edges. Use short, controlled strokes near trim where brush techniques matter, feathering the shift between cut-in and rolled areas.
Keep a loaded roller and overlap each pass; use short, controlled strokes near trim, feathering into rolled areas.
Match your roller nap to the wall texture and maintain a wet edge so paint colors stay uniform. Check for runs as you go and smooth them immediately.
Work in manageable sections, finishing each from top to bottom before moving on.
Extension Pole Technique for Smooth Rolling
If you want a smooth, even finish on tall walls, attach a quality roller to a sturdy extension pole and keep the roller at a slight angle to maintain contact with the surface as you work. You’ll control pressure and reach without overreaching.
Use Extension poles designed for your roller type, lock them securely, and test balance before painting. Aim for Smooth rolling by maintaining steady, overlapping strokes and moderating speed.
- Extend pole to comfortable height
- Lock joints solidly
- Load roller evenly
- Work in controlled vertical passes
Check for missed spots with consistent lighting as you progress.
Keep a Wet Edge to Prevent Lap Marks
Work in small sections so the paint stays wet as you roll. Keep your pressure steady on the pole to lay an even coat.
Overlap each pass while the paint is still wet to avoid lap marks.
Work In Small Sections
Want flawless, streak-free walls? Work in small sections so you keep a wet edge and avoid lap marks. Small zones let you blend seamlessly, and they help you consider color psychology while testing how light alters tone. Focus on paint durability by using even coats and proper overlap.
- Start at a corner and paint a 3–4 foot vertical strip.
- Feather the edge and immediately roll adjacent strip.
- Check for drips and smooth them before paint skins.
- Maintain steady pace so each section meets while wet.
This method keeps progressions invisible and results professional.
Maintain Consistent Pressure
Because paint dries fast, keep steady, even pressure on your roller or brush so the edge stays wet and you avoid lap marks. Work deliberately, loading just enough paint to cover without drips, and maintain the same hand pressure from top to bottom.
If you change pressure mid-stroke you’ll see uneven sheen and streaks, so practice strokes before starting. Keep mixed cans accessible for quick touch-ups; proper color mixing beforehand and organized paint storage reduce pauses that cause drying edges.
Clean and reload rollers consistently, and step back occasionally to catch subtle irregularities while the surface is still workable.
Overlap While Paint Is Wet
How do you prevent those telltale lap marks? Keep a wet edge and work fast so brush strokes blend seamlessly. Match paint consistency across trays and touch-up mixes; thicker paint drags, thinner runs. Follow these focused steps:
- Load roller evenly and start from a wet edge.
- Work in overlapping vertical passes, blending with light brush strokes.
- Maintain steady rhythm—don’t let sections dry before adjoining areas.
- Feather edges with a damp brush or roller to unify texture.
If you notice laps, re-roll immediately while paint’s wet. Consistent speed and paint consistency are your best defenses.
Handling High Ceilings and Awkward Angles
Ever stood at the base of a room and wondered where to begin with its high ceilings or awkward angles? You’ll prep by removing or protecting ceiling fixtures and clearing the floor.
Use a sturdy extension pole and a quality roller to reach high areas, keeping strokes even. For tight corners and odd angles, switch to an angled brush and work from top down.
Match technique to wall textures—smooth walls need long, consistent passes; textured walls benefit from stippling to fill crevices.
Take breaks to inspect from a distance, correcting drips or missed spots before paint dries.
Painting Accent Walls and Vertical Patterns
When you want a room to pop, an accent wall or vertical pattern gives a bold focal point without repainting the whole space; start by choosing a wall that naturally draws the eye and suits the room’s light and layout. You’ll plan color coordination and consider lighting effects to enhance texture and height.
Measure precisely, mark plumb lines, and use high-quality brushes or a steady-edge tool. Apply primer where needed, then paint clean vertical stripes or a single bold hue. Finish with crisp trim and step back to adjust contrast until the impact feels balanced.
- Prep surface
- Choose palette
- Tape guides
- Cut edges
Prevent Drips and Splatter on Long Walls
Because long walls give paint more opportunity to run, you’ll want to work deliberately and keep tools light, clean, and moving. Use a well-loaded roller but avoid excess by rolling off on a tray; shorter naps hold less paint and reduce drips.
Choose brushes for cutting in—angled sash brushes help you control edges without splatter. Tape trim and lay drop cloths; secure plastic sheeting where needed.
Maintain a steady pace, repainting overlaps before they skin over. Also consider color selection that hides minor flaws so you won’t overwork sections, which often causes runs and messy splatter.
How Many Coats and Recommended Drying Times
If you want an even, durable finish on tall walls, plan for at least two coats of paint and follow the manufacturer’s recommended drying times between them. You’ll assess coverage after the first coat; high-contrast colors or drastic hue shifts tied to color psychology may need a third coat.
Choose eco friendly paints when possible—they often dry differently, so read labels.
- Check recommended recoat time on the can.
- Wait longer in cool or humid conditions.
- Lightly sand between coats if specified.
- Use proper ventilation to speed curing.
Follow timing precisely to avoid streaks and adhesion issues.
Spot-Checks and Touch-Ups Without Ladders
While you’re standing on the floor, use a lightweight telescoping pole with a small roller or brush attachment to reach high spots for quick spot-checks and touch-ups. Inspect evenly under good light, looking for thin coverage, drips, or missed edges.
Match the paint color by working from the same batch or bringing a labeled sample. Dab minimally to blend—feather the edges rather than overloading the roller.
Keep a stable stance and clear floor area to maintain ladder safety mindset even when not using one.
Clean tools promptly and recheck after drying; repeat tiny passes until the finish looks seamless.
Working With Smooth vs. Textured Walls
When you’re prepping to paint, recognize that smooth and textured walls demand different tools and techniques. You’ll adjust your wall preparation based on surface: smooth walls need light sanding and a high-quality roller for even coverage; textured walls need thicker nap rollers and brushes to reach crevices.
Do a texture comparison to decide materials and paint thickness. Use this checklist:
- Assess surface type and note imperfections.
- Choose primer suited to texture.
- Select roller nap and brush sizes accordingly.
- Plan technique: long, even strokes for smooth; stippling for textured.
Work methodically and you’ll get professional results.
Repairing Mistakes and Sanding High Areas
Because even careful work can leave drips, missed spots, or rough patches, you’ll want a clear plan for fixing errors and sanding high areas before moving on. Inspect walls from different angles with good light.
Scrape drips gently, sand high edges smooth with fine-grit sandpaper, then wipe dust with a tack cloth.
For small fills, use lightweight spackling; sand flush when dry. Touch up with matched paint—verify color matching under room lighting. Blend edges with feathering strokes.
Rinse and dry brushes after spot repairs to keep them ready; proper brush cleaning preserves edges and prevents future flaws.
Clean Tools and Store Partially Used Paint
When you finish, clean brushes and rollers right away to prevent dried paint and ruined tools.
Rinse water-based paints with warm soapy water and use the proper solvent for oil-based products.
Seal partially used cans tightly, label them with color and date, and store them upside down in a cool, dry place.
Clean Brushes Immediately
Though you’re enthusiastic to move on, clean your brushes and tools right away to prevent dried paint that’s hard to salvage. You’ll protect bristles, save time, and keep paint storage tidy for partial cans.
Rinse oil or latex with the right solvent, work bristles until water runs clear, and reshape before drying.
- Remove excess paint on a rag or edge.
- Use the correct cleaner (water for latex, solvent for oil).
- Comb bristles with a brush comb or old fork.
- Hang brushes to dry bristle-down to retain shape and prevent rust.
Store Paint Properly
Want to keep paint fresh and tools ready for the next job? Clean brushes and rollers thoroughly, squeeze excess paint back into the can, and strain leftovers to remove debris.
For partially used cans, press plastic wrap over the opening, seal lids tightly, and store upside down to create an airtight seal. Label cans with color, date, and room.
Keep paint in a cool, dry area away from freezing or direct heat—your proper storage prevents separation and spoilage.
If you need more later, visit a local paint store for matched tints or recycling options instead of buying new gallons.
Quick Fixes for Uneven Paint After Drying
If your paint dried with streaks, roller marks, or patchy sheen, you can usually correct it without repainting the whole wall. You’ll assess light angles, note sheen differences, and decide if spot-sanding or blending will fix it.
Consider color psychology when choosing touch-up placement and match eco-friendly paints if you recoat. Try these fixes:
- Lightly sand glossy patches, dust, then feather in thin touch-up coats.
- Re-roll adjacent areas with a loaded roller to blend texture.
- Use a glaze to even sheen on small zones.
- Apply a full coat only where blending fails.
Five Time-Saving Techniques for Tall Walls
When you’re tackling tall walls, working smart beats working harder: plan safe access, use tools that reach, and sequence tasks to avoid repeated trips up and down ladders.
Use an extension pole with a roller and a wide-angle brush for cutting in; you’ll cover more surface quickly and keep consistent texture.
Use an extension pole with a roller and wide-angle brush to cut in faster and keep texture consistent.
Pre-mix paint batches to maintain color combinations across the wall and avoid stops that show.
Tape once for multiple coats, remove debris from floors first, and set a trash bag for used rollers.
Choose reliable paint branding for predictable coverage so you won’t redo sections later.
Cost-Saving Swaps That Still Deliver Quality
Although you’ll be tempted to buy every premium tool and top-shelf gallon, you can still get professional results by choosing smarter, not pricier, options. Use Eco friendly primers to prep surfaces—many cut VOCs and cost less than specialty formulations.
Pick Low cost brushes with synthetic bristles for trim; they clean up well and last when cared for. Rent a quality pole and roller instead of buying one-off pro gear. Limit expensive specialty paints to accent walls.
- Buy store-brand rollers
- Reuse drop cloths after washing
- Trade leftover paint with neighbors
- Shop seasonal paint sales
When to Hire a Pro for Complex Tall-Wall Jobs
Because tall walls can hide unexpected challenges—high scaffolding needs, tricky access, or structural quirks—you should consider calling a pro when the job goes beyond ladders and a pole.
If you face complex access, steep heights, or fragile surfaces, pros bring training, insurance, and equipment that protect your home and them. Ask about safety harnesses, rope access certification, and how they verify ladder stability before work.
Hire a pro if your schedule’s tight, the finish must be flawless, or repairs and inspection accompany painting. A contractor reduces risk, avoids delays, and guarantees durable, professional results.
Final Inspection Checklist for Your Finished Tall Wall
Now that the paint’s dry, you should walk the wall to check for evenness and smooth out any high or low spots you missed.
Inspect edges and trim closely for clean lines, drips, or missed areas that need touch-ups.
Finally, verify paint thickness to make certain of consistent coverage and proper protection across the whole surface.
Surface Evenness Check
Before you call the job done, walk the length of the wall and scan for inconsistencies in texture, light reflection, and paint coverage; these visual checks catch the small bumps, roller marks, or thin spots that often hide on tall surfaces.
Check surface texture and paint adhesion closely; run your hand to feel for ridges and press lightly to test bonding. Use good lighting and varied viewing angles. Fix issues before they cure.
- Note thin spots for a touch-up coat.
- Mark dents or bumps for filling.
- Sand glossy ridges smooth.
- Reprime areas with poor adhesion.
Edge And Trim Inspection
When you finish the wall, inspect the edges and trim for clean lines, consistent coverage, and tight caulking where paint meets molding or baseboards. Do an edge inspection with good lighting, a steady ladder, and a magnifying glance. Check trim alignment, look for gaps, drips, or missed spots, and touch up with a small brush. Confirm caulk bonds and smooth transitions. Use this quick checklist:
| Item | Condition | Action |
|---|---|---|
| Edges | Clean lines | Touch-up |
| Trim | Aligned | Adjust/secure |
| Caulk | Continuous | Re-caulk |
| Coverage | Even | Repaint |
| Finish | Smooth | Sand/tidy |
Paint Thickness Verification
If you want durable, uniform coverage on a tall wall, verify paint thickness across the surface so you can catch thin spots, runs, or excessive buildup before the finish cures. Walk the wall in good light, feel for ridges, and use a thickness gauge or a simple wet-film comb for spots that look odd. Check edges and high sections reached by extension poles. Maintain paint consistency and roller maintenance to avoid shedding or uneven laydown.
- Scan visually under side light.
- Feather heavy edges with a loaded roller.
- Thin thick areas with a soft brush.
- Recoat thin areas after drying.
Frequently Asked Questions
Can I Use Spray Paint or an Airless Sprayer Instead of Rollers for Tall Walls?
Yes — you can use spray paint or an airless sprayer for tall walls. You’ll need spray paint techniques for coverage and masking, plus airless sprayer tips for pressure, tip selection, and consistent passes to avoid runs and overspray.
How Do I Match New Paint to an Existing Aged Wall Color?
Want a perfect match? You’ll use color matching techniques: take a sample, get a spectrophotometer read, and request paint color blending from the store, then test and tweak on the wall until the aged tone blends seamlessly.
Can Humidity or Temperature Extremes Affect Paint Adhesion on Tall Walls?
Yes — humidity effects and temperature considerations matter: you’ll get poor adhesion if it’s too humid, too cold, or too hot; you’ll want controlled conditions, proper drying time, and compatible paint formulated for those temperatures.
Are There Eco-Friendly Low-Voc Primers Suitable for High Walls?
Yes — you can use eco friendly primers and low VOC options designed for high walls; you’ll find water-based acrylic and shellac-based primers that adhere well, dry fast, minimize odors, and reduce environmental impact during large projects.
What Warranty or Longevity Can I Expect From Professional Tall-Wall Paint Jobs?
You’ll typically get 1–10 years warranty depending on contractor and product; paint durability and long term quality often mean 10–15 years with proper prep. You’ll want written guarantees and maintenance to preserve results.
Conclusion
You’ve just conquered a wall that could double as a skyscraper—congrats, pro. With the right prep, tools, and a few clever tricks, you’ve turned a towering challenge into a walk in the park. Your paint job now looks sharp from floor to ceiling, saved you time and money, and might even make neighbors jealous. Keep the checklist handy, and next time you’ll finish faster, cleaner, and with even more swagger.