How to Paint the Wall Above the Stairs Easily
You can paint the wall above your stairs easily by prepping, protecting, and working safely. Tape edges, lay drop cloths, clean and repair surfaces, then use a stain‑blocking primer where needed. Stand on secure scaffolding or an adjustable platform and cut in with an angled brush, then roll with an extension pole using light, overlapping strokes. Feather wet edges and do thin coats for even coverage. Keep tools handy and follow safety tips — continue for step‑by‑step techniques and pro shortcuts.
Paint the Wall Above Stairs: Step‑By‑Step

Before you touch a brush, gather your tools and prep the area so the job goes quickly and looks professional. You’ll tape edges, lay drop cloths, and clean the wall.
Gather your tools, prep the space, tape edges, lay drop cloths, and clean the wall before painting.
Choose paint considering color psychology to set mood; test swatches at stair lighting.
Sand and prime any repairs, then roll from top down in manageable sections, using an angled brush for trim and corners.
Keep paint texture consistent by maintaining a wet edge and using proper rollers for sheen.
Let coats dry fully, inspect under varied light, remove tape carefully, and touch up spots for a seamless finish.
When to Paint Stair Walls: Timing & Signs
Once you’ve finished prep and the first coat, you’ll want to know when the stair wall actually needs repainting. Check for peeling, visible stains, scuffs along traffic paths, or fading from sun exposure.
If you’re shifting mood with color psychology—choosing calming blues or energizing yellows—timing matters to match seasonal light and wear. Touch up minor blemishes now; plan a full repaint every 5–7 years or sooner in high-traffic homes.
If leftover cans sit, label them and use paint recycling programs or store properly for future touchups. Stay proactive to keep the stairwell looking intentional and fresh.
Essential Tools for Stairwell Painting
Because stairwells combine awkward angles, high traffic, and variable light, you’ll want a focused set of tools to work safely and efficiently. Grab an angled brush for trim, a 4–6″ roller with extension for large surfaces, and a mini-roller for tight corners.
Use a lightweight pole and adjustable ladder accessory to reach higher sections without strain. Keep a texture brush or sponge on hand to match wall texture when touching up.
Bring a paint tray, quality painter’s tape, drop cloths, and a small bucket for mixing. Guarantee paint ventilation by opening windows and using a fan to speed drying.
Safety Gear and Stairwell Precautions

When you’re working on stairs, prioritize gear that protects you and keeps your footing secure: non-slip shoes, a fitted dust mask or respirator for fumes and sanding, safety glasses, and gloves that still let you grip tools. Use a harness or secure ladder setup if reaching high, and clear the stairwell of trip hazards. Mark wet areas and ventilate to reduce fumes. Keep a phone nearby for emergencies and work with a spotter if possible.
| Item | Purpose |
|---|---|
| Non-slip shoes | Traction on steps |
| Mask/respirator | Fume and dust protection |
| Safety glasses | Eye protection |
| Gloves | Grip and hand protection |
Choosing Paint for Stair Walls
When picking paint for the stair walls, focus on durable finishes that stand up to scuffs and frequent traffic.
You’ll want contrast between the wall and trim or stairs to guide sightlines and add visual interest.
Choose a higher-sheen option in the busiest areas for easier cleaning, and save lower sheens where you want to hide minor imperfections.
Durable Finish Options
Although stair walls take more abuse than most, you can pick a paint system that stands up to scuffs, moisture, and frequent cleaning without sacrificing appearance. You’ll want durable finishes like satin or semi-gloss for better scrub resistance and impact protection.
Consider acrylic latex formulas labeled “washable” or “kitchen and bath” for moisture-prone areas. For high-traffic runs, choose long-lasting coatings with added binders or ceramic reinforcement to resist abrasion.
Use quality primer on patchy surfaces to improve adhesion. Apply two thin coats, let them cure fully, and you’ll have a finish that’s both practical and attractive for years.
Color Contrast Tips
If you want the stairs to feel deliberate rather than incidental, pick colors that play off the surrounding trim, tread material, and natural light—use contrast to guide the eye and define the vertical plane.
You’ll use color psychology to set mood: cool, muted tones calm, while warm, saturated hues energize. Contrast can be subtle—slightly deeper than adjacent walls—or bold, framing the staircase like art.
When doing paint mixing, test small samples on the stair wall to see shifts with changing light.
Balance contrast with cohesion: repeat one accent color elsewhere to unify the space without overwhelming movement.
Sheen For High-Traffic
Picking the right sheen matters as much as color for a stair wall, because it determines durability, cleanability, and how light plays across the surface. You’ll prefer eggshell or satin where you need balance: they hide imperfections yet resist scuffs. For landings and handrail zones, choose semi-gloss for High traffic durability and easier wiping. Consider matte on adjacent areas to reduce glare. Sheen selection affects maintenance frequency and appearance over time, so test samples under stair lighting.
| Area | Recommended Sheen |
|---|---|
| Handrail zone | Semi-gloss |
| Landing | Satin |
| Long wall | Eggshell |
| Trim | Semi-gloss |
| Accent | Matte |
Finish Guide: Matte vs Eggshell vs Satin
When you’re choosing a finish for the wall above the stairs, think about how much wear it’ll see and how much sheen you want—matte hides imperfections, eggshell balances subtle sheen and washability, and satin offers the most durability and easy cleaning.
You’ll pick matte if you want a soft, modern look that downplays flaws and supports color psychology for calm, muted tones, but it’s less scrub-friendly.
Eggshell suits living spaces where occasional wiping occurs.
Satin resists scuffs and cleans easily, good for busy households.
Consider how paint manufacturing affects pigment depth and durability when selecting finish and formulation.
Measure the Stairwall Quickly and Accurately
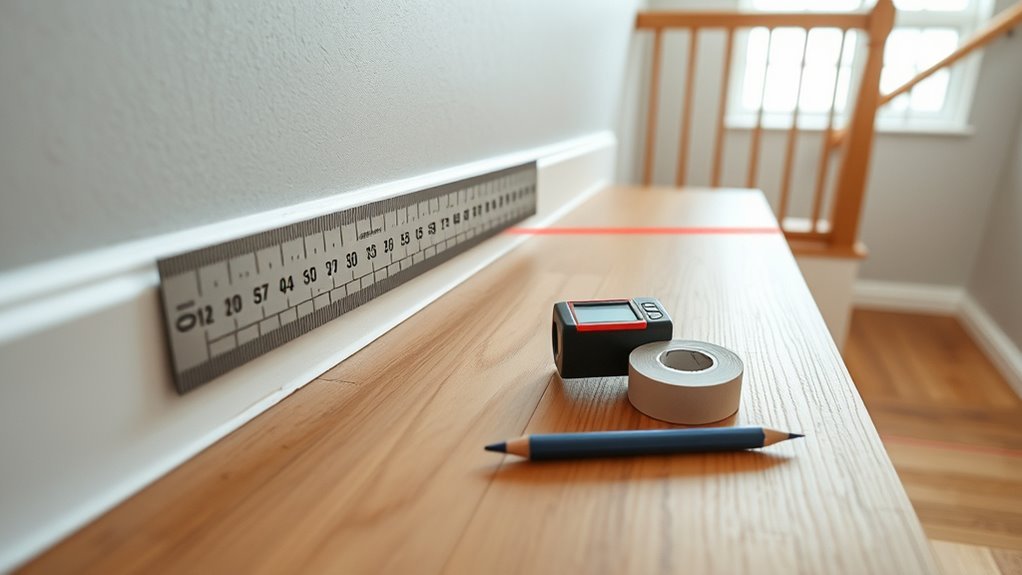
Start by measuring the wall height at several points so you catch any variations.
Then determine the wall length along the stair run, following the baseboard or trim for accuracy.
Don’t forget to account for the stair slope by measuring rise and run or using the stair string line to get true dimensions.
Measure Wall Height
Because stairwalls follow the slope of your stairs, you’ll need a quick, reliable way to measure their height at multiple points; grab a tape measure and a straightedge and work from the baseboard up to the ceiling at the top of the run.
Measure at regular intervals—every 2–3 steps—recording vertical height and noting changes.
Check wall texture for bumps that affect straightedge placement, and note paint sheen differences that might hide imperfections.
Use a helper to hold the straightedge for long runs.
Transfer marks to a sketch.
Double-check longest and shortest points before buying materials.
- baseboard to ceiling
- riser-to-riser points
- texture bumps
- highest peak
Determine Wall Length
After you’ve marked the heights along the stairwall, measure its length in straight, horizontal runs—top to bottom and along any landings—so you know exactly how much paint and trim you’ll need. Use a tape measure and note each run separately, then add them for total linear feet. Measure twice to avoid mistakes.
Record measurements alongside wall height notes so trim, baseboards, and sample swatches reflect accurate dimensions for color coordination. Knowing exact length helps calculate cans for coverage and assess areas that need extra coating for paint durability.
Snap a photo of your notes for reference while shopping and prepping.
Account For Stair Slope
When you measure a stairwall, account for the slope by taking measurements along the actual incline rather than only horizontally; this gives you accurate lengths for paint, trim, and any patterns that must follow the stair angle.
You’ll mark top, bottom, and intermediate points along risers, then use a tape or laser to capture the true incline distance.
That stair slope dictates paint runs and ensures wall alignment with the stair tread.
Sketch a scaled profile and note measurements. Transfer those dimensions to materials to avoid surprises.
- Mark riser intersections.
- Measure along incline.
- Draw scaled profile.
- Label transfer points.
Estimate Paint and Supplies for a Stairwell
Since stairwells tend to have high walls and awkward angles, you’ll want to calculate paint and supplies carefully before you start so you don’t run out mid-job. Measure wall height and run length, subtract windows or trim, then multiply for square footage.
Account for slope by measuring each riser section separately. Check paint coverage per gallon and add 15–20% for touchups and second coats.
Choose color psychology wisely—lighter hues open space; accents guide the eye.
Pick eco-friendly paints for low odor and quicker reentry.
List rollers, extension pole, angled brush, drop cloths, and ladder access gear.
Protect Stairs, Banisters, and Floors
Before you start painting, cover the banister and railings with painter’s tape and a drop cloth to prevent drips and scratches.
Lay runner protection or taped-down drop cloths on the steps and add floor protection at the base to catch any spills.
Taking these simple steps will keep your stairs, rails, and floors safe and make cleanup faster.
Cover Banister And Railings
If you’re keeping paint off banisters, railings, and stairs, don’t skip proper coverings—tape, plastic sheeting, and paper protect surfaces quickly and effectively. You’ll want neat banister coverage and solid railing protection before you start.
Secure plastic or kraft paper with painter’s tape, wrap spindles individually if they’re detailed, and check for gaps.
Work top-down so gravity won’t drip onto wrapped areas. Remove covers only after paint’s dry to the touch.
- Rolled kraft paper taped along rail base
- Plastic sheeting draped over banister length
- Individual spindle wraps for ornate rails
- Tape seams and corners tightly
Protect Steps And Floors
Now that the banister and railings are securely wrapped, move on to protecting the steps and floors beneath the work area. Lay down overlapping drop cloths or rosin paper, taping seams to prevent slips and dust penetration. Secure edges with painter’s tape so coverings won’t shift when you climb.
Protect stair noses with cardboard strips or stair-specific pads. Keep a small dustpan and brush handy for quick cleanups.
Store paints and tools on a tray to avoid spills and practice basic tool maintenance—clean rollers and brushes after use to prevent drips and prolong lifespan. Check coverings periodically during the job.
Repair Holes, Cracks, and Scuffs on Stairs
When you spot holes, cracks, or scuffs on stair treads or risers, tackle them promptly to keep the surface safe and smooth. Inspect each step, noting depth and length; small dings need filler, larger gaps require patching compound and possible wood or drywall repair.
Sand and prime repaired spots to blend with surrounding paint, and consider how staircase lighting highlights imperfections so you don’t miss them.
Check behind trim for drafts and compromised wall insulation near the stair stringer.
- Hairline crack running along riser.
- Gouge on tread edge.
- Paint scuff near bannister.
- Dealer-sized hole at step corner.
Clean and Degrease High‑Traffic Stair Walls
Before you paint, prepare the area by removing dust, covering the stairs and fixtures, and scuffing glossy spots so paint will stick.
Pick a cleaner suited for your wall finish and grease level—degreasers for kitchen-adjacent walls, mild detergent for general grime—and follow product instructions.
Rinse with clean water and let the wall dry completely before priming or painting.
Prep Surface And Area
Because stair walls get the most contact, you should thoroughly clean and degrease them before painting so the new finish will stick and look even.
Inspect the wall texture for dents, peeling, or grease buildup; repair gouges and sand glossy spots.
Tape trim, cover stairs and railings, and lay drop cloths.
Think about color psychology—lighter hues brighten tight stairwells; darker tones hide scuffs but can feel heavy.
Keep a step ladder steady and clear traffic while you work.
Visualize the finished run from top and bottom to guide prep.
- Scuffed banister
- Oily fingerprints
- Sanded patch
- Protected steps
Choose The Right Cleaner
How will you tackle grease, fingerprints, and ground-in dirt without damaging the paint? Choose a cleaner that lifts grime yet respects finish. Test a mild detergent first, then stronger degreasers for stubborn spots. Gather cleaning supplies: sponge, soft brush, microfiber cloths, and a pH-neutral cleaner or trisodium phosphate alternative. Focus on surface preparation—loosen dirt gently, avoid abrasive scrubbing, and spot-test hidden areas. Use gloves and good ventilation. Quick-reference table:
| Cleaner Type | Best For | Notes |
|---|---|---|
| Mild detergent | Light dirt | pH-neutral, safe on most paints |
| Degreaser | Grease | Spot-test first |
| TSP alternative | Heavy grime | Use sparingly |
| Rinse aid | Finish touch | See next section |
Rinse And Dry Thoroughly
Once you’ve lifted the grime, rinse the wall thoroughly to remove cleaner residue and prevent streaks or paint damage. You’ll work top‑to‑bottom, guiding a damp sponge so the wall rinse carries dirt away.
After rinsing, blot and squeegee excess water, then use microfiber towels to dry thoroughly. Keep airflow with a fan or open windows; don’t rush painting until surface feels bone dry.
Visualize the finished prep:
- Sudsy sponge lifting fingerprints and scuffs.
- Clear rinse streaming downward, taking grit.
- Squeegee pulling beads into a towel.
- Fan drying fresh, smooth surface ready for primer.
Tape for Clean Lines Around Trim and Rails
Want crisp, professional edges where paint meets trim and railings? Use painter’s tape along the trim and a thin decorative tape for accents or irregular profiles. Press tape firmly with a plastic card to seal edges and prevent bleed.
Mask railings in sections, wrapping ends and overlapping slightly for continuous lines. Remove tape when paint is tacky but not fully dry to avoid peeling—pull back at a 45-degree angle.
If paint bleeds, touch up with a fine brush after tape removal. Label taped areas to track drying time and work methodically up or down the stair wall.
Prime Stained or Uneven Stair Walls
Before you paint, check how deep and widespread any stains or discoloration are so you know if simple cleaning will do or if sealing is needed.
Pick a high-quality stain-blocking primer suited to the stain type—oil-based for nicotine or tannin stains, shellac-based for severe bleed-through.
Prep the surface by cleaning, sanding glossy spots, and patching imperfections so the primer and topcoat adhere evenly.
Assess Stain Severity
If stains or patchy areas mar your stair wall, take a close look to determine how deep and widespread the discoloration is; this will tell you whether spot-priming will suffice or if you need to prime the entire surface. You’ll assess water marks, nicotine, or scuffs, noting bleed-through potential and texture changes.
Consider how stain removal efforts might affect finish and your paint color selection later. Use natural light and a hand lamp to inspect at angles.
Imagine the damage:
- Faint shadowed streaks near the banister.
- Dark circular water rings.
- Yellowed nicotine haze.
- Raised, rough patched spots.
Choose Blocking Primer
How do you pick the right blocking primer for a stained or uneven stair wall? You’ll prioritize priming importance: choose a shellac- or oil-based blocking primer for heavy stains, tannin bleed, or water marks.
Use a high-hide latex primer for mild discoloration. Match primer type to finish paint for best adhesion and durability.
Consider color coordination—tinted primers can reduce the number of finish coats and help cover uneven patches. Apply evenly over the problem areas, following manufacturer drying times.
This focused choice prevents stains from bleeding through and gives a uniform base for the final paint coat.
Prep Surface Properly
Now that you’ve picked the right blocking primer, get the stained or uneven stair wall ready so the primer and topcoat perform their best. You’ll remove grease, sand glossy spots, and fix gouges so the surface texture is consistent. Wipe dust with a damp cloth, let it dry, and tack rag before priming. Ventilate the stairwell to avoid paint fumes; open windows and run fans. Mask trim and cover floors.
- Scrape loose paint.
- Fill holes with lightweight spackle.
- Sand transitions feathered smooth.
- Clean with trisodium phosphate alternative.
Prime only when the wall is clean and dry.
Ladder‑Free Ways to Reach High Stair Walls
When a full ladder won’t fit or you want a safer, steadier approach on stairs, several ladder-free options let you reach high walls without sacrificing control.
You can use a stable scaffold board or portable staging that spans steps, letting you work level and apply creative color accents precisely.
Consider adjustable step platforms that lock to stair treads for secure footing while experimenting with wall texture techniques like subtle stippling.
Use adjustable step platforms that lock to stair treads for secure footing while trying subtle stippling textures.
Harness systems or secured scaffolding provide hands-free stability for detailed edges.
Always check weight ratings, use non-slip bases, and have a partner spot you to keep the setup safe and steady.
Use an Extension Pole With a Roller
If you don’t want to juggle a ladder on stairs, attach a roller to an extension pole and paint from the floor or a lower step for safe, steady coverage. You’ll reach high areas without stretching, keeping your back straight and brushstrokes even.
Choose a roller nap that suits wall texture to avoid uneven sheen, and keep paint loaded lightly to prevent drips. Check color matching by testing a small swatch before rolling the whole plane. Move slowly in overlapping strokes, stepping back to inspect.
Clean the roller and pole after use to maintain performance and accurate future color matching.
- Long pole in hand, steady stance
- Light, even pressure across bumps
- Overlapping passes erase roller lines
- Swatch confirms color and finish
Best Brushes and Tools for Cutting‑In
When cutting in above the stairs, you’ll want a high-quality angled brush that holds paint and keeps a crisp line.
You’ll also find taping and edging tools useful for protecting trim and getting consistent edges without wobble.
Pick tools that feel balanced in your hand so you stay steady on the ladder or stair treads.
Angle Brush Essentials
Because precise cutting-in sets the tone for the whole job, you’ll want a high-quality angled sash brush and a few complementary tools at the ready.
Choose a 2–2.5″ nylon blend for smooth lines; keep a smaller 1″ for tight corners.
Match paint colors carefully—color matching at the start avoids awkward touch-ups later; store extra in sealed cans for paint storage.
Maintain a steady wrist and short, controlled strokes.
- Angled sash brush (2–2.5″)
- Small 1″ brush for corners
- Clean rag and mild solvent
- Shallow tray and lid for temporary storage
Taping And Edging Tools
After you’ve got your angled sash brush in hand, the right taping and edging tools will make cutting‑in faster and cleaner. You’ll want a sharp utility knife, painter’s tape, an edging tool, a trim brush, and a small roller for touchups. Use tape for crisp lines near ceilings and spindles; an edging tool speeds straight runs. Match tools to paint for smooth decorative finishes and remember color psychology when choosing accent trims. Below’s a quick reference to pick gear.
| Tool | Best Use | Tip |
|---|---|---|
| Painter’s tape | Crisp lines | Press edges firmly |
| Edger | Long runs | Keep steady pace |
| Trim brush | Detail | Short strokes |
| Small roller | Blends | Light pressure |
| Utility knife | Clean edges | Score tape gently |
Rolling Technique for Even Tall‑Wall Coverage
If you want an even finish on a tall stairway wall, start by cutting in along edges and railings, then work in vertical sections with a loaded roller on an extension pole so each pass overlaps the previous one by about 2–3 inches.
Keep a consistent pressure and rolling speed to avoid lap marks and maintain a wet edge until the section is covered. You’ll focus on color blending between sections and simple roller maintenance to keep nap consistent.
Visualize the motion:
- Steady vertical strokes from top to bottom.
- Slight overlap where sections meet.
- Smooth, continuous wrist movement.
- Light, regular reloading of paint.
Brushing Corners and Tight Stair Spots
Pick a high‑quality angled sash brush so you can get crisp lines in corners and along trim.
Use the angled edge to work paint into tight stair spots where a roller can’t reach.
Keep your feet steady on the stairs and move your body with the brush to stay safe while you paint.
Choose The Right Brush
When you’re tackling corners and tight stair spots, the right brush makes the job faster and neater, so choose one that fits the space and the paint type. You’ll consider Choosing colors and Wall textures since nap and sheen show differently near edges.
Pick brushes that match your trim width and paint viscosity.
- Small sash brush for narrow gaps, imagine its flat tip slicing clean lines.
- Slim angled brush for contoured junctions, visualizing it hugging the corner.
- Round-head brush for curved rails, picturing smooth arcs.
- Short-handle brush for awkward reaches, seeing steady control.
Use An Angled Brush
Having the right brush choices behind you, reach for an angled brush to tackle corners and tight stair spots with precision. You’ll cut neat edges by holding the handle at a low angle, using short, controlled strokes that follow the wall’s plane.
Angled brush techniques include tipping the bristles for fine lines and using the heel for broader coverage near trim. Keep a small tray nearby so you don’t overload the brush.
After work, clean and dry the brush fully, then use brush storage tips like hanging or sleeve protection to preserve shape and bristle alignment for the next touch-up.
Maintain Safe Body Position
As you work along stair edges and into tight corners, keep your feet planted and your center of gravity low so you won’t overreach or lose balance.
Maintain ergonomic posture: bend at the knees, hinge at the hips, and hold the brush close to the handle for control.
Use steady breathing techniques to stay calm and coordinated when leaning or twisting.
Move the ladder or step stool rather than stretching.
Visualize each motion before you paint.
- Small lunge with one foot forward for reach
- Short, controlled strokes into the corner
- Twist from hips, not shoulders
- Pause to reset stance and breathe
Work in Sections to Avoid Lap Marks
Because paint dries quickly on angled surfaces, work in manageable sections so you can keep a wet edge and avoid lap marks. You’ll plan segments that follow the stair angle, roughly one to two feet high, painting each in a continuous pass.
Use consistent brush or roller pressure and overlap wet edges slightly. If you need minor adjustments, employ subtle color blending and texture techniques at the edges to disguise progression before the paint skin forms.
Move steadily: finish one section fully—cutting in, rolling, smoothing—then step back to inspect before continuing. That discipline prevents visible seams and guarantees an even finish.
Blend Painted Sections Across the Stair Plane
Once you’ve completed each manageable section, blend the wet edges across the stair plane so the finish reads as one continuous surface. You’ll work quickly along the incline, keeping a wet edge and using light, overlapping strokes to mask paint blends. Focus on color blending at the overlap, feathering the roller or brush to avoid ridges.
Step back on the landing to inspect from the viewing angle, correcting any streaks while paint’s still workable. Visualize the plane as a single panel and move rhythmically to maintain consistency.
- Long, even roller strokes
- Feathered brush tips
- Diagonal crossover strokes
- Visual checks from below
How Many Coats and When to Apply Them?
If your first coat covers evenly and the surface looks uniform from the landing, you can wait the paint’s recommended dry time before applying a second; if not, add another thin coat rather than loading up on one thick layer. You’ll base coat count on sheen, surface porosity, and your color selection—lighter colors may need fewer coats, darker or bold hues often need more. Proper paint preparation (priming, cleaning) reduces coats. Apply thin, even strokes, inspect from the stairs for uniformity, and only add another coat after touch-dry feel and manufacturer cure time.
| Coat | Surface | Action |
|---|---|---|
| 1 | Clean/primed | Apply thin |
| 2 | Even? | Assess |
| 3 | Touch-ups | Add thin |
| 4 | N/A | Wait cure |
| 5 | N/A | Final check |
Fix Drips, Runs, and Splatter on Stair Walls
As you finish, scan the stair wall for spots, runs, and stray splatter so you catch imperfections early.
Use a scraper and fine sandpaper to remove drips and feather the edges before touching up with matching paint.
To avoid repeats, control load on your brush or roller, work in small sections, and protect nearby surfaces with drop cloths and tape.
Spotting Paint Imperfections
When you’re painting the wall above the stairs, keep an eye out for drips, runs, and splatter—their gravity and your vantage point make them easy to miss until the paint dries. You’ll scan from top and bottom, judging how color psychology affects perceived flaws and how paint texture hides or reveals them.
Use steady lighting and step back often to spot shiny trails or raised beads.
Visualize problem types:
- Vertical streak glinting under light.
- Small blob catching on a step view.
- Fine splatter that reads like noise at distance.
- Uneven sheen where texture shifted during rolling.
Removing Runs And Drips
Now that you’ve learned to spot drips, runs, and splatter from different angles, you’ll want to know how to fix them before the paint fully cures. If the paint is still tacky, gently lift runs with a clean brush or palette knife, pulling paint downward to even thickness.
For cured drips, sand lightly with fine-grit paper, feathering edges so color blending won’t show a hard line. Remove dust, then apply thin coats matching sheen.
For uneven texture application, use a light skim coat or stipple to match surrounding finish, sanding between layers for a seamless result.
Preventing Future Splatter
How can you keep paint splatter off stair walls in the first place? You’ll prevent drips and runs by prepping, choosing tools, and adapting to wall texture and color coordination needs. Tape trim, lay drop cloths, and use a sash brush for edges.
Roll slowly, load the roller evenly, and keep a wet edge. Inspect under good light and smooth micro-drips before they dry.
- imagine a neat edge where trim meets stair rail
- picture a smooth wall texture without blobs
- see coordinated colors blending without splatter
- visualize tidy steps covered with cloth and tape
Paint Around Handrails, Balusters, and Posts
Because handrails, balusters, and posts sit in tight spots and get a lot of contact, you’ll need a steady hand and the right tools to paint them cleanly without drips or missed areas. Tape around edges, use a sash brush for curves, and consider painting posts separately if removable. For decorative accents or textured finishes, test brushes and rollers on scrap wood first. Work top-down, wipe dust, and apply thin coats to avoid runs.
| Tool | Purpose |
|---|---|
| Sash brush | Detail edges |
| Small roller | Smooth flats |
| Foam brush | Tight spots |
| Masking tape | Protect trim |
Handle Awkward Angles and Odd Stair Layouts
When staircases bend, split, or tuck into odd corners, plan each section before you lift a brush so you can work efficiently and avoid missed spots. You’ll survey angles, note wall texture changes, and map reachable zones from each step.
Use a sturdy ladder or platform, adjust Lighting placement to reduce shadows, and mark transition lines lightly in pencil. Work top-down, tackling one face at a time. Visualize each plane:
- Narrow landing with low ceiling and tight turn.
- Long sloped wall bordering rising steps.
- Short return wall behind a post.
- Recessed alcove beside a mid-landing.
Take breaks to reassess sightlines.
Four Quick Edge Techniques for Clean Lines
Now that you’ve mapped each stairway plane and marked your lines, it’s time to make those edges crisp. First, use painter’s tape pressed firmly along your guideline, burnishing the edge to prevent bleed-through.
Second, try the cut-in brush technique: steady wrist, short strokes, and feather paint away from the tape.
Third, employ an angled trim brush for tight corners and changes in texture options, working slowly for control.
Fourth, remove tape at a 45-degree angle while paint’s tacky to avoid peeling.
Consider color coordination when planning contrasts, and touch up small flaws with a tiny artist brush.
Drying Times and Ventilating the Stairwell
While paint feels dry to the touch within an hour or two, full curing—when it reaches its maximum hardness and resistance—can take anywhere from 24 hours to several days depending on formula, humidity, and temperature.
Though paint feels dry in an hour, full curing takes 24 hours to several days depending on conditions.
You’ll plan ventilation so fumes dissipate and layers cure evenly, protecting decorative accents and any recent wall murals. Open windows, run a fan up the stairwell, and avoid heavy traffic while paint strengthens.
Visualize the finished space:
- A breeze lifting fresh scent.
- Sunlight warming a drying mural.
- Fans circulating air past accents.
- Quiet stairs waiting for use.
Cleanup Checklist to Protect Stairs and Hardware
After the paint has set and fresh air has cleared the stairwell, you’ll want a focused cleanup checklist to protect steps, banisters, and hardware from drips, dust, and abrasive scrubbing.
Start by removing drop cloths carefully, folding contaminated areas inward to trap flakes. Vacuum treads, corners, and under rail brackets; use a soft brush attachment near staircase lighting fixtures.
Wipe banisters and newel posts with a damp microfiber cloth, avoiding harsh solvents that can mar finish or alter wall texture. Check screws and hinge areas for paint build-up, gently scrape with a plastic blade.
Dispose of waste and store tools dry.
Touch‑Up Strategy After Furniture and Foot Traffic
If furniture scuffs or heavier foot traffic have dulled sections of paint, take a methodical approach to touch-ups so repairs blend seamlessly with the surrounding wall. You’ll assess damage, clean surfaces, and feather edges before applying matched paint.
Consider color psychology when choosing whether to refresh the entire run or spot-treat; lighter tones hide wear differently than deep hues. Factor budget planning into decisions: small repairs save money, full repaints add value.
Visualize results with simple staging:
- Run your hand along trim to find rough spots.
- Lightly sand scuffs to smooth edges.
- Wipe, prime, and feather paint.
- Step back and inspect lighting.
Common Mistakes Homeowners Make on Stair Walls
Because stair walls sit in a high‑traffic, highly visible spot, homeowners often make avoidable mistakes that fight visibility and durability. You might pick a trendy color without considering color psychology and end up with a space that feels cramped or unsettling.
Don’t skimp on primer or choose a low‑durability finish where scuffs are inevitable. Avoid overcomplicated decorative stencils that overwhelm narrow sightlines or aren’t scaled to wall dimensions.
Skipping proper masking and trim protection leads to messy edges. Plan lighting, test samples at stair height, and pick materials made for wear so your work lasts and reads well.
Save on Stairwell Painting Without Losing Quality
While you don’t need a big budget to get professional-looking results, smart choices matter: prioritize quality primer and a durable, washable paint so you avoid costly touch-ups. Use sample pots to confirm color at stair height before committing.
Tackle prep yourself—cleaning, sanding, and carefully taping trim—then hire pros only for high, awkward spots or complex finishes. You can save by learning historical techniques for brushing and cutting in, choosing eco-friendly paints that dry fast and need fewer coats, and using extendable poles and scaffold alternatives to keep safety and finish tight.
- Paint with long-pile roller for even coverage
- Backroll cut-ins to blend
- Use drop cloths and trim guards
- Work top-down to catch drips
When to Hire a Pro for Stairwall Painting?
When your stairwell combines height, awkward angles, or delicate trim, hire a pro—you’re trading DIY risk for speed, safety, and a cleaner finish. You should call a pro if scaffolding, complex scaffolding planning, or unfamiliar Historical techniques are involved, or if you want precise application of eco friendly paints. Pros handle prep, ventilation concerns, and matching finishes around banisters. Consider cost vs. risk: complex jobs or limited mobility justify hiring. Use the table below to compare quick criteria and decide fast.
| Situation | Hire? |
|---|---|
| Very high ceiling | Yes |
| Intricate trim | Yes |
| Simple repaint | Sometimes |
| Eco friendly finish desired | Yes |
Frequently Asked Questions
Can I Paint Stairwall Murals or Patterns Without Professional Help?
Yes — you can tackle stairwall murals and DIY staircase patterns yourself. You’ll plan designs, use simple stencils or projector guides, prep surfaces, tape carefully, and work slowly; you’ll get professional-looking results without hiring someone.
Will Paint Color Affect Natural Light Perception on Stairs?
Like a sunrise shifting mood, yes — you’ll use color psychology and light reflection to alter stair perception; lighter hues bounce light, making stairs feel airy, while darker tones absorb it, creating depth and cozier steps.
How to Waterproof or Mold‑Proof Basement Stair Walls?
You should control basement humidity first, fix leaks and improve ventilation, then apply waterproof paint and sealants, repair cracks with hydraulic cement, and use mold-resistant primer and dehumidifiers to keep stair walls dry and mold-free.
Can I Use Voc‑Free Paint for High‑Traffic Staircase Areas?
Want safer air quality while keeping durability? Yes, you can use VOC-free paint for high-traffic staircases. You’ll choose eco friendly finishes, apply texture application techniques for toughness and grip, and expect slightly different drying times.
Are There Paint Warranties or Guarantees for Interior Stair Walls?
Yes — manufacturers and contractors often offer warranties or guarantees; you’ll get varying coverage depending on paint color options and wall preparation techniques, so check terms, document prep, and keep receipts to make certain any defects or failures are covered.
Conclusion
Painting the wall above your stairs can transform your home quickly and safely. Want a reason to start? Studies show DIYers tackle about 30% of interior projects themselves, so you’re in good company. With the right tools, paint choice, and simple precautions—plus touch‑up plans—you’ll save money without sacrificing quality. If the job’s large, awkward, or risky, hire a pro. You’ll finish confidently and enjoy the fresh, clean look every time.