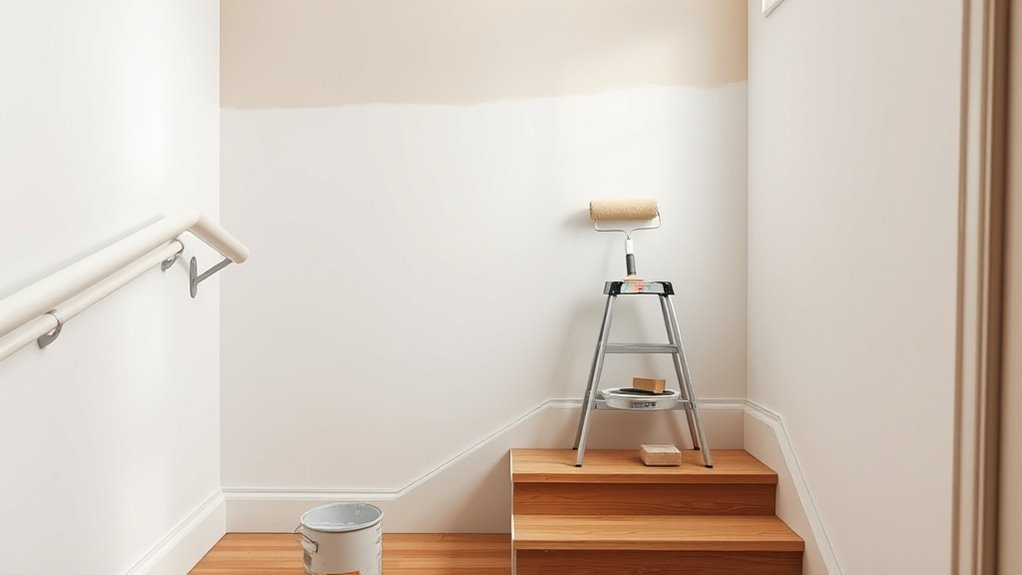
How to Paint the Wall Above the Stairs Easily
You can paint the wall above your stairs easily by planning, clearing the area, and using the right tools: an extension pole, angled brush, appropriate roller nap, drop cloths, and secure masking. Work top-down in thin, overlapping coats, keep a wet edge, and use an extra coat where needed for coverage. Protect rails and steps with breathable runners and tape, use a ladder or platform safely, and check your work under different light — keep going for tips on measurement, priming, and finish choices.
Step-by-Step Plan for Painting Stairwell Walls
Before you start, gather your tools and map out each stage so you won’t stop midway: tape, drop cloths, a sturdy ladder, primer, paint, rollers with extension poles, angled brushes for trim, sandpaper, and a vacuum.
Start by cleaning and sanding the surface, then vacuum dust thoroughly.
Apply primer where needed, cutting in trim first with angled brushes, then roll large areas with extension poles.
Work top-down to avoid drips, blending each wet edge.
Consider color psychology when choosing hues and select eco-friendly paints to reduce fumes.
Let coats dry fully; inspect and touch up before removing tape.
Assess the Job: Height, Angles, and Risk
Because stairwells vary widely, start by measuring wall height, ceiling slope, and the run of the stairs so you know what equipment and safety gear you’ll need. Check clearances for ladders, scaffolding, or extension poles and note awkward angles or low ceilings that demand articulating tools.
Evaluate footing, lighting, and whether someone can steady you; consider harnesses for high, steep jobs. Think about ventilation for fumes and how color psychology will affect light perception in the stairwell.
Finally, plan paint quantities and disposal—include paint recycling or proper disposal options to minimize waste and comply with local rules.
Pick a Finish for Stairwell Walls
You’ll want to pick a sheen that balances appearance and maintenance, since flat, eggshell, satin, and semi-gloss all look different and clean up differently.
Think about where scuffs and fingerprints are likely on your stairwell and choose a more durable finish for high-contact areas.
That way you’ll get the look you want without sacrificing longevity.
Sheen Options Explained
When choosing paint for your stairwell, pick a sheen that balances durability and appearance so high-traffic walls stay looking good without constant touch-ups. You’ll weigh matte, eggshell, satin, or semi-gloss; each hides imperfections or wipes clean differently. Consider color psychology for mood, and ventilate to reduce paint odor during application. Match sheen to traffic and trim for cohesion.
| Sheen | Best use |
|---|---|
| Matte | Hides flaws |
| Eggshell | Low sheen, moderate washability |
| Satin | Easy to clean, soft glow |
| Semi-gloss | Trim, high-wear spots |
Durability Versus Aesthetics
Picking the right sheen sets the stage, but now you need to balance how the wall will look with how it will hold up. You’ll pick satin or eggshell for stairwells that see hands and scuffs; they clean easily and keep moderate sheen.
Choose flat or matte if you want to hide imperfections and emphasize subtle wall texture, though they’re less washable.
High-gloss gives durability and highlights architectural trim but exaggerates flaws and increases color contrast.
Consider traffic, light, and maintenance: prioritize easy-clean finishes where kids or heavy use occur, reserve low-sheen options for low-traffic, visually forgiving areas.
Measure Walls Above Stairs Accurately
Because stairwell walls slope and sightlines change as you climb, measure carefully before buying paint or materials. You’ll note wall texture and color palette impacts light and perceived height, so measure at several points: top, middle, bottom. Use a laser measure for angled runs and a tape for detail near trim. Record widths, heights, and any obstructions like windows or fixtures. Sketch dimensions to scale on a simple diagram. Verify measurements twice or with a helper. Refer to the table below for a quick checklist to keep your measurements consistent and accurate.
| Location | Measurement tip |
|---|---|
| Top | Measure from ceiling to nosing |
| Middle | Check slope and obstructions |
| Bottom | Measure to floor and baseboard |
Estimate Paint Quantity for the Stairwell
Now that you’ve mapped the stairwell dimensions, estimate how much paint you’ll need by calculating the total wall area and adjusting for doors, windows, and trim. Multiply square footage by the paint’s coverage per gallon, then divide by coats.
Now that you’ve mapped the stairwell, calculate total wall area, subtract openings, then apply paint coverage per gallon.
Account for texture and absorption; you’ll likely need extra for older plaster. Consider color mixing if you plan custom shades, and label tins clearly for paint storage between coats. Keep a small amount for touch-ups.
- Calculate wall area and subtract openings.
- Check paint coverage on the can.
- Add 10–15% for waste and touch-ups.
- Plan for mixing and sealed storage.
Choose Safe Access: Ladder, Scaffolding, or Stair Ladder
When working above a stairwell, choose the access method that keeps you stable, lets you move safely, and fits the stair geometry and ceiling height.
Pick a platform or stair ladder when you need lateral movement; scaffolding gives a broad, steady workspace for large areas or rough wall textures.
Use a standard extension ladder only if the steps and landing let it sit securely and you can avoid overreaching.
Always inspect equipment, follow load limits, and wear slip-resistant footwear.
Consider safety harnesses when working high or solo, and keep tools tethered.
Choose the simplest, most secure option for the task.
How to Position a Ladder on Stairs Safely
When you’re working on stairs, make sure the ladder base is level—use adjustable legs or a ladder leveler so each foot sits solidly.
Position the top against a firm surface and secure it with a strap or a spotter to prevent slipping.
Double-check stability before you climb and re-check after any repositioning.
Level The Ladder Base
Before you climb, make sure the ladder sits level and stable on the stairs so it won’t wobble under your weight. Check each foot and use a ladder leveler or a firm wooden shim under the low foot.
Position the ladder so weight centers over the rails and test stability by applying light pressure downward.
Keep tools in a belt and wear a safety harness if required for height.
Don’t overreach; move the ladder instead.
- Inspect feet and stairs for debris.
- Use adjustable ladder leveler or shim.
- Center weight and test before ascending.
- Wear a safety harness when needed.
Secure Top Support
After you’ve leveled the base, lock in a solid top support so the ladder won’t slide or shift on the stairway. Position the ladder’s top against a reinforced section of wall or use a portable ladder top designed for stairs.
Check that contact points are firm and won’t compress paint or drywall—consider wall reinforcement like a plywood pad behind a drop cloth.
Secure the ladder with a strap or hook to a stair rail or immovable fixture, and test stability by gently shifting weight before climbing.
Keep tools on a belt, not on the ladder, to maintain balance and prevent sudden movement.
Set Up Temporary Platforms and Stair Ladders
If you’ll be working high above a stairwell, set up sturdy temporary platforms and a stair ladder so you can move along the wall safely and reach every section without overreaching. Position platforms level, anchor them to solid points, and test stability before climbing. Keep paint trays and rollers handy to avoid stepping back and forth; that helps preserve your chosen color schemes and ensures consistent application for decorative finishes. Wear non-slip shoes and a harness if needed.
- Measure span and pick platform size.
- Lock stair ladder securely.
- Use guard rails or toe boards.
- Keep tools within arm’s reach.
What Tools You Really Need for Stairwell Painting
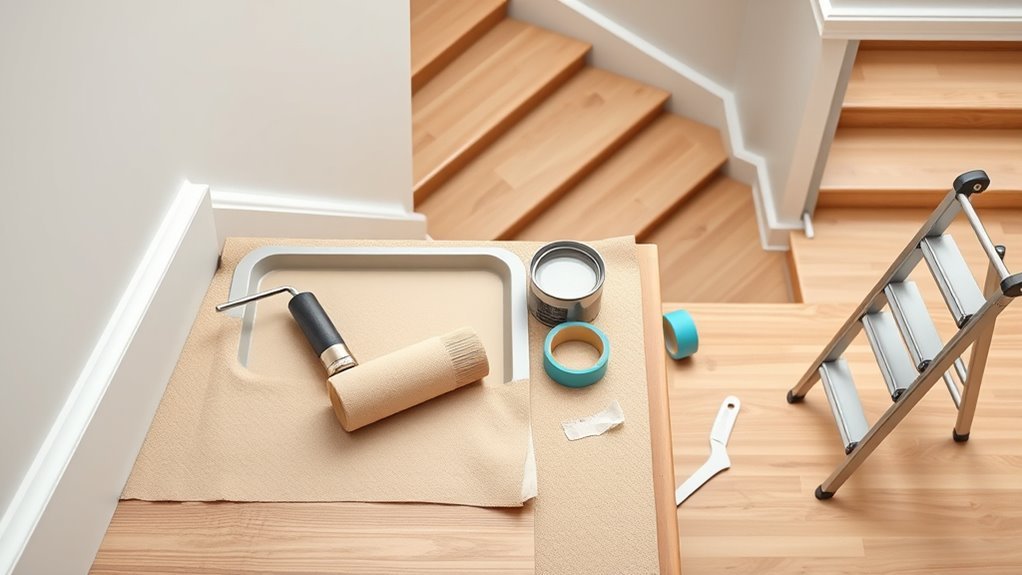
When you’re painting a stairwell, having the right tools makes the job safer, faster, and neater. You’ll need an extension pole with a roller, angled sash brushes for edges, a 2–3 inch brush for detail, and a sturdy drop cloth to protect stairs.
Use a small trim brush for tight corners and a pad edger for consistent lines. Keep a roller tray, painter’s tape, and a lightweight step stool handy.
Learn brush techniques for smooth cutting-in and consider current color trends when choosing finish and sheen so your work looks modern and cohesive.
Best Budget Paints & Tools That Work
Because you’re likely balancing quality with cost, pick paints and tools that give reliable coverage and durability without breaking the bank. You’ll want mid-grade latex for easy cleanup. Consider eco-friendly paints to reduce odors. And use colors with color psychology in mind to make the stairwell feel open or cozy.
Balance cost and quality with mid-grade, low-VOC latex and thoughtful colors to make the stairwell feel inviting.
Choose brushes and rollers that hold paint well to cut trips up and down stairs.
- Affordable eggshell latex — good hide, washable.
- Eco friendly paints — low-VOC, better air quality.
- 9″ roller with 3/8″ nap — smooth coverage.
- Angled sash brush — neat trim control.
Personal Protective Equipment to Wear
Before you start, make sure you’ve got the right PPE: safety goggles to shield your eyes, a respirator or mask to keep paint fumes and dust out of your lungs, and clothing that protects skin and stays breathable.
Choose goggles that fit well, a mask rated for paint fumes or particulates, and coveralls or old clothes you can move in on the stairs.
Proper gear keeps the job safe and lets you focus on a clean finish.
Eye Protection Gear
If you’re painting the wall above the stairs, protecting your eyes is essential—paint splatters, dust, and drips can strike faster than you expect. You’ll prioritize eye safety by choosing proper protective gear that fits well and won’t fog.
Pick wraparound safety glasses for splash protection and impact resistance. For broader coverage, use goggles with adjustable straps. Consider a face shield when sanding or scraping overhead.
Always clean lenses and replace scratched gear. Inspect seals and straps before climbing. Store gear clean and dry. Replace any compromised item promptly to keep your vision safe while you work.
- Wraparound safety glasses
- Sealed goggles
- Face shield
- Lens cleaning cloth
Respiratory Protection Masks
After protecting your eyes, you’ll also want to guard your lungs—especially when sanding, scraping, or spraying paint above the stairs where dust and fumes hang in the air.
Choose respirator masks rated N95 or better for dust; use a respirator with organic vapor cartridges when working with solvent-based paints.
Fit it snugly, perform a seal check, and replace filters per manufacturer guidance. Keep a spare on hand if you’re working long shifts or switching tasks.
Don’t rely on a loose cloth mask; breathing safety depends on proper fit and the correct cartridge for the contaminants you expect to encounter.
Protective Clothing Choices
When you’re painting above stairs, wear clothing that protects skin and lets you move—long sleeves, long pants, and a snug but flexible layer will keep splatters and dust off while preventing snags on railings or tools. Choose Protective clothing and Safety gear that balance protection and mobility. Pick breathable fabrics, avoid loose cuffs, and fasten sleeves.
Add knee pads if you’ll crouch on steps. Use disposable coveralls for heavy spills and washable work clothes for light jobs.
- Gloves: nitrile or latex for solvent protection
- Eye protection: splash goggles
- Respirator-compatible hood or cap
- Non-slip footwear
Prep: Clear and Protect the Stairwell
Before you start painting, clear the stairwell and protect every surface that could get splattered or scuffed. Remove rugs, shoes, and décor, and wipe dust from banisters and steps so tape and drop cloths adhere properly.
Lay breathable drop cloths and secure edges with low-tack tape; use stair-specific runners where needed. Create a staging spot for tools and paint cans to keep walkways clear.
Consider color psychology when choosing swatches—test how hues read in stair lighting. If you prefer safer options, pick eco-friendly paints to reduce fumes while you work and air out the space afterward.
How to Mask Trim, Handrails, and Fixtures
If you want clean edges and no stray drips, mask trim, handrails, and fixtures carefully before you start rolling—use painter’s tape designed for delicate surfaces and press it down firmly along edges to prevent bleed-through. Choose tape width to cover baseboards and thin trim; remove knobs or shield fixtures with plastic and tape.
Consider how Color psychology affects accent choices near stairs and use Eco friendly paints to reduce odors. Work top-down and keep a damp cloth handy for quick cleanup.
- Tape seams twice for corners.
- Wrap handrails with craft paper.
- Cover light switches tightly.
- Label masked areas.
How to Repair Holes, Cracks, and Nail Pops
Because small imperfections catch the light and ruin a fresh paint job, you’ll want to fix holes, cracks, and nail pops before you roll—start by cleaning the area, knocking loose material free, and enlarging tiny holes slightly so filler can bond. Remove any wallpaper remnants, check for mold, and dry the surface for mold prevention. Push in popped nails, replace with screws if needed, then apply patching compound. Sand smooth, wipe dust, and repeat for deep repairs. Use lightweight spackle for small dings. Refer to the quick guide below.
| Task | Tool | Tip |
|---|---|---|
| Clean | Vacuum/brush | Remove dust |
| Inspect | Flashlight | Check mold |
| Fasten | Screwdriver | Swap nails |
| Fill | Spackle | Layer thin |
| Sand | Sandpaper | Feather edges |
Choose Primer for Stained or Patched Areas
If you’ve patched or have stains on the stair wall, pick a stain-blocking primer to stop bleed-through before you paint.
Clean and sand the patched areas so the primer bonds evenly.
Apply a thin, even coat and let it fully dry before finishing the paint.
Stain-Blocking Primer Options
When you’ve got stains or fresh patches on the stairwell wall, choosing a true stain-blocking primer keeps them from bleeding through your new paint. These primers seal tannins, water marks, smoke residue, and joint compound so you get an even finish.
You’ll want products labeled “stain-blocking” or “shellac-based” for tough tannins and smoke. Water-based options handle mild stains and won’t cause primer peeling when recoated.
For stain removal concerns, always test a small area first. Compare drying time, odor, and recoat window, then pick what suits your space.
- Shellac-based: best for tannins
- Oil-based: durable seal
- Water-based: low odor
- Universal: balance
Patch Area Preparation
Before you prime patched or stained spots, clean and sand the area so the primer can bond properly and the finish will look uniform. After repairs, wipe dust with a damp cloth and let dry.
Choose a stain-blocking primer for tannin or water marks; use a shellac or epoxy-based primer for severe stains. If you prefer eco-friendly paints, look for low-VOC primers with stain-blocking claims.
Match primer sheen and tint to your topcoat to avoid flash. Think about color psychology—warm undertones can brighten stairways; cool primers tame yellowing.
Apply thin, even coats and follow drying times before painting.
How to Sand and Smooth Textured or Popcorn Walls
Although textured and popcorn ceilings can hide imperfections, you’ll need to remove or smooth them to get a crisp paint finish on the wall above the stairs.
Textured or popcorn ceilings may hide flaws, but smooth them for a clean, crisp stairway wall finish.
For textured wall removal, work carefully: test a small area, wet-scrape loose texture, and use a pole sander with coarse paper to level high spots. Wear protection, tarp floors, and vac frequently.
Smoothing affects how light plays on color, so consider paint color psychology when choosing shades that minimize shadows. Finish with a skim coat of joint compound, sand smooth with fine grit, then prime before painting.
- Prep and protect
- Wet-scrape loose texture
- Sand high spots
- Skim, sand, prime
Best Lighting to Reveal High-Wall Imperfections
When prepping that tall stairwell, you’ll want directional task lighting to cast sharp shadows and expose bumps and ridges.
Then use diffused wall-grazing light to softly highlight low spots without creating glare.
Together these approaches help you pinpoint repairs before you paint.
Directional Task Lighting
If you want to spot every bump, crack, or uneven patch on a high wall, aim directional task lighting so beams skim the surface at a low angle; that raking light casts shadows that make imperfections obvious, helping you plan repairs and choose the right finish.
You’ll balance this with ambient lighting to keep the stairwell usable and consider color psychology so light temperature doesn’t distort paint choices.
Position adjustable spotlights or track heads to sweep the wall, move them as you work, and use higher lumen outputs for detail checks.
- Use adjustable fixtures.
- Aim low-angle beams.
- Match light temperature.
- Test as you go.
Diffused Wall Grazing
Because harsh raking light can exaggerate every nick, diffused wall grazing gives you a softer, more even way to reveal high-wall imperfections without turning minor flaws into distractions. You’ll position fixtures that wash light upward and across the surface, using frosted lenses or indirect LED strips to cut glare.
This approach exposes true textured wall effects without exaggerating shadows, so you can judge repairs and primer needs accurately. Walk the stairwell while adjusting angles until irregularities are visible but not theatrical.
Use portable diffusers for touch-ups and note areas needing skim coats before you roll paint for a flawless finish.
How to Cut In Along Ceilings and Stair Rails
Before you start rolling, grab a quality angled brush and get comfortable with steady, short strokes; cutting in along ceilings and stair rails is all about control and a light touch. You’ll protect ceiling texture with a thin bead of paint, wiping excess to avoid drips. Work from the top down, keeping a wet edge to blend with rolled areas later. Open windows to reduce paint fumes and keep air moving.
- Tape rail edges sparingly for clean lines.
- Use an angled brush for tight corners.
- Feather paint toward the center.
- Check for drips frequently.
Roller Types and Nap Lengths for Vertical Stair Walls
Now that your cut-in lines are tidy, pick the right roller to finish the vertical stair wall efficiently. Choose a 3/8″ nap for smooth plaster or drywall to lay down paint evenly without texture, or a 1/2″ nap for lightly textured surfaces. Use a 3/4″ nap only on pronounced textures to avoid patchiness.
Match synthetic or woven covers to latex or oil paints respectively. Combine traditional techniques—loading evenly, maintaining a wet edge—with mindful strokes that respect sightlines and color psychology.
Rolling top-to-bottom reduces drips and ensures a consistent finish so your staircase looks intentional and balanced.
Use an Extension Pole for Safe Stairwell Coverage
Want to keep both hands free and avoid awkward balancing on stairs? Use an extension pole for safe stairwell coverage to paint high areas without climbing. You’ll reduce strain, maintain control, and keep a steady reach.
- Attach a compatible roller to the extension pole and tighten securely.
- Adjust pole length incrementally—don’t overextend—to guarantee stability and safety coverage.
- Stand on a lower step or flat landing, brace feet, and paint with smooth, controlled strokes.
- Inspect connections and clean the pole after use to assure longevity and reliable safety coverage.
Maintain a Wet Edge on Tall Vertical Surfaces
When you work up a tall vertical surface, keep a wet edge so each stroke blends into the next and you avoid lap marks; that means painting systematically from top to bottom (or vice versa) in overlapping sections and keeping your roller or brush loaded enough to merge new paint with still-wet paint.
Work in manageable zones, finish one before moving on, and watch drying times—humidity and temperature speed or slow drying, affecting your wet edge.
Choose eco-friendly paints that dry predictably and test a small area first.
Consider color psychology: darker trims hide seams, lighter fields show blends, so plan accordingly.
Brushing vs. Rolling: When to Use Each
Although both brush and roller can give good results, you’ll choose one over the other depending on the surface, finish, and detail work required. You’ll grab a brush for trim, corners, and textured spots where control matters, and a roller for broad, even coverage on the main wall above stairs.
Rollers speed the job; brushes handle edges and subtle blending that affects color psychology near landings. Prefer eco friendly paints? They work with both tools but check nap length for absorption. Consider these quick guidelines:
- Use brush for trim and tight angles.
- Use roller for flat expanses.
- Match nap to texture.
- Blend edges carefully.
How to Paint Around Sconces, Switches, and Outlets
After you’ve handled edges and large surfaces with a roller, you’ll need to work carefully around sconces, switches, and outlets to keep lines neat and electrical components safe. Turn power off at the breaker before removing covers; label screws and set plates aside.
After rolling large areas, carefully work around sconces, switches, and outlets—cut power, remove covers, and label parts before painting
For sconce installation, paint up to but not onto mounting hardware, then reinstall fixtures and touch up with a small brush.
Use painter’s tape around switch plates and outlet placement areas, pressing tape firmly to prevent bleed. Cut in with a steady hand and angled brush for crisp lines.
Reattach covers only after paint fully dries.
Managing Drips and Splatter on Stairs and Floors
Before you start, lay down drop cloths or adhesive runner protectors to cover treads and landings so paint won’t soak in or stain.
Keep a small angled brush and a damp rag handy so you can catch and wipe any drips immediately.
Work from top to bottom and use controlled brush or roller strokes to minimize splatter.
Protect Stair Surfaces
How will you keep paint off the steps while you work? Protecting stair surfaces matters, especially around staircase lighting and varying wall texture.
Lay a breathable drop cloth down the run, taping edges to avoid tripping. Use adhesive paper runner for high-traffic treads; it peels cleanly.
Mask handrails and light fixtures with painter’s tape and thin plastic, keeping switches and staircase lighting accessible.
For angled sections near textured walls, cut foam pipe insulation into strips and tape along the riser edge to catch drips.
Check coverings often and replace any saturated protection to prevent tracked paint.
Control Paint Drips
Now that the floors and fixtures are covered, focus on stopping drips and splatter before they reach the stairs. You’ll tape off edges and lay overlapping drop cloths down the stair run, securing them so they won’t shift.
Use a steady-loading roller and tap excess back into the tray; that reduces overspill from fast strokes. Keep a small brush handy for cut-ins near railings and to catch drips as they form.
If wall texture is pronounced, work thinner coats to avoid pooling in crevices. Consider test patches with different paint color schemes to confirm coverage and drip behavior before committing.
How to Apply a Second Coat Without Lap Marks
Once your first coat has fully dried, you’ll want to work quickly and methodically so the second coat blends without leaving lap marks. Position good paint ventilation to keep the surface tack-free and maintain consistent drying. Use the same roller nap and keep a loaded roller edge to feather into wet areas. Maintain a wet edge and paint in overlapping W patterns, then finish with light, even strokes.
- Re-roll previously painted areas without adding new paint.
- Work in manageable sections.
- Keep consistent pressure and angle.
- Inspect under different light to spot missed seams.
Consider color psychology when choosing finish sheen.
Timing: Wait Times Between Coats on Tall Walls
Because tall walls present larger surface areas and varying airflow, you’ll want to give each coat enough time to dry fully before starting the next—typically 2 to 4 hours for latex in good conditions, longer for oil-based paints. Check paint labels and room humidity; cooler, damper air slows drying.
Use a fan or open windows to improve airflow without blowing dust. If you’re using eco-friendly paints, they often dry similarly but still follow manufacturer guidance.
Plan coats around natural light so you can spot uneven sheen. Waiting patiently preserves finish and respects color psychology by ensuring true hue development.
How to Blend Touch-Ups So They Disappear
To make touch-ups vanish, match the paint sheen exactly so light reads the spot the same as the rest of the wall. Use feathered brushstrokes to soften the edges, then lightly blend the repaired area with a damp sponge while the paint’s still tacky.
If you work quickly and patiently, the patch will become invisible from the stairs.
Match Paint Sheen
How do you make a touch-up disappear when the color is already matched? You’ll need to match sheen too. Sheen affects perceived color and ties into color psychology; a glossy spot draws the eye. Check the original finish (flat, eggshell, satin, semi-gloss) and compare in good light. Keep small amounts of mixed paint in proper paint storage so sheen stays consistent.
- Test on scrap and view from stairs.
- Thin touch-up paint slightly for smoother lay.
- Use same brush or roller type as original.
- Blend edges by feathering while wet for uniform reflectance.
Feather Edge Brushstrokes
When you feather edge brushstrokes, you soften the shift between the new paint and the old so the repair disappears from view. Start with a small, dry brush and load it sparingly; tap off excess.
Lightly stroke outward from the patch in short, overlapping arcs that follow existing texture patterns so gradients read natural. Work while paint is tacky, not wet or fully dry, blending edges until visible lines vanish.
Consider color psychology: slightly warmer or cooler undertones can betray repairs, so match hue and warmth precisely. Step back often, adjust pressure, and stop when the repair blends seamlessly.
Blend With Damp Sponge
If feathering with a dry brush doesn’t fully disappear the repair, reach for a damp sponge to finesse the edges; it offers a softer, more subtle blend for semi-absorptive wall finishes. You’ll lightly dab outward from the patch, lifting excess paint and breaking hard lines so touch-ups vanish.
Match sponge moisture to paint sheen, test in an unseen spot, and let thin layers dry between passes. Consider how color psychology affects perceived uniformity—warmer tones hide inconsistencies differently than cool hues.
Use eco friendly paints when possible; they behave like conventional formulas but reduce fumes and environmental impact.
- Blot excess moisture
- Dab, don’t rub
- Feather outward thinly
- Inspect under varied light
How to Avoid Visible Seams and Roller Texture
Because seams and heavy roller marks stand out on an angled wall, you’ll want to control how much paint you load and how you blend each pass. Load the roller lightly, working small sections and maintaining a wet edge to guarantee seam concealment.
Use a short-nap roller for smooth surfaces; back-roll thinly applied coats to even out coverage. If texture appears, gently skim with a microfiber roller or light brush strokes while paint is wet for texture removal.
Check from different angles and step back frequently. Let coats dry fully before re-coating and sand any remaining high spots very lightly.
Painting Two-Tone Walls Above Stairs
When you paint a two-tone wall above the stairs, prep and tape carefully so the line stays crisp as you work on a ladder. Use a steady hand and a quality brush to blend the paints right at the break so the shift looks intentional, not patchy.
Take your time with the tape removal while the paint’s still tacky to avoid jagged edges.
Prep And Tape Carefully
Before you start cutting in, take time to prep and tape precisely so your two-tone line stays crisp as you work up the stairs. You’ll choose colors with color psychology in mind and pick eco-friendly paints to keep fumes low.
Clean the surface, repair dents, and sand glossy spots so tape adheres.
Use a level or laser to mark the break line; start taping from the top down the stair angle.
Press tape edge firmly to prevent bleed. Remove tape while paint is tacky for a sharp edge, and tidy seams with a small brush if needed.
- Clean and sand
- Mark the break
- Apply tape
- Press and remove
Blend At The Break
Now that your tape’s set and paint’s applied, focus on blending at the break so the two colors meet cleanly along the stair angle. Work while edges are slightly wet: feather the top color into the bottom with a dry brush or soft roller, following the stair line. Use small, controlled strokes and step back to check alignment from the landing.
If you mix a transitional hue, keep color mixing notes so you can recreate it later. Store leftover paint properly—seal cans, label them, and follow paint storage guidelines—to touch up mistakes and maintain consistent tone as lighting or sheen shifts over time.
Paint Accent Walls and Feature Panels Above Stairs
If you want to give your staircase an immediate personality boost, painting an accent wall or adding a feature panel above the stairs delivers high impact with relatively little effort.
You’ll pick hues using color psychology to set mood—calming blues, energetic corals—and choose eco friendly paints to reduce fumes.
Define the panel with crisp edges, test swatches at different times of day, and use painter’s tape for clean lines.
Consider vertical stripes or a framed rectangle for visual lift.
Keep the rest neutral so the accent reads clearly and complements existing trim and lighting.
- Test color swatches
- Pick eco friendly paints
- Tape precise edges
- Coordinate with trim
Working With Angled Ceilings and Awkward Transitions
Because stairways often meet sloped ceilings and odd corners, you’ll want a plan that adapts to irregular planes. Start by studying the lines where walls, angled ceilings, and trim meet, marking tight spots.
Use a small angled brush for control and a mini roller to fill flats without overloading. For awkward shifts, tape narrow strips to create crisp edges or use a flexible painter’s tool to follow curves.
Work in manageable sections, feathering paint into joints to avoid lap marks. Clean edges as you go and step back frequently to check alignment before the paint dries.
Dealing With High Ceilings: Paint From Below or Above?
When you’ve mapped out awkward lines and practiced steady brushwork near sloped ceilings, the next decision is how you’ll reach high areas — from below with extension tools or above from a scaffold or ladder. You’ll weigh safety, control, and how ceiling textures affect finish.
Long poles give smooth strokes on varied textures and keep your paint color consistent without ladder shakes. Working from a scaffold offers precision for cutting in and inspecting texture seams but needs more setup.
Consider access, comfort, and paint type when choosing.
- Extension pole for broad coverage
- Roller with angled head
- Ladder for detail work
- Scaffold for stability
How to Speed Up Drying in Cool, Humid Stairwells
Although cool, humid stairwells slow paint drying, you can accelerate the process with targeted ventilation, gentle heat, and thinner coats. Work in thinner layers so solvents evaporate faster, and allow proper tack time between coats.
Use space heaters or gentle heat sources set low and monitored to raise temperature slightly without creating hotspots. In a cool climate, pick fast-drying formulas and low-VOC paint catalysts designed to speed film formation.
Hang temporary fans to circulate air subtly, aiming for steady movement rather than blasts. Check dryness with fingertip tests and avoid heavy recoats; patience plus incremental steps prevents runs and uneven curing.
Ventilation and Safety in Enclosed Stairwells
Good ventilation keeps fumes and dust from building up in enclosed stairwells, so make airflow your first priority before you open cans or sand. You’ll manage ventilation safety by planning exhaust and intake, using fans, and timing work to minimize exposure.
Good ventilation is essential—prioritize airflow, plan exhaust and intake, and use fans before painting or sanding.
Watch for enclosed space hazards like poor circulation and lingering solvent vapors; don’t work alone if risks are present. Wear a respirator rated for paint fumes, eye protection, and keep a charged phone nearby.
Follow these quick steps:
- Open doors/windows and create a cross-breeze.
- Use an inline or box fan to exhaust air.
- Run a HEPA shop vac while sanding.
- Take regular breaks outdoors.
How to Keep Stairs Usable During the Job
Before you start painting, plan a clear, safe path so people can still use the stairs without tracking paint or tripping over tools. Tape protective runners, mark wet zones, and position drop cloths to protect treads while preserving staircase acoustics by avoiding loose coverings that rattle. Keep handrail design accessible; don’t block rails with ladders or materials. Communicate schedules and post signs at top and bottom. Use short work intervals to reopen the stairs frequently.
| Area | Action | Timing |
|---|---|---|
| Treads | Runner tape | Between coats |
| Rail | Clear access | Continuous |
How to Remove Paint Splatter From Wood and Metal
If paint splatters land on wood or metal, act quickly to prevent them from curing and bonding—fresh drips wipe away far easier than dried spots. You’ll pause, assess substrate, and choose solvent compatible with finish; water for latex, mineral spirits for oil. Test hidden area first. Consider how Color psychology influenced your choice earlier and remember eco friendly paints may clean differently.
Act fast: wipe fresh drips, test solvent on a hidden spot, and match cleaner to paint and surface.
- Blot excess with damp cloth, don’t rub.
- Apply appropriate solvent sparingly; let sit seconds.
- Gently scrape with plastic scraper or fine steel wool on metal.
- Clean residue, dry, and touch up finish as needed.
How to Protect Newly Painted Walls From Scuffs
When you’ve just painted a stairwell, protect the finish by limiting contact and adding simple barriers. Keep traffic minimal until the paint fully cures; post a polite sign and reroute items.
Use felt pads on handrails and stair treads to prevent scuffs from bags or tools. For high-contact zones, apply a clear polyurethane or washable topcoat that complements your paint color and preserves wall texture.
Clean hands and soft cloths remove marks gently—avoid abrasive pads. Inspect weekly for nicks and touch up with matched paint.
Small preventative steps keep your stairwell looking fresh longer.
Seasonal Considerations: Winter vs. Summer Painting
When you paint the wall above the stairs, season matters because temperature and humidity change how paint behaves and how long it takes to dry.
In winter you’ll have shorter daylight and fewer workable hours.
While summer offers longer days but higher humidity that can slow curing.
Plan your schedule and ventilation based on the season to get even coverage and proper drying times.
Temperature And Humidity
Although painting above the stairs can be done year-round, temperature and humidity strongly affect drying, adhesion, and finish, so you should adjust timing and product choices for winter versus summer.
You’ll manage Temperature control and monitor Humidity levels to avoid problems like blushing, tackiness, or cracking. Use heaters or fans sparingly to keep temps within paint manufacturer ranges; run dehumidifiers in summer or humidifiers in cold, dry months.
Pick paints rated for wider temperature ranges and longer open times in heat.
- Check paint label for temp range.
- Measure humidity before starting.
- Use slow-dry formulations in summer.
- Warm room gently in winter.
Daylight And Work Hours
After you’ve set temperature and humidity controls, plan your work around available daylight and reasonable work hours for safety and finish quality.
In winter, shorter days mean you’ll need brighter artificial lamps or schedule when natural lighting’s strongest—midday is best for color accuracy.
In summer, start early to avoid heat and glare, and use shaded breaks to inspect progress.
Keep your work hours consistent to reduce fatigue on stairs and maintain steady painting rhythm.
Communicate timing to others in your household so traffic’s limited.
Adjust start times seasonally so light and energy are used efficiently.
Paint Drying Times
Because temperature and humidity directly affect how paint cures, you’ll need to treat winter and summer projects differently to get reliable drying times and a durable finish.
In winter, heat and low humidity can speed skin formation but trap solvents, so ventilate and allow longer cure times.
In summer, warm humid air speeds solvent release but slows full cure; watch for tackiness.
Consider paint texture—flat paints hide flaws but dry differently than gloss.
Also think about color psychology: darker hues absorb heat and may change drying rates.
Follow these tips:
- Increase ventilation in winter.
- Control humidity in summer.
- Use fast-dry formulations.
- Allow extra cure time before heavy use.
Troubleshoot Runs, Streaks, and Bubbling Fast
When you spot runs, streaks, or bubbling while painting the wall above the stairs, stop and address them immediately to avoid bigger repairs later. Scrape raised bubbles with a putty knife, sand smooth, and prime bare spots before repainting.
At the first sign of runs or bubbles on stair walls, stop, scrape, sand, prime, and repaint carefully.
For runs, sand the drip, feather edges, and apply thin, even coats—avoid overloading your brush or roller.
Streaks often come from uneven sheen; blend by feathering wet edges and using consistent pressure.
If texture issues persist, try compatible texture techniques and consider eco-friendly paints that minimize drying anomalies.
Always test a small area before finishing the entire wall.
How to Document Measurements and Photos for Complex Jobs
Measure twice and write each dimension down once so you don’t have to guess later.
Photograph key angles of the stairwell and close-ups of tricky spots, then label each image with location and date.
Store measurements and photos in a single, named folder so you can retrieve them quickly on the job.
Measure Twice, Note Once
If you want the job to go smoothly, jot down dimensions and take clear photos before you start so you won’t be guessing on ladders later. Measure twice, note once: record wall height, stair run, and any trim depths. Include preferred hues and why—color psychology matters for stairwell mood—and note if you’ll use eco-friendly paints. Label photos with measurement tags and orientation so you can recreate shots later from the ground. Keep a digital and paper copy.
- Use a tape, laser, and level.
- Note obstructions and outlets.
- Timestamp photos.
- Log paint finish and brand.
Photograph Key Angles
You’ve already logged dimensions and tagged photos, so now focus on capturing the specific angles that show how the stair line meets the wall, corners, and any trim or obstructions. Photograph each junction straight-on, from above, and from below so contractors see pitch and shadow. Note finishes, paint layers, and influences like color psychology or historical styles that affect restoration choices.
| Shot | Angle | Note |
|---|---|---|
| A | Stair line, level | Measure overlap |
| B | Corner, oblique | Show reveal |
| C | Trim junction | Detail paint layers |
| D | Obstruction | Mark clearance |
Label And Store Files
When you finish shooting and logging dimensions, create a consistent file-naming and folder structure so every photo and measurement is instantly findable. Include project ID, location (e.g., “stair-left”), shot angle (A–D), date, and version number. You’ll save time on revisions and sharing. Use a simple label system and backup routine.
Keep raw photos, edited images, and measurement spreadsheets in separate folders under the project.
- Project root: ProjectID_Date
- Photos: ProjectID_location_angle_date_v01.jpg
- Measurements: ProjectID_location_measurements_v01.xlsx
- Archive: backups with timestamps and notes
Maintain file organization and consistent labels.
How to Plan a Multi-Day Stairwell Painting Schedule
Because stairwell painting stretches over several days, plan each phase so you know what to do and when. Start by mapping prep, priming, cutting in, rolling, and drying days on a calendar.
Allow extra drying time for eco friendly paints and note ventilation needs. Schedule higher-effort tasks—like reaching upper walls or touchups—when you’re rested.
Pick colors with color psychology in mind for mood and light impact, testing swatches early.
Coordinate helpers’ availability and block stair access during wet-work.
Keep daily checklists: tools, safety gear, drop cloths, and trash removal to keep each day efficient and predictable.
Post-Paint Cleanup for Stairs and Long-Term Care
After the paint dries, tackle cleanup methodically so stains and hazards don’t become long-term problems. You’ll want durable cleaning tools ready and a plan for proper paint disposal. Sweep and vacuum stairs to remove dust, then wipe rails and treads with a damp cloth. Store leftover paint sealed in labeled cans away from heat.
After painting, clean carefully: sweep, wipe rails, store leftover paint sealed and labeled away from heat.
- Remove tape and address small drips with a scraper and damp rag.
- Clean brushes and rollers per label; keep cleaning tools separate from household chores.
- Dispose of rags and solvent per local regulations for paint disposal.
- Inspect monthly for scuffs and touch up promptly.
How to Maintain Consistent Color Across Large Walls
If you want an even finish across a large wall, plan your approach so lighting, paint mixing, and application stay consistent from start to finish.
Work in sections, rolling a wet edge to prevent lap marks.
Mix all paint for the project in one large batch or batch-mix identical ratios, labeling cans for touch-ups.
Keep lighting steady—use the same temporary lamps if natural light shifts.
Use quality rollers and maintain uniform pressure and speed.
Blend edges by back-rolling and feathering.
Let primer and coats dry fully before evaluating.
For stairwell scale, check color consistency from multiple vantage points as you go.
Creative Finishes to Enhance Stairwell Ambiance
When you want to give your stairwell personality, creative finishes can transform the space without major renovation. Use color psychology to set mood: soft blues calm, warm golds energize. You’ll pick finishes that suit light and traffic, balancing contrast and cohesion.
- Metallic wash: add subtle sheen on risers for depth.
- Creative stencil gallery: repeat a motif up the wall for rhythm.
- Two-tone shift: darker lower third protects scuffs, lighter above opens space.
- Textured glaze: brush in layers to hide imperfections and catch light.
These choices update ambiance without structural work.
When to Call a Pro for Complex Angles or High Risk
Because painting above stairs often involves awkward angles, high ceilings, and safety hazards, you should call a pro whenever the job requires working from ladders over open treads, scaffolding, or extensive surface prep on steep slopes.
If you’re unsure about access, structural soundness, or fall protection, get professional assistance. Pros handle complex angles, matching trim lines and ensuring even coverage without drips.
They bring the right equipment, spot hidden damage, and comply with safety codes. Hire someone when the job risks injury, involves electrical fixtures, or demands precise finishes you can’t achieve safely.
It saves time and prevents costly fixes.
Frequently Asked Questions
Can I Paint Stairwell Walls if I Have Asthma or Severe Allergies?
Yes — you can, but you’ll need precautions: pick low-VOC paint, ventilate well, use HEPA filters, wear an approved mask, and schedule breaks to monitor air quality and maximize allergy safety while someone else helps if symptoms worsen.
Will Paint Fumes Affect Neighboring Rooms Through HVAC Systems?
Yes — paint fumes can travel through HVAC filtration and ductwork, causing fume dispersion into neighboring rooms; you should shut vents, run exhaust fans, use low-VOC paint, and upgrade filters to reduce spread and protect occupants.
How Do I Match New Paint to Faded Existing Color Years Later?
Faded finish? Start smart: sample, scan, subtle. You’ll color match by testing chips, using a spectrophotometer, then paint blending edges and feathering strokes. You’ll adjust tint, compare in different light, and retouch seamlessly.
Can I Paint Over Wallpaper on Stairwell Walls Safely?
Yes—you can paint over wallpaper on stairwell walls, but you shouldn’t. Wallpaper removal and thorough surface preparation yield better, longer-lasting results; skim, repair, prime, and guarantee adhesive is gone so paint bonds and won’t peel later.
How Long Before Hanging Artwork Back on Painted Stairwell Walls?
If you’re enthusiastic, wait 24–48 hours; ironically, the fastest latex dries quicker while oil needs up to a week. Drying time varies by paint types, humidity, and temperature—always press-test lightly before rehanging art.
Conclusion
You’ve tackled heights, angles, and the eternal mystery of uneven rollers like a saint with a brush. You’ll pick a finish that survives traffic, measure like an obsessive, and estimate paint so you don’t make midnight runs to the store. Clean up once, not forever. Keep color consistent unless you enjoy optical illusions. If stairs start looking like modern art, maybe call a pro — or blame the cat and pretend it was intentional.