How to Paint the Wall at Home (Beginner Guide)
You can paint a wall like a confident beginner by prepping, priming, and using the right tools: clear the area, fix holes, sand, clean, and apply primer for patchy or bare drywall. Choose finish and color, tape edges, cut in with an angled brush, then roll in overlapping strokes while keeping a wet edge. Let coats dry, remove tape while tacky, clean brushes, and store supplies—keep going to learn timing, techniques, and pro tips.
Paint a Wall in Five Clear Steps
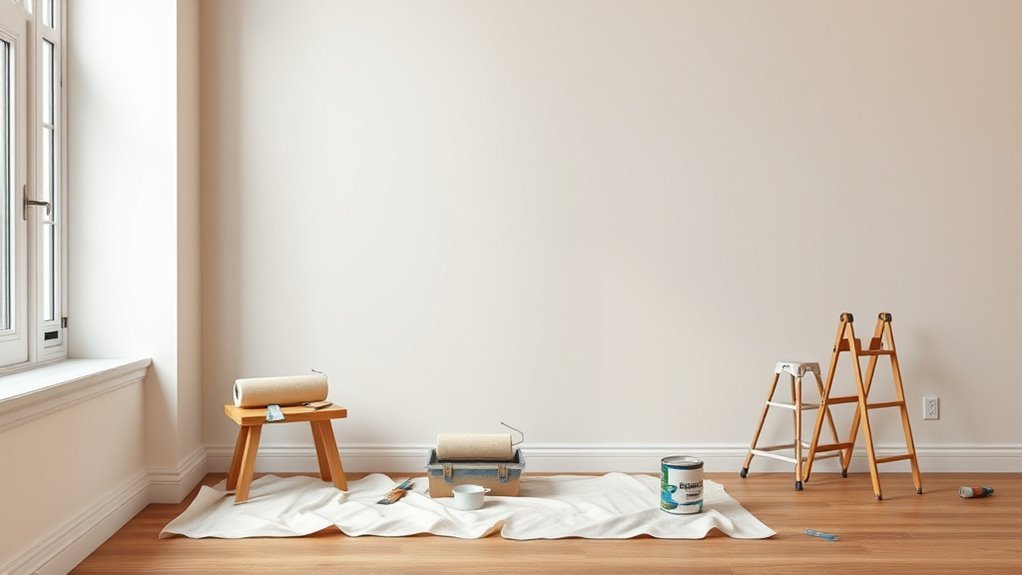
Before you start, gather your supplies and clear the area so you can work without interruption.
Gather your supplies and clear the area so you can work uninterrupted and stay focused.
You’ll prep the wall: clean, sand, and patch holes so paint adheres smoothly. Prime if needed, matching primer to your chosen finish.
Mix eco friendly paints thoroughly, then cut edges with a brush before rolling in overlapping W-patterns for even coverage.
Let the first coat dry fully, inspect for drips or thin spots, then apply a second coat.
Consider color psychology when selecting shades—soft tones calm, bright hues energize—so the finished wall matches the mood you want to create.
Which Rooms and Walls to Tackle First
Start with high-traffic areas like the hallway and kitchen so your work gets the most daily benefit.
Tackle accent walls first to make a big impact with less time and paint.
Also consider how light and room size will change color perception before you begin.
Start With High-Traffic Areas
If you want the biggest payoff for your time and money, tackle high-traffic rooms first—think entryways, living rooms, kitchens, and hallways—because those surfaces show wear fastest and set the tone for the rest of the house.
Start by inspecting wall texture and patching dings so paint adheres evenly. Choose colors with color psychology in mind: calming tones in living areas, energizing hues in kitchens.
Work from top to bottom, ceilings to baseboards, and tackle one room at a time to limit disruption. Finish trims last, and step back frequently to guarantee even coverage and consistent sheen.
Prioritize Accent Walls First
After handling high-traffic rooms, focus on accent walls to give spaces instant character without repainting every surface. You’ll pick walls that frame focal points—behind beds, sofas, or fireplaces—so the color psychology enhances mood. Choose richer hues or textured finishes if existing wall texture adds depth; smooth walls suit bold pigments. Start in shared spaces where accents guide flow, then tackle private rooms. Use the table to plan priority, tools, and time.
| Room | Suggested Wall |
|---|---|
| Living room | Behind sofa |
| Bedroom | Headboard wall |
| Dining | Fireplace or buffet wall |
Consider Light And Size
Because natural light and room proportions change how paint reads, look at each space at different times of day before choosing where to begin. You’ll notice lighting effects shift hue and depth; a warm morning glow can soften bold colors, while harsh afternoon sun can wash them out.
Consider size: lighter shades enlarge small rooms, darker tones add coziness to large ones. Use color psychology to match mood—calming blues for bedrooms, energizing yellows for kitchens.
Start where light flatters the finish and where the room’s scale complements your goal. Tackle visible areas first to set a cohesive flow.
Choose Paint: Finish, Type, and Sheen
When you’re picking paint, prioritize finish, type, and sheen because they determine durability, appearance, and how easy the surface will be to clean. You’ll choose based on room use: high-traffic areas need washable latex with a satin or semi-gloss paint sheen; low-traffic rooms work with matte or eggshell. Consider oil for trim and moisture-prone spaces. Test samples on the wall to judge how paint finish and light interact. Match sheen to texture—smoother surfaces handle higher sheen. Use this quick reference:
| Use case | Recommended finish |
|---|---|
| Bathroom/kitchen | Semi-gloss |
| Trim | Oil or semi-gloss |
| Living room | Eggshell |
| Ceiling | Flat |
Pick the Best Paint Color for Your Space
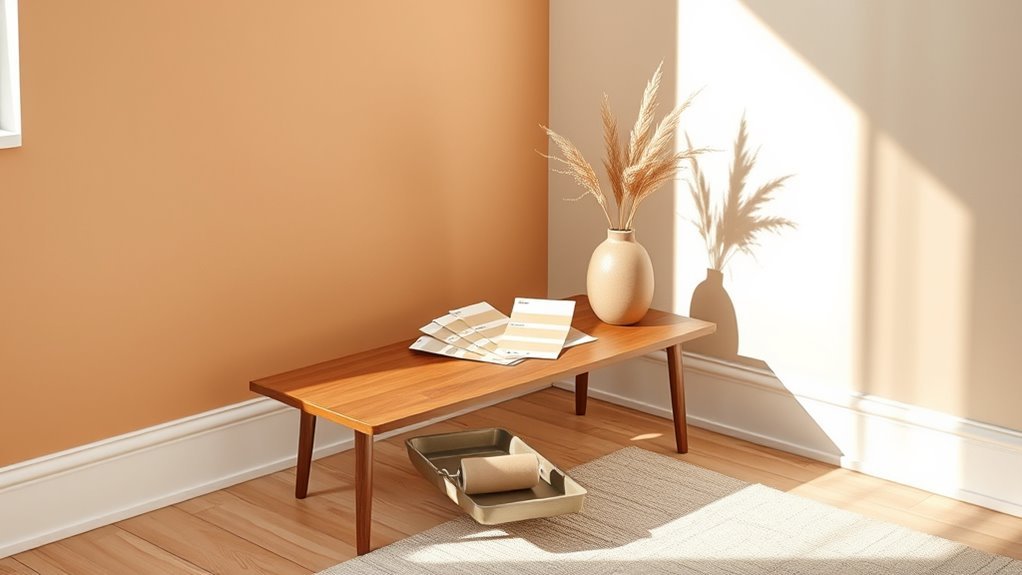
Think about how natural and artificial light change a color throughout the day so you know what it’ll really look like.
Match your paint to major furnishings and flooring to keep the room feeling cohesive.
Always test with swatches on different walls before you commit.
Consider Lighting Conditions
How will the light in your room change the way a color looks? You’ll notice lighting impact immediately: colors shift with Natural versus artificial sources. Warm bulbs deepen tones, cool daylight brightens them. Test swatches at different times so you see true effect.
Consider direction and intensity too — north light is cooler, south light is warmer. Use this checklist before you buy:
- View samples in morning, noon, and evening
- Test large swatches on multiple walls
- Observe under overhead and lamp lighting
- Note how shadows alter perceived hue
- Choose samples that read well in all lights
Coordinate With Furnishings
Because your furniture and textiles set the room’s mood, pick paint that complements their dominant tones and finishes. Look at large pieces first—sofas, rugs, cabinetry—and aim for furnishing harmony by choosing a backdrop that supports, not competes.
Use color coordination to tie accents together: pick a wall shade two to three tones lighter or darker than a main fabric, or choose a neutral that enhances metal and wood finishes.
Consider scale and pattern: busy upholstery needs calmer walls.
Balance warm and cool elements so the room feels cohesive. Trust the dominant furnishings to guide your final palette choice.
Test With Swatches
When you’re narrowing down colors, test swatches on the actual walls so you can see how light and furnishings change the look throughout the day. Apply several 4×4-inch patches at eye level, near windows, and beside large furniture.
Observe morning, noon, and evening light; note how color psychology affects mood in each spot. Consider finish and paint durability—matte hides flaws, satin cleans easier.
After 48 hours, compare tones and textures, then choose.
- Test multiple values
- Try adjacent walls
- View with room lighting
- Inspect with your decor
- Reassess after two days
Calculate How Much Paint You Need
Before you buy paint, measure the walls and calculate coverage so you know exactly how much to get. Measure width and height of each wall, subtract windows and doors, then multiply to find square footage.
Measure each wall, subtract windows and doors, then multiply width by height to get square footage.
Check your paint can for coverage (usually sq ft per gallon). Divide total square footage by coverage to find gallons, then round up for touch-ups.
Account for surface texture and number of coats—rough surfaces and darker-to-lighter gradation need more.
Consider color psychology when choosing finishes and whether eco-friendly paints fit your budget; low-VOC options may require an extra coat for full opacity.
Basic Tools and Supplies Checklist
Before you start, gather the essential painting tools like rollers, brushes, trays, and a good ladder so you won’t interrupt your workflow.
Choose the right paint type and quantity based on the surface and coverage you calculated earlier.
Don’t forget prep and safety supplies—drop cloths, painter’s tape, masks, and gloves—to protect surfaces and yourself.
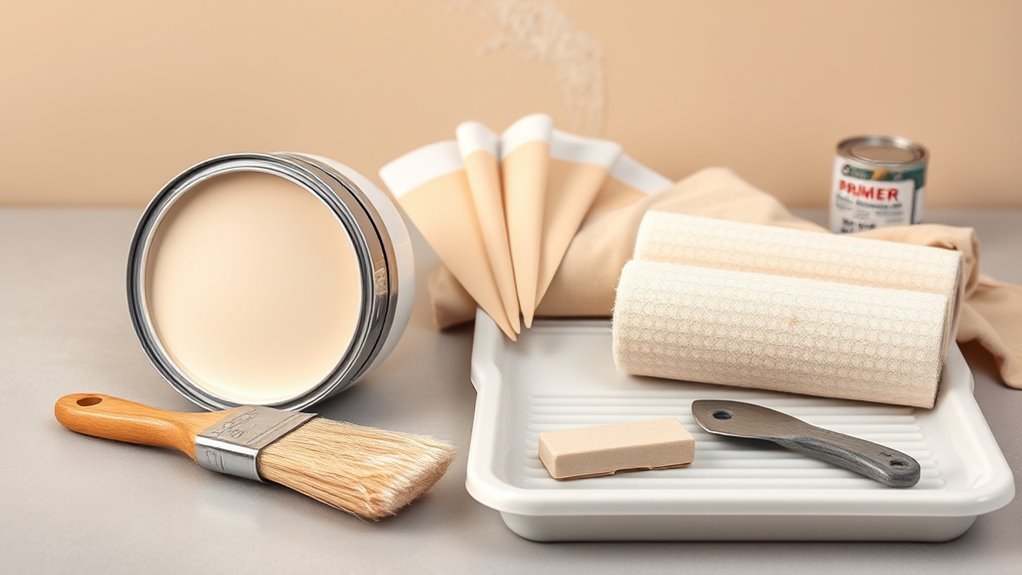
Essential Painting Tools
Although painting seems simple, having the right tools makes the job faster, cleaner, and gives you a professional finish. You’ll want quality basics so prep and application go smoothly, especially if you’re choosing colors based on color psychology or using eco-friendly paints.
Gather these essentials, check condition, and replace cheap rollers or frayed brushes.
- Roller frame and sleeves (different naps)
- Angled and flat brushes (trim and detail)
- Drop cloths and painter’s tape
- Paint tray, liners, and extension pole
- Sandpaper, spackle, putty knife, and scrub brush
Keep tools clean; they last longer and give better results.
Paint Types And Quantities
When you pick paint, choose the right type and estimate how much you’ll need so the job goes smoothly and you don’t end up short or with excess cans.
Decide between matte, eggshell, satin, semi-gloss, or gloss based on room use—higher sheen stands up to scrubbing.
Calculate area: height times width for each wall, subtract doors and windows, divide by coverage per can.
Factor two coats plus 10% waste.
Consider color psychology for mood: calming blues, energizing yellows.
If you prefer low-VOC options, look for eco friendly paints; they protect indoor air without sacrificing coverage.
Prep And Safety Supplies
Because good prep sets the stage for a smooth paint job, gather the essential tools and safety supplies first. You’ll want protective gear, cleanup items, and tools that suit Eco friendly paints and any Historical color schemes you’re matching. Organize everything near the workspace and check labels for ventilation and disposal instructions.
Wear a mask when sanding or working with strong odors, and keep kids and pets away. A tidy prep prevents mistakes and speeds the job.
- Respirator or dust mask
- Safety glasses and gloves
- Drop cloths and painter’s tape
- Sandpaper, spackling tools, putty knife
- Paint tray, rollers, brushes
Buying Checklist: Paint, Tools, and Extras
Before you start, make a concise checklist so you don’t stop mid-job to hunt for supplies. Choose paint by testing swatches and considering color psychology for mood and light. Prefer eco-friendly paints to reduce odors and VOC exposure.
Buy enough primer and topcoat—calculate the area and add 10–15% for touch-ups. Gather rollers, angled brushes, trays, extension poles, painter’s tape, putty knives, spackle, sandpaper, and drop cloths.
Get a small ladder, stir sticks, a paint can opener, and disposable gloves. Include cleaning supplies: rags, mild detergent, and a bucket. Pack a flashlight for low-light corners.
Protect Floors, Furniture, and Fixtures
If you want clean floors and undamaged furniture, cover everything that’s staying in the room. You’ll prepare by moving small items, protecting upholstery, and planning pathways so paint doesn’t travel.
Prioritize floor protection and fixture safeguarding before you open cans. Use drop cloths, plastic sheeting, and painter’s tape to seal edges.
- Lay canvas or plastic drop cloths
- Wrap furniture in breathable covers
- Tape seams to prevent paint seepage
- Protect door thresholds and vents
- Shield light fixtures and hardware
Check coverings as you work and replace any compromised protection immediately to avoid stains.
Remove Outlet Plates and Cover Switches Safely
Before you start painting, turn off the power at the breaker to avoid shocks.
Remove outlet and switch plates with a screwdriver so you can paint evenly around them.
Tape over exposed switches and outlets to keep paint out and protect the wiring.
Turn Off Power
When you’re ready to work around outlets and switches, cut the power at the breaker and double-check it’s off with a non-contact voltage tester so you can remove plates and cover switches safely. You’ll protect yourself and the wiring by following basic electrical safety and doing circuit testing before you touch anything.
Label the breaker, confirm adjacent outlets are dead, and keep children away while you work. If a tester still reads live, stop and consult an electrician.
- Turn off the correct breaker
- Use a non-contact tester
- Verify multiple points
- Keep the area clear
- Call a pro if unsure
Remove Outlet Plates
Ready to remove outlet plates safely? After you’ve turned off power, test outlets to confirm.
Use a screwdriver to loosen screws, hold the plate so it doesn’t drop, then lift it straight off. Set plates and screws aside in a small container.
If a switch cover is present, remove it the same way, keeping switches centered to avoid bending.
Don’t touch wiring; if wires are exposed, stop and call a pro.
Keep outlet safety in mind: avoid metal tools contacting terminals and don’t paint near open boxes.
Label removed plates so reinstallation is quick and correct.
Tape Over Switches
Since switches can still be accidentally flipped while you paint, cover them with painter’s tape to prevent drips and keep circuits off. You’ll turn off power at the breaker, remove outlet plates if needed, and tape switches securely to maintain switch safety and avoid smudges. Use low-tack tape so paint won’t peel when you remove it.
If you’re replacing outlets later, note wiring before removal. After painting dries, peel tape slowly and reinstall plates.
- Turn off breaker first
- Remove plates for cleaner edges
- Apply low-tack painter’s tape
- Press tape into seams
- Inspect wiring for outlet replacement
Clean Walls: Dust, Grease, and Stains
Although a fresh coat of paint hides a lot, you’ll get the best results by removing dust, grease, and stains first. Wipe walls with a dry microfiber to remove dust, then degrease kitchen areas with a mild detergent or trisodium phosphate substitute. Rinse and let dry fully to prevent adhesion problems.
For stubborn stains, use a gentle abrasive pad or stain-blocking primer. Keep windows open and use fans to reduce paint fumes while cleaning and painting.
Test a small area first, especially on varied wall textures, to guarantee cleaning won’t alter the surface before you prime and paint.
Repair Holes, Cracks, and Textured Flaws
Before you pick up a brush, fix any holes, cracks, or texture problems so the paint lays smoothly and lasts longer. You’ll inspect walls, remove loose debris, and use appropriate products for texture repair and hole filling.
For small holes, apply spackle; for larger ones, use patch kits. For cracks, push in joint compound and embed tape if needed. Match existing texture only where required.
- Choose the right filler for the damage
- Remove loose material before applying filler
- Apply in thin layers, letting each dry
- Use a primer over repaired spots
- Check edges for feathering
Sand and Smooth Surfaces for Painting
Now that repairs are dry and primed, sand the patched and surrounding areas so paint will adhere evenly and you won’t see bumps or ridges.
Use medium-grit sandpaper to level filler, then fine-grit for a smooth finish.
Start with medium-grit to level filler, then finish with fine-grit for a smooth, paint-ready surface.
Lightly feather edges into existing texture and wipe dust with a damp cloth or tack cloth.
For large areas, use a sanding block or pole sander to keep planes flat.
Check with a light at an angle to spot imperfections.
After surface sanding, clean thoroughly before primer application or painting.
Proper smoothing saves time, improves coverage, and gives a professional-looking final coat.
When and Why to Prime Your Walls
When your repairs are dry and the surface is clean, prime the wall so paint bonds evenly and hides stains or color differences. You’ll see the priming importance when a single coat prevents patchiness, seals porous patches, and creates a uniform base.
Good surface preparation reduces peeling and improves coverage, saving time and paint. Prime before drastic color changes, bare drywall, or after patching. Don’t skip it for high-traffic areas or glossy finishes that need adhesion.
- Prevents uneven sheen
- Seals porous surfaces
- Blocks stains and tannins
- Improves topcoat adhesion
- Reduces paint consumption
Choose the Right Primer for Problems
If your wall has stains, water damage, heavy repairs, or tannin bleed, pick a primer formulated to tackle that specific problem so your topcoat performs and looks right.
Assess the issue: use a stain-blocking primer for smoke or marker, a water-resistant primer for damp spots, and a shellac or oil-based product for tannin bleed.
For patched drywall, choose a high-adhesion primer.
Read labels for VOCs and surface compatibility. Test a small area if unsure.
Addressing primer problems up front saves time and prevents finish failures.
Treat the surface, apply the correct problem primer, then paint confidently.
Choose Brushes and Rollers for the Surface
Because different surfaces demand different tools, pick brushes and rollers that match the texture and paint type so you get even coverage and fewer touch-ups. You’ll choose a synthetic brush for water-based paints and natural bristles for oil, checking Brush durability for repeated scrubbing.
Match Roller texture to surface: smooth for plaster, medium nap for lightly textured walls, thick nap for rough stucco. Pick quality to reduce lint and improve finish.
Clean and store tools properly to extend life.
- Choose synthetic or natural bristles
- Match nap to wall texture
- Check brush ferrule tightness
- Prefer lint-free rollers
- Clean and store promptly
Cut In Clean Edges Like a Pro
Grab a high-quality angled brush that fits the trim and holds paint without dripping.
Practice steady, short strokes and, when needed, use painter’s tape to protect adjacent surfaces for razor-sharp lines.
Remove the tape while the paint’s still slightly tacky to avoid peeling.
Choose The Right Brush
When you’re aiming for sharp, professional-looking edges, choosing the right brush makes all the difference. A quality angled sash brush with firm, tapered bristles helps you cut in clean lines without dragging or splattering.
You’ll pick a width that matches trim, match natural bristle to oil or synthetic to latex, and consider paint texture to control flow.
Also think about color psychology when selecting finish sheen for a room—matte hides flaws, semi-gloss highlights trim.
Maintain the brush by cleaning thoroughly and reshaping the tip so it performs reliably.
- Angled sash for precision
- Width matches trim
- Synthetic for latex
- Clean after use
- Reshape tip before storing
Use The Tape Method
After you’ve cut in with a good angled brush, tape helps you get perfectly straight edges without fretting over a steady hand. You’ll press painter’s tape firmly along trim or ceiling, smoothing to seal edges so paint won’t bleed.
Paint up to the tape line, remove tape while paint is tacky for crisp lines. Use low-tack tape on delicate surfaces.
Consider how color psychology affects your trim choices—contrasting edges can energize or calm a room.
If you’re using eco-friendly paints, check manufacturer drying times; some formulations behave differently.
Clean up promptly and store leftover tape for touch-ups.
Roll Paint for Even Coverage
If you want a smooth, even finish, load your roller evenly and work in overlapping strokes so paint blends seamlessly across the wall. You’ll roll from top to bottom in sections, maintaining a wet edge to avoid lap marks.
Choose a roller nap suited to your surface, match paint finish to room use, and remember how color psychology affects mood—lighter sheens highlight imperfections more.
Press evenly, don’t overload, and back-roll to even texture. Clean excess from tray ridges and inspect under good light.
- Use the correct roller nap
- Maintain a wet edge
- Load evenly, not excessively
- Back-roll for uniform texture
- Inspect and correct immediately
Apply Multiple Coats and Drying Times
Although a single coat can cover light tints, you’ll usually need two or more to get true color and durability. Wait recommended drying times on the can—often one to four hours between coats for latex, longer for oil-based—so you don’t trap solvent or cause tackiness.
Lightly sand glossy spots before recoating to improve adhesion. Thin coats dry faster and reduce drips, so apply evenly and resist overbrushing.
Full cure can take weeks; avoid heavy cleaning until then to protect paint durability. Consider color psychology when choosing final coats—deeper hues may need extra layers for uniform appearance.
Avoid and Fix Drips, Roller Marks, and Lap Lines
When you spot drips, roller marks, or lap lines, deal with them promptly to keep a smooth, professional finish—small issues are much easier to fix while the paint’s still wet or just tacky. Use a light touch: glide a loaded roller or a soft brush over the area, feathering into surrounding paint.
Deal with drips and roller marks immediately—lightly feather while tacky for a smooth, professional finish.
For drips, push paint back up and roll out. Sand tacky imperfections lightly once dry and recoat thinly. Choose quality tools and eco-friendly paints to minimize defects and odor. Remember how finish affects mood—color psychology matters when correcting texture and sheen.
- Work while paint is tacky
- Feather edges gently
- Sand minor bumps
- Use thin touch-up coats
- Pick good rollers
Blend New Paint Into Existing Walls
After smoothing out drips and roller marks, you’ll want to blend your new paint into the surrounding wall so the repair disappears. Feather the edges with a slightly damp brush, working outward from the patch to thin the fresh coat into old layers. Match sheen and finish; a sheen mismatch reveals repairs even if color matches.
Consider how color psychology affects perception—lighter tones make progressions less noticeable. Use the same brand or a compatible formula, preferably eco-friendly paints to avoid off-putting odor.
Step back often under different lighting, letting paint cure between touch-ups until the blend is seamless.
Paint Around Trim, Outlets, and Switches Safely
When you paint near trim, take time to mask edges tightly so you get a sharp line without drips.
Turn off power and cover outlets with tape or outlet covers before you paint to avoid splatters and electrical hazards.
For switches, remove the faceplates or tape around them carefully so you can paint cleanly without risking the wiring.
Protecting Trim Edges
Although trim and fixtures may seem like small details, protecting edges around baseboards, casings, outlets, and switches is essential to a clean, professional-looking paint job. You’ll use trim protection and edge masking to keep lines crisp.
Apply painter’s tape flush against trim, press the edge with a putty knife, and seal with a thin coat of base color to prevent bleed.
Use an angled brush for near-trim cutting in.
Remove tape while paint is tacky for the cleanest line.
Inspect edges and touch up with a fine brush where needed.
- Press tape firmly
- Seal tape edge
- Use angled brush
- Remove when tacky
- Touch up carefully
Covering Outlets Safely
Protecting trim is only half the battle; you’ll also need to cover outlets and switches to keep paint off wiring and faceplates. Start by turning power off at the breaker and testing outlets—electrical precautions are nonnegotiable. Remove faceplates with a screwdriver, label screws, and keep parts together.
Cover receptacles with painter’s tape or use foam outlet protectors; tape edges precisely to avoid bleed. For stubborn paint lines, use a small brush for careful cutting-in around the taped area.
When paint’s dry, remove tape slowly, reinstall plates, and restore power. These outlet safety steps minimize mess and risk.
Working Around Switches
Because switches sit at eye level and get frequent use, you’ll want to handle them carefully to keep paint off mechanisms and maintain functionality. Turn off power at the breaker, remove the switch cover, and label screws so you can reassemble correctly.
Use painter’s tape to protect edges and a small angled brush to cut in near the switch. Avoid getting paint inside the box to preserve electrical safety.
- Turn off power first
- Remove switch cover gently
- Tape edges precisely
- Use a small brush for cutting in
- Reinstall cover after paint dries
Painting High or Hard-to-Reach Areas
If you’re tackling high or hard-to-reach areas, plan how you’ll work safely and efficiently before you start cutting in or rolling—choose the right ladder or scaffolding, gather extension poles and the proper brush or roller attachments, and clear the workspace so you won’t need to reposition frequently.
Use a sturdy ladder with someone spotting you or a small scaffold for long runs. Attach an angled brush or extension roller to maintain consistent coverage and protect paint durability.
Think about color psychology when painting ceilings or high trims—lighter tones open space, darker accents add drama.
Work methodically in manageable sections and wipe drips promptly.
Speed Drying and Ensure Proper Curing
When you want paint to dry faster and cure properly, control temperature, humidity, and airflow from the start—keep the room between 50–85°F (10–29°C).
Lower humidity below 60%, and use fans or dehumidifiers to promote steady evaporation.
Lower humidity under 60% aids steady evaporation—use fans or dehumidifiers for faster, more even drying.
You’ll shorten drying time and support a uniform curing process by avoiding cold drafts, applying thinner coats, and following manufacturer recoat intervals.
Monitor surface tack and hardness before putting items back.
- Apply thin, even coats
- Maintain steady room conditions
- Use gentle airflow, not direct blasts
- Wait full cure before heavy use
- Check manufacturer’s cure time recommendations
Clean and Store Brushes and Rollers
Although it’s tempting to stash tools and move on, you should clean brushes and rollers right after use to preserve their shape and performance.
Rinse water-based paint under warm running water until it runs clear; use a mild soap and comb bristles with a brush comb.
For oil-based paints, follow label directions and use the recommended solvent, then wash and condition bristles.
Squeeze excess water and reshape bristles before drying flat or hanging to avoid misshaping.
Clean rollers by spinning or rolling excess paint out, then rinse thoroughly.
Store dry tools in a dry place; label containers for paint storage and note color and date.
Remove Paint From Skin, Clothes, and Surfaces
Once your tools are stored and cleaned, you’ll want to tackle any stray paint on your skin, clothes, and nearby surfaces before it dries. Act quickly: use soap and warm water for latex on skin, mineral spirits for oil-based (ventilate), and treat clothing by scraping excess, soaking, then laundering.
For surface cleaning, gently blot fresh spots; use appropriate remover for the material and test a hidden area first. Protect finished areas with painter’s tape and clean rags. Dispose of solvents safely.
- Act fast to prevent stains
- Test solvents on hidden spots
- Blot, don’t rub fresh paint
- Use proper PPE
- Dispose responsibly
When to Call a Pro and Cost Considerations
If a job involves extensive repair, high ceilings, tricky textures, or you simply don’t have the time or confidence, call a pro—it’s often worth paying for experience and the right equipment to get a clean, durable finish.
You’ll know to seek professional assistance when structural fixes, lead paint, or complex trims are involved. Ask for a clear cost estimation before work starts, including labor, materials, and prep.
Get multiple quotes, check references, and confirm warranties. If the price aligns with peace of mind and quality, hire the pro; otherwise, tackle smaller, well-defined projects yourself.
Frequently Asked Questions
Will Painted Walls Affect Indoor Air Quality Long-Term?
Yes — painted walls can affect indoor air quality long-term; you’ll reduce air quality concerns by choosing low-VOC paints, proper ventilation, and sealing surfaces, since paint chemical risks like VOCs can persist and off-gas over time.
How to Handle Lead Paint in Older Homes?
Like handling a fragile antique, you’ll treat lead paint hazards seriously: test first, seal off rooms, wear proper PPE, and hire certified pros for safe removal techniques; don’t sand or strip alone, and keep kids away.
Can I Paint Over Wallpaper Without Removing It?
You can sometimes paint over wallpaper, but you shouldn’t. Wallpaper removal and proper surface preparation prevent peeling; you’ll strip loose paper, clean residue, repair seams, prime the wall, then paint for a durable, professional finish.
What Are Safe Paint Options for Nurseries and Sensitive Individuals?
You should choose low-VOC, non toxic paints and hypoallergenic finishes; pick water-based acrylics or milk paint, read certifications (GREENGUARD, EPA Safer Choice), ventilate well, and let paints cure fully before occupying the room.
How to Store Leftover Paint for Years Without Spoilage?
You’ll keep leftover paint fresh by sealing cans tightly, transferring to smaller airtight containers, and topping with plastic wrap; label and date each can. Store in cool, dry places with good shelf organization and minimal temperature swings.
Conclusion
You’ve learned the five steps, picked the right room, paint, and tools, and figured out coverage—but the real moment’s coming when you lift that roller. Breathe, steady your grip, and remember small mistakes wipe or sand away. The color will shift as it dries; don’t panic if it looks different at first. Stand back, take it in, and if something still nags you, tweak it or call a pro—your refreshed room is closer than it seems.