How to Paint the Wall at Home (Beginner Guide)
You can paint a wall yourself today by prepping, priming, and using the right tools. Clear and cover the room, clean and sand the surface, patch holes, then prime if needed. Cut in edges with an angled brush, roll in overlapping strokes keeping a wet edge, and apply at least two coats with proper drying time. Remove tape carefully, touch up edges, and clean tools. Keep going for tips on color, finish, and common fixes.
Quick Step-by-Step: Paint a Wall in One Afternoon
If you’ve got an afternoon free, you can transform a single wall fast by following a few focused steps: clear the area, prep the surface, tape edges, roll primer or paint, and clean up.
You’ll start by moving furniture and dusting, then repair holes and sand rough spots.
Choose color psychology wisely—pick hues that match mood and room function.
Test swatches in natural light before committing.
Use eco friendly paints to reduce odors and off-gassing, letting you work comfortably.
Apply even coats, watch for drips, remove tape while paint’s tacky, and ventilate until dry.
Tools & Materials to Paint a Wall
Before you start, make sure you’ve got the right tools and materials on hand. You’ll need essential painting tools (rollers, brushes, trays, drop cloths).
To choose the paint type and finish that suits the room, gather surface-prep supplies like sandpaper, spackle, and primer.
With those items ready, the job will go faster and look much better.
Essential Painting Tools
Want a smooth, professional-looking paint job? You’ll need basic tools: quality brushes (angled for trim), rollers with appropriate nap, roller frame, sturdy tray, and extension pole.
Use painter’s tape, drop cloths, and a reliable putty knife and spackling for repairs.
A sanding block, sponge, and bucket keep surfaces clean.
Get a ladder and good lighting to spot flaws.
Include respirator or masks, gloves, and goggles for safety.
Carry a small toolbox with screwdrivers and pliers.
While you choose colors considering color psychology and eco-friendly paints, save finish and paint-type decisions for the next section.
Paint Types And Finishes
When you’re choosing paint, focus first on the type (latex vs. oil) and the finish (flat to high-gloss), because those two decisions determine durability, washability, and how much surface texture shows. You’ll pick latex for easy cleanup and interior walls; use oil for trim needing toughness. Match finish to room use: flat hides flaws, satin resists scuffs, semi-gloss and gloss clean well. Consider paint color and color psychology—cool tones calm, warm tones energize. Use this quick guide:
| Type | Finish | Best Use |
|---|---|---|
| Latex | Flat | Low-traffic ceilings |
| Latex | Satin | Living rooms |
| Oil | Semi-gloss | Trim |
Surface Prep Materials
Picking the right paint was only half the job; now you’ll gather the tools and materials that let the paint perform its best.
For effective surface preparation, collect a putty knife, patching compound, sandpaper (80–220 grit), sanding block, scraper, wire brush, and tack cloth.
You’ll need painter’s tape, drop cloths, a good primer, and mitts or gloves.
Choose quality rollers, brushes, an extension pole, and a paint tray.
Material selection matters: pick primers and fillers suited to drywall, plaster, or masonry.
Organize tools for easy access so prep goes quickly and your finish lasts.
Choose Paint Type & Finish for Your Room
First, pick the right paint for your walls—latex for most rooms, oil for trim or high-moisture areas.
Then choose a finish that matches use and appearance: matte hides flaws, satin or eggshell cleans easier, and semi-gloss or gloss stands up to scrubbing.
Finally, consider room conditions like humidity, lighting, and traffic to guarantee durability and the look you want.
Pick The Right Paint
How do you know which paint will work best for your room? You’ll weigh color theory and paint durability alongside room use and light. Pick a formula suited to walls (latex for easy cleanup, oil for tougher stains). Test swatches on different walls, observe at day and night, and note undertones. Consider VOC levels for indoor air and how the paint layers over primer. Buy enough for two coats plus touch-ups.
| Surface | Best Use | Notes |
|---|---|---|
| Latex | Most walls | Easy cleanup |
| Oil | Trim | Durable finish |
| Primer | New drywall | Seals surface |
| Low-VOC | Bedrooms | Better air quality |
Select Appropriate Finish
Wondering which finish will suit your room best? You’ll pick based on use and look: flat hides imperfections and suits ceilings, while eggshell offers a soft, low-sheen option for living spaces.
Satin gives slight sheen and wipes clean—good for trim or moderate-traffic walls. Semi-gloss and gloss are durable and reflective, ideal for trim, doors, or moisture-prone areas.
Compare finish options for durability, maintenance, and appearance. Understand sheen levels: higher sheen means more washability but shows flaws.
Test small patches to confirm how light affects the finish before committing to full-room application.
Consider Room Conditions
Where will the paint live and what’ll it face every day? You’ll assess light, humidity, and traffic before choosing type and finish.
For kitchens and bathrooms, prioritize mildew-resistant formulas and semi-gloss for easy cleaning.
In bedrooms or living areas, matte or eggshell masks imperfections and reduces glare.
Mind ventilation considerations: poor airflow needs low-VOC paints and longer drying times; run fans or open windows when possible.
Consider temperature impacts too—late-season cold or heat can ruin adhesion and extend curing.
Match paint to room conditions, follow manufacturer temp ranges, and you’ll get durable, attractive results.
Estimate Paint Quantity Needed
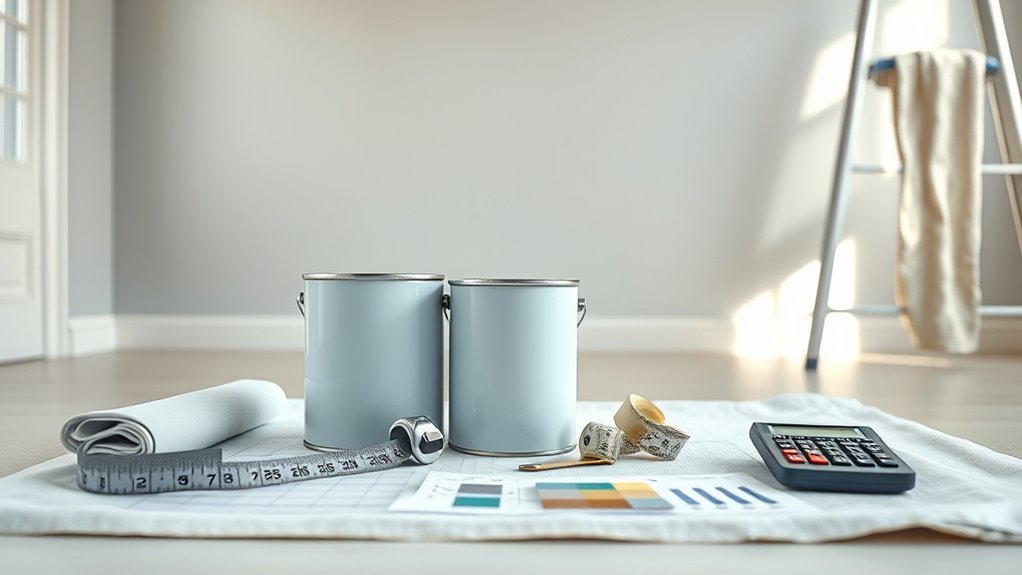
Before you buy cans, measure the walls and calculate the area so you know how much paint you’ll actually need. Multiply length by height, subtract windows/doors, and divide by coverage per gallon from the paint branding. Consider two coats and primer needs. Color psychology doesn’t change coverage, but darker or richer pigments may need extra coats. Use this quick reference:
| Item | Value |
|---|---|
| Wall area | Length × Height |
| Coverage per gallon | Check label |
| Coats | Usually 2 |
| Adjustments | Subtract openings; add primer |
Round up and buy one extra quart for touch-ups.
Pick a Paint Color That Fits Your Room
Think about how natural and artificial light change the way colors read in your room.
Match the paint to existing decor like furniture and rugs so everything feels cohesive.
Before you commit, test paint samples on the wall to see the color at different times of day.
Consider Room Lighting
Because light changes how color looks, you should evaluate your room’s lighting before you pick a paint shade. Step into the space at different times and observe how natural and artificial sources alter color perception.
North-facing rooms get cooler, softer light; south-facing ones feel warmer and brighter. Note bulb types—LEDs, incandescents, and fluorescents each shift hues.
Test sample swatches on multiple walls, viewing them in morning, afternoon, and evening. Assess contrasts caused by windows and shadows.
Use finishes to control reflectivity: matte hides imperfections, satin or eggshell boosts subtle sheen. Adjust choices based on these observations.
Match Existing Decor
A good paint color should tie your room’s existing elements together, so start by surveying fabrics, furniture, and flooring to identify dominant and accent tones.
You’ll want a base shade that complements dominant pieces and an accent that echoes smaller items. Use color coordination to balance warm and cool elements and avoid clashes with wood finishes or metal accents.
For matching decor, pick neutrals if you plan varied patterns, or choose a muted version of an existing color to keep harmony.
Keep contrast moderate so artwork and textiles stand out without fighting the walls.
Trust your instinct, but prioritize cohesion.
Test Paint Samples
How will the color really look in your room once the light changes? You should test paint samples on different walls and observe them at various times. Color testing helps you avoid surprises and guarantees the hue complements furniture and flooring.
Apply 4×4-inch swatches or larger patches, let them dry, then evaluate morning, afternoon, and artificial light. Take photos and live with the samples for a couple days before deciding.
- Place samples near windows and in corners
- Compare samples against textiles and finishes
- View samples under lamps and overhead lights
- Note how shadows shift the tone during the day
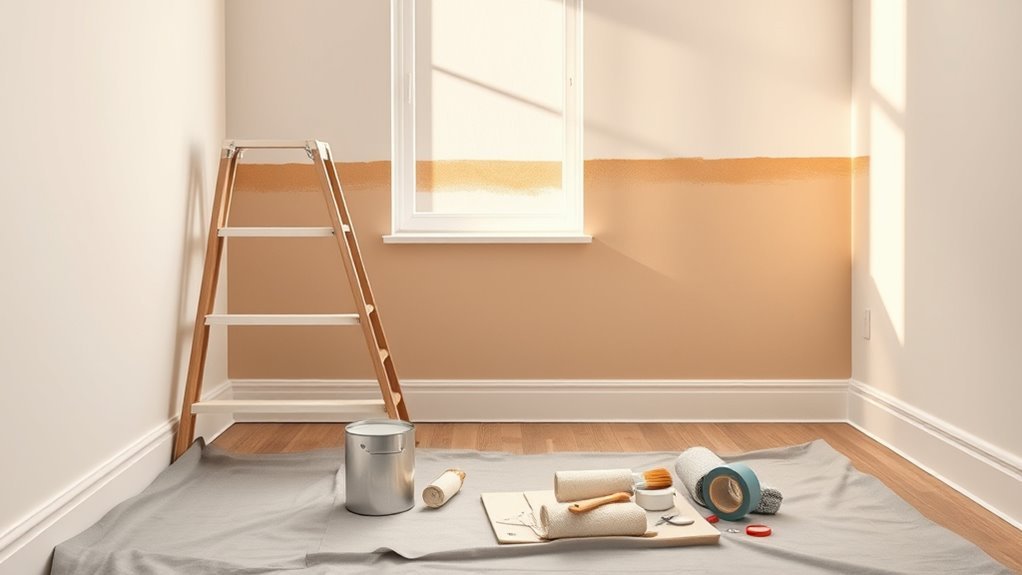
Prepare the Room and Protect Furniture
Before you paint, clear the room and move any furniture away from the walls so you’ve got a clean, accessible workspace.
Decide on a furniture arrangement that keeps aisles clear and protects pieces you can’t remove.
Cover floors and remaining items with drop cloths or plastic sheeting, taping edges to prevent slips.
Remove curtains or cover them, and take down wall art and light fixtures if possible.
Open windows and use fans to improve room ventilation and speed drying.
Gather painter’s tape to protect trim, outlets, and switches.
Keep tools and paint on a stable, covered table nearby.
Repair Holes, Cracks, and Damaged Drywall
First, assess how extensive the damage is so you know whether you’re dealing with a small nail hole or a larger compromised section.
For tiny holes and hairline cracks you can patch with spackle or joint compound and sand smooth.
If the damage is large, you’ll need to cut out the bad drywall, fit a patch or new piece, tape, and mud before painting.
Assess Damage Extent
Once you’ve cleared the area and removed loose paint, take a close look for holes, cracks, and any sagging or crumbly drywall so you can gauge what repairs are needed. Do a quick damage assessment considering size, depth, and whether underlying studs or insulation are exposed. Note wall texture to match repairs later.
Prioritize structural issues before cosmetic fixes.
- Small hairline cracks vs. wider gaps
- Punctures, dents, or blow-out areas
- Water stains or soft, sagging drywall
- Texture differences needing replication
Mark each issue, photograph for reference, and plan tools and materials accordingly.
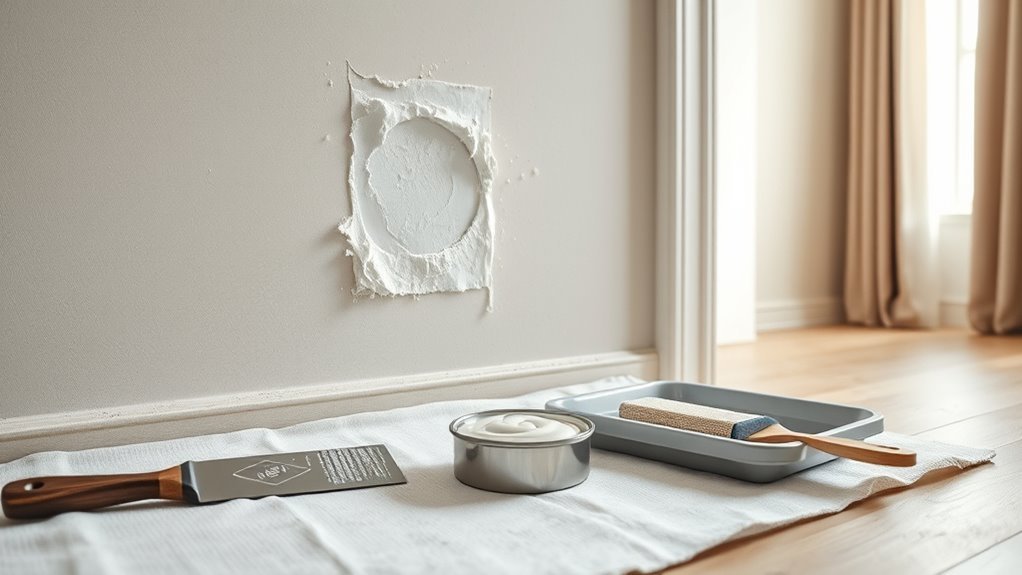
Patch Small Holes
When you’re ready to patch small holes and hairline cracks, gather a putty knife, spackling compound, sandpaper, and a damp cloth so you can work efficiently.
Clean the area with the damp cloth, removing dust and loose paint.
Press spackling into each hole, overfilling slightly; smooth flush with the wall using the putty knife.
Let it dry fully, following product time.
Sand lightly to a seamless finish, wipe away dust, and inspect for low spots.
Repeat filling if needed.
Prime patched spots before painting to ensure even sheen and strong adhesion during hole repair and drywall patching.
Repair Large Damages
How do you tackle larger holes, deep cracks, or areas of damaged drywall without turning the job into a full renovation? You’ll cut out ragged drywall, fit a patch or new drywall piece, secure with screws, and tape seams.
Apply joint compound in thin layers, sand between coats, and match wall texture before painting. If paint peeling surrounds damage, scrape and prime that area first.
- Remove loose material and clean the hole
- Install a backing or patch and fasten firmly
- Tape seams, mud, sand, and texture to blend
- Prime fully, then repaint to match existing wall texture
Clean and Sand Walls for a Smooth Finish
Before you grab paint, clean and sand the walls so the finish looks professional. Remove dust, grease, and cobwebs with a mild detergent solution; rinse and let dry.
Sand glossy spots and rough areas with fine-grit sandpaper until the transition feels smooth under your hand. Lightly scuff the entire surface if wall texture varies, so new paint adheres evenly.
Wipe away sanding residue with a damp cloth and allow to dry.
Address nail holes and small imperfections with spackling, sanding flush once dry.
Proper cleaning and sanding to guarantee consistent paint sheen and a long-lasting, smooth result.
Primer: When to Use It and How to Apply
You’ll want to prime when you’re covering stains, moving between drastic color changes, or working on new drywall to guarantee even coverage.
Apply primer with a roller for large areas and a brush for edges, working top to bottom and maintaining a wet edge.
Let it dry fully before sanding lightly and painting.
When To Prime
Wondering whether to prime? You should prime when surfaces need sealing, stain blocking, or better paint adhesion. Know priming benefits and choose primer types that match the job: stain-blocking, bonding, high-build, or tinted primer.
Prime new drywall, patched areas, drastic color changes, and porous or glossy surfaces.
- New drywall or joint compound
- Deep stains, smoke, or water damage
- Switching from dark to light paint
- Glossy surfaces or slick finishes
Priming saves paint, prevents bleed-through, and improves durability. If you’re unsure, test a small area; the right primer types make finish and coverage much more reliable.
How To Apply
If your surface needs sealing, stain blocking, or a uniform base for paint, start by choosing the right primer and preparing the area—clean, sand glossy spots, and repair holes so the primer can bond properly.
Pick a primer compatible with your finish and any eco-friendly paints you plan to use. Stir thoroughly, pour into a tray, and use a brush for edges and a roller for flats.
Apply thin, even coats; don’t overload the roller. Allow full drying per label before sanding lightly and wiping dust.
Consider how primer affects final hue—color psychology can shift perceived warmth or brightness.
Tape Edges for Crisp Lines
Before you start brushing, press painter’s tape firmly along baseboards, trim, and window frames so paint won’t seep under the edges.
For effective edge taping and crisp lines, smooth the tape down with a plastic putty knife, overlap slightly at corners, and use high-quality tape suited for your surface.
Remove tape at a 45° angle while paint is tacky or fully dry depending on manufacturer instructions to avoid lifting.
Check seams and touch up tiny bleeds with a small artist brush.
- Choose low-tack or medium-tack tape by surface
- Seal tape edges with clear coat or base color
- Label taped sections
- Work in small areas
Cut In Around Trim, Ceilings, and Outlets
With your edges taped and sealed, next you’ll cut in around trim, ceilings, and outlets to create clean joins where the roller can’t reach.
With edges sealed, cut in carefully along trim, ceilings, and outlets for crisp, roller-free joins.
Use a high-quality angled sash brush for precise trim detailing; load it lightly and draw steady strokes along the trim and ceiling line. Work in short sections, keeping a wet edge to avoid lap marks.
For outlet coverage, remove plates or paint carefully around them with the tip of the brush, then replace plates once paint is dry.
Check for drips or missed spots and touch up immediately for a professional, even finish.
Load Your Roller and Avoid Drips
Once you’ve finished cutting in, load your roller evenly by dipping it into the tray’s shallow well and rolling it back and forth on the ramp until the nap holds a thin, uniform coat—too much paint causes drips and splatter, while too little wastes effort. Keep these quick tips in mind to prevent runs and protect finish quality.
Roller maintenance matters: shake off excess, use the tray’s grid, and replace rollers when fuzzy. Also consider paint color psychology when choosing sheen—gloss shows flaws more, matte hides them. Small pauses to check edges prevent drips.
- Roll off excess on the grid
- Inspect for loose fibers
- Wipe tray edges
- Store rollers flat
Paint the Wall in Even, Overlapping Passes
Although it may feel tempting to rush, roll the paint in steady, even strokes and slightly overlap each pass so you blend edges and avoid lap marks. Keep a wet edge by working systematically from one corner and maintaining consistent pressure; that overlap creates a seamless finish and prevents streaks.
Use shorter, controlled strokes near trim and longer strokes in the field, reloading the roller evenly.
Choose colors with color psychology in mind so your smooth application complements the mood you want. If possible, pick eco-friendly paints to reduce odor and toxins while you work efficiently and cleanly.
How Many Coats and Drying Times
Because paint thickness, surface porosity, and color change how many coats you’ll need, plan for at least two coats on most walls and check coverage after the first has dried.
Drying times vary by brand, humidity, and temperature; follow manufacturer times and wait before recoat.
Lighter colors or drastic color changes often need extra coats.
Eco friendly paints may dry differently, so read labels.
Consider color psychology when choosing finish and how many layers you want for depth.
- Wait recommended recoat window on label
- Test a small patch for coverage
- Aim for consistent film thickness
- Allow full cure before hanging items
Paint Textured, Glossy, or Stained Walls
When you’re tackling textured, glossy, or stained walls, prep is the difference between a lasting paint job and one that peels or shows through; start by cleaning, sanding, and priming appropriately for the surface.
For textured finishes, remove dust with a brush, spot-sand high ridges, and use a thick-nap roller or spray to reach crevices.
For glossy surfaces, scuff-sand lightly and apply a bonding primer so paint adheres.
For stained walls, seal with a stain-blocking primer to prevent bleed-through.
Use appropriate primer types, let them dry fully, then paint with compatible sheen and tools for even coverage.
Fix Common Problems: Drips, Streaks, Lap Marks
If you spot drips, streaks, or lap marks as you paint, stop and fix them right away to keep the finish smooth and even. Identify common causes: too much paint on the brush/roller, uneven pressure, or drying too slowly.
For fixing mistakes, gently back-roll or feather edges while paint is wet; scrape large drips with a putty knife, sand when dry, then touch up. Work in small sections and maintain a wet edge to prevent lap marks.
- Remove excess paint from tools before use
- Smooth drips immediately with a brush
- Sand streaks lightly before repainting
- Keep a consistent stroke pattern
Clean Brushes, Rollers, and Trays Properly
After fixing drips and smoothing out streaks, don’t let paint sit in your brushes, rollers, or trays—cleaning them right away saves you time and money.
Rinse water-based paint under warm running water, comb bristles with your fingers or a brush comb, and reshape before drying.
For oil-based paints, use mineral spirits per label directions, then wash with soapy water.
Remove excess paint from rollers into the tray, spin or roll on old cardboard, then rinse thoroughly.
Dry tools flat or hang to prevent misshaping.
Regular cleaning brushes and roller maintenance extend tool life and keep finishes smooth for future jobs.
Remove Tape and Touch Up Edges Without Damage
Because paint can lift the finish if tape stays on too long, peel it carefully and at a slight angle to protect your edges. For clean tape removal, score stubborn lines, pull slowly toward the painted area, and warm adhesive with a hairdryer if needed.
Inspect edges for tiny flaws and do edge touch up with a fine brush, matching pressure and paint load.
- Peel tape slowly, keeping a shallow angle
- Use a utility knife for hardened beads
- Warm tape edges for easier removal
- Keep a small brush and matching paint handy
Handle tape removal and touch ups promptly to avoid rework.
Store and Dispose of Leftover Paint Safely
When you finish a project, store leftover paint so it stays usable and dispose of what you can’t keep responsibly.
Label cans with color, date, and room; seal lids tightly and place a layer of plastic wrap under the lid to prevent skinning.
Label paint cans with color, date, and room; seal lids tightly and add plastic wrap to prevent skinning.
Keep cans upright in a cool, dry spot away from heat or freezing.
Donate usable leftovers to community groups or use them for touch-ups.
For unusable paint, follow local safe disposal guidelines — many areas have household hazardous waste drop-offs or collection events.
Never pour paint down drains or into the ground; that risks contamination and fines.
One‑Afternoon Painting Checklist
Now that your leftover paint is stored or disposed of, get ready for a single-afternoon refresh with a clear, compact checklist. You’ll pick a color that fits mood and light—use color psychology to guide choices—then prep the room, protect floors, and choose eco friendly paints if you want low odor and fewer toxins.
Move quickly but carefully: tape edges, fill small holes, and sand rough spots. Keep tools organized so you finish in one session.
- Choose color and finish
- Prep surfaces and patch holes
- Protect floors and furniture
- Paint edges, cut in, then roll
Frequently Asked Questions
Can I Paint Over Wallpaper Without Removing It First?
You can, but it’s risky: wallpaper removal is usually best. You’ll need thorough surface preparation—cleaning, repairing seams, and priming with a bonding primer—otherwise paint won’t adhere well and finish may fail.
How Do I Paint When Humidity or Temperature Is Below Recommended?
You should postpone painting until conditions improve; if you can’t, use moisture barriers, dehumidifiers, and temperature adjustments like space heaters to raise surface temps, apply fast-drying primers, and work in small sections to avoid adhesion and curing problems.
Can I Paint Walls With Active Mold or Mildew Present?
Like ripping off a bandage, you shouldn’t paint over active mold or mildew; you’ll need mold remediation first, because paint compatibility matters and primers or paints won’t adhere or prevent regrowth without proper cleaning and remediation.
What’s the Best Way to Paint When Sharing a Home With Pets?
Keep pets out of the room, ventilate well, and use pet safe paints; you’ll clean surfaces and do pet friendly preparation like sealing vents, covering bedding, and drying fully before allowing pets back to avoid fumes and drips.
How Long Before Rehanging Pictures and Shelves After Painting?
About 24 hours for touch-dry paint, but you’ll wait 48–72 hours for full cure; 90% of finishes harden within three days. You’ll use painting techniques and color selection choices to minimize rehang risks.
Conclusion
You’ve turned a blank wall into a fresh horizon—like planting a sapling that will grow into shade and stories. As paint dries, it’s not just color settling; it’s a small promise kept, a room learning a new mood. You’ve learned tools, choices, and care, and that quiet transformation will keep giving. Treat your space kindly, and each repaint will feel like revisiting and renewing a trusted, unfolding landscape.