How to Paint Triangles on a Wall (DIY Accent Wall)
You can make a bold triangle accent wall with simple steps: prep and prime the wall, measure and sketch a scaled grid, mark triangle points, and tape straight lines with quality painter’s tape. Paint lighter colors first, remove tape while paint is tacky, then retape and fill in darker shapes, touching up edges with an angled brush. Work in thin coats on textured surfaces and protect floors; keep going and you’ll find tips for color choices, layout, and fixes.
Choose a Triangle Pattern: Large, Repeating, or Random
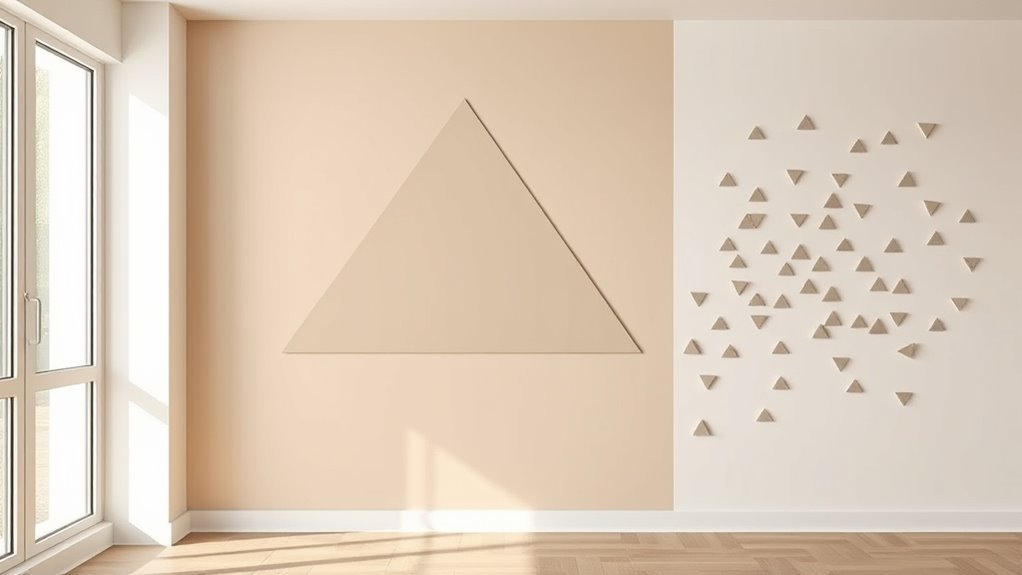
When picking a triangle pattern, think about the room’s scale and the mood you want to create: large triangles make a bold, modern statement; repeating small triangles add texture and rhythm; random sizes feel playful and organic.
You’ll decide whether geometric symmetry suits your vision or whether irregular placement feels livelier. Consider color contrast to highlight shapes: high contrast sharpens edges, low contrast softens the effect.
Sketch layouts on paper, then tape a small test area to judge balance. Measure spacing so triangles read as a coherent pattern, not clutter, and choose paints that layer cleanly for crisp lines.
Best Rooms and Walls for a Triangle Accent Wall
Think about where a triangle accent wall will get the most attention — in the living room, use it as a focal wall behind the sofa or TV to anchor the space.
For a nursery or kid’s room, choose softer colors and playful patterns to spark imagination without overwhelming the room.
You’ll also want to take into account wall size and sightlines so the pattern feels balanced from common viewing spots.
Living Room Focal Wall
Looking for a bold yet simple way to anchor your living room? Use a triangle focal wall to create geometric symmetry and punchy color contrast that draws eyes without clutter. Position the design behind your sofa or media console so furniture complements, not competes.
Keep scale proportional to the wall and sightlines for balance.
- Pick a focal point and measure twice.
- Choose two contrasting paints plus a neutral.
- Tape sharp edges for clean lines.
- Anchor with minimal decor and lighting.
You’ll transform the room into a modern, intentional space that feels both dynamic and grounded.
Nursery Or Kid’s Room
If you want a playful, calming focal point in a nursery or kid’s room, a triangle accent wall gives you bold shape without overwhelming the space. You can match Nursery themes—animals, clouds, or geometric jungles—to soft palettes, or pick vibrant hues for energetic play. Use removable painter’s tape for precise lines and low-VOC paint for safety. Plan triangles around furniture height so they frame cribs or reading nooks. For Kids’ room decor versatility, experiment with matte and gloss contrasts.
| Area | Size | Color idea |
|---|---|---|
| Crib wall | Small | Pastel mint |
| Play zone | Medium | Sunshine yellow |
| Reading nook | Small | Dusty blue |
| Accent stripe | Thin | Soft gray |
How to Pick a Color Palette for Geometric Walls
Because geometric walls demand both balance and boldness, start your color-picking by deciding the mood you want—calm, energetic, cozy, or dramatic—and let that guide your palette choices. You’ll use color harmony to keep triangles cohesive and pattern contrast to make shapes pop.
Consider lighting, furniture, and room size as constraints. Try these steps:
- Pick a dominant hue for the largest triangles.
- Choose one or two accent colors for contrast.
- Add a neutral to rest the eye and connect elements.
- Test samples on the wall at different times of day before committing.
Which Paint Finish Flatters Triangle Patterns
Think about how finish changes a triangle pattern’s depth and sheen so your design reads the way you want. A matte finish mutes glare and hides imperfections.
While eggshell or satin adds subtle sheen that makes shapes pop. Also consider durability and cleaning needs—higher-sheen finishes stand up to scuffs and are easier to wipe.
Finish Effects On Depth
When you pick a paint finish for your triangle pattern, remember that sheen changes how depth reads: matte finishes mute reflections and make colors sit flat and sculptural, while satin or semi-gloss catches light on edges and can exaggerate dimensionality. You’ll use finish to control perceived volume and color blending across facets.
Consider these effects:
- Matte — flattens planes, emphasizes shape and texture enhancement.
- Satin — soft highlights add gentle depth without glare.
- Semi-gloss — sharp edge highlights, pronounced dimensionality.
- Mixed sheens — strategic contrast boosts visual layers; test samples under room light.
Sheen Durability And Care
Although sheen affects how your triangle pattern reads, it also determines how well the finish stands up to wear and how easy it is to clean. You’ll weigh sheen comparison and Durability factors: flat hides imperfections but scuffs; satin balances subtle shine with wipeability; semi-gloss resists stains on high-traffic triangles. Choose finish by wall use and lighting. For care, dust gently, spot-clean with mild soap, and avoid abrasive tools to protect edges.
| Finish | Look | Care |
|---|---|---|
| Flat | Matte | Gentle |
| Satin | Soft glow | Wipeable |
| Semi-gloss | Bright | Durable |
Tools and Materials You’ll Need
Before you start, gather the right tools and materials so the job goes smoothly: painter’s tape, a level or ruler, a pencil, a utility knife or scissors, a small roller and tray, angled paintbrushes for edges, quality latex paint in your chosen colors, primer (if needed), drop cloths, and a sanding block.
You’ll also consider color blending and wall texture when choosing paints and prep steps.
Essential extras include a ladder, mixing sticks, a damp cloth, and painter’s gloves.
- Tape and measuring tools
- Rollers and brushes
- Paints and primer
- Prep and cleanup supplies
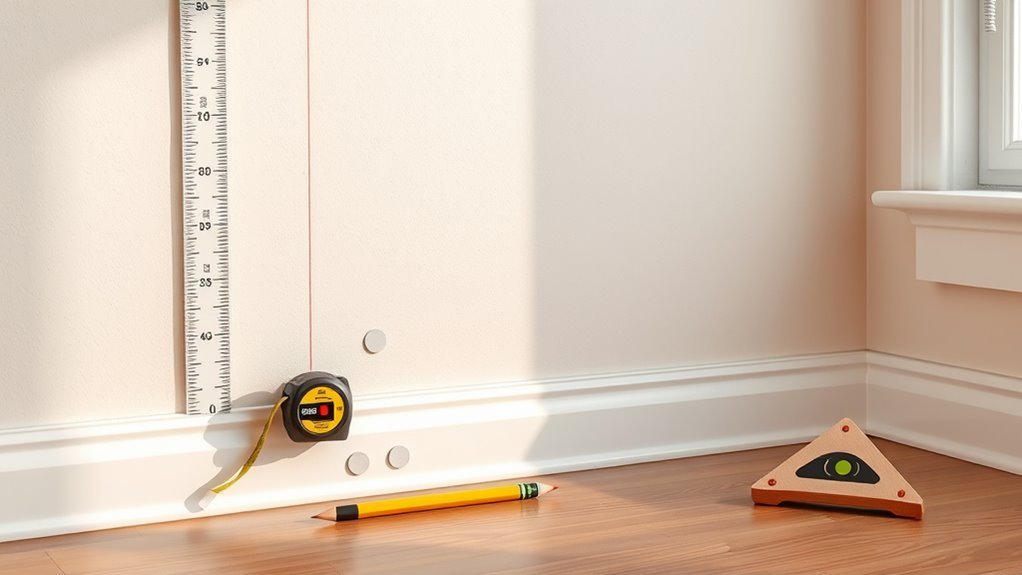
Measure the Wall and Plan Triangle Scale
Start by measuring the wall height and width so you know the exact canvas you’re working with.
Decide how big each triangle should be based on those dimensions and how many shapes you want across and up the wall.
Sketch a scaled layout on paper or use painter’s tape on the wall to map the triangle positions before you paint.
Measure Wall Dimensions
How big do you want your triangles to feel in the room? Measure wall width and height with a tape measure, noting any baseboards or trim. Record wall texture and test paint sheen on a scrap to see how light will read the shapes.
Sketch the wall to scale on graph paper or use an app, marking outlets, switches, and windows. Then:
- Measure overall width and height precisely.
- Mark obstacles and note clear vertical space.
- Note repeatable patterns (studs, seams) for alignment.
- Save measurements and photos before masking and layout.
Determine Triangle Size
Now that you’ve got accurate wall measurements and noted obstacles, decide how large each triangle should read in the room. Pick a base size that balances focal impact with practicality: larger triangles make bolder statements; smaller ones increase complexity and emphasize pattern symmetry. Consider furniture scale, viewing distance, and how Color blending will appear across adjacent shapes. Sketch a few sizes to test proportions. Use the table below to compare options quickly.
| Size option | Visual effect |
|---|---|
| Large (3–4 ft) | Bold focal points |
| Medium (1.5–2.5 ft) | Balanced scale |
| Small (6–12 in) | Intricate texture |
| Mixed | Dynamic rhythm |
Map Triangle Layout
Before you mark anything on the wall, measure its full width and height and note the locations of outlets, trim, and furniture so you can scale triangles that actually fit. Use a sketch or grid to translate inches to panel squares, keeping triangle size proportional and avoiding obstacles.
Consider Color psychology when choosing hues and how Triangle symbolism affects direction and mood.
Follow this quick planning checklist:
- Record wall dimensions and obstacle coordinates.
- Choose triangle base/height relative to wall thirds.
- Mock up layout on paper or digitally.
- Adjust scale so shapes read clearly from typical viewing distance.
Sketch Triangle Layouts on Paper First
Although you could dive straight onto the wall, sketching your triangle layouts on paper first lets you test sizes, angles, and color arrangements without wasting paint. You’ll draft several compositions, vary triangle scale, and note placement relative to furniture and architectural features.
Label each shape with intended hues so you can consider color psychology—how warm or cool tones affect mood—and jot paint texture choices, like matte or eggshell, to predict finish. Use simple measurements and scale marks so transfers go smoothly.
Keep sketches clear and numbered; they become your blueprint when taping and painting, reducing mistakes and rework.
Test Designs With Graph Paper or Digital Mockups
Before you tape anything, use graph paper to scale your triangle layout so each square represents a real wall measurement.
You can also snap photos of the wall and use a simple app to try different color combos and placements.
That way you’ll catch proportion issues and color clashes before you start painting.
Scale Designs On Grid
Start by plotting your triangle pattern on graph paper or a digital grid so you can see exact proportions and repeat units before you commit paint to the wall.
Scale each triangle to wall dimensions, accounting for wall texture and trim. Use the grid to test spacing, seam alignment, and color balance informed by color psychology.
Then transfer measurements to the wall with a level and chalk line.
- Choose grid scale (e.g., 1 square = 6″)
- Mark anchor points on the wall
- Verify angles with a protractor
- Recalculate paint quantities based on scaled areas
Try Digital Color Mockups
When you’re ready to see how colors interact at scale, create digital mockups or sketch on graph paper to test combinations and contrast before taping the wall.
Use a photo of your wall or a scaled grid to map triangle placement, then apply paint swatches digitally to experiment rapidly.
Digital mockups speed iterations and keep proportions accurate; graph paper gives tactile control and helps measure cuts and angles.
Focus on value and saturation for clear color visualization from various distances.
Save versions, compare them in natural light, and pick the palette that balances boldness and harmony before you commit to painting.
Make a Measured Grid for Uniform Triangles (How-To)
If you want perfectly even triangles across your wall, lay out a measured grid first so each shape lines up and stays consistent; you’ll save time and avoid uneven gaps later.
- Measure wall width and height, note any interruptions like outlets.
- Choose triangle size based on Color combinations and Room scale, account for Wall textures that affect tape adhesion.
- Calculate spacing: divide dimensions by triangle counts, mark corner points on paper plan.
- Use a straightedge and level to sketch grid on protected floor, double-check diagonal consistency.
This method keeps triangles uniform and your painting precise.
Transfer Grid Points to the Wall Accurately
How will you get the grid from paper to paint-ready precision on the wall? Measure and mark a reference line at eye level, then transfer perpendicular and horizontal coordinates using a laser level or chalk line.
From each paper point, measure down and across, marking with a pencil or light removable marker. Verify diagonals to prevent cumulative error.
Account for wall textures by pressing marks into depressions or smoothing small bumps before final layout. Step back often to confirm alignment and color harmony with your swatches under room lighting.
Once all points match the paper grid, you’re ready to join them for taping and painting.
Which Tape to Use for Crisp Triangle Edges (And Why)
Because crisp triangle edges depend on clean paint stops, choose a tape that bonds firmly without pulling paint off and that lays flat over textured surfaces. You’ll want tapes that resist bleed, release cleanly, and suit your paint type so your shapes—and the color psychology you aim for—stay true.
For crisp triangle edges, use tape that bonds firmly, lays flat on texture, resists bleed, and releases cleanly.
Consider these options:
- High-adhesion painter’s tape for textured walls.
- Delicate-surface tape for freshly painted or fragile finishes.
- Multi-surface tape for varied materials and quick projects.
- FrogTape with PaintBlock for extra edge sealing and sharp lines.
Also think about historical patterns and finish sheen when matching tape to technique.
Taping Techniques for Straight, Sharp Triangle Lines
When you lay tape for triangle edges, take deliberate steps to guarantee straight, sharp lines: measure and mark your triangle points, press the tape down firmly along each guideline, and smooth its edges to seal against paint bleed.
Use a level or straightedge to confirm angles, and apply tape from the center outward to avoid lifting. Overlap tape slightly at corners, then trim excess with a sharp utility knife for crisp joins.
When painting, remove tape while paint is tacky, not fully dry.
Consider Color contrast and Pattern repetition when planning tape placement to maintain a clean, intentional design.
Protect Floors, Furniture, and Fixtures Before Painting
Before you start painting, clear the area and cover floors, furniture, and fixtures to prevent drips, dust, and scuffs. Lay drop cloths, move small items, and tape edges so you won’t worry about paint removal later. Protect light switches, vents, and hardware with painter’s tape. If your wall texture is delicate, use softer coverings to avoid abrasion.
- Sweep and vacuum floors first.
- Use canvas cloths for high-traffic zones.
- Wrap furniture tightly with plastic.
- Tape around fixtures and trim.
Check covers periodically and keep a damp cloth handy for quick spot cleanup.
Prime the Wall for a Flawless Triangle Finish
Now that your floors and furniture are protected, prep the wall by filling any holes, sanding rough spots, and wiping away dust so the primer bonds evenly.
Check wall texture—smooth surfaces need light sanding; textured walls may require thicker primer or a skim coat.
Use a high-quality primer suited to your topcoat and let it dry fully between coats.
Keep paint ventilation by opening windows and using a fan toward an exterior vent; that helps drying and reduces fumes.
Tape clean edges once primer cures.
Inspect for missed flaws and touch them up before you move on to painting triangles.
Paint Large Triangle Sections Without Lap Marks
Before you start painting big triangle sections, make sure the surface is clean, primed, and free of dust so the paint adheres evenly.
Use high-quality paint, a good roller, and sharp brushes to get consistent coverage and avoid streaks.
Work wet-to-wet, feather the edges, and overlap slightly to blend each pass and prevent lap marks.
Proper Surface Preparation
Although prepping sounds tedious, getting the surface right is the key to painting large triangle sections without lap marks. You’ll remove dust, repair imperfections, and create a uniform base so colors read true—important for color psychology and when using eco-friendly paints that need consistent film build.
Follow these steps before taping:
- Clean walls with mild detergent; rinse and dry thoroughly.
- Fill holes and sand smooth; feather edges for seamless progression.
- Prime patched and bare areas with compatible primer; let cure fully.
- Lightly scuff glossy finishes; remove residue before painting.
Proper prep prevents uneven absorption and obvious lap lines.
Use Quality Paint And Tools
Because a crisp, uniform finish depends as much on materials as technique, pick quality paints and tools that suit your wall and design. Choose a good acrylic or latex paint with consistent pigmentation to avoid streaks when covering large triangle sections.
Use a high-density roller and a quality angled brush for edges; cheap rollers shed fibers and cause texture variation. Keep your color mixing measured and documented so you can reproduce shades or touch up later.
Maintain proper paint storage—seal cans, store upright in a cool place, and stir before reuse. Good supplies reduce lap marks and make your shapes look professional.
Feathering And Overlap Technique
When you roll large triangle sections, feather the paint outward from the taped edge and overlap each pass slightly so wet edges blend seamlessly; you’ll avoid lap marks and keep pattern symmetry.
Use a loaded roller, light pressure, and short strokes. Work while paint is wet to achieve smooth color blending.
- Roll toward the tape, then pull away gently.
- Overlap previous wet edge by 25–50%.
- Keep a wet edge by painting adjacent triangles quickly.
- Inspect in different light to correct streaks.
Clean tools and steady rhythm preserve crisp lines and consistent finish.
Paint Crisp Two-Tone Triangles Step-by-Step
Before you pick up the brush, prep the wall and layout your triangles so you can paint clean, sharp edges without redoing work later. Measure and mark with a level and pencil, then apply painter’s tape along your lines, pressing edges firmly.
Prime if needed, especially when switching tones; choose colors with color psychology in mind and eco-friendly paints for safer indoor air.
Paint the lighter tone first, remove tape when wet for crispness, then retape and paint the darker tone, or vice versa for coverage.
Finish with touch-ups using a small angled brush for any tiny flaws.
Paint Multi-Color Triangle Patterns Without Bleeding
If you want crisp, bleed-free multi-color triangle patterns, plan your sequence and seal every tape edge before laying down paint. You’ll pick colors with color psychology in mind, test paints on your wall texture, and work in logical order so colors don’t contaminate each other.
Use low-tack painters’ tape and a thin sealing coat of base color over tape edges.
- Map triangle order.
- Apply tape, press edges.
- Seal tape with base coat.
- Paint top color last.
Let each layer fully dry, remove tape slowly, and touch up tiny flaws with a fine brush.
Handle Overlapping and Intersecting Triangle Edges
Because overlapping triangles create visible seams, you’ll need a clear plan for edge handling to keep lines sharp and colors distinct. Plan the order: paint background shapes first, then overlay triangles last so edges stay crisp.
Use low-tack painter’s tape and press firmly along seams; remove tape while paint’s tacky to avoid lifting.
For intentional gradual shifts, employ subtle edge blending with a dry brush or sponge to soften joins into a color gradient.
When edges intersect, clean any bleed with a small angled brush and matching paint.
Work systematically across the wall to maintain consistent edge quality and visual cohesion.
When to Use a Brush vs a Roller for Triangle Details
Once your edges are tidy and intersections cleaned up, decide whether a brush or a roller will give you the control and finish you want for each triangle. You’ll pick based on size, detail, and surface.
- Small triangles: use a fine angled brush for crisp lines and tight corners.
- Large triangles: a small roller speeds coverage and keeps finish uniform.
- Rough wall textures: a thicker-nap roller helps fill crevices; brush only for touch-ups.
- Color coordination: use brush for layered colors or precise borders, roller for single-color fields.
Choose tools per triangle, working deliberately to match finish and design goals.
Drying Times and When to Remove Tape Safely
You’ll want to follow paint manufacturer guidelines for drying times so each triangle cures fully before the next color or coat.
Test a small corner to make sure paint’s dry to the touch but not tacky before pulling tape.
Remove tape slowly at a 45-degree angle while the paint is slightly damp to avoid lifting or tearing.
Drying Time Guidelines
If you want crisp triangle edges, plan around paint drying times and tape removal windows so the paint’s set enough to resist lifting but still tacky enough to peel cleanly. You’ll also factor in color blending and texture effects when timing layers.
- Light coats dry in 20–30 minutes; wait before the next coat.
- Heavy or textured layers need 2–4 hours to firm.
- Humidity and temperature can double drying times; check conditions.
- Latex paints cure to handle in 24 hours; full cure takes weeks.
Test a hidden edge before committing. Keep notes on times so you can repeat successful timing.
When To Remove Tape
While the paint is still slightly tacky, peel the tape back at a 45-degree angle to get the cleanest edge without lifting paint. Wait for edges to skin over but not fully cure; that brief tackiness helps prevent jagged tears and color bleed.
On glossy or smooth wall texture you can remove tape sooner; on rough or heavily textured surfaces go slower to avoid paint snagging.
If you planned color blending near seams, remove tape between coats to check boundaries and fix feathering while paint’s workable.
Pull tape slowly and steadily, keeping it close to the surface to preserve crisp triangle lines.
Touch Up Paint Lines and Fix Bleed-Through
Because crisp edges make the whole triangle design pop, you’ll want to tackle any paint bleeds and uneven lines as soon as the main coats dry. Inspect edges under good light, noting where bleed through occurred and where you’ll need to touch up.
Because crisp edges make the triangle design pop, tackle bleeds and uneven lines promptly for sharp, professional results.
- Lightly sand any raised ridges for a smooth edge.
- Apply a fine brush with base color to reclaim straight lines.
- For small bleeds, use a tiny brush or craft knife to remove excess and repaint.
- Feather new paint outward slightly to blend, then let cure before removing remaining tape.
Work patiently; precise touch up keeps triangles sharp and professional.
Seamless Finishes at Corners, Outlets, and Switches
When you tape triangle edges into corners, take time to align the tape so lines stay crisp where two walls meet.
Paint carefully around outlets, removing switch plates if possible to avoid paint buildup.
Finish by feathering color at switch plate edges so covers sit flush and the pattern looks continuous.
Aligning Tape At Corners
If you want crisp, seamless corners, take a moment to plan how your tape will meet at each angle before you press it down. You’ll improve Tape alignment and achieve Corner precision by prepping edges, cleaning dust, and visualizing triangle lines.
Follow these steps:
- Measure and mark corner intersections lightly with a pencil.
- Cut tape slightly longer than the joint; overlap edges outside the painted area.
- Press tape from center toward edges to avoid bubbles and gaps.
- Seal tape edge firmly with a plastic card for a tight barrier against bleed-through.
Remove tape at a 45° angle while paint is tacky.
Painting Around Outlets
Though outlets and switches can interrupt a crisp triangle design, you can get seamless results by prepping carefully and working methodically. Turn power off, remove plates, and note wiring before painting.
Mask plates and outlet edges with low-tack tape; press tape into any creases caused by wall textures so paint won’t bleed. Use a small angled brush for tight edges, matching your color schemes and keeping strokes away from exposed contacts.
Once paint’s dry, remove tape and reinstall plates. If paint nibs appear, gently sand and touch up. This approach preserves sharp triangle lines and respects varying wall textures.
Blending Switch Plate Edges
Because switch plates sit at the intersection of paint lines and hardware, you’ll want to blend their edges carefully to keep triangles crisp and surfaces seamless. You’ll remove plates, mask precisely, and use small tools to maintain pattern consistency and achieve subtle color blending at edges. Follow these steps:
- Unscrew plates, clean area, and dry thoroughly.
- Mask plate openings tightly with low-tack tape, matching triangle lines.
- Use an angled brush for feathered strokes where colors meet.
- After paint cures, remove tape, reinstall plates, and touch tiny gaps.
This approach keeps corners neat and triangles visually continuous.
Scale a Pattern Up or Down for Different Walls
When you need the triangle pattern to fit a different wall, measure the wall and the original pattern first so you can calculate a simple scale factor. Then multiply your triangle dimensions and spacing by that factor to get the new stencil sizes.
You’ll preserve pattern repetition by scaling both triangle size and gaps uniformly so the rhythm looks intentional. Consider color contrast when larger or smaller triangles change perceived intensity—bigger shapes read bolder, smaller ones subtler.
Draft a scaled mockup on paper or in a simple digital grid, test a stencil, then adjust spacing or scale slightly before committing to the whole wall.
Adapt Triangle Designs for Textured Walls
If your wall has texture—stucco, beadboard, or rough plaster—you’ll need to tweak stencil edges and paint application so triangles stay crisp and consistent. Treat the textured surface first: clean, sand high peaks, and use primer to improve paint adhesion.
If your wall is textured—stucco, beadboard, or rough plaster—prepare, sand high peaks, and prime for crisp stenciled triangles.
Place templates firmly and use low-moisture, stippling strokes to avoid bleed.
- Seal seams with flexible caulk for tight edges.
- Use a dense foam roller for even coverage.
- Apply thin multiple coats rather than one heavy coat.
- Remove tape slowly at a 45° angle after paint skins.
Check edges and touch up with a small artist brush.
Budget-Friendly Shortcuts and Material Swaps
While you don’t need top-tier supplies to get great results, choosing smart substitutes and shortcuts will save money without sacrificing a clean, professional-looking triangle mural. Use plastic drop cloths, foam rollers, and trim brushes instead of pricier tools. Consider sample-size paints to test color psychology small-scale, then mix custom shades from leftover cans. For rough wall texture, sand or prime only high-contact areas and use thicker paint to even out finish. Swap specialty tape for painter’s tape plus a steady hand on edges. Quick drying formulas cut downtime, letting you finish faster and cheaper.
| Item | Budget Swap |
|---|---|
| Tape | Painter’s tape + steady hand |
| Tools | Foam rollers, trim brushes |
| Paint | Samples, leftover mixes |
Common Mistakes and How to Avoid Them
You’ll want to watch for a few common slip-ups that can ruin crisp triangle walls: poor tape technique, uneven paint coverage, and misaligned layouts.
Use fresh painter’s tape and press the edges down firmly to prevent bleed-through.
Measure and mark guides carefully, and apply thin, even coats so your triangles look sharp and consistent.
Poor Tape Technique
Because clean, crisp triangle edges all come down to how you apply tape, poor tape technique is the most common reason geometric wall patterns look sloppy. You’ll avoid Tape mishaps and Color bleeding by prepping, pressing, and planning. Follow these quick steps:
- Clean wall surface and measure precisely.
- Use quality painter’s tape, press edges firmly with a plastic card.
- Seal tape edge with a thin coat of base color to prevent bleeding.
- Remove tape while paint is tacky, pulling at a 45° angle.
Practice on scrap board first so your angles, adhesion, and timing become consistent.
Uneven Paint Coverage
If you rush through coats or overload your brush, you’ll end up with streaks, roller marks, and thin spots that ruin crisp triangle shapes. Take time to apply even, thin coats and let each dry fully before the next.
Use a high-quality roller suited to your wall texture and a small brush for edges. Feather out edges to avoid buildup along tape lines.
Test color samples first—color psychology affects perceived depth, so uneven coverage can change a hue’s warmth or coolness.
Fix thin areas by misting and rolling lightly; don’t sand unless paint is fully cured.
Misaligned Triangle Layout
Once your coats are smooth, the next big gamble is the triangle layout—misaligned shapes are obvious even with perfect paint. You’ll avoid crooked lines and awkward spacing by measuring, marking, and checking alignment often. Consider wall texture when placing templates; bumps shift tape and distort edges.
Account for color blending when triangles meet—plan overlaps and drying order.
- Measure twice, draw once: use a level and pencil guide.
- Use rigid templates and painter’s tape for crisp corners.
- Test on scrap for texture-caused distortion.
- Step back frequently to verify overall balance.
Maintain and Clean Your Painted Triangle Wall
When you want your triangle wall to keep looking sharp, a simple routine of gentle cleaning and timely touch-ups will do the trick.
Dust weekly with a microfiber cloth to avoid scratching varied wall textures; avoid abrasive sponges. For stains, spot-clean with mild soap and water, testing hidden areas first.
Dust weekly with a microfiber cloth; spot-clean stains with mild soap and water, testing a hidden area first.
Address scuffs quickly with a white eraser or gentle cleaner. Keep leftover paint for precise paint removal and fast fixes—label cans with color codes and finish.
For chipped edges, sand lightly, prime small spots, then feather new paint to blend. Regular checks prevent larger repairs.
Combine Triangle Walls With Other Accents (Shelves, Trim)
Because triangle walls already demand attention, pair them with minimal, purposeful accents like slim floating shelves or contrasting trim to enhance rather than compete with the pattern. You’ll balance color combinations and pattern variations by choosing accents that echo tones or introduce a single neutral.
Keep scale small so shelves don’t interrupt large triangles.
- Match shelf finish to a triangle hue for cohesion.
- Use thin trim to outline select shapes subtly.
- Group small decor items to follow triangle angles.
- Limit accent colors to one additional shade for restraint.
This approach highlights geometry while keeping the wall readable.
Remove Triangle Paint Without Damaging Drywall
If you need to remove triangle paint without damaging drywall, start by softening the paint with a mild stripper or warm, soapy water so you can work gently rather than scraping aggressively.
Work in small sections, use a plastic scraper at a low angle, and blot loosened paint with a damp cloth.
Sand lightly with fine-grit paper only where necessary, then spot-prime repairs to restore uniform porosity.
Test any solvent in an inconspicuous area to avoid finish issues related to color mixing or altered paint durability.
Finish by cleaning residue and allowing full cure before repainting for best adhesion.
Inspiring Triangle Design Variations to Try Next
Now that you’ve cleaned up and prepped the wall, it’s a great moment to experiment with triangle layouts that change the whole room’s mood. Try patterns that reference Historical inspiration or embrace cultural symbolism to add depth and meaning.
Consider these quick ideas:
- Oversized single triangle as a focal anchor.
- Repeating tessellated triangles for a geometric wallpaper effect.
- Asymmetrical cluster with varied sizes for dynamic energy.
- Color-blocked chevron rows mixing neutrals and accents.
You can mix metallics, matte, or textured paint, and test swatches first to confirm scale and contrast before committing.
When to Hire a Pro for a Triangle Accent Wall
While tackling a simple, small triangle accent is within most DIYers’ reach, call in a pro when precision, scale, or finish quality matters—like on high walls, complex tessellations, or when using specialty paints or metallics that demand expert application.
Simple triangle accents are DIY-friendly, but hire a pro for large, precise, or specialty-painted designs.
You should hire a pro if your design includes intricate joins, perfectly crisp edges across multiple planes, or challenging surfaces where alternative wall textures complicate masking and adhesion.
Pros also help realize creative color schemes with seamless gradients or metallic layering, save time, and prevent costly mistakes.
If safety, lasting results, or a polished gallery-quality finish matter, bring in an expert.
Frequently Asked Questions
Will the Triangle Paint Affect Indoor Air Quality or Trigger Allergies?
It might — paint fumes can affect indoor air quality and act as allergy triggers. You’ll cut risk by choosing low‑VOC paints, ventilating well, using masks, and keeping sensitive people away while painting and during drying for several days.
Can I Apply Wallpaper Over Painted Triangles Later?
Yes—you can apply wallpaper over painted triangles; coincidentally, when sunlight hits textured edges, you’ll notice seams, so verify wallpaper compatibility by sanding glossy spots and testing paint adhesion first, using proper primer for a smooth bond.
How Long Before Hanging Art or Shelves on the Painted Wall?
You can hang art or shelves after the paint drying and wall preparation are complete; wait 24–48 hours for most latex, 72 hours for heavy items, and up to a week for full cure before mounting heavy shelves securely.
Can I Use Leftover Triangle Paint on Furniture or Trim?
Yes — you can use leftover triangle paint on furniture or trim; just test adhesion first. For furniture upcycling, sand and prime; for trim accents, guarantee proper bonding and touch up edges so finishes look intentional and durable.
Do Triangles Affect Room Resale Value or Staging Recommendations?
They can influence resale impact: you should choose neutral colors and simple patterns. For staging tips, remove or repaint bold triangles before showings, or keep them minimal so buyers can envision the space and won’t be distracted.
Conclusion
You’ve planned your pattern, picked your palette, and taped precise lines; now stand back and admire the impact. Let the triangles anchor your living room, energize your office, or soften a bedroom corner. Touch up edges, add shelves or trim to echo the shapes, and change accessories to repeat or contrast the motif. Enjoy a bold focal point, a playful accent, and a fresh room that reflects your taste and skill.