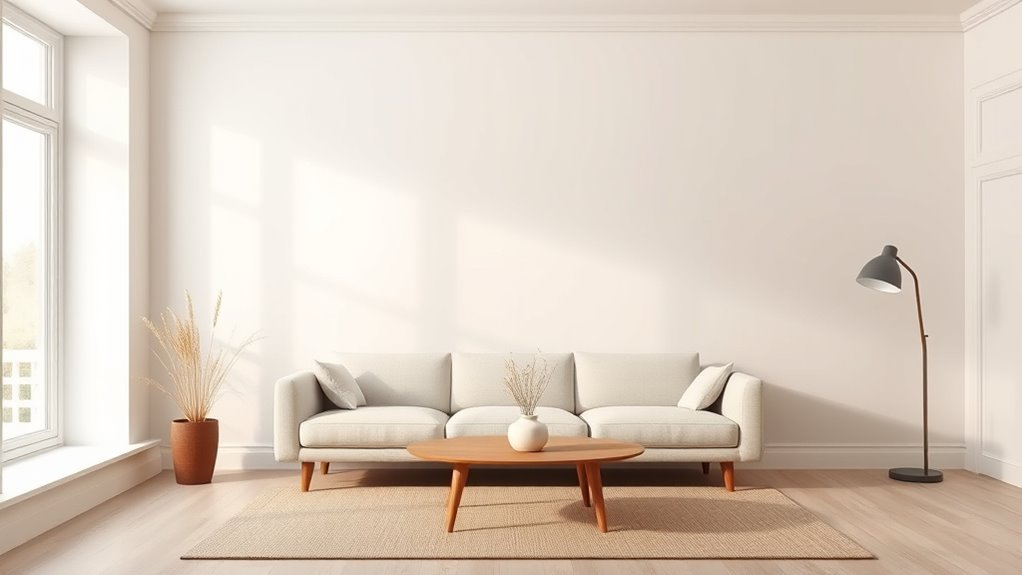
How to Paint Walls Ombre (Step-by-Step Guide)
Decide the ombre style, test colors, and map gradient zones on the wall. Prep by cleaning, patching, sanding, and priming for an even base. Mix three to five tints and label ratios; work wet‑on‑wet, rolling or brushing while blending edges with a dry brush or sponge for smooth shifts. Feather overlaps and keep a wet edge; let coats tack before light touchups. Follow step timings and tools for a polished fade, and continue for detailed tips and troubleshooting.
Which Ombre Wall Style Fits Your Room (Subtle, Two‑Tone, Vertical)
When choosing an ombre style, think about the room’s purpose, size, and natural light—these factors will determine which look feels intentional rather than overpowering. You’ll pick subtle fades for calm spaces, two-tone bands for bold statements, or vertical gradients to emphasize height.
Consider color blending carefully: softer progressions suit bedrooms and reading nooks, crisper separations fit dining or entry areas. Match technique to wall texture—smooth walls show gradients clearly, textured surfaces break blends into mottled effects.
Measure sunlight and traffic, then test samples. Choose the style that complements function and finishes without competing with furnishings.
How an Ombre Wall Changes Mood and Perceived Size
You can use ombre to make a room feel deeper by fading darker tones at the bottom or lighter tones toward the ceiling to trick the eye.
The gradient also shifts the room’s mood—soft, cool fades feel calm while warm, saturated shifts boost energy.
And because ombre guides how light and shadow read across the wall, it subtly changes how spacious or cozy the space feels.
Affects Perceived Depth
Ever wondered why a gradient wall can make a room feel taller or cozier? You can use ombre to tweak perceived depth: darker shades at the bottom ground the space, lighter tones above lift the ceiling. Color psychology and interior harmony guide your choices—warm gradients pull the eye forward; cool gradients recede. Place the darkest band where you want stability, and the lightest where you want openness. Use vertical fades to elongate walls, horizontal fades to widen them.
| Effect | Use |
|---|---|
| Taller feel | Light top, dark bottom |
| Cozier | Dark top, warm tones |
| Wider | Horizontal fade |
| Airy | Pale gradient |
Alters Ambient Mood
Although subtle, an ombre wall can shift a room’s mood and sense of scale almost immediately. You’ll notice ambient atmosphere change as colors flow from light to dark, creating mood enhancement without extra décor.
Use gradients to make ceilings feel higher or corners recede, tailoring emotional impact to function—calm in bedrooms, energy in studios. Consider these effects when planning:
- Soft pastels to soothe and expand small spaces
- Bold gradations to energize and define zones
- Darker bases to ground and shorten tall rooms
- Lighter tops to lift and brighten overall perception
Choose tones intentionally for clear, purposeful results.
Manipulates Light Flow
When you paint an ombre wall, light flows differently across the gradient and reshapes how the room feels and reads visually. You’ll notice highlights gather on lighter bands and shadows deepen on darker ones, so you can guide attention and alter perceived depth.
Use color psychology to choose hues that expand or cozy up a space: cool, pale tones push walls back; warm, saturated tones advance them.
Consider wall texture too—smooth surfaces reflect more light, enhancing the gradient, while textured finishes scatter light and soften shifts.
Thoughtful placement of furniture and lighting completes the illusion and mood you want.
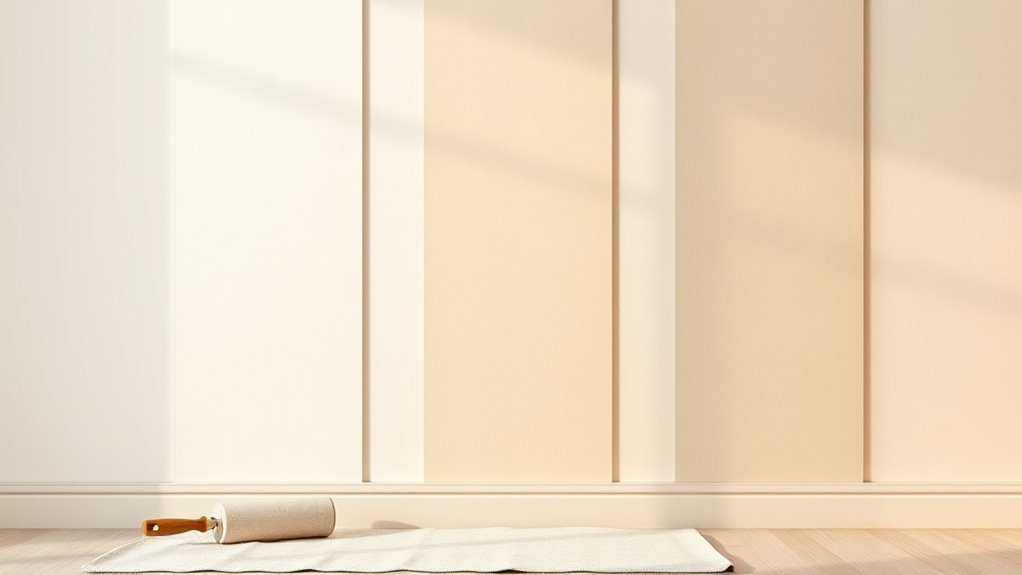
Choose the Right Paint Colors for a Smooth Ombre Gradient
You’ll want to pick colors with similar temperature so warm shades blend into warm and cool into cool, avoiding a jarring shift.
Plan the number of gradation steps and keep contrast between each step subtle to guarantee a smooth shift.
Test swatches on the wall to confirm the steps read as a seamless gradient from a distance.
Color Temperature Match
Because warm and cool hues sit on different ends of the color spectrum, matching their temperatures is key to a seamless ombre—pick paints that share either warm undertones (yellows, reds) or cool undertones (blues, greens) so gradual changes read as gradual shifts rather than jarring jumps.
You’ll use color psychology to influence mood: warm feels cozy, cool feels calm. Choose a paint brand with reliable undertone descriptions. Test swatches together on the wall and view them at different times.
- Arrange swatches from lightest to darkest
- Check gradual blends under natural light
- Use neutral midtones to bridge extremes
- Limit saturation jumps
Gradation Step Contrast
If you want a seamless ombre, pick paint steps that change gradually in value and saturation so each band reads as a subtle shift rather than a stripe. You’ll select a dominant hue, then create incremental tints and tones—small jumps in lightness prevent harsh lines.
Consider color psychology: softer gradation feel calming, bolder contrasts energize. Sample swatches on the wall to confirm flow under your room’s light.
Also factor paint durability; different sheens can reflect light differently and age unevenly, so use consistent quality and finish. Blend carefully at borders and step back often to judge the overall gradient.
Pick Color Direction: Light→Dark or Dark→Light?
When choosing whether to blend from light to dark or dark to light, think about the room’s natural light and where you want the eye to be drawn. You’ll decide based on function and mood: light-to-dark lifts ceilings and widens spaces; dark-to-light anchors a focal wall.
Consider color psychology—lighter tones feel airy; darker hues feel cozy. Also factor paint durability where lower, darker sections may hide scuffs better.
- Light→Dark makes rooms feel taller and more open.
- Dark→Light creates drama and emphasizes a feature wall.
- Match direction to furniture placement.
- Test small swatches in different light.
How Many Ombre Shades Do You Need?
Decide how many gradient steps you want before you mix paints. More steps give a smoother shift, while fewer steps create a bolder, banded look.
Think about how subtle or dramatic you want the fade so you can plan the number of shades accordingly.
Number Of Gradient Steps
Choosing how many ombre shades to use comes down to the effect you want and the wall size. You’ll decide between subtle shifts or bold steps: more steps give finer gradient blending; fewer steps emphasize color contrast.
Consider these guidelines as you plan:
- Small accent wall: 2–3 shades for impact without complexity.
- Medium wall: 3–5 shades to balance depth and simplicity.
- Large wall: 4–7 shades for a smooth progression across space.
- Patterned or textured surfaces: extra steps to avoid harsh transitions.
Pick a step count that matches your design intent and the room’s scale, then test on a sample panel.
Color Transition Smoothness
After picking how many steps you’ll use, you’ll want to focus on how smooth each shift should feel across the wall. Decide if you want subtle, soft fades or bold, visible bands.
For subtle progressions, use more intermediate shades and blend while paint is wet to encourage color blending and avoid harsh lines.
For a graphic look, fewer shades with crisp edges work better. Test a small panel to assess gradient consistency and tweak ratios between tones.
Your brush strokes, roller pressure, and timing control the result, so practice technique and adjust mix strength until the transition reads balanced and intentional.
Choose the Right Paint Finish for Ombre Walls
How glossy should your ombre be? You’ll pick a finish that balances color psychology with practical paint durability. Matte softens progressions and reduces glare, while satin adds subtle sheen and cleans easier. Consider room use and lighting—high traffic or moisture needs more robust finishes.
- Matte: minimizes reflections, smooth blends
- Eggshell: slight sheen, forgiving surface
- Satin: durable, easy to wipe
- Semi-gloss: brightest sheen, best for trims and moisture-prone spaces
Test sample swatches in your light, evaluate how the sheen affects gradients, and choose the finish that supports mood and maintenance.
Tools & Materials for an Ombre Wall
Before you start, gather the right tools and materials so the ombre process goes smoothly and your gradients look professional. You’ll need high-quality interior paint in at least three tints, a primer, and sample pots for color mixing to create smooth gradual changes.
Grab angled and flat brushes, a 4–6″ foam roller, extension pole, painter’s tape, drop cloths, mixing sticks, trays, and sanding block. Include a clean cloth and mild cleaner for prep.
Practice brush techniques on cardboard to blend edges before touching the wall. Keep labels and a notebook to record mixes so you can replicate exact shades later.
Budget: DIY Ombre Wall Cost Estimate
One practical way to budget for a DIY ombre wall is to break costs into paint, tools, and prep, then estimate based on the room size and how many tints you’ll mix.
You’ll pick paints with color psychology in mind, balancing mood with paint durability for longevity.
Calculate gallons, primer, tester pots, tape, rollers, and cleanup.
Expect savings by renting or borrowing tools and mixing tints yourself.
- Paint (gallons, primer, tester pots)
- Tools (rollers, brushes, edgers)
- Prep (tape, drop cloths, spackle)
- Labor time (your hours, possible helper)
Track receipts and add a contingency of 10–15%.
Measure and Map Your Wall Before Painting
Before you pick up a brush, measure the height and width of your wall so you know how much paint and how many gradient bands you’ll need.
Use a level and pencil to mark the horizontal lines where each ombre shift will occur, spacing them evenly or according to your design.
These measurements and marks will keep your color fades smooth and consistent.
Measure Wall Dimensions
How big is the space you’re transforming? Measure height and width of each wall, noting doors, windows, and outlets so your ombre layout fits. Record dimensions on a sketch, then calculate square footage for paint estimates and primer.
Compare coverage with paint brands to decide quantities, and think about Color pairing when ordering samples.
- Measure wall height from floor to ceiling
- Measure width between trim or adjacent walls
- Subtract openings (doors/windows) from total area
- Note obstacles (outlets, vents, light switches)
Accurate measurements save time and prevent mismatched gradients or insufficient paint.
Mark Ombre Transitions
When you’ve got your measurements, map the ombre shifts directly on the wall so your gradient lands exactly where you want it; use a level and pencil to mark horizontal gradual changes lines at measured intervals.
Decide whether progressions feel soft or defined—Ombre color psychology suggests placing lighter tones near windows or ceilings for airiness, and deeper tones where you want focus.
Number each zone and sketch a quick reference chart showing paint mixes and ratios.
For Gradient wall murals, tape faint guides if you want crisper bands.
Step back often to verify sightlines, then photograph your map for painting day.
Prep the Wall: Clean, Patch, and Sand
Since a smooth, clean surface makes the ombre effect pop, start by wiping the wall with a damp cloth to remove dust and grease, then let it dry completely.
You’ll want to inspect for dents, nail holes, and loose paint that’ll interrupt blends and affect wall texture and even the mood—remember color psychology relies on clean gradations.
Patch imperfections, sand edges until smooth, and remove sanding dust.
- Fill holes with spackle; smooth with a putty knife.
- Sand feathered edges for seamless blending.
- Vacuum and tack cloth to remove residue.
- Check for glossy spots; sand lightly to dull.
Prime the Wall for Even Blending
Before you start blending, roll on a neutral primer to create an even base that won’t alter your ombre colors.
Lightly sand any rough spots and fix small dents or cracks so the surface is smooth. That preparation helps your shifts lay down consistently and look seamless.
Use a Neutral Base
If you want smooth, predictable ombre shifts, prime the wall with a neutral base first. You’ll create an even surface that helps pigments blend and preserves paint durability. A neutral undertone prevents surprises from underlying colors and lets you control color psychology, ensuring your ombre reads as meant.
- Choose a mid-tone gray or warm beige for consistent transparency.
- Apply a quality primer designed for your wall type.
- Let the primer fully cure before painting to avoid streaks.
- Use a roller for uniform coverage and tack cloth for dust removal.
This step simplifies blending and yields reliable results.
Sand and Repair Surface
Now that your primer’s down, get the surface smooth so your ombre blends flawless. You’ll sand with fine-grit paper, fill holes with spackle, and re-sand once dry. Smooth walls let gradients flow and support color psychology choices; patched bumps distort light and hue. Wipe dust, inspect under angled light, and touch up primer. Consider furniture coordination when repairing near trim or outlet areas so progression feels intentional. Keep tools handy and work methodically for even gradation.
| Task | Tip |
|---|---|
| Sand | Use 220-grit |
| Fill | Apply thin layers |
| Clean | Tack cloth wipe |
| Inspect | Angled light check |
How to Transfer Your Ombre Layout to the Wall
Once you’ve mapped your color zones on paper, transfer those measurements to the wall using a level and pencil, marking the top and bottom of each band so your gradient stays straight and even. Use the marks to plan gradations mindful of color psychology and paint durability: lighter zones at eye level brighten, durable finishes go where scuffs occur.
Transfer measurements to the wall with a level and pencil, marking each band for straight, durable gradients.
Measure from a fixed corner, mark horizontal guide lines, and double‑check with a laser level if available.
- Use a soft pencil to avoid visible marks.
- Label each band with its shade number.
- Snap chalk lines for crisp edges.
- Protect trim and floors.
Mix Consistent Intermediate Ombre Shades Step‑by‑Step
Because consistent intermediate shades make the gradient read smooth, you’ll mix methodically and record each step. Start by mixing the two endpoint colors in equal parts, then halve or third the increments depending on how many bands you planned.
Use measuring cups or a scale for repeatable ratios, note mixes on a swatch card, and test on scrap to check value and saturation.
Keep additives minimal so paint durability isn’t compromised; stir thoroughly for even pigment.
Consider color psychology when choosing midtones—warmer mids feel cozy, cooler ones calm.
Store leftover mixes sealed and labeled for touch-ups.
Mark Horizontal Bands for Controlled Transitions
When you mark horizontal bands, you give yourself clear guides for blending so each shift stays even and predictable. You’ll measure, level, and pencil faint lines to define where each hue begins and ends, considering color psychology to place lighter tones higher for airiness. Keep lines subtle so blending erases them.
Mark horizontal bands, measure and pencil faint lines, then blend so each hue shifts even and airy.
Marking also helps assess paint durability across gradations, ensuring heavier coats where wear occurs. Use these checks:
- Measure ceiling-to-floor and divide into equal or graduated bands.
- Use a laser level or long level for straight lines.
- Pencil lightly; avoid thick tape lines.
- Note traffic spots for extra protection.
Brush vs Roller vs Sponge: Best Uses for Each
Although each tool can blend color, you’ll choose a brush, roller, or sponge based on the surface, finish, and the kind of changeover you want.
For crisp control and delicate gradients, use a quality brush; your brush technique—short, feathered strokes—lets you refine edges and detail.
A roller covers large walls fast and gives a smooth, even base for subtle ombre progression; use nap appropriate to texture.
A sponge creates organic, textured shifts ideal for soft, mottled effects and spot blending.
Match tool to wall texture and desired finish, and test on a scrap before committing.
Two Blending Techniques, Explained Simply
If you want clean, smooth fades, choose wet-on-wet blending; if you prefer textured, painterly shifts, use layered dry blending. You’ll pick wet-on-wet for seamless gradations: keep paints workable, brush horizontally, and feather edges while still damp.
For seamless, smooth fades use wet-on-wet; for textured, painterly shifts choose layered dry blending for controlled depth.
Layered dry blending gives depth through thin, semi-dry passes, ideal when color psychology calls for tactile warmth or dramatic contrast. Consider paint durability—each method needs proper primer and curing time. Choose based on look and lifespan.
- Wet-on-wet: fast, subtle transitions
- Layered dry: controlled texture, buildable depth
- Tools: soft brush, sponge, blending pad
- Prep: prime, test samples
Paint the Base Coat Without Lap Marks
Before you start blending, lay down a smooth base coat that won’t show lap marks so your ombre reads as a clean gradient.
Work in manageable sections, maintaining a wet edge and back-rolling with a microfiber roller to even sheen.
Thin paint slightly for better leveling, but test first to keep opacity.
Use consistent pressure and overlap each pass by 50% to avoid streaks.
Let the first coat cure fully before evaluating coverage; sand any raised fibers lightly.
Choose your base hue with color psychology in mind, and consider furniture coordination to guarantee the gradient complements the room.
Create Smooth Midtone Blends With Glazing Medium
Pick a glazing medium that’s compatible with your paint and has the translucency you need. Mix several midtone tints at consistent strengths so your fades read even across the wall.
As you apply the glaze, feather and blend the edges with a dry brush or soft roller to make the shifts seamless.
Choose the Right Glaze
Wondering how to get those seamless midtone shifts? You’ll pick a glaze that balances transparency, working time, and finish so your ombre reads smooth and intentional. Consider how texture patterns interact with sheen and how color psychology guides your midtones’ warmth or coolness. Test small swatches before committing.
- Choose a water-based glazing medium for easy cleanup and longer open time.
- Match glaze sheen to final finish (matte hides brushstrokes; satin highlights depth).
- Thin glaze gradually to control transparency.
- Use a soft brush or microfiber roller to avoid drag and streaks.
Mix Consistent Tint Strengths
Now that you’ve chosen the right glaze, you’ll need to mix consistent tint strengths so each horizontal band blends smoothly into the next. Measure paint and glazing medium by volume, keeping ratios steady for each successive midtone step. Label containers with percentages to reproduce mixes if you pause. Test swatches on scrap board to confirm hue progression and consider color psychology—softer gradations feel calming, bold shifts energize.
Stir thoroughly for uniform translucence; uneven mixing hides brushwork and undermines paint durability. Work from lightest to darkest or vice versa, maintaining repeatable increments for a balanced, controllable ombre effect.
Feather and Blend Edges
When you lay down your midtone bands, feather the wet edges with a soft-bristle brush or a dry, clean rag so the glaze thins out gradually into the adjacent color. Work quickly, dragging light strokes outward to avoid hard lines. Use glazing medium to extend open time and soften transitions.
Consider how color psychology shifts with subtle gradients and how furniture coordination will read against the blend.
- Load barely any paint on the brush
- Cross-hatch strokes perpendicular to the seam
- Wipe excess glaze off a lint-free rag
- Step back often to judge the overall flow
Finish with a light mist of water if needed.
Feather Edges for a Seamless Gradient
Because the key to a smooth ombre is blending, you’ll want to feather your edges gently as you work so shifts disappear instead of standing out. You’ll use light, crisscross strokes and a dry brush to soften gradual shifts, focusing on gradient blending and preserving color harmony. Keep a consistent pressure, step back often, and wipe excess paint. Practice on scrapboard first.
| Tool | Stroke | Tip |
|---|---|---|
| Dry brush | Light crosshatch | Blend softly |
| Foam brush | Short dabs | Avoid heavy paint |
| Rag | Circular rubs | Lift excess |
| Glaze | Thin layers | Build slowly |
Stay patient; subtlety wins.
Paint Order: Top‑Down or Bottom‑Up-What to Choose?
Which direction should you work—top‑down or bottom‑up—depends on your room, ladder access, and the ombre effect you want. You’ll choose top‑down for gravity‑friendly drips and when darker hues sit above lighter ones. Go bottom‑up if your baseboard color anchors the design or you want easier touchups.
Consider how Color psychology influences mood—darker tops feel cozy, lighter floors open space. Test your chosen paint brand on a poster board before committing.
Quick checklist:
- Ladder stability and reach
- Wall texture and primer needs
- Hue progression placement
- Traffic and furniture protection
How to Avoid Visible Lines Between Bands
How do you keep band shifts seamless? You’ll prime and plan gradual progressions: mix intermediate shades for color blending, label them, and apply in thin, overlapping strokes. Work while paint’s wet so bands merge naturally.
Use a clean, dry brush or soft nylon brush to feather edges, practicing edge smoothing with light, horizontal passes. Keep a consistent brush or roller pressure and stroke length across bands.
Step back often to spot any harsh lines, then rework immediately before paint skins over. Clean tools between mixes to avoid muddying hues, and maintain good lighting to judge subtle variations accurately.
Fix Common Blending Mistakes as You Go
When you notice a blending error, act quickly so the paint’s still workable. You can fix streaks, hard edges, and muddy gradations without redoing sections. Use a damp brush to soften lines, feather with light pressure, and blend in small circular motions. Keep tools clean to protect paint durability and consider how adjustments affect color psychology—subtle shifts change mood.
- Soften hard edges with a dry brush
- Lift excess paint with a clean rag
- Reintroduce fresh paint sparingly to balance tones
- Step back frequently to assess overall flow
Work methodically and don’t overblend.
Dry Time: How Long to Wait Between Coats and Blends?
Plan on standard acrylic wall paint needing about 1–2 hours to become touch-dry and 4–6 hours before it’s safe to overcoat. Though temperatures and humidity can change that.
For blends, wait until the base coat is slightly tacky but not wet—usually 30–60 minutes—to allow smooth feathering without lifting underlying paint.
If conditions are slow, extend intervals and test a small area so your shifts stay clean.
Drying Time Guidelines
Although drying times vary with paint type and conditions, you’ll usually wait 1–4 hours between coats and slightly less when blending wet-on-wet. You should monitor ambient temperature and humidity because they affect drying time and overall paint curing.
Aim for tack-free surfaces before recoating to avoid lifting.
- Check manufacturer’s label for specific recoat windows.
- Use a fan or dehumidifier to speed drying in slow conditions.
- Test a small swatch to confirm tack-free status before full recoats.
- Allow longer cure time for high-gloss or latex finishes before heavy use.
Follow these practical guidelines to keep your ombre smooth and durable.
Blend Wait Intervals
Because drying stage affects how colors meld, you’ll want to time your blends so paint is tacky but not wet or fully cured; that subtle shift keeps edges workable without lifting underlying layers.
Aim for 10–30 minutes between coats for latex in normal humidity, longer on porous or textured walls. Test a small area: if a slight drag lifts pigment, wait more.
Consider wall texture and ventilation; rough surfaces absorb faster. Cooler temps and high humidity slow cures.
Use color psychology to plan transitions—softer blends feel calming, bold shifts energize. Adjust intervals based on tests, not just clocks.
Working Around Corners, Edges, and Trim
When you reach corners, edges, and trim, slow down and switch to a smaller brush or an angled brush so you can control the gradient without splattering onto adjacent surfaces. You’ll adjust Color mixing at junctions to keep tones consistent, and rely on precise Brush techniques to feather gradations.
Tape trim if you need sharp lines, but feather paint into taped edges for a seamless look. Work one small area at a time, blending while paint is wet.
- Use an angled sash brush for tight control
- Wipe excess paint frequently
- Match blended tones before moving around a corner
- Remove tape while paint’s tacky
Ombre on Textured Walls: What to Change
If your walls have texture, you’ll need to adjust your technique and tools so the gradient reads smoothly instead of getting lost in valleys and peaks. You’ll face textured wall challenges: use thicker glaze, stipple brushes, and work wet-to-wet. Blend with a dry brush and light feathering, letting glaze settle into highs while avoiding pooled paint in lows. Test ombre pattern variations on a sample board to confirm gradations. Protect trim and use consistent strokes. Keep layers thin and build depth gradually.
| Tool | Purpose |
|---|---|
| Stipple brush | Blend into texture |
| Glaze mix | Controlled transparency |
Create a Dramatic Two‑Tone Ombre Statement
To make a bold two‑tone ombre statement, pick two colors with strong contrast—think deep navy fading into smoky lavender or charcoal softening into pale blush—and position the darker shade where you want the most visual weight.
Make a bold two‑tone ombre: choose contrasting hues—deep navy to smoky lavender—placing darker tones where visual weight matters.
You’ll plan progressions, consider Color psychology to set mood, and test swatches.
Blend with a dry brush or roller as paint drying slows, feathering edges for a seamless gradient.
Follow steps:
- Tape crisp division lines, then remove for softness
- Work wet-to-wet for smoother blends
- Use graduated glaze layers for control
- Step back frequently to judge balance and intensity
Subtle White‑Fade Ombre for a Light, Airy Room
Although soft and understated, a white‑fade ombre can transform a room into an airy, light-filled haven by gently graduating from pure white to a barely‑there tint.
You’ll pick three near-white shades—pure white, a soft ivory, and a whisper of color—using color theory to facilitate smooth transitions and maintain warmth or coolness.
Tape horizontal guides, blend with a damp brush, and feather edges for invisible joins. Keep baseboards and trim crisp to preserve light.
Coordinate textiles and accessories for cohesive furniture coordination; choose light woods, pale linens, and metallic accents that echo the subtle gradient without overwhelming the space.
Vertical Ombre Options to Add Height
To make a room feel taller, you can run a vertical gradient from floor to ceiling and position the darkest tone near the base or the top depending on the effect you want.
Use smooth color blending techniques—like feathering and multiple intermediate shades—to keep the shift seamless.
Finish by integrating accent trim (moldings or painted edges) to sharpen the vertical lines and emphasize height.
Vertical Gradient Placement
When you orient an ombre vertically, you can make ceilings feel taller and rooms more spacious by guiding the eye upward with a gradual change from darker to lighter tones (or vice versa).
You’ll plan placement to emphasize height, using Color blending and Gradient symmetry to keep shifts balanced. Consider focal points and furniture alignment so the gradient complements rather than competes.
Decide whether the darkest tone anchors at the floor or ceiling depending on desired effect.
- Start darker at base to ground the room.
- Start darker at ceiling for dramatic lift.
- Centered gradient for subtle vertical pull.
- Split gradient around windows to frame views.
Color Transition Techniques
If you want to emphasize height with a vertical ombre, choose progression techniques that guide the eye smoothly upward without visible bands; soft feathering, carefully blended glazing, or narrow stepping work best depending on your paint type and skill.
Start by testing gradations on a scrap board to confirm color blending and Shade harmony.
For soft feathering, work wet-to-wet with a large brush, tapping edges to blur.
For glazing, apply thin translucent layers, building depth gradually.
Narrow stepping uses closely matched tones with micro-blends at seams.
Keep strokes vertical, maintain consistent pressure, and step back frequently to judge the overall flow.
Accent Trim Integration
Now that you’ve chosen a vertical ombre technique that reads smoothly, think about how accent trim can amplify that upward pull. Use accent trim to frame panels, guide the eye, and break wide walls into vertical ribbons. You’ll balance ombre flow with crisp edges, avoiding muddied blends.
- Paint trim slightly darker to emphasize vertical lines and add height.
- Use narrow white trim for contrast when employing subtle color blocking.
- Extend trim to ceiling for continuous upward movement.
- Match trim sheen to wall finish to keep focus on gradients, not glare.
Plan placement before blending to preserve clean transition and effect.
Horizontal Ombre for a Calming Panoramic Look
Although you might think ombre always runs vertically, horizontal ombre stretches color across the room to create a tranquil, panoramic effect that visually widens and grounds your space. You’ll choose a low-to-high saturation gradient, considering color psychology to soothe or energize, and select texture patterns that add subtle depth. Work in bands from baseboard to ceiling, blending with long, horizontal strokes and a soft brush or roller. Keep blends gentle for calmness. Measure heights, mark levels, and mix intermediate shades. Table shows band ideas and mood cues:
| Band | Mood |
|---|---|
| Dark base | Grounded |
| Mid-tone | Balanced |
| Light top | Airy |
Ombre Techniques Adapted for Furniture (Overview)
1 smart way to extend ombre from walls to furniture is to simplify the gradient into manageable zones—top, middle, and base—so you can paint drawers, tabletops, or chair legs with consistent shifts. You’ll adapt furniture techniques to scale, choosing brushes and foam for smooth blends and sanding between coats for adhesion. Plan transitions and test swatches on hidden surfaces.
- Map zones visually before you start
- Use thinned paint for feathered blending
- Work wet-to-wet across adjacent zones
- Protect hardware and undersides while painting
These ombre furniture methods keep proportion and flow aligned with your wall ombre.
Using Stencils and Tape to Protect Patterns
When you want crisp edges or need to preserve existing patterns while blending an ombre, stencils and painter’s tape are your best tools. You’ll position stencil patterns where you want the design preserved, securing them with low-tack tape or spray adhesive to prevent bleed.
Apply paint in thin layers, dabbing or using a roller away from stencil edges. Use tape techniques to mask borders or create sharp transition points: press tape firmly, remove in stages while paint’s tacky, and replace with new strips for overlapping fades.
Test on scrap, keep edges clean, and work from light to dark for predictable results.
Add Metallics or Glaze Layers to Your Ombre
To add shimmer or depth to your ombre, consider metallic paint options like pearl, bronze, or subtle silver for highlights.
Use thin glaze layers applied with a brush or lint-free cloth to control sheen and blend without hiding the gradient.
Work in small sections and wipe or feather immediately so the metallics settle evenly.
Metallic Paint Options
Adding metallics or glaze layers can instantly lift an ombre wall, giving it shimmer, depth, and a luxe finish without overpowering your gradient.
Choose metallic paint options that complement your base tones and use Metallic accents sparingly to avoid glare. Consider water-based metallics for ease, oil-based for durability, or pearlescent mixes for subtle glow.
Match sheens to create harmony with Textured finishes if you’ve added plaster or brushwork. Test samples first and layer lightly.
- Water-based metallics: easy cleanup, low odor
- Oil-based metallics: durable, richer look
- Pearlescent: soft glow
- Metal leaf: high impact, delicate application
Glaze Application Techniques
Although glazing can seem delicate, you’ll get the best results by working in thin, controlled layers that build shimmer and depth without hiding the gradient beneath.
Start with a translucent glaze mixed to a low opacity and test on a scrap. Work wet into wet for seamless color blending across bands, or let layers dry for subtle striation.
Use a soft roller or brush, dragging lightly in the ombre direction. For metallics, apply sparingly and buff between coats.
Glaze layering lets you adjust sheen and tone incrementally—stop when the balance of shimmer and gradient feels natural to your eye.
Child‑Safe and Low‑VOC Paint Options for Nurseries
When you’re painting a nursery, choosing low‑VOC, child‑safe paints will cut down on odors and harmful emissions so the room’s safe as soon as possible. You’ll want eco friendly options and certified child safe paints that meet stringent VOC and chemical standards.
Pick washable, non‑toxic finishes and wait recommended cure times before occupying the room. Consider breathable primers and zero‑VOC topcoats to protect delicate lungs.
Key choices to compare:
- Zero‑VOC paints from reputable brands
- Green Seal or Greenguard certified formulas
- Water‑based, washable finishes
- Natural, plant‑based paint alternatives
Follow label instructions and ventilate during application.
How to Touch Up Your Ombre Wall Later
When you touch up your ombre wall, make sure you match the paint sheen to the original finish so the repaired area doesn’t stand out.
Use small brushes and lightly feather the edges of your touch-up to blend the new paint into the surrounding gradient.
Work in thin layers, checking each one after it dries to keep the progression smooth.
Match Paint Sheens
Because gloss and sheen affect how color reads, you’ll want to match the original finish before you touch up your ombre wall. Check the wall texture and note how light behaves; gloss will reflect more, altering color psychology and perceived depth.
When you prep, test small swatches to confirm sheen matches across lighting angles.
- Identify original sheen: flat, eggshell, satin, semi-gloss
- Buy touch-up paint mixed to that sheen
- Test under various lights and at different distances
- Use the same applicator type to replicate texture
Match sheen precisely to keep repairs invisible and consistent.
Feather Blend Edges
If you need to touch up your ombre wall later, feather blending is the quickest way to make repairs disappear. Start by softening the repair edges so they gradate smoothly into the surrounding finish.
Lightly sand the patched spot, remove dust, and thin matching paint slightly so it feathers. Use a dry, soft brush and small horizontal strokes that overlap the existing gradient; work outward to avoid hard lines.
Respect color psychology by matching tones so mood and flow stay consistent. Finish with a light clear coat if needed to boost paint durability and guarantee the repaired area wears like the rest.
When to Call a Pro: Scale and Complexity Limits
Although you can handle small ombre walls yourself, call a pro once the project grows in scale or technical complexity beyond your tools and experience. You’ll want expert help if color psychology choices affect multiple rooms, or if uneven wall texture demands specialty primers and techniques you haven’t used.
- Large open-plan areas with continuous gradients
- Historic walls needing preservation or repair
- High ceilings, scaffolding, or inaccessible surfaces
- Complex color transitions across architectural features
A pro will manage logistics, match pigments consistently, and guarantee safety with lifts or scaffolding. Hire one when time, risk, or finish quality exceeds what you can confidently deliver.
Styling Tips That Complement an Ombre Wall
When you’re styling a room with an ombre wall, let the gradient guide your palette and textures so the space feels cohesive rather than competing for attention. Use color psychology to choose accents that reinforce the mood the gradient creates—cool tones for calm, warm hues for energy.
Balance bold ombre sections with neutral furniture coordination: pick sofas, rugs, and curtains in complementary neutrals or muted versions of the gradient colors. Add texture—throw pillows, woven baskets, and metallics—to create depth without clutter.
Keep patterns minimal and repeat one or two colors from the gradient to unify the room.
How Lighting Affects Perceived Gradient and Color
Pay attention to how natural light direction will shift your ombre’s gradient throughout the day, making one side appear softer or more saturated.
Choose artificial light temperature carefully—warm bulbs will deepen warm tones while cool bulbs can mute them.
Use shadows and highlights strategically to enhance the progression and keep the gradient looking intentional from every angle.
Natural Light Direction
How does natural light change the way your ombre reads on the wall? You’ll notice Natural light shifts hue intensity across the gradient and emphasizes texture through shadow play, so position your strongest shift where daylight flatters it.
- Face the gradient toward windows for gradual, luminous blending.
- Place darker tones where incoming light fades to keep balance.
- Use angled sunlight to reveal brushstrokes and subtle changes.
- Test at different times to capture morning and afternoon contrasts.
Plan your layout around daily light patterns, adjust blend points accordingly, and step back often to judge perceived depth and color.
Artificial Light Temperature
Natural light sets the baseline, but artificial light temperature can totally change how your ombre reads after sunset. You’ll test bulbs before finalizing hues, because artificial light shifts color perception and intensity. Cooler bulbs push blues forward; warmer bulbs deepen ambers. Position lamps to evenly wash the gradient so gradual changes stay smooth under different temperatures. Replace bulbs and re-evaluate at night to avoid surprises.
| Bulb Type | Effect on Hue | Recommended Use |
|---|---|---|
| Warm (2700K) | Deepens warm tones | Cozy rooms |
| Neutral (3500K) | True-to-paint | Multipurpose |
| Cool (5000K+) | Enhances cool tones | Modern spaces |
Shadow And Highlighting
Why does a gradient look different in one corner than another? You’ll notice light changes perceived color and contrast: direct light flattens changeover, while angled light increases Shadow depth and reveals texture. Use Highlight accents to guide the eye and balance tones. Consider placement and fixtures; test finishes at different times.
- Position lamps to soften harsh edges and reduce banding.
- Use directional lighting to enhance subtle shifts without overpowering.
- Introduce dimmers to control contrast and mood.
- Inspect the wall from common viewpoints to adjust blends and accents.
Adjust application where light exaggerates or mutes the ombre.
Photograph Your Ombre Wall for Social Media
Once your ombre wall is fully dry and the light’s right, grab your camera or phone and think about composition—pick one or two focal points (a plant, a chair, a framed print) to anchor the shot and show scale.
Use natural light and shoot from multiple angles to capture the gradient’s smoothness. Mind color psychology when choosing props: warm tones feel cozy, cool tones feel calm.
Coordinate furniture and decor with hues to create harmony and highlight the gradual change. Keep the frame uncluttered, use shallow depth of field for softness, and edit minimally to preserve true colors before posting to social media.
Common Mistakes to Avoid When Painting Ombre Walls
Although ombre looks effortless, it’s easy to trip up if you rush—common mistakes like uneven blending, incorrect paint sheens, and skipping test swatches can ruin the smooth gradient you’re after. You should plan color psychology to set mood, test swatches under real light, and consider furniture coordination so tones complement decor.
Although ombre seems effortless, rushing causes uneven blends, sheen mistakes, and poor swatch testing — plan colors and coordinate decor.
Prep wall seams and use consistent tools. Don’t overwork wet edges.
- Skipping priming or using inconsistent primers
- Choosing clashing undertones without swatches
- Ignoring sheen differences between bands
- Rushing without adequate drying time
Follow these steps to keep your ombre polished and intentional.
Quick Troubleshooting Guide for Uneven Blends
If your ombre has visible lines or patchy shifts, don’t worry—you can usually fix it without repainting the whole wall. First, feather edges with a dry brush or a clean, slightly damp sponge to blur harsh gradations.
Work in small sections, blending with horizontal strokes while stepping back to check progression. Match pressure and stroke direction to avoid new texture patterns.
If color jumps persist, thin a small amount of the adjacent shade and glaze over the join. Use lighting to assess how color psychology alters perception; cooler light softens contrasts, warmer light emphasizes them.
Let layers dry before reassessing.
Maintenance: Cleaning and Preserving the Finish
When you want your ombre wall to keep looking fresh, clean it gently and protect the finish with a clear topcoat or periodic touch-ups. Wipe dust with a microfiber cloth, spot-clean stains with mild soap, and avoid harsh scrubbing that removes pigment.
Remember that Historical influences and Cultural variations shaped color choices and varnish preferences, so respect original intent when restoring.
Respect historical and cultural influences on color and varnish—honor original intent when restoring finishes.
Check edges and blending points regularly to catch wear early.
- Dust weekly with a soft cloth.
- Use pH-neutral cleaner for spots.
- Reapply clear satin topcoat every few years.
- Touch up fades with matched paint.
Further Resources and Tutorials to Expand Your Ombre Skills
To build your ombre skills faster, seek out a mix of concise tutorials, hands-on workshops, and reference guides that focus on blending techniques, tools, and surface prep. You’ll learn color psychology to choose harmonious gradients and test paint durability for long-lasting results. Practice with sample boards, study video breakdowns of brush and roller motion, and join local classes or online forums for critique.
| Resource type | Benefit |
|---|---|
| Video tutorial | Visual blending steps |
| Workshop | Hands-on feedback |
| Guidebook | Prep and durability tips |
Frequently Asked Questions
Can Ombre Be Applied to Exterior Walls and Withstand Weathering?
Yes — you can apply ombre to exterior walls and expect exterior durability if you use weather resistant finishes, proper primers, UV-stable paints, and protective sealers; you’ll maintain color fade resistance and long-term performance with regular maintenance.
Can Wallpaper Be Used Instead of Paint for an Ombre Effect?
Yes — you can: imagine dawn blending across a wall; you’ll use wallpaper application as an alternative wall coverings method, matching gradients or printing custom murals, and you’ll achieve durable, repeatable ombre effects with careful alignment.
How Do I Calculate Paint Quantity for Multiple Walls or an Entire Room?
Measure each wall’s height and width, calculate total square footage, subtract openings, then divide by paint coverage per gallon. You’ll plan paint mixing, allow extra for touch-ups, and account for color matching between batches.
Can I Create an Ombre Ceiling Without Making the Room Look Smaller?
Yes — you can create an ombre ceiling without shrinking the space. Use lighter tones near corners and darker hues overhead, keep shifts smooth, maintain ample lighting, and coordinate with wall colors to preserve a positive room size illusion.
Are There Eco-Friendly Disposal Methods for Leftover Tinted Paint?
Yes — you can: picture pouring rainwater guiding leaves to a drain; take leftover tinted paint to municipal hazardous waste days, use eco friendly disposal centers, donate usable cans, or find tinted paint recycling programs that reclaim pigments and cans.
Conclusion
You’ve just given your walls a gentle transformation—think of it as a soft wake-up call for the room rather than a dramatic overhaul. With the right color play and blending, your space will subtly breathe new life, stretching or cozying where you want. Keep touch-ups handy, avoid heavy-handed strokes, and let the gradient do the talking. In time, your ombre will feel like it was always meant to be there—quietly splendid and effortlessly at ease.