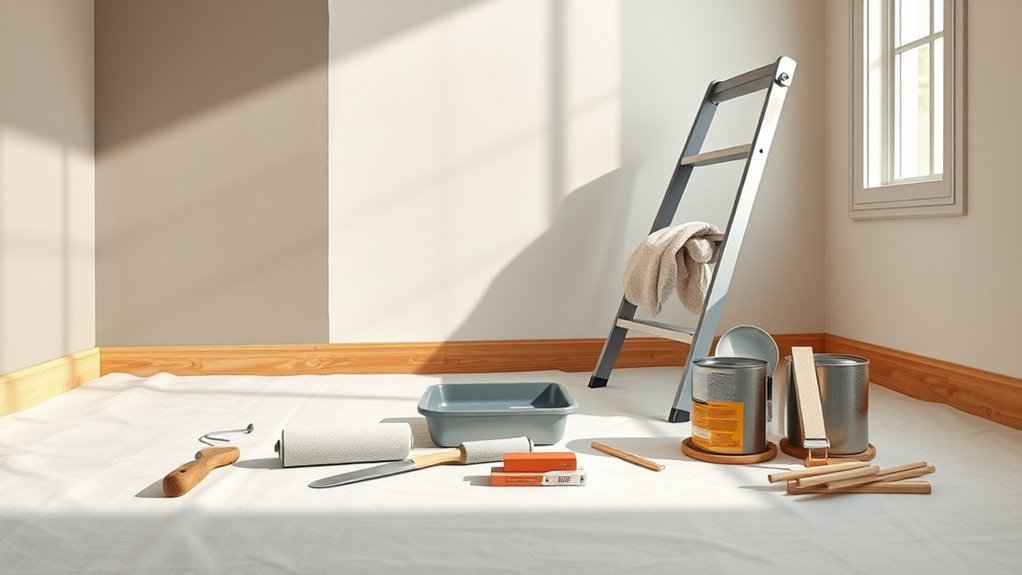
How to Paint Walls Properly Like a Professional
To paint walls like a pro, clear and cover the room, clean and repair holes or cracks, then sand and prime patched areas so paint sticks evenly. Cut in edges with a brush, roll large surfaces maintaining a wet edge, and apply additional coats until coverage is uniform. Remove tape carefully, clean tools, ventilate to speed drying, and return furniture only when paint is fully cured. Keep going and you’ll pick up pro tips for finish, troubleshooting, and upkeep.
Quick Overview of the Painting Workflow
When you’re ready to paint, follow a clear sequence: prep the room, fix surface flaws, prime where needed, cut in edges, roll large areas, and finish with touch-ups and cleanup.
You’ll choose paint considering color psychology to set mood and scale, and you’ll weigh eco friendly options like low-VOC formulas.
Gather tools, cover floors, and repair holes quickly. Prime glossy or stained spots, then cut precise lines before rolling.
Work in consistent passes to avoid lap marks. Let coats dry fully, inspect under good light, and do targeted touch-ups.
Clean tools and ventilate for safe curing.
What You’ll Achieve by Following This Guide
Follow this guide and you’ll get a smoother, more professional-looking finish that hides imperfections.
You’ll also save time and money by avoiding common mistakes and rework.
Plus, your walls will stay protected longer, cutting down on future touch-ups.
Improved Finish Quality
Although it takes attention to prep and technique, you’ll get a smoother, more even paint surface that hides imperfections and resists streaks and brush marks. You’ll notice crisper edges, uniform sheen, and consistent color because you learned proper color mixing and matched batches carefully.
Good sanding, priming, and correct roller nap reduce texture mismatch so finishes read as intentional, not accidental. Proper paint storage preserves sheen and prevents skinning, so touch-ups blend seamlessly.
You’ll also cut fewer corners with glazes and detail work, producing professional-looking trim and flat areas that stand up to close inspection and everyday use.
Time And Cost Savings
Those better finishes also save you time and money in the long run. You’ll spend less on touch-ups, buy fewer gallons, and avoid costly mistakes by following pro prep, correct tools, and efficient techniques.
Choosing colors with color psychology in mind reduces later repainting, while eco-friendly paints cut cleanup time and health risks. You’ll finish faster, waste less, and get results you’re proud to keep.
- Faster completion with proper tools and sequencing
- Fewer repaint sessions thanks to smart color choices
- Lower material costs through accurate estimating
- Healthier, quicker cleanup using eco-friendly paints
Long-Lasting Wall Protection
When you prepare surfaces correctly and use the right primers, paints, and application techniques, your walls will resist stains, scuffs, and moisture for years. You’ll get reliable wall protection by repairing cracks, sanding smooth, and applying compatible primer before topcoat.
Use high-quality paints formulated for your room—kitchen and bathroom finishes boost paint durability against humidity and cleaning. Apply even coats with proper drying time, and seal edges where water or dirt intrudes.
Regular maintenance—gentle cleaning and timely touch-ups—extends results. Follow these steps, and you’ll preserve aesthetics, reduce repainting frequency, and protect your investment effectively.
Why Proper Wall Painting Matters
Because a well-painted wall does more than look fresh, you’ll notice its impact on your room’s mood, durability, and even your property’s value. You’ll use color psychology to set tone, and consider paint texture for tactile depth. Proper technique prevents peeling, stains, and uneven wear, saving time and money.
A well-painted wall changes mood, protects surfaces, and boosts value—smart color, texture, and technique save time and money
You’ll also create a healthy environment by sealing dust and mold-prone surfaces.
- Improve atmosphere and perceived space
- Extend surface lifespan and reduce repairs
- Protect against moisture and stains
- Boost resale appeal with clean, consistent finishes
Paint right, and your space will feel cared for and last longer.
How to Choose Paint Finish for Walls
Pick a sheen that matches both the look you want and the room’s use. Matte or eggshell hides flaws and suits low-traffic areas.
While satin or semi-gloss stands up better to scrubbing in kitchens and bathrooms. Consider durability and maintenance so your finish performs where you need it.
Sheen Levels Explained
Although finish level might seem like a small detail, it changes how paint looks, how it cleans, and how durable it is—so you should choose carefully.
Sheen levels determine reflectivity and hide; lower sheens mask imperfections, higher sheens boost paint gloss and durability. Pick based on surface prep and desired effect, not trends. Consider maintenance and touch-up ease.
- Flat: hides flaws, low washability
- Eggshell: subtle sheen, more washable
- Satin: balanced gloss, durable for traffic
- Semi-gloss: high sheen, easy to clean
Match sheen to surface condition and upkeep needs.
Room Function Considerations
Where will the room see the most wear and what kind of upkeep do you want to do? Consider function first: high-traffic spaces like hallways and kids’ rooms need durable, washable finishes.
Bedrooms and dining rooms can use softer sheens. Think about color psychology—calming tones for bedrooms, energetic hues for play or gyms—and how sheen affects intensity.
Match finish to furniture placement: glossy or semi-gloss works near trim, doors, and areas that get bumped; matte hides imperfections behind sofas and beds.
You’ll balance maintenance, light, and mood to pick a finish that suits daily use and style.
Picking the Right Sheen for Each Room

When you choose a paint sheen, consider how each room is used and how much wear it’ll get. Your sheen selection affects appearance and paint durability; pick finishes that match traffic and cleaning needs.
Use glossier sheens where scuffs and moisture occur, flatter sheens where you want to hide imperfections. Balance look and function.
Choose glossier sheens for scuffs and moisture, flatter finishes to conceal imperfections—balance appearance with function.
- High traffic: satin or semi-gloss for easy cleaning
- Low traffic: matte or eggshell to hide flaws
- Moist areas: semi-gloss for moisture resistance
- Bedrooms/living rooms: eggshell for warmth and subtle sheen
Match sheen to use, not just aesthetics, for lasting results.
Water‑Based vs Oil‑Based Paint: Pros and Cons
If you want easy cleanup, faster drying, and lower fumes, go with water‑based (latex) paints. You’ll like their quick recoat times, milder odors, and reduced environmental impact versus traditional oils.
They resist yellowing and flex with surfaces, though they may show wear sooner in high‑traffic spots.
Oil‑based paints offer superior paint durability, smoother leveling, and tougher finishes for trim and cabinets. However, they dry slowly, smell strong, and need solvents for cleanup.
Choose latex for walls and living areas; pick oil for surfaces needing extra hardness.
Consider ventilation, maintenance, and solvent disposal when deciding.
How to Read Paint Labels and Coverage Estimates
Now that you’ve weighed latex versus oil, you’ll want to learn how to read paint labels so you buy the right product and amount. Read coverage (sq ft/gal), VOC levels, surface prep notes, and recommended coats. Match label details to your wall: material, porosity, and chosen Paint color.
Note Finish sheen—flat, eggshell, satin—affects appearance and durability. Use these checklist items to calculate required gallons and avoid returns:
- Coverage per coat (sq ft/gal)
- Number of coats recommended
- Dry time and recoat window
- Surface instructions and primer needs
Confirm math, buy a little extra for touch-ups.
Choosing Paint Colors That Suit Your Space
Think about how natural and artificial light change a color throughout the day so you pick tones that work in your room.
Coordinate your paint with existing furnishings and finishes to keep the space feeling cohesive.
Test small swatches on different walls before committing so you know how the shade actually looks.
Consider Room Lighting
How will the natural and artificial light in your room alter the way paint looks once it’s on the walls? You’ll want to evaluate room lighting at different times and fixtures before picking a shade.
Color temperature shifts perception: warm bulbs deepen warm tones, cool bulbs brighten blues and grays. Test samples on three walls and observe for several hours. Consider how shadows and highlights change intensity.
- Check samples in morning, afternoon, and night
- Note warm vs cool color temperature of your bulbs
- Assess direct sunlight versus diffused light
- Look for glare and shadow patterns
Choose what feels consistent to you.
Coordinate With Furnishings
Because your furniture, rugs, and decor set the room’s mood, pick paint that complements their dominant colors and finishes rather than competes with them.
You’ll assess scale and style—bold sofas need calmer walls; ornate wood calls for warm neutrals. Use furnishing coordination to link tones: pull a muted hue from a rug or a metal finish and amplify it on trims or an accent wall.
Consider contrast for depth, and keep high-traffic zones forgiving. Plan placement of wall accessories in advance so paint enhances art and shelving.
Ultimately, choose a palette that creates cohesion without overwhelming the space.
Test Small Swatches
Wondering how a color will actually look in your room? Test small swatches on different walls and observe them at various times of day. You’ll learn how light, furniture, and mood influence perception. Note color psychology—how tones calm or energize—and consider paint durability for high-traffic areas.
- Stick samples near trim and upholstery.
- View swatches in morning, noon, and artificial light.
- Paint a 12×12″ patch to assess finish and wear.
- Compare samples against fabrics and flooring.
This hands-on approach prevents costly mistakes and ensures your chosen hue complements the space functionally and emotionally.
How to Calculate How Much Paint You Need
Want to avoid buying too much or running out mid-project? Measure each wall’s width and height, subtract windows and doors, then total the square footage.
Check your paint can for coverage per gallon—usually 350–400 sq ft—and divide your total by that number.
Factor in coat count: two coats doubles your need; primer may be separate.
Account for texture or absorption by adding 10–20% extra.
If you plan color psychology choices or eco-friendly pigments, verify coverage differs for specialty formulas and adjust accordingly.
Round up to the nearest gallon to guarantee consistency and avoid mismatched batches.
Essential Painting Tools Every DIYer Needs
To get professional-looking results, you’ll want the right brushes — angled sash brushes for trim, flat brushes for broad strokes, and detail brushes for touch-ups.
Don’t forget roller essentials like the correct nap for your surface, a sturdy frame, and extra covers for smooth, even coats. With those tools on hand, you’ll work faster and make fewer mistakes.
Essential Brush Types
When you’re getting ready to paint, choosing the right brushes makes the job cleaner, faster, and more professional-looking. You’ll want a mix: angled sash for cutting in, flat for broad strokes, sash or filbert for trim, and a small detail brush for corners.
Use synthetic bristles for latex, natural for oil. Practice good brush maintenance: clean thoroughly after each use, reshape bristles, and store upright. Keep paint storage sealed and labeled to avoid waste.
Choose sizes that match surface area and detail, and replace worn brushes—good tools save time and improve finish quality.
- Angled sash: sharp edges
- Flat: coverage
- Detail: precision
- Trim: control
Must-Have Roller Accessories
If you’re aiming for smooth, even coverage without back-and-forth trips to the sink, a few key roller accessories make all the difference. Grab a quality roller frame and extension pole so you reach high walls without straining.
Use multiple roller covers—match nap to wall texture for consistent paint pickup and finish. Keep a roller tray and liner to switch colors fast and protect brushes.
A corner roller and edging pad speed clean lines around trim. Finish with a roller cleaner and spare covers to extend life and preserve your chosen paint color for touch-ups.
Painting Tools That Speed Pro Results (Sprayers, Edgers)
Though brushes and rollers work for many jobs, sprayers and edgers can cut your time and lift your finish to a pro level. Sprayers cover large areas fast and edgers tame corners and trim without messy tape. You’ll choose tools that match project scale, paint type, and surface.
Consider color psychology when testing swatches and pick eco friendly pigments if sustainability matters. Use sprayers for textured or big walls, edgers for clean junctions.
- Sprayer: speed, even coats
- Edger: crisp lines, less prep
- Tip: practice on scrap
- Maintenance: clean immediately
Selecting Brushes for Cutting‑In and Trim
Because clean, crisp edges depend as much on your brush choice as on your technique, pick brushes built for cutting‑in and trim work that match the paint and the surface. Choose angled sash brushes for precision and synthetic filaments for water‑based paints, natural bristle for oils.
For sharp, clean edges, use angled sash brushes and match filaments to paint — synthetic for water, natural for oil.
Prioritize brush ergonomics: a comfortable handle reduces shake and improves control during long strokes. Keep sizes handy—2 to 2.5 inches for windows and doors, smaller for tight spots.
Use paint container tips: load evenly, don’t overload, tap excess on the rim or a dedicated grid.
Clean and store brushes properly to preserve shape and performance.
Which Rollers and Nap for Common Wall Textures
For smooth walls, you’ll want a short nap roller to lay down an even coat without texture.
For light orange peel, pick a medium nap to get good coverage while still smoothing the finish.
For heavy textures, use a long nap so the roller can reach into crevices and cover irregular surfaces.
Smooth Walls : Short Nap
When you’re painting smooth walls, pick a short-nap roller (1/4″ to 3/16″) to get an even finish without trapping air or leaving texture. You’ll preserve smooth surfaces and avoid mimicking textured finishes; short nap works best with flat, eggshell, or satin sheens and with eco-friendly paints to minimize odor.
Load the roller evenly, maintain a wet edge, and use light pressure so the coat lays flat.
- Choose high-density microfiber for flawless coverage
- Use a quality frame to prevent wobble
- Replace roller after about two rooms
- Back-roll cut edges for consistency
Light Orange Peel : Medium Nap
If your walls have a light orange peel texture, pick a medium-nap roller (3/8″ to 1/2″) to fill the tiny crests and valleys without flattening the surface or leaving roller marks.
You’ll want a high-quality synthetic cover that holds paint and releases it evenly, reducing stipple and back-rolling. Load the roller evenly, work in 4×4 foot sections, and use a “W” pattern to blend edges.
Keep a light touch at the end of each pass to avoid ridges. For trims, switch to a brush.
The orange peel finish needs consistency; medium nap gives coverage without overfilling texture.
Heavy Texture : Long Nap
Because thick textures trap paint deep in crevices, you’ll want a long-nap roller (3/4″ to 1 1/4″) that reaches into peaks and valleys without skimming over them.
For heavy texture walls, choose sturdy covers that hold lots of paint so you won’t keep reloading. You’ll work steadily, pressing slightly to force paint into hollows and keeping a wet edge for uniform coverage.
Use extension poles for consistent pressure and reduce fatigue. Remember to back-roll for even distribution.
- Choose 3/4″–1 1/4″ long nap
- Pick durable synthetic or lambswool
- Load generously, don’t overload
- Back-roll for uniform finish
Choosing Primers and When to Use Them
Although primers seem optional, they dramatically improve paint adhesion and coverage, especially over bare drywall, patched areas, or drastic color changes. You shouldn’t buy into priming myths that say they’re always unnecessary; choose primer types based on substrate and goal.
Use stain-blocking or oil-based primers for tannin bleed, shellac for severe stains, and latex for general sealing and easy cleanup. For dramatic color shifts, use a high-hide primer to reduce coats.
Apply with roller or brush evenly, sand lightly if needed, and let dry fully before topcoat. Proper priming guarantees a professional, lasting finish.
Picking Caulk and Patching Compounds
You’ll want to pick a caulk that suits the job—paintable latex for trim and silicone for wet areas.
Match patch compounds to the surface (wood filler for trim, spackle or joint compound for drywall) so repairs blend smoothly.
Apply and sand carefully, then feather edges before priming and painting for a seamless finish.
Choosing The Right Caulk
How do you pick the right caulk for a paint job? You’ll choose based on surface, movement, and finish. Prioritize caulk durability for long-lasting seals and match caulk color to the paint or trim. Use acrylic-latex for paintable indoor joints, silicone for wet areas, and specialty products where flexibility’s critical. Prepare joints, apply smoothly, and tool for neat beads.
- Choose paintable acrylic-latex for interior trims.
- Use silicone for bathrooms and kitchens.
- Select hybrid or polyurethane where extreme movement occurs.
- Match sheen and caulk color to surrounding surfaces before painting.
Matching Patch Compounds
After you’ve picked the right caulk, you’ll want patch compounds that behave the same as the surrounding materials so repairs blend and hold up. You’ll choose lightweight spackling for small dings, setting compound for deep gouges, and flexible patching for trim gaps. Match drying time and sandability to avoid surprises. Consider texture: premixed options copy common textures, or you’ll use wall texture techniques to recreate patterns before paint. Test a small patch. Compare firmness, shrinkage, and adhesion so your repairs don’t telegraph beneath the finish.
| Use | Strength | Best for |
|---|---|---|
| Spackle | Light | Small holes |
| Setting compound | High | Deep repairs |
Application And Finishing
When you move from prep to finish, pick caulk and patch compounds that match the material, flexibility, and texture of the surrounding surface so repairs disappear under paint. You’ll select products that sand smooth, won’t shrink, and cure at compatible rates; consider paint storage stability and any color mixing needs if you tint patches.
Apply thin layers, feather edges, and sand between coats. Prime patched areas before topcoat.
- Match compound to substrate
- Use flexible caulk for gaps
- Sand, prime, and check texture
- Label and rotate stored paint
Follow these steps and your finish will blend seamlessly.
Safety Gear, Ventilation, and PPE Basics
Before you pick up a brush, take a moment to gear up: proper ventilation, gloves, eye protection, and a respirator (for solvent-based paints) keep you safe and let you work longer with fewer mistakes. You’ll wear protective clothing, check airflow, and prioritize respiratory safety. Keep windows open, use fans, and avoid spills. Fit goggles snugly, choose nitrile gloves, and replace respirator filters per manufacturer guidance. Take breaks outside to clear fumes.
| Item | Use | Frequency |
|---|---|---|
| Gloves | Barrier | Every job |
| Goggles | Eye safety | Each session |
| Respirator | Fumes | As needed |
| Fans | Ventilation | Continuous |
| Coveralls | Clothing | Per project |
Planning Your Project Timeline by Room Size
Because room size directly shapes how long a painting project takes, map out each space before you buy supplies or schedule time. Measure square footage, note trim complexity, and factor drying windows so you won’t rush. Smaller rooms often finish in a day; larger rooms need staged coats and ventilation breaks.
Consider color psychology when choosing finishes—bold colors may require extra coats. Also weigh environmental impact: low-VOC paints and responsible cleanup add time but reduce harm. Plan buffer days for touch-ups and curing.
Use this checklist to estimate realistic timelines:
- Measure and sketch each room
- Count doors, windows, and trim
- Choose paint type and coats
- Schedule drying and cleanup
Preparing the Room: Moving Furniture and Fixtures
Start by clearing out the room so you have open space to work and won’t risk knocking over furniture. Move smaller pieces to another room and cover larger items with drop cloths.
Turn off power and remove or cover light fixtures and switch plates before you paint.
Clear Out The Room
How will you clear the room without creating extra work later? You’ll use smart room organization and sensible furniture arrangement so moving’s efficient and cleanup’s minimal.
Start by grouping items and protecting valuables, then move large pieces first toward a single staging spot. Use the checklist below to guide actions and prevent backtracking:
- Label boxes by room and priority for fast unpacking.
- Place furniture on blankets or sliders to avoid scuffs.
- Keep a clear path to exits and the staging area.
- Stack lightweight items safely to prevent falls.
This approach saves time and keeps walls, floors, and your back intact.
Remove Light Fixtures
With furniture out of the way and valuables protected, you can focus on removing light fixtures to avoid paint splatters and make sanding or patching easier. Turn power off at the breaker, test switches, and remove bulbs and shades.
Unscrew the fixture, supporting it as you disconnect wires; cap wires with wire nuts and tuck them into the box. Label or photograph connections for reinstallation.
Cover electrical outlets and switch plates with painter’s tape or remove plates entirely. Store hardware and fixtures safely.
If wiring looks unsafe, stop and call an electrician—don’t guess.
Clean the area before priming and painting.
Protecting Floors, Trim, and Hardware Correctly
Want your freshly painted walls to look professional? You’ll protect floors, trim, and fixtures before you paint. Use quality floor protection and precise hardware masking to prevent paint transfer and save cleanup time. Follow these focused steps:
Protect floors, trim, and fixtures first—use quality coverings, precise tape, and quick touch-ups for professional results.
- Lay down a continuous drop cloth or rosin paper, taping seams for no gaps.
- Apply painter’s tape to trim edges, pressing firmly for crisp lines.
- Mask hardware with low-tack tape and small plastic bags without touching painted surfaces.
- Keep a damp cloth and small brush handy for immediate touch-ups and spot-cleaning.
Take these precautions to ensure neat, professional results every time.
Removing Outlet Covers, Fixtures, and Switch Plates
After you’ve protected floors and masked trim, remove outlet covers, switch plates, and light fixtures to prevent paint buildup and get clean edges. Turn off power at the breaker, test switches, then unscrew outlet covers and switch plates, labeling screws if needed.
For fixture removal, disconnect light fixtures after turning off power, supporting heavy pieces so wiring stays safe. Tape wires and tuck them back into boxes, then install blanking plates if you’ll paint long-term.
Keep small hardware in labeled bags. Removing these items saves you time, avoids drips, and guarantees crisp paint lines around outlets and fixtures.
Inspecting Walls: Spotting Stains, Mold, and Damage
How do you know if a wall needs more than a fresh coat of paint? Inspect closely for stains, mold, cracks, or texture issues that affect paint adhesion. You’ll want to mark problem areas and decide if repair or treatment is required before painting.
- Dark stains that bleed through new paint
- Fuzzy black or green spots signaling mold
- Cracks, holes, or flaking that disrupt wall texture
- Areas where previous paint peels, indicating poor paint adhesion
Address structural damage and moisture sources first. Treat mold safely or call a pro, then ensure surfaces are sound for reliable, lasting results.
Cleaning Walls Effectively Before Painting
Before you pick up a brush, clean the walls so paint can adhere and look even; a quick wipe won’t suffice if dirt, grease, or mildew remain. Start by dusting and vacuuming ceilings and corners.
Degrease kitchen and high-traffic areas with a trisodium phosphate substitute; test first.
Treat mildew with a diluted bleach solution, rinse thoroughly, and dry.
For stubborn marks, use a gentle scrub or specialty wall stain removal products.
Remove loose peeling paint and scuff lightly with fine sandpaper.
Final wipe with a damp cloth guarantees a neutral surface ready for primer and proper paint mixing techniques.
Repairing Holes, Cracks, and Damaged Drywall
Once the walls are clean and dry, address holes, cracks, and other drywall damage so your paint will lay smooth and last.
For small dents use spackling; for larger holes, cut a backing and apply a patch. Follow manufacturer instructions for drywall repair and let compounds fully dry before proceeding.
Use these steps to plan repairs:
- Inspect damage and clear loose debris.
- Choose spackle or joint compound based on hole size.
- Apply patch or backing, then compound in thin layers.
- Feather edges so blends are minimal for painting.
Wall patching done right prevents future problems and creates a professional base.
Sanding Tips for a Smooth Finish
Before you paint, pick the right sanding grit—start with a coarser grit for bumps and move to a finer grit for a silky finish.
Use even, light pressure and sand with the grain or in circular motions on drywall to avoid gouges.
Keep the surface clean of dust before priming so your paint lays down smoothly.
Choosing The Right Grit
Curious which sandpaper grit will give you a flawless wall? You’ll make better Grit selection by matching abrasive types to the job. Coarser grits remove old finish; finer grits refine surface before priming. Pick grit based on imperfections: deep gouges need 60–80, general smoothing 100–120, feathering edges 150–180, final finish 220–320.
Consider these points:
- Match abrasive types (silicon carbide for drywall, aluminum oxide for wood) to material.
- Use lower numbers to shape, higher numbers to polish.
- Avoid skipping steps; progressive grit prevents scratches.
- Test on a small area to confirm feel and finish.
Proper Sanding Technique
Because proper sanding sets the foundation for a flawless paint job, start by working systematically—move the sandpaper with the grain (on wood) or in broad, even strokes (on drywall) and keep the abrasive flat to avoid gouges.
Use progressively finer grits to blend edges and smooth primer or patching compound.
Wear a respirator and eye protection to mitigate sanding hazards, and use a vacuum-equipped sander where possible.
Between passes, wipe surfaces with a tack cloth and vacuum joints for thorough dust removal.
Check in raking light to spot imperfections, then finish with a final light sand before priming.
When to Prime and How to Apply Primer
If your walls show stains, severe color contrast, or new drywall, you’ll want to prime them first to guarantee even adhesion and true color payoff. You’ll pick a primer based on surface and stain severity, apply with a roller for broad coverage and a brush for edges, and follow recommended primer drying times to avoid trapping moisture.
Use proper priming techniques: feather edges, maintain a wet edge, and avoid overworking. Let the primer fully cure before painting.
Benefits include sealed porous surfaces, blocked stains, and improved topcoat performance.
- Seal porous drywall
- Block stains effectively
- Promote topcoat adhesion
- Assure uniform color
Taping Trim for Crisp Paint Lines
When you’re aiming for sharp, professional-looking edges, taping trim before you paint is a small step that makes a big difference.
Start with clean, dry trim and choose high-quality masking tape that won’t lift existing finish. Press tape firmly along the trim edge, sealing gaps to prevent bleed.
Start with clean, dry trim and press high-quality tape firmly to seal edges and prevent paint bleed.
Remove nearby hardware or cover it. Paint up to the tape, watching how paint sheen may reveal uneven application; adjust pressure or finish if necessary.
Pull tape back on itself at a 45° angle while paint is still tacky or just dry to avoid tearing. Inspect and touch up any minor flaws.
Cutting‑In: Professional Brush Technique
Now that your trim’s taped and prepped, cutting‑in is the step that defines the room’s finished look. You’ll steady your brush grip, load a modest paint palette on the tray edge, and work with controlled strokes. Hold the brush like a pencil, angle bristles toward the tape, and pull paint into the corner with confident, continuous motions.
Blend each section before it skins over so edges stay seamless.
- Start from ceiling line, move outward
- Use light pressure for thin, even film
- Feather edges toward unpainted wall
- Reload sparingly to avoid drips and blobs
How to Load a Roller and Keep Paint Even
Once your cutting‑in’s dry, load the roller so it holds enough paint to cover without dripping: dip the nap lightly, roll back and forth in the tray well, then settle the roller on the tray’s ridged area to distribute paint evenly.
Keep a consistent film by reloading before the roller runs bare; a thin, even coat preserves your paint color and prevents texture inconsistencies.
Check the nap for clumps and remove excess at the tray edge.
Work a short section at a time, maintaining the same pressure and angle.
Clean or change rollers when switching paint texture or color to avoid contamination.
Rolling Patterns That Avoid Lap Marks
Start by rolling a loose “W” on the wall to spread paint evenly without pushing it into streaks.
Then fill in the gaps with overlapping passes so the surface looks uniform.
Keep a wet edge as you work so each section blends smoothly into the next.
Start With a “W” Pattern
Although it might look simple, painting in a “W” pattern prevents lap marks by spreading paint evenly and keeping a wet edge as you roll. You start near a corner, make a loose “W,” then fill it without retracing, adjusting pressure for wall texture.
Keep a consistent paint storage routine so roller loads stay uniform. Work methodically across sections so strokes blend.
- Load roller evenly to avoid drips
- Vary pressure gently for bumps and grooves
- Overlap each “W” slightly for smooth progressions
- Pause to reload before edges dry
This technique saves touch-ups and produces a professional finish.
Maintain a Wet Edge
Because paint dries fast at the edges, keep a wet edge by working in overlapping sections and finishing each area before the previous one skins over. Roll from a loaded roller into the next wet strip, blending strokes to hide lap marks.
Stay mindful of lighting and Color psychology so hue shifts don’t trick you into reworking still-wet areas. Pace yourself—work one wall at a time, keeping a wet border along adjacent surfaces.
If you pause, cap brushes and seal cans for proper paint storage to prevent skinning. Clean tools between sessions and maintain consistent pressure and direction for an even, professional finish.
Maintaining a Wet Edge for Seamless Coverage
When you keep a “wet edge” while painting, you work fast enough that each new stroke overlaps the last before the paint skins over, preventing lap marks and ensuring an even finish. You’ll plan small sections, maintain consistent roller pressure, and blend edges immediately.
Work with slow-drying formulas if heat or airflow speeds drying. Consider color psychology when choosing tones that benefit from flawless blending, and pick eco-friendly options that still level well.
Tips to maintain a wet edge:
- Paint in manageable 4×4 foot zones
- Keep a loaded roller ready
- Match stroke direction
- Control temperature and ventilation
How Many Coats You Really Need
Most walls need one to two coats of paint, but the exact number depends on factors like the color change, paint quality, surface condition, and sheen.
You’ll usually apply a single coat over a similar hue, but bold or dark-to-light shifts often require two or more.
High-quality paint spreads better, hiding minor flaws and improving paint texture so you need fewer passes.
Rough or patched surfaces may demand extra coats for uniform coverage and color matching.
Use a primer when switching extremes or covering stains; it reduces coats and guarantees true color.
Assess visually and stop when finish looks even.
Drying Times, Recoat Windows, and Temperature Effects
Check the paint can for dry time guidelines so you know when the surface is tack-free and when you can safely recoat.
Remember that temperature and humidity change those times — warmer, drier conditions speed drying while cold or humid conditions slow it.
Plan your schedule around the manufacturer’s recoat window to avoid adhesion problems.
Dry Time Guidelines
Although paint feels dry to the touch after a short while, actual dry and recoat times vary widely by product and conditions, so plan your schedule around the manufacturer’s stated “dry to touch” and “recoat” windows.
You’ll factor in paint type, finish, and how your chosen paint color and color palette affect perceived drying—darker hues can feel tackier. Check can labels and test small areas before full recoating.
Use these quick rules:
- Wait full recoat window, even if surface feels dry.
- Thin coats dry faster than thick ones.
- Ventilate spaces for consistent curing.
- Allow extra time for oil-based paints.
Temperature And Humidity
You’ve planned your recoat windows and ventilation, but temperature and humidity will still dictate how quickly paint actually cures. You should aim for manufacturer-recommended temperatures—typically 50–85°F—because temperature effects can slow drying or cause tackiness. Cooler air lengthens cure time; hot, humid conditions can trap moisture and ruin the finish.
Control humidity with dehumidifiers or by painting during drier hours; aim for 40–50% relative humidity when possible. Check recoat windows before sanding or applying another coat: if the surface’s dry-to-touch time matches guidance and no tackiness remains, proceed.
Proper temperature and humidity control prevents adhesion and appearance problems.
Trimming Around Windows, Doors, and Ceilings Cleanly
When you’re painting, crisp edges around windows, doors, and ceilings make the whole room look finished; trimming carefully saves time on touch-ups later. You’ll tape or freehand with a steady brush, protect window framing, and watch for paint drips.
Cut in before rolling, work in short sections, and keep a damp rag handy.
Cut in ahead of the roller, paint in short sections, and keep a damp rag nearby for quick fixes.
- Use high-quality painter’s tape for straight lines.
- Hold a steady angle with a sash brush.
- Remove tape while paint’s tacky, not fully dry.
- Check corners and door jambs for consistent coverage.
Trim methodically and you’ll avoid messy touch-ups.
Painting Textured, Plaster, and Masonry Surfaces
If a wall’s surface is rough, porous, or uneven, plan for extra prep and the right tools so your paint adheres and the finish looks even.
For textured finishes, remove dust with a stiff brush, repair cracks with compatible filler, and sand lightly where needed.
Use high-build primer on masonry to seal pores and improve adhesion.
With plaster techniques, match repair texture before painting; feather edges so new paint blends.
Choose a roller with appropriate nap or a brush for deep grooves, and apply two coats of quality masonry or acrylic paint.
Let each coat dry fully for a uniform result.
Safely Painting High Ceilings and Tall Walls
When you’re tackling high ceilings and tall walls, set your ladder on a stable, level surface and secure it before climbing.
Use a quality roller extension to reach far without overreaching, and keep a pole-mounted brush for cutting in.
Together, safe ladder setup and an efficient extension save time and reduce risk.
Safe Ladder Setup
Need to reach a high ceiling or tall wall? You’ll set up a ladder for ladder safety and height stability before painting. Inspect the ladder, clear the area, and position it correctly. Secure footing and maintain three points of contact while working. Follow these steps:
- Choose a ladder rated for your weight and tool load.
- Place feet on firm, level ground; use anti-slip pads if needed.
- Angle ladder so base is one-quarter of working height away from the wall.
- Lock spreaders and top caps; tie off the ladder if chances of movement exist.
Work deliberately; don’t overreach or stand above the top two rungs.
Efficient Roller Extension
After you’ve got your ladder set and stable, reach higher without climbing by using a quality roller extension pole. It lets you paint ceilings and tall walls safely while keeping both feet on the ground or on a secure step.
Attach a sturdy paint roller head, tighten the locking mechanism, and test the connection.
Use a telescoping extension pole so you can adjust reach without changing tools.
Work in controlled strokes, keeping the roller loaded but not dripping.
Maintain wrist control and a relaxed grip to reduce fatigue.
For corners and edges, switch to a brush or shorter pole for precision.
Edges and Corners: Feathering and Blending Techniques
Because clean edges make a room look finished, you’ll want to master feathering and blending before you tackle corners and trim. You’ll use feathering techniques to soften roller or brush lines, keeping paint thin at edges so wet and dry areas meld.
For corner blending, work from the corner outward with light pressure, alternating brush strokes to avoid buildup. Practice maintaining a wet edge and matching texture.
- Load less paint near edges
- Lightly drag brush outward
- Overlap strokes while paint is wet
- Step back to inspect gradation
These habits give crisp, seamless corners without tape.
How to Fix Drips, Runs, and Sags Mid‑Job
When you spot a drip, run, or sag while the paint’s still wet, act quickly to smooth it before it skins over; otherwise you’ll end up sanding or repainting the whole area. Gently glide a loaded brush or a clean roller over the defect, working outward to redistribute paint and blend edges.
For small sags, lift excess with the brush tip and roll lightly to level. Keep a damp rag handy to catch stray drips.
Adjust technique for drip prevention: thin heavy coats, maintain a wet edge, and don’t overload tools. Regularly check progress to guarantee effective sag correction.
Spot Priming and Touch‑Up Strategies
Catching runs while the paint’s still wet helps you avoid sanding, but some spots will still need attention once surfaces dry. You’ll inspect for thin coverage, stains, or repaired areas, then decide whether primer application is required before finishing.
For seamless results, focus on color blending at edges and feathering strokes so touch-ups vanish.
- Spot-prime only damaged or porous patches.
- Use thin coats and match sheen to surrounding paint.
- Blend new paint into old with light overlapping strokes.
- Feather edges with a damp brush for invisibility.
Work patiently; small, correct steps beat heavy rework.
Removing Painter’s Tape Without Damaging Paint
If you want crisp lines and intact paint, remove the tape at a 45-degree angle while the paint is fully dry or just tacky, pulling slowly and steady so you don’t lift the finish. Start at a corner, score any built-up edge with a utility knife to separate paint from tape.
Peel back toward the painted area, keeping tension low. Heat stubborn tape lightly with a hairdryer to soften adhesive. Dispose of used Painter’s tape promptly.
Inspect edges and touch up tiny flaws with a fine brush. Maintain wall protection during removal by working methodically and avoiding drips or smudges.
Cleaning and Storing Brushes, Rollers, and Paint
Right after you finish painting, clean brushes immediately so dried paint doesn’t ruin the bristles.
Wrap rollers in plastic and store them upright to keep them fluffy and ready for the next coat.
Keep leftover paint sealed and labeled—decide whether to store it for touch-ups or dispose of it properly.
Clean Brushes Immediately
Why wait and let dried paint ruin your brushes? Clean them immediately after use to preserve bristles, maintain shape, and protect your investment. Good brush maintenance pairs with sensible paint storage to keep supplies ready.
- Rinse excess paint until water (or solvent) runs clear.
- Use a gentle brush comb or your fingers to remove trapped paint.
- Reshape bristles, blot on a clean rag, and let air-dry horizontally or hanging.
- Label containers, seal lids, and store paint off the floor in a cool spot.
Do this every time; it saves time, money, and guarantees better results next project.
Store Rollers Properly
When you finish rolling, don’t leave rollers to dry out—clean or wrap them immediately so they’ll stay soft and ready for the next coat.
Rinse synthetic or foam rollers until water runs clear, squeeze gently, and spin to remove excess.
For short breaks, wrap rollers in plastic wrap or a sealed bag and store upright to avoid flattening the nap.
For longer storage, dry completely, then keep in a breathable bag or original tube to retain shape.
Label and stack by size.
Maintain paint container organization: cap lids tightly, date cans, and group by color to streamline future touch-ups and projects.
Dispose Or Reuse Paint
Because you’ll want tools ready for the next job, clean brushes and rollers immediately after use and either store leftover paint properly or dispose of it responsibly.
Rinse water-based tools until clear; use solvent for oil-based, then ventilate.
Seal cans tightly, label color and date, and keep in a cool place to reuse paint later.
If you can’t reuse paint, follow local paint disposal rules or take it to a hazardous-waste facility.
Consider donating usable leftovers.
- Clean thoroughly to extend tool life
- Store sealed to prevent skin and odor
- Reuse paint for touch-ups
- Follow proper paint disposal guidelines
When to Call a Pro: Signs You Need Expert Help
If you’re facing extensive wall damage, persistent moisture issues, or complicated surface repairs, it’s time to call a pro; tackling these problems yourself can lead to wasted time, higher costs, or unsafe conditions. You’ll want experts with expert tools, structural know-how, and an understanding of color psychology for tricky rooms. Call help when repairs are beyond patching, when mold or leaks recur, or when textured/veneer finishes demand specialty skills.
| Sign | Problem | Result |
|---|---|---|
| Cracks | Structural shift | Unsafe |
| Mold | Moisture | Health risk |
| Veneer | Complex finish | Bad outcome |
| Large area | Time drain | Costly mistakes |
Budgeting Tips to Save Without Cutting Quality
While you want to save, you don’t have to skimp on quality—smart planning and a few trade-offs keep costs down without compromising results. You’ll prioritize prep, buy right, and stretch materials.
Use budget hacks like timing purchases during sales and buying sample sizes to test colors. Choose affordable supplies that still perform: mid-grade rollers, decent brushes, and reusable trays.
Plan labor—do prep yourself but hire pros for tricky work.
- Compare prices and read reviews before buying
- Reuse and clean tools to extend life
- Buy only what you need, avoid excess
- Bundle purchases for discounts
Low‑VOC and Eco‑Friendly Paint Options
When you choose low‑VOC and eco‑friendly paints, you cut indoor air pollution and reduce environmental impact without sacrificing finish or durability. You’ll pick water‑based formulas, use eco friendly primers for adhesion, and select VOC free finishes for living spaces. They dry fast, clean easily, and mask well when you prep surfaces. Compare brands for coverage and certification, test small patches, and ventilate while painting. Here’s a quick comparison to help you decide:
| Type | Pros | Use |
|---|---|---|
| Low‑VOC | Lower fumes | Living rooms |
| Zero‑VOC | Minimal odor | Bedrooms |
| Natural | Biobased | Kid areas |
Designer Finishes: Accent Walls, Stripes, and Textures
After picking low‑VOC or natural paints that suit your room, you can use designer finishes to add personality without harming indoor air quality. Choose a focal wall for accent techniques, test colors in different light, and plan stripes or stencils with precise layout lines.
For textured finishes, practice on scrap board to control depth and drying. Keep tools clean and use appropriate primers for adhesion.
- Pick one focal wall to avoid overwhelming the space.
- Use narrow painter’s tape for crisp stripes.
- Try faux plaster or glaze for subtle texture.
- Test samples before committing.
Common Painting Mistakes and How to Avoid Them
Because paint can both transform a room and magnify mistakes, you’ll want to avoid common pitfalls that waste time and money. You’ll prep surfaces, choose the right paint color, and test samples under real light. Don’t skip priming or clean edges with proper tape. Match roller nap to wall texture and use consistent strokes to avoid lap marks. Keep a wet edge and thin coats; sand between if needed. Clean tools and store leftover paint for touch-ups.
| Mistake | Cause | Fix |
|---|---|---|
| Drips | Too much paint | Load less |
| Uneven finish | Wrong nap | Change roller |
| Bleed | Bad tape | Seal edges |
Troubleshooting Peeling, Blistering, and Discoloration
If paint is peeling, blistering, or changing color, you can usually pinpoint the cause by checking for moisture, surface contamination, or poor adhesion and then address it systematically. Inspect and isolate the problem area, dry or fix leaks, and remove loose paint.
Sand glossy spots and clean grime to restore adhesion. For peeling prevention, prime properly and use compatible products. Understand blistering causes—trapped moisture, painting in heat, or painting over damp surfaces—and correct them before repainting.
- Identify moisture sources
- Remove contaminants thoroughly
- Match primer and paint types
- Allow proper drying time
How to Maintain Painted Walls for Long Life
Once you’ve fixed peeling, blisters, and contamination, regular care will keep your paint looking fresh and extend its life.
Clean gently using a soft cloth or sponge with mild detergent; test inconspicuously to verify cleaning won’t alter wall texture or finish.
Tackle stains promptly and spot-prime before touching up to blend sheen differences.
Control humidity and ventilation to prevent mold and lingering paint odor—run exhaust fans and air out rooms after painting.
Use felt pads on furniture, avoid abrasive cleaners, and repaint high-traffic areas sooner.
Keep records of paint type and color for consistent future maintenance and touch-ups.
Final Inspection Checklist for Pro Results
Before you call the job done, walk the space with a sharp eye and a checklist to catch any flaws that’ll be obvious to occupants or clients. Inspect coverage, touch up thin spots, and confirm edges are crisp. Review sheen consistency and consider color psychology impact in each room—mood matters. Test high-contact areas for paint durability and scuff resistance. Check for drips, texture issues, and clean lines at ceilings and floors.
Sign off only after a final wipe and odor check.
- Even finish and uniform sheen
- Straight, paint-free trim lines
- No visible drips or texture defects
- Durability in touch zones
Next Projects: Painting Trim, Doors, and Cabinets
When you’re ready to move beyond walls, tackle trim, doors, and cabinets with techniques that prioritize smooth edges, durable finishes, and proper surface prep.
Start by cleaning, sanding, and using appropriate primers for wood, MDF, or previously painted surfaces. Use painter’s tape sparingly to protect adjoining wall texture and remove it while paint’s tacky.
Choose finishes—semi-gloss for trim, satin for doors, durable enamel for cabinets—matching your color psychology goals to mood and light.
Work in thin, even coats with quality brushes or HVLP sprayers, sanding lightly between coats for professional smoothness and long-lasting results.
Frequently Asked Questions
Can Wallpaper Be Painted Over Safely Without Removal?
Yes, you can often paint over wallpaper safely, but you’ll risk issues. You should prioritize wallpaper removal when possible; otherwise do thorough surface preparation, repair seams, prime with a bonding primer, and use paint designed for adhesion.
How to Prep and Paint Behind Radiators or Baseboard Heaters?
You’ll remove lightweight heaters when possible, using radiator masking to protect fins and pipes; mask nearby trim, unscrew and pull radiator slightly forward, paint with angled brushes and small rollers, then reinstall and touch up around fittings.
What Paint Disposal and Leftover Storage Rules Apply Locally?
Check your local waste authority for paint safety and disposal regulations; you’ll often need to dry latex, never pour paint down drains, and store sealed cans labeled and in a cool, ventilated area until proper hazardous-waste drop-off.
How to Repaint Over Lead‑Based Paint in Older Homes?
You should hire certified contractors for lead paint removal and follow strict safety precautions: seal the room, use HEPA vacuums, wear respirators and disposable suits, wet-sand minimally, dispose waste per regulations, and test clearance before repainting.
Are Paint Additives (Extenders, Mildewcides) Worth Using?
An ounce of prevention is worth a pound of cure. You’ll find additive benefits boost paint durability and finish, but you’ll want quality base paint and follow instructions — they’re worth it when moisture or mildew are real risks.
Conclusion
You’ve learned the pro workflow, from prep to that final inspection, so you’ll leave walls smooth and durable. Follow finish and sheen choices, tackle peeling or discoloration promptly, and maintain paint like a proud keeper of a Victorian manor’s secrets. Keep tools clean and touch up as needed, and you’ll move confidently into trim, doors, and cabinets. Now roll up your sleeves, and give your room the respect it deserves—like restoring a classic portrait.