How to Prepare a Wallpapered Wall for Painting
Start by evaluating whether the wallpaper is firmly adhered or loose, noting seams, damage, and adhesive residue. Clean the surface, sand glossy areas, and spot-treat or strip loose paper and backing. Fill holes, skimcoat uneven spots, then apply a primer made for wallpapered surfaces or for sealing adhesive. Let repairs and primer fully dry before painting. Follow manufacturer instructions and consider a pro for large or stubborn jobs—keep going to learn specific tools, primers, and time-saving tips.
What This Guide Helps You Do With Wallpapered Walls
Before you lift a paintbrush, this guide shows you how to handle wallpapered walls so your paint job lasts and looks professional. You’ll learn to assess wallpaper patterns and wall textures to decide whether to remove paper, strip backing, or spot-treat.
You’ll identify seams, damaged areas, and adhesive residue that interfere with primer and paint adhesion. You’ll choose appropriate primers and fillers and know when to sand or skimcoat for uniformity.
You’ll get clear criteria for keeping wallpaper beneath paint versus full removal, helping you save time and avoid costly rework while achieving a smooth, durable painted finish.
Quick 6-Step Workflow to Prep a Wallpapered Wall for Paint
You’ll start by removing the wallpaper carefully to avoid damaging the drywall beneath.
Next you’ll repair any holes or gouges, sanding smooth so the surface is even.
Finally, you’ll prime the repaired areas (or the whole wall) to guarantee the paint adheres and the finish looks uniform.
Remove Wallpaper Carefully
Although it’s tempting to rush, removing wallpaper carefully is the single most important step to guarantee your new paint looks smooth and lasts. This quick 6-step workflow lets you strip paper efficiently while protecting the drywall underneath.
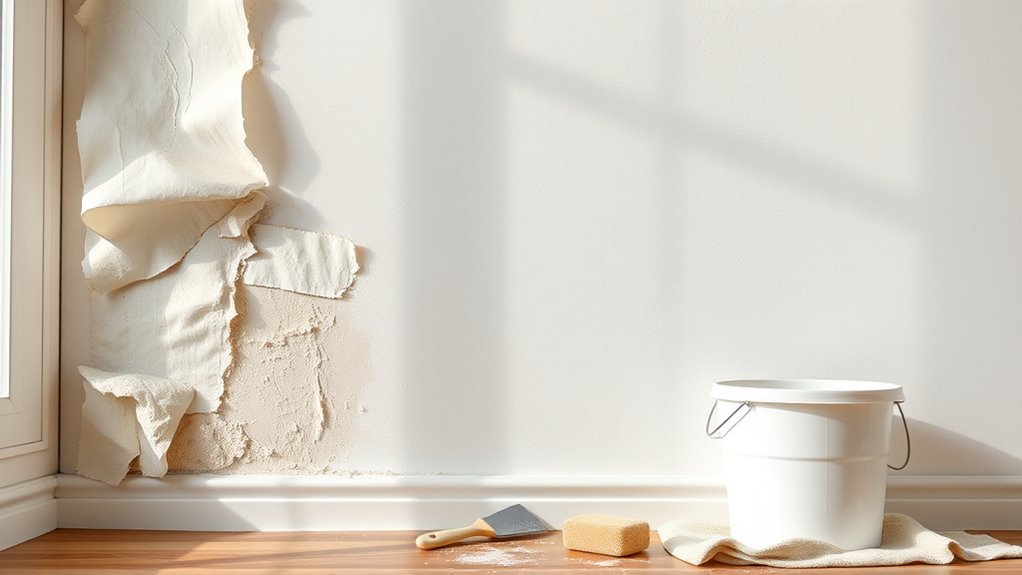
Start by scoring small sections, especially where decorative patterns hide seams. Use a steamer or solvent, work top to bottom, and peel gently to avoid gouging. Keep a bucket, sponge, and scraper handy for residue.
Dry the wall fully before moving on. Dispose of scraps responsibly and ventilate the room. Take breaks to assess progress so you don’t force removal and damage the surface.
Repair And Prime
Now that the paper’s gone and the wall’s dry, it’s time to repair and prime so your paint will adhere and look even. Inspect for gouges, seams, and leftover adhesive types—scrape and sand smooth.
Fill holes and dents with lightweight spackle, let it dry, then sand flush. Wipe with a damp cloth to remove dust and any residue from stubborn wallpaper patterns.
Apply a stain-blocking primer where tannins or adhesive stains remain. Use a high-build primer over repaired areas for uniform absorbency.
Once primer’s dry, lightly sand, wipe, and you’re ready to paint for consistent color and finish.
When to Paint Over Wallpaper vs Remove It
If the wallpaper’s intact, firmly stuck, and patterned in a way you like, painting over it can save time and money; but if it’s peeling, textured, or hiding damage, take it down first.
You’ll paint over smooth, unpasted seams that lie flat and have stable wallpaper patterns without extra texture. Don’t cover bubbling, loose edges, or ingrained stains—those need removal and adhesive removal so paint adheres.
Consider longevity: painted wallpaper can delaminate later. If removal risks wall damage or you lack time, prime first and test a small section.
Choose removal when seams, texture, or adhesive issues threaten finish quality.
Tools You Need to Prep a Wallpapered Wall
Before you start stripping or priming, gather the right tools so the job goes faster and cleaner. You’ll need items that handle different wallpaper patterns and adhesive types without damaging drywall.
Start with a scoring tool and a spray bottle to loosen paste, then a wide putty knife for removal and a scraper for stubborn bits.
A sanding block and medium-grit sandpaper smooth remaining adhesive; a vacuum or brush clears dust.
Finally, have primer-ready rollers and a brush for edges to guarantee paint bonds evenly.
- Scoring tool, spray bottle, putty knife
- Scraper, sanding block, vacuum
- Rollers, brushes, medium-grit sandpaper
Safety Gear and Room Protection
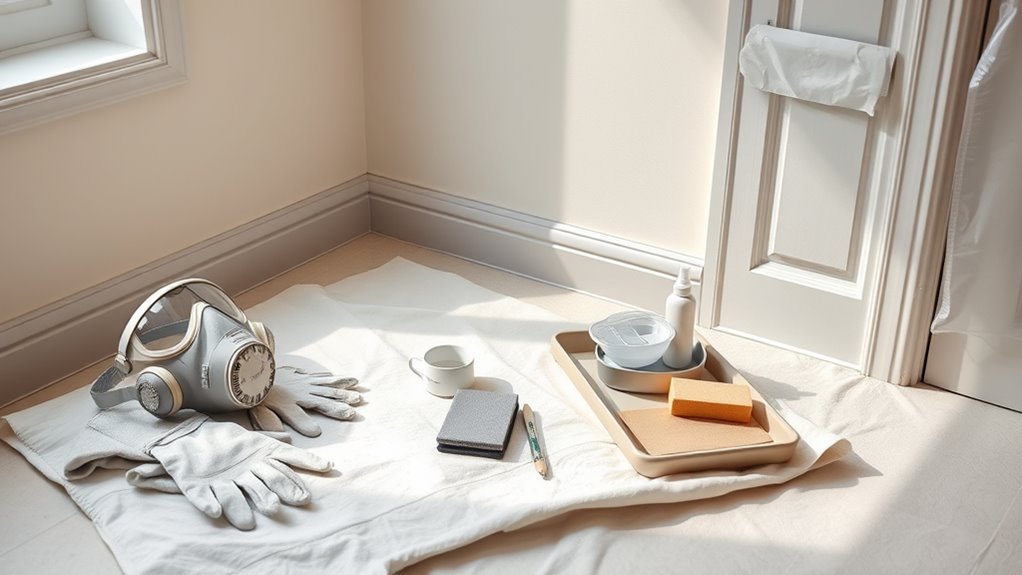
While you prep the room, protect yourself and the space with the right safety gear and coverings. Wear safety goggles, a respirator or mask rated for dust and fumes, and gloves to avoid skin irritation when stripping or sanding.
Lay drop cloths or plastic sheeting over floors and furniture, taping edges to prevent dust escape. Use painter’s tape to seal baseboards and outlets.
Open windows and run fans to guarantee room ventilation, directing dust and fumes outside.
Follow basic safety precautions: keep a clear path to exits, avoid working alone if ladders are involved, and store tools safely when not in use.
Quick Inspection: Check Wallpaper Condition Fast
Now that the room’s protected and you’re geared up, take a fast but systematic look at the wallpaper to decide your next move. Inspect seams, bubbles, and lifted edges, noting repeats in wallpaper patterns that might hide damage.
With protective gear on, quickly scan seams, bubbles, and pattern repeats to spot hidden damage before proceeding.
Smell for old adhesive types—solvent or starch—since odor hints at removal difficulty. Look for water stains, mold, or paint over wallpaper; mark problem spots. Take photos to compare later.
- Seams and bubbles: note locations.
- Stains and mold: prioritize remediation.
- Adhesive clues and pattern repeats: inform strategy.
Test Whether Wallpaper Peels Off
Start by picking a hidden corner and gently peeling a small section to see if the paper comes off cleanly.
If it tears or leaves backing, check the adhesive residue left on the wall.
That residue will tell you whether you can paint over it or need to strip and clean first.
Test A Small Area
How can you tell if the wallpaper will come off without a fight? Test a small area by scoring a hidden corner, peeling gently, and noting how wallpaper patterns lift. Use this quick check to predict effort and plan adhesive removal steps later.
- Score a seam lightly, peel a 2×2 inch section to see if the paper and backing separate.
- Try pulling near a baseboard; easy release means you can strip large panels.
- If it resists, dampen the spot briefly and retry to gauge soak time.
Record results before you commit to full-wall stripping or painting over.
Check Adhesive Residue
Wondering whether any sticky residue will stay behind? Test a corner by peeling a small strip; if the paper lifts cleanly, adhesive compatibility is good. If it tears or leaves tacky film, you’ve got residue to address.
Use a mild solvent or warm soapy water to test residue removal on an inconspicuous spot, then blot and rinse. Check results after drying — paint won’t adhere to remaining glue.
If residue persists, strip the wallpaper or use a deglosser formulated for adhesive removal. Recheck adhesion after cleaning before priming to guarantee a stable paint surface.
Identify Vinyl, Coated, and Paper-Backed Wallpaper
Before you strip or paint, learn to spot vinyl, coated, and paper-backed wallpaper so you can choose the right prep method. Each type looks and feels different, and treating them the same can ruin your paint job. You’ll inspect texture, sheen, and edges. Note wallpaper patterns and adhesive types to help ID layers without damaging drywall. Look for shiny or embossed surfaces, a plastic feel, or a cloth-like backing.
- Vinyl: smooth or embossed, water-resistant surface.
- Coated: paper with a sealed finish, peels unevenly.
- Paper-backed: fibrous, soaks and lifts cleanly.
How Adhesive Age Changes Removal and Cleaning Steps
Because old adhesive dries out and hardens, you’ll usually need more aggressive removal and longer cleaning than with fresh paste.
As adhesive aging progresses, it bonds more tightly to paper and drywall, so you’ll scrape, sand, or apply stronger solvents compared with gentle steaming.
Test a small area first to avoid damage.
Work methodically: loosen material, remove flakes, then focus on residue removal using appropriate cleaners and a stiff brush.
Expect repeat cycles of wetting and scraping.
Finish by rinsing and letting the wall dry fully before priming.
Proper technique prevents paint adhesion problems later.
Why Humidity and Room History Matter
You should assess current moisture levels before you strip or prep wallpaper, since damp walls can hide damage and invite mold.
Check the room’s history—past leaks, condensation problems, or poor ventilation modify how you clean and repair.
Addressing both moisture and history upfront prevents surprises and guarantees the paint will adhere properly.
Assess Moisture Levels
If the room holds lingering damp or has a history of leaks, you’ll need to address moisture before scraping or priming; high humidity and past water problems can undermine any paint job.
You’ll perform a quick moisture analysis with a meter or by taping plastic to the wall for 24–48 hours to spot trapped damp.
Monitor humidity control; keep levels below 50% while drying.
Fix active leaks and improve ventilation before proceeding.
Follow this checklist:
- Use a moisture meter for hotspot readings.
- Test vapor retention with taped plastic.
- Run dehumidifiers and ventilate until stable.
Check Wall History
When evaluating a wallpapered wall, look into the room’s past because prior humidity problems, leaks, or repeated damp cycles often leave hidden damage that can ruin new paint or primer. Knowing that history helps you pick the right prep and materials.
You should ask prior owners about past floods, roof or plumbing leaks, and persistent condensation. Inspect behind baseboards and inside closets for musty odors, staining, or loose wallpaper patterns that suggest trapped moisture.
Note adhesive types—water-based pastes behave differently than vinyl-ready glues—and test small areas for peeling. That history guides drying, mold treatment, and selection of primers and paints.
Remove Loose or Bubbling Wallpaper Edges
Before you start smoothing or priming, peel back any loose or bubbling wallpaper edges so they won’t trap moisture or cause blisters under new paint. You’ll expose old adhesive and potential damage, and you should inspect wallpaper patterns to plan removal or patching.
Use a putty knife to lift edges gently, trimming torn bits. Clean remaining adhesive with a mild remover or warm soapy water, then rinse and dry thoroughly.
If seams are sound, press them flat with seam roller after adhesive removal. Finally, note areas needing patching before priming to confirm a smooth painted finish.
- Lift edges gently
- Clean adhesive
- Dry and inspect
Score Wallpaper Safely
Now that you’ve lifted loose edges and cleared adhesive, scoring the wallpaper lets moisture penetrate adhesive evenly so the paper loosens without tearing underlying drywall. You should use a scoring tool with fine points, testing on a scrap to avoid damage. Score gently across seams and patterned areas, adapting pressure for different wallpaper patterns and adhesive types. Work methodically, keeping lines shallow and even. Clean dust as you go so solutions reach adhesive. Follow with your chosen removal method.
| Tool | Pressure | Area |
|---|---|---|
| Scoring tool | Light | Seams |
| Utility knife | Gentle | Edges |
| Scraper | Moderate | Residue |
Use a Wallpaper Steamer Safely and Effectively
If you choose to use a wallpaper steamer, handle it deliberately and respect the heat and moisture it produces. You’ll loosen adhesive without damaging drywall if you work slowly, keep a safe distance, and test an inconspicuous area first — especially with complex wallpaper patterns. Wear gloves and eye protection, ventilate the room, and avoid electrical outlets.
- Move methodically: hold steamer steady, wait for glue to soften.
- Scrape gently: use a broad scraper at a low angle to prevent gouging.
- Maintain equipment: follow steamer maintenance guidelines to guarantee safe, reliable performance.
Make and Use a Stripping Solution
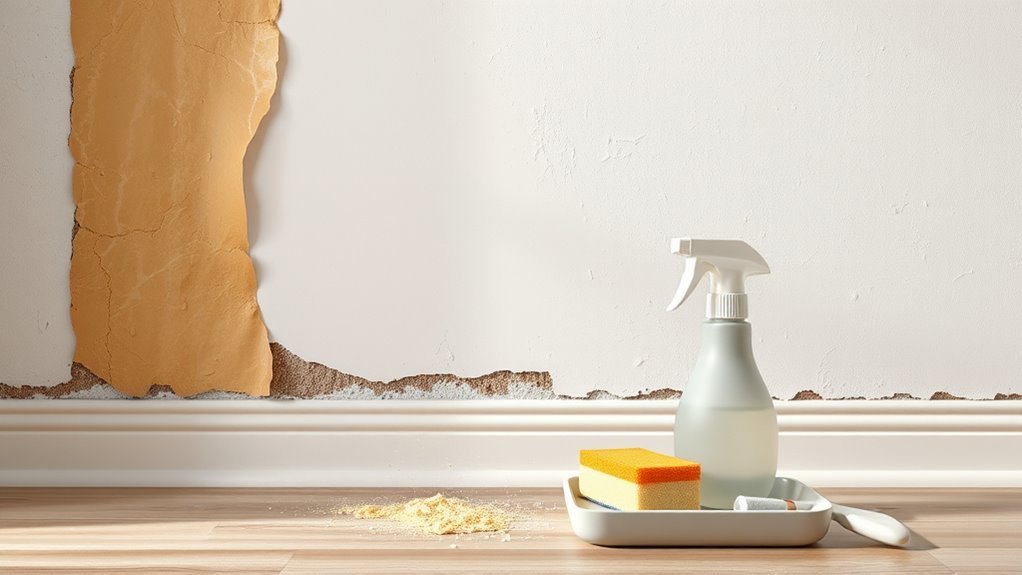
When steaming and scraping leaves stubborn adhesive behind, a stripping solution can help dissolve what’s left so you can get the wall smooth for priming and painting.
Mix warm water with a few drops of liquid dish soap and a cup of white vinegar per gallon, or use a commercial remover following label directions.
Test on a small section to guarantee it won’t affect underlying wallpaper patterns or drywall.
Apply with a sponge, let sit briefly to break down adhesive chemistry, then gently scrub and rinse.
Work in small areas, ventilate the room, and wear gloves and eye protection.
Remove Stubborn Paper Backing
Once the top layers are off, you’ll want to soften any adhesive residue with your stripping solution so it loosens easily.
Use a wide putty knife or scraper to remove the remaining backing without gouging the drywall.
Finish by cleaning the wall thoroughly and applying a primer so paint will adhere evenly.
Soften Adhesive Residue
Although the top layer of paper may peel away, the stubborn backing and glue often cling, and you’ll need to soften that residue before painting. You’ll focus on adhesive removal to avoid damaging walls during wallpaper peeling.
Heat and moisture relax glue bonds; apply a warm, damp sponge or a steamer in short passes. Let the surface sit until tackiness reduces, then blot — don’t rub — to lift softened paste.
Use a mild detergent or commercial gel for stubborn spots, following instructions. Rinse and dry fully before priming.
Remember: work in sections and ventilate the room.
- Warm water
- Steamer
- Gel cleaner
Scrape Remaining Backing
After softening the paste, you’ll still find stubborn fibrous backing clinging to the wall that needs scraping off before priming. Use a wide putty knife held flat to avoid gouging; work in small sections and scrape with the grain of any remaining wallpaper patterns to prevent tearing.
Switch to a scraper with a fresh blade for tougher spots, and dampen only the backing you’re about to tackle so the wall beneath won’t over-saturate. Remove loose fibers and vacuum debris as you go.
Aim for a uniformly smooth base for later texture matching and repair, avoiding aggressive scraping that damages drywall.
Clean And Prime
When you’ve removed the bulk of the backing, clean the wall thoroughly and prime right away to seal any remaining fibers and adhesive—this prevents bleed-through and gives paint something uniform to grab onto.
Use a sponge with mild detergent to remove residue from old wallpaper patterns, dry fully, then sand any raised areas.
Choose a high-adhesion, stain-blocking primer suited to your substrate. Apply evenly and inspect for missed spots before painting.
- Test for tacky residue with a white cloth.
- Sand and vacuum dust between coats.
- Use oil-based primer for stubborn adhesive.
Follow these removal techniques.
Clean Adhesive Residue From Walls
If glue or paste still clings to the wall, you’ll need to remove it before painting to guarantee a smooth, long-lasting finish.
Start by testing a small area with warm water and a sponge; some adhesive softens and wipes away. For stubborn residue, use a mild detergent or a mixture of vinegar and water, scrubbing gently to avoid damaging drywall or revealing wallpaper patterns underneath.
Test a small spot with warm water; gently scrub stubborn adhesive with mild detergent or vinegar solution.
Rinse thoroughly and let dry.
Use a putty knife on flat spots, working carefully to avoid gouges.
After adhesive removal, inspect the surface for tackiness and repeat cleaning where needed before priming.
Tackle Paste in Corners and Seams
Once the main adhesive is gone, pay special attention to corners and seams where paste often hides and causes bubbling under new paint. You’ll inspect seams near baseboards, crown molding, and patterned joins from wallpaper patterns.
Use a damp sponge and a flexible putty knife to lift softened paste; work gently to avoid gouging drywall. Match your approach to adhesive types—starch-based softens with water, while stronger adhesives may need repeated dampening.
After scraping, wipe residues, let dry, and check for remaining tackiness. Properly cleared seams ensure smooth priming and prevent pattern outlines from telegraphing through fresh paint.
- Inspect seams closely
- Soften then scrape delicately
- Wipe and dry thoroughly
Safely Neutralize Stubborn Glue
Because some adhesives resist water and scraping, you’ll need safe chemical or enzymatic neutralizers to break them down without harming drywall or surrounding trim. Test a small area behind baseboards or near a corner to confirm compatibility with wallpaper patterns and paint-ready surfaces.
Apply a manufacturer-recommended product, let it dwell per instructions, then loosen glue with a plastic scraper or soft brush. Wipe residues with clean damp cloths, changing water often to avoid re-depositing adhesive.
Ventilate the room, wear gloves and eye protection, and dispose of waste per label guidance. Repeat targeted treatments until adhesive removal is complete.
Repair Gouges and Paper Tears
Start by evaluating the extent of gouges and paper tears so you know what repairs are needed.
Carefully remove any loose or flapping paper to create a stable edge.
Fill the damaged areas with spackling, let it dry, then sand smooth for a paint-ready surface.
Assess Damage Extent
Before you grab tools or filler, take a careful look at the wall to determine how deep and widespread the gouges and paper tears are so you can choose the right repair method. You’ll note whether damage follows wallpaper patterns or is random, which affects patch placement and whether adhesive removal nearby is needed.
Measure lengths, count affected areas, and press gently to test adhesion. Decide if damage is superficial, needs patching, or requires replacing a strip.
- Map locations and sizes.
- Test paper adhesion around tears.
- Photograph for reference before repairs.
Remove Loose Paper
Once you’ve identified the damaged areas, peel back any loose or hanging wallpaper fibers and carefully trim jagged edges with a sharp utility knife so you have a clean margin to work from.
Work gently around wallpaper patterns to avoid enlarging tears; follow printed lines if possible to keep seams tidy.
For small gouges, lift only the torn paper and flatten surrounding material.
Use a damp sponge to soften old glue before adhesive removal, scraping residue with a plastic putty knife.
Keep the patch area dry afterward and remove any remaining loose bits so the surface is ready for the next repair step.
Fill And Sand Surface
When you’ve removed loose paper and cleaned the area, fill gouges and torn edges with a lightweight spackling compound, pressing it firmly into gaps so it bonds to the wall and the paper backing. Let it dry fully, then sand smooth with fine-grit paper so repaired spots vanish under paint. Match surface texture if nearby wallpaper patterns left impressions. Remove any remaining adhesive removal residue before priming; sticky spots stop primer adhesion. Feather edges to blend. Use a thin coat, sand, repeat if needed.
Clean dust, vacuum, and tack cloth before you prime and paint.
- Inspect repaired areas
- Sand progressively
- Clean thoroughly
Fill Drywall Joints and Damaged Trim
After removing loose paper and sanding rough edges, you’ll need to fill drywall joints and any damaged trim so the painted surface looks seamless. Use a quality joint compound to seal gaps between drywall sheets, embedding tape over wider seams to prevent future cracking.
For trim nicks, apply wood filler, let it cure, then shape with a small file. Smooth changeover around decorative accents and respect existing wallpaper patterns nearby to avoid accidental damage.
Prime all patched areas before painting to guarantee uniform sheen and adhesion. Inspect for shrinkage, reapply compound if needed, then spot-prime once flat.
Sand Walls Without Creating Dust Clouds
When you sand walls after repairs, keep dust under control by using a wet-sanding technique that softens joint compound instead of creating airborne particles.
Attach dust-collection tools—like vacuums with HEPA filters or sanding blocks with built-in collectors—to capture what you do generate.
Seal off the room and vacuum surfaces frequently so lingering dust doesn’t settle back into your fresh prep.
Wet Sanding Technique
If you’re dealing with stubborn seams or rough patches on wallpapered walls, wet sanding gives you control without the airborne dust that comes from dry sanding. You’ll work gently with a damp sponge or fine-grit sanding block, keeping the surface barely moist so wallpaper patterns stay visible and adhesive formulas don’t rehydrate excessively.
Move in light, circular strokes, checking often. Don’t soak seams; blot instead. After sanding, wipe with a clean damp cloth and let the wall dry fully before priming.
- Use fine grit (180–240)
- Keep tools just damp
- Inspect seams frequently
Use Dust-Collection Tools
Because sanding can kick up fine particles that settle everywhere, attach a vacuum-equipped sanding tool or use a dust shroud to pull debris away as you work. You’ll control airborne grit while preserving decorative patterns and avoid embedding dust into other surfaces.
Move slowly with light pressure so you blend seams and smooth wall textures without gouging. Change filters and empties often to keep suction strong. Protect vents and openings, and sand in short sessions to keep the collection system effective.
Wear a respirator and goggles; even with extraction, tiny particles still travel. This keeps cleanup easier and your primed surface cleaner.
Seal And Vacuum Frequently
Although sanding’s gritty fallout seems inevitable, you can keep it under control by sealing off the room and vacuuming frequently as you work. Tape plastic over doorways, vents, and furniture, and run a HEPA vacuum on the wall as you sand to catch dust and stray adhesive removal residue.
Contain debris so wallpaper patterns won’t spread flakes into other rooms.
- Seal openings with painter’s plastic and tape.
- Use a HEPA vacuum while sanding.
- Wipe surfaces with damp cloths after vacuuming.
You’ll reduce cleanup time, protect adjoining spaces, and keep air breathable during prep.
Feather and Blend Repaired Areas
Once the patch compound’s dried and sanded smooth, you’ll feather the edges so the repair melts into the surrounding wall. Use a wide drywall knife to thin the compound outward in overlapping strokes, matching any residual texture from wallpaper patterns.
Lightly sand between thin coats, keeping edges soft. If you found adhesive removal spots earlier, prime those areas first to prevent show-through.
Apply a bonding primer over repairs, then inspect under good light, repeating feathering where seams show. Clean dust thoroughly before priming; a seamless blend guarantees your final paint won’t reveal the fix.
Degloss Shiny Wallpapered Surfaces
If you’re dealing with shiny wallpaper, scuffing the surface is a must before painting so primer and paint will stick. You’ll want to abrade gloss gently with fine-grit sandpaper or a Scotch-Brite pad, keeping pressure even to avoid damaging vintage patterns beneath.
Clean dust with a damp cloth, let dry, then spot-check adhesion.
Wipe away dust with a damp cloth, let dry, then test paint adhesion before proceeding.
For modern textures, sand lightly along texture ridges to preserve detail while reducing sheen. If seams lift, re-secure before painting.
Finally, wipe with solvent-free degreaser, dry fully, and inspect for uniform dullness so primer bonds reliably.
- Sand gently
- Clean thoroughly
- Inspect surface
Bonding vs Standard Primer: When to Use Each
After you’ve dulled and cleaned glossy or textured wallpaper, choose the right primer so paint will adhere and last. If wallpaper patterns show through or paper feels slick, use a bonding primer — it maximizes adhesive strength and prevents lifting.
For well-sealed, flat walls where texture and seams are minimal, a standard primer can block stains and provide uniform adhesion. Match primer choice to the substrate: loose edges, vinyl surfaces, or varied wallpaper patterns call for bonding.
Stable, well-prepped paper can accept standard primer. Always test a small area to confirm adhesion before priming the entire wall.
Choose the Best Primer for Wallpaper Remnants
If you’ve got small wallpaper remnants that won’t come off, pick a primer that locks them in and won’t let adhesive bleed through.
Consider oil-based primers for stain blocking and durability, or high-bonding adhesion primers designed to grip slick surfaces.
Test a small area first so you know which option bonds best before you paint the whole wall.
Oil-Based Primer Options
Wondering which oil-based primer will best lock down stubborn wallpaper paste and stains? You’ll want a solvent-based stain blocker that seals adhesive removal residue and reduces bleed-through from old wallpaper patterns. Pick a slow-dry formula for better leveling, especially over seams or patched areas.
- Alkyd stain-blocking primer — excellent for tannin and paste stains, sands smooth.
- Shellac-modified oil primer — fast-sealing, great for tough adhesive spots but has stronger odor.
- Oil-based bonding primer — balances sealing and adherence for varied substrates.
Always ventilate, test a small area, and follow manufacturer cure times before painting.
High-Bonding Adhesion Primers
How do you pick a primer that actually sticks to stubborn wallpaper remnants? You’ll want a high-bonding adhesion primer formulated for slick surfaces; these grip old paste, vinyl, and loose edges so paint won’t peel.
Apply to clean, dry walls, feathering into seams and around decorative accents to maintain detail. Test a small patch over varied wall textures—smooth, embossed, or patterned—then sand lightly if needed.
Choose water- or solvent-based bonding primers per manufacturer guidance and ventilation. Let cure fully before topcoating.
Proper selection prevents lifting, seals residues, and creates a reliable base for your new paint finish.
Test Primer Adhesion Before Painting
Before you roll on primer, do a quick adhesion test so you don’t waste time on paint that won’t stick. Pick a discreet spot, especially over visible wallpaper patterns, and clean it where adhesive removal might’ve left residue.
Do a quick primer adhesion test on a discreet, cleaned spot—let dry, tape, and check for lifting.
Apply a small primer patch, let it dry, then press a strip of painter’s tape and pull sharply.
- Choose a hidden area with pattern contrast.
- Clean residue from adhesive removal before testing.
- Evaluate adhesion after 24 hours; look for lifting or peeling.
If the primer sticks well, proceed. If it lifts, remove remaining paper or repeat cleaning before repainting.
Spot-Prime Seams and Repaired Patches
Once seams and patched areas are dry and sanded smooth, spot-prime them so they blend with the surrounding wall and prevent flash-through. You’ll target seams where wallpaper patterns once met and any spots left after adhesive removal. Use a small brush or roller, feathering primer beyond repairs to avoid visible edges. Allow full drying, then re-sand lightly if needed. Check under different light angles to confirm uniformity before overall priming.
| Tool | Purpose |
|---|---|
| Small brush | Precision at seams |
| Roller | Smooth feathering |
| Sandpaper | Blend edges |
Use Shellac or Oil Primer to Block Stains
Want to stop old water stains, nicotine, or adhesive bleed from showing through new paint? Use a shellac or oil-based primer to seal contaminants after adhesive removal and seam repairs. These primers lock stains so your topcoat hides wallpaper patterns or discoloration without tint shifts.
Apply with a brush or roller, ventilate well, and follow drying times. Test a small area first.
- Choose shellac for fast blocking and quick recoat.
- Pick oil primer for tough, set-in stains.
- Spot-check adhesion where glue was stubbornly removed.
Prime Textured or Embossed Wallpaper Correctly
If your wallpaper has heavy texture or embossing, prime it with a product made for high-build or embossed surfaces so paint lays down smoothly and hides the pattern. You’ll prep by cleaning, ensuring adhesive removal, and repairing lifts. Roll on a high-build primer, brushing into creases and embossed valleys; it fills and evens without sanding. Test a small area, let it dry fully, then assess coverage. Use primers labeled for textured wallpaper patterns to avoid future issues. Trust the primer to create a uniform base so your topcoat goes on evenly and the wall looks calm and finished.
| Hope | Relief | Confidence |
|---|---|---|
| Soft | Even | Ready |
| Calm | Smooth | Done |
Prevent and Fix Pattern Show-Through
Even when you’ve primed textured wallpaper, patterns can still ghost through paint, so take proactive steps to stop it before you topcoat. Assess surfaces for raised areas and any remaining adhesive after cleaning; stubborn glue can highlight wallpaper texture under paint.
Even primed textured wallpaper can ghost—inspect for raised areas and residual adhesive, then fill, sand, and seal.
Spot-fill low areas with a thin skim of joint compound, sand smooth, and remove dust.
If pattern shows through after priming, apply a stain-blocking sealer to problem zones.
For widespread show-through, consider lining the wall with a thin drywall or heavyweight lining paper.
Maintain good adhesion and complete adhesive removal to ensure a smooth finish.
- Clean and remove adhesive
- Spot-fill and sand
- Seal problem areas
How Many Primer Coats You’ll Need
First, you’ll assess the wallpaper’s condition to see if seams, adhesive residue, or heavy patterns could bleed through. Then consider the primer type—stain-blocking or shellac-based primers may cut the number of coats you need.
Finally, determine coat quantity based on those factors and the primer’s coverage recommendations.
Assess Wallpaper Condition
Wondering how many primer coats you’ll need? First inspect the wallpaper patterns and seams: raised or heavily textured patterns often need extra priming to level surface irregularities.
Check for lifting edges, bubbles, or visible adhesive — any sign means you should address adhesive removal before priming. If paper is intact and smooth, one good coat may suffice.
Damaged or previously patched areas usually require two coats. For mixed conditions, prioritize spot-priming problem zones, then apply an overall coat.
Keep records of areas treated so you can judge whether a second coat improves adhesion and hides remnants.
Consider Primer Type
When you pick a primer, choose one formulated for wallpapered surfaces—stain-blocking, high-adhesion primers and oil- or shellac-based products will often bond better to remaining paper and adhesive than standard latex.
You’ll want a primer that tames visible wallpaper patterns and seals varied adhesive formulas so paint lays flat and color reads true. Test a small area to confirm adhesion and finish before committing.
Use a brush for seams and a roller for broad areas, working wet edges to avoid lap marks. Let the manufacturer’s recommended dry time pass fully; it guarantees proper bonding and durability.
Determine Coat Quantity
How many primer coats you’ll need depends on the condition of the wallpaper, the primer’s opacity, and the paint color you plan to use. You’ll assess stains, seams, and any remaining adhesive removal traces; heavy wallpaper texture or bold colors usually need more coverage.
Start with one coat and inspect for bleed-through, texture shadowing, or uneven sheen. If problems show, apply a second coat.
For dramatic color changes or persistent texture, a third coat or a high-hide primer may be necessary. Balance cost and effort: test a small area before committing to full recoat.
- Inspect surface
- Apply one coat
- Reevaluate
Choose the Right Paint Finish After Priming
Once the primer’s dry, pick a finish that balances appearance and practicality for your space. You’ll weigh sheen levels: flat hides minor imperfections and suits textured patterns, while eggshell or satin offers durability with subtle luster for living areas.
Semi-gloss or gloss works where wipeability matters, like kitchens, but they’ll highlight bumps and seams. Consider traffic, cleaning needs, and how light hits the wall.
Also think about color matching—sheen can alter perceived hue, so test swatches in different light after priming. Apply small test panels, inspect when dry, then choose the finish that meets wear and visual goals.
Prep Trim, Outlets, and Switch Plates
Because trim, outlets, and switch plates frame the wall, you’ll want to safeguard and prepare them before painting so edges stay crisp and hardware stays clean. Remove plates and mask trim with low-tack tape; if wallpaper patterns meet trim, score edges to separate paper from wood. Check for residual adhesive types and clean with appropriate solvent so paint adheres evenly. Sand glossy trim lightly, then prime bare spots.
Protect trim and plates before painting: remove covers, tape edges, clean adhesives, sand glossy areas, and prime bare spots.
- Unscrew outlets/switches and label wires.
- Tape edges tightly to prevent bleed.
- Replace plates after paint cures to avoid smudges and guarantee a professional finish.
Protect Floors and Furniture During Prep
Want to keep paint, dust, and debris off your floors and furniture? Lay down heavy-duty drop cloths or plastic sheeting, overlapping seams and taping edges to baseboards so dust from sanding and adhesive removal doesn’t sneak underneath.
Move small furniture out; cover larger pieces with fitted cloths and secure with painter’s tape—avoid tape on finished surfaces.
Use cardboard or rosin paper along high-traffic paths to protect wallpaper patterns you’re preserving elsewhere.
Keep a small shop vacuum and damp rags handy to catch dust as you work.
Remove trash frequently to prevent tracked debris and maintain a safe, clean workspace.
Work Safely Around Windows and Doors
When you work near windows and doors, protect the frames with painter’s tape and drop cloths to prevent scratches and paint bleed.
Secure any loose glass and remove or cover hardware so it doesn’t get damaged or paint-covered.
Take care when opening and closing doors or windows during prep to avoid knocking tools or wet surfaces.
Protect Window And Door Frames
As you strip the wallpaper and prep the wall, take a moment to protect window and door frames so paint, dust, and adhesive don’t damage their finish. You’ll want clean lines where wallpaper patterns met frames; cover trim with painter’s tape and low-tack protective film.
Wipe away loose adhesive before taping so tape adheres and won’t lift finish later. Fit drop cloths at thresholds to catch debris and prevent tracked adhesive. Keep tools off frames and use small pads for tight corners.
- Tape edges firmly
- Film or paper over trim
- Lay and secure drop cloths
Secure Glass And Hardware
How do you protect fragile glass and exposed hardware while working around windows and doors? You’ll use simple steps: cover glass protection with painter’s tape and protective film, loosen and label screws for hardware removal, and cushion edges to prevent chips. Work methodically, keep parts together, and wear gloves and eye protection.
| Task | Tool | Tip |
|---|---|---|
| Cover glass | Painter’s tape | Overlap edges |
| Film application | Static cling film | Smooth bubbles |
| Remove hardware | Screwdriver set | Label pieces |
| Protect trim | Foam tape | Avoid paint bleed |
| Store parts | Labeled bag | Keep nearby |
Handle Mold, Mildew, and Water Stains
Before you paint, address any mold, mildew, or water stains so they don’t reappear under the new finish. You’ll clean affected areas with a bleach solution or commercial cleaner, rinse thoroughly, and dry completely to prevent recurrence.
For stubborn marks, use a stain-blocking primer after cleaning for effective water stain removal and mold prevention. Don’t paint over active growth.
- Kill and clean: apply cleaner, scrub, rinse, dry.
- Treat stains: spot-prime with a stain-blocking primer.
- Monitor humidity: use dehumidifiers or ventilation to prevent return.
Repair Plaster Under Wallpaper
Before you strip anything, check how well the wallpaper is stuck to the wall so you don’t uncover hidden damage.
If sections lift or feel soft, you’ll likely find crumbling plaster underneath that needs patching.
Repair any damaged plaster, let it fully dry, and sand smooth before continuing with primer and paint.
Assess Wallpaper Adhesion
When you check how well the wallpaper is sticking, pay close attention to any soft spots, bubbling, or seams that lift away from the wall—these are signs the plaster underneath may be failing and will need repair before you paint.
You’ll also note how wallpaper patterns align and whether old adhesive types created uneven bonds. Gently press and tap to map loose areas, testing both patterned and plain sections. Record locations and size of delamination so you can plan repair or removal.
Prioritize spots that trap moisture or show flex. Use the list below to guide your inspection.
- Tap for hollow sound
- Peel small test edge
- Mark weak zones
Repair Damaged Plaster
If your inspection found bubbling, soft spots, or lifted seams, you’ll need to repair the underlying plaster before painting over wallpaper. Remove loose paper and scrape away crumbling plaster, then clean residue from old adhesive formulas so patches will bond.
For small hollows, use a lightweight patching compound. For larger damage, apply a fiberglass mesh and a base coat of joint compound. Sand smooth once dry, feather edges to match surrounding surface, and prime patched areas with a bonding primer suited to varied wallpaper patterns.
Allow full cure, then reassess adhesion so your paint finish stays even and durable.
Deal With Lath-and-Plaster Quirks
Although lath-and-plaster walls add character, they also bring quirks you need to address before painting: hairline cracks, loose plaster keys, and uneven surfaces that’ll telegraph through new paint. You’ll focus on lath maintenance and plaster intricacies: secure loose keys with plaster washers, widen tiny cracks slightly and fill with flexible compound, and skim uneven areas for a uniform profile.
Lath-and-plaster walls add charm but require fixing loose keys, flexible crack repairs, and skimming before priming.
Sand smooth once dry and prime with a bonding primer to prevent suction differences.
- Reinforce loose keys and nail heads.
- Fill and flexible-repair hairline cracks.
- Skim and prime uneven surfaces.
Remove Wallpaper in Rentals With Minimal Damage
Before you start, check your lease and any landlord rules so you know what’s allowed and what you’ll need to restore.
Use low‑impact removal methods — scoring lightly, steaming or a gentle solvent — to avoid ripping the underlying wall.
If small tears or adhesive remain, fix them with removable patching products that won’t violate your deposit terms.
Assess Lease And Rules
When you’re renting, check your lease and talk to your landlord before you remove wallpaper so you don’t risk losing your deposit or facing repair charges. You’ll need permission for changes that affect walls, especially if wallpaper patterns are unique or part of the property’s decor.
Ask about acceptable end-state: intact backing, painted walls, or full removal. Clarify expectations for adhesive removal and whether professional repairs are required.
- Confirm lease clauses on alterations and restoration.
- Get landlord approval in writing, note agreed finish.
- Ask if they’ll waive charges for minor surface defects.
Use Low-Impact Methods
If you need to remove wallpaper in a rental with minimal damage, focus on gentle, reversible techniques that preserve the wall surface and satisfy your landlord’s expectations.
Start by testing a small corner: score lightly if paper is vinyl, or try steaming for stubborn adhesive. Peel slowly at a low angle, supporting the paper to avoid gouging drywall. Use a plastic scraper and keep tools blunt.
Work in sections, rinsing residue with mild detergent so you don’t alter wall textures. Preserve fragile areas near trim and switches.
Note wallpaper patterns to patch matching strips later if reapplication’s needed.
Repair With Removable Products
Though you’ll often aim to avoid harsh solvents, removable repair products give you a quick, low-impact way to fix small tears, gaps, or adhesive residue without reshaping the wall. You’ll want products labeled for temporary use so you don’t damage wallpaper patterns or underlying drywall. Test a small area to confirm compatibility with different adhesive types, then proceed gently.
- Use adhesive remover sheets to lift stuck edges.
- Apply a removable seam adhesive for loose strips.
- Smooth tiny tears with a temporary clear patch.
After repairs, you can prime and paint with minimal rental damage.
Speed Up Prep for Large Rooms
Because time swells with square footage, you’ll want a clear plan and a few labor-saving tools before tackling a large, wallpapered room. Work in zones, score small areas, and prioritize sections with complex wallpaper patterns and stubborn adhesive removal. Bring extra hands or a rolling scaffold to move quickly and safely.
| Task | Tool | Time |
|---|---|---|
| Scoring | Perforator | 10–20m |
| Stripping | Stripper/steam | 20–40m |
| Cleaning | Sponge/scraper | 10–30m |
Keep materials staged, label waste bins, and rotate helpers so you maintain steady progress without fatigue.
Troubleshoot Bubbling After Painting
If you spot bubbling after painting, first check for moisture sources like leaks or condensation that could be pushing paint away from the wall.
Next, assess whether the wallpaper was fully adhered before painting or if loose edges lifted during the job.
Finally, patch or re-glue affected sections, sand smooth, and repaint using the proper primer and technique.
Identify Moisture Sources
When you see bubbling after painting over wallpaper, your first task is to track down where moisture’s coming from so you can stop further damage and choose the right fix. Start by inspecting obvious sources: windows, plumbing, roof, and exterior walls. Note any damp spots, musty smells, or staining behind wallpaper patterns before attempting removal techniques.
- Check windows and seals for leaks or condensation.
- Inspect plumbing, appliances, and nearby bathrooms for drips.
- Look for roof or exterior wall penetration, flashing, or gutter failures.
Address the root cause, then plan repairs and proper drying before refinishing.
Assess Wallpaper Adhesion
Before you commit to scraping or priming, check how well the wallpaper’s still stuck to the wall so you can choose the right fix. Press edges and center; note loose seams, bubbling or soft spots. Consider wallpaper patterns that hide flaws versus ones that demand smoothness. Test adhesive types by lifting a corner—paste-backed, pre-pasted, or vinyl peel differently. Small bubbles may re-adhere; widespread detachment needs removal. Document problem areas and plan whether targeted reglueing or full removal fits the adhesion condition.
| Area | Action |
|---|---|
| Edges | Press |
| Center | Tap |
| Seams | Inspect |
| Bubbles | Test |
| Whole wall | Decide |
Repair And Repaint
Though you followed the prep steps, bubbling can still appear after painting, and you’ll need to tackle it promptly to prevent further damage. Inspect bubbles to determine if trapped moisture, incompatible adhesive types, or loose wallpaper patterns caused the lift. Small blisters can be flattened; larger bubbles need repair.
- Puncture and press out trapped air, then smooth and seal with clear adhesive.
- For lifted seams, inject wallpaper-friendly adhesive beneath the edge and clamp until dry.
- If paint delaminated, remove affected paper, re-prime substrate, and repaint using compatible primer and paint.
Address causes to prevent recurrence.
Fix Paint Texture Irregularities From Old Paper
If old wallpaper left behind glue lines or raised seams, you’ll want to even those textures before painting so the finish looks smooth and professional. Start by inspecting under good light to spot remnants of wallpaper patterns and tacky adhesive.
Use a scraper and solvent for adhesive removal, working gently to avoid gouging drywall. Sand remaining high spots with medium, then fine-grit sandpaper until flat.
Feather joints with lightweight joint compound, thinly applied, then sand smooth once dry. Wipe surface with a damp cloth to remove dust.
Prime the repaired areas with a stain-blocking primer before painting.
Common Rookie Mistakes to Avoid
Once you’ve smoothed seams and primed repaired spots, watch out for common rookie mistakes that can undo that work. You’ll want to avoid shortcuts that reveal old wallpaper patterns, damage substrate, or cause paint failure.
After smoothing seams and priming, avoid shortcuts that reveal old wallpaper, harm substrate, or cause paint failure.
Be methodical: test adhesion, keep surfaces clean, and follow proper removal techniques where needed. Don’t rush sanding or skip a final wipe-down. Use appropriate primer for patched areas and match texture before painting.
If you’re unsure, stop and reassess—fixing mistakes later costs time and finish quality. Learn from these pitfalls to get a smooth, lasting result.
- Rushing removal techniques
- Skipping adhesion tests
- Ignoring visible wallpaper patterns
Estimate Time and Cost for Wallpaper Prep
When you plan wallpaper prep, budget both time and money realistically: expect 1–3 hours of work for a small room (single wall or minor repairs).
4–8 hours for an average room with full removal and patching.
And a full day or more for large rooms or stubborn adhesive.
Estimate costs: basic tools and stripper run $20–60, spackle and sandpaper $10–30, primers and sealers $20–50.
Factor in time for matching Wallpaper patterns if you’re repairing sections; mismatches add labor.
Premium Adhesive brands or specialty removers raise costs but can speed work, reducing total hours.
When to Call a Pro for Removal or Repair
Although you can handle many wallpaper jobs yourself, call a pro if the paper won’t lift after standard steaming and scoring. If adhesive has deeply bonded to drywall or plaster, or if you spot mold, excessive substrate damage, or multiple patched layers—these issues need specialized tools, expertise, and often repairs beyond routine spackling.
If wallpaper won’t lift after steaming—or you find mold, deeply bonded adhesive, or extensive damage—call a pro.
You should also hire help when intricate wallpaper patterns or heavy vinyl layers hide underlying rot, or when complex wall textures make removal messy. Pros diagnose structural risk, remove stubborn adhesive, and restore surfaces so your paint adheres and looks smooth.
- Mold or rot
- Stubborn bonded adhesive
- Multiple layered papers
Test the Final Surface Before Full Paint
Want to make sure your prep work actually worked? Test small areas across the wall: choose spots near seams, repaired patches, and where wallpaper patterns were most visible. Apply primer and a sample of your chosen paint, then let it fully dry.
Inspect for texture differences, flash-through, or residue showing through. Check color matching under natural and artificial light; move a swatch from another wall to compare.
Lightly scuff the test patch to confirm adhesion holds. If issues appear, address them—additional primer, sanding, or spot repair—before committing to a full paint job.
Maintain Painted Walls That Started as Wallpaper
After testing and correcting any problem spots, plan a simple maintenance routine to keep your painted wall—once covered in wallpaper—looking good for years. You’ll protect the finish by using gentle cleaners, addressing scuffs quickly, and avoiding harsh abrasives that can expose underlying seams from the original wallpaper design.
Touch up using the same painting techniques and paint sheen to blend repairs. Monitor humidity to prevent reappearance of loosened backing. Keep records of paint formula and prep steps so future touch-ups match.
Follow this focused care to preserve a smooth, consistent result that respects the wall’s history.
- Clean gently
- Touch up precisely
- Monitor humidity
Quick Checklist for Prepping a Wallpapered Wall
Before you start priming or painting, run through a short, focused checklist so nothing gets missed.
Inspect wallpaper patterns for lifting, bubbles, seams, or damage; mark areas needing repair.
Test adhesion at a corner to see if full removal’s needed or if you’ll paint over.
Clean the surface to remove dust, grease, and adhesive residue—adhesive removal is essential for primer to bond.
Fill holes and smooth rough spots with spackle, then sand lightly.
Tape off trim and protect floors.
Choose a quality primer suited to the wall condition.
Confirm ventilation and gather tools before you begin.
Frequently Asked Questions
Can I Wallpaper Over a Painted Wall Later Without Removing the Paint?
You can, but you’ll likely need thorough wallpaper removal and wall surface preparation first; painted surfaces may repel adhesive, hide damage, or cause peeling, so you’ll prep, prime, and sometimes skim or sand to guarantee proper wallpaper adhesion.
Will Wallpaper Adhesive Affect Indoor Air Quality After Painting?
Imagine a faint chemical breeze — yes, wallpaper adhesive can affect indoor air quality; its adhesive fumes may linger, so you should ventilate, choose low-VOC glue, and let painted surfaces fully cure before applying new adhesive.
Can I Use Wallpaper Paste to Reattach Small Loose Seams Before Priming?
Yes — you can use wallpaper paste to reattach small loose seams before priming, but test wallpaper adhesive compatibility first; choose a pH-neutral paste, apply sparingly, smooth seams, then let fully dry to guarantee proper wallpaper seam repair.
How Do I Match New Drywall Textures to Existing Plaster Under Wallpaper?
You’ll skim-coat new drywall so it visually coincides with old plaster, blending edges as rain meets pavement. Use drywall smoothing compounds, feather joints, then texture match with stipple/knockdown techniques until surfaces align seamlessly.
Will Heating or AC Affect Primer Curing on Walls That Had Wallpaper?
Yes — temperature and humidity affect primer curing; you’ll want controlled climate while doing wallpaper removal and wall preparation. Keep temperatures within primer’s recommended range and moderate humidity so the primer dries evenly and bonds properly.
Conclusion
Now that you’ve prepped the wall, you’re ready to paint with confidence. Whether you removed the paper or skimmed and smoothed it, take one last inspection—like tuning a piano before a concert—to catch flaws. Prime any bare spots, let everything dry, and use thin, even coats of paint. Maintain good ventilation and touch up nicks promptly. With a little care, your painted wall will look fresh and last for years.