How to Prepare Concrete Wall for Painting Easily
You can prepare a concrete wall easily by cleaning off grease, mildew, and efflorescence, repairing cracks and spalls, and letting the surface dry completely before priming. Scrub or power-wash, chip out loose material, fill holes with a cementitious patch, and undercut spall edges for good bond. Use a masonry or bonding primer suited to interior or exterior use, then apply two thin coats of acrylic masonry paint. Keep going for tips on tools, tests, and troubleshooting.
Quick Prep Checklist: Clean → Repair → Prime → Paint
Before you paint, follow a simple sequence: clean, repair, prime, then paint.
You’ll start by removing dust, efflorescence, and loose particles to expose true surface texture — pressure-wash or scrub with a stiff brush.
Next, repair cracks and spalls with appropriate patching compound, ensuring level seams that won’t telegraph through finish.
Prime with a concrete-specific primer to seal pores and improve adhesion; this step boosts concrete durability and helps finish coat perform.
Finally, apply paint in recommended conditions, checking manufacturer’s coverage and recoat times.
Stick to this checklist for a straightforward, durable result.
Why Preparing Concrete Prevents Peeling and Blistering
When you properly clean, repair, and prime concrete, you remove the moisture, salts, and loose particles that cause paint to lose adhesion and form blisters. You’ll stop peeling by creating a stable surface so coatings bond uniformly. Proper prep controls trapped moisture and salt efflorescence, avoids bubbling, and yields consistent Color contrast and texture enhancement so finishes look intentional. You’ll also extend paint life and reduce touch-ups. Visualize the change:
| Problem | Result |
|---|---|
| Dirty pores | Strong bond |
| Salts | No efflorescence |
| Cracks | Smooth finish |
| Blisters | Even texture |
| Flaking | Lasting color |
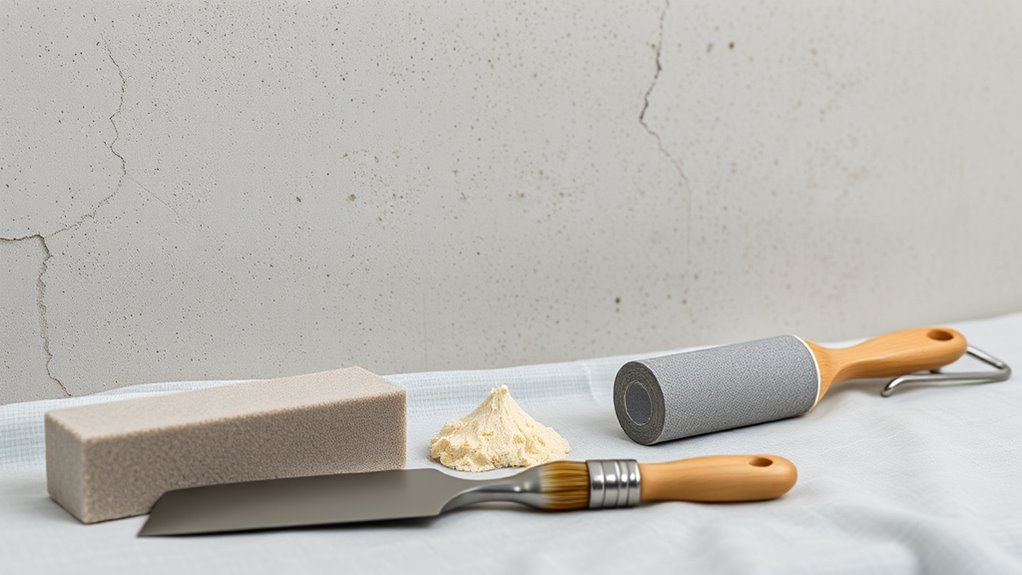
Tools & Materials for Prep and Repair
If you want reliable results, bring the right tools and materials for cleaning, repairing, and priming concrete so you can work efficiently and avoid redoing steps. Gather a stiff-bristle brush, pressure washer or hose, concrete cleaner or trisodium phosphate, masonry patch compound, tuckpointing tools, putty knife, and sanding block.
Have rust remover, wire brush, and concrete primer suited for porous surfaces. For decorative finishes or concrete coloring, stock stain or tint compatible with your primer and topcoat plus compatibility test kits.
Don’t forget drop cloths, painter’s tape, safety gear—gloves, goggles, respirator—and buckets for mixing compounds.
Inspect Concrete Walls for Paint Problems
Before you start prepping, walk the surface and check for cracks that need patching.
Watch for efflorescence—white powder or salts—that signals moisture issues you’ll have to treat.
Note any previous coatings so you can choose the right cleaners, primers, and adhesion methods.
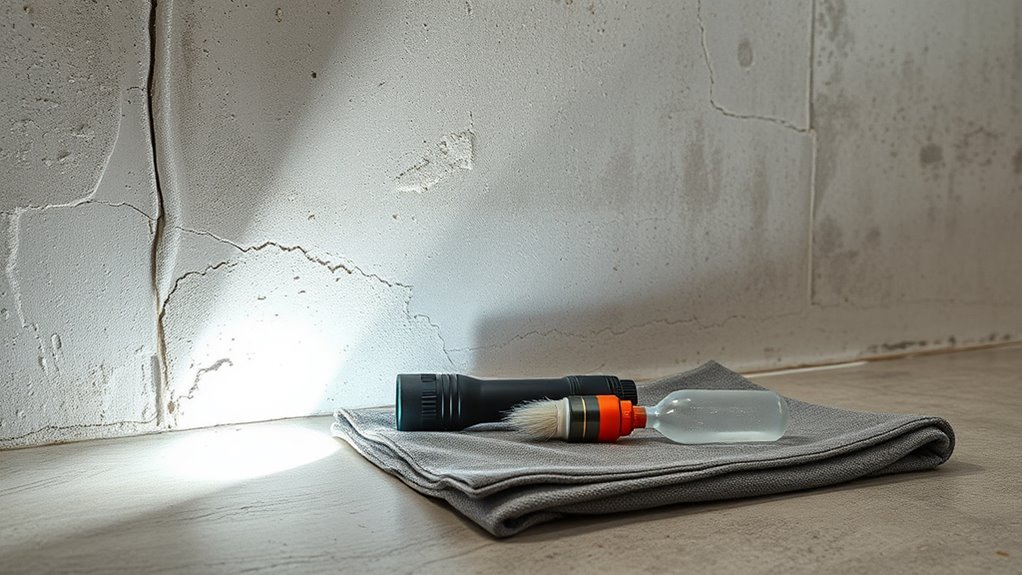
Check For Cracks
Although small hairline fissures might look harmless, you should carefully inspect concrete walls for cracks before painting, because they can let moisture through, cause paint to flake, and hide structural issues.
For reliable crack detection, run a thorough surface inspection: use good light, a flashlight, and your hand to feel for gaps or shifting. Mark cracks with pencil, measure width and length, and note active movement by monitoring over days.
Small static cracks you can fill with masonry caulk or epoxy; wider or structural ones need a professional assessment. Repair properly before priming to guarantee lasting paint adhesion.
Look For Efflorescence
Ever wondered why paint peels or powdery white streaks show up on concrete? You should inspect walls for efflorescence — salt deposits that signal moisture movement. Scrape a small area; powdery residue or crystalline buildup means salts are present.
Note affected zones and assess surface texture, since rough or porous surfaces shed salts differently. Efflorescence prevention starts with addressing moisture sources: improve drainage, seal joints, and let the wall dry fully before priming.
Clean salts with a stiff brush and mild acid rinse, then recheck. Don’t paint over active efflorescence, or coatings will fail prematurely.
Identify Previous Coatings
When you inspect a concrete wall, identify any previous coatings so you know how to prepare and which products will bond properly. Check for paint, sealers, epoxy, or limewash by tapping, scraping, and testing small areas with solvent.
Note where coatings are peeling, blistering, or powdering—these signs show poor surface adhesion or aging that will affect coating durability. Smooth, glossy finishes may need sanding or a primer; porous, chalky areas require cleaning and a binder.
Record types and conditions, then choose cleaners, primers, and paint compatible with the existing layer to guarantee a long-lasting finish.
Clean Concrete: Degreasing, Power Washing, and Scrubbing
Before you paint, you need to remove grease, dirt, and loose particles so the coating will bond properly; start by degreasing trouble spots, then follow with power washing and targeted scrubbing to restore a clean, roughened surface.
You’ll spot-treat oil stains with a concrete degreaser, agitate with a stiff brush, then rinse.
Use a pressure washer on moderate settings to remove embedded grime without damaging surface texturing. Scrub corners and joints by hand.
Let the wall dry fully before testing adhesion.
After cleaning, consider concrete sealing only if manufacturer recommends it for the chosen paint system and exposure conditions.
Remove Efflorescence and Mildew Safely
After cleaning away grease and grime, check the wall for white powdery deposits and dark, fuzzy patches—those are efflorescence and mildew, and they need different treatments.
For Efflorescence removal, gently scrub with a stiff brush and a diluted muriatic acid solution (follow label instructions), rinse thoroughly, and let the wall dry.
For Mildew treatment, apply a 1:3 bleach-to-water solution or a commercial fungicide, scrub affected areas, rinse, and dry.
Wear gloves, eye protection, and a respirator when mixing chemicals.
Dispose of runoff responsibly.
Repeat if needed, and only paint once the surface is visibly clean and completely dry.
Test Moisture and Condensation Before Painting
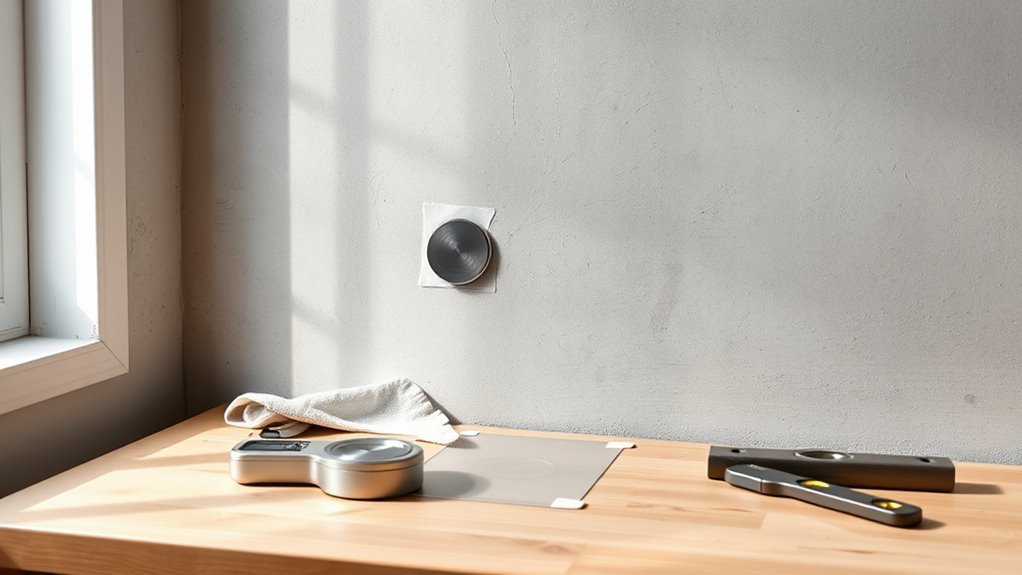
Because trapped moisture and condensation can ruin paint adhesion, you should test the wall’s dampness and only paint when readings are consistently low.
Use a reliable moisture testing meter for quick spot checks across the surface, noting higher readings near floors or plumbing.
For Condensation assessment, run a simple plastic-sheet test: tape a sealed 24-hour square to the wall and check for trapped water.
Record results, compare to paint manufacturer limits, and wait or improve ventilation if readings exceed acceptable levels.
Repeat tests after repairs or drying measures to confirm the wall is ready before priming and painting.
Profile Concrete: Sanding, Etching, and Key Surface Prep
When the wall is dry and free of loose material, you’ll need to create the right surface profile so primer and paint can bond properly.
Once dry and stable, create an appropriate surface profile so primer and paint can properly bond.
You’ll decide between sanding, mechanical abrasion, or chemical etching based on existing surface texture and coating history.
Sanding smooths minor roughness; use a diamond pad or coarse sandpaper for concrete.
Etching with a muriatic or phosphoric solution opens pores and improves adhesion—neutralize and rinse thoroughly.
Aim for slight aggregate exposure without overcutting; that texture helps primer key into the concrete.
Remove dust with a vacuum and tack cloth, then inspect before priming.
Fix Cracks and Spalls in Concrete (Step‑By‑Step)
Start by evaluating damage areas so you know which cracks and spalls need repair and how deep they are.
Clean and prep each spot by removing loose concrete, dust, and contaminants so patches will bond.
Then mix and apply the appropriate patching compound, smooth it flush with the wall, and let it cure before sanding or painting.
Assess Damage Areas
Before you pick up a trowel, walk the wall slowly and mark every crack, hairline, and spall so you don’t miss hidden damage; this lets you prioritize repairs by severity and location.
Next, classify defects: hairline, structural crack, surface spall, or delamination. Measure widths and depths, noting active water entry or rust stains that indicate rebar exposure.
Photograph and map areas to track progress.
Estimate material needs based on volume of loss.
This assessment is essential for proper surface preparation and long-term concrete maintenance, so you’ll choose correct patch mixes, reinforcement methods, and whether professional repair is required.
Clean And Prep
How will you get the patch ready to bond? Clean the area thoroughly: remove loose debris, dust, and efflorescence with a wire brush, vacuum, or pressure washer. Let the concrete fully dry.
Use a stiff brush to undercut edges of spalls so the repair material keys in.
Apply a concrete cleaner or mild acid etch if oil or contaminants remain, then rinse and dry.
For cracks, widen slightly with a chisel to create a V-groove for better adhesion.
Protect surrounding decorative finishes and match existing surface textures later.
Wear gloves, eye protection, and follow product instructions for safe prep.
Patch And Smooth
With the surface clean and dry, you can begin repairing cracks and spalls so the patch will bond and look seamless. First, widen hairline cracks with a chisel and remove loose debris; vacuum and dampen the area.
Mix a compatible patching compound to manufacturer specs, then force it into voids using a trowel. Feather edges to match surface texture and reduce visible shifts.
After curing, sand lightly to smooth high spots. If needed, apply a thin skim coat for uniformity.
Choose a finishing coat or tint for color matching so repairs disappear under primer and paint.
Patch Large Holes and Level Uneven Areas
When you encounter large holes or hollow spots in concrete walls, you’ll need to build them back up with the right materials and technique so the surface is sound and paint will adhere evenly.
Clean debris, chip out loose concrete, and let areas dry; moisture barriers must be addressed before repair.
Clear debris, remove loose concrete, and allow drying—ensure any moisture barriers are fixed before starting repairs
Mix a polymer-modified patching compound or mortar, apply in layers, and compact each layer to match existing surface texture.
Screed and trowel to level, feathering edges for a seamless connection.
Once cured, sand high spots lightly and recheck for hollows.
Proper patching prevents future cracking and guarantees an even paint finish.
Choose the Right Concrete Primer: Interior vs. Exterior
After you’ve repaired holes and smoothed surfaces, pick a primer that matches the wall’s location and condition to guarantee paint bonds and wears well.
For interior walls, choose low-odor, mildew-resistant primers that seal dust and improve color selection by creating a uniform base. They also support subtle texture enhancement without overpowering finishes.
For exterior concrete, use weatherproof, UV-resistant primers that repel moisture and prevent efflorescence, ensuring long-term adhesion.
Always check porosity: highly porous surfaces need a high-build primer, while smoother walls suit thin-seal primers.
Follow manufacturer dry times and apply evenly with roller or brush for best coverage and performance.
Bonding Primers vs. Masonry Sealers: When to Use Each
You’ll pick a bonding primer when the concrete is chalky, powdery, or has poor adhesion that needs strengthening before paint.
Use a masonry sealer to block moisture and penetrate porous surfaces without changing adhesion.
Match your choice to the wall’s condition—patchy, powdery, or failing bond calls for a bonding primer; damp or highly porous concrete calls for a sealer.
When To Use Bonding Primers
Because concrete and masonry vary so much in porosity and surface strength, you’ll reach for a bonding primer whenever paint needs extra grip or the surface is chalky, powdery, or flaking.
Use bonding primers on smooth, dense concrete, glossy patches, or areas patched with cementitious compounds that repel paint. They restore surface adhesion, bridging weak spots so topcoat bonds uniformly.
Apply after cleaning and drying; follow manufacturer instructions for recoat times. Skip them only when the substrate already accepts paint readily.
In short, choose bonding primers whenever adhesion is doubtful or the substrate has inconsistent porosity to guarantee a durable finish.
When To Use Masonry Sealers
While bonding primers focus on adhesion, masonry sealers stop moisture and efflorescence so paint lasts. You’ll pick a sealer when the wall is porous, prone to dampness, or showing salt deposits that would otherwise push paint off.
You want masonry sealers when damp stains recur, water wicks through, or previous paint bubbles. Surface sealing stabilizes the substrate and prevents salts migrating to the finish. Apply per manufacturer, allow full cure, and test a small area first.
- Use on porous concrete or cinderblock
- Choose breathable sealers for exterior walls
- Prevents efflorescence-driven peeling
- Improves long-term paint adhesion
Choosing Based On Surface
Having picked a masonry sealer for damp or porous concrete, you’ll next decide whether the surface needs a bonding primer instead—or both. Check surface texture: smooth, glossy concrete usually needs bonding primer to promote adhesion; rough, porous surfaces benefit from a sealer to reduce suction. Consider surface color: dark stains or patchy tones may need a pigmented bonding primer to block bleed-through. Use this quick guide:
| Condition | Recommendation |
|---|---|
| Smooth, painted before | Bonding primer |
| Porous, damp | Masonry sealer |
| Stained or uneven color | Bonding primer (pigmented) |
Masking, Protection, Ventilation, and Jobsite Setup
Before you open the first can of primer, set up clear masking, protection, ventilation, and a tidy jobsite so your work stays clean and safe. You’ll use proper masking techniques to shield trim, fixtures, and floors, and wear protection gear—gloves, goggles, and respirators—for dust and fumes.
Before opening primer, mask surfaces, clear the area, ventilate, and wear gloves, goggles, and a respirator.
Keep pathways clear, collect debris, and position fans or open windows to create cross-ventilation. Plan waste containment and safe storage for solvents.
- Tape edges with low-residue painter’s tape
- Cover floors with drop cloths or plastic
- Isolate furniture and fixtures
- Arrange fans to exhaust air outdoors
How to Apply Primer and Paint on Concrete + Troubleshooting
Before you prime, make sure the concrete is clean and dry by sweeping, washing with a mild detergent or trisodium phosphate solution, and rinsing thoroughly.
Apply a concrete-specific primer with a roller or sprayer, let it cure, then finish with two coats of paint using even strokes.
If you spot peeling, blistering, or efflorescence, stop, address the underlying moisture or adhesion issue, repair the surface, and re-prime before repainting.
Surface Cleaning Steps
Once the wall’s loose debris and dust are removed, you’ll focus on deep cleaning to guarantee primer and paint bond properly. Dirt, efflorescence, grease, and mildew can all cause adhesion failures if left untreated.
You’ll improve surface bonding by using appropriate cleaners: trisodium phosphate for grease, diluted muriatic or commercial efflorescence removal solutions for salt stains, and a mildew cleaner or diluted bleach for biological growth. Rinse thoroughly and let dry. Follow with a pH-neutral wipe before priming.
- Use stiff brush and vacuum
- Apply efflorescence removal product safely
- Rinse until water runs clear
- Allow 48 hours to dry
Fixing Paint Problems
How do you get a durable, attractive finish on concrete walls? Start by applying a masonry primer that bonds to concrete; you’ll roll into pores and cracks, maintaining texture preservation.
Patch holes with cementitious filler, sand smooth, then spot-prime.
For paint, use acrylic masonry paint and work in thin, even coats to avoid drips.
Match color by testing swatches on the wall and viewing at different times of day for accurate color matching.
If bubbling, peel and re-prepare the area; if peeling recurs, check moisture and seal before repainting.
Clean brushes and inspect for uniform coverage.
Frequently Asked Questions
Can I Paint Concrete Over Existing Wallpaper or Wall Coverings?
You shouldn’t paint concrete over existing wallpaper or wall coverings; you’ll need wallpaper removal first, then thorough surface cleaning, patching, and priming to guarantee paint adhesion and a durable, professional-looking finish on the concrete wall.
How Long Should New Concrete Cure Before Painting?
You should wait 28 days for new concrete to cure before painting; once cured, do surface cleaning and concrete sealing prep, and you’ll guarantee adhesion and durability—don’t rush, moisture can ruin paint and primer performance.
Are Special Paints Needed for Below-Grade Basement Concrete?
Yes — you’ll need paints that fight damp like armor against ghosts of water; use moisture barriers, choose coatings with primer compatibility, and pick masonry or epoxy-based basement paints to prevent peeling and mold in below-grade concrete.
Can I Use a Roller on Highly Textured Concrete Surfaces?
Yes — you can use a roller on highly textured concrete; roller suitability depends on surface texture. Choose a thick-nap roller or specialty high-pile cover, work in multiple directions, and backroll to guarantee full coverage and penetration.
What Seasonal Temperatures Are Best for Exterior Concrete Painting?
I’d paint when temperatures stay between 50–85°F—think of a baker who times bread for perfect rise. Temperature guidelines and seasonal considerations matter: avoid freezing nights, extreme heat, and high humidity for durable, even exterior results.
Conclusion
Preparing concrete for paint takes a little elbow grease, but “measure twice, cut once” applies: do the prep right and you’ll avoid peeling, blistering, and wasted time. Clean, repair, and pick the correct primer—bonding primer for smooth concrete, masonry sealer for porous surfaces—then mask and ventilate before you paint. Follow manufacturer instructions and troubleshoot adhesion issues promptly. With patience and proper prep, your paint job will last and look professional.