How to Prepare Your Walls for Painting Perfectly
Start by defining your goal and evaluating wall type, damage, stains, and moisture; test for lead in older homes. Clear the room, remove plates and fixtures, and protect floors and furniture. Clean, fill holes, match texture, sand, and de-gloss as needed. Treat mold or stains, then prime high‑porosity or repaired areas. Caulk gaps, mask edges, and inspect for flaws. Follow these steps and you’ll get a flawless, long‑lasting finish—keep going to learn the exact techniques.
Quick Step‑by‑Step Wall Prep Checklist
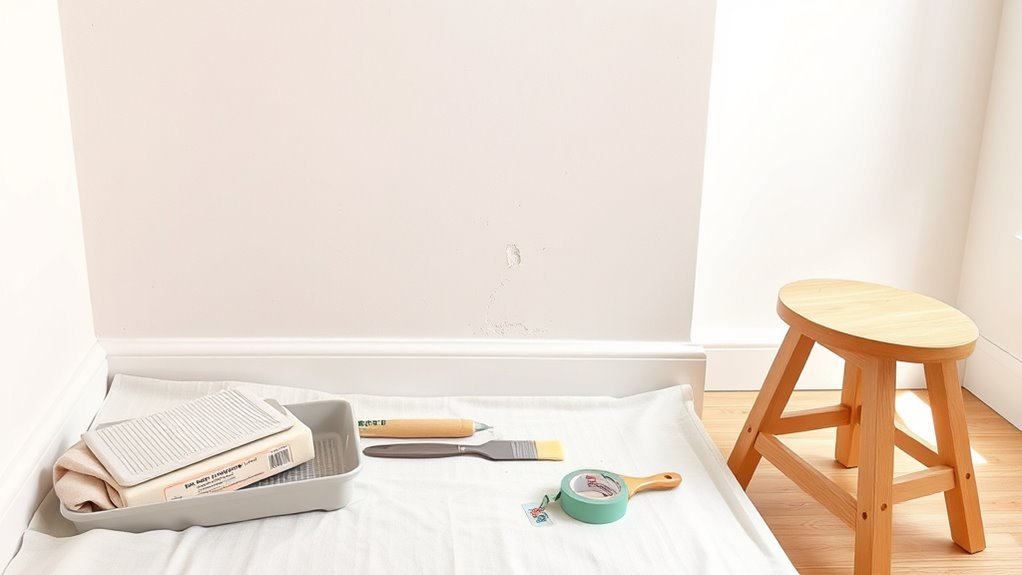
Before you paint, follow this quick, hands-on checklist to get walls clean, smooth, and ready. Clear furniture and cover floors, then remove switch plates and outlet covers.
Before you paint, clear the room, protect floors, and remove switch plates for a clean start.
Wash walls with mild detergent, rinse, and let dry. Patch holes and cracks, sand smooth, and wipe away dust. Prime stained or repaired areas and feather edges for even absorption.
Lightly scuff glossy surfaces before priming. Tape trim and baseboards for crisp lines.
Consider color selection and test swatches on small sections to judge light. Choose paint finish based on room use, then you’re ready to apply paint.
Identify Your Painting Goal and Wall Type
When you decide what you want the room to do—brighten a dark corner, hide surface flaws, resist moisture, or create a dramatic accent—you can choose the right paint type, finish, and prep level for the wall surface.
First, define your painting goal: freshen, conceal imperfections, waterproof, or emphasize architecture.
Use color psychology to pick hues that affect mood and perceived space.
Next, assess wall texture—smooth, orange peel, popcorn, or plaster—because texture dictates sanding, filling, and primer needs.
Match finish to function: eggshell for living areas, satin for moisture-prone rooms, flat to hide flaws, semi-gloss for trim.
Gather the Right Tools and Materials
Now you’ll gather the right tools and materials so the job goes smoothly. Make a checklist of essential tools and surface-prep items—sanders, scrapers, patching compound, cleaners—and pick paint and tape suited to your wall type.
With the right supplies on hand you’ll save time and get a cleaner finish.
Essential Tools Checklist
If you want a smooth, professional-looking paint job, gather the right tools and materials before you touch a brush. You’ll choose tools that match your plan—consider color psychology to pick hues and paint finish types for durability and sheen. Get quality supplies to save time and avoid mistakes.
- Brushes: angled for trim, sash for detail
- Rollers: nap length matched to wall texture
- Trays and liners: keep mixes consistent
- Tape and drop cloths: protect edges and floors
- Ladder and extension pole: reach safely and evenly
These essentials let you work efficiently and achieve clean results.
Surface Prep Materials
Because proper prep prevents problems, gather surface-specific materials before you prime or paint. You’ll need cleaners, spackling compound, sandpaper in varied grits, putty knives, and a wire brush for flaky areas. Match tools to surface texture: smooth walls need fine sanding; textured surfaces require flexible scrapers and soft-bristle brushes.
Use a moisture meter for dampness and degreasers for kitchens. Have primers and sealers ready for stains or high-porosity walls. Select applicators that won’t alter paint sheen when testing—small rollers or brushes for trial patches.
Organize materials so you can work efficiently and avoid delays.
Paint And Tape Selection
Which paints and tapes work best for your project depends on surface type, traffic, and desired finish. Choose paint color to match light and room use; pick paint finish for durability—flat hides flaws, eggshell balances sheen and scrubability, satin or semi-gloss suits trim and high-traffic areas.
Use painter’s tape rated for delicate surfaces on fresh drywall, and medium-adhesion tape for painted trim. Consider primer-compatible paints for stain-blocking.
Gather rolls, a quality angled brush, and a small roller for touch-ups.
- Match tape adhesion to surface
- Test paint color in daylight
- Use proper paint finish per room
- Buy enough primer
- Keep replacement blades
Clear and Protect the Room
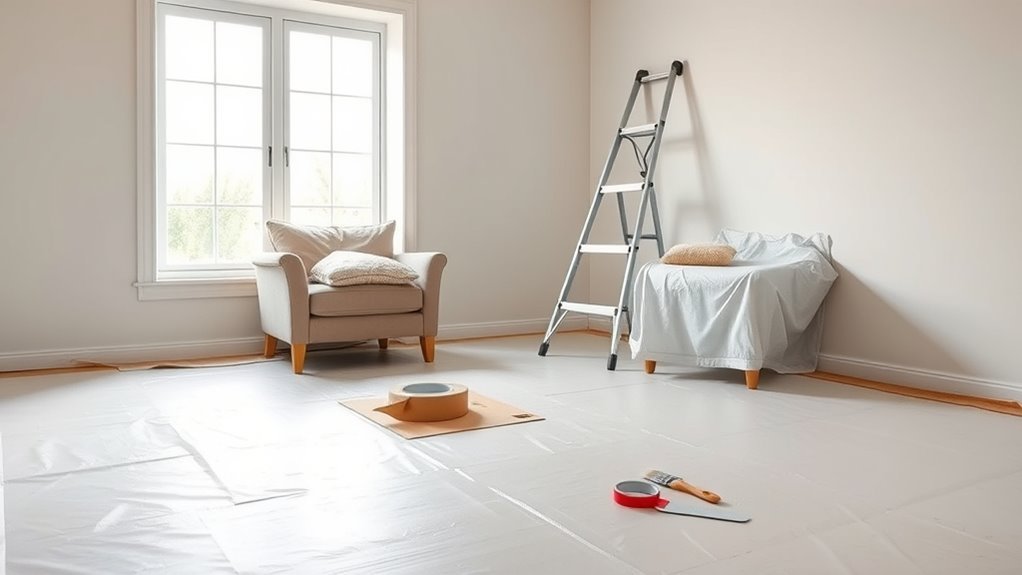
Start by moving furniture out or to the center of the room so you have clear working space. Cover floors with drop cloths and tape them down, and protect light fixtures, switches, and vents with plastic or painter’s tape.
Taking these steps now will keep your paint job neat and make cleanup much easier.
Move Furniture Out
How will you clear the room efficiently before painting? Start by planning furniture placement and room rearrangement so you know what stays, what moves, and where to stage items temporarily. Work systematically from one corner, label boxes, and keep pathways clear. Use helpers for heavy pieces and protect items as you go.
- Empty drawers and cabinets
- Move small items first
- Disassemble large furniture
- Stack pieces against one wall
- Create a clear work corridor
Keep essentials accessible and avoid blocking exits. This organized approach speeds painting and minimizes accidental scuffs or damage.
Cover Floors And Fixtures
Ready to protect your floors and fixtures before paint starts flying? Lay down drop cloths or heavy-duty plastic, taping seams so debris and spills can’t seep through. Remove or mask light fixtures, vents, and outlet covers; use painter’s tape that won’t pull finishes when removed.
For hardwood, add rosin paper first to prevent scuffs. For textured walls, keep cloths pulled tight near baseboards so wall texture doesn’t catch and lift fibers.
Create clear pathways to avoid tracked paint. Proper protection saves cleanup time and preserves paint durability by preventing accidental contamination during application.
Remove Switch Plates, Outlet Covers, and Fixtures
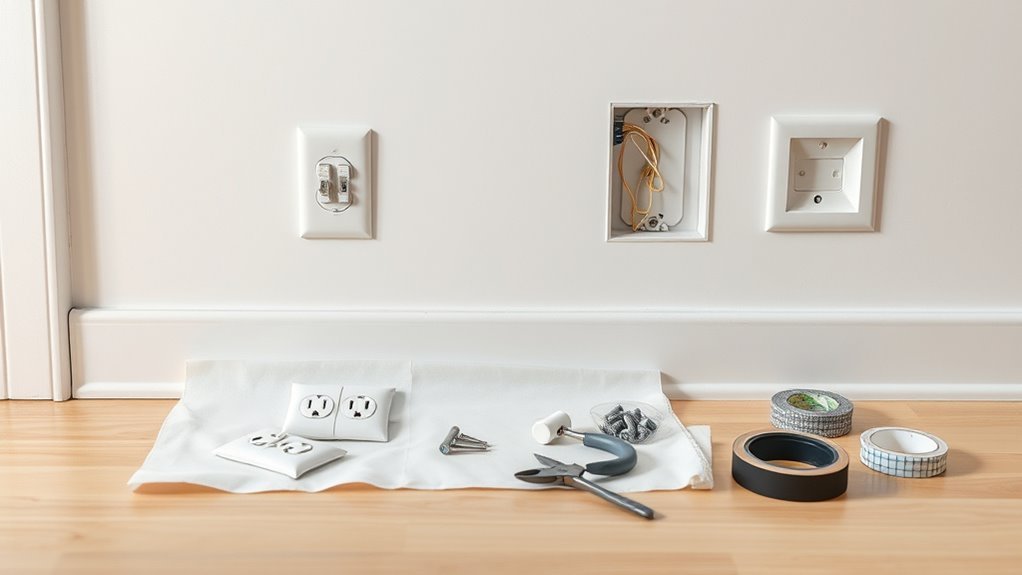
Before you paint, remove switch plates, outlet covers, and any light fixtures that can be easily detached so you get clean edges and avoid splatters. You’ll work safer and neater by doing switch plate removal and simple fixture disassembly before taping.
Remove switch plates, outlet covers, and easy-to-remove fixtures before painting for cleaner edges and fewer splatters.
Turn power off at the breaker.
Unscrew plates gently, noting orientation.
Label and bag matching screws.
Detach fixtures per manufacturer steps.
Store plates and parts in one place.
Replace everything after paint cures to protect finishes and functionality.
Clean Walls: Dust, Grime, and Grease Removal
Before you paint, remove dust and cobwebs from the walls with a broom or vacuum to guarantee a smooth finish.
Pay extra attention to high-touch areas like light switches, door frames, and around appliances where grime builds up.
Use a mild degreaser or TSP substitute on those spots, then rinse and let the wall dry completely.
Remove Dust and Cobwebs
How do you tackle dust and cobwebs so paint will stick and look even? You’ll remove loose particles before priming, since dust hides in decorative techniques and clings to uneven wall texture. Work top-down and use gentle tools to avoid damaging surfaces.
- Start with a microfiber duster for ceilings and corners.
- Follow with a soft-bristle broom to reach high walls.
- Vacuum baseboards and sills with a brush attachment.
- Wipe walls lightly with a damp microfiber cloth where appropriate.
- Inspect under different light angles to catch missed areas.
Clean, dry walls ensure adhesion and a smooth finish.
Degrease High-Touch Areas
Why do greasy fingerprints and cooking splatter ruin a fresh paint job? You need to de-grease high-touch areas thoroughly so new paint will adhere and look uniform.
Mix a mild degreaser or trisodium phosphate substitute with warm water, test a hidden spot to protect wall texture, and work from bottom up. Use a soft sponge, rinse with clean water, and let surfaces dry completely.
Pay attention to switches, door frames, and kitchen backsplashes where oils concentrate. After cleaning, inspect for lingering sheen differences; proper de-greasing helps ensure paint sheen remains consistent and professional.
Inspect for Holes, Cracks, Moisture, and Lead Risk
When you inspect walls, check carefully for holes, cracks, stains, and any signs of moisture or flaking paint—these tell you what repairs and preparations are needed before you paint.
When inspecting walls, look for holes, cracks, stains, moisture, and flaking paint to determine necessary repairs and prep.
You’ll note wall texture and current paint sheen to decide sanding, priming, or sealing. Also assess potential lead risk in homes built before 1978; test kits or pros confirm hazards.
- Map damaged areas by size and location
- Note soft spots or bubbling from moisture
- Photograph questionable zones for reference
- Flag chipping layers that may contain lead
- Record areas needing different prep levels before priming
Fill Nail Holes and Small Surface Imperfections
Before you prime or paint, fill every nail hole and small imperfection so the finish goes on smooth and uniform. Use a lightweight spackling compound for nail holes and tiny surface imperfections; it dries fast and sands easily.
Press compound into each hole with a putty knife, remove excess, and let it cure fully. Sand flush with fine-grit paper, wipe dust with a damp cloth, and spot-prime patched areas to guarantee adhesion.
For textured surfaces, match nearby texture before priming.
Work systematically across the wall so you don’t miss any defects, ensuring a seamless look once you paint.
Repair Larger Holes, Cracks, and Popcorn Texture
If you’ve got larger holes, deep cracks, or stubborn popcorn texture, tackle them now so your finish lays down evenly and lasts. You’ll remove loose material, widen hairline cracks slightly, and use patching compound or joint tape for stability.
Match wall texture before priming so the paint sheen reads consistently. Follow these practical steps:
- Clear dust and debris thoroughly
- Apply backing or mesh for big voids
- Layer compound, letting each cure
- Recreate texture to blend with surrounding wall
- Prime repaired areas to seal and equalize absorption
Finish by inspecting for continuity before moving on.
Sand Walls for Smoothness and Adhesion
Before you paint, sand the repaired and surrounding areas so the surface is smooth and the new coating will stick.
Use the right grit sandpaper and sanding tools for each spot, starting coarse where needed and finishing finer for a feathered edge.
Wipe away dust and check for imperfections before priming or painting.
Sanding Techniques Overview
Though sanding might seem like a minor step, it’s essential for a smooth, long-lasting finish—you’ll remove imperfections, dull glossy surfaces, and create the slight tooth paint needs to stick.
You’ll choose grits, tools, and directions to match goals: coarse to remove flaws, fine to refine. For texture enhancement or to prepare for decorative techniques, vary pressure and overlap strokes.
Keep dust controlled and inspect under good light.
- Start with 80–120 grit for repairs
- Progress to 150–220 grit for smoothing
- Use sanding blocks for flat areas
- Use sanding sponges for contours
- Vacuum and tack cloth between steps
Preparing Surfaces Properly
When you sand walls for smoothness and adhesion, aim to create a consistent, slightly abrasive surface that helps new paint bite while removing bumps, old gloss, and minor repair ridges.
Work from top to bottom with 120–150 grit for general smoothing, then spot-sand repairs with finer grit.
Remove dust thoroughly; you want clean pores for primer to seal.
Check wall texture under varied light to ensure uniformity—texture affects finish and color perception, so consider color psychology when choosing sheen and tone.
Finish with a tack cloth, inspect for missed spots, and apply primer once surface feels even and clean.
Scuff‑Sand Glossy Surfaces and Deglossing
If your walls have a glossy finish, you’ll need to scuff‑sand or degloss them so new paint will stick. You’ll evaluate wall texture and paint sheen, then choose an approach: light sanding, liquid deglosser, or both. Work methodically, clean dust, and test a small area.
- Use 220–320 grit sandpaper for light scuffing.
- Apply deglosser per label, ventilate the room.
- Feather edges to avoid visible gradual transitions.
- Remove sanding dust with a damp cloth.
- Prime glossy areas with bonding primer.
These steps guarantee adhesion and a uniform surface without altering the room’s original contours.
Treat Mold, Mildew, and Stains Safely
Because mold, mildew, and stains can compromise paint adhesion and indoor air quality, you should address them before priming or painting. Start by isolating the area and wearing gloves, eye protection, and a mask.
For light wall mold and mildew, scrub with a vinegar solution or a diluted bleach mix, rinsing thoroughly and allowing complete drying. Test a small area first.
For persistent spots, use a commercial mold remover following label instructions.
For general stain removal—water, grease, nicotine—use appropriate cleaners and a degreasing agent.
Dispose of contaminated rags safely to prevent spores spreading.
Choose the Right Primer for Your Walls
Wondering which primer will give your paint the best chance to look and last great? You’ll pick a primer that suits surface type, stain blocking needs, and the finish you want. Consider how primer affects Color psychology—its opacity and undertone shape the final hue. If you prefer low-VOC products, match primers to eco friendly paints to avoid adhesion problems.
Choose a primer that matches your surface, blocks stains, and preserves true color—especially with low‑VOC paints.
Choose based on drywall, plaster, or glossy old paint, and whether you need mildew resistance. Think ahead to topcoat compatibility so colors read true.
- Surface-specific bonding
- Stain and tannin blocking
- Tinting for true color
- Low VOC options
- Mildew resistance
When to Prime (And How to Apply It)
Now that you’ve picked a primer that matches your surface and finish goals, it’s time to know when to apply it and how to do the job right. Prime whenever bare drywall, repaired patches, stains, or drastic color changes are present.
Guarantee surfaces are clean, dry, and sanded; wipe away dust. Use priming techniques like roller for large areas, brush for edges, and a thin nap for textured surfaces.
Apply one even coat and let it dry fully before sanding lightly for smoother paint adhesion. For tricky spots, spot-prime and inspect for uniform coverage to avoid flashing or uneven gloss.
Caulk Gaps Around Trim, Windows, and Baseboards
When gaps around trim, windows, or baseboards let drafts or moisture in, caulking them creates a cleaner look and improves energy efficiency. You’ll want to caulk gaps before painting so paint adheres and edges look seamless. Choose paintable, flexible caulk and a matching color. Clean surfaces, cut the tube tip, and apply steady beads. Tool the caulk smooth with a wet finger or tool, wipe excess, and let it cure.
- Inspect all trim and window joints for gaps.
- Remove old, failing caulk first.
- Use painter’s tape sparingly.
- Prioritize exterior and high-moisture areas.
- Finish with trim sealing for longevity.
Mask for Clean Paint Lines
How do you get crisp, professional-looking edges without bleeding or jagged lines? Use a reliable mask technique: clean the surface, apply high-quality painter’s tape firmly along the trim, pressing the edge down with a putty knife or credit card to seal.
Paint away from the tape edge to reduce seepage. For extra sharpness, coat the tape edge with a thin layer of the base wall color, let it dry, then apply your topcoat.
Remove tape while paint is tacky, pulling back at a 45-degree angle. Check edges and touch tiny flaws with a fine brush for a flawless paint line.
Final Inspection Checklist and Quick Troubleshooting
Before you declare the job done, run a quick, systematic inspection to catch small issues that can spoil the finish. You’ll do a final inspection room-by-room, using good light and touch to spot drips, missed spots, or texture inconsistencies.
Before declaring the job done, perform a room-by-room inspection with good light and touch to catch flaws.
Use this checklist to fix problems fast and follow simple troubleshooting tips when things aren’t right.
- Check uniform sheen and coverage under angled light.
- Run fingers lightly to detect tacky or rough areas.
- Inspect edges and corners for clean lines.
- Look for paint runs or splatters on trim.
- Verify repaired spots blend with surrounding texture.
Frequently Asked Questions
Can I Paint Over Wallpaper Without Removing It First?
Yes — you can paint over wallpaper, but you’ll often get better results if you tackle wallpaper removal first; thorough surface preparation is key, so clean, repair seams, and prime the paper to guarantee paint adhesion and durability.
How Long Should New Drywall Cure Before Priming and Painting?
You should wait 24 to 72 hours after drywall installation for the curing process to settle joint compound and adhesives; in humid conditions or thicker mud layers, wait up to a week before priming and painting for best results.
What Temperature and Humidity Are Ideal for Painting Indoors?
Aim for about 65–75°F and 40–50% humidity levels; you’ll treat the room like a gentle oven, temperature control steady, humidity levels balanced, so paint adheres smoothly and dries evenly without cracking or bubbling.
Can I Reuse Leftover Paint From Previous Projects Safely?
Yes, you can reuse leftover paint if it’s stored properly; check Paint storage seals, stir and strain, test Color matching on a sample patch, and discard any foul-smelling, separated, or lumpy paint that won’t remix.
How Do I Dispose of Leftover Paint and Hazardous Materials Properly?
A neighbor once drove leftover cans to a municipal drop-off; you should label, dry or solidify latex, and take flammables to a hazardous waste facility. Paint disposal rules vary, so check local hazardous waste guidelines before dropping off.
Conclusion
You’ve got this — prepping walls isn’t as scary or time‑consuming as it seems. Even if you’re worried about the mess or the time it takes, a little careful prep (patching, sanding, caulking, and priming) saves hours later and gives pro results. Follow the checklist, protect floors and furniture, and tackle one section at a time. In a weekend you’ll transform the room with clean lines and longer‑lasting paint you’ll actually enjoy.