How to Remove Acrylic Paint From the Wall Easily
If the acrylic’s fresh, blot excess, then wipe with a cloth dampened in warm soapy water or 70–90% isopropyl alcohol, working outward to avoid spread; rinse and dry. For dried spots, soften with short bursts of a hair dryer or apply rubbing alcohol, gently lift with a plastic scraper, then finish with a Magic Eraser or light sanding. Always test first, wear gloves, and ventilate. Keep going for surface-specific tips, heat methods, and touch-up guidance.
Quick Fix: Remove Fresh Acrylic Paint in Minutes

If the acrylic paint is still wet, act fast: blot excess with a clean paper towel, then dab the spot with a cloth dampened in warm soapy water or rubbing alcohol until the paint lifts. You’ll rinse and repeat, working outward to avoid spreading.
Once dry, gently scrape any residue with a plastic scraper and lightly sand smooth. Test a small area before using stronger solvents.
If you remove paint down to primer or bare drywall, note the surface for future touch-ups. Keep paint primers handy to seal repaired spots, and match color carefully so your touch-up blends seamlessly with existing wall paint.
Identify Acrylic Paint on Your Wall
Start by feeling the paint’s texture—acrylic dries slightly raised and plastic-like rather than powdery. Check for telltale drips or thicker spots where brush or roller marks pooled.
If you’re unsure, rub a hidden area with a bit of rubbing alcohol; acrylic will soften or lift, while latex or oil won’t react the same way.
Check Paint Texture
Because acrylic paint has a distinctive finish, you can often tell what’s on your wall just by touch and sight. Do a quick texture check: run your hand lightly across the area to note the surface feel. Acrylic usually dries slightly raised and smooth, not chalky like latex or powdery like some primers.
Look for a subtle sheen under light and feel for a plastic-like resistance when you press gently. If the paint feels flexible rather than brittle, it’s likely acrylic. Record these observations before cleaning so you choose removal methods that won’t damage the underlying wall.
Look For Paint Drips
Now that you’ve checked texture, scan the wall for drips and runs—those telltale signs can confirm acrylic. Look closely where paint pooled or gravity created vertical streaks; acrylic often dries with slightly raised edges and a matte to satin finish.
If you spot drips, note their color and thickness for future color matching when repairing. Photograph problem areas before you touch anything.
Drips near trim or corners can hint whether the surface was prepped with paint priming; lack of primer often causes heavier runs. Mark locations so you can target removal and touch-up without disturbing surrounding undamaged paint.
Test With Rubbing Alcohol
If you’re unsure whether a stubborn spot is acrylic, test it with isopropyl rubbing alcohol to check—wet a cotton ball, dab an inconspicuous area, and rub gently; if the paint softens or transfers, it’s water-based acrylic.
Once confirmed, work carefully so you don’t disturb surrounding color mixing or finish. Start with gentle dabbing, then lift softened paint with a plastic scraper. If residue remains, repeat or try a mild detergent.
- Protect trim and apply test in hidden spot.
- Use small amounts to avoid penetrating wall primer.
- Rinse and let dry before repainting.
When to Act: Fresh Versus Dried Acrylic Paint
If the acrylic is still wet, act right away—fresh paint wipes off much more easily with a damp cloth and mild soap.
If it’s already dried, you’ll need stronger methods and more patience, so let it cure fully before testing solvents.
Always check the wall’s finish and a hidden spot first to avoid damage.
Act Immediately For Best Results
1 key rule: act as soon as you spot acrylic paint on the wall, because fresh paint wipes away far more easily than dried. You’ll save time and preserve wall texture by tackling spills immediately. Fresh paint hasn’t bonded fully, so gentle blotting with a damp cloth or mild soap often removes it without scrubbing.
- Blot excess with a soft cloth, avoid rubbing to prevent spreading and disturbing color mixing.
- Use mild soap and warm water; test a hidden area first to protect finish.
- For stubborn spots, try a diluted rubbing alcohol, working from the edges inward.
Wait For Paint To Dry
While fresh acrylic is easiest to remove, you’ll sometimes need to wait for it to dry before treating the wall—especially when the spill is thin, large, or already partly tacky. Let it fully cure if attempts smear pigment or ruin color mixing, otherwise you’ll spread stains.
Dry paint can flake and lift cleanly with gentle scraping or soft brushing, reducing damage. Be mindful of wall texture: porous or heavily textured surfaces hold dried paint differently, so wait until it’s hard to the touch.
Once dry, test a small area before using solvents or vigorous methods to avoid finish damage.
Assess Surface Before Cleaning
How quickly you act depends on whether the acrylic is fresh or fully dried: treat wet spills immediately to lift pigment easily, but hold off on aggressive methods until dried paint hardens.
You’ll check wall texture and surrounding finish before choosing solvents or scraping. Soft textures need gentler approaches to avoid damage; smooth surfaces tolerate more mechanical removal. Consider color matching for any touch-up after cleaning.
- Test a small hidden area for finish reaction and color matching.
- Blot fresh paint with minimal pressure; don’t spread.
- For dried paint, soften with warm soapy water before careful scraping.
Safety: PPE, Ventilation, and Drop Cloths
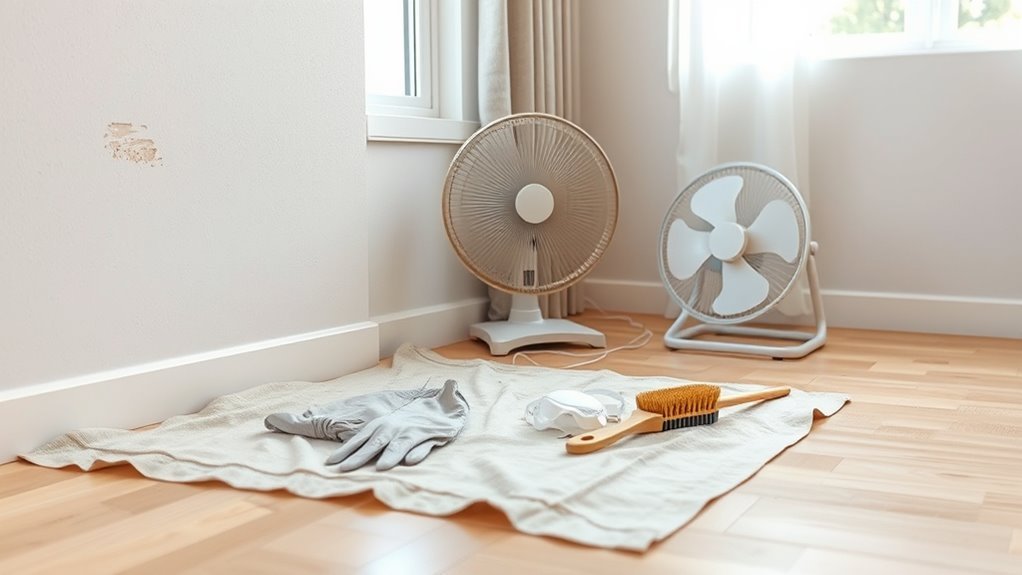
Before you start scraping or applying solvents, make sure you’ve set up proper personal protective equipment, ventilation, and drop cloths so you stay safe and keep the work area contained.
Before scraping or using solvents, set up PPE, ventilation, and drop cloths to contain the work area.
Wear safety equipment: nitrile gloves, eye protection, and a respirator if using strong chemicals.
Use ventilation tips: open windows, position a fan to blow fumes outward, and work in short sessions to limit exposure.
Lay drop cloths over floors and furniture, taping edges to prevent slipping and collect debris.
Keep a trash bag nearby for waste and used cloths, and avoid eating or drinking in the work area.
Supplies You’ll Need for Most Paint Removals
Since you’ll be tackling different paint types and wall surfaces, gather a basic kit that covers scraping, softening, cleaning, and protection. You’ll want tools that let you remove acrylic without harming finish or substrate, then assess color matching and paint durability for touch-ups.
Include gentle solvents and a mild abrasive, plus safety gear. Keep items small for spot work and durable enough for repeated use.
- Plastic scraper, putty knife, assorted sandpaper (120–320 grit)
- Citrus-based remover, isopropyl alcohol, microfiber cloths
- Gloves, goggles, painter’s tape, drop cloth
Test a Hidden Patch: Step-by-Step Spot Check
Pick an inconspicuous spot like inside a closet or behind a switch plate and clear the area first.
Mix a small amount of your chosen cleaning solution and apply it gently with a cotton swab.
After it dries, inspect for any paint reaction, discoloration, or surface damage before treating the visible area.
Choose An Inconspicuous Area
When you’re ready to test a cleaning method, find a hidden patch—like inside a closet or behind furniture—and try it there first to make sure the cleaner won’t damage the finish or color.
You’ll assess how color mixing shows up where light’s limited and whether the wall texture reacts oddly. Clean a small spot, wait, then inspect under normal light. Note any dulling, lifting, or residue so you can choose a gentler approach if needed.
Record results and location before treating visible areas.
- Test on varied textures.
- Check color mixing effects.
- Photograph results for reference.
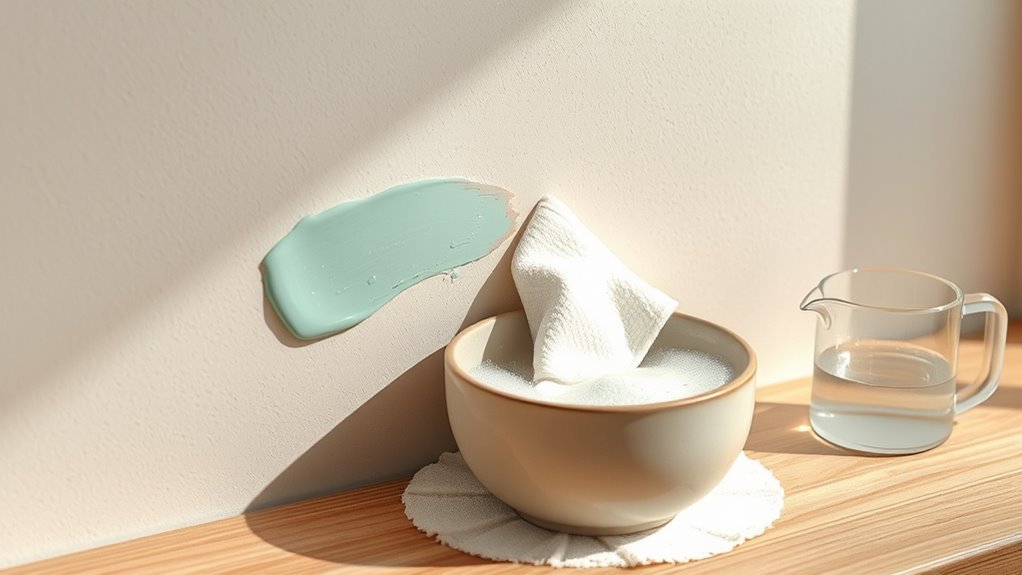
Prepare Test Cleaning Solution
How will you mix and label a small test solution so you can isolate what works (and what doesn’t)? Start with a clear, mild cleaner diluted per directions—water, dish soap, or rubbing alcohol—then pour a teaspoon into separate labeled containers.
Note concentration, solvent, and approximate dwell time on each label. Place labels where they’ll stay during your cleaning schedule so you track when each was applied.
Test each on the inconspicuous patch, aiming for the closest color matching to surrounding paint before you proceed. Record results immediately to compare effectiveness and any visible changes, keeping the process systematic and repeatable.
Inspect For Paint Reaction
Before you apply any cleaner widely, test a small, hidden patch to see how the wall paint reacts; you’ll avoid surprises by watching for color change, softening, or sheen loss. Pick an inconspicuous corner, apply your prepared solution, and blot gently.
Wait 15–30 minutes, then inspect for paint consistency changes and any wall discoloration. Note how the surface feels and whether the finish dulls.
- Record visible color shift.
- Check for tackiness or paint lifting.
- Evaluate sheen and texture differences.
If you see damage, stop and choose a milder method or consult a pro.
Remove Fresh Acrylic With Warm Soapy Water
If the paint is still wet, you can usually lift it right off the wall with warm, soapy water and a soft cloth. Start by mixing a few drops of dish soap into warm water, dampening the cloth, and gently blotting the stain until the paint softens and comes away.
Work from the edges inward to prevent spreading. Rinse and reapply as needed, using light pressure to avoid damaging the finish or causing color fading on painted surfaces.
For light staining, repeat blotting and rinse frequently. Dry the area with a clean towel and inspect; if residue remains, try another gentle pass.
Use Isopropyl Alcohol on Recent Acrylic Spots
When recent acrylic spots don’t lift with soapy water, reach for isopropyl alcohol to dissolve the resin quickly and safely. You’ll work on small areas, testing an inconspicuous patch first to guarantee the wall texture and paint finish won’t react. Dab alcohol on a cloth, blot gently, and avoid scrubbing hard.
- Use 70–90% isopropyl alcohol for faster breaking of acrylic chemistry bonds.
- Blot from the edges inward to prevent spreading and to preserve wall texture.
- Rinse the area with a damp cloth, then dry to check for residue or damage before repeating.
How White Vinegar Loosens Acrylic Paint
When you apply white vinegar to acrylic paint, its mild acidity breaks down the paint’s outer binders. That acid action softens the paint film, making it easier to lift with a cloth or scraper.
You’ll usually see the paint swell or become tacky within a few minutes, signaling it’s ready to remove.
Vinegar’s Acidic Action
Because white vinegar contains acetic acid, it breaks down the acrylic binder that holds pigment to the wall, softening the paint film so you can lift or wipe it away more easily. You’ll notice edges loosen first, especially where color blending met thin strokes or uneven wall texture.
Apply vinegar, wait briefly, then test a small area.
- Target high-contrast spots where pigments separate.
- Use gentle agitation with a microfiber to avoid gouging texture.
- Rinse and blot to prevent residue or streaks, checking for lingering tint.
Vinegar is safe for quick spot treatment when used carefully.
Paint Film Softening
You’ve seen how vinegar attacks edges and thin strokes; now look at what it does to the paint film itself. You’ll apply warm white vinegar to loosen acrylic’s polymer matrix, so flakes lift without harsh scrubbing. Test first for color matching and wall texture changes; porous textures absorb more liquid. Work in small areas, blotting rather than rubbing, and rinse with water afterward to stop softening.
| Step | Effect |
|---|---|
| Apply | Polymer softens |
| Wait | Paint swells |
| Blot | Loosens film |
| Lift | Paint releases |
| Rinse | Stops reaction |
Remove Dried Acrylic With Rubbing Alcohol and Scraping
If the acrylic’s already dried, grab rubbing alcohol and a plastic scraper to soften and lift the paint without damaging the wall surface. Apply alcohol to a cloth, blot the spot, and let it penetrate; test a small area to check how wall texture reacts. You’ll notice softened edges where color mixing blurred; work slowly to preserve paint you want to keep.
Use the scraper at a low angle, lifting softened flakes.
- Soak a cotton pad, press briefly, then wipe.
- Work outward from the center to avoid smearing.
- Rinse with a damp cloth and dry.
Use a Plastic Scraper Without Damaging the Undercoat
Want to lift paint without gouging the undercoat? Use a plastic scraper at a shallow angle, working slowly across the spot. Test a hidden area first to confirm pressure won’t peel primer or reveal substrate.
Good wall preparation matters: remove dust, soften paint edges with warm water, then scrape in short, controlled strokes. Don’t force stubborn patches; rehydrate and retry.
Ignore acrylic myths that claim hard metal is the only effective tool—plastic protects layers. Keep scraper edges clean and replace when nicked.
Finish by lightly sanding feathered edges before touching up paint for a seamless repair.
Use a Magic Eraser on Acrylic Paint Spots
Wipe the area with a damp cloth to remove dust and loosen the paint before you start.
Use the Magic Eraser with light, controlled strokes so you scrub gently without stripping the undercoat.
Rinse the wall, let it dry, and inspect the spot to repeat treatment only where needed.
Prepare The Surface
Before you start scrubbing, dampen a Magic Eraser and gently test it on an inconspicuous patch to make sure it won’t remove the wall’s finish. You’ll clear dust and loose paint first, so the eraser works efficiently without extra abrasion.
Check for color matching needs afterward; if the area lightens, note the original shade before proceeding.
Assess wall texture—smooth, eggshell, or orange peel—so you know how aggressive you can be.
- Wipe with a dry microfiber to remove dust.
- Use a damp cloth to lift loose flakes.
- Photograph the spot for color matching reference.
Gentle Scrubbing Technique
Once you’ve confirmed the finish won’t lift, dampen the Magic Eraser slightly and work in small, gentle circles over the paint spot, applying only light pressure so you don’t abrade the wall.
Move methodically from the edge inward to avoid spreading pigment from color mixing; if the mark resists, pause and re-wet the eraser rather than scrubbing harder. Test frequently to gauge progress.
For stubborn flecks, use short, repeat passes and replace the eraser when it soils.
After removal, consider whether paint priming is needed before touching up to guarantee repaired areas accept new paint evenly.
Clean And Inspect
After gentle scrubbing, step back and inspect the spot under good light so you can see any remaining pigment or surface damage.
Use a damp Magic Eraser gently to lift stubborn acrylic flecks, watching how it affects paint texture.
If the wall looks dull or scuffed, don’t panic—test a tiny area to check color matching before treating the whole spot.
Finish by wiping with a soft cloth and allowing the area to dry; repeat only if necessary.
- Note leftover pigment and surface irregularities.
- Test color matching on an inconspicuous patch.
- Reapply gently if texture remains uneven.
When to Use a Commercial Paint Remover Safely
Wondering when it’s worth reaching for a commercial paint remover? Use one when the acrylic stain won’t lift with soap, water, or gentle scraping, or when texture and color matching issues risk needing a full repaint.
Reach for a commercial paint remover when acrylic stains resist soap, water, or scraping and a full repaint looms.
Choose a product labeled for walls and test a small, hidden spot first to confirm finish and pigment response.
Ventilate well, wear gloves and a respirator, and protect floors and trim.
Consider environmental impact by selecting low-VOC, biodegradable formulas and disposing of waste per local rules.
If you’re unsure, consult a professional before using harsh chemicals.
Remove Acrylic From Glossy or Semi-Gloss Finishes
If a commercial remover is too harsh for your glossy or semi-gloss walls—or if you’ve already confirmed it won’t harm the finish—you’ll need a gentler, controlled approach because these surfaces show damage and streaks more readily.
Start by softening fresh acrylic with a damp microfiber and mild dish soap, blotting rather than rubbing to protect the sheen.
Test any method in an inconspicuous spot to check color matching and paint durability effects.
For stubborn spots, use a plastic scraper and isopropyl alcohol sparingly, then rinse and buff.
- Blot with soap and water
- Test inconspicuous area first
- Scrape gently, finish with alcohol
Remove Acrylic From Matte or Flat Walls
Matte and flat walls are more porous, so you’ll want to test paint removal on a hidden spot first to avoid damage.
Start with a gentle cleaning solution and soft cloth, working slowly to lift the acrylic without scrubbing through the finish.
If the spot lightens or the finish is harmed, be ready to touch up or repaint that area for a seamless result.
Test Paint Removal First
Before you tackle the whole stain, test your removal method on a hidden patch of matte or flat-painted wall to see how the finish reacts. You’ll learn whether scrubbing dulls sheen, if pigments spread, or if the underlying color mixing reveals itself. Try a tiny area behind furniture or near trim, let it dry, then inspect.
Note any lifting, texture change, or bleeding that could require primer selection later. If damage appears, stop and reconsider approach.
- Scrub gently, wait, inspect.
- Compare with adjacent untouched paint.
- Photograph results for reference.
Use Gentle Cleaning Solution
When you’re dealing with acrylic on matte or flat walls, reach for a mild, non-abrasive cleaning solution so you don’t lift or dull the finish. Dampen a soft microfiber cloth or sponge, wring well, and gently blot the paint—don’t scrub.
Test in an inconspicuous spot to confirm the cleaner won’t alter wall texture or color matching.
For stubborn spots, use a paste of baking soda and water applied lightly, then rinse.
Work from edges inward to avoid spreading.
Dry promptly with a clean cloth.
If the paint resists, pause and reassess before using stronger methods to protect the finish.
Touch-Up And Repaint
If the stain won’t come off without damaging the finish, you’ll need to touch up or repaint the area to restore a uniform look. Prep by gently sanding matte or flat walls, clean dust, and feather edges so new paint blends.
Test color matching with a small swatch—natural light shows differences. Match wall texture by using the same roller nap or texture spray.
- Clean and sand lightly to smooth the perimeter.
- Apply primer if stains show through, then a thin coat of matched paint.
- Blend edges and let dry before evaluating repeat coats.
Remove Acrylic From Textured or Stucco Walls
Because textured and stucco surfaces trap paint in nooks and ridges, you’ll need a different approach than you’d use on flat walls. Start by gently scraping excess with a plastic putty knife, then soften remaining acrylic with a damp cloth and warm, soapy water.
For stubborn spots, apply a small amount of isopropyl alcohol or a commercial paint remover, testing first in an inconspicuous area. Blot—don’t rub—to avoid damaging texture.
After removal, assess texture repair needs and sand or patch minimally. Finish by color matching touch-ups so repaired areas blend seamlessly with the surrounding surface.
Tackle Acrylic on Wallpaper Without Ruining It
Although wallpaper can be delicate, you can remove acrylic paint without ruining the paper by acting quickly and using gentle, targeted methods. Start by protecting furniture and flooring, and test a hidden spot for colorfastness.
Use a soft cloth dampened with mild detergent or rubbing alcohol, blotting—don’t rub—to lift paint. For thicker spots, carefully loosen edges with a plastic scraper or a credit card.
- Blot with mild soap solution.
- Gently lift dried paint with a plastic edge.
- Rinse lightly and pat dry to avoid moisture damage to textured walls and seams.
Work patiently to preserve the paper.
Remove Paint From Trim, Baseboards, and Doorframes
Before you start scraping, check what material your trim, baseboards, and doorframes are made of—wood, MDF, or painted metal will need different care.
Use gentle methods first, like warm soapy water, a soft cloth, or a plastic scraper, and test a hidden spot to make sure the finish isn’t damaged.
If the paint won’t budge, move to milder solvents or a heat gun on low, working slowly to avoid warping or stripping the trim.
Assess Trim Material
When you start removing acrylic paint from trim, baseboards, or doorframes, first identify the material—wood, MDF, metal, or plastic—so you can choose a safe method and solvent. Do a quick trim assessment and surface evaluation: look for finishes, dents, or previous paint layers, and note heat-sensitive or porous substrates. That determines whether you’ll sand, scrape, or use a solvent.
- Wood: sealed vs. raw affects abrasives and chemicals.
- MDF: avoid excessive moisture; test solvents first.
- Metal/plastic: prefer gentle plastic-safe scrapers and non-corrosive cleaners.
Gentle Removal Techniques
Once you’ve identified the trim material, begin with the least aggressive options so you won’t damage the surface. Test a damp microfiber cloth and mild dish soap on an inconspicuous spot; gently rub along grain or molding.
For stubborn spots, use a cotton swab dipped in rubbing alcohol, moving with the trim’s contours to protect paint edges. Avoid harsh scrapers that can alter wall texture or gouge wood.
If paint remains, try a commercial citrus-based remover, rinsing thoroughly.
For multi-colored spots caused by color mixing, clean each hue separately and dry fully before repainting or sealing.
Lift Acrylic Paint From Brick and Masonry
Brick and masonry soak up paint and hold it fast, so you’ll need a different approach than you’d on drywall or wood. You’ll assess surface porosity and wall textures, then choose methods that won’t harm brick or mortar. Test a small area first; consider how color mixing from previous layers affects removal.
- Use a stiff nylon brush and warm soapy water, scrubbing along mortar lines.
- Apply a masonry-safe poultice or commercial remover, following label dwell times.
- Rinse with a low-pressure power washer, keeping spray at an angle to protect joints.
Wear gloves, eye protection, and ventilate the area.
Remove Acrylic From Painted Furniture Near the Wall
If acrylic paint splattered onto your painted furniture near the wall, act quickly to prevent stains from setting into the finish. Blot excess with a damp cloth, then test a mild solvent (soapy water, rubbing alcohol) in an inconspicuous spot.
Work gently with a soft cloth or wooden scraper to lift paint without abrading the surface. If tiny flecks remain, use a cotton swab and solvent sparingly.
After cleaning, dry thoroughly and assess the finish. If gloss or color looks uneven, consider color matching touch-up paint and thin layers to blend.
Finish with proper paint sealing to protect the repair.
Use Heat Tools to Loosen Stubborn Acrylic Paint
Before you grab a heat tool, test it on a hidden spot to make sure it won’t damage the wall.
Start with a hair dryer on low heat to soften the acrylic, then gently warm any stubborn areas.
Once the paint softens, scrape it off carefully with a plastic tool to avoid gouging the surface.
Test Heat On Hidden Area
Start by checking a small, hidden patch of wall—behind furniture or inside a closet—so you can test heat tools without risking visible damage. You’ll learn how heat affects paint, wall texture, and any underlying color mixing that shows through.
Apply low heat briefly, watch for bubbling, discoloration, or warping, and stop if the surface softens too much. Note results and adjust temperature or distance before moving to visible areas.
- Try short bursts, 6–8 inches away.
- Record ideal heat setting and time.
- Test compatibility with trim, caulk, and primer.
Use Hair Dryer First
When heat testing went well, grab a hair dryer and aim at the paint to soften it—hold it 6–8 inches away and use short, steady passes so the surface warms without blistering. You’ll feel progress as flakes loosen; keep Hair dryer safety in mind—avoid high heat settings and never leave the dryer unattended. Gentle Heat application reduces damage and makes cleanup easier. Stay patient; warm paint peels more predictably. If edges lift, repeat brief heating rather than prolonged blasts. You’ll gain confidence with each pass, knowing you’re protecting the wall while removing stubborn acrylic carefully and effectively.
| Calm | Relief |
|---|---|
| Warm | Safe |
| Steady | Hope |
Scrape With Plastic Tool
Once the heated paint has softened, take a plastic scraper or putty knife and work at a low angle to lift flakes without gouging the wall. If edges still cling, reapply brief bursts of heat to loosen them further.
You’ll scrape gently across wall texture variations, avoiding deep pressure that would damage drywall or plaster. Collect loosened bits and assess the spot for remaining residue; a soft damp cloth helps. Keep color matching in mind for any touch-ups—note original sheen and hue before repair.
- Test pressure on an inconspicuous area.
- Use overlapping strokes toward removed paint.
- Clean residue before repainting.
Use Strong Solvents Safely (Acetone, Mineral Spirits)
Because acetone and mineral spirits are much stronger than soap and water, you’ll want to use them carefully and sparingly to avoid damaging the wall or harming yourself. Work in a ventilated area, wear gloves and eye protection, and test a hidden spot first to check how the solvent affects paint textures and color matching.
Apply solvent with a cloth—dab, don’t rub—then blot loosened paint with a clean rag. Limit contact time to prevent undercoat lifting. Dispose of rags safely and store solvents sealed.
If the finish softens excessively, stop and consider gentler methods or professional help.
Remove Paint Splatter Without Stripping the Undercoat
If you want to remove paint splatter without stripping the undercoat, work carefully and use the gentlest effective method first. Test a hidden patch to check color mixing effects and how wall texture responds.
Start with a soft plastic scraper, then try a damp microfiber with mild dish soap; blot rather than rub to avoid lifting the base coat.
Begin with a soft plastic scraper, then blot with a damp microfiber and mild dish soap to protect the base coat.
For stubborn spots, use isopropyl alcohol on a cotton swab, moving outward from the splatter.
- Soft plastic scraper: lift flakes, preserve texture.
- Damp microfiber + soap: safest for most paints.
- Isopropyl swab: targeted, avoids broad abrasion.
Fix Small Dings After Paint Removal
After you’ve removed the splatter, you’ll often find small dings or shallow gouges where the paint came off; you can repair these quickly with a few simple tools and minimal drying time.
Lightly sand edges, dust off, then press a small amount of spackling into the ding with a putty knife. Let it dry, sand smooth, and wipe clean.
Choose filler that accepts paint well so texture matches. When ready to touch up, focus on color matching and paint sheen to avoid obvious spots; test a tiny area first.
Use thin layers and feather edges for an unobtrusive repair.
Repaint a Spotless Patch Seamlessly
Before you repaint, you’ll want to sand, clean, and prime the patched area so the new paint adheres smoothly.
Match the color and sheen carefully—use a sample swatch or take a chip to the store if needed.
Apply thin coats and feather each edge into the surrounding wall to blend the patch seamlessly.
Surface Preparation Steps
When you’re ready to repaint a patched area, start by cleaning the wall, sanding the edges smooth, and priming the spot so the new paint blends seamlessly with the surrounding surface.
You’ll inspect the wall texture and repair any dents or high spots; smooth gradual changes keep touch-ups invisible.
Check moisture and remove grease with a mild detergent. Choose primer suited to your surface before painting.
- Sand feathered edges until texture matches.
- Clean and dry thoroughly to guarantee adhesion.
- Apply quality primer and let it fully cure.
Consider color matching separately to avoid mismatched finishes.
Paint Matching Tips
Now that the patched area is primed and smoothed, focus on matching color and sheen so your repair disappears. You’ll test small swatches, view them in different light, and use sample pots or on-site mixing for accurate color matching. Keep notes on formulas and paint batch numbers. For texture blending, choose tools that replicate the original finish and practice on scrap before applying. Use thin coats and compare from several feet away, adjusting tint gradually until seamless.
| Step | Tip | Result |
|---|---|---|
| 1 | swatch test | match |
| 2 | natural light | confirm |
| 3 | note formula | repeat |
| 4 | tool choice | mimic |
Feathering And Blending
Although the patch is primed and color-matched, you’ll need to feather and blend each coat so the repair disappears into the surrounding wall. Work from the patch outward with a slightly damp brush or roller, using light, overlapping strokes to soften edges.
Match sheen and wall texture, and adjust color mixing in small increments to avoid obvious seams. Let each thin coat dry fully before evaluating.
- Use a small foam roller for subtle texture.
- Scrape edges gently between coats to remove ridges.
- Step back often under consistent lighting to judge blend.
Use Stain-Blocking Primers: When and How
If stains or ghosting from old acrylic paint keep showing through, a stain-blocking primer will save you time and effort by sealing the problem before you repaint. You’ll choose an oil-based or shellac-based stain-blocker for tough tannin, marker, or water stains; latex-blockers work for mild discoloration.
Follow priming techniques: clean, sand lightly, and apply thin, even coats with a brush or roller, letting each dry fully. That prevents bleed-through and guarantees uniform topcoat adhesion.
For problem areas, spot-prime then coat the whole wall to avoid patchy sheen. Always ventilate and follow manufacturer cure times for best stain prevention.
Eco-Friendly and Non-Toxic Paint-Removal Options
When you want to remove acrylic paint without harsh chemicals, several eco-friendly, non-toxic methods work well and are gentle on both surfaces and the environment. You can tackle drips and smears safely using household items and Eco friendly solvents designed for minimal fumes. Try small spots first, then scale up, and always ventilate.
- Vinegar and warm water: soften paint, scrape gently with a plastic scraper.
- Baking soda paste: lift paint from textured surfaces without abrasion.
- Commercial Non toxic options: plant-based paint removers labeled biodegradable for tougher areas.
Test each method, wipe residue, and rinse thoroughly.
Protect Finished Walls During Future Projects
To keep finished walls looking pristine during future projects, start by covering and masking any area that could get splattered or scuffed—use drop cloths, painter’s plastic, and low-tack painter’s tape on trim and adjacent surfaces. You’ll protect finishes by creating barriers, moving furniture away, and using foam rollers or shields when spraying nearby.
If touch-ups become necessary, test small swatches for color matching before committing, and sand lightly to feather edges. After repairs, apply a clear paint sealing coat to blend sheen and lock repairs.
Regular maintenance and careful setup will minimize repainting and preserve your wall finish.
Common Mistakes That Damage Wall Finish and How to Avoid Them
Because a few common slip-ups can undo hours of careful prep and finishing, you should know which mistakes most often harm wall surfaces and how to stop them. Don’t scrub too hard, use harsh solvents, or skip testing paint removers—you’ll strip finish or spread stains. Prioritize gentle methods and check a hidden spot first.
Balance color matching when you touch up, and consider environmental safety by choosing low-VOC cleaners.
- Rubbing aggressively: causes sheen loss and abrasion.
- Using strong chemicals without testing: eats paint and base.
- Ignoring manufacturer instructions: ruins warranty and finish.
Troubleshooting: What to Do If Paint Won’t Budge
If the paint won’t budge, first check how thick the layer is so you can choose the right removal method.
If thin scrubbing and mild cleaners fail, try a stronger solvent like rubbing alcohol or a commercial acrylic remover, testing a small hidden spot first.
If the finish still won’t come off or you’re worried about damage, call a professional to avoid making the problem worse.
Assess Paint Thickness
When paint won’t budge, start by checking how thick the layer is—you can often tell by touch and a close visual inspection. Press gently with a fingernail: a raised ridge or rough edge means multiple coats or dried blobs. Thin, recent splatters lift easier; thick areas resist and may need careful scraping to avoid paint peeling or damaging underlying finish.
Note any attempts at color matching—if you’ll repaint later, mark spots so repairs blend. Use this quick checklist to map trouble spots before choosing a method.
- Run fingertip test for ridges.
- Inspect edges for lift.
- Mark thick zones for repair.
Try Stronger Solvents
Although stronger solvents demand more caution, they’re often your best option when water and mild cleaners fail to shift dried acrylic. Test a solvent in an inconspicuous spot, using Texture analysis to see if the surface softens or the finish etches.
Work small, blotting—don’t rub—to remove softened paint. If the solvent alters sheen or removes original pigment, pause; note how it affects Color matching for any future touch-ups.
Ventilate, wear gloves and eye protection, and use minimal solvent applied with a cotton swab. Neutralize residue afterward with mild soap and water, then let the wall fully dry before evaluating.
Consider Professional Help
Sometimes even the strongest solvents won’t budge stubborn acrylic or they damage the wall’s finish, so you’ll want to bring in a pro. If you’ve tried safe methods and the stain persists or the surface is delicate, seek professional guidance to prevent costly repairs.
An expert consultation can assess paint type, wall material, and restoration options, plus offer guaranteed results.
- Get a licensed restorer to evaluate damage and recommend techniques.
- Ask for references, insurance, and a written estimate.
- Request minimally invasive options and a warranty on work performed.
When to Call a Professional Restorer
If your attempts haven’t budged stubborn paint, call a professional restorer to avoid making the damage worse. You should contact one when paint covers textured, antique, or historically significant surfaces where improper cleaning risks destroying finish or historical context.
Call also if solvents cause bubbling, paint penetrated deeply, mold appears, or large areas are affected. Pros assess substrate, recommend conservation-friendly methods, and minimize environmental impact by using regulated disposal and low-toxicity materials.
They’ll document condition, use reversible treatments, and prevent recurring issues. If you’re unsure, a quick consultation can save fabric, value, and time compared with trial-and-error.
Cost Estimate: DIY Clean-Up Versus Professional Repair
When you weigh the options, tackling acrylic paint removal yourself usually costs far less up front but can add time, risk, and hidden expenses if things go wrong. You’ll do a cost comparison between supplies, time, and possible repairs.
DIY vs. professional choices hinge on damage level, skill, and patience. Estimate materials (cleaners, scrapers, touch-up paint), your hours, and potential wall repairs if you damage drywall or finish. A pro charges labor and warranty but reduces risk.
- Materials and time — lower direct cost, higher risk.
- Repair after mistakes — unpredictable expense.
- Pro service — higher fee, more certainty.
Remove Acrylic Paint From Ceiling Surfaces
You’ve weighed DIY versus hiring a pro for wall paint issues; ceilings add a different set of challenges you should consider before starting.
Consider DIY vs. pro for walls—ceilings bring extra challenges worth weighing before you start
You’ll need stable support, good lighting, and drop cloths to protect floors and furniture.
Gently scrape flakes, then clean with mild detergent and a soft sponge.
For cured acrylic, use a damp microfiber and a little rubbing alcohol, testing a hidden spot first.
Repair minor texture with joint compound, sand smooth, and focus on surface preparation to guarantee adhesion.
When repainting, plan color matching under ceiling light to avoid noticeable differences.
Remove Paint From High or Hard-to-Reach Areas
Because high or hard-to-reach areas demand extra safety and the right tools, you’ll want to plan your approach before you climb or extend any equipment. Use a sturdy ladder or extension pole with a gentle scraper and damp microfiber—work from the top down to catch drips.
Test a small patch to note how wall texture affects removal and whether paint lifts cleanly. After cleaning, assess staining and match repaired spots carefully for color matching to blend repairs.
- Secure ladder placement and a spotter.
- Use extension tools and gentle solvents.
- Feather edges to preserve texture.
Remove Acrylic Paint Caused by Children or Crafts
High or hard-to-reach spots require planning, but marks from kids and craft projects usually call for quicker, gentler fixes you can do at eye level. For child accidents, blot fresh paint with a damp cloth, then try mild soap and water. Dried spots respond to gentle scraping with a plastic card, followed by a damp sponge. For Craft cleanup, test a small area first and avoid harsh chemicals on finished walls.
| Situation | Action | Timing |
|---|---|---|
| Fresh smear | Blot, soap | Immediate |
| Dried fleck | Plastic card, sponge | Within days |
| Stubborn spot | Test solvent | Cautious |
Preventative Tips to Avoid Future Acrylic Splashes
If you want to keep acrylic paint off your walls, set up simple barriers and routines before projects start. Protect surfaces with drop cloths, tape edges, and wear old clothes to prevent accidental splashes. Plan paint choices so touched-up spots blend: note color matching and original paint sheen for seamless fixes if needed. Keep tools and lids organized to avoid spills. Quick routines reduce accidents and save time.
Set simple barriers, protect surfaces, and organize tools—small routines prevent acrylic splashes and make touch-ups seamless.
- Secure drop cloths and tape seams.
- Store brushes upright and seal lids immediately.
- Assign a cleanup station with wipes and warm water.
How to Dispose of Paint-Removal Waste Responsibly
When you finish removing acrylic paint, handle the waste deliberately to protect people and the environment. Gather used rags, scraped paint chips, and solvent residues in sealed, labeled containers to limit environmental impact.
Don’t pour solvents or slurries down drains; check local regulations for hazardous-waste rules. Many communities offer household hazardous-waste drop-off or special collection events—use those disposal methods.
For small, fully dried paint flakes, bag them securely and follow municipal trash guidelines. If you’re unsure, contact your local waste authority for instructions.
Proper handling reduces contamination risks and guarantees you comply with laws while protecting waterways and soil.
Quick Reference: Best Methods by Surface Type
Now that you’ve handled waste responsibly, you’ll want a quick, surface-by-surface guide to remove remaining acrylic paint without causing damage. Assess texture assessment needs first: smooth drywall tolerates gentle scraping and mild solvent; textured walls need soft tools to avoid tearing texture.
Now that waste is handled, follow a surface-by-surface guide to safely remove acrylic paint without damaging finishes.
For wood, test a small area, consider color matching after sanding. For tile or metal, use nonabrasive scrapers and solvents, then clean thoroughly.
- Drywall: soft putty knife, sponge, mild detergent.
- Textured walls: soft-bristled brush, targeted solvent, gentle blotting.
- Wood/Tile/Metal: test spot, scrape, color matching if refinishing.
Step-by-Step Checklist to Remove Acrylic Paint Safely
Before you start, gather protective gear, testing materials, and appropriate tools so you can work quickly and safely. You’ll follow a clear checklist: test a hidden spot for paint color and finish, protect floors, try mild removers, escalate only if needed, and dispose responsibly to minimize environmental impact. Work gently, document results, and note what worked.
| Step | Action |
|---|---|
| 1 | Test hidden area |
| 2 | Protect surroundings |
| 3 | Apply mild remover |
| 4 | Rinse and assess |
| 5 | Dispose waste properly |
Frequently Asked Questions
Can Acrylic Paint Be Removed From Wallpaper Adhesive Seams Without Peeling the Paper?
Yes — you can often remove acrylic from wallpaper adhesive seams without peeling the paper. You’ll work gently to prevent wallpaper damage, blotting and using mild solvent slowly to avoid paint bleeding and loosened adhesive.
Will Acrylic Paint Bleed Through Latex Paint Requiring a New Topcoat?
Yes — acrylic can cause paint bleed through latex, so you’ll often need a primer to block staining before repainting; this reduces topcoat requirements and guarantees the new finish won’t discolor or show bleed-through.
Can Pet-Safe Cleaners Remove Acrylic Paint Without Harming Animals?
Yes — you can usually remove acrylic paint with pet-safe cleaners without harming animals if you use non toxic solvents and gentle scrubbing. You’ll avoid fumes, rinse thoroughly, and keep pets away until surfaces fully dry.
Does Temperature and Humidity Affect Acrylic Paint Removal Success?
Yes — temperature effects and humidity impact matter: think of paint as a sleeping seed that wakes in warmth; you’ll find warmer, drier air loosens acrylic, while cold or high humidity makes it set tighter, slowing removal.
How Long Must a Surface Cure Before Repainting After Solvent Use?
You should wait until the surface prep solvents fully flash and the substrate feels dry; typical curing time is 24–72 hours, longer in cool/humid conditions, before sanding, priming, and repainting for best adhesion.
Conclusion
You’re not helpless against acrylic splatters — act fast, use the right supplies, and protect yourself and the area. Think of the theory that “fresh paint always lifts easier” as your rhythm: it usually holds true, so treat new drips immediately, work gently, and don’t panic if dried spots take more effort. With patience, proper cleaners, and disposal care, you’ll restore your wall and prevent repeats, keeping your space looking sharp.