How to Remove Caulk From Painted Wall Safely
You can safely remove old caulk from a painted wall by working slowly with the right tools and protecting the surface; score along the caulk bead with a utility knife, loosen it with a plastic scraper or caulk-removal tool, and peel away gently to avoid lifting paint. Use an caulk softener or rubbing alcohol on stubborn bits, then clean residue with mild soap. Touch up primer and paint as needed, and if you keep going you’ll find detailed tips for tougher spots.
Why Old Caulk Is a Problem on Painted Walls
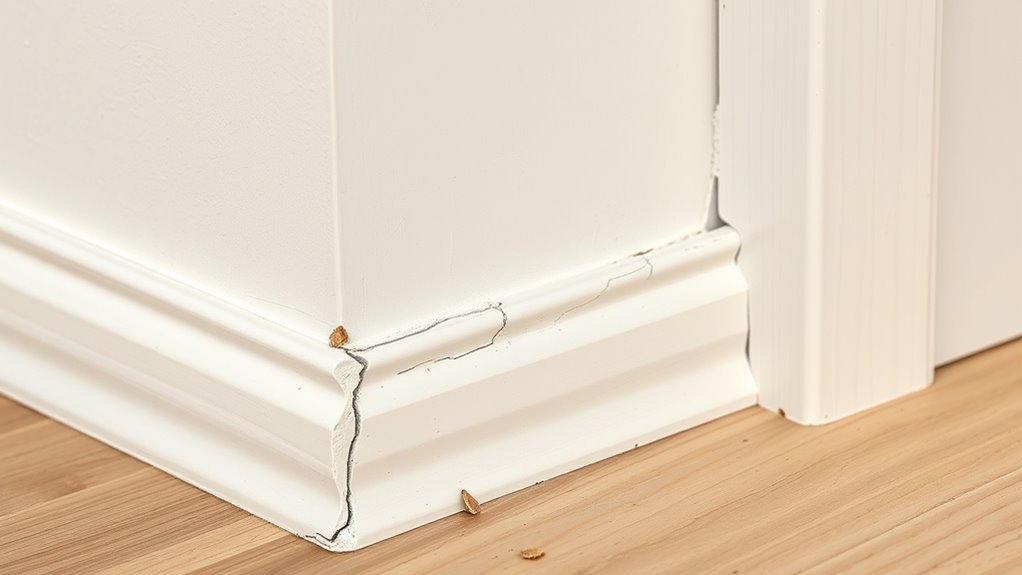
Why does old caulk bother you beyond looks? You notice caulk discoloration that signals age and trapped mildew, and you worry it’s compromising the seal.
Old caulk can shrink and pull away, letting moisture reach the drywall or trim, which invites mold and structural damage.
Old caulk can pull back and let moisture into drywall or trim, inviting mold and structural damage.
You’ll see paint chipping where caulk no longer bonds, creating rough edges that catch dirt and spread deterioration.
Tackling degraded caulk protects finishes and prevents bigger repairs.
You’ll want to assess adhesion and cleanliness before deciding on removal, since addressing failing caulk early saves time and keeps painted walls sound.
When to Remove Caulk vs. Leave It
If the caulk is cracked, peeling, discolored with mold, or no longer adhering to the wall or trim, you should remove it and recaulk; otherwise, weigh options. If caulk color still blends and seals without gaps, you can leave it.
Remove if gaps let moisture reach painted surfaces, if mold returns after cleaning, or if aging causes stickiness that catches dirt.
Consider wall texture—rough surfaces may need fresh caulk to maintain a clean seal, while smooth walls tolerate older caulk longer.
Also remove when repainting or changing trim so new caulk matches paint and prevents future failure.
Quick Safe Method: Remove Caulk From Painted Walls
Grab a few basic tools—plastic scraper, utility knife, soft cloths, and a mild adhesive remover—and lay down drop cloths to protect floors.
Work slowly with a plastic tool and a gentle solvent to lift caulk without scraping paint.
If you hit stubborn spots, soften the caulk first and keep pressure light to preserve the wall’s finish.
Tools And Materials
Before you start, gather the right tools and materials so you can remove caulk quickly without damaging the paint. You’ll want a utility knife, plastic scraper, soft cloths, rubbing alcohol, and painter’s tape. Note caulk color and wall texture—these affect how gently you work and which blade or solvent you choose.
| Tool | Purpose |
|---|---|
| Utility knife | Cut bead |
| Plastic scraper | Lift caulk |
| Rubbing alcohol | Clean residue |
| Painter’s tape | Protect edges |
| Soft cloths | Wipe clean |
Have gloves and eye protection handy and test solvents in an inconspicuous spot first.
Soft Paint Protection
Now that you’ve gathered the right tools and checked your caulk color and wall texture, protect the painted surface with a soft, forgiving barrier before you cut. Lay thin microfiber cloth or painter’s felt along the joint, taping edges gently so adhesive won’t lift paint.
The goal is to buffer blades and scrapers from gouging drywall or disturbing paint mixing blends near edges. Work slowly, keeping the strip between tool and wall; replace if damp or dirty. If your wall texture’s pronounced, trim felt smaller to follow contours without bunching.
- Relief: you’re preventing damage
- Confidence: gentle protection helps
- Calm: no sudden scrapes
- Pride: neat finished edge
What Kind of Caulk Is on Your Wall?
Because different caulks react differently to removal methods, you should identify the type on your wall before you start scraping or applying solvents. Check caulk color, feel the bead, and note wall texture; silicone is rubbery and translucent, acrylic/latex feels paintable, and polyurethane is firm. Test a hidden strip with a fingernail and mild solvent.
| Feature | Silicone | Acrylic/Latex |
|---|---|---|
| Texture | Rubber-like | Paintable |
| Solvent response | Resists water | Softens with water |
| Paintability | Poor | Good |
Knowing type helps you pick tools and avoid damage.
How Paint Type Affects Caulk Removal
Whether your wall has water-based or oil-based paint changes how the caulk bonds and what solvents you can safely use. You’ll notice that oil-based paints usually hold caulk tighter.
Water-based finishes may soften more easily with gentle cleaners. Also consider the paint’s sheen—higher gloss means stronger adhesion and a greater risk of lifting the paint when you remove caulk.
Water-Based Vs. Oil-Based
When you’re removing caulk from painted surfaces, the paint’s base—water-based (latex) or oil-based (alkyd)—changes what tools and solvents you can use and how careful you need to be with the finish. You’ll treat latex paint more gently: water and mild detergent work, and a plastic scraper protects delicate topcoats and varied wall texture.
Alkyd needs stronger solvents and slower technique to avoid lifting paint. Match your approach to caulk color to spot residue early, and always test a hidden area first. Be patient; aggressive scraping risks damage.
- Relief when residue lifts cleanly
- Frustration with stubborn stains
- Confidence after a successful spot test
- Calm knowing you tested first
Finish And Adhesion
If your paint has a glossy finish or strong adhesion, you’ll need to be more cautious removing caulk so you don’t peel the topcoat or pull away layers underneath. Test a small area first: glossy, enamel, and oil-based paints bond differently than flat or latex finishes.
Use a plastic scraper, heat, or solvent suited to the paint type, working slowly to avoid lifting. Match your technique to wall texture; smooth walls tolerate gentler scraping, while textured surfaces hide small nicks.
Note caulk color—contrasting hues reveal mistakes, so take extra care near trim. Patch and touch up immediately if any paint comes off.
Safety Precautions Before Removing Caulk
Before you start scraping or softening old caulk, take a few minutes to set up safe working conditions. You’ll protect paint and yourself by checking caulk color contrasts and wall texture so you spot damage early. Open windows for ventilation, cover floors, and test a small area to confirm paint won’t lift. Keep pets and kids away.
Before scraping old caulk, set up ventilation, cover floors, test paint, and keep pets and kids away.
- Feel relieved knowing you reduced risk.
- Feel confident that you’ve protected the finish.
- Feel calm having a clear escape route for fumes.
- Feel empowered by a simple, safe plan.
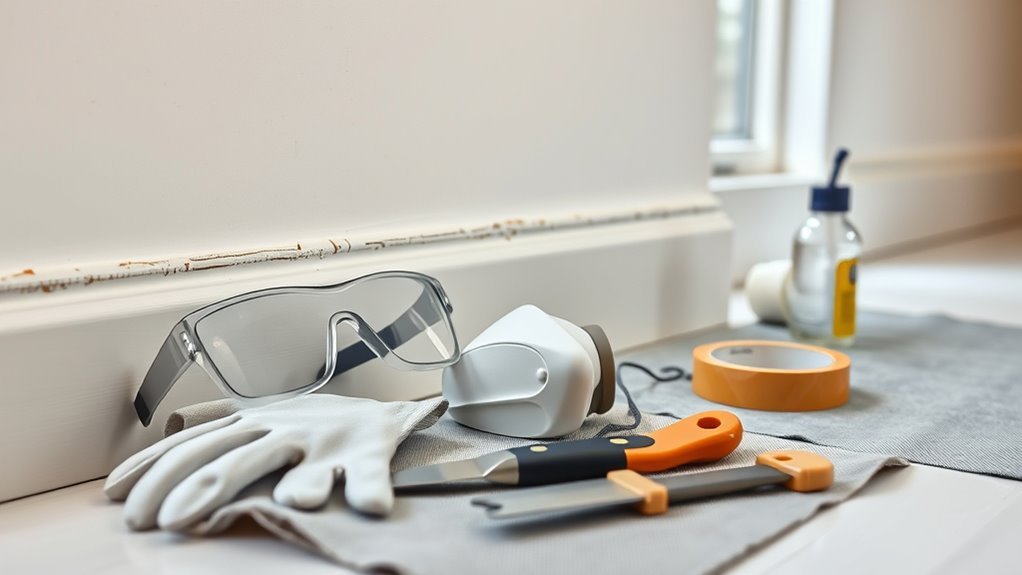
Wear gloves, eye protection, and a mask as needed.
Tools for Removing Caulk From Painted Walls
You’ll need a few essential removal tools—like a utility knife, caulk removal tool, and plastic scraper—to get the old caulk out cleanly.
Don’t forget protective safety gear such as gloves and eye protection to prevent cuts and irritation.
Have surface repair supplies on hand (fine sandpaper, spackle, and touch-up paint) to fix any nicks and restore the finish.
Essential Removal Tools
When tackling old caulk on a painted wall, the right tools make the job faster and protect your finish—so gather a few essentials before you start. You’ll want instruments that let you remove caulk precisely, preserving paint and easing future touch-ups or paint matching when color blending is needed.
Keep a gentle approach so caulk color differences don’t lead to overzealous scraping.
- A sharp utility knife to lift edges and feel triumphant
- A flexible caulk remover tool to pry cleanly and confidently
- Soft plastic scrapers to protect the paint and soothe worry
- Microfiber cloths for tidy, satisfying cleanup
Protective Safety Gear
Although removing caulk from a painted wall isn’t usually hazardous, you should still wear basic protective gear to guard your hands, eyes, and lungs from sharp tools, chemical solvents, and dust.
Put on nitrile gloves to protect skin from solvent residues and to feel caulk texture as you probe edges. Use safety goggles to stop fragments or splashes, and a respirator mask rated for organic vapors if you use strong removers.
Wear long sleeves to shield paint compatibility areas from accidental spills. Keep knee pads if you’ll kneel, and a small flashlight to inspect seams safely without risking surface damage.
Surface Repair Supplies
Before you start, gather a compact kit of surface-repair supplies so you can remove caulk cleanly and minimize paint damage. You’ll want tools that let you work gently, fix small gouges, and prepare for seamless touch-ups. Keep a gentle scraper, fine sandpaper, and soft cloths handy to avoid scuffs. Have a small jar of matching paint for color matching and a lightweight filler for nicks.
Practice texture blending on scrap material before repairing the wall so your finish looks natural and confident.
- A plastic scraper that won’t gouge
- Fine-grit sandpaper (220–320)
- Lightweight filler and putty knife
- Small matched paint jar and brush
Solvents and Cleaners Safe for Painted Surfaces
Which cleaners won’t strip your paint or leave stains? Use mild, pH-neutral solutions like dish soap and warm water for most painted walls; they’re safe across caulk color variations and won’t harm wall texture.
Rubbing alcohol in small amounts removes residue without softening latex paint, while mineral spirits work sparingly on oil-based finishes—ventilate and blot, don’t rub.
Commercial, paint-safe caulk removers labeled non-stripping can help; follow instructions.
Avoid bleach, ammonia, and harsh abrasives that can dull or discolor paint.
Always wipe dry and rinse the area after cleaning to prevent lasting marks or film.
How to Test a Small Patch for Paint Adhesion
Pick a hidden spot near the caulk line, like inside a corner or behind trim, so any damage stays out of sight.
Press a piece of strong tape onto the paint, rub firmly, then pull it back quickly to check for flaking.
If paint lifts, stop and use gentler methods or consult a pro before removing the caulk.
Choose Hidden Test Area
When you’re getting ready to remove caulk, find a discreet spot—like inside a closet, behind a baseboard, or under trim—where a small test patch won’t be seen. This lets you check how the paint reacts without risking visible damage.
Pick an area with the same wall texture and similar caulk color to mirror the main surface. Clean gently, note any sheen differences, and mark boundaries lightly so you can compare later.
Test a tiny bit and wait.
- Relief if paint holds
- Frustration if it flakes
- Confidence when match is good
- Hesitation if color shifts
Perform Adhesion Tape Test
After you’ve checked a hidden spot and seen how the paint reacts, confirm adhesion with a simple tape test so you know whether the caulk will come away cleanly.
Press a 2-inch strip of strong, low-residue painter’s tape onto the painted edge of the caulk and rub firmly for 30 seconds.
Pull the tape back sharply at a 45° angle. If paint lifts, stop—caulk removal will need solvent or professional help to avoid damage.
If paint stays, proceed cautiously, watching for texture matching and minimal paint blending needs.
Repeat in a couple of spots to ensure consistent attachment before full removal.
How Temperature and Humidity Affect Removal
Because caulk softens and hardens with temperature, you’ll find removal much easier on warmer days when the material is pliable and pulls away cleanly. Cold makes caulk brittle, increasing the chance it flakes and takes paint with it.
Warm days make caulk pliable and easy to peel; cold turns it brittle and likely to flake off.
You should check humidity too: high moisture can make silicone tacky and stubborn, low humidity dries caulk fast and can bond it tighter to paint.
Consider caulk color and wall texture—dark or textured areas hide damage, but they can also hide missed residue.
Time your job for mild, dry conditions when possible to reduce risk and effort.
- Relief when it peels smoothly
- Frustration with flaky pull-offs
- Pride in clean edges
- Anxiety about hidden stains
Preparing the Room and Protecting Surfaces
Clear the work area so you’ve got room to move and won’t knock anything over.
Protect adjacent surfaces with painter’s tape and drop cloths to prevent damage or stray cleaner marks.
Gather the tools and materials you’ll need—scraper, utility knife, caulk softener, rags, and gloves—before you start.
Clear The Work Area
Before you start scraping or softening the caulk, move furniture and loose items out of the area and cover floors and nearby surfaces with drop cloths or plastic sheeting to catch debris and chemical drips.
Check lighting so you can spot caulk texture changes and possible wall discoloration before work begins.
Label and set aside small valuables and electronics.
Keep windows open for ventilation.
- Relief knowing paint won’t get ruined
- Confidence spotting uneven caulk texture
- Calm from tidy, clear workspace
- Assurance you caught wall discoloration early
Now step back and confirm everything’s protected and accessible.
Protect Adjacent Surfaces
Work systematically so you don’t miss seams where caulk residue could fall; press tape firmly along varied wall texture to avoid gaps.
If caulk color is close to paint, protect more carefully to prevent staining from solvents or scraped fragments.
Wrap nearby fixtures and remove lightweight items.
Use low-tack tape on delicate finishes, and check seals periodically during removal to maintain a clean, undamaged workspace.
Gather Necessary Tools
With surfaces sealed and nearby items stowed, gather the tools you’ll need so the removal goes smoothly and without extra trips to the store. You’ll want a small kit that protects the paint and reveals the caulk texture so you can match the repaired seam to the wall color.
Bring gloves, a sharp utility knife or caulk remover tool, a plastic scraper to avoid gouging, and soft cloths for cleanup. Prep a trash bag and container for used blades. Keep a gentle solvent and a fine-grit sanding pad handy for stubborn bits and final blending.
- Relief: knowing you’re prepared
- Confidence: precise tools at hand
- Care: preserving wall color
- Satisfaction: smooth, matched finish
Loosen Acrylic-Latex Caulk Safely
When the caulk’s soft enough to move, you’ll want to loosen it gently to avoid damaging the paint underneath. Use a plastic scraper or putty knife at a shallow angle and work along the bead, following the caulk color to spot thin edges where it separates from the paint.
Don’t force metal tools against delicate wall texture; instead, score along seams with a utility knife blade held flat, then pry small sections free. Pull slowly, keeping the blade parallel to the wall.
Wipe softened residue with a damp cloth and repeat heating or solvent in short bursts until the bead lifts cleanly.
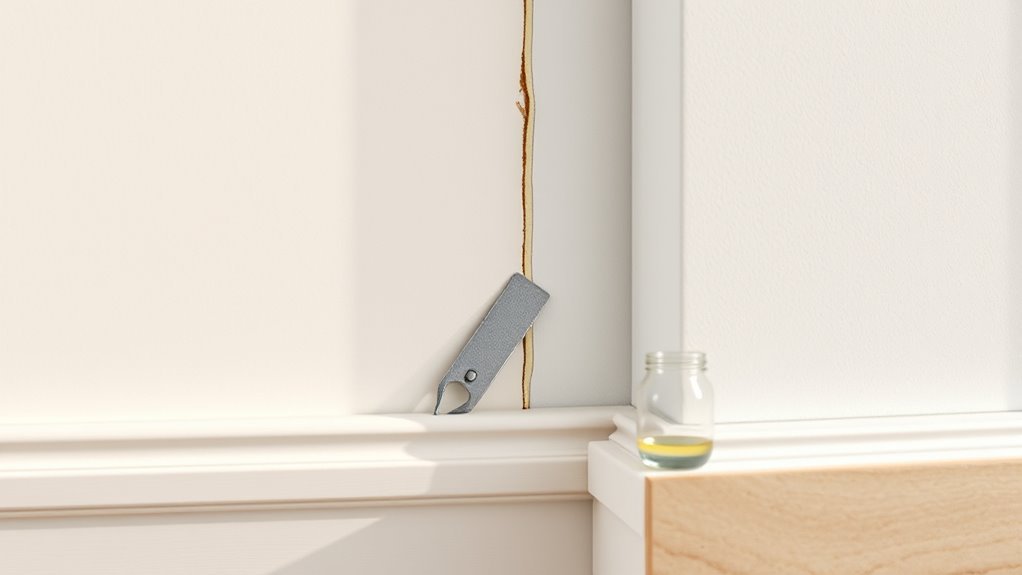
Remove Silicone Caulk Without Peeling Paint
How do you get stubborn silicone caulk off painted walls without tearing the finish? You’ll work slowly: soften the silicone with a commercial remover or isopropyl alcohol, score the bead gently with a razor at a shallow angle, and lift tiny sections with a plastic scraper. Match your pace to the wall texture and the caulk color to avoid uneven spots.
After removal, clean residue with mild detergent and recoat if needed. Take breaks to assess the paint.
- Frustration eases when progress shows
- Relief comes from patient, steady strokes
- Confidence grows with careful tools
- Satisfaction in a flawless finish
Remove Polyurethane and Specialty Caulks (Home Tips)
Polyurethane and specialty caulks bond harder than standard silicone, so you’ll need stronger methods and a careful touch. Work slowly with a sharp plastic scraper and fine razor where paint adhesion is solid; test a tiny area first to check caulk color transfer and paint lift.
Heat gently with a hair dryer to soften the bead—not hot enough to blister paint—and use mineral spirits sparingly on painted surfaces. For textured walls, follow the wall texture contours to avoid gouging.
After removing bulk caulk, clean residue with a soft cloth and mild detergent, then spot-repair paint if needed.
How to Use Caulk Remover Gel Correctly
If the caulk stubbornly resists scraping or heat, a caulk remover gel can make the job much easier—just pick a product labeled safe for painted surfaces and follow the manufacturer’s instructions. You’ll apply gel evenly, let it dwell the recommended time, then gently lift softened caulk with a plastic scraper.
Wipe residue with a damp cloth and mild cleaner, rinse thoroughly, and let the wall dry. Test a small painted area first to confirm paint compatibility and avoid surprises when you later do caulk color matching for repairs.
- Relief at progress
- Confidence in results
- Frustration fading
- Satisfaction restored
Soften Caulk With Heat Without Harming Paint
You can soften old caulk with low-heat tools like a hair dryer or heat gun on its lowest setting to avoid blistering paint.
Always test a small, inconspicuous area first to confirm the finish won’t lift or discolor.
Work slowly and evenly, keeping the heat source moving so you soften only the caulk without overheating the paint.
Use Low Heat Sources
Although heat can loosen old caulk quickly, you’ll want to use low, controlled temperatures so the paint underneath doesn’t blister or discolor. Aim a hair dryer or heat gun on low, keep it moving, and watch the caulk’s softness change. Different caulk color and wall texture can affect how long you heat.
Hold tools several inches away and test a small area. Stop immediately if paint darkens or smells burnt. Gently pry softened caulk with a plastic scraper.
- Relief when the bead peels away cleanly
- Satisfaction of preserved paint
- Calm knowing you avoided damage
- Confidence to finish the job
Test Paint Compatibility
Because different paints react to heat in different ways, always test a small, hidden spot before softening caulk with a hair dryer or heat gun. Pick an inconspicuous corner or inside a closet seam.
Heat briefly at low setting for 5–10 seconds, then let cool and inspect for gloss change, bubbling, or lift.
Note how caulk color shifts and whether the paint softens differently over varied wall texture like smooth plaster versus orange peel.
Record results and adjust temperature or time accordingly.
If any damage appears, stop and try a non-heat method to avoid compromising the finish.
Work Slowly And Evenly
Having confirmed the paint tolerates low heat, proceed slowly and evenly when warming the caulk so you don’t shock the finish. You’ll keep the heat source moving, never linger in one spot; that prevents scorching or softening paint layers, regardless of Caulk branding or Wall texture.
Aim for gradual flexibility, testing a corner before a full pass. Use gentle scraping once pliable, and stop if paint softens. Work in short sessions, cool between passes, and keep ventilation.
- Relief when the job goes smoothly
- Pride in preserving your paint
- Frustration avoided by patience
- Satisfaction at a clean edge
Manual Scraping Techniques That Protect Paint
When you scrape caulk by hand, work slowly and keep the blade shallow so you lift the sealant without gouging the paint; steady, light strokes let you follow the bead and stop at the painted edge. Check caulk color against paint to avoid surprises, and note wall texture — smoother walls need gentler pressure. Use a plastic scraper or putty knife with a rounded corner, keep the tool at a low angle, and peel loosened sections rather than forcing them.
| Tool | Purpose |
|---|---|
| Plastic scraper | Non-marring lift |
| Putty knife | Controlled leverage |
| Nylon brush | Clean residue |
| Cotton rag | Wipe clean |
| Masking tape | Protect edges |
How to Use a Razor Blade Safely on Painted Walls
Before you start, make sure the blade is sharp, clean, and secured, and wipe the painted surface so debris won’t scratch the finish.
Hold the blade at a low angle and use good lighting to see the caulk line clearly as you work.
Keep a thin protective card between the blade and paint where possible, and always cut away from your fingers to avoid injury.
Prepare Blade And Surface
If you’re going to use a razor blade on painted walls, start by inspecting and prepping both the blade and the surface so you don’t gouge the paint. Check caulk color contrast and paint compatibility; test a hidden spot to ensure the blade won’t scrape finish. Score only the caulk edge, not the paint film.
Clean residue and let solvent dry to avoid slipping. Tape a narrow strip of painter’s tape along the seam for extra protection.
- You’ll feel cautious but confident.
- You’ll breathe easier with a test spot.
- You’ll avoid heart-sinking scratches.
- You’ll finish neater and calmer.
Angle And Light Control
Now that the blade and surface are prepped, focus on blade angle and lighting to keep paint intact. Hold the razor at a low angle—about 15–30 degrees—to slide under old caulk without digging into paint.
Use steady, shallow strokes, moving the blade away from the painted edge.
Adjust angle lighting so you can see the caulk line clearly; side lighting reveals edges better than overhead glare.
Move a portable light to change shadows and improve light control rather than increasing pressure.
If you lose the line, stop, relight, and recheck your angle before continuing to avoid accidental paint damage.
Protect Paint And Fingers
While you work the blade along the caulk line, protect both the paint and your fingers by using simple guards and controlled motions. You’ll want a new razor, a thin card or plastic guard between blade and wall, and finger placement away from the edge.
Move slowly at a shallow angle to preserve caulk aesthetics and avoid gouging paint color matching areas that’ll be touched up. Keep steady pressure, stop if paint peels, and switch to a plastic scraper where needed.
Remember safety gloves and eye protection.
- Relief when paint stays intact
- Confidence in clean lines
- Pride in neat repairs
- Calm during the task
When to Use a Plastic Scraper Instead of Metal
Because painted walls can chip or gouge easily, you’ll want to reach for a plastic scraper whenever the paint finish is delicate, the surface is uneven, or the caulk is soft enough to lift without metal.
Choose a thin, stiff plastic blade so you can follow contours and respect wall texture while avoiding paint damage. Match your approach to the caulk color—darker caulk may hide slight scuffs, but don’t assume the paint’s safe.
Work at a low angle, use light pressure, and change blades when dull. Stop if paint starts lifting; switch to gentler methods or pause to reassess.
Combine Solvent and Mechanical Methods for Stubborn Caulk
Before using any solvent, test it on a hidden paint spot to make sure it won’t damage the finish.
If the test is fine, apply a small amount to soften the caulk, wait a few minutes, then use a plastic scraper to lift loosened material.
Finish by wiping away residue with a soft cloth and a mild cleaner.
Test Solvent Compatibility
If you’re dealing with stubborn caulk, test a solvent on an inconspicuous painted area first to make sure it won’t damage the finish. You want to verify color matching and texture blending after a short wait. Apply a tiny amount, blot, and inspect under good light; note any softening, discoloration, or sheen change.
If safe, proceed cautiously with combined solvent and mechanical removal. If not, try a gentler solvent or stop.
- Relief when the paint survives
- Frustration avoided by a quick trial
- Confidence in proceeding safely
- Satisfaction from a seamless repair
Soften Caulk With Solvent
When caulk won’t budge, soften it with a solvent to make scraping easier and reduce the chance of gouging the paint; work in short sections and reapply as needed. Apply solvent sparingly, wait per instructions, and test around a hidden spot so Caulk color contrast and Wall textures remain intact. Use a plastic scraper and soft cloth to lift softened caulk.
| Solvent type | Best use |
|---|---|
| Isopropyl alcohol | Light silicone, painted trim |
| Mineral spirits | Oil-based caulk, durable paint |
| Citrus solvent | Gentler on finishes |
| Acetone | Stubborn spots, small areas |
Scrape And Clean Residue
After softening stuck caulk with solvent, combine gentle scraping and more solvent to lift the residue without damaging the paint. Work small areas, reapplying solvent to soften stubborn bits; use a plastic scraper at a low angle to protect wall texture and preserve caulk color samples if you’re matching later.
Wipe softened residue with a lint-free cloth, switching pads as they load. For tight spots, use a nylon brush, not metal. Rinse the area with mild soap and water, then pat dry.
Inspect under good light to catch faint streaks or texture damage before repainting.
- Relief at seeing a clean edge
- Confidence in preserved paint
- Frustration fading with each pass
- Pride in careful restoration
Remove Caulk From Corners and Tight Seams
Because corners and tight seams trap caulk, you’ll need patience and the right tools to extract it without harming the paint. Use a thin razor blade or a hooked caulk remover to lift edges gently, watching how caulk color contrasts with the painted surface. Work small sections, angling the blade parallel to avoid gouging.
For narrow gaps, a dental pick or stiff nylon brush helps dislodge softened caulk after scoring. Protect adjacent surfaces with painter’s tape and reapply heat briefly from a hair dryer to loosen stubborn beads.
Pause often to inspect wall texture and stop if paint starts to lift.
Clean Residual Caulk Residue From Painted Surfaces
Before you use any solvent, test it on an inconspicuous spot to make sure it won’t damage the paint.
Use gentle scraping tools like a plastic putty knife or a soft-bristled brush to lift softened residue without gouging the surface.
Finish by wiping the area with a mild detergent solution to remove residue and let the paint dry so you can inspect your work.
Test Solvent First
When you’re removing caulk residue from painted walls, test any solvent on a small, hidden spot first so you don’t damage the finish. This simple check tells you whether the cleaner will lift the paint, soften the finish, or leave a stain.
Pick an inconspicuous area, note caulk color and wall texture, dab a cotton swab with solvent, wait a few minutes, then blot. If paint looks unchanged, proceed cautiously. If it dulls or peels, stop and try a milder product.
Trust your eyes and patience to protect the painted surface and avoid costly touch-ups.
- Relief when it works
- Frustration avoided
- Confidence regained
- Pride in careful repair
Gentle Scraping Tools
If paint’s intact but caulk’s stubborn, reach for gentle scraping tools to lift residue without gouging the surface. Use a plastic putty knife, old credit card, or silicone-tipped scraper at a shallow angle, working slowly to peel away softened caulk.
Keep tools clean to avoid redistributing caulk staining. Test pressure in an inconspicuous spot to confirm paint compatibility; stop if you see lifting or scratches.
Trim tool edges lightly with sandpaper if needed for precision. Remove narrow beads and threads, then vacuum or brush away particles.
Proceed to cleaning steps only after all loose residue’s removed.
Clean With Mild Detergent
Although the paint’s intact, you’ll still need a mild detergent to lift any remaining caulk residue without damaging the finish. Mix a few drops of dish soap in warm water, dampen a microfiber cloth, and gently wipe the area.
Work in small sections, rinsing frequently, so you don’t spread residue or cause caulk discoloration. If stubborn bits remain, use a soft-bristled brush with the solution, then blot dry.
Watch for paint chipping; stop if the paint softens and switch to less moisture. Finish by drying completely and inspecting the seam for any missed residue.
- Relief at a clean wall
- Pride in careful work
- Comfort in preserved paint
- Satisfaction of a neat finish
Remove Silicone Smears Without Stripping Paint
Because silicone can smear over paint without bonding, you can usually lift those smudges without stripping the finish—if you work gently and pick the right cleaner. Test a small spot first, considering caulk color and wall texture. Use a soft cloth, mild solvent (isopropyl alcohol diluted), and gentle scouring pad only if needed. Work outward from the smear, blotting not rubbing. Rinse with water and dry. Repeat sparingly; harsher chemicals risk paint.
| Step | Tool | Action |
|---|---|---|
| 1 | Cloth | Test spot |
| 2 | Alcohol | Dab gently |
| 3 | Pad | Light scuff |
| 4 | Water | Rinse |
| 5 | Dry | Inspect |
Remove Mold and Mildew From Old Caulk Lines
You should spot mold early by watching for dark spots, musty smells, or discoloration along caulk lines so it doesn’t spread.
Use gentle, paint-safe cleaners like diluted bleach, hydrogen peroxide, or an enzyme cleaner and test a small area first.
After cleaning, keep the area dry, improve ventilation, and replace old caulk to prevent recurrence.
Identify Mold Early
Noticing mold early makes removing it from old caulk lines much easier and keeps the problem from spreading. You’ll spot tiny black, green, or brown specks along seams and changes in caulk color where moisture collects. Check corners, grout lines, and hidden edges regularly so you can act before staining or structural damage occurs.
Lightly probe suspect areas; softness or crumbly texture signals active growth. Document locations and monitor progression to support mold prevention and decide if caulk replacement is needed. Trust your senses—odor, sight, and touch—so you catch problems while removal stays simple and safe.
- Shock at hidden spots discovered overnight
- Frustration over stained paint edges
- Relief when it’s only surface growth
- Urgency to fix before spread
Safe Cleaning Solutions
Once you’ve identified mold along caulk lines, tackle it with gentle, effective cleaners that won’t damage paint or release harmful fumes. Mix equal parts water and white vinegar in a spray bottle, test on a small patch to verify caulk color and wall texture aren’t affected, then spray and let sit five minutes.
For stubborn mildew, make a paste of baking soda and water, apply with a soft brush, and rinse.
Avoid bleach on painted surfaces; it can strip pigment. Pat areas dry and ventilate the room.
If staining persists, consider replacing the caulk rather than using aggressive chemical cleaners.
Prevent Recurrence Strategies
Because mold likes damp, shaded gaps, preventing its return means cutting off its favorite conditions and maintaining clean, dry caulk lines. You’ll remove old mold, let surfaces fully dry, and choose mildew-resistant silicone or paintable caulk that matches caulk color to blend with your wall texture.
Ventilate bathrooms, fix leaks promptly, and use a dehumidifier if needed. Check lines monthly and re-caulk sooner if seal fails.
- You’ll feel relief seeing clean seams again.
- You’ll regain control over a healthier space.
- You’ll protect paint and wall texture long-term.
- You’ll avoid recurring scrubbing and worry.
Treat Adhesive Stains Left After Caulk Removal
After you scrape away the caulk, sticky adhesive residue can stay behind and attract dirt, so you’ll want to tackle it before repainting or refinishing the area.
Start by testing a small patch to check how the caulk color interacts with paint and whether wall texture hides imperfections.
Use a plastic scraper, then apply rubbing alcohol or a citrus-based adhesive remover sparingly with a microfiber cloth.
Dab, don’t rub; let the solvent soften residue, then lift gently.
Rinse with mild soapy water, blot dry, and inspect under good light.
Repeat cautiously until all tackiness is gone.
Remove Discolored or Painted-Over Caulk
First, check whether the caulk has stained the paint or been painted over, since that affects how careful you’ll need to be.
If the caulk is painted, you’ll soften it with a mild heat source or a recommended solvent first to avoid lifting surrounding paint.
Work slowly and test a small area so you can stop if the finish begins to come off.
Assess Paint And Caulk
When the caulk’s discolored or painted over, you’ll want to evaluate how deep the paint penetrates and whether the caulk’s still flexible; that determines whether you can strip it cleanly or need to remove and replace it.
Check caulk color against surrounding trim and note if paint soaked in or simply coats the surface. Run a fingernail test for tackiness and bend a small section to assess flexibility.
Observe wall texture—rough surfaces hold paint differently than smooth ones. Consider surrounding conditions like moisture or previous repairs before proceeding.
- Frustration at mismatched caulk color
- Anxiety over damaging paint
- Relief when flexibility remains
- Urgency to fix visible seams
Softening Painted Caulk
If the caulk’s been painted over or gotten hard with age, you’ll want to soften it before trying to scrape so you don’t gouge the wall or tear paint. Apply a softening agent—commercial caulk remover or isopropyl alcohol—for painted-over caulk, test a small patch first to check Caulk color bleeding and Wall texture reaction. Wait per product instructions, cover with plastic to keep it moist, then gently probe with a plastic scraper. If stubborn, reapply. Clean residue with mild detergent and repaint if needed.
| Step | Product | Time |
|---|---|---|
| Test | Alcohol | 5–10 min |
| Soften | Remover | 15–30 min |
| Cover | Plastic | N/A |
| Scrape | Plastic tool | As needed |
| Clean | Soap/water | 5–10 min |
Repair Paint Chips Caused During Removal
Because caulk removal can lift thin paint layers, you’ll often find small chips or flakes along the seam that need touch-ups before re-caulking. You should gently sand loose edges, clean the dust, and apply a matching primer to stabilize exposed substrate.
Choose paint that matches original sheen and has good paint compatibility with nearby coatings. If caulk texture matters, test a tiny area to ensure new caulk adheres and won’t show through.
Fill chips with thin coatable filler, let it dry, then spot-prime and paint.
- Frustration at visible flaws
- Relief after a smooth patch
- Pride in neat seams
- Calm before re-caulking
Feather and Blend Edges for an Invisible Repair
Once the patch is smooth, feather the caulk edge with fine sandpaper so it tapers into the surrounding paint.
Then use a small brush or sponge to blend matching paint outward from the repair so the shift disappears.
Take thin layers and check in different light until the finish looks seamless.
Feathering The Caulk Edge
When the caulk’s been removed and the gap filled, you’ll want to feather the new bead so it blends seamlessly with the surrounding paint; this step prevents a raised ridge that catches light and draws the eye.
Use a damp finger or a flexible caulk tool to smooth from center outward, matching the caulk color to minimize contrast. Pay attention to wall texture—textured surfaces need gentler taps rather than long strokes.
Let the caulk skin slightly before final smoothing to avoid dragging. Finish by inspecting at different angles to catch imperfections.
- Relief that the repair vanishes
- Pride in neat work
- Calm knowing it’s durable
- Satisfaction of an invisible fix
Blend With Matching Paint
How do you make the repair disappear entirely? You’ll feather the caulk, then use color matching and texture blending to hide edges. Test paint swatches on scrap, adjust tint for an exact match, and thin coats help blend. Use a small brush or sponge to feather into surrounding finish; replicate texture with stippling or light sanding between layers. Work incrementally, letting each coat dry, and step back often to check under different light. Keep tools clean to avoid hard edges. The table below summarizes choices and effects to guide your finishing decisions.
| Step | Tool | Result |
|---|---|---|
| Match | Swatch/tint | Accurate hue |
| Apply | Small brush | Controlled blend |
| Texture | Sponge/stipple | Seamless finish |
| Inspect | Varying light | Confirm invisibility |
Prep the Cleaned Gap for New Caulk or Paint
After you’ve removed old caulk and let the area dry, inspect the gap for leftover debris, loose paint, or rough edges. Use a utility knife, fine-grit sandpaper, or a small brush to clean and smooth the surface. Wipe with a damp cloth and let dry again.
After removing old caulk and drying, clean the gap of debris, sand rough edges, wipe, and let dry again
Consider how caulk color and wall texture will affect the final appearance when you prep: push back any paint nibs, feather edges with sandpaper, and remove dust with a tack cloth. Mask adjacent surfaces if needed.
Finish by ensuring the gap is dry, clean, and uniform so new caulk or paint bonds properly.
- Relief: the space feels renewed.
- Confidence: you’re ready to finish.
- Pride: the wall looks cared for.
- Calm: no surprises at the finish.
Choosing the Right Caulk for Painted Walls
Because the wrong caulk can ruin your paint job, pick a product that matches the joint type, substrate, and finish. You’ll choose between acrylic latex for painted drywall and silicone or hybrid options for moisture-prone areas.
Match caulk color to existing trim or paint, or pick paintable white if you’ll repaint. Consider wall texture: smooth surfaces need a fine-bead, flexible formula; textured walls benefit from thicker, sag-resistant caulk that fills irregular gaps.
Check adhesion on a small test patch, cure time, and paintability. Buy a quality tube suited to movement rating (low, medium, high) for durable, invisible seams.
Apply Painter’s Tape to Protect Paint When Re-Caulking
Want a crisp, straight caulk line without smudging your paint? You’ll want painter’s tape to shield edges while you prep and apply new caulk. Choose tape width that aligns with trim and wall, press edges firmly to prevent bleed.
Consider Color matching when picking caulk — match paint sheen and tone. Remember different Caulk types behave differently at edges, so tape gives predictable lines and cleaner touch-ups.
Remove tape slowly at a 45° angle while the caulk’s still tacky for the sharpest edge. The result feels satisfying, professional, and less nerve-wracking.
- Relief: no messy edges
- Pride: neat finish
- Confidence: controlled process
- Calm: quick cleanup
Re-Caulking Technique That Prevents Paint Damage
When you’re ready to re-caulk, work in short, controlled runs so the bead stays smooth and you don’t pull paint away when tooling. Use a steady squeeze and keep the gun angle shallow to lay even caulk color that blends with trim or wall.
Tool immediately with a damp finger or a flexible silicone tool, moving along the joint without stopping to avoid ridges that catch paint.
Remove tape before the caulk skins to preserve crisp lines and prevent peeling.
Match technique to wall texture—drier tools for rough surfaces, smoother passes for flat walls—to protect surrounding paint.
How Long to Wait Before Painting Over New Caulk?
If you use a latex or acrylic caulk, wait at least 24 hours before painting so the caulk fully skins and adheres.
For silicone or specialty caulks, follow manufacturer cure times—sometimes 48–72 hours.
Check caulk color; it may shift slightly as it cures and affect final coverage.
Do a small adhesion testing spot: press a piece of tape, peel sharply, and confirm no lifting.
Only paint when surface is tack-free and passes adhesion checks.
Proper drying prevents peeling and ghosting.
Trust the cure time, test, then paint confidently.
- Relief when it’s done right
- Pride in a seamless finish
- Frustration avoided
- Confidence restored
Match Paint Finish After Caulk Removal
Because caulk removal often exposes a slightly different sheen or texture, you’ll want to match the existing paint finish before repainting so the repair blends seamlessly.
First, compare the old caulk color to the wall; if it stained or faded, clean and prime the spot.
Test paint sheen on a small patch—eggshell, satin, or semi-gloss—so light reflects the same.
Use the same paint sheen and a small brush or mini-roller for feathered edges.
If color differs, tint a sample or bring a paint chip to the store.
Let test patches dry fully before committing to repainting.
Avoid Common Mistakes That Damage Paint
Although you want the caulk gone, don’t rush the job or use harsh tools that’ll gouge or strip paint; slow, careful work preserves finish and prevents peeling. Check caulk color against paint before starting so you don’t over-sand or over-scrape trying to match tones. Test a small patch to see how wall texture reacts to solvent or a scraper.
Use gentle scrapers, plastic picks, and minimal solvent, removing residue inch by inch. If you damage paint, stop and reassess your approach.
- Frustration when a bold scrape reveals primer
- Regret over a ruined patch of texture
- Relief after a careful test succeeds
- Satisfaction with an invisible repair
Time Estimates: Touch-Up vs. Full-Room Removal
Now that you know to test and proceed slowly to avoid paint damage, plan your time based on scope.
Now that you’ve tested and will proceed slowly to avoid paint damage, plan your time based on scope.
For a touch-up around windows or a single seam, expect 30–90 minutes: score old caulk, peel carefully, clean residue, and allow brief drying so paint adhesion isn’t compromised before re-caulking.
For a full-room removal, budget several hours to a day per room depending on joint length and caulk longevity—older, hardened caulk takes longer and may need solvents.
Factor in drying and curing time between steps. You’ll work steadily; interruptions for drying or repairs are normal, so schedule accordingly.
Cost: DIY vs. Professional Caulk Removal
When you weigh cost, DIY removal usually saves money upfront but costs you time and effort, while hiring a pro trades convenience and guaranteed results for higher labor fees. You’ll consider materials, patching paint, and matching caulk color; uneven wall texture can make matching harder and increase touch-up time.
If you value control and lower expense, you’ll do it yourself. If you dread mistakes or need speed, a pro may be worth the price. Balance setback risk versus hourly charges and remember warranties.
- Frustration at visible repairs
- Relief from finishing it yourself
- Anxiety over color match
- Comfort with guaranteed work
When to Call a Pro for Painted-Wall Caulk Removal
Cost and convenience often steer your choice, but certain situations make calling a pro the smarter move. Call a pro if the caulk color matches old paint and you risk scraping through multiple layers, or if the wall texture is delicate, ornate, or uneven and could be damaged by tools.
Hire help when mold runs deep, seams are extensive, or previous repairs failed; professionals have steamer, chemical, and abrasive options that protect finish.
Also consider a pro if you lack steady hands, patience, or time—it’s often cheaper than repairing botched paint or textured-surface damage.
Document and Inspect Adhesion Before and After
Before you remove any caulk, photograph and note how well it’s sticking so you can compare conditions afterward. Inspect joints for gaps, peeling, and adhesion differences against wall texture. Record caulk color, age, and any mold or staining. Use a ruler or probe gently to test adherence; note areas that lift easily versus bonded spots.
After removal, re-photograph identical angles and relabel images to track changes and potential paint damage. This documentation helps decide repairs or professional help.
- Frustration at stubborn strips
- Relief when adhesion’s intact
- Worry over damaged paint
- Confidence with clear records
Eco-Friendly Solvents and Disposal Tips
Start by choosing low-VOC, biodegradable solvents designed for sealant removal so you reduce fumes and environmental impact. You’ll test the solvent on an inconspicuous patch to verify it won’t affect caulk color or paint. Work in a ventilated area, wear gloves, and use minimal product—apply, wait, and gently lift softened caulk with a plastic scraper.
Collect waste on paper towels; never rinse solvent down drains. Seal used towels and residue in labeled, airtight bags and follow local hazardous-waste guidelines for disposal.
Note any historical use of lead or oil-based sealants and consult municipal disposal rules before discarding.
Remove Caulk on Textured Painted Walls
When you’re tackling caulk on a textured painted wall, go slowly and use tools that won’t flatten the texture—think plastic scrapers, soft-bristled brushes, and small angled tools to work the softened sealant out of crevices. Test a hidden spot first so Caulk color contrast and adhesion don’t surprise you.
Warm water and mild solvent loosen silicone without harming paint if you blot, not scrub. Work in short sections, lift softened caulk with care, then rinse and pat dry. If paint flakes, stop and repair tiny spots before continuing.
- Frustration turns to relief
- Pride in restored detail
- Calm in careful progress
- Satisfaction with a matched finish
Handling Painted Trim and Baseboards During Removal
If the trim or baseboards are painted, take extra care to protect the finish as you remove caulk. Score the bead gently with a utility knife, angling away from the painted surface to avoid gouges.
Use a plastic scraper or dental tool to lift softened caulk so you don’t pull paint.
Test a solvent in an inconspicuous spot to confirm it won’t affect caulk color or paint sheen.
Work slowly to minimize adhesive bonding to the paint; if resistance is high, reheat with a hair dryer to soften the caulk before prying.
Clean residue with mild soap and a soft cloth.
Remove Caulk Near Delicate Finishes (Veneer, Wallpaper)
The same careful approach you used on painted trim applies to veneer and wallpaper, but you’ll need to be even more gentle to avoid lifting or staining delicate surfaces. Test a small area to check caulk color transfer and how the wall texture reacts.
Use a plastic scraper, dab with minimal solvent on a cloth, and lift slowly along seams. Work outward from edges and stop if adhesive or finish softens.
- You feel anxious about ruining a cherished pattern.
- You want the job to look seamless.
- You worry about staining from older caulk color.
- You crave a calm, careful finish.
Tool Maintenance and Cleaning After Removal
After you finish scraping and wiping, clean your tools right away to prevent dried caulk from hardening and ruining edges. Rinse blades, scrapers, and putty knives with warm soapy water, then use a nylon brush to remove residue from crevices.
For silicone, wipe with isopropyl alcohol before washing. Dry and lightly oil metal parts to stop rust.
Check edges for nicks and sharpen or replace dull blades so you don’t damage decorative accents or uneven wall textures on future jobs.
Store tools in a dry pouch or rack to keep them ready; label blades so you avoid cross-contamination between materials.
Quick Fixes for Small Gummy Caulk Spots
When small gummy caulk spots cling to paint, you can remove them fast without stripping nearby finish by softening the residue and gently lifting it away. Start with a targeted solvent and a blunt tool so you only touch the tacky bits. You’ll test solvent in an inconspicuous spot to protect caulk color and match wall texture.
Dab, wait, then use a plastic scraper or dental pick to lift softened bits. Work slowly to avoid smearing. If paint flecks appear, stop and blot.
Celebrate the small win — the wall looks cared for again, and you didn’t overdo it.
- Relief at instant improvement
- Pride in subtle repair
- Calm from careful touch
- Satisfaction in preserved finish
Removal Checklist: Tools, Safety, and Steps
Since you’ll be working close to painted surfaces, gather the right tools and follow simple safety steps before you start: gloves, eye protection, a mild solvent tested on an inconspicuous spot, plastic scrapers or dental picks, soft cloths, painter’s tape, and a small vacuum or brush for debris. Plan steps: protect adjacent paint with tape, note caulk color and wall texture, loosen edges gently, remove softened caulk with scrapers, wipe residue, and rinse. Follow table for quick reference:
| Task | Tip |
|---|---|
| Protect | Tape edges |
| Test | Solvent spot |
| Loosen | Small picks |
| Remove | Plastic scraper |
| Clean | Soft cloth, vacuum |
Troubleshooting Common Post-Removal Issues
If caulk removal leaves stains, gouges, or residue on your painted wall, don’t panic—most issues are fixable with the right approach. Assess the caulk color transfer and wall texture to decide cleaning, sanding, or spot-priming.
Use gentle solvents for stains, fine-grit sanding for small gouges, and a compatible primer for discoloration before repainting. If residue persists, a plastic scraper plus solvent works better than harsh tools.
Use mild solvents for stains, fine sanding for gouges, and primer before repainting—use a plastic scraper with solvent for stubborn residue.
- You’ll feel relieved when a stain lifts.
- You’ll regain confidence after smoothing damage.
- You’ll appreciate matching caulk color later.
- You’ll relax once touch-up paint hides flaws.
Frequently Asked Questions
Can Caulk Removal Release Harmful Fumes Into Neighboring Rooms?
Yes — caulk removal can release caulk fumes that drift into neighboring rooms, so you should open windows and use fans. Ventilation concerns matter; wear a respirator and seal off adjacent areas to limit exposure and odors.
Will Removing Caulk Void My Home Insurance or Warranty?
Like fixing a chipped mug once cost me a refund, removing caulk rarely voids insurance or warranty if you follow manufacturer-approved removal techniques and respect caulk composition; check policy terms and document repairs to avoid disputes.
How Do I Remove Caulk From Painted Furniture Adjacent to Walls?
You’ll loosen old caulk using caulk removal tools like a razor scraper and utility knife, clean edges, then use surface preparation techniques—sanding lightly and wiping with solvent—so repainting or re-caulking won’t damage the painted furniture.
Can Pets or Children Safely Re-Enter the Room Immediately After Removal?
Want them back right away? You shouldn’t—Pet safety and Child re entry depend on ventilation and cured surfaces, so wait until fumes dissipate and caulk’s set (usually hours to 24); keep them out until it’s safe.
What Records or Photos Should I Keep During a DIY Removal Project?
You should keep dated photos of the area before, during, and after, plus notes listing cleaning tools used, safety precautions taken, product names, timestamps, and any damage or disposal records, so you can document and verify the process.
Conclusion
So you’ve heroically decided to de-caulk your painted wall—congratulations, you’re officially an amateur renovation vigilante. Don’t get cocky: proceed gently, or you’ll join the museum of peeled paint. Use the right tools, test a hidden spot, and keep cleanup supplies nearby so you don’t look like a crime scene cleaner. If things go sideways, remember: patching and repainting are perfectly respectable hobbies, not admissions of domestic failure.