How to Remove Chalk Paint From Wall Easily
You can usually remove chalk paint from walls with simple testing and gentle cleaning: try a small patch with mild soap and water first, then use diluted vinegar or rubbing alcohol for stubborn areas, working with a soft cloth in circular motions. For textured or bonded paint, gently sand or use a heat gun on low, then skim‑coat if needed. Protect trim and ventilate the room; keep going and you’ll find step‑by‑step methods and surface‑specific tips ahead.
Can Chalk Paint Be Removed From Walls?
Wondering if you can get chalk paint off your walls? You can—usually—but success depends on factors like how many coats were applied and the wall texture.
Chalk paint sits matte and porous, so it often comes off easier than glossy finishes, yet it can bond to rough surfaces. You’ll test a small area first to see how it responds.
Gentle methods like soap, warm water, or light sanding often work; tougher spots might need a deglosser or chemical stripper. You’ll proceed carefully to avoid damaging drywall or plaster, adapting technique to results.
Identify Your Wall Finish
First, check what kind of paint you’re dealing with—latex, oil, or a chalk-based finish—because removal methods vary.
Then test a small, inconspicuous area to see if the wall surface is drywall, plaster, or something else and how it reacts.
Those two steps will tell you which cleaning method and tools are safe to use.
Check Paint Type
Before you start scrubbing, confirm what finish is on your wall so you pick a removal method that won’t damage it. Check whether it’s matte, eggshell, satin, or gloss — each has different paint durability and may react differently to solvents. You’ll also consider color matching if you need touch-ups. Gently inspect sheen, rinse a hidden area, and note how the surface responds.
| Finish | Feel |
|---|---|
| Matte | Absorbs |
| Eggshell | Soft sheen |
| Satin | Slight shine |
| Gloss | Smooth, tough |
Test Surface Material
How can you tell what your wall is made of and how it’ll hold up to cleaners? You’ll inspect wall texture first: smooth drywall, textured plaster, or rough brick all react differently. Run your hand; look for bumps, pores, or sanding marks.
Next, check paint sheen—flat, eggshell, satin, or gloss—by angling light; glossier finishes resist scrubbing better. Test a hidden spot with mild cleaner and a soft cloth, wait for damage or color lift.
Note any primer or topcoat layers. Record findings before proceeding so you choose the safest remover and technique for your specific wall finish.
When to Remove Chalk Paint vs. Leave It
If the chalk paint is flaking, obscuring vents, or trapping moisture, you’ll need to remove it to restore the wall’s function.
If the finish still performs but your style or color goals have changed, you can choose to leave it or paint over it.
We’ll look at practical signs that warrant removal versus times it’s fine to keep the paint.
When Paint Compromises Functionality
When chalk paint starts to interfere with how a surface functions—sticking cabinet doors, clogged drawer slides, or paint that flakes into food prep areas, you’ll need to remove it rather than leave it in place. You should act when safety, hygiene, or mechanical performance suffer. Countertops, baby furniture, and kitchen cabinets demand removal. Ignore chalk paint myths that suggest harmlessness; consider environmental impact when choosing removal methods. Address underlying damage, then refinish or seal properly. Use gentle strippers, sanding, or heat as appropriate, and test small areas to protect finishes and hardware.
| Problem | Risk | Action |
|---|---|---|
| Sticking doors | Wear, breakage | Remove paint |
| Flaking near food | Contamination | Strip and clean |
| Jammed slides | Loss of function | Sand/replace hardware |
| Baby items covered | Safety hazard | Strip and refinish |
| Sealed improperly | Trapped moisture | Remove and reseal |
When Aesthetic Goals Change
Because your style evolves, you’ll need to decide whether chalk paint still serves the look you want or if it’s time to strip it back to the original surface. You’ll weigh factors: does the current hue need precise color matching for cabinets or trim? Can you update decorative accents instead of removing paint?
If the finish conflicts with new furniture, erasable trends, or resale plans, removal makes sense. Keep the paint if it complements textures, hides flaws, or saves time. Test small areas, assess effort versus impact, and choose removal only when the aesthetic shift justifies the work and cost involved.
Tools & Supplies for Safe Removal
Before you start scrubbing, gather the right tools and supplies so you can work quickly and avoid damage. You’ll want protective gear, gentle removers, and soft tools that won’t gouge drywall. Look for eco friendly options like biodegradable cleaners and reusable cloths, and follow DIY safety tips: ventilate, wear gloves, and protect floors.
Keep a small bucket of warm water for rinsing and a trash bag for debris.
- Microfiber cloths and soft sponges
- Mild biodegradable cleaner and spray bottle
- Plastic scraper, sanding sponge, gloves
These items help you remove chalk paint safely and efficiently.
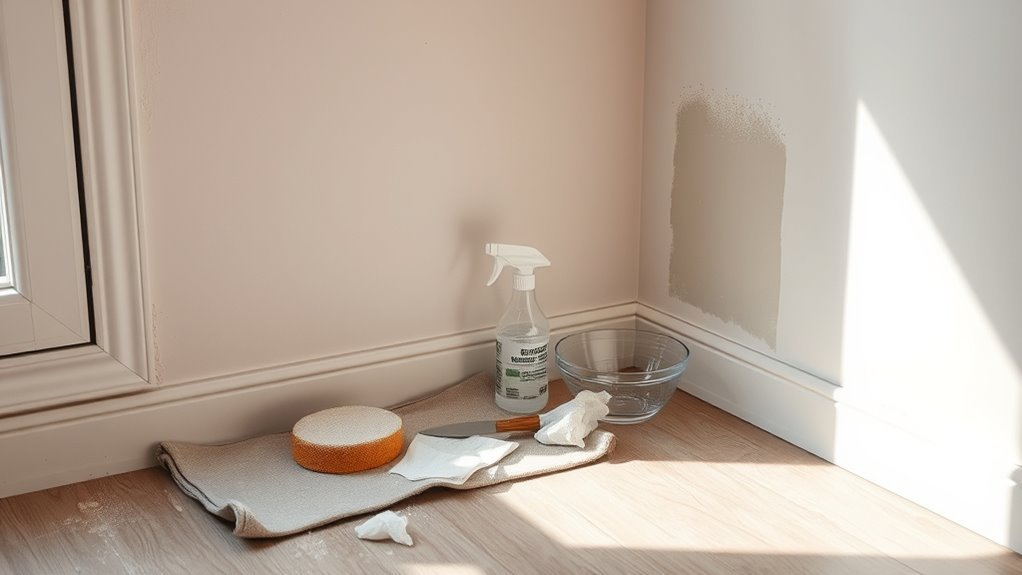
Test a Patch for Chalk Paint Removal
Pick a hidden area like behind a piece of furniture and apply your chosen cleaning solution there.
Let it sit briefly, then blot and rinse according to the product instructions.
After the spot dries, inspect for paint removal, color change, or surface damage before treating the rest of the wall.
Choose Hidden Area
Start by finding a discreet spot—inside a closet, behind a baseboard, or near a door frame—where a small test patch won’t be seen. Choose a hidden area or other concealed spot so you can evaluate removal methods without risking visible damage.
You’ll check adhesion, colorfastness, and finish reaction. Keep the patch size minimal and note timing and results.
- Test adhesion: scrape gently to see if paint lifts.
- Inspect color: watch for fading or discoloration.
- Check finish: ensure underlying surface isn’t damaged.
Document findings to decide the safest full-scale approach.
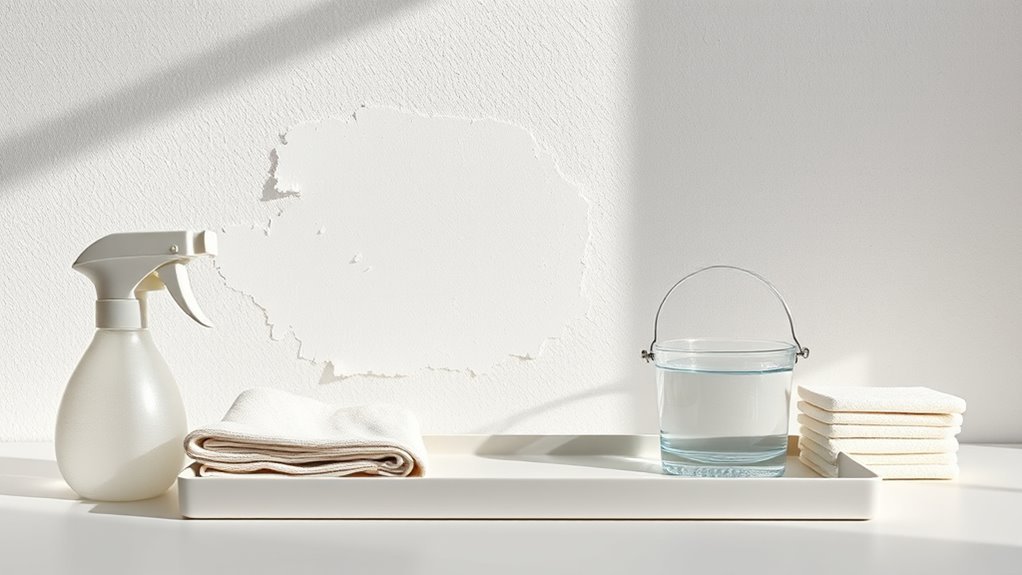
Prepare Cleaning Solution
When you’ve confirmed the test area, mix a small batch of your chosen cleaner—mild dish soap in warm water, diluted white vinegar, or a commercial chalk-paint remover—so you can trial it without overdoing the chemical strength. You’ll dab, wait, and compare. Start gentle; avoid scrubbing hard. Note color change, softness, and lift. Don’t buy into chalk paint myths suggesting abrasive force is needed. Try eco friendly removers first. Use gloves and a soft cloth. Record results to choose the safest option.
| Cleaner | Strength | Expected Result |
|---|---|---|
| Soap | Mild | Light lift |
| Vinegar | Moderate | Dissolve residue |
| Commercial | Variable | Faster removal |
| Eco | Low | Safer finish |
Inspect After Drying
After the patch has fully dried, inspect it closely for color change, residue, and surface texture to decide if the cleaner worked and won’t damage the wall. You’ll compare the test area to surrounding paint, noting any fading, cloudiness, or softening.
Consider historical context—older finishes may react differently—and weigh environmental impact if you’ll repeat the process elsewhere. If the patch looks intact, proceed; if not, stop and choose a gentler method. Record results so you don’t repeat mistakes.
- Note color match and sheen differences
- Check for residue, bubbling, or tackiness
- Log materials used and outcome
Remove Fresh Chalk Paint From Drywall
Although chalk paint dries quickly on drywall, you can still remove fresh splatters with minimal damage if you act fast and use gentle techniques. Blot excess with a dry cloth to avoid spreading; don’t rub.
Lightly dampen a microfiber cloth with warm water and mild dish soap, testing inconspicuously to protect paint finish and preserve chalk paint texture.
For thicker spots, gently lift with a plastic scraper at a low angle. Rinse the area, then pat dry.
If any faint residue remains, use a soft eraser sponge sparingly.
Touch up chips carefully to maintain wall color matching.
Lift Dried Chalk Paint From Latex or Acrylic Walls
Before you start, test a small hidden spot to make sure your removal method won’t damage the latex or acrylic finish. Try gentle solvents like diluted rubbing alcohol or mild dish soap, working softly with a cloth or sponge.
Rinse the area with clean water and dry it thoroughly to prevent streaks or water damage.
Test Paint Removal First
Wondering whether your latex or acrylic wall can handle chalk paint removal? You should always test first to avoid surprises: pick an inconspicuous spot, wipe away surface chalk dust gently, and follow your wall prep routine.
Press a damp microfiber cloth and mild cleaner on the test area, wait, then check for finish lifting, discoloration, or texture changes.
- Try a small corner behind furniture.
- Note how paint, finish, and underlying primer react.
- Photograph the spot for comparison.
If the test shows no damage, proceed gradually. If you see softness or peeling, stop and reassess your approach.
Use Gentle Solvents
If your test spot held up, you can start using gentle solvents to lift dried chalk paint without harming latex or acrylic finishes. Choose a mild, pH-neutral cleaner or a diluted vinegar solution as eco-friendly alternatives; apply sparingly with a soft cloth and work from the edges inward.
Test any solvent on an inconspicuous area, blot rather than scrub, and avoid solvents containing strong alcohols or acetone that can damage paint films.
For older homes, consider conservation-minded methods to respect historical preservation—consult a specialist if paint might be original.
Repeat gentle passes until the paint softens and lifts.
Rinse And Dry Properly
Once the softened chalk paint is lifted, rinse the area with clean water to remove residue and solvent traces so the latex or acrylic finish can dry evenly. Blot excess water with a microfiber cloth, then air-dry or use a fan to speed evaporation; don’t rub, which can harm the surface or weaken paint adhesion.
Inspect the finish for streaks or stains and note any color matching issues before touch-ups. If you’ll repaint, wait fully until the wall feels dry to the touch.
- Use gentle blotting, not scrubbing
- Check for remaining residue under bright light
- Test touch-up paint for color matching
Remove Chalk Paint From Plaster & Textured Walls
Because plaster and textured surfaces trap paint in nooks and pores, removing chalk paint from them takes a gentler, more patient approach than scraping a smooth wall.
You’ll benefit from understanding chalk paint history and wall texture techniques to choose compatible removers and tools.
Test a small area first with a mild, pH-neutral stripper or a warm, soapy sponge to loosen paint without eroding texture.
Use soft-bristled brushes and microfiber cloths, working in circular motions and rinsing frequently.
For stubborn spots, repeat treatments instead of aggressive scraping.
Finish by blot-drying to avoid water damage and inspect for missed flecks.
Remove Chalk Paint From Wallpaper Safely
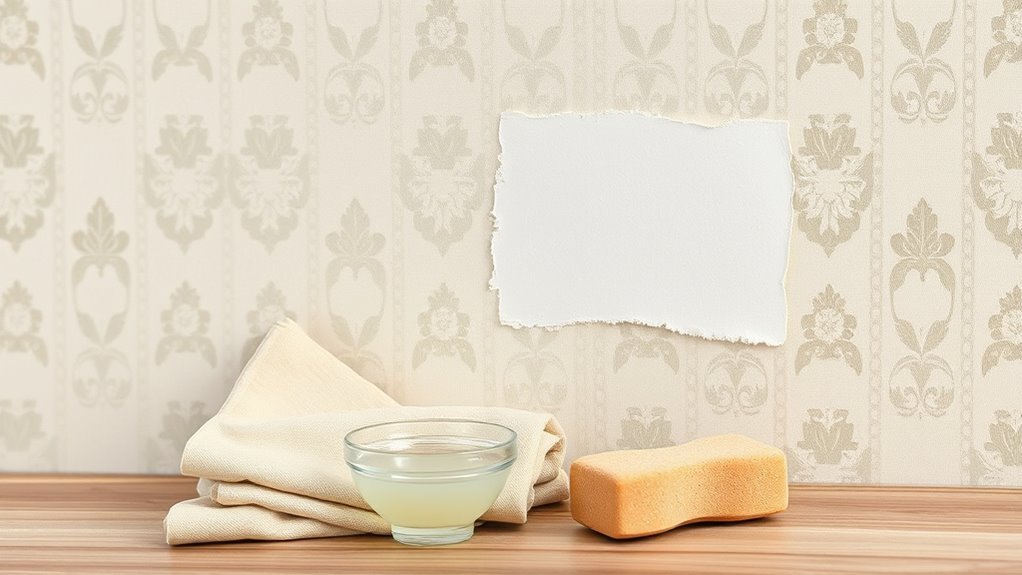
Moving from plaster to wallpaper, you’ll need a different, gentler plan since wallpaper soaks and tears more easily than textured walls. You’ll test a small hidden area first because chalk paint durability varies and some papers delaminate.
Moving from plaster to wallpaper requires a gentler approach—test a hidden area first; blot, don’t rub.
Work from edges toward the center, blotting—don’t rub—to lift softened paint. Keep moisture light and use a soft sponge; avoid scraping that harms the paper backing.
- Start with dry brushing to remove loose chalk finish.
- Use minimal dampening and blot with a microfiber cloth.
- If adhesive fails, stop and consult a pro restoration tip.
Mind wall texture considerations while proceeding gently.
Which Solvent for Which Surface
Different surfaces need different solvents, so you’ll pick a cleaner that won’t damage paint, drywall, wood, or wallpaper.
I’ll include a simple compatibility chart to match surface types with safe solvent options.
Before you start, follow basic safety and prep steps—ventilation, gloves, and a patch test.
Surface Type Matters
When you’re deciding how to remove chalk paint, match the solvent to the surface—what’s safe on sealed wood can ruin drywall or unsealed plaster. You’ll check surface sheen and wall texture before picking a method.
Smooth, glossy finishes resist mild solvents; porous, matte walls soak them up. Test a small patch, wait, and inspect for staining or softening.
Choose gentler products for delicate textures and stronger ones for durable, sealed surfaces.
- Test in an inconspicuous spot to judge reaction.
- Use minimal solvent on textured or crumbly plaster.
- Protect trim and adjacent sealed wood.
Solvent Compatibility Chart
Now that you’ve assessed surface sheen and texture, match specific solvents to the substrate to avoid damage.
For raw plaster or unsealed drywall, use mild soap and water first; stronger solvents can gouge porous finishes.
For painted latex walls, try isopropyl alcohol or a mild citrus-based remover—test a hidden spot because some popular brands’ formulas vary.
For oil-based or varnished surfaces, mineral spirits or acetone work but test and ventilate.
For delicate wallpapers or historic finishes linked to chalk paint history, avoid solvents; instead, use gentle mechanical removal.
Always spot-test and proceed gradually to protect the surface.
Safety And Preparation
Because safety starts before you touch a solvent, prepare the area and yourself first. You’ll assess the wall surface—painted drywall, plaster, or masonry—to pick a compatible solvent from the chart, and follow a strict preparation checklist so you don’t damage the substrate.
Wear proper safety equipment and ventilate the room; open windows, use a fan, and seal nearby furniture. Test a small patch before wider application. Keep cleaning supplies and a trash bag handy, and know disposal rules for used rags.
- Ventilation, gloves, and eye protection before you begin
- Surface test and solvent selection
- Disposal and cleanup plan
Use Vinegar, Rubbing Alcohol, and Mineral Spirits Safely
Before you start, read product labels and test a small hidden spot so you know how each solvent reacts with your wall finish.
Use vinegar cleaning diluted (1:1 with water) for water-based chalk paint, applying with a soft cloth and blotting—don’t saturate.
Dilute vinegar 1:1 with water and blot gently with a soft cloth—avoid saturating water‑based chalk paint.
For tougher spots, use rubbing alcohol safety practices: ventilate, wear gloves, and dab gently to avoid stripping underlying paint.
Mineral spirits work on stubborn residue but use sparingly, in well-ventilated areas, with a respirator if needed.
Dispose of rags safely, avoid open flames, and stop immediately if the wall finish softens or discolors.
Use Gentle Scrubbing & Magic Erasers Without Damage
While you’re working with solvents or milder cleaners, pair them with gentle scrubbing to lift chalk paint without harming the wall—use a soft sponge or microfiber cloth and light, circular motions rather than hard scrubbing. You’ll protect the surface and control chalk removal while evaluating wall preparation needs.
Test a small, hidden spot first.
For tougher marks, try a magic eraser carefully—dampen it and rub gently, avoiding glossy or delicate finishes. Rinse and pat dry, then inspect for residue.
Follow up with proper wall preparation before repainting or sealing to ensure even adhesion.
- Test area first to judge effect
- Use light pressure only
- Rinse and inspect thoroughly
Use Heat and Steam to Loosen Stubborn Chalk Paint
If gentle scrubbing and a magic eraser don’t budge stubborn chalk paint, try heat or steam to soften the finish so you can lift it more easily. Use a heat gun on low, keeping it moving and staying several inches from the wall to avoid scorching; test a small area first.
For delicate surfaces, employ steam techniques with a handheld steamer, holding the nozzle a few inches away to loosen paint without over‑saturation. After warming, wipe softened paint with a soft cloth or plastic scraper.
Work in short bursts, ventilate the room, and wear gloves and eye protection during heat application and steam techniques.
Sanding & Skim‑Coating for Stubborn Paint Stains
When heat and solvents won’t remove stubborn chalk paint, you’ll need to abrade and then refinish the surface—sanding down the blemishes and applying a thin skim coat to create a smooth, paint-ready base. Start with medium-grit sandpaper to level flakes, then finer grit to feather edges; always wear a mask to avoid inhaling chalk dust.
Clean the sanding residue, tack with a damp cloth, and mix a lightweight joint compound for skim coating. Apply thin layers, let dry, and sand lightly between coats until wall textures are even and consistent.
- Use a vacuum and damp cloth to control dust
- Feather compound beyond stain edges
- Keep coats very thin
Touch‑Up Painting After Chalk Paint Removal
Before you repaint, make sure the repaired area is completely smooth, dry, and free of dust so the new paint will blend seamlessly with the surrounding wall. You’ll test small swatches, matching finish and sheen to respect chalk paint history and avoid patchy repairs. Use a soft brush, thin coats, and feather edges outward for subtle blending. Consider wall color coordination with existing tones; step back between coats. Visualize the process:
| Patch | Brush | Blend |
|---|---|---|
| Sanded | Thin coat | Feathered |
| Dry | Second coat | Match sheen |
Finish with light sanding if needed, then seal.
Remove Chalk Paint From Trim, Baseboards & Woodwork
You’ve prepped the wall and handled touch-ups; now focus on the trim, baseboards, and woodwork, which usually need more careful attention because of profiles, joints, and original finishes. Work slowly: test removers on an inconspicuous spot to respect original finishes and balance Chalk paint durability with gentle techniques.
Use small tools and low-abrasion pads to reach grooves without gouging. For historic pieces, consider conservation-friendly methods used in historical restoration.
- Use citrus or soy-based strippers for controlled softening.
- Employ plastic scrapers and toothbrushes for grooves.
- Finish with fine-grade steel wool and a mild solvent.
Avoid Surface Damage During Aggressive Removal
If you must use aggressive methods, proceed with deliberate control to protect the substrate. You’ll plan surface preparation, test small areas, and choose tools that match paint durability. Use fine-grit abrasives, low-pressure heat, or solvent blends while monitoring progress to avoid gouging or blistering. Move slowly, keep edges supported, and stop at bare substrate signs. Restore any abrasions promptly with filler and primer to maintain finish integrity.
| Tool | Risk Level | When to Use |
|---|---|---|
| Fine abrasive | Low | Light adhesion |
| Heat gun | Medium | Stubborn spots |
| Solvent | Variable | Durable layers |
Removing Chalk Paint From High or Hard‑To‑Reach Areas
When tackling chalk paint on high or hard-to-reach areas, plan for safety and access first so you can work steadily without strain. Use an adjustable ladder or scaffold, secure footing, and a partner to steady equipment.
Match tools to wall texture; smooth walls scrub differently than textured surfaces. Test a small area with a gentle remover to avoid damage.
- Use extendable scrapers and soft-bristled brushes for reach and control.
- Employ a spray bottle or low-pressure sprayer to apply remover evenly.
- Protect floors and furniture with drop cloths and tape.
Work methodically, rinsing and drying sections as you go.
When to Call a Pro and What to Ask
Although many chalk‑paint issues are DIY‑fixable, call a pro when the job risks structural damage, extensive surface prep, or your safety. If paint covers plaster, mold, or lead, or you lack proper tools, seek professional assistance.
Ask about their experience with chalk paint removal, methods they’ll use, timeline, and cleanup procedures. Request proof of insurance and licenses, and get a written estimate detailing labor, materials, and disposal fees.
Discuss cost considerations upfront: ask for itemized quotes and whether unexpected findings will change the price. Confirm warranty on work and get contactable references before you commit.
Frequently Asked Questions
Can Chalk Paint Cause Indoor Air Quality Issues or Odors?
Yes — you might notice chalk paint odor and temporary indoor air quality impacts, especially if poorly ventilated or using solvent additives. You should ventilate, use low-VOC products, and allow curing to minimize smells and emissions.
Will Chalk Paint Removal Harm Nearby Furniture or Fabrics?
Better safe than sorry: you won’t necessarily damage furniture or fabrics if you’re careful; you’ll prevent chalk paint staining by moving or covering items, using proper wall surface prep, gentle solvents, and testing small areas first.
Can I Remove Chalk Paint From Ceilings Safely?
Yes, you can remove chalk paint from ceilings safely if you protect floors and furniture, work steadily, and use gentle scrubbing or a stripper compatible with ceiling texture; monitor paint adhesion and stop if the surface weakens.
Are There Eco-Friendly Disposal Methods for Chalk Paint Waste?
Want eco-friendly disposal methods for chalk paint waste? You can use biodegradable solvents to thin leftover paint, collect unusable residue for hazardous-waste or community recycling, and prioritize recycling chalk paint containers and excess to minimize landfill impact.
How Long After Removal Can I Reapply a New Finish?
You can reapply a new finish after 24–48 hours once paint removal is complete and the wall prep’s dry; if you used water, wait longer for full drying, and always test for moisture before painting.
Conclusion
You can usually remove chalk paint from walls without drama, but first identify the finish and test a patch—measure twice, cut once. If the surface’s intact, gentle methods like soap, water, or a citrus-based remover often do the trick; tougher jobs may need sanding or stripping, so protect trim and avoid aggressive abrasion on delicate areas. Reach high spots with extension tools, and call a pro if you’re unsure or the substrate’s valuable.