How to Remove Crayon From a Painted Wall Safely
You can safely remove crayon by testing a hidden spot first, then gently lifting wax with a damp microfiber cloth and warm soapy water or a baking-soda paste; work in small circular motions and pat dry. For stubborn marks, soften wax with a hair dryer or use a little rubbing alcohol or a melamine sponge—always test first to avoid dulling flat paint. After cleaning, rinse, dry, and touch up any tiny paint loss, and keep tips to prevent repeats if you want more guidance.
Quick Answer: Safest Way to Remove Crayon From Painted Walls
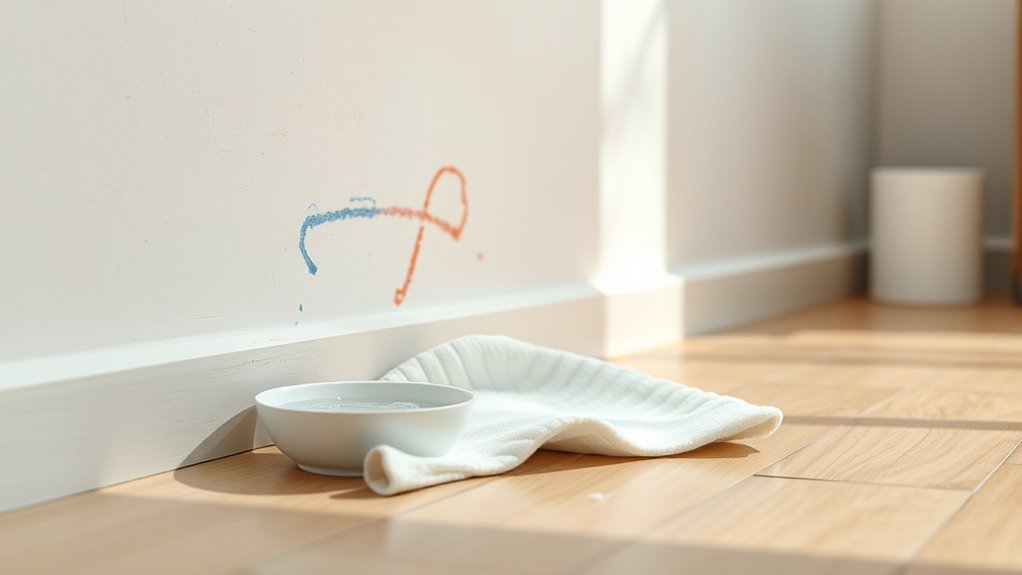
If you need a fast, safe fix, start with a soft microfiber cloth dampened with warm soapy water and gently rub the crayon mark; that removes most pigment without harming typical latex paint.
You’ll work gently, testing a small spot first, then blotting rather than scrubbing to protect your wall decor.
For stubborn residue, try a gentle nonabrasive cleaner or a magic eraser used lightly; test again.
Avoid harsh chemicals or scraping that can damage paint or remove crayon art you want to keep.
Rinse, dry, and inspect; repeat cautiously until the mark’s gone.
How Paint Finish Affects Crayon Removal (Flat to Semi‑Gloss)
If your wall has a flat finish, you’ll need extra caution because the porous surface soaks up crayon and can show abrasion marks.
With semi-gloss paint, you’ll have more leeway to scrub gently since the smoother surface resists staining and damage.
I’ll explain specific techniques for each finish so you can pick the safest, most effective method.
Flat Finish Challenges
Because flat paint soaks up wax and pigment more than glossier finishes, you’ll often need different cleaning tactics and a gentler touch to avoid removing color or leaving a halo. You should test a small area first because color blending and wall textures change how crayons set. Use mild cleaners, soft cloths, and light blotting. Avoid heavy scrubbing that damages flat finishes. If pigment persists, try repeated gentle lifts rather than one aggressive pass. Note how texture traps wax and plan accordingly.
| Action | When to use |
|---|---|
| Spot test | Always |
| Soft cloth | Light marks |
| Mild cleaner | Stubborn wax |
| Recoat | If halo persists |
Semi‑Gloss Cleaning Tips
Flat finishes demand a gentle approach, but semi‑gloss gives you more leeway: its smoother, less porous surface resists wax penetration, so you can be slightly more assertive without stripping paint.
When cleaning semi‑gloss, test a hidden spot first. Start with a soft cloth and mild dish soap; rub gently in circular motions.
For stubborn marks, use a magic eraser lightly, keeping pressure minimal to avoid dulling sheen.
Avoid harsh solvents near Crayon artistry or Wall murals—these can lift varnish or pigments.
Rinse with clean water, pat dry, and assess; repeat only if necessary to preserve finish.
Test a Hidden Spot Safely Before You Clean
Before you apply any cleaner, pick a hidden spot—inside a closet, behind furniture, or a baseboard corner—and try your chosen method there first. You’ll see how paint reacts to gentle rubbing or solvents without risking visible damage.
Test on areas that match varying wall textures so you know if smooth, eggshell, or textured finishes tolerate the treatment. Try techniques used near art supplies storage, since crayons and markers often congregate there.
Wait a few minutes, then inspect for discoloration, sheen change, or softened paint. If it looks unchanged, proceed cautiously; if not, choose a milder approach.
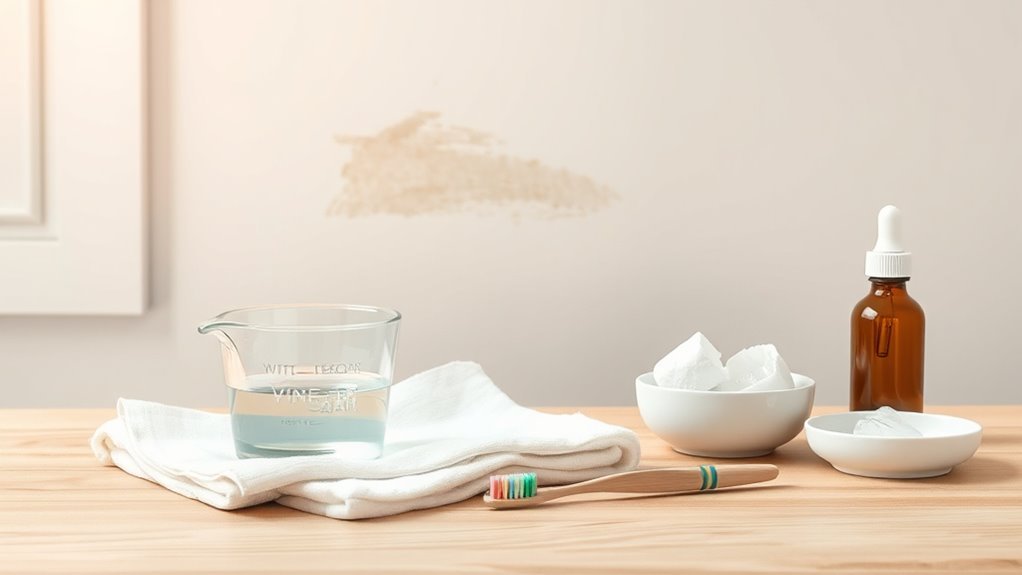
Tools and Cleaners to Have on Hand
Once you’ve confirmed a safe test spot, gather the tools and cleaners you’ll need so you can remove crayon marks efficiently and with minimal risk. Have soft microfiber cloths, a gentle sponge, a plastic scraper, and cotton swabs for detail work.
Keep a mild dish soap solution, white vinegar diluted with water, and a commercial non-abrasive cleaner labeled safe for painted surfaces. For tougher stains, isopropyl alcohol works in small amounts—test first.
Avoid harsh abrasives or solvents that could ruin creative wall art finishes. Understanding crayon color psychology helps predict staining severity from darker pigments.
Stay cautious and work gently.
Remove Fresh Crayon With a Damp Microfiber Cloth
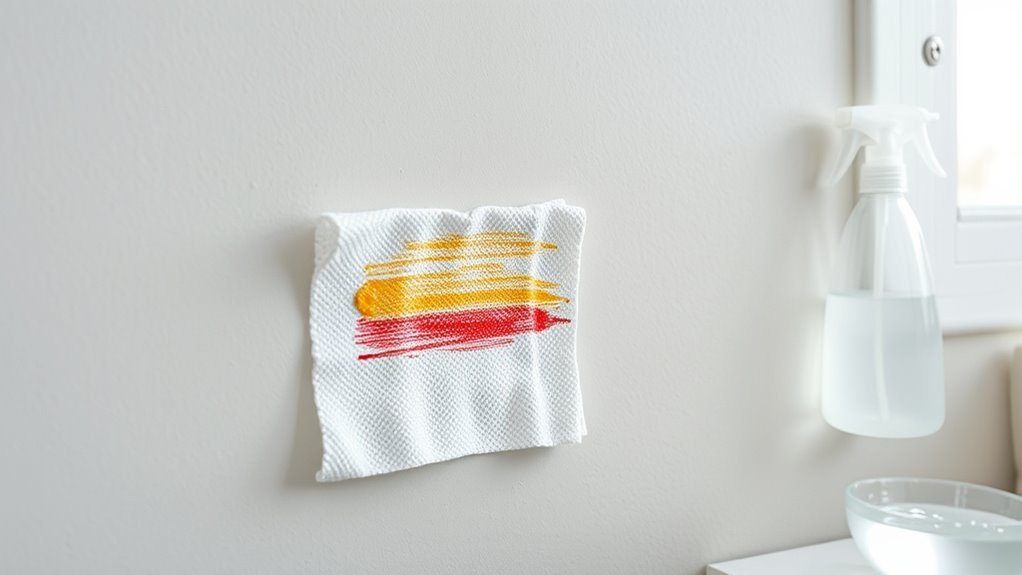
If the crayon mark is fresh, act quickly to keep it from setting into the paint.
Dampen a microfiber cloth (not dripping) and gently blot the mark, working from the outside in.
Don’t rub hard—use light pressure and repeat with a clean section of cloth until the wax lifts.
Act Quickly After Marking
When your child’s crayon meet-up with the wall is still fresh, act fast and grab a damp microfiber cloth to wipe it away gently; you’ll prevent pigment from setting. Move promptly because fresh marks from art supplies lift more easily than dried wax.
Check wall textures first—smooth paint wipes cleaner than textured surfaces—so adjust pressure and motion to avoid scuffing. Use light, steady strokes and rinse the cloth often to avoid smearing.
If color persists after a few gentle passes, stop and consult the next steps to avoid damaging the finish. Quick action preserves paint and saves time.
Use Damp Microfiber Cloth
Because fresh crayon hasn’t set, grab a damp microfiber cloth and gently wipe the mark using light, circular motions; this minimizes smearing and respects paint finish. You’ll notice color blending — stop if pigments spread. Work with the wall texture, not against it, letting fibers lift wax from crevices. Rinse the cloth often and check progress. If residue persists, repeat briefly; avoid harsh rubbing. Below is a quick reference:
| Step | Action | Tip |
|---|---|---|
| 1 | Dampen cloth | Use lukewarm water |
| 2 | Wipe gently | Circular motion |
| 3 | Rinse cloth | Prevent redistributing |
| 4 | Inspect | Watch texture |
| 5 | Repeat | Short intervals |
Gentle Blotting Technique
Start by gently blotting the fresh crayon with a damp microfiber cloth, pressing lightly to lift wax without smearing; don’t scrub. You’ll dab from the outer edges toward the center to reduce color blending and prevent spreading. Use short, gentle presses, rinsing the cloth often to remove wax buildup.
On textured walls, follow grooves carefully so you don’t push pigment deeper into the wall texture. If residue remains, slightly moisten a clean section and repeat until the mark fades.
Dry the spot with a soft towel to avoid water halos, then inspect under good light for any leftover streaks.
Use a Soft Eraser or Art Gum Safely
Although it seems simple, using a soft eraser or art gum takes care and the right touch to avoid damaging paint. You’ll want gentle, short strokes and light pressure to lift crayon without scuffing the finish.
You’ll test in an inconspicuous spot first, then work from the edges of the mark inward. Use eraser techniques like small, controlled motions and rotate the eraser to avoid buildup.
Keep the area clean by brushing away crumbs frequently. Choose a high-quality art gum for delicate finishes and follow art supply safety: avoid solvents, don’t press hard, and stop if paint dulls or flakes.
Remove Crayon With a Baking‑Soda Paste
Make a paste by mixing baking soda with a bit of water until it’s spreadable but not runny.
Gently rub the paste onto the crayon marks with a soft cloth or sponge, working in small circles to lift the wax without stripping paint.
Rinse the area with a damp cloth and dry to check your progress, repeating if needed.
Making The Paste
Once you’ve gathered a small bowl, baking soda, and a bit of water, mix them into a spreadable paste — you want the texture of toothpaste, not soup.
Measure roughly two parts baking soda to one part water, then adjust by teaspoons until it holds its shape. Stir gently to avoid airborne powder; this is basic color mixing of ingredients, not pigments.
Aim for a smooth, gritty cream that won’t drip into corners or soak into wall texture. Test a tiny amount on an inconspicuous spot to confirm consistency and that the paste won’t abrade the paint before proceeding.
Applying And Rinsing
Now that your paste’s ready and you’ve confirmed it won’t damage the paint, apply a small amount directly onto the crayon mark with a soft cloth or your fingertip. Rub gently in circular motions, matching pressure to the wall texture so you don’t abrade matte or satin finishes.
If color mixing from adjacent crayons occurs, stop and blot excess paste with a damp cloth. Rinse the area with a clean, damp cloth, wiping from the outer edge inward to prevent halos.
Pat dry with a towel and inspect; repeat once if residue remains, then fully rinse and allow to air dry.
Why Baking Soda on a Cloth Beats Abrasive Scrubbers
While abrasive scrubbers can take off crayon quickly, baking soda on a damp cloth gives you controlled, effective cleaning without stripping paint or leaving scratches. You’ll protect wall texture and avoid color mixing from scuffed paint when you gently rub. Use light pressure and rinse the cloth often.
| Benefit | Tool | Result |
|---|---|---|
| Gentle | Baking soda cloth | Preserves paint |
| Precise | Soft cloth | Targets marks |
| Safe | Mild abrasiveness | No scratches |
| Clean | Rinse frequently | Removes residue |
This method’s consistency helps you remove crayon while keeping finishes intact.
Use White Vinegar Safely (Dilution & Steps)
Use a mild vinegar solution—about one part white vinegar to two parts water—to break down crayon without stripping paint.
Test the mix on a hidden spot first to make sure the finish won’t react.
If it’s safe, apply gently with a soft cloth and use light circular motions until the mark lifts.
Vinegar-To-Water Ratio
Because undiluted white vinegar can dull or strip paint, you’ll want to mix it with water before treating crayon marks. Use a mild solution so color blending from crayons doesn’t spread and so wall texture won’t soften. Start with 1:1 for stubborn marks, but prefer 1:4 for painted surfaces. Apply gently with a soft cloth, blotting rather than rubbing.
| Situation | Ratio |
|---|---|
| Stubborn crayon | 1:1 |
| General cleaning | 1:4 |
| Delicate paint | 1:8 |
Rinse with a damp cloth and dry promptly to protect the finish.
Test On Hidden Area
Before you apply your vinegar solution across a visible area, try it on a hidden spot like inside a closet or behind trim to make sure the paint holds up.
You’ll dilute white vinegar per the prior ratio, apply a small amount, wait a few minutes, then blot gently.
Check for discoloration, sheen change, or softening.
Do the same near crayon art or wall murals edges to confirm colors won’t bleed.
If the test passes, proceed cautiously; if not, stop and choose another method.
- Dilute vinegar as instructed
- Apply to concealed area
- Wait and inspect closely
- Note results and proceed
Gentle Scrub Technique
When the test patch shows no paint damage, mix the diluted white vinegar solution and apply it sparingly to the crayon marks. Then gently scrub with a soft cloth or non-abrasive sponge in small circular motions to lift wax without harming the finish.
Start with a 1:1 water-to-vinegar ratio; adjust only if the wall texture is delicate. Blot excess moisture between passes and avoid soaking seams or trim.
For stubborn pigment, repeat briefly rather than increasing strength—color mixing from residual wax can smear.
Rinse the area with a damp cloth, pat dry, and inspect the paint before declaring the job complete.
Dish Soap and Warm Water for Oily Crayon Residue
If greasy crayon marks stay after you’ve scraped and blotted, mix a few drops of dish soap into warm water and gently scrub the spot with a soft cloth or sponge. You’ll lift oily residue without harming most paints; test a hidden area first near crayon art or behind wall decals.
Work from the edges inward, rinse the cloth often, and avoid soaking the wall. Pat dry with a clean towel. Repeat if needed, waiting between attempts to check paint reaction.
- Test hidden area
- Use soft cloth/sponge
- Rinse and wring frequently
- Pat dry and inspect
When Rubbing Alcohol or Isopropyl Wipes Are Safe
Before you grab isopropyl wipes, test them on an inconspicuous patch to make sure the paint and finish won’t soften or discolor.
Use rubbing alcohol only on hard, nonporous surfaces or on paint finishes labeled as durable or semi-gloss.
If the spot test shows no damage, proceed gently and avoid soaking the wall.
When Isopropyl Is Safe
Wondering whether rubbing alcohol will hurt your paint? You can use isopropyl safely when you understand Isopropyl safety and avoid unwanted chemical reactions.
Test first on an inconspicuous spot, use diluted 70% isopropyl if possible, and work gently with a soft cloth. Don’t soak the wall; quick dabs prevent finish damage.
- Test a hidden area for color change.
- Use 70% isopropyl or a mild dilution.
- Blot—don’t rub aggressively—to lift crayon.
- Rinse with water and dry to remove residue.
Follow these steps and you’ll minimize risk while removing crayon.
Surface And Paint Compatibility
When you’re deciding whether to use rubbing alcohol or isopropyl wipes, consider the type of paint and surface finish first. Hard, nonporous finishes like semi-gloss and gloss resist solvents better than flat or matte paints, which can dull or remove pigment.
Test a hidden spot to check for color blending or softening before you proceed.
On textured walls, solvents can sink into crevices and lift pigment unevenly, so dab gently and wipe outward.
For delicate or aged paint, avoid isopropyl or use diluted solutions.
If unsure, consult paint specs or choose milder cleaners to protect the finish.
Use WD‑40 or Baby Oil to Lift Wax Without Harm
Although wax can cling stubbornly to paint, you can lift crayon marks gently by applying a small amount of WD‑40 or baby oil to a soft cloth and rubbing the spot in a circular motion until the wax loosens.
Test first on an inconspicuous patch, especially near Crayon art or Wall murals, to verify finish safety.
Work gently, blotting removed wax with a clean cloth.
After removal, wash the area with mild soap and water to remove residue.
- Test on hidden area
- Use minimal product
- Rub gently in circles
- Clean residue afterward
Use Heat (Hair Dryer or Iron + Cloth) to Loosen Wax
If oil or WD‑40 didn’t fully lift the wax, you can soften crayon with gentle heat to make it easier to blot away. Aim a hair dryer on low, keeping it several inches from the mark and moving continuously so paint and wall texture won’t overheat.
For stubborn glaze, place a thin cloth over the crayon and press briefly with a warm (not hot) iron, testing a hidden spot first. As wax softens, blot with paper towels or a microfiber cloth—don’t rub.
Note that deep Crayon color may need repeat heating and blotting; stop if paint softens or discolors.
Magic Erasers and Melamine Sponges: Pros & Precautions
Because melamine sponges act like ultra-fine sandpaper, they can remove crayon quickly but they can also dull or strip paint if you scrub too hard. Use gentle pressure, test an inconspicuous spot, and avoid repeated passes. Rinse the sponge often to prevent grit buildup.
Melamine sponges remove crayon fast but can dull paint—use light pressure, test first, and rinse often.
- Light pressure first to protect finish.
- Test a hidden area for colorfastness.
- Prefer eco friendly alternatives if you need gentler cleaning options.
- Supervise use around kids for children’s safety; store sponges out of reach.
Stop if paint softens or dulls, then switch to milder methods.
Removing Stubborn or Layered Crayon: Step‑By‑Step
When a single pass won’t budge wax, tackle stubborn or layered crayon with a patient, methodical approach that protects the paint while lifting pigment.
First, test a small inconspicuous area to confirm paint compatibility, noting crayon color and wall texture.
Warm the wax gently with a hair dryer on low to soften layers, then blot with a clean microfiber cloth.
Apply a mild dish soap solution sparingly, rubbing in concentric circles.
For persistent marks, use a paste of baking soda and water applied gently, then rinse and pat dry.
Finish by inspecting for residue and repeating only as needed.
Combine Methods Safely Without Stripping Paint
You’ve already softened and lifted most of the wax; now combine techniques carefully so you remove remaining pigment without stripping the paint. Work from least to most aggressive: gentle soap, eraser, solvent swab, quick rinse.
Test each step on an inconspicuous spot, wait for full dry, and stop if sheen changes.
Use small circular motions, minimal pressure, and fresh cloths to avoid spreading pigment.
Preserve any playful art therapy residue or crayon stamping designs kids meant to keep by masking them first.
Keep solvents away from trim and ventilation open.
Rinse and pat dry after each successful pass.
Prevent Sheen and Paint Discoloration While Cleaning
To prevent sheen changes and paint discoloration while cleaning, work deliberately with the mildest option that removes the pigment and stop as soon as the mark lifts. Test a hidden spot first so you observe any color mixing or sheen shift before treating visible areas.
Use soft cloths, gentle cleaners, and light pressure—scrubbing roughens wall texture and alters gloss. Rinse residues thoroughly and dry gently to avoid streaks.
If marks persist, move up steps gradually rather than repeating harsh treatments. Keep treatments localized to avoid uneven patches; proceed slowly and reassess after each short attempt.
Patch Tiny Paint Damage After Cleaning: Touch‑Up Steps
If the cleaning removed crayon but left small nicks or scuffs, you can quickly restore the finish with a few simple touch-up steps. Match paint using a hidden spot or leftover sample, and clean the area with a damp cloth. For textured surfaces, blot gently to preserve pattern. Use a small artist brush for precision—that’s especially helpful near crayon art or wall murals. Feather edges to blend.
If cleaning removed crayon but left nicks, match paint, clean gently, and feather thin touch-up layers to blend.
- Sand lightly and remove dust.
- Apply primer only if bare drywall shows.
- Dab matched paint in thin layers.
- Blend edges and let fully cure before rehanging items.
When Should You Call a Professional?
When small touch‑ups don’t fully restore the wall—or the damage goes beyond nicks and scuffs—you should consider calling a professional.
Call a pro if crayon removal scratched or stripped paint, exposed drywall, or left stains that bleed through fresh paint.
Hire someone when textured or high walls require scaffolding, or when multiple rooms are affected and you want consistent color matching.
Mention child safety concerns so they use gentle, non toxic options and secure the area.
If mold, electrical outlets, or structural damage appear, stop DIY attempts and get a licensed contractor to assess and repair.
Quick Prevention Tips to Avoid Future Crayon Marks
Because kids are curious and crayons are easy to grab, the simplest prevention is to set clear boundaries and make drawing supplies more convenient—keep crayons in a designated box, provide paper or an easel at their height, and put a washable mat or chalkboard surface on walls where scribbling’s allowed.
You’ll reduce stray marks by organizing art supplies, teaching allowed zones, and matching materials to wall textures to avoid permanent impressions. Stay consistent with rules and praise good behavior.
Consider temporary low-adhesion tape to define drawing areas and store specialty crayons separately so children use only washable varieties.
- Keep art supplies organized
- Designate drawing zones
- Match materials to wall textures
- Use washable crayons only
Common Mistakes That Make Crayon Stains Worse
Although it seems harmless to grab whatever’s on hand, some common reactions actually spread the wax or set the pigment, making stains harder to remove.
Don’t scrub aggressively with a dry cloth; that can grind pigment into pores, especially on textured paint or rough wall textures. Avoid using harsh cleaners or solvents from art supplies kits unless label says safe for painted walls—these can strip finish or smear color.
Don’t heat the crayon with a hairdryer; heat melts wax deeper. Skip colored erasers or abrasive pads that abrade paint.
Instead, test gentle methods in an inconspicuous spot first.
Frequently Asked Questions
Can Crayons Permanently Damage Lead‑Based Paint?
Yes — crayons won’t usually strip lead paint, but they can smear and hide flakes; you’ll still face lead paint health risks if underlying paint is deteriorating, so you’ll want professional testing and safe remediation.
Are Crayon Solvents Safe Around Pets and Children?
They’re not always safe; you should prioritize pet safety and chemical safety by choosing non‑toxic cleaners, ventilating the area, keeping pets and children away until residues dry, and storing solvents locked out of their reach.
Will Cleaning Crayon Affect Textured or Popcorn Walls?
Like walking on eggshells, you’ll need extra care: textured surfaces and popcorn walls can loosen with vigorous wall cleaning, so you’ll use gentle cleaners, soft brushes, and light pressure to avoid damage and uneven discoloration.
Can Crayon Removal Techniques Remove Wallpaper or Decals?
Yes—you can damage wallpaper or decals with aggressive crayon removal; gentle decal cleaning and proper wallpaper removal methods reduce risk. Test solvents in an inconspicuous spot, use mild cleaners, and peel or lift slowly to avoid tearing.
How Long Should I Wait After Painting Before Cleaning Crayon Marks?
Wait about two weeks before cleaning crayon marks so paint cures; smoother wall texture may allow earlier gentle cleaning, but textured surfaces need longer. That helps protect paint durability and prevents scuffs or finish damage.
Conclusion
You’ve turned crayon chaos into calm: the bright, waxy smear that once shouted from the wall now slips away under gentle rubbing and patient touch. As you stand back, the smooth, painted surface returns—cool, even, ordinary—while the memory of sticky color lingers like a warm sunspot fading at dusk. Keep a soft cloth, a test patch, and steady hands handy, and you’ll swap frantic scrubs for quiet, confident fixes every time.