How to Remove Mildew From Exterior Painted Surfaces
You can remove mildew from exterior painted surfaces yourself by identifying powdery spots, protecting plants and trim, and wearing gloves, goggles, and an N95. Mix a mild cleaner (or 1 cup bleach per gallon water), test a small area, scrub gently with a soft brush, then rinse with a hose and let dry. Reapply or spot-prime peeled areas and improve ventilation or landscaping to prevent return—keep going for tips on tools, timing, and tougher stains.
Is It Mildew, Mold, or Dirt?
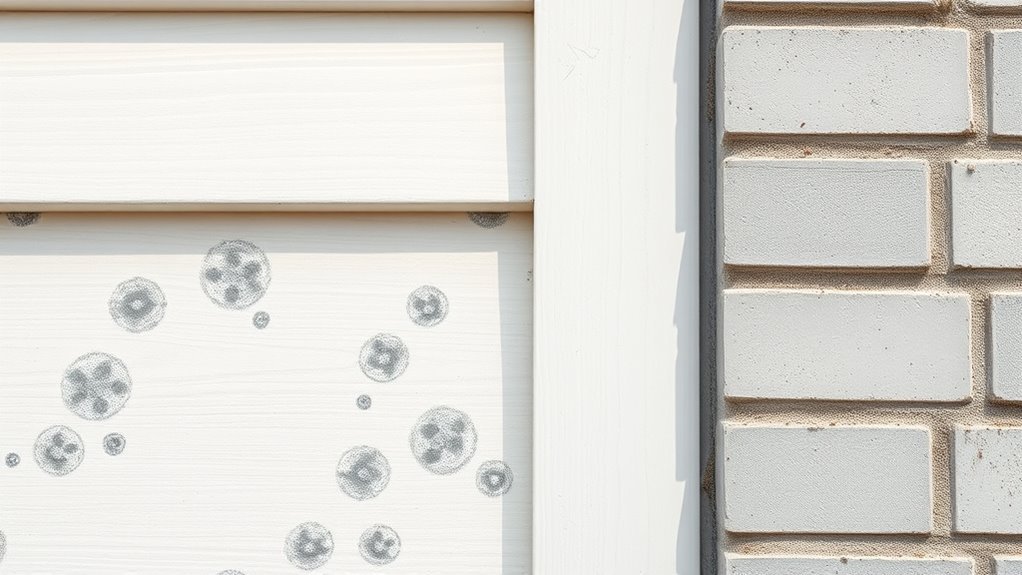
When you spot fuzzy or discolored patches on siding or trim, don’t assume it’s mildew—mold and simple dirt can look similar but need different treatments. You’ll first inspect texture: mildew often appears powdery and patchy, mold can be slimy or fuzzy, while dirt wipes away with minimal effort.
Smell helps: mold may smell musty. Test a small area with diluted bleach or a mild cleaner—if it lifts easily, it was likely dirt.
For true biological growth, plan appropriate removal and preventive steps. Knowing the difference saves your DIY paint job and focuses outdoor cleaning efforts correctly.
When to Remove Mildew From Exterior Paint
If you notice dark, powdery spots spreading across siding, trim, or painted fences, act quickly—mildew can stain paint and, over time, degrade the finish. Remove mildew as soon as you see it: early treatment prevents staining and costly repainting, especially on historical paint that’s more fragile.
Prioritize removal after damp seasons or following shaded, poorly ventilated conditions where spores thrive. Use appropriate methods and test a small area first; for delicate or period surfaces, consider gentler techniques and approved cleaners.
Choose eco friendly cleaners when possible to limit runoff damage to plants and nearby materials.
Safety Gear for Cleaning Mildew on Painted Surfaces
Because mildew cleaners and disturbed spores can irritate your skin, eyes, and lungs, you should always suit up before you start scrubbing painted surfaces. Follow basic safety precautions: work in fresh air, keep others away, and read product labels.
Always suit up before scrubbing mildew: work in fresh air, keep others away, and read product labels.
Wear protective clothing that covers arms and legs, a water-resistant apron, and closed shoes. Use chemical-resistant gloves and eye protection; a fitted N95 or respirator blocks spores and fumes.
Stop and rinse if you feel dizzy or get a rash. These steps protect you and your home while you remove mildew safely.
- Gloves
- Respirator
- Eye protection
Tools and Brushes for Cleaning Painted Walls
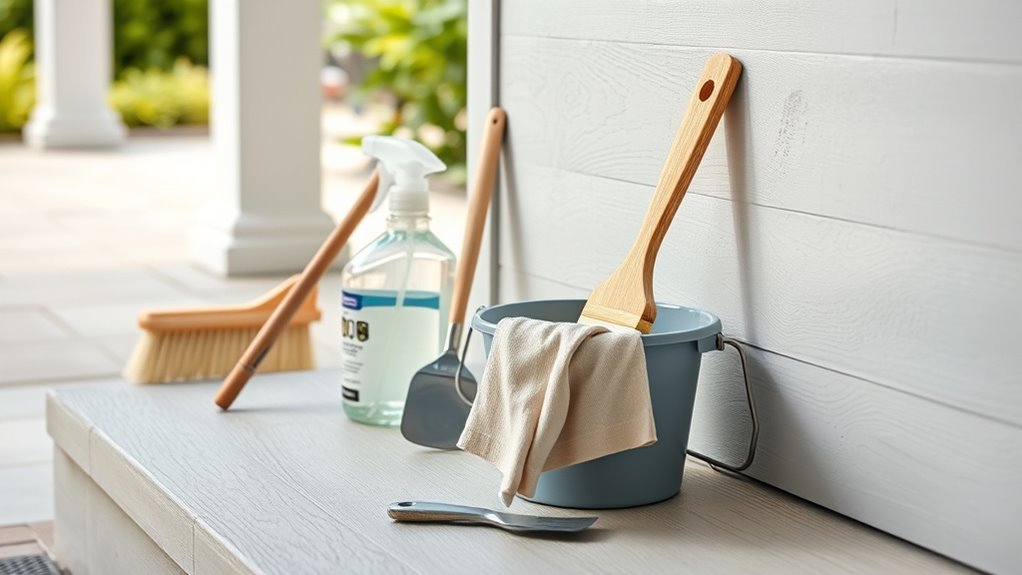
Before you start scrubbing, pick brushes and tools that match your paint type and the severity of the mildew so you won’t damage the finish.
You’ll also want the right protective gear—gloves, goggles, and a mask—ready before you mix or apply any cleaning solution.
Finally, choose effective cleaners and rinse tools that won’t leave residue, and test a small area first.
Choosing The Right Brushes
When you’re tackling mildew on painted exteriors, picking the right brush makes the job faster and prevents damage to the finish. You’ll want soft nylon for painted wood and dense synthetic for smoother trims; avoid stiff wire that scratches.
Think about color matching touch-ups afterward and plan brush storage to keep bristles true between uses.
Choose sizes: small for corners, medium for siding, large for broad panels.
Emotional payoff comes from restoring appearance without stress—you’re protecting your home, saving time, and feeling proud of the results.
- Restore confidence.
- Save time.
- Love the outcome.
Protective Gear Essentials
If you’re gearing up to remove mildew from painted exteriors, protect yourself with the right gear: chemical-resistant gloves, safety goggles, a NIOSH-approved respirator for bleach or mold cleaners, and old clothing or a disposable coverall to shield skin and prevent tracked contamination.
Add knee pads and non-slip shoes for ladders, and use a wide-brim hat to keep drips off your face. Bring a garden hose for rinsing, not a pressure washer unless specified.
Keep tools organized away from landscaping—think gardening tips when placing gear—and guarantee exterior lighting lets you see stains clearly at dawn or dusk.
Cleaning Solutions And Tools
With your protective gear in place and the area prepped, gather the right cleaners and scrubbing tools to remove mildew without harming the paint. You’ll pick gentle cleaning agents—diluted bleach or oxygen-based solutions—matched to the finish, and keep surface preparation simple: rinse loose dirt, test a small spot, then proceed.
Choose soft-bristle brushes, nylon sponges, and an extendable pole for reach. Work top to bottom, rinsing frequently to avoid streaks.
- Soft-bristle brush — effective, nonabrasive, reassuring
- Nylon sponge — precise, controlled, satisfying
- Extendable pole — safe, efficient, freeing
Simple Household Cleaners That Remove Mildew
Although you’re likely to find several commercial products marketed for mildew, plenty of effective cleaners are already in your pantry — and they’re easy to mix and use safely on painted exteriors.
You can use diluted bleach (1 part bleach to 3 parts water) for stubborn spots, white vinegar full strength for gentle removal, or baking soda paste for scrubbing without damage.
Hydrogen peroxide works on organic stains; be mindful of chemical reactions when mixing agents.
Wear gloves, test a small area, and rinse thoroughly.
Historical cases of DIY success show these simple cleaners often restore painted surfaces without harsh solvents.
Choosing a Commercial Mildew Cleaner
You’ve tried pantry solutions and they worked for light cases, but tougher or recurring mildew often calls for a purpose-made cleaner. When choosing one, focus on labels that mention mildew identification and confirm suitability for painted exteriors. Don’t buy into cleaning myths promising instant, permanent results; look for EPA registration or active ingredients like sodium hypochlorite, hydrogen peroxide, or specialized biocides.
- Pick a product rated for painted surfaces to protect finish and color.
- Choose a formulation that matches the mildew severity—gentle for stains, stronger for regrowth.
- Prefer clear instructions and safety data to minimize risk.
How to Test a Cleaner on Painted Surfaces

Before you use a cleaner broadly, test it on a small, inconspicuous patch of painted surface like behind a downspout or inside a trim corner.
Wait the manufacturer’s recommended dwell time, then rinse and let the spot dry completely.
Inspect for discoloration, softening, or paint lift before proceeding with the full treatment.
Test Inconspicuous Area
Since painted finishes can react unpredictably, always try your cleaner in an inconspicuous spot first. You’ll protect against paint peeling and test color matching before tackling larger areas. Dab a small amount, rub gently, then rinse and blot dry. Note any softening, lifting, or dulling.
- Relief — spotting problems early spares you bigger repairs and stress.
- Confidence — a successful patch means you can proceed without fear.
- Control — if the finish fails, you stop and plan a safer approach.
Record results and location so you don’t repeat a damaging treatment elsewhere.
Wait And Inspect
After testing a small spot, step back and wait at least 24 hours to see how the paint holds up under real conditions—cleaner residues can take time to show softening, discoloration, or tackiness.
Check the patch in different light and weather: morning sun, shaded areas, and under any exterior lighting at night. Look for peeling, color shift, or tacky texture; smell for chemical residue that might attract garden pests.
If the paint looks and feels unchanged, gradually test a larger area. If you see damage, rinse thoroughly, neutralize per product instructions, and choose a gentler cleaner.
Prep the Area and Protect Plants
When you’re getting ready to clean mildew off exterior paint, clear the work area and shield anything nearby that could be damaged—windows, light fixtures, and especially plants. You’ll do thoughtful surface preparation to prevent splashback and runoff. Lay down drop cloths, tape plastic over trim, and move potted items away.
For beds, wet soil, build temporary barriers, or cover shrubs with breathable fabric to guarantee plant protection without suffocating foliage. Stay mindful of wind direction and keep pets and kids clear.
Wet soil, temporary barriers, or breathable covers protect beds and shrubs—mind wind, keep pets and kids away.
Small precautions protect beauty and health, and they make the actual cleaning step less stressful.
- Relief — knowing plants are safe
- Pride — neat, protected surfaces
- Calm — controlled, careful prep
Step-by-Step: Clean Mildew From Walls and Trim
Put on gloves, goggles, and a mask before you start so you’re protected from spores and cleaning chemicals.
Next, mix the recommended cleaning solution and apply it to walls and trim with a brush or sprayer, working from the bottom up.
Rinse thoroughly once the mildew’s loosened and inspect the surface, repeating treatment for any stubborn spots.
Safety Gear First
Because mildew cleaners can irritate your skin, eyes, and lungs, gear up before you start cleaning. You’ll want clear safety precautions and the right protective equipment to avoid injury and keep the job painless. Pretend your comfort matters—because it does.
- Wear a fitted respirator (N95 or better) to block fumes and spores—feel safer breathing.
- Put on chemical-resistant gloves and long sleeves to protect skin—stay confident, not anxious.
- Use goggles and a face shield for splash protection so you won’t worry about eye injuries.
Check gear for damage and replace anything compromised before you proceed.
Mix Cleaning Solution
Now that you’re protected, it’s time to mix a solution that kills mildew without damaging paint. Start by confirming mildew identification: black or green spots that stain grout or siding. Use a mild bleach mix (1 cup bleach to 1 gallon water) or a commercial cleaner per label. Always mix outdoors, wear gloves and goggles, and stir gently.
| Purpose | Ratio |
|---|---|
| Light mildew | 1 cup bleach : 1 gal water |
| Heavy growth | Follow product label |
Test a small painted area first. Apply with a soft brush, let sit briefly, then scrub gently.
Rinse And Inspect
Ready to rinse? Grab a hose with a spray nozzle and gently wash treated areas from top down. Rinse until runoff runs clear, keeping water away from open windows and delicate garden furniture.
Check trim, siding, and exterior fixtures for streaks or missed spots. If residue remains, reapply cleaner briefly and rinse again.
- Relief — seeing mildew disappear restores pride.
- Vigilance — spotting missed patches prevents regrowth.
- Calm — clean surfaces make maintenance easier.
Finish by letting surfaces air dry, then inspect again in sunlight for any faint stains needing touch-up.
How to Rinse and Dry After Mildew Removal
Once you’ve scrubbed away the mildew, rinse the area thoroughly with clean water to remove residue from cleaners and loosened spores; doing this prevents streaks and chemical damage to the paint.
Use a garden hose with a gentle spray or low-pressure washer, working top to bottom to avoid re-soiling.
Dry surfaces with microfiber cloths or allow air to dry on a sunny, breezy day.
Check around outdoor lighting and under eaves where moisture lingers.
Clear debris that invites pests and schedule routine pest control if needed.
Finish by inspecting for missed spots and ensuring gutters direct water away from painted areas.
Remove Stubborn Spots Safely (Scraping & Re-Cleaning)
If stubborn mildew spots resist your initial wash, tackle them carefully with scraping and targeted re-cleaning so you don’t damage the paint. Use a plastic scraper to lift mildew flakes gently; avoid metal tools that worsen peeling paint.
Spot-clean with a mild bleach solution or mildew remover, rinse thoroughly, and let dry before reassessing. Test a small area first to gauge paint reaction.
Spot-clean with a mild bleach solution or mildew remover, rinse well, let dry, and test a small area first.
If spots persist, repeat gently rather than forcing scraping. Restore caulk or primer where mildew was removed to prevent return.
Follow up with periodic inspections to catch renewal early.
- Relief — see the spot vanish.
- Confidence — your home looks cared for.
- Pride — you preserved the finish.
How to Clean Without Damaging Paint
While you’re removing mildew, take steps that protect the paint: pick gentle cleaners, soft brushes or cloths, and low-pressure rinsing to avoid stripping or etching the finish. Test cleaners on an inconspicuous area to confirm paint compatibility and watch for discoloration.
Match scrub tools to surface texture—soft nylon for smooth finishes, gentle bristle pads for light texture—so you don’t gouge or dull the coat. Use diluted mild detergent or a labeled mildew remover, rinse thoroughly, and dry with a microfiber cloth to prevent water spots.
Work in sections, avoid harsh chemicals or high-pressure washers, and repeat only as needed.
When Repainting Is Better Than Cleaning
Although cleaning can remove surface mildew, you should consider repainting when stains penetrate the paint, the finish is peeling or chalking, or repeated cleanings haven’t restored appearance.
Repainting makes sense if mildew returns quickly due to weather patterns or underlying damage; it stops the cycle instead of masking it. You’ll also avoid wasted effort when paint peeling exposes bare wood or siding.
When mildew keeps returning and paint peels away, repainting breaks the cycle and prevents wasted effort and damage
Choose repainting when structural degradation or stubborn staining undermines curb appeal and confidence in cleaning.
- You’ll feel relief replacing failing surfaces.
- You’ll regain pride in your home’s look.
- You’ll prevent repeated cleanup frustration.
Picking Mildew-Resistant Primers and Paints
When you’re repainting to stop mildew, start with a mold-resistant primer designed to block stains and inhibit growth.
Then pick an exterior paint labeled anti-mildew or mildew-resistant—these finishes contain additives that slow future spores.
Choosing the right primer and finish together gives your job lasting protection.
Mold-Resistant Primer Options
If you want a long-lasting defense against exterior mildew, start by choosing the right mildew-resistant primer and paint combo—these products create a hostile surface for spores and improve paint adhesion. You’ll pick primers labeled “mildew-resistant” or containing biocides; they support mildew prevention and extend paint rejuvenation benefits by sealing porous wood and masonry. Apply according to temperature and moisture guidelines for best results.
- Oil-based shellac primers — fast block of stains, dramatic reassurance.
- Acrylic latex mildew-resistant primers — flexible, durable, calm confidence.
- Bonding primers — grip stubborn surfaces, steady relief.
Anti-Mildew Paint Finishes
Because mildew thrives on damp, shaded exteriors, you’ll want paints formulated to repel spores and shed moisture—look for products labeled “mildew-resistant” or containing EPA-registered fungicides, combined with a compatible primer to seal and protect the substrate.
Choose high-quality acrylic or elastomeric finishes for breathability and durability. Confirm paint compatibility with your primer to avoid adhesion failures.
For environmentally conscious choices, seek eco friendly solutions with low-VOC formulations and non-toxic fungicide systems.
Apply per manufacturer directions, maintaining recommended coverage and dry times. Recoat schedules and proper surface prep will extend protection and reduce recurring mildew growth.
Improve Drainage and Ventilation to Prevent Mildew
Although mildew thrives in damp, shaded spots, you can starve it out by improving drainage and airflow around your exterior walls. Check gutters, downspouts, and grading to prevent pooling that causes soil erosion and damp foundations.
Improve drainage and airflow around exterior walls—clear gutters, fix grading, and prevent pooling to keep mildew away.
Clear vents, trim obstructing growth near vents, and use soffit or ridge vents to boost circulation.
Don’t ignore pest control—rodents and insects can damage seals and create moisture paths.
Act regularly; small fixes stop mold from returning and protect paint.
- Feel relieved when water flows away.
- Feel empowered fixing airflow.
- Feel safe knowing pests won’t worsen damp.
Landscaping Changes to Keep Mildew Off Painted Walls
You can cut back or reposition plants to let more sun reach painted walls, since sunlight helps inhibit mildew growth.
Trim shrubs and choose lower-growing or more widely spaced plantings to boost airflow along the façade.
Those simple landscaping tweaks will make painted surfaces drier and less inviting to mildew.
Increase Sunlight Exposure
If you want mildew to dry out before it takes hold, open up the space around your painted walls so more sun and airflow can reach them. You’ll boost sunlight exposure and use natural bleaching to fade early spots, making your siding look fresher while preventing growth.
Trim or remove dense shrubs, thin tree branches that cast long shadows, and position reflective surfaces to bounce light where needed. These targeted changes are low-cost and effective.
Choose plants that don’t touch walls and schedule pruning seasonally to maintain brightness.
- Relief
- Pride
- Confidence
Improve Airflow Around Walls
Sunlight will only do so much on its own, so improving airflow around your walls helps stop mildew before it gains a foothold. Prune shrubs and trim tree branches so plants sit several feet from siding; that spacing promotes airflow improvement and reduces damp shade.
Replace dense groundcovers with gravel or low, airy plantings that won’t trap moisture. Install or clear gutter extensions and downspouts to keep splashback away from walls.
Consider adding lattice or slatted screens that direct breezes while preserving privacy. Use simple ventilation techniques like foundation vents or operable vents in enclosed porches to keep surfaces dry.
Regular Maintenance Schedule to Prevent Recurrence
While mildew can be removed with a single deep clean, keeping it from returning means sticking to a simple, regular maintenance schedule you can actually follow. You’ll check for shadowed damp spots, trim vegetation that shelters spores, and inspect for garden pests that damage paint and trap moisture.
Remove mildew for good: follow a simple maintenance routine—check damp shadows, trim sheltering plants, and inspect for pests.
Keep gutters clear and confirm exterior lighting directs warmth and discourages dampness. Set reminders so tasks don’t pile up; consistency beats occasional overhauls.
- Monthly: quick visual sweep and gutter check — relief.
- Quarterly: wash high-risk areas — satisfaction.
- Annually: repaint or seal as needed — pride.
Quick, Temporary Fixes for Renters
Your landlord or lease may limit permanent fixes, but you can still stop mildew quickly and temporarily without breaking rules. You can scrub small patches with a vinegar-water mix or diluted bleach, rinse thoroughly, and dry with a towel to prevent recurrence. Use a soft brush to avoid paint damage.
Improve airflow by trimming shrubs and moving potted plants, which also reduces garden pests attraction. Add temporary exterior lighting to discourage dampness-attracting insects and help you spot regrowth.
Keep records and take photos before and after cleaning so you can show your landlord any ongoing issues without making unauthorized alterations.
When to Call a Pro: Mold, Rot, or Persistent Stains?
If mildew keeps returning after cleaning, you should call a pro—especially when stains penetrate the paint, wood feels soft, or you spot black or fuzzy growth that spreads beyond small patches.
You’ll want an expert to assess structural rot, hidden mold, and whether treatments respect historical preservation standards and paint compatibility.
Don’t risk amateur fixes that worsen damage or violate preservation rules.
- Fear — imagining costly repairs if you wait.
- Relief — knowing a pro preserves original materials.
- Confidence — getting correct remediation and compatible repainting choices.
Time and Cost Estimates for DIY Mildew Removal
Because mildew varies in extent and surface type, expect a wide range in time and cost for a DIY cleanup. You’ll spend 1–6 hours for small areas, longer for siding or textured surfaces. Supplies cost $15–$75 (cleaner, scrub brushes, gloves, garden hose); a pressure washer rental adds $50–$100/day. Mildew detection early cuts time and cost. Plan repeat visits based on cleaning frequency—monthly in damp climates, annually elsewhere.
| Task | Typical Time/Cost |
|---|---|
| Small patch | 1–2 hrs / $15–$30 |
| Large area | 4–8 hrs / $50–$175 |
Checklist: What to Do Next After Cleaning
Once the surface’s mildew is gone, take a few focused steps to keep it that way and protect your work. You’ll want to inspect and fix contributing issues, then set up simple habits that prevent return.
Check for damp soil or clogged gutters, trim plants away from walls, and watch for garden pests that hold moisture against paint. Improve airflow and add or adjust exterior lighting to discourage mold-friendly shade.
Finally, schedule regular quick inspections so you catch problems early.
- Repair leaks, clear gutters, and trim vegetation.
- Treat areas prone to garden pests and moisture.
- Install/angle exterior lighting and inspect quarterly.
Frequently Asked Questions
Can Mildew Harm Exterior Caulking or Window Seals?
Yes, mildew can degrade caulking and window seals over time, and you should address it promptly. Use mildew prevention and exterior cleaning techniques regularly to protect seals, restore adhesion, and avoid water intrusion.
Does Mildew Affect Wood Siding Structural Integrity?
Yes — you’ll see surface discoloration first, and if wood deterioration progresses from prolonged mildew and moisture, you’ll risk rot and structural damage, so act quickly to clean, dry, and repair affected wood siding areas.
Will Pressure Washing Damage Older Painted Surfaces?
Yes — pressure washing can damage older painted surfaces if you use too high pressure or the wrong nozzle; you should opt for lower pressure, proper technique, and exterior cleaning products to guarantee surface protection and avoid stripping paint.
Can Mildew Spread to Indoor Spaces From Exterior Walls?
Yes — you can get indoor contamination from exterior mildew; spores and moisture enable mold migration through gaps, vents, or HVAC systems. You should seal entry points, clean affected areas, and improve ventilation to prevent spread.
How Long After Cleaning Is It Safe to Repaint?
A house painter I know waited 48 hours after rinsing; you should too. You’ll guarantee mildew prevention by using proper exterior cleaning techniques, letting surfaces fully dry before repainting so primer and paint adhere and cure correctly.
Conclusion
You’ve tackled mildew like a gardener facing down an overgrown hedge—armed, steady, and practical—so your home can breathe easier. Keep an eye on trouble spots, patch and repaint where needed, and treat recurring stains quickly before they spread like gossip. If rot or stubborn mold shows up, call a pro. With simple upkeep and the right supplies, your exterior will stay cleaner and healthier, ready for brighter days and calmer evenings.