How to Remove Old Paint Off Walls the Right Way
You’ll start by identifying the paint and substrate, test for lead, then seal and ventilate the room while wearing proper PPE. Match your method—chemical stripper, heat/infrared, or careful sanding—to the surface and paint type, work in small sections, and clean up residue and waste per local rules. Repair gouges, prime with a bonding or stain-blocking primer, and finish with low‑VOC paint. Keep going to see tool choices, timelines, and safety steps.
Quick Step-by-Step: How to Strip Paint Safely
Before you start, prep the room: open windows, lay down drop cloths, and wear a respirator, gloves, and goggles so you stay safe while stripping paint.
Begin by testing a small area to see adhesion and any underlying layers; note historical context if you suspect lead or original finishes.
Begin with a small test patch to check adhesion and reveal any underlying or historic finishes.
Score or chemically soften stubborn sections, following product instructions and ventilating continuously.
Scrape gently with appropriate tools, avoid gouging the substrate, and clean residue with a damp sponge.
Sand lightly for smoothness, vacuum thoroughly, and dispose of waste per local regulations.
Inspect the revealed paint color before refinishing.
What Kind of Paint and Wall Are You Dealing With?
Because different paints and substrates respond to different stripping methods, you need to identify both the paint type (latex, oil, enamel, or possibly lead-based) and the wall material (drywall, plaster, wood, or masonry) before you begin.
You’ll inspect finish sheen, adhesion, and any cracking to tell latex from oil/enamel. Soft substrates like drywall need gentler methods; masonry and wood tolerate more aggressive scraping or sanding.
Consider paint durability—high-durability enamels may need chemical strippers or heat. Note future color matching needs: porous surfaces soak primer differently, affecting final hue.
Match removal method to both paint and substrate for best results.
How to Check for Lead Paint Before You Start?
Before you start sanding or scraping, check whether the old paint contains lead. You can collect small chip samples for lab analysis, use EPA-recognized home test kits for a quick screen, or hire a certified inspector for a definitive assessment.
Don’t skip this step—lead-safe procedures depend on the results.
Test Chip Samples
If your home was built before 1978, you should test paint chips for lead before sanding or scraping, since disturbing lead-based paint can create dangerous dust. Collect chips from multiple spots, noting areas with different wall texture or color matching attempts. Seal samples in plastic and label location and depth.
- Wear gloves and a respirator, and avoid creating dust while chipping.
- Send sealed samples to an accredited lab for clear results and documentation.
- Keep test records and photos to inform contractors and to plan safe removal or abatement.
Accurate testing protects your health and guides the right removal method.
Use Home Test Kits
Want a quicker check than lab testing? You can use home test kits to screen for lead paint before you start scraping. Follow kit instructions precisely: swab or scratch small areas, wait the reaction time, and compare results to the kit’s color chart.
Remember kits screen only; they’re convenient for initial decisions but less definitive than lab analysis. Use kits alongside visual cues like flaking, multiple layers, poor paint adhesion, or unusual color matching attempts that reveal older coatings beneath.
If a kit indicates lead or results are unclear, stop work and consider more reliable testing or professional guidance.
Hire Certified Inspector
Home test kits can give you a quick indication, but for definitive answers hire a certified lead inspector or risk assessor to do a proper survey. You’ll get lab-grade testing, documented results, and safety recommendations tailored to your space.
Certified inspectors understand historical preservation concerns and can advise on preserving original surfaces or artistic techniques while reducing exposure.
- They’ll sample paint layers and send them to accredited labs.
- They’ll provide a written report with clearance criteria and remediation options.
- They’ll recommend contractors trained in safe work practices and containment.
Hire one before you strip paint to protect occupants and heritage.
When to Call a Pro for Lead Paint Removal?
If you find lead in your paint, or you’re working in a home with young children or pregnant occupants, call a professional because those are high-risk situations you shouldn’t take lightly.
You should also get a certified test to confirm contamination before deciding on any removal method.
Finally, hire licensed abatement contractors when local rules require it or when disturbance is extensive to ensure safety and compliance.
High-Risk Situations
Because lead dust and deteriorating paint pose serious health risks, you should call a certified pro whenever removal could release particles into the air or soil—especially in homes built before 1978, when paint frequently contains lead.
If you’re tackling extensive chipping, structural work, or plan to sand large surfaces, don’t risk contamination. Pros contain and dispose of hazardous waste, and coordinate safe color matching after remediation or delicate wallpaper removal without spreading dust.
Consider hiring professionals in these high-risk scenarios:
- Extensive peeling across multiple rooms or exterior siding.
- Renovations that disturb painted substrates (window frames, doors).
- Homes with young children, pregnant occupants, or soil exposure.
Testing And Confirmation
How will you know if paint removal needs a pro? You should test suspect paint, especially in older homes, for lead and consider environmental concerns and historical preservation before acting. If tests are positive or surfaces are fragile, call a specialist.
| Situation | What to test | Action |
|---|---|---|
| Chipping old paint | Lead presence | Hire pro if positive |
| Renovation in children’s areas | Dust contamination | Stop work; test |
| Listed or historic building | Paint sampling | Consult preservation expert |
| Large-area removal | Air/soil | Use certified contractor |
A pro protects health, meets regs, and preserves historic finishes.
Licensed Abatement Required
When testing shows lead or you’re facing extensive removal, you’ll often need licensed abatement rather than DIY fixes. You shouldn’t risk your family’s health or violate local rules; licensed abatement ensures lead safety, proper containment, and legal disposal. Call a pro when contamination is widespread, surfaces are damaged, or occupants include children, pregnant people, or immune-compromised individuals.
- Widespread peeling, chipping, or multiple rooms affected.
- Renovations disturb painted surfaces above regulated thresholds.
- Vulnerable occupants or unclear testing results.
A licensed abatement contractor gives documentation, follows regulations, and minimizes exposure so you can safely restore your home.
Choose the Right Tools for Paint Removal
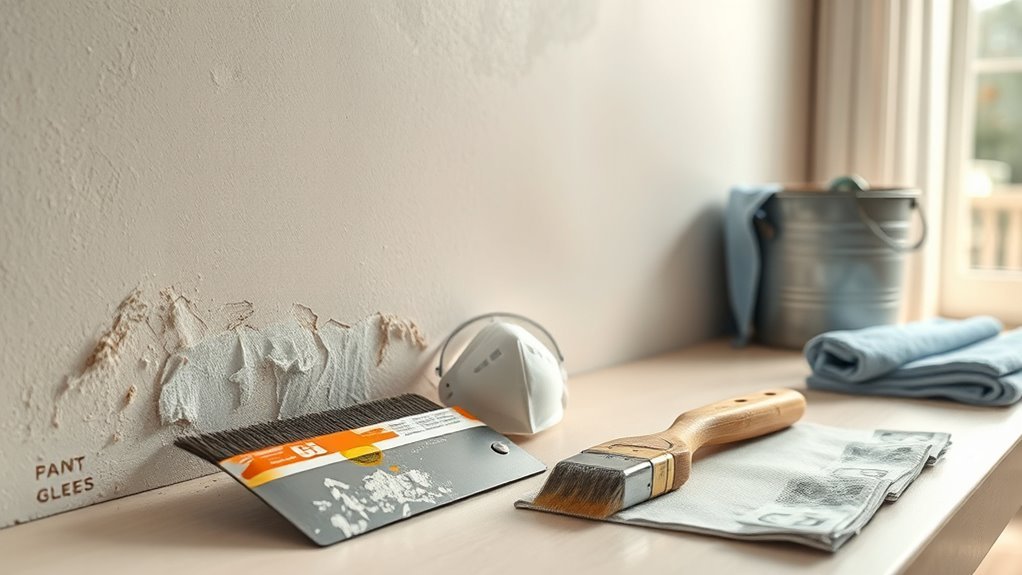
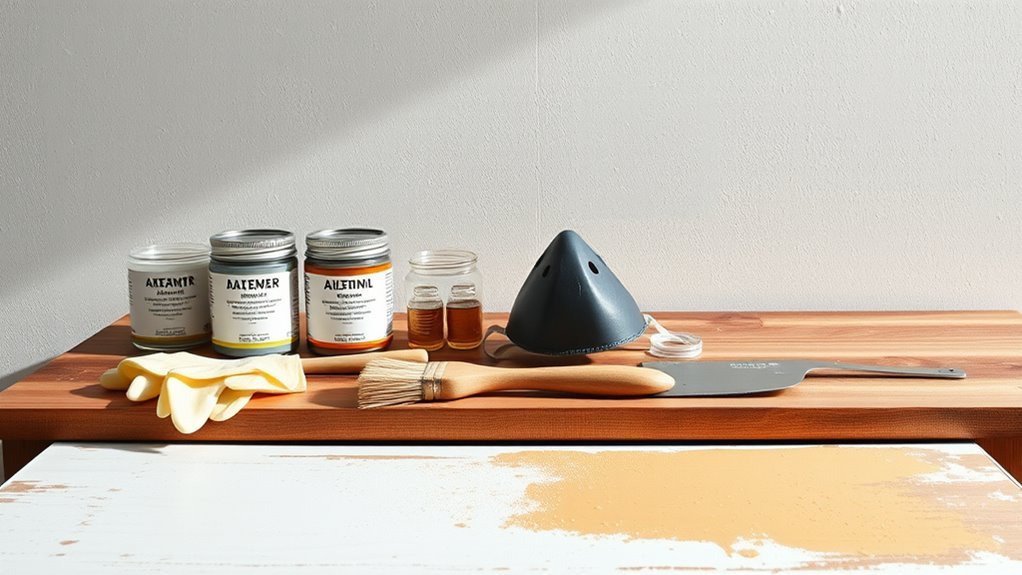
Before you start stripping paint, gather the right tools so the job goes faster and safer: a reliable scraper, a heat gun or chemical stripper suited to your paint type, sanding equipment, and proper PPE like gloves, goggles, and a respirator.
Gather the right tools—scraper, heat gun or stripper, sanders, and PPE—to make paint stripping faster and safer.
Pick scrapers and putty knives in various sizes, quality sanders with appropriate grit, and spatulas for delicate trim.
Choose a heat gun with adjustable settings or a low-toxic stripper for older finishes.
Keep paint-safe containers and drop cloths handy.
Plan for color matching and texture blending when prepping patched areas so repairs disappear beneath new coats.
PPE and Ventilation: Stay Safe While Stripping Paint
Before you start stripping paint, make sure you’re wearing the right respiratory protection to block dust and fumes.
Open windows, run fans, or use an air purifier to keep fresh air moving and contaminants down.
Proper PPE plus effective ventilation will protect your lungs and make cleanup easier.
Proper Respiratory Protection
Concerned about dust and fumes while stripping paint? You need the right respiratory protection to work safely around varying wall textures and to avoid contaminating indoor plants nearby. Choose a respirator rated for lead and solvent fumes, fit it properly, and replace filters per manufacturer guidance.
- Use a NIOSH-approved N95 or P100 for dry dust; upgrade to a half-mask respirator with organic vapor cartridges for chemical strippers.
- Perform a fit check each time you put the mask on.
- Keep masks and cartridges stored away from heat and solvents to maintain effectiveness.
Effective Room Ventilation
Good respiratory protection helps, but you also need strong room ventilation to keep dust and fumes from building up and drifting to houseplants or other rooms.
Open windows and doors, and position box fans to push contaminated air outdoors; place an exhaust fan near the work area if possible.
Run a HEPA air purifier to capture fine dust and improve air quality while you work.
Monitor humidity—excess moisture can affect paint removal and encourage mold—so use a dehumidifier if needed for moisture control.
Change filters and purge the space for at least 30 minutes after sanding or stripping finishes.
Protect Floors, Furniture, and Fixtures First
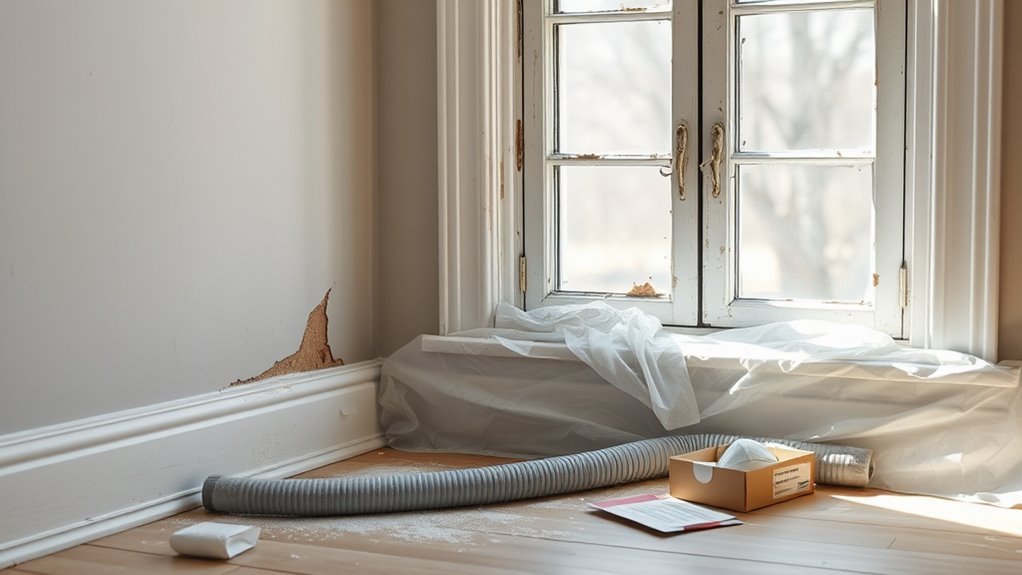
If you’re going to strip paint, start by covering floors, furniture, and fixtures so dust, drips, and chemical residue don’t create extra work or permanent damage. Lay heavy-duty drop cloths and plastic sheeting, tape seams, and remove small items.
Protect trim and switches with painter’s tape so you can focus on wall textures without worrying about splatter. Consider how paint colors might bleed onto porous surfaces and choose barrier materials accordingly.
- Use rosin paper or canvas drop cloths for floors.
- Wrap furniture in plastic and secure with tape.
- Shield fixtures with disposable covers and tape.
Which Chemical Strippers Work : And When to Use Them
When you’re choosing a chemical stripper, you’ll want to match the type to the paint and the surface.
Solvent-based strippers work fast on oil-based paints.
Caustic options are good for heavy buildup but need careful handling.
Waterborne eco-friendly strippers are safer for indoor use and delicate substrates.
We’ll cover how each one performs, safety precautions, and when to pick one over another.
Solvent-Based Strippers
Though they’re potent and fast-acting, solvent-based strippers demand careful handling and the right choice for the job. You’ll reach for them when paint is stubborn, multiple layers are present, or heat and sanding would damage the substrate.
You apply solvent gel, wait, then scrape softened paint, protecting skin and ventilating well. Solvents work on oil and some enamels, preserving underlying wood for accurate color matching and maintaining paint durability when you’ll repaint.
Choose low-odor, biodegradable formulas when possible.
- Methylene chloride alternatives — strong, quicker removal.
- NMP/DPG blends — gentler, safer profile.
- Citrus/soy-based — mild, slower action.
Caustic Stripping Options
Because caustic strippers break down old paint chemically rather than just softening it, you’ll reach for them when you need fast removal of multiple layers, especially oil-based finishes and thick, baked-on coatings.
You’ll use products based on sodium hydroxide or potassium hydroxide to saponify and lift paint; follow label directions, wear goggles, gloves, and a respirator, and neutralize surfaces after use.
Caustic chemicals work quickly but can damage some substrates and finishes, so test first.
Dispose of residues responsibly and be mindful of environmental impact—don’t pour waste down drains and consider containment to prevent soil or water contamination.
Eco-Friendly Waterborne Strippers
Waterborne, low-odor strippers let you remove paint with fewer toxic fumes and less environmental harm. They’re a smart choice for interior work, delicate substrates, and projects where ventilation is limited.
You apply them like traditional strippers, wait the recommended dwell time, then scrape or wipe residue. They work well under eco-friendly primers and on multi-layer finishes, though very thick coatings may need repeat applications or a heat assist.
Plan for sustainable disposal of paint slurry and used rags per local rules.
Consider these uses:
- Thin latex layers on drywall.
- Trim and moldings.
- Prep before repainting with low-VOC primers.
How to Apply and Remove a Chemical Stripper Safely
When you’re ready to strip paint, prepare the room and yourself first: open windows, lay down drop cloths, wear gloves, eye protection, and a respirator rated for organic vapors, and keep a fire extinguisher nearby.
Read the stripper label and SDS for chemical safety details and ventilation requirements.
Always read the stripper label and SDS for safety details, chemical hazards, and ventilation instructions.
Test a small area, apply stripper with a plastic applicator, and wait the recommended time.
Scrape softened paint gently, collecting waste in sealed containers.
Neutralize surfaces if instructed, then rinse and dry.
Dispose of rags and residues per local hazardous-waste guidelines.
Use personal protective gear throughout and never leave chemicals unattended.
Heat Guns vs. Infrared: When to Use Each
When you’re stripping paint, a heat gun works great for small areas and tight spots where you need focused, fast softening.
Infrared tools are better for larger surfaces and older, multi-layered paint because they heat more evenly and reduce scorching.
Pick the method based on surface type, paint age, and safety—use proper protection and avoid overheating delicate substrates.
Heat Gun Best Uses
Although both heat guns and infrared heaters strip paint by applying heat, they do it differently and excel in different situations. You’ll reach for a heat gun when you need precise control—stripping trim, targeting stubborn layers, or working around delicate features. It’s handy for wallpaper removal in small areas and for loosening old lead paint before chemical treatment.
You can also use it when color matching requires removing finish from a specific spot without heating an entire wall. Follow safety steps, keep the nozzle moving, and test a hidden area first.
- Trim/detail work
- Small-scale wallpaper removal
- Spot color matching
Infrared Strengths
If you need to remove paint from large, flat areas without scorching or dust, infrared heaters are your go-to tool because they heat paint through the substrate evenly and gently. You’ll prefer infrared technology when layers are thick or fragile, since paint heating loosens coatings uniformly and reduces airborne particles. Use a heat gun for spot work, corners, or quick softening. Match tool to job scale and access. Below compares uses clearly.
| Infrared | Heat Gun |
|---|---|
| Large, flat areas | Small, detailed spots |
| Gentle, uniform paint heating | Quick, localized softening |
| Slower, less airborne dust | Faster, more focused control |
Safety And Surface Considerations
Both infrared heaters and heat guns can speed paint removal, but you’ll need to weigh safety and surface risks before choosing one.
You’ll prefer infrared for delicate substrates because it heats deeper without blistering finishes. It’s gentler on plaster and useful in historical preservation where layers matter.
Use heat guns for thicker, stubborn coatings on metal or trim, but beware scorching, lead fume release, and warped wood.
Consider color psychology when restoring finishes—lighter tones show heat damage more.
Follow PPE, ventilation, and test a small area first.
- Test small area
- Use proper PPE and ventilation
- Match method to substrate
Strip Paint With a Heat Gun Without Gouging Plaster
When you use a heat gun on plaster, go slow and keep the nozzle moving so the surface softens without scorching or blistering; aim for even warmth and watch for bubbling paint. Hold the gun several inches away, test a small area, and use a wide scraper gently as softened paint lifts—don’t gouge.
Work in sections, ventilate, and wear a respirator and gloves. Monitor paint texture changes to know when to stop heating.
After stripping, clean residue with a damp sponge and let dry fully before any repairs. Note remaining surface variations early to plan color matching and finishing.
Mechanical Removal: Scraping, Sanding, and Grinders
Though it’s more labor-intensive than chemical or heat methods, mechanical removal gives you precise control over how much old paint you take off and how you treat the underlying plaster or wood. You’ll use scrapers for loose paint, hand sanding to refine edges, and grinders for stubborn layers, adjusting technique to preserve wall texture and aid later color matching.
Work systematically, test a small area, and switch tools if you see gouging. Wear eye protection and a dust mask. Consider primer after smoothing to unify surface and tone before matching final color.
- Scrapers: thin coats first
- Hand sanding: detail work
- Grinders: heavy removal
How to Sand Old Paint Without Making Hazardous Dust
Because sanding can fling flakes and create fine dust that contains lead or other toxins, you should take steps to control and capture particles before you start. Seal the room, close vents, and hang plastic sheeting.
Wear an N100 respirator, disposable coveralls, gloves, and goggles.
Use a sander with a HEPA vacuum attachment or a vacuum-equipped orbital sander to capture dust at the source.
Wet-sanding small areas reduces dust but increases paint fumes, so ventilate and monitor air.
After sanding, wipe surfaces with a damp microfiber cloth for surface prep, bag waste securely, and dispose per local hazardous-waste rules.
Oscillating Tools and Putty Knives for Trim and Detail
When you need precision around trim, an oscillating tool gives you control for cutting through paint without gouging the wood.
Pair it with a thin, flexible putty knife to scrape loosened paint and get into creases and corners.
Use steady, light passes with both tools to avoid damage and keep edges clean.
Oscillating Tool Techniques
If you need precise control around trim and in tight corners, grab an oscillating tool and a selection of narrow scraper blades and sanding attachments—these make quick work of old paint without risking gouges that a large sander can cause.
You’ll work slowly, testing blade choice and speed so you don’t damage profiles or alter wall textures you intend to keep. Use light pressure, keep the tool flat, and switch to fine sanding attachments for feathering edges before repainting.
Think about color matching when prepping edges so new paint blends seamlessly.
- Choose blade width
- Control speed
- Feather edges
Putty Knife Strategies
Oscillating tools handle tight spots fast, but a set of putty knives gives you the fine control needed around trim profiles and delicate details. Keep a selection of blade widths from 1/2″ to 4″ and a flexible and stiff option for different contours.
You’ll scrape gently at an angle to lift flaking paint without gouging the substrate. Use narrow blades for crevices and wider ones to smooth *gradients* after removal.
Match your pressure to the wall textures and employ heat or chemical softener only when needed. These painting techniques preserve trim integrity and speed cleanup with minimal damage.
Wet Stripping Methods for Delicate Surfaces
Because delicate surfaces can chip or warp under harsh abrasion, wet stripping gives you more control and less risk of damage. You’ll choose a water based stripper for minimal fumes and easier cleanup, test a small patch, and follow surface preparation steps like cleaning and scoring paint to improve penetration.
Wet, water-based stripping offers gentler control for delicate surfaces—test a small patch, keep the stripper moist, then rinse and dry.
Work in sections, keep the product moist, and lift softened paint with a plastic scraper or soft cloth to avoid gouging. Rinse residue promptly and dry fully before repainting.
- Test patch and compatibility
- Maintain moisture; don’t let stripper dry
- Neutralize and rinse thoroughly
Remove Stubborn Paint From Wood Trim
When stubborn paint clings to wood trim, approach the job patiently and methodically so you can remove layers without damaging profiles or underlying wood.
Start by testing a small area to note paint color, depth, and adhesion.
Use a chemical stripper formulated for wood or a heat gun on low, working along the grain and into crevices with a plastic scraper and soft-bristle brush.
Protect surrounding wall texture and flooring with tape and drop cloths.
After removal, sand lightly with fine grit, clean residue, and inspect for gouges.
Prime bare wood before repainting to guarantee a smooth, durable finish.
How to Remove Paint From Plaster vs. Drywall
Although plaster and drywall might look similar, they require different removal methods and care, so you’ll want to choose your technique based on substrate, paint age, and surface condition.
You’ll treat plaster gently to avoid cracking, using chemical strippers or gentle scraping, while drywall needs light sanding and careful patching to prevent paper tearing. Keep edges feathered for a seamless finish; plan for color matching and texture blending when repainting.
Consider these quick guidelines:
- Plaster: test small area, use heat or stripper, scrape with care.
- Drywall: sand minimally, avoid over-sanding paper.
- Old lead paint: test and abate safely.
Repairing Damage After Removal: Fill, Skim, Sand
Once you’ve removed the old paint, assess and repair any gouges, blistering, or torn paper before you repaint. Patch holes with lightweight filler, press it firmly, and let it dry fully.
After removing old paint, inspect and repair gouges or torn paper; fill holes, press firmly, and dry fully.
For larger damage, skim coat joint compound, feathering edges to match surrounding wall texture. After curing, sand progressively with fine grit until smooth; avoid over-sanding textured areas.
Clean dust, then inspect surface under good light to ensure uniformity. Match your sanding level to the paint sheen you’ll apply—satin or gloss needs smoother prep than flat.
These steps create a sound substrate ready for primer and new finish.
Best Primers After Stripping Paint
After you’ve repaired and smoothed the surface, pick a primer that matches the wall’s condition and the finish you plan to apply. You’ll want a bonding primer for glossy or chalky remnants, a stain-blocking primer where residues or tannins remain, or a high-build primer to level minor imperfections.
Choose products that aid color matching so the topcoat requires fewer coats and delivers true color. Prioritize primers formulated to enhance paint durability, adhesion, and coverage. Consider compatibility with latex or oil topcoats and dry times.
- Bonding primer for adhesion
- Stain-blocking primer for tannins
- High-build primer for leveling
Eco-Friendly and Low-VOC Removal and Refinishing Options
If you want to limit toxins and indoor odors, choose low-VOC or zero-VOC strippers and paints and pair them with safer removal methods like heat guns with temperature controls, scraping, or wet stripping with citrus- or soy-based solvents.
You’ll prefer eco-friendly solvents formulated from plant-based ingredients; they work well on latex and some oil-based layers without harsh fumes.
After stripping, pick Low VOC alternatives for primers and topcoats to maintain indoor air quality.
Ventilate, wear appropriate protection, and test a small area to ensure adhesion and finish.
These choices protect your health while delivering professional-looking results.
Disposal and Cleanup: Handling Paint Waste Safely
Choosing safer strippers and low-VOC finishes helps keep fumes down, but you still need to handle leftover paint, solvents, and contaminated rags responsibly to protect people and the environment.
Follow local disposal regulations, label containers, and never pour solvents down drains.
Use dedicated cleanup supplies—absorbent pads, sealed metal cans, and NIOSH-rated gloves—and store waste in a cool, ventilated area until disposal.
- Contact local hazardous-waste facilities for drop-off rules and allowable volumes.
- Harden latex paint with commercial hardeners or kitty litter before trashing per local rules.
- Recycle empty metal cans and return unused product to community reuse centers.
Fixes for Bubbles, Gouges, Ghosting, and Residue
When you spot bubbles, gouges, ghosting, or sticky residue on painted walls, address each issue with the right prep so repairs hold and the finish looks uniform. First, ventilate to reduce paint fumes and protect yourself.
Pop and sand bubbled areas, scraping loose paint back to a firm edge. Fill gouges with patching compound, feathering edges, then sand smooth.
For ghosting, wash with trisodium phosphate or a degreaser. Prime stains with a stain-blocking primer.
Remove adhesive residue with an appropriate solvent, then clean and sand. Finish with primer where needed, then repaint for an even, durable result.
Time Estimates: Planning by Room Size and Method
After you’ve repaired bubbles, gouges, stains, and residue, plan how long stripping and repainting will take based on room size and the method you use. Small rooms (10×10) with smooth wall texture and minimal prep can be stripped and primed in a day; allow another for paint color coats.
Medium rooms need 2–3 days; textured walls or multiple colors add time. Large or high-ceiling spaces, intricate trim, or stubborn layers require 3–5 days or more.
- Chemical stripper: faster on many layers, ventilation adds setup time.
- Heat/scrape: labor-intensive, slower on textured walls.
- Sanding: precise, time varies with surface prep.
Cost Comparison: DIY vs. Hiring a Contractor
If you tackle paint removal yourself, you’ll save on labor but pay for tools, materials, and extra time. Do a cost analysis: tally stripper, scrapers, sandpaper, PPE, disposal, and your hours.
DIY fits small rooms and simple layers; mistakes and longer timelines add hidden costs.
DIY works for small rooms and light layers — but errors and delays can quickly erase any savings.
Hiring a pro raises upfront fees but offers contractor benefits: speed, experience, proper equipment, and warranty.
Get multiple quotes, verify references, and compare total project costs, including prep and cleanup.
Balance your budget, schedule, and skill level to decide whether DIY savings outweigh the reliability and efficiency a contractor brings.
Regulations, Certifications, and Local Resources (Lead Rules)
Choosing between DIY and a contractor also means confronting legal and safety obligations around lead paint—especially in homes built before 1978. You’ll need to verify certification requirements for anyone handling or disturbing lead-based paint and confirm legal compliance with federal and local rules.
Contact local health departments, EPA-certified firms, or home improvement centers for guidance and listings. Follow safe work practices, clearance testing, and proper disposal to protect occupants.
- Check contractor certifications and state-specific lead rules.
- Use local resources for testing kits and safe-work guidance.
- Obtain documentation proving legal compliance after work.
Frequently Asked Questions
Can Old Paint Removal Methods Damage Underlying Wallpaper Adhesives?
Yes — they can. You’ll risk wallpaper damage and chemical risks if you use harsh strippers, prolonged solvents, or excessive scraping; you’ll dissolve adhesives, weaken seams, and cause bubbling or peeling unless you test, ventilate, and use gentler methods.
Will Seasonal Humidity Affect Stripping Effectiveness or Drying Times?
Yes — humidity impact matters: you’ll see drying delays and slower stripper action in high humidity, so you’ll plan longer cure times, use dehumidifiers or warm ventilation, and avoid stripping on very damp or rainy days.
Can Painted Brick or Masonry Be Stripped the Same Way as Walls?
Not exactly; you’ll need different paint removal techniques for brick masonry stripping because porous, uneven surfaces absorb paint and chemicals, so you’ll use harsher strippers, wire brushing, pressure washing, or sanding with care to avoid masonry damage.
How Do I Estimate Remaining Layers of Paint Without Testing?
You can’t be certain, but you’ll do a rough layer estimation by inspecting edges, peeling, brush strokes, and color shifts; combine visual clues with historical paint testing results or records to refine your paint testing plan.
Are There Insurance Implications for DIY Lead Paint Disturbance?
Careful caution: you’ll risk claims if you disturb lead paint hazards yourself. Your homeowner policy might exclude contamination; you should contact your insurer, document work, and consider specialist abatement to protect insurance coverage and liability.
Conclusion
You’ve got the know-how to tackle paint removal safely and smartly, from identifying paint type and checking for lead to choosing tools and knowing when to call a pro. Will you weigh time, cost, and safety before diving in? Take precautions, follow local rules, and fix surface issues methodically to avoid costly mistakes. With planning and care, you’ll restore your walls efficiently and protect your home and family.