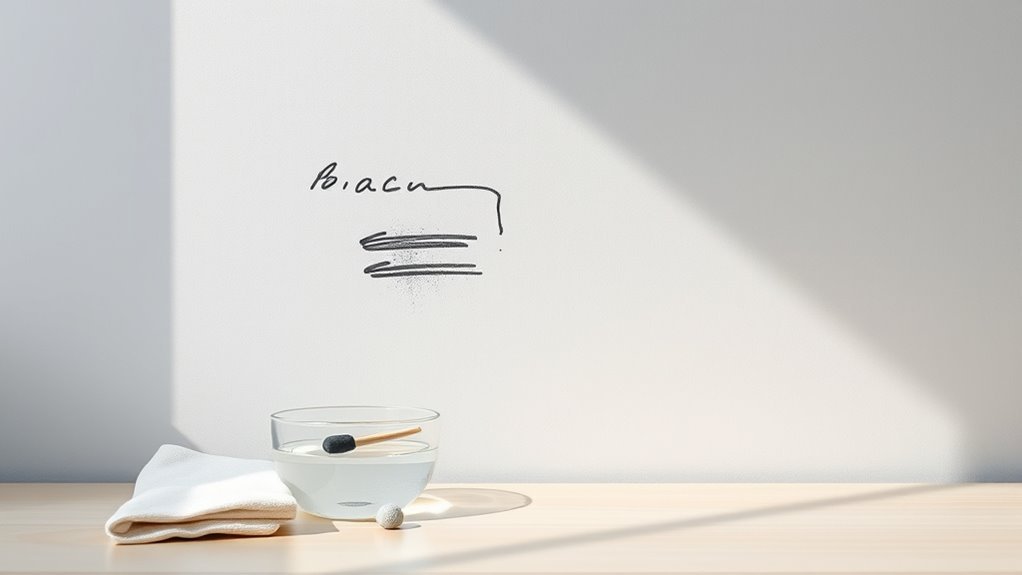
How to Remove Permanent Marker From Painted Wall
Start by testing a hidden spot to verify the paint won’t soften or dull. Work from gentle cleaners—soapy water, diluted vinegar, or a baking-soda paste—applied with a microfiber cloth, blotting rather than scrubbing. If marks persist, try a melamine sponge or 70% isopropyl alcohol, dabbing gently and rinsing afterward. Stop at any sign of damage, rinse and dry the area, then touch up with matching paint if needed; keep going and you’ll find step‑by‑step alternatives and prep tips.
Quick Fix: Remove Permanent Marker From Painted Walls in Minutes
If you need a fast, reliable fix, you can often remove permanent marker from painted walls with items you already have at home. You grab rubbing alcohol or hand sanitizer, dab a cloth, and gently rub the mark; it lifts quickly if the paint’s durable.
For delicate finishes, try a magic eraser lightly—test first.
Eco-friendly solutions like white vinegar mixed with baking soda can work too, reducing chemicals.
After removing stains, you might touch up or incorporate creative decorating—small decals or trim—to mask imperfections.
Work gently, test a hidden spot, and dry the area thoroughly afterward.
What to Know First: Can Your Paint Be Saved?
Before you grab a cleaner, check what kind of paint you have—flat, satin, or gloss will react differently.
You should also test a small, hidden spot to see how the finish holds up to cleaning.
Those two quick checks tell you whether the paint can be saved or if touching up will be needed.
Check Paint Type
While you can often remove permanent marker, whether the paint survives depends on its type and finish. Check whether your wall is matte, eggshell, satin, or gloss; tougher finishes resist solvents better. Consider the paint’s age and historical context—older paints may be more fragile. If the wall was treated with specialty coatings or artistic techniques (faux finishes, glazes), proceed cautiously.
- Identify finish: matte soaks up ink; gloss beads.
- Note age and exposure: sun-faded paint can flake.
- Flag decorative work: consult a pro for faux or layered techniques before using solvents.
Test Paint Durability
Because some removers strip paint as well as marker, you’ll want to test durability in an inconspicuous spot first. Pick a hidden corner or behind furniture, apply your chosen cleaner sparingly, and rub gently.
Watch for softening, discoloration, or gloss change. If paint lifts, stop — you’ll need a gentler method or touch-up.
Test any touch-up paint too to check paint color matching and finish before committing.
Document successful techniques for future marks and consider turning persistent blemishes into creative wall art if touch-ups fail.
Always let test areas dry fully; results can change as solvents evaporate.
What to Have on Hand Before You Start
As you get ready to tackle marker stains, gather the right supplies so you won’t have to stop mid-cleaning. You’ll want items that protect the paint while removing ink; choose gentle, eco friendly solutions when possible and keep small tools for precise work.
Have a damp microfiber cloth ready to blot, a soft-bristled brush for edges, and a breathable mask if you use stronger cleaners.
- Mild cleaner and spray bottle
- Cotton swabs, microfiber cloths, soft brush
- Painter’s tape, plastic sheet, disposable gloves
Also keep creative disguises like touch-up paint for finishing touches.
Why Begin With Mild Cleaners to Protect Paint Finishes
Start with mild cleaners so you don’t strip or dull the paint finish. Gentle solutions remove marker without weakening the surface or removing topcoats.
If that doesn’t work, you can move to stronger options carefully.
Preserve Paint Integrity
Why begin with the mildest cleaners first? You want to protect paint finishes and preserve Creative wall art and subtle Wall texture while removing marker. Start gently to avoid stripping sheen, discoloring pigments, or roughening surfaces.
Test any cleaner in an inconspicuous spot and wait to see results. If safe, proceed gradually.
- Use pH-neutral cleaners to minimize chemical stress.
- Choose soft cloths or sponges to prevent abrasion.
- Limit dwell time; rinse promptly to avoid lingering effects.
Start With Gentle Solutions
Having tested a small area and confirmed the paint’s tolerance, reach for the mildest cleaners first to minimize risk to finish and color. You’ll protect sheen and hue by trying water with a drop of dish soap, diluted vinegar, or a gentle magic eraser alternative.
Apply gently in a circular motion, blotting rather than scrubbing, and rinse often. If that removes marker, stop—don’t escalate. Only move to stronger solvents if necessary, testing unseen spots each time.
This cautious approach preserves any creative wall art or DIY mural techniques you’ve applied, keeping edges crisp and pigments intact.
How to Test a Hidden Spot Safely
Before you try any cleaner on the visible wall, find an inconspicuous spot—inside a closet, behind a trim piece, or near a baseboard—and test there first so you can see how the paint reacts. Use hidden spots for color testing before proceeding.
Apply a tiny amount of your chosen cleaner, wait, and inspect for discoloration, softening, or gloss change. If it alters the finish, stop and choose a milder option.
- Note time: wait 5–10 minutes to judge effect.
- Clean a small area with a cotton swab to control application.
- Photograph the spot to compare before and after.
How to Blot, Rub, and Sponge Without Stripping Paint
While you work, go gently and use the least abrasive action that removes the marker—blot first, then rub lightly, and sponge only to lift residue—so you avoid stripping the paint. You’ll tackle marker stains based on wall textures: smooth surfaces tolerate firmer blotting, textured walls need softer dabbing. Use a clean microfiber, mild solvent tested earlier, and circular motions only when needed. Rinse the sponge frequently and pat dry to prevent soak-through. If color lifts, stop and retest. Keep movements controlled to protect finish and edges.
| Action | Pressure | Tip |
|---|---|---|
| Blot | Light | Use microfiber |
| Rub | Gentle | Circular, short |
| Sponge | Soft | Rinse often |
How to Remove Fresh Marker With Dish Soap
If the marker is still wet, act quickly and gently to avoid pushing ink deeper into the paint.
Mix a few drops of dish soap with warm water and dampen a soft cloth or sponge—never soak the wall.
Gently blot and wipe the stain in small circles until the ink lifts, rinsing the cloth as needed.
Act Quickly And Gently
When you catch a fresh permanent-marker smudge on your painted wall, act quickly and gently to prevent it from setting in; dish soap mixed with warm water is often all you need. You’ll protect any creative wall art and avoid damaging wall texture by using gentle motions. Blot instead of rubbing, test a hidden spot, and work outward from the stain’s edge.
- Blot with a soft microfiber cloth dampened with the soap solution, lifting pigment gently.
- Rinse the cloth and dab to remove soap residue, preventing streaks.
- Dry with a clean towel, inspecting for remaining marks.
Soap And Warm Water
Move from blotting to a simple soap-and-water cleaning once the stain looks fresh and the surface feels damp but not saturated. Mix a few drops of mild dish soap with warm water, dampen a soft cloth, and gently work the mark using small circular motions.
Match your pressure to the wall texture; smoother walls need lighter strokes, textured surfaces may require careful tapping to avoid embedding pigment. Rinse the cloth and repeat until the marker lifts.
If residue persists, try a slightly stronger soap solution or revisit artistic techniques like spot testing before moving to harsher removers to protect paint.
Remove Marker With a Baking‑Soda Paste
Because baking soda is mildly abrasive yet gentle on most painted finishes, you can lift permanent‑marker stains without stripping the paint—mix it into a paste and apply it directly to the mark, rubbing lightly with a damp cloth until the ink breaks down.
You’ll protect any nearby creative art or wall decoration by working carefully and testing a hidden spot first. Use small circular motions, add water sparingly, and blot rather than scrub aggressively to avoid finish damage.
Rinse residue and dry. If stain persists, repeat once more before trying stronger methods.
- Test
- Apply paste
- Rinse and dry
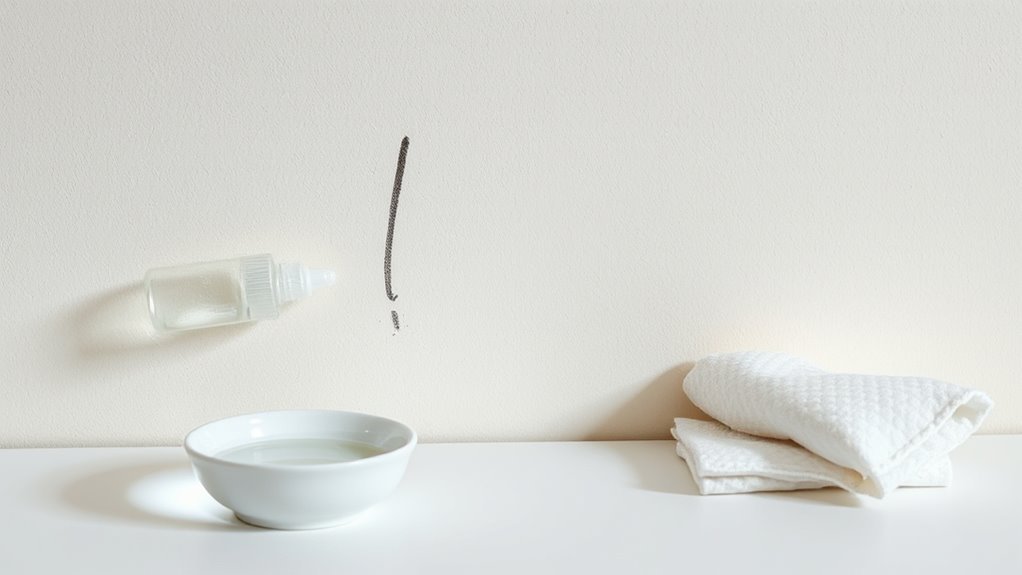
Remove Marker With Rubbing Alcohol: Safely
Before you start, test isopropyl alcohol on a hidden spot to make sure the paint won’t lift. Apply a small amount to a clean cloth and gently rub the marker stain in a circular motion.
Rinse the area with water and pat dry to remove residue and check the result.
Test On Hidden Area
When you’re planning to use rubbing alcohol to lift permanent marker, test it first on a hidden spot like the inside of a closet or behind a baseboard to make sure the finish won’t dull or peel.
You’ll check for color matching and how the wall texture reacts before treating visible areas. Apply a small dab, wait five minutes, then inspect in good light. Note results and proceed only if no change appears.
- Choose an inconspicuous area with similar color matching and wall texture.
- Use a cotton swab to minimize solvent.
- Photograph results for reference.
Apply Isopropyl Alcohol
Ready to lift that stubborn ink? Dampen a clean microfiber cloth with 70% isopropyl alcohol and blot the mark gently—don’t scrub hard. Work from the edges inward to prevent spread.
Use short bursts, checking your hidden test spot between attempts to avoid paint damage. If alcohol alone seems harsh, try creative techniques like diluting with water or applying through a cotton swab for precision.
Keep a small plastic tray for drops and a second cloth for blotting. If you’ve run out, consider alternative tools such as rubbing alcohol wipes or hand sanitizer with high alcohol content, used sparingly.
Rinse And Pat Dry
After you’ve blotted away the ink with isopropyl alcohol, rinse the area with a clean, damp cloth to remove any residue; this helps stop the solvent from continuing to soften the paint.
You’ll gently wipe until the cloth shows no marker traces, then pat dry with a microfiber towel. Drying quickly prevents water spots and helps you assess Color matching and Texture preservation needs.
- Blot excess moisture; avoid scrubbing to protect texture.
- Use light pressure when patting to maintain finish.
- If discoloration appears, test a small touch-up area for color matching before repainting.
Use Hydrogen Peroxide on Light‑Colored Paint
If your wall is a light color, hydrogen peroxide can lift permanent‑marker stains without bleaching the paint; you’ll want 3% solution and a soft cloth or cotton swab for gentle application. Test a hidden spot first so your Creative wall art or subtle color matching won’t be ruined.
Dab peroxide onto the mark, wait 30–60 seconds, then blot—don’t rub—to avoid spreading pigment. Repeat short cycles until the stain fades, always drying between attempts.
If residue remains, rinse with a damp cloth and pat dry. Stop if paint softens or sheen changes; consult a pro for delicate finishes.
Apply Nail‑Polish Remover Without Harming Finish
Before using nail‑polish remover, test it on a hidden spot to make sure it won’t strip the paint.
Use an acetone‑based remover very sparingly with a cotton swab, blotting gently rather than rubbing.
If the finish still looks damaged after cleaning, rinse the area and touch up with matching paint.
Test On Hidden Area
Want to make sure nail‑polish remover won’t damage the paint? Test on a hidden area first. Choose a small spot behind furniture or inside a closet so you can inspect results without affecting visible decor. This check respects artistic techniques and different wall textures, letting you see if sheen, color, or brushwork shifts.
- Clean the spot, dab remover on a cotton swab, wait 30 seconds, then blot.
- Compare the test spot to adjacent paint in daylight and artificial light.
- Wait 24 hours to confirm no delayed effects before treating the marker on the main wall.
Use Acetone Sparingly
Although acetone-based nail‑polish remover can lift permanent marker quickly, use it sparingly so you don’t strip the paint’s finish. You’ll test a small spot, dab gently with cotton, and watch for sheen change. Acetone causes chemical reactions that remove ink but can dull latex or enamel, so limit contact and blot — don’t rub. For safe DIY solutions, try diluted remover or alternate solvents first. If unsure, stop and reassess. Keep ventilation, gloves, and minimal liquid. Enjoy this quick reference:
| Action | Tool | Time |
|---|---|---|
| Test | Cotton swab | 10s |
| Dab | Remover | 5–15s |
| Observe | Eye | 30s |
Rinse And Repaint If Needed
If a solvent lift still leaves a faint halo or the finish looks uneven, rinse the area gently to remove residue and let it dry completely before you decide to repaint.
If spotting from nail‑polish remover altered sheen, test touch‑up paint on an inconspicuous patch first. Match color and finish carefully, accounting for age‑fading and varied wall textures that affect appearance.
Use thin coats and allow full drying between layers. If texture differs, repair with matching compound before painting.
- Feather edges to blend old and new paint.
- Use sample swatches for precise color matching.
- Match wall textures before final coat.
Use Non‑Gel Toothpaste for Small Scribbles
When you’ve got a few small scribbles on a painted wall, non‑gel toothpaste is an easy, low‑risk spot treatment you can try with items you already have. Dab a pea‑size amount onto a soft cloth or cotton swab and gently rub the mark in circular motions. You’ll see the pigment lift without harsh chemicals.
Rinse the area with a damp cloth, then blot dry. Try toothpaste hacks like plain white paste only; avoid gels or abrasive powders. Test a hidden spot first to make sure paint won’t dull.
Repeat once if needed, then let the wall fully dry.
Use a Magic Eraser Cautiously
A Magic Eraser can work wonders on permanent marker, but you’ve got to be careful—its micro‑abrasive surface can remove paint or gloss as easily as the ink. You should test a Magic eraser in an inconspicuous spot, dampen it lightly, and rub gently.
Focus on short strokes and check your progress frequently to protect finish and paint safety. If paint dulls or flakes, stop immediately and switch methods.
- Test area first: small, hidden, same lighting.
- Use light pressure: don’t scrub hard.
- Rinse and dry: prevent residue and assess results.
Use WD‑40 on Stubborn Marker Marks
After trying a Magic Eraser, you can reach for WD‑40 for stubborn permanent marker that won’t budge; its solvent properties help break down the ink without aggressive scrubbing. Spray a little on a cloth, test an inconspicuous spot first so your Creative wall art or Decorative paint patterns aren’t affected, then gently rub. Wipe with mild soapy water afterward to remove residue and dry. Repeat sparingly; overuse can dull finish. Keep ventilation and avoid flames. For delicate or valuable painted surfaces, consult a pro.
| Step | Tip |
|---|---|
| 1 | Test first |
| 2 | Use cloth, not spray directly |
| 3 | Rinse and dry |
Try Baking Soda + Vinegar for Persistent Stains
If the marker won’t budge with solvents, try a paste of baking soda and white vinegar to lift the stain without harsh chemicals. You’ll mix to a spreadable consistency, apply gently, and let it fizz for a minute.
If solvents fail, make a baking soda–vinegar paste, apply gently, let fizz, then rub and rinse.
Rub lightly with a soft cloth, rinse, and pat dry to avoid paint damage. This method suits walls near kids’ Creative art corners or DIY crafts spaces where non-toxic fixes matter.
- Mix 1 tbsp baking soda + enough vinegar to form paste.
- Test hidden spot first.
- Wipe, rinse, repeat until mark fades.
Use Hand Sanitizer as a Quick Remover
Before you start, test the hand sanitizer on a hidden spot to make sure it won’t damage the paint.
Squirt a small amount onto the marker stain, rub gently with a soft cloth, then wipe away.
Rinse the area with a damp cloth and repeat as needed until the mark fades.
Test On Hidden Spot
While you’re prepping to remove the marker, pick a discreet spot—inside a closet or behind furniture—and dab a small amount of hand sanitizer to check for colorfastness and finish damage. You’ll see whether the paint softens, dulls, or bleeds.
If you’re preserving creative wall art or worrying about color matching later, this quick test saves trouble. Note drying time and any residue. If the spot looks unchanged, proceed cautiously; if not, stop and consider touch-up options.
- Wait 30 seconds, then blot gently.
- Inspect under good light.
- Photograph results for comparison.
Apply Hand Sanitizer
Want a fast, low-risk way to lift permanent marker from painted walls? Apply a small dab of alcohol-based hand sanitizer to a soft cloth, blot gently, and watch ink break down. Test first for color matching and on different wall textures to verify no finish change. Work from edge to center.
| Step | Tool | Time |
|---|---|---|
| Test | Cloth | 10s |
| Apply | Sanitizer | 30s |
| Blot | Dry cloth | 20s |
Don’t scrub hard; repeat short applications as needed and move to a hidden spot if you see discoloration.
Rinse And Repeat
If the first application lifted some but not all of the marker, rinse and repeat: apply another small dab of alcohol-based hand sanitizer to a clean cloth, gently blot the remaining stain, and then wipe with a dry cloth to remove dissolved ink. You’ll avoid scrubbing, which can damage paint or alter color matching.
Pay attention to wall texture; porous or heavily textured surfaces may need more gentle, repeated dabs. Test an inconspicuous spot first.
If residue persists, consider a mild cleaner or touch-up paint.
- Blot—don’t rub.
- Work outward from edges.
- Let dry, assess results.
How Long to Let Solvents Sit for Best Results
When you apply a solvent, give it just enough time to loosen the marker without soaking the paint — typically 10–30 seconds for mild cleaners (like rubbing alcohol or dish soap solutions) and up to 1–2 minutes for stronger options (like acetone or commercial removers). Test a hidden spot first to check color matching and how wall texture reacts. Watch closely: if paint softens or color changes, blot immediately and stop. Short dwells reduce risk; stronger solvents need supervision. Below is a quick reference.
| Solvent | Typical Dwell |
|---|---|
| Mild | 10–30s |
| Strong | 1–2min |
How to Repeat Treatments Safely
Before trying another round, check how tough your paint is by testing a small, hidden spot to make sure repeated cleaning won’t strip or soften the finish.
If the test looks good, wait at least 10–15 minutes between treatments so the solvent doesn’t overwork the paint.
If you see dulling, swelling, or paint lift, stop and use a gentler method.
Check Paint Durability
Curious how many times you can treat the same spot without damaging the finish? You’ll assess paint color and wall texture first: glossy paints tolerate scrubbing better than flat, and porous texture soaks agents faster. Test a hidden patch, note any discoloration, and document results.
- Start with mild solvent on a cotton swab to see if paint lifts.
- Try gentle abrasion on the test spot to check resilience.
- Increase strength progressively, recording which method removed marker without harming finish.
If the test shows fading or softening, stop and consult a pro or repaint the area.
Wait Between Attempts
If a removal attempt doesn’t fully lift the marker, pause and let the area rest for at least 15–30 minutes before trying again so solvents can evaporate and the paint can recover.
You’ll reduce softening, streaking, and pigment migration by spacing attempts. Test again in an inconspicuous spot, use gentle pressure, and limit solvent contact time.
If paint dulls, stop and let it cure; repeated treatments can harm finishes and complicate color matching later.
For walls that double as creative wall art, consider masking damage with a small touch-up or blending repairs rather than aggressive repeated scrubbing.
How to Remove Large or Layered Marker Stains
When you’re tackling large or layered permanent-marker stains, you’ll need a different approach than for small scribbles because thicker coverage soaks deeper into paint and can smear if treated too aggressively. Work methodically and test a hidden spot first.
Use gentle solvents sparingly, and consider blending techniques if the wall features Creative wall art or nearby DIY spray paints finishes.
- Lift surface ink with rubbing alcohol on a microfiber cloth, dabbing, not rubbing.
- Use a melamine sponge lightly for layered areas, rinsing frequently.
- If stain persists, apply a spot primer then touch up with matching paint.
When to Stop to Avoid Further Paint Damage
Because aggressive scrubbing or repeated solvent use can strip or dull paint quickly, stop as soon as you see the finish change, softening, or color loss. You should pause and assess whether the mark is fading without further abrasion.
If solvent residue beads or the sheen shifts, you’re damaging the layer beneath any creative wall art and should halt. Wipe gently with a damp microfiber to remove cleaners, ventilate, and keep pets and indoor plant safety in mind—avoid runoff near foliage.
If the stain persists after gentle attempts, accept professional help or targeted touch-up rather than risking more paint damage.
How to Touch Up Paint After Marker Removal
After you remove the marker, check that the cleaned spot matches the surrounding paint. If it doesn’t, grab matching paint or a sample to get a closer hue.
Use a small brush or sponge and feather the new paint outward from the center so the repair blends with the wall. Let each thin coat dry fully before adding another to avoid visible edges.
Match Paint Color
Want the repair to disappear completely? You’ll need precise color matching and some artistic techniques to recreate the original finish. Start by bringing a small paint chip to the store or use a digital match, and test samples on cardboard.
- Match base tones first, then adjust for warmth or coolness.
- Mix tiny amounts, noting ratios; apply thin swatches and let them dry to compare.
- If you’re unsure, buy a small container or sample pot and retest.
Work patiently, keeping records of mixes. When the hue’s right, you’ll be ready to touch up without obvious seams.
Feather And Blend
When you’re ready to blend your touch-up, work from the perimeter inward and use a light, feathering motion to break up hard edges so the repair disappears. You’ll use Feathering techniques and careful Color blending to match texture and sheen. Apply thin coats, let each dry, then fade with a soft brush or sponge until gradations vanish. Check in different light, adjust saturation with tiny strokes, and avoid overloading the brush.
| Tool | Purpose |
|---|---|
| Soft brush | Feather edges |
| Sponge | Blend texture |
| Thin coats | Control color buildup |
Match Paint Color and Finish for Seamless Touch‑Ups
Before you touch up a marked spot, identify the exact paint color and sheen so the repair blends in, not stands out. You’ll want precise color matching and attention to finish blending to avoid a visible patch. Test small swatches in inconspicuous areas, let them fully dry, and compare under the room’s lighting.
- Use leftover paint or get a sample chip for professional color evaluation.
- Match sheen — matte, eggshell, satin — because light reflects differently.
- Apply thin layers, feathering edges, and let each coat cure before assessing.
Work patiently; a blended repair looks invisible.
Fix Marker on Semi‑Gloss & Gloss Paint
You’ll first want to confirm whether your wall has a semi-gloss or gloss finish, since those surfaces handle cleaners differently.
Test a safe, low‑abrasive cleaner on an inconspicuous spot to make sure it won’t dull the sheen.
Once you know the finish and a compatible cleaner, you can proceed with confidence.
Assess Paint Finish
Because semi-gloss and gloss paints have smoother, tougher surfaces, they’ll resist marker differently than flat or eggshell finishes — so start by identifying the sheen before you try any removers. You’ll want to inspect wall textures and test a small hidden spot to see how the finish reacts. Note any variations for color matching if you need touch-up later.
Consider these steps:
- Clean a tiny area with mild soap and water to reveal true sheen.
- Rub gently with a pencil eraser to judge surface resistance.
- Compare to an unmarked section to confirm gloss level and texture.
Choose Safe Cleaner
When dealing with semi‑gloss or gloss paint, pick cleaners that’ll lift ink without dulling the sheen or stripping the finish. Start with mild, nonabrasive choices: soap and water, diluted isopropyl alcohol (test first), or a magic eraser used gently.
If you want Eco friendly options, try white vinegar diluted with water or baking soda paste applied lightly. Avoid acetone and harsh solvents.
For stubborn marks, consider creative art solutions like a soft art gum eraser or a watercolor brush with mild cleaner to work ink away without scuffing. Always test an inconspicuous spot and rinse thoroughly after cleaning.
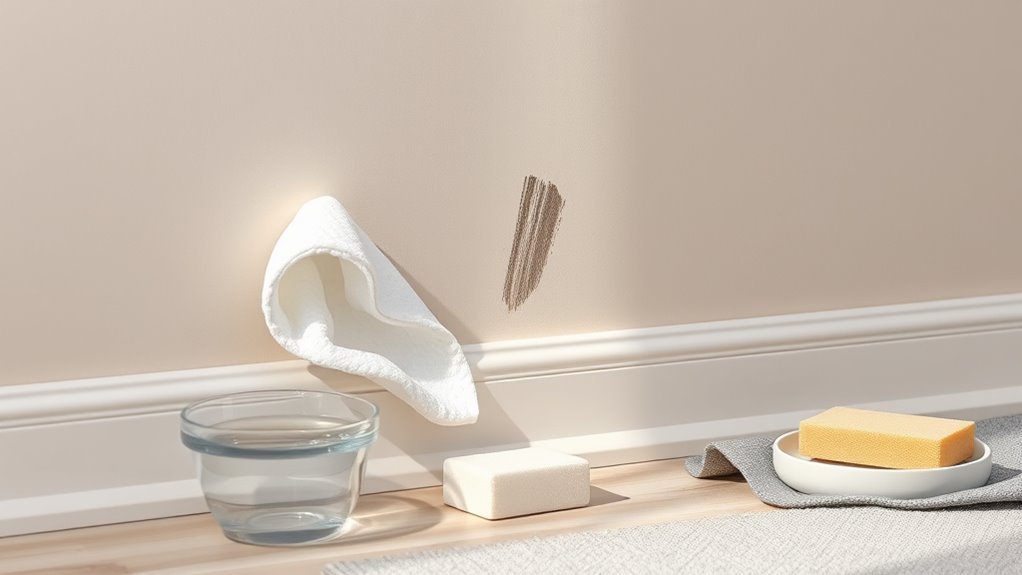
Fix Marker on Flat & Matte Paint
If your flat or matte-painted wall has marker on it, act gently to avoid damaging the finish. You want to remove ink without dulling the paint, especially if the mark intrudes on your wall art or clashes with artistic expression. Start with mild cleaners and soft cloths, test hidden spots, and blot instead of rubbing.
- Use a damp microfiber cloth and mild detergent; blot gently, rinse, repeat.
- Try a magic eraser sparingly, testing first to ensure no sheen loss.
- If stubborn, use isopropyl alcohol on a cotton swab, working outward from the stain.
Treat Textured Walls, Stucco, and Sprayed Textures
Textured walls, stucco, and sprayed finishes need a quick assessment so you can match cleaning methods to the surface profile. Start with gentle options—soft brush and mild cleaner—so you don’t damage raised areas.
For stubborn marks, move to stronger spot treatments or light sanding and touch-up, testing first in an inconspicuous spot.
Assess Surface Texture
Because textured finishes hide grooves and crevices, you’ll need to evaluate the exact pattern and depth before choosing a removal method. You’ll perform a quick surface texture and paint assessment to determine whether marker sits on peaks, in valleys, or has soaked through.
Note substrate firmness and previous repairs; loose texture changes your options.
- Inspect pattern: shallow orange peel versus deep stucco affects access.
- Probe gently: use a fingertip or soft brush to test adhesion.
- Photograph and mark: document spots and depth for targeted treatment without overworking paint.
Gentle Cleaning Methods
How should you approach cleaning marker from a textured wall without damaging the finish? Start gently: dust or vacuum to remove loose grit, then test a hidden spot.
Use a soft cloth dampened with mild dish soap and water, blotting rather than scrubbing to protect stucco or sprayed textures.
For stubborn marks, try a magic eraser lightly—don’t soak it—and work in small circles.
Avoid solvents that could lift paint or ruin creative wall art or DIY home decor finishes.
Rinse with a clean damp cloth and pat dry.
If stain persists, stop and reassess before using stronger methods.
Tough Stain Techniques
If gentle cleaning didn’t work, you’ll need tougher techniques that respect the texture and paint—start by testing any stronger product on an inconspicuous patch.
For stucco, sprayed textures, or heavy orange peel, work gently with a soft-bristle brush and solvent—rubbing alcohol, acetone sparingly, or a commercial graffiti remover—then rinse and blot.
Protect surrounding areas if you plan to repaint or integrate the spot into creative wall art or DIY mural techniques.
- Use solvent on a microfiber cloth, dab, don’t scrub.
- Try a magic eraser lightly, keep pressure low.
- Sand minimal high spots, prime, touch up with matching paint.
Remove Marker Near Trim, Baseboards, and Corners
When marker stains sit close to trim, baseboards, or inside corners, you’ll need a gentler, more controlled approach to avoid damaging paint or woodwork. Work slowly with cotton swabs or a soft toothbrush dipped in rubbing alcohol or a diluted magic eraser solution, dabbing rather than rubbing.
Protect any decorative trim or creative wall art edges by applying remover to the swab tip only. For wood baseboards, test a hidden spot first and switch to mild dish soap if finish dulls.
Wipe residue with a damp microfiber and dry immediately. Preserve artistic expression by proceeding patiently and checking results often.
Protect Surrounding Areas Before Cleaning
Before you start cleaning, clear and cover the area so solvent or scrub residue won’t stain floors, furniture, or artwork. You’ll protect Creative wall art and DIY décor nearby by isolating the work zone and minimizing splatter. Tape plastic sheeting along baseboards, drape drop cloths over rugs, and move small items out of reach. Keep ventilation open and wear gloves.
- Seal edges with painter’s tape to protect trim and artwork.
- Use old towels or cardboard under the spot to catch drips.
- Remove or cover nearby DIY décor pieces to prevent accidental damage.
Remove Marker From Painted Doors and Cabinets
Because doors and cabinets see heavy use, you’ll want to tackle permanent marker stains carefully to avoid stripping paint or leaving a shadowy residue.
Start by testing a mild cleaner on an inconspicuous area. Use rubbing alcohol on a soft cloth, rubbing gently in small circles; switch to a magic eraser lightly if needed. Rinse with a damp cloth and dry.
Test cleaners out of sight. Gently rub rubbing alcohol on a soft cloth, try a magic eraser lightly, then rinse and dry.
For painted surfaces with decorative touches or faux finishes, proceed cautiously so you don’t damage creative wall art or planned DIY wall decals nearby.
If marks persist, consider touching up with matching paint rather than aggressive scraping or solvents.
Clean Marker Off Painted Furniture and Trim
You’ll find furniture and trim demand a gentler hand than walls or cabinets since paint edges and profiles show wear quickly. Treat small marks with a soft cloth and a dab of isopropyl alcohol, testing inconspicuously first so your Furniture tips protect finish.
For delicate trim, try a magic eraser gently; don’t scrub edges. If stain persists, use a matching touch-up paint sparingly.
- Blot with alcohol, then rinse and dry.
- Lightly abrade with a melamine sponge, avoiding corners.
- Apply touch-up paint with a fine brush for flawless Wall design continuity.
Act calmly and work slowly.
Remove Marker From Outdoor Painted Surfaces
When dealing with permanent marker on outdoor painted surfaces, act quickly and choose cleaners that won’t harm weatherproof coatings or nearby landscaping. Start by rinsing the area with water.
Act quickly to rinse away permanent marker on outdoor painted surfaces, using cleaners safe for coatings and landscaping.
Then test a mild solvent—rubbing alcohol or diluted vinegar—on an inconspicuous spot. Gently blot, don’t scrub, to avoid removing paint or protective finishes.
For stubborn marks, use a soft brush with a commercial cleaner rated for exterior paints, following instructions and wearing gloves. Rinse thoroughly and let dry.
Reapply protective measures as needed; consider outdoor protection and updated weatherproofing techniques to prevent repeat damage.
Remove Marker From Wallpaper & Murals
You’ll first assess the wallpaper or mural material—vinyl, paper, or hand-painted surfaces—all react differently. Test any cleaning method on an inconspicuous area before treating the mark.
If the test goes well, use mild, gentle solvents and a soft cloth, working lightly to avoid damage.
Assess Wallpaper Material
Before you try any cleaners, identify the wallpaper type so you don’t damage the finish. You’ll check surface characteristics—wall texture, coating, and whether a painted mural used a glossy paint sheen. Peel a corner or inspect seams for paper, vinyl, or fabric backing. Vinyl holds up; paper and fabric are fragile. Note printed patterns or hand-painted art that may lift or bleed.
- Paper: absorbent, matte, avoid solvents.
- Vinyl: wipeable, resilient, test milder agents first.
- Fabric/embroidered: delicate, likely needs professional care.
Test Cleaning Method
Now that you’ve identified the wallpaper type, spot-test any cleaning method in an inconspicuous area to make sure it won’t damage or discolor the surface. Apply a tiny amount of your chosen cleaner, blot gently, and wait a few minutes.
Check for color fading and altered wall textures; some patterns or coatings react slowly. If the test area shows no change, proceed cautiously on the mark, working from the outside in.
If you notice any softening, lifting, or pigment loss, stop immediately. Record what you tried and the outcome so you can avoid repeating harmful methods on visible areas.
Use Gentle Solvents
When gentle scrubbing and soap won’t lift the permanent marker, try a mild solvent—but proceed cautiously to protect wallpaper prints and mural paint. You’ll want to test a tiny, hidden spot and work slowly, using soft cloths and minimal product. Prefer Creative techniques and Eco friendly solutions when possible to avoid harsh chemicals and preserve finishes.
- Rubbing alcohol diluted with water: dab, blot, don’t rub.
- White vinegar solution: mild, plant-friendly, effective on fresh stains.
- Citrus-based solvent: natural, smells pleasant—use sparingly and rinse.
Stop if color or paper softens; consult a pro for treasured murals.
Handle Marker Left by Kids vs. Adults
If a marker stain came from a child, you’ll usually be dealing with larger, softer scribbles and more delicate paint nearby. Adult marks tend to be smaller but might be heavier or layered.
Childish marker scrawls are softer and broader—treat gently; adult scribbles are smaller but may be heavier, requiring firmer care.
You should treat childish scrawls like attempts at creative wall art—approach gently, test a mild cleaner on an inconspicuous spot, and use soft cloths to avoid lifting paint.
For adult scribbles, press a little firmer with solvent, working in short bursts and re-testing often.
Temporary marker stains often respond to gentle abrasion or rubbing alcohol, but always prioritize paint integrity and stop if finish dulls or flakes.
Prevent Marker Stains With Clear Paint Sealers
Ever thought about sealing your walls to keep markers from becoming permanent problems? You can protect Creative wall designs or Artistic wall murals with clear paint sealers that create a wipeable surface. Apply a thin, even coat and let it cure; you’ll reduce staining without altering appearance. Choose a matte or gloss clear sealer to match the original finish.
- Test a small, hidden spot for adhesion and sheen.
- Use water-based clear sealers for low odor and easy cleanup.
- Recoat periodically in high-traffic areas to maintain protection and wipeability.
Choose Stain‑Resistant Paint Finishes That Help
When repainting, choose semi‑gloss or satin finishes because they resist staining and wipe clean more easily.
Pick formulas labeled washable to make marker removal simpler without damaging the paint.
Also look for products marked stain‑resistant for extra protection against permanent marker mishaps.
Choose Semi‑Gloss Or Satin
Choosing a semi‑gloss or satin finish helps you resist stains and makes marker cleanup far easier than flat paint. You’ll notice the Finish sheen repels oils and ink, so gentle wiping works better, and Color matching any touch‑ups stays cleaner longer.
Pick satin for subtle glow, semi‑gloss for high-traffic areas.
- Use a small test patch to confirm Color matching and sheen before painting.
- Clean marks promptly; the Finish sheen lets you scrub lightly without loss of pigment.
- For trims and bathrooms, choose semi‑gloss for durability; for living spaces, satin balances look and cleanability.
Prioritize Washable Formulas
Because washable paints are formulated to resist stains and stand up to repeated scrubbing, you’ll save time and frustration when marker or dirt hits the wall. Choose washable formulas so marker stains sit on the surface rather than soak in, making removal easier with mild cleaners.
Check paint compatibility before using solvents or erasers; some washable finishes tolerate gentle cleaners while others need only water and soap. When repainting, pick a washable option for high‑traffic areas and test removers in an inconspicuous spot to confirm paint compatibility.
That proactive choice reduces staining headaches and preserves finish integrity.
Look For Stain‑Resistant Labels
Washable paints help, but you can get even more protection by looking for stain‑resistant labels on the can. Choose finishes marketed for scuff and stain resistance so permanent marker wipes away easier, and favor brands that tout eco friendly methods to reduce VOCs. That protects surfaces and supports art preservation when walls display drawings or murals.
- Look for “stain‑resistant” or “scrubbable” on the label.
- Check VOC levels and eco friendly methods in product specs.
- Test a small patch to confirm marker removal without harming finish.
Natural, Low‑Chemical Marker‑Removal Methods
If you want to remove permanent marker without strong solvents, several gentle, household options can do the job while protecting your paint. You’ll try baking soda, vinegar, rubbing alcohol, or toothpaste, testing a hidden spot first. Use soft cloths, gentle rubbing, and short dwell times to avoid paint damage. Consider eco friendly solutions and cultural considerations when choosing scents or ingredients for shared spaces.
| Method | Notes |
|---|---|
| Baking soda paste | Mild abrasiveness |
| White vinegar | Mild solvent |
| Rubbing alcohol | Quick, test first |
| Toothpaste (non-gel) | Gentle polishing |
Safely Use Commercial Marker Removers
When you choose a commercial marker remover, read the label and test it on an inconspicuous spot first to make sure it won’t strip or discolor your paint. You’ll protect finishes and any creative wall art nearby by working carefully, ventilating the room, and wearing gloves. Use small amounts and blot; don’t scrub aggressively.
- Pick a remover labeled safe for painted surfaces and follow timing instructions.
- Apply with a soft cloth, rinse residue, and dry to inspect results.
- If paint dulls, stop and consider DIY wall repairs or professional help to restore appearance.
Cleaner Labels: What Matters for Painted Walls
Although many cleaners look similar on the shelf, you should focus on a few key label details to protect painted walls. Check for low VOCs, non-abrasive formulas, and “safe for painted surfaces” claims. Avoid oxygen bleach and strong solvents unless label specifies paint compatibility.
Look for dilution instructions and spot-test guidance; manufacturers who include application steps reduce risk. If you prefer Eco friendly alternatives, seek biodegradable surfactants and fragrance-free options.
For walls with murals or delicate finishes, labels that mention Artistic techniques or conservation-friendly use are beneficial. Always follow contact time and ventilation recommendations to protect finish and health.
Avoid Common Cleaning Mistakes That Worsen Stains
Now that you know how to read labels and pick safer cleaners, turn your attention to mistakes that can make stains worse. Don’t over-scrub; aggressive rubbing can grind marker into paint or remove finish, wrecking wall decor. Avoid mixing cleaners—you’ll create harsh reactions that harm paint and any nearby creative art. Test in a hidden spot before full treatment to prevent surprises.
- Use too much solvent: it spreads stain and strips paint.
- Skip a patch test: you risk irreversible damage.
- Ignore manufacturer guidance: you might void finishes or warranties.
Signs You Need Professional Restoration
If a marker stain keeps bleeding through cleansers, flakes paint, or affects a large area, you should call a pro—these issues signal damage beyond DIY fixes. You’ll want experts when odor persists, textured finishes suffer, or underlying layers show through. Professionals respect historical context of older paints and use conservation-minded artistic techniques to match color and texture. They’ll advise on stabilization, deep cleaning, or selective repainting.
| Sign | Why it matters | Action |
|---|---|---|
| Bleeding | Ink penetrates layers | Call pro |
| Flaking | Paint instability | Stabilize |
| Large area | Visible mismatch | Match finish |
| Odor | Chemical residue | Deep clean |
Marker Removal as Tenant Move‑Out Repairs
When you’re prepping a rental for move-out, removing permanent marker from painted walls becomes a practical cost-saving task you might handle yourself before calling a pro. You’ll protect your deposit by acting fast, testing cleaners on hidden spots, and avoiding harsh scrubbing that strips paint.
Know common Marker myths—don’t assume all inks come out the same. Preserve any Creative wall art you intend to keep by masking it off. Follow a simple, documented process so you can show due diligence.
- Test small area first.
- Use gentle solvent options.
- Rinse and dry thoroughly.
How to Document Damage for Landlords or Insurance
How should you document permanent‑marker damage for a landlord or insurer? Photograph the marks from several angles and distances, include a ruler or coin for scale, and capture surrounding wall textures and lighting so claims reviewers see context.
Note date, time, room, and likely cause; describe any attempts you made to clean it and list products used. If artistic techniques were involved—graffiti, stamps, or accidental sketching—detail them so responsibility is clear.
Preserve originals: don’t repaint before approval. Keep copies of receipts, repair estimates, and written communications with the landlord or insurer for a complete, traceable record.
Tips to Keep Kids and Artists From Repeating Mistakes
Because prevention is easier than repair, set clear, simple rules and make supplies and surfaces predictable: give kids washable markers and designated drawing zones, keep permanent markers out of reach, and provide artists with scrap boards or removable panels for experiments. You’ll reduce incidents and encourage Creative wall art in proper spaces.
Use consistent reminders and visible storage labels so everyone knows where tools belong.
- Teach: show Kids’ painting tips—pressure control, edge masking, and cleanup routines.
- Limit access: store permanents locked or high.
- Reward: praise care and display approved pieces.
Quick Troubleshooting: What to Try Next
If your first attempt didn’t lift the stain, don’t panic—try a different approach based on the marker type and paint finish. Test a small hidden spot, then work gently. For glossy paint you can be firmer; for flat paint, go lighter. Consider turning a faint mark into creative wall art or blend it with DIY home decor if removal fails.
| Marker Type | Paint Finish | Next Try |
|---|---|---|
| Alcohol-based | Glossy | Rubbing alcohol, light |
| Permanent ink | Satin | Magic eraser, test |
| Water-based | Flat | Mild soap, dab |
| Unknown | Any | Test, then escalate |
Fail‑Safe Order: Safest‑to‑Strongest Cleaning Steps
When your initial attempts don’t work, move through a fail-safe sequence from the gentlest methods to the strongest so you avoid paint damage. You’ll protect the finish and explore creative techniques that suit DIY decor without risking more harm. Test a hidden spot, work small, and rinse as you go.
Use this ordered approach:
- Mild soap and water with a soft cloth, blotting gently.
- Isopropyl alcohol or a magic eraser, applied sparingly and tested first.
- Stronger solvents (acetone or commercial removers) only as a last resort, with ventilation and quick wipes.
Stop if paint softens; reassess or seek pro help.
Estimated Time and Cost for Common Fixes
You can usually remove most permanent-marker marks in 10–30 minutes per spot with common household items, and expect costs to range from free (soap and water) up to $10–20 for specialty cleaners or replacement touch‑up supplies.
Start with mild, quick tests—detailed steps vary by wall textures and paint finish. Rubbing alcohol or magic erasers often work within minutes; factor $0–5.
Stronger cleaners or small tubes of touch‑up paint take longer (30–60 minutes including drying) and cost $8–20. If artistic techniques like stippling or feathering are needed to blend repairs, add time for practice and careful application.
Final Checklist: Restore, Protect, and Prevent
Before you finish, run through a short checklist to make sure the repair’s solid, the wall’s protected, and future marks are less likely. You want the surface sealed, the finish matched, and any creative wall art or personal expression preserved. Check edges, test touch-ups under light, and confirm sealant compatibility so repairs don’t stand out.
- Inspect: confirm paint adhesion, smoothness, and color match.
- Protect: apply a clear coat or washable finish suited to painted walls.
- Prevent: set rules, use washable markers, or designate a creative wall art area for personal expression.
Frequently Asked Questions
Can Marker Bleed Through to the Primer or Drywall?
Yes—you can get bleed-through depending on marker types and wall textures; oil-based or industrial markers soak primer or drywall, while lighter water-based pens usually don’t. You’ll need testing and prompt treatment to prevent staining.
Will Marker Fumes Pose Health Risks During Removal?
Yes — marker fumes can irritate you, so take health concerns seriously. Open windows, use fans for ventilation tips, wear gloves and a mask, work briefly, and stop if you feel dizzy or have breathing trouble.
Can Hair Dye or Color Remover Take Marker off Walls?
Yes — you can try hair dye or color remover for marker removal, but test first on an inconspicuous spot. You’ll risk paint damage; use gentle wall cleaning methods and rinse thoroughly to avoid staining or discoloration.
How Do I Remove Marker From Painted Glass or Mirrors?
Like a Victorian with a smartphone, you’ll use rubbing alcohol or a dry-erase marker to lift ink from glass or mirrors; cleaning techniques include gentle rubbing, then rinsing and drying to prevent streaks and stain prevention.
Will Insurance Cover Marker Damage in Rental Properties?
Usually you’ll check your rental policy first; insurance claims for marker damage depend on the policy and landlord’s rules. You’ll report promptly, document the damage, and expect either repair charges or a claim if your policy covers tenant-caused damage.
Conclusion
You’ve learned what to try, what to test, and what to avoid—so start gently, test discreetly, and act confidently. Protect the paint by using mild cleaners first, preserve the finish by spot-checking hidden areas, and restore the surface with targeted repairs when needed. If a method fails, pause, reassess, and escalate carefully. Prevent future marks with clear rules, visible supplies, and simple fixes on hand—so your walls stay clean, unmarred, and ready.