How to Smooth Out Walls Before Painting Properly
You’ll get smooth walls by protecting surfaces, cleaning thoroughly, and inspecting for cracks, dents, or loose paint; test old paint for lead if it’s pre‑1978. Remove loose material, fill holes with joint compound, feather edges, and sand progressively with fine grit until patches blend. Wipe dust, prime all repairs, and let each coat dry fully before recoating. Finish with a light sand and final primer coat, and keep going to learn tips for flawless blending and troubleshooting.
Quick 6-Step Process to Smooth Walls Before Painting
Before you pick up a brush, follow this quick 6-step process to get walls smooth and paint-ready.
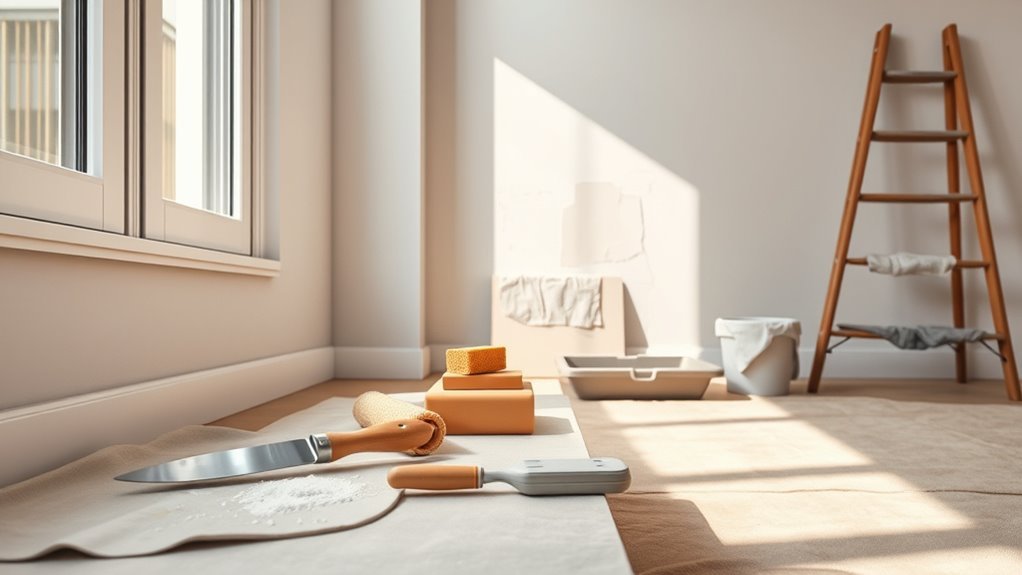
First, clear the area and protect floors.
Start by clearing the room and covering floors to protect surfaces before you begin painting.
Second, clean surfaces to remove dust and grease.
Third, inspect wall texture and mark imperfections.
Fourth, apply appropriate filler or joint compound, feathering edges for seamless blends.
Fifth, sand progressively with fine grit, wipe residue, and recheck texture under good light.
Sixth, prime repaired areas to lock in patches and guarantee consistent paint sheen.
You’ll achieve a uniform surface ready for whatever finish you choose, saving time and improving results.
What Smooth Walls Look Like : And Why It Matters
When you run your hand across a properly smoothed wall, you’ll feel an even, uninterrupted surface with no ridges, gouges, or visible patch lines — and you’ll see consistent light reflection that makes paint look true to color.
You’ll notice seamless gradations where repairs were made, minimal shadowing, and a uniform wall texture that lets color read accurately.
Smooth walls improve paint adhesion, so coatings grip evenly and last longer. That means fewer touch-ups, reduced spotting, and a professional finish.
Tools & Materials for Smoothing Walls
Although you can tackle small repairs with little more than a putty knife, achieving truly smooth walls requires the right set of tools and materials. Gather a sanding block or pole sander with varied grits, drywall compound, a good-quality putty knife, corner trowel, dust mask, and microfiber cloths. Have primer and a hawk or mud pan ready.
Choose spackle for pinholes and lightweight joint compound for larger areas. Consider how Wall textures and final paint will interact—select tools that let you match or remove texture as needed.
Keep Color coordination in mind when picking primer and finish samples.
Protect Floors, Trim, and Fixtures the Easy Way
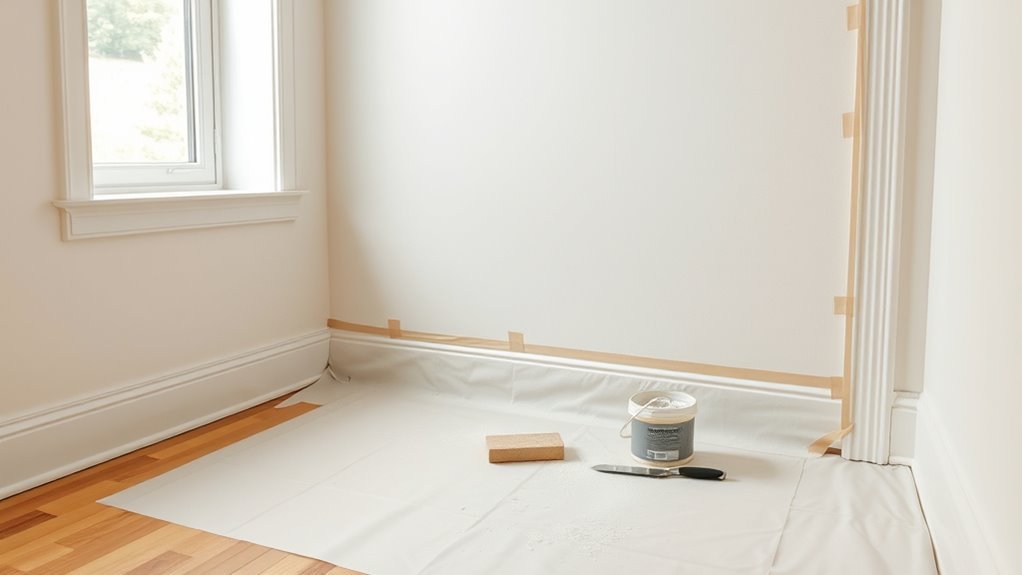
Start by covering floors with drop cloths or plastic sheeting so dust and mud from sanding don’t stain anything.
Tape paper or low-tack painter’s tape over trim and use plastic bags or removable covers for fixtures to avoid accidental smears.
Work methodically from top to bottom so you don’t miss spots and can remove protection cleanly when you’re done.
Protect Floors Quickly
Want to keep paint off your floors, trim, and fixtures without wasting time? You’ll act fast: roll out drop cloths, tape edges, and secure plastic sheeting for floor protection and quick cleanup. Move furniture, cover hardware, and keep a trash bin handy. Use weighted edges to stop trips and gaps. Finish by sweeping debris before painting.
| Item | Action | Tip |
|---|---|---|
| Drop cloth | Spread | Overlap seams |
| Tape | Seal edges | Press firmly |
| Plastic | Clip | Clear for light |
| Weights | Anchor | Cans work |
You’ll work efficiently and protect surfaces.
Cover Trim Carefully
Before you paint, protect trim with precise masking so you get clean lines and avoid touchups later. You’ll remove dust, sand rough spots, and use low-tack painter’s tape along edges, pressing firmly for crisp borders.
Cover baseboards and crown molding with paper or plastic, securing with tape only on trim, not drywall, to prevent damage to wall textures.
For ornate trim detailing, work in small sections and use foam brushes to cut in where tape can’t reach.
Protect fixtures and floors with drop cloths.
After painting, peel tape slowly at a 45° angle for perfect edges and minimal cleanup.
Assess Wall Condition Quickly and Accurately
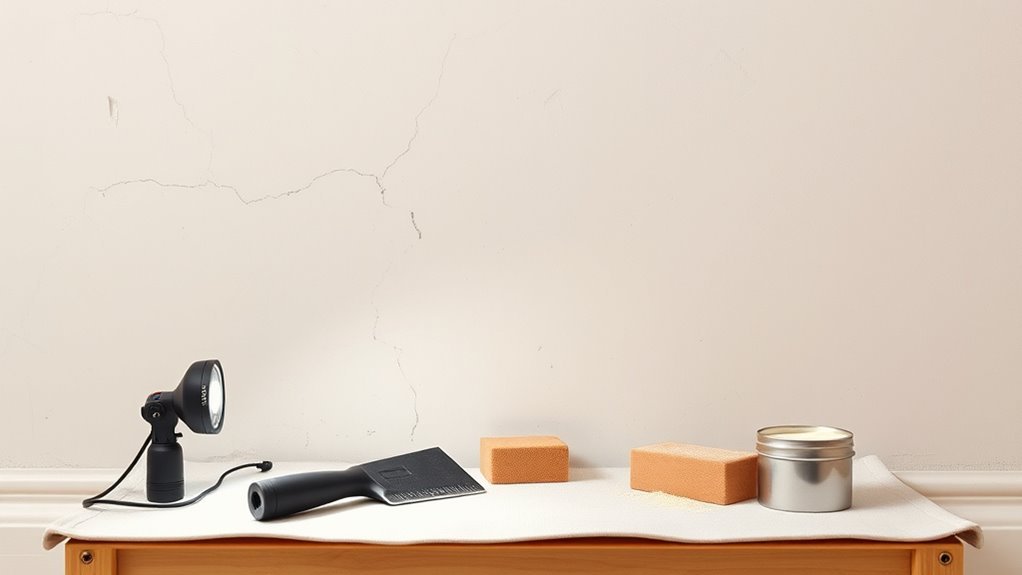
Start with a quick visual inspection to spot cracks, bumps, peeling paint, or nail pops.
Then run your hand over the surface and lightly tap to listen for hollow sounds that indicate loose plaster or drywall.
These fast checks help you prioritize repairs before you sand or skimcoat.
Quick Visual Inspection
When you walk into a room to prep walls, take a quick visual sweep to spot cracks, dents, peeling paint, stains, and uneven texture so you know what repairs and products you’ll need. Focus on areas around trim, outlets, and existing wall art, noting any shadowed spots that hide flaws.
Check for inconsistent color coordination from previous touch-ups or sun-faded sections. Mark repair zones with removable tape or a pencil, prioritizing wide cracks and raised seams. Note moisture stains and flaking paint separately.
This rapid inspection saves time by directing sanding, patching, and primer choices before you start work.
Tap And Listen
After your visual sweep, tap along the wall with a knuckle or small hammer to listen for hollow sounds that indicate loose plaster, separated drywall, or voids behind the surface.
Move methodically in a grid, marking weak spots with pencil or painter’s tape. When you find hollows, probe gently to gauge severity, then plan repairs—adhesive injections for small voids, patching or reboarding for larger areas.
Note problem zones relative to room features so repair placement won’t conflict with color coordination or furniture arrangement later.
Finish by re-tapping repaired sections to confirm solidity before sanding and priming for paint.
Clean Walls: Remove Grease, Dust, and Mildew
Because paint only sticks to a clean surface, you’ll need to remove grease, dust, and mildew before any repairs or priming. Start by dusting ceilings and corners with a microfiber broom, then vacuum baseboards and vents.
Degrease kitchen walls with a mild detergent or trisodium phosphate substitute, rinsing thoroughly.
Treat mildew with a bleach solution (1 part bleach to 3 parts water), scrub gently, and rinse well. Let walls dry completely.
Inspect for remaining stains that might bleed through new wall color and note texture patterns that influence cleaning technique.
Clean, dry walls guarantee primer and paint adhere evenly.
When to Strip Old Paint vs. Spot Repair
Check the paint’s overall condition and look for widespread cracking, bubbling, or multiple layers that suggest you should strip it rather than patch.
Test for lead on any pre-1978 paint before you start, since that changes how you’ll remove or repair it.
For small chips or isolated damage on a stable, non-leaded surface, spot repairs and proper sanding will usually do the job.
Assess Paint Condition
When you inspect old paint, focus on its adhesion, surface integrity, and the extent of damage to decide whether to strip it completely or just repair spots. You’ll check for peeling, bubbling, and multiple layers that might hide uneven wall textures or clash with new color schemes.
Decide quickly: spot repair saves time on isolated flaws; stripping’s better for widespread failure. Use this checklist to evaluate:
- Peeling area size and frequency
- Surface hardness and crumbling
- Visible stains or mold presence
- Layer count and thickness
- Compatibility with new primer and finish
Then pick the efficient, safe approach.
Test For Lead
If your inspection shows failing or multiple old paint layers, test for lead before deciding between spot repairs and full stripping. You should use certified lead testing kits or hire a professional to confirm hazards.
If tests are positive, prioritize paint safety: contain dust, wear proper PPE, and follow local regulations for abatement.
Small isolated failures on non-fragile surfaces might allow sealed spot repairs using encapsulants, but widespread chipping or multiple layers usually require full stripping by trained crews.
Document results and notify occupants.
Always treat unknown old paint as potentially hazardous until lead testing proves otherwise.
Evaluate Surface Damage
Before you decide whether to strip old paint or make spot repairs, walk the entire surface and note the extent, depth, and pattern of damage so you can weigh effort, cost, and risk. Inspect for flaking, blistering, cracking, and substrate softness.
Consider existing wall texture and paint sheen—glossy layers hide flaws and resist adhesion. If damage is widespread, stripping and re-priming may be necessary; limited flaws call for spot repair and feathering.
Evaluate time, ventilation, and lead risk. Balance aesthetics and durability.
- area affected percentage
- depth of deterioration
- adhesion test results
- texture match difficulty
- cost versus longevity
Remove Loose Paint and Flaking Safely
Although you’re enthusiastic to get painting, start by removing loose and flaking paint so the new coat will adhere and look smooth.
Use a putty knife or paint scraper at a low angle to lift flakes, and a wire brush for stubborn spots. Sand edges with medium-grit paper until feathered into surrounding wall textures. Vacuum or wipe dust with a damp cloth.
If old paint chips, work gently to avoid creating dust clouds; wear a mask and goggles. Prime bare areas before repainting to aid color matching and adhesion.
Dispose of debris per local regulations; keep the area clean for best results.
Fix Nail Pops and Loose Drywall Screws
When nail heads or screw tops start to push out of drywall, you’ll want to reset them before you sand or paint so the surface stays flat and crack-free.
Pull the popped fastener, drive a new drywall screw into a stud or use a wide-head screw, then countersink slightly.
Apply joint compound and smooth to match wall textures and any decorative finishes.
Sand lightly once dry and prime.
- Remove loose fastener
- Replace or reset in stud
- Countersink slightly
- Fill and feather compound
- Sand and prime
This prevents future popping and keeps finishes consistent.
Repair Hairline Cracks and Small Gaps With Spackling
Start by prepping the surface: wipe away dust, loose paint, and any crumbling material so the spackle will bond.
Apply a small amount of spackling compound into hairline cracks and gaps, then use a putty knife to press it in.
Smooth the area flush with the wall, let it dry, and sand lightly before priming or painting.
Prep Surface First
Before you roll on primer, fix hairline cracks and small gaps with spackling so your paint lays down smoothly and won’t show imperfections later. You’ll prep the surface by cleaning, removing loose debris, and checking wall texture to match surrounding areas.
Consider color coordination only after repairs so patched spots don’t stand out under primer. Follow these quick steps to prep properly:
- Wipe walls with mild cleaner and let dry
- Scrape loose paint from cracks
- Apply small amounts of spackle to gaps
- Sand leveled spots lightly once dry
- Remove dust before priming
These steps ensure a seamless finish.
Apply And Smooth Spackle
Because hairline cracks and small gaps can telegraph through primer and paint, you’ll want to fill them carefully with spackling compound so the surface reads smooth and uniform. You’ll work in thin layers, pressing spackle into gaps with a putty knife, letting each layer dry before sanding.
Match your approach to wall texture and consider color selection later for touchups; spackle dries white or beige and accepts primer. Clean dust, feather edges, and inspect under raking light.
Use primer over repaired spots before final paint to guarantee consistent sheen and adhesion.
Fill Larger Cracks and Holes With Joint Compound
When you find cracks or holes larger than about 1/4 inch, use premixed joint compound (or a setting compound for deeper repairs) to rebuild the surface. It fills voids, bonds well, and sands smooth once dry.
Clean debris, undercut edges slightly, then apply compound in thin layers, letting each cure. Sand lightly between coats for a flat result.
Match nearby wall textures and consider color matching at the primer/paint stage so repairs disappear.
- Use a putty knife for even layers
- Choose setting compound for deep voids
- Feather edges to blend
- Sand with fine grit
- Prime before painting
Applying Drywall Tape and a Skim Coat
Now that holes are filled, you’ll prep the surface and mix the joint compound to a smooth, workable consistency.
Apply tape over seams using steady pressure to seat it, then cover with a thin skim coat of mud, feathering the edges.
Work in long, smooth strokes so the tape stays flat and the surface blends seamlessly.
Prep And Mud Application
Before you mud, make sure the seams and nail pops are clean and dust-free so the tape can bond properly. You’ll mix joint compound to a creamy, spreadable consistency, apply tape, and embed it smoothly.
Work in thin coats, feathering edges to minimize sanding. Let each layer dry fully, then skim coat for a flat surface. Consider how decorative techniques or matching existing wall textures affect your skim strength and blend.
- Use a hawk and trowel for control
- Apply firm pressure when embedding tape
- Feather at least 6 inches beyond seams
- Sand between coats with fine grit
- Clean tools after each session
Tape Placement Techniques
Once you’ve got clean seams and a properly mixed compound, press tape firmly into the bed of mud and smooth out air bubbles with a 6–10 inch taping knife so the tape lies flat and centered over joints. Work one joint at a time, wiping excess compound outward to feather edges.
Let the first coat set, then apply a thin skim coat over tape, extending wider to blend with surrounding wall texture.
Sand lightly between coats, remove dust, and inspect for hollows. Match skim thickness to your planned paint finish and consider color coordination when selecting primer and final paint to guarantee even coverage.
When Textured Walls Need Skim Coat Versus Re-Texturing
If your textured walls show uneven patterns, deep gouges, or multiple patched areas, you’ll usually need a skim coat to create a smooth, uniform surface.
You’ll choose skim coat versus re texture based on damage, time, and finish goals. Consider textured wall alternatives only if you want a different look or easier maintenance.
Ask yourself whether hiding flaws or preserving texture matters more.
- Extent of damage: large dents or repairs
- Desired finish: smooth vs decorative
- Time and budget constraints
- Skill level: DIY vs pro
- Long-term maintenance needs
Make the choice that fits your priorities.
Sanding for Smooth Walls Before Painting
Because sanding smooths high spots and blends repairs, you’ll want the right grit, tools, and technique to get a paint-ready surface.
Start by cleaning the wall and testing a small area so you don’t disturb existing texture patterns unnecessarily.
Sand repaired spots until edges feather into surrounding drywall, keeping pressure even and motion gentle.
Use a sanding block or pole sander with dust collection to limit mess and check progress with raking light.
After sanding, vacuum and wipe with a damp cloth.
Prime repaired areas with wall primers before painting to guarantee uniform adhesion and finish.
Which Sandpaper Grits and Tools to Use
When choosing sandpaper and tools, match grit to the job: coarse (80–100) for stripping old paint or leveling heavy joint compound, medium (120–150) for smoothing repairs, and fine (180–220) for final feathering before primer.
You’ll pick grit based on wall texture and desired paint sheen, and choose tools that keep surfaces flat and consistent.
- Use a sanding block for hand control and even pressure
- Employ a pole sander for larger, flat walls
- Try a sanding sponge for contours and slight texture
- Use a vacuum-assisted sander to reduce dust
- Keep a tack cloth for dust removal before priming
Feather Edges and Blend Repairs Into the Wall
As you finish sanding repairs, feather the edges so the patched area tapers smoothly into the surrounding wall; this prevents visible ridges under paint and helps the new finish read as part of the surface.
You’ll use a fine sanding block or sponge, angling strokes outward to thin the compound edge. Check progress by running your hand lightly across the patch and viewing from an angle.
For seamless wall blending, blend texture and sheen as needed—lightly scuff surrounding paint if required. Clean dust, inspect in good light, and touch up minor highs.
Proper edge feathering makes the repair disappear under paint.
When to Reapply Compound and Drying Times Between Coats
If the patch still feels soft or shows shrinkage, let it fully dry before adding another coat — otherwise you’ll trap moisture and invite cracking. Check touch, time, and temperature: thin coats dry faster; heavy fills need 24–72 hours. Match compound type to the job; drying varies by product and paint types you’ll use later. Also consider color selection only after surface is stable.
Let patched areas fully dry before recoating—thin layers dry quicker; heavy fills may need 24–72 hours.
- Light sanding between coats for adhesion
- Wait for no tack before reapplying
- Use fans or mild heat to speed drying
- Record ambient humidity and temps
- Thin layers build strength faster
Prime Patched and Repaired Areas for Adhesion
Before you paint, prime all patched and repaired areas so the paint will bond evenly and the finish won’t flash or soak in differently. You’ll seal joint compound and repaired spots with a quality primer to promote paint adhesion and prevent sheen or color shifts.
Lightly sand repaired spots, remove dust, and apply a thin, even coat of primer; use a brush for edges and a roller for broader areas. Once dry, do a texture comparison between primed patches and surrounding wall to confirm uniformity.
If mismatch persists, scuff and add a second primer coat before proceeding to topcoat.
Troubleshooting: Bubbling, Ridges, Seams, and Final Checklist
When you start seeing bubbling, ridges, or seam lines, act quickly to diagnose the cause so the final coat looks smooth and professional. Common culprits include trapped moisture, improper priming, overworking wet compound, or drywall tape that wasn’t fully embedded.
You’ll inspect, fix, and prevent issues before choosing painting techniques or finalizing wall color selection. Sand and reapply compound where needed, dry thoroughly, and prime repaired spots. Check humidity and substrate stability.
- Scrape loose material and sand smooth
- Use a high-quality primer on repairs
- Re-tape seams if tape lifts
- Allow full drying time
- Test paint finish on a patch
Frequently Asked Questions
Can I Smooth Walls in High-Humidity Climates Without Mold Issues?
Yes — you can. You’ll prevent mold by drying surfaces, using mold-resistant primer, and installing moisture barriers where needed. You’ll apply proper ventilation, dehumidifiers, and mold prevention techniques before smoothing and painting for safe results.
Are There Eco-Friendly Compounds and Primers for Smoothing Walls?
Yes — you can use eco friendly primers and natural smoothing compounds; you’ll find low-VOC, clay- or lime-based fillers and plant-based primers that bond well, reduce fumes, and support moisture control for healthier, greener walls.
How Do I Handle Radiators or Built-In Shelves When Skim Coating?
You’ll protect radiators, use radiator concealment panels or remove covers, skim around pipes, and feather joints; for shelf integration, tape edges, build fillets, and blend skimcoat into shelves so progressions read seamless and durable.
Can Wallpaper Be Skim Coated Over Instead of Removed?
About 60% of homeowners underestimate prep time, so no—you shouldn’t skim coat over wallpaper. You’ll complicate surface preparation and risk adhesion failures; prioritize wallpaper removal, then skim coat for a durable, smooth finish.
What Safety Gear Is Required for Sanding Lead-Painted Surfaces?
You need protective gear: a properly fitted NIOSH-approved respirator, disposable coveralls, gloves, and eye protection; use lead paint safety practices like wet sanding, containment, HEPA vacuuming, and follow local lead abatement rules.
Conclusion
You’ve got the tools and steps to turn bumpy, tired walls into a smooth canvas ready for paint. Take your time evaluating damage, feather and blend compound like a sculptor smoothing clay, let each coat dry fully, and prime repaired spots for lasting adhesion. Protect floors and trim, sand lightly between coats, and troubleshoot small defects early. Follow the checklist, and your walls will look crisp and professional when the paint goes on.