How to Touch Up Flat Wall Paint Without Marks
You can make flat paint touch-ups nearly invisible by first cleaning and lightly sanding the damaged spot, then filling holes or gouges and priming bare or porous patches. Match color and sheen using leftover paint or a test pot, thin slightly for easier feathering, and apply thin coats with a small roller or quality brush, blending outward until seamless. Check the repair in different light and after it’s dry — keep going and you’ll find tips for perfect results.
Quick Step‑By‑Step: Touch Up Flat Paint Without Visible Marks
If you want a seamless repair, start by cleaning the spot and removing any loose paint or dirt so the new coat will adhere evenly.
Next, sand lightly and feather edges to blend; surface preparation guarantees texture matches. Wipe away dust, then apply primer only if the patch absorbs differently.
Sand lightly and feather edges for a seamless blend; wipe dust away and prime only if absorption differs.
Test color matching by rolling a swatch or brushing a small area, comparing when dry.
Use a small brush or mini-roller, stippling into surrounding paint to avoid lap marks. Let layers dry fully between thin coats.
Finally, step back under varied light to confirm the repair blends before declaring it finished.
When to Repair vs Repaint the Whole Wall?
If the damage is limited to a few small chips or nail holes, you’ll usually repair just those spots.
But when patches would be highly visible, the paint is very old, or the color has faded or changed, you’ll probably need to repaint the whole wall for a uniform look.
Consider scope of damage, patch visibility risk, and paint age and color before you start.
Scope Of Damage
How extensive is the damage, and will a touch-up actually blend in? You’ll assess chips, scuffs, and stains by size, frequency, and location. Small isolated blemishes often merit touch-ups; widespread peeling, multiple repair spots, or mismatched sheen mean a full repaint.
Consider color psychology—bright accents draw attention to flaws, while muted neutrals hide them—plus interior lighting, which can amplify differences. Check from different angles and distances.
If repairs will sit in focal areas or under strong light, repainting the whole wall yields uniformity. Choose the approach that minimizes visible contrast and matches the room’s visual priorities.
Patch Visibility Risk
When you repair a spot on flat paint, consider how noticeable that patch will be from typical viewing angles and distances; small, out-of-sight fixes often disappear, but patches near focal points or under bright light will draw attention. You’ll weigh color consistency and texture matching against effort: if a patch sits in a focal area, or multiple spots cluster, repainting the whole wall usually wins. Use the table to judge risk quickly.
| Visibility | Fix? | Action tip |
|---|---|---|
| Low | Repair | Spot blend, feather edges |
| Medium | Repair/repaint | Test small area |
| High | Repaint | Full wall for uniformity |
Paint Age And Color
Why does paint age matter for deciding between a spot repair and a full repaint? You’ll judge whether aging, fading, or grime will defeat color matching and leave a visible patch.
If paint age is low and you have the original can, spot repair works.
If walls faded unevenly, match fails and a full repaint’s better.
- Recent paint — easy color matching with same batch.
- Moderate age — test a small patch to check sheen and hue.
- Heavy fading — full repaint avoids ghosted spots.
- Unknown history — consider repainting for uniformity.
How Flat Paint Behaves : And Why Touch‑Ups Show
Flat paint soaks into and hides surface imperfections, but it also diffuses light unevenly, so any new coat will usually look different than the old one.
You’ll notice matte surfaces absorb light and mask gloss variations, which helps color psychology by making hues feel softer and calmer. Yet, that same absorption highlights texture differences.
When you touch up, the fresh layer sits differently on cured paint; variables like film thickness and paint durability change how light reflects.
To minimize visible patches, feather edges, match application method, and blend thin layers so the repaired area integrates with the surrounding finish.
How to Tell If You Have the Original Color and Sheen
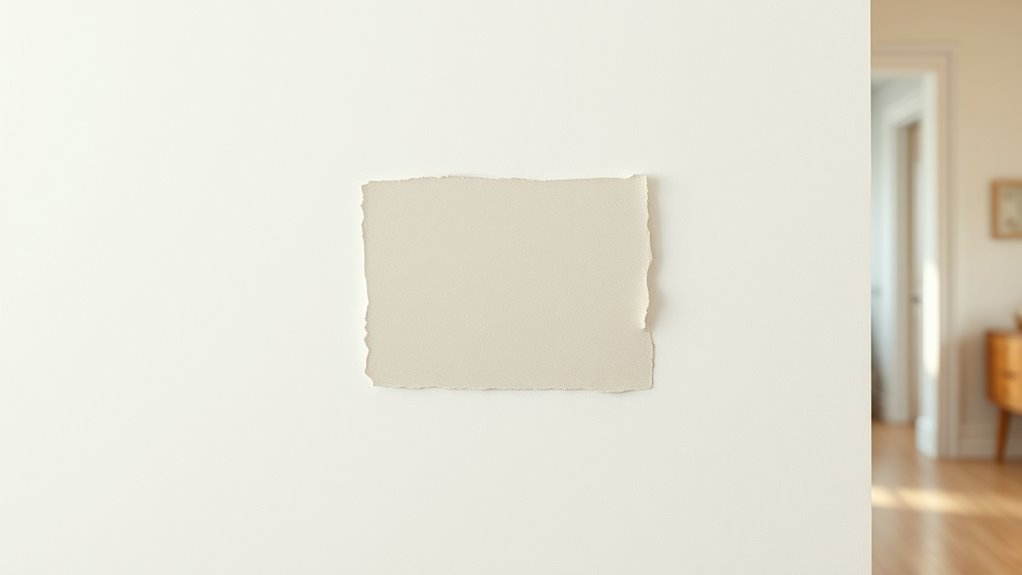
Before you touch up, you’ll want to confirm the original color by comparing paint swatches to the wall in natural light. Check the paint sheen too—flat, matte, or low-luster will reflect differently and affect how a patch blends.
If the swatch and sheen don’t match, get a color match and the same finish before you start.
Match Color Swatches
If you’re not sure whether the paint on your wall is the original color and sheen, start by comparing small swatches under the same light the room gets most often. You’ll check color matching and sheen consistency quickly by placing samples beside the wall, letting them dry, and viewing from different angles.
Try this simple process:
- Paint tiny swatches from leftover cans or test pots.
- Let swatches cure fully; wet paint can mislead.
- Observe at eye level and from a distance in natural and artificial light.
- Photograph swatches for comparison and to confirm a match later.
Check Paint Sheen
When you’re matching paint, don’t forget to compare sheen as well as color—sheen affects how light reflects and can make even a perfect color look wrong. Check a hidden area with the original paint and your sample under the same light. Rub a small spot to see if surface sheen consistency and Paint durability match; higher sheen hides marks and lasts longer. If unsure, test a 2-inch square and let it dry. Use this quick reference:
| Area | Original Sheen | Sample Sheen |
|---|---|---|
| Trim | Eggshell | Satin |
| Wall | Flat | Flat |
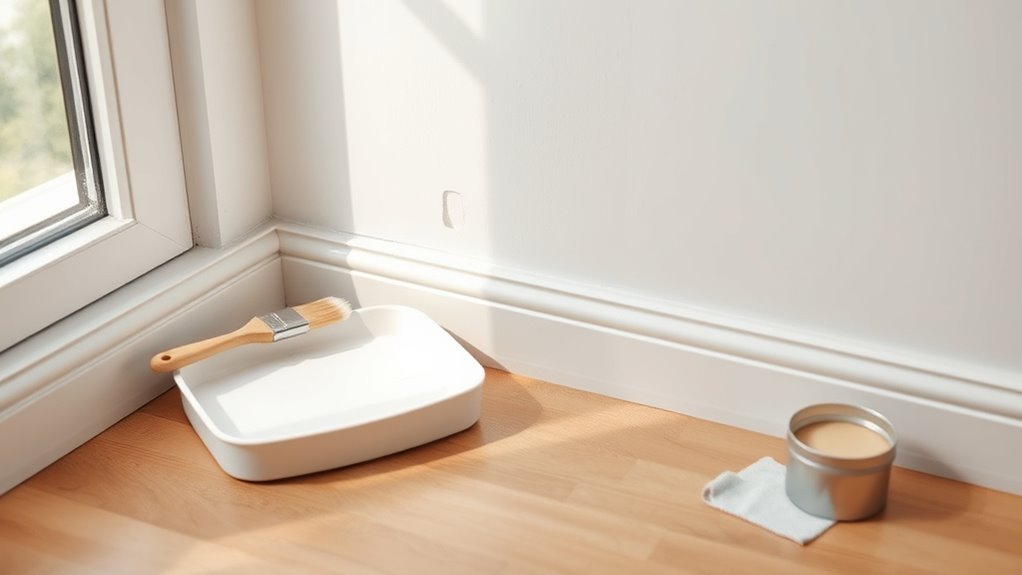
Tools You’ll Need for a Seamless Flat‑Paint Touch‑Up
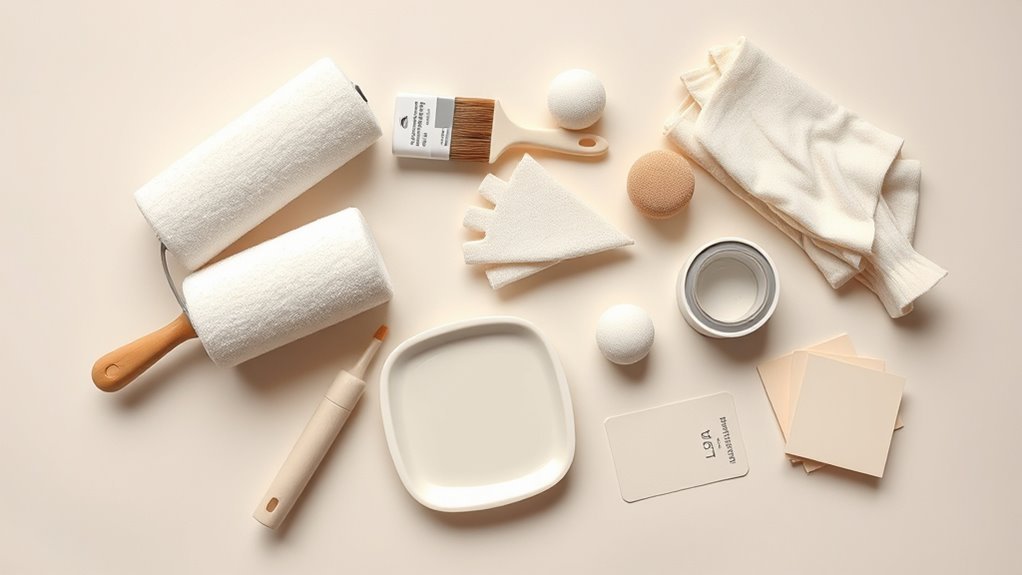
Because a few well-chosen tools make the job quicker and neater, gather them before you start. You’ll want items that help you prep, apply, and blend without damaging surrounding finish.
Gather a few quality tools first — prep, apply, and blend carefully to protect the surrounding finish.
Think about how touch-ups affect color psychology in a room and choose tools that preserve paint durability.
- High-quality angled brush for edges and small spots.
- Mini foam roller to match flat texture over larger patches.
- Fine-grit sandpaper and a sanding block for smooth gradations.
- Clean cloths, painter’s tape, and a small tray for tidy work.
Keep tools clean and within reach for seamless touch-ups.
Choose Paint: Match Color and Flat Sheen
Before you start touching up, make sure you’ve matched the paint color exactly by comparing chips or using a sample from the original can.
Also confirm the finish is truly flat—using a paint with a different sheen will make the repair stand out.
If you’re unsure, test a small patch and view it in the room’s normal lighting.
Match Paint Color Precisely
If your patchwork is going to disappear, you’ll need an exact color match and the same flat sheen as the surrounding wall. You won’t rely on memory; you’ll sample, compare, and adjust for color consistency and sheen matching before you buy paint. Follow these steps:
- Take a small peeled chip or a clear photo in natural light to the store for a lab match.
- Test a few matched samples on the wall; let them dry fully.
- Compare samples at different times of day to confirm color consistency.
- Blend small amounts if needed, mixing until the hue and flat appearance align.
Confirm Flat Sheen Consistency
When you’re matching paint, don’t overlook sheen — a flat finish reflects very little light, so even a perfect color match can stand out if the gloss differs. Check the original can or test spot to confirm flat sheen consistency before you buy.
If you can’t find the exact flat, ask the supplier to adjust base and additives rather than using a satin or eggshell.
For tricky blends, practice color blending on a scrap board, then compare under the room’s lighting at different times.
Apply touch-ups sparingly and feather edges to keep the uniform flat appearance across the wall.
How to Test a Color Match Before You Start
How do you know the new paint will blend with the old? Test small patches to confirm color consistency and check paint durability. Apply samples where they’ll be inconspicuous and view them in different light.
- Clean a tiny spot, apply a thumb-sized swatch, let it dry fully.
- Compare swatch at morning, midday, and evening light for tone shifts.
- Rub the dried swatch gently to assess durability and adhesion.
- If mismatch appears, get a tint adjustment from the store or sample a different batch.
Only proceed when color and finish match and the sample resists light wear.
Clean the Repair Area So Paint Will Stick
Before you paint, make sure the patch is clean so the new paint will bond properly.
Wipe greasy spots with a mild degreaser or a mix of dish soap and water, then rinse and let it dry.
Finally, remove dust and loose debris with a soft brush or vacuum before you coat the area.
Surface Degreasing Techniques
Since oils and grime will keep fresh paint from adhering, you should thoroughly degrease the repair area before priming or painting.
For good surface preparation, focus on the wall texture so cleaners don’t damage patterns. Use gentle, effective methods that won’t saturate drywall.
- Mix mild dish soap with warm water; wipe with a soft cloth following texture.
- Use trisodium phosphate substitute sparingly for stubborn grease; rinse thoroughly.
- Try a microfiber pad and a circular motion to lift residues without flattening texture.
- Finish with clean water wipe and let the area dry completely before priming or painting.
Dust And Debris Removal
Want the paint to adhere and look seamless? Start by removing dust and debris from the repair area: vacuum with a soft brush attachment, then wipe with a slightly damp microfiber cloth to pick up fine particles. Let the wall dry completely before sanding or priming.
Match the original wall texture when you sand or blend edges so touch-ups don’t stand out. Clean surfaces improve paint durability and help new paint bond evenly.
If dust returns, tack cloths remove remaining grit. Take your time—clean preparation guarantees touch-up paint lasts and visually blends with the surrounding finish.
Remove Loose Paint, Dirt, and Grease Without Damage
Even if the paint around your repair looks mostly intact, you should remove any loose flakes, dust, or grease so new touch-up paint sticks and blends properly. Gently scrape loose paint with a plastic scraper, avoiding damage to decorative accents or wall decals nearby.
Even if paint looks fine, remove loose flakes, dust, and grease so touch-up paint adheres and blends smoothly.
Wipe dust with a dry microfiber cloth, then clean grease with a mild dish soap solution and a soft sponge. Rinse and let dry fully before priming or painting.
- Test cleaning method in an inconspicuous spot.
- Use gentle pressure; don’t sand aggressively.
- Replace stained caulk or trim if needed.
- Keep tools clean and residue-free.
Patch Small Dents and Nail Holes the Right Way
Before you fill dents or nail holes, make sure the area’s clean and dry so the patching compound will adhere.
Use a lightweight spackle, smooth it flush, and sand once it’s set so the repair sits level with the wall.
Match the paint’s flat finish when you touch up so the patched spot blends in with the rest of the surface.
Prep Surface Properly
Although small dents and nail holes might seem insignificant, they’ll show up after you touch up flat paint unless you patch them correctly. You need clean, dry surfaces: wipe dust, remove loose paint, and sand edges smooth. Good surface preparation guarantees filler bonds and paint consistency looks even.
Use lightweight spackle for small defects, press it in, then feather edges with fine sandpaper. Prime patched spots if porous.
- Clean area thoroughly.
- Apply spackle; smooth with a putty knife.
- Sand gently; remove dust.
- Prime if needed for uniform absorption and adhesion.
Match Paint Finish
When you want your touch-up to disappear, match the flat paint’s texture and sheen so the patched spot blends with the surrounding wall. Before filling small dents and nail holes, test the original finish by brushing a tiny amount of fresh paint nearby. Use the same flat formula or a manufacturer-matched sample to keep sheen consistent.
Feather edges with a small brush or sponge to mimic stipple. Consider the room’s color palette when selecting touch-up paint and confirm paint durability for high-traffic areas.
Let each thin coat dry completely, then reassess texture and apply another light layer if needed.
Fill Larger Gouges and Match Wall Texture
If you’ve got larger gouges, you’ll want to fill them and recreate the surrounding texture so the repair blends in seamlessly. Choose a filler suited to the substrate, apply with a putty knife, and shape it to match the wall color area. Let it cure fully before proceeding.
Fill larger gouges with suitable filler, shape to match surrounding texture, let cure, then paint for a seamless repair
- Pick a joint compound or spackling that accepts paint.
- Apply in layers, building to the original surface level.
- Recreate the texture pattern with a brush, sponge, or texture tool while compound is damp.
- Prime the patch, then touch up with matching flat paint for an invisible repair.
Sanding Tips: How Much to Sand for a Smooth Blend
Once your filler is fully cured and primed, sand the patch so it sits flush with the surrounding paint—light, controlled sanding is what makes the repair disappear. Use fine-grit sandpaper (220–320) and a sanding block to avoid low spots.
Sand just enough to remove primer ridges and texture peaks; over-sanding exposes filler. Check color consistency by viewing the area after sanding and before paint—scuffs can look different under various lighting effects, so inspect from multiple angles and distances.
Wipe dust with a tack cloth, re-prime tiny bare areas, and only stop when the patch reads flat and even.
Feather the Edges So the Patch Disappears
After sanding, smooth the shift by thinning out excess paint at the patch edges so they don’t stand proud.
Use a lightly loaded brush or roller and blend with short, light strokes that feather the paint into the surrounding wall.
Keep your movements gentle and build up thin layers until the repair vanishes.
Smooth The Transition
While the patch is still slightly damp, blend its edges into the surrounding paint by feathering outward with a soft brush or roller, working in light, overlapping strokes so the repaired area fades smoothly into the wall. You’ll preserve color psychology impacts and keep wall art areas uniform.
- Work from the center outward, reducing pressure as you reach existing paint.
- Use a dry, clean brush to lightly drag and soften any ridges.
- Step back often to spot visible seams under different light angles.
- If needed, reapply tiny, feathered taps rather than heavy strokes until the patch vanishes.
Thin Out The Paint
Now that the patch edges are softened, thin the paint at the perimeter so the repaired spot melts into the surrounding finish. Work with a lightly loaded brush or damp sponge, dragging paint outward to feather the edge. You’ll reduce visible ridges and match surface sheen, preserving paint durability by avoiding thick buildup that flakes later.
Think about color psychology: seamless shifts keep rooms calm and consistent, while obvious patches draw attention.
Keep movements short and controlled, wiping excess onto a rag. Let each thin layer dry fully before evaluating. Repeat only as needed; multiple thin coats beat one heavy swipe.
Blend With Light Strokes
When you feather the edges with light, controlled strokes, the patch will disappear into the surrounding wall instead of standing out. You’ll blend gradually, matching texture and sheen so touch-ups vanish. Consider color psychology: subtle gradients read as intentional, not repair.
Confirm the wall is free of dust from wall cleaning before you start. Use a small brush or roller, lighten pressure near the perimeter, and work outward.
- Load minimally to avoid drips.
- Tap and roll in thin layers.
- Check under different lighting.
- Let each pass dry before adding more.
Primer for Flat Paint: When and Which Type to Use
If your flat-painted wall shows stains, patching, or bare spots, you’ll usually need a primer before applying touch-up paint to guarantee even coverage and adhesion.
Choose a stain-blocking primer for nicotine, water marks, or marker; use a bonding primer on glossy patches or smooth surfaces.
For porous repairs or fresh drywall, pick a high-adhesion primer to improve paint durability and prevent flashing.
Match primer type to wall textures—thin-surface primers for smooth areas, thicker ones for textured walls to fill tiny voids.
Apply one even coat, let fully dry, then spot-paint; don’t skip priming when substrate differs.
Thin Paint Safely to Improve Blending (When Needed)
After priming patchy or repaired areas, you may still see subtle differences in sheen or texture where the new paint meets the old; thinning the touch-up paint can help it feather into the surrounding finish so those edges disappear. You’ll adjust paint consistency sparingly to avoid runs and altered color. Test small blends, because dilution affects drying and color matching. Use a clean container and fine water or manufacturer-recommended thinner. Work quickly and in light coats.
Thin touch-up paint slightly and feather in light coats—test blends, match gloss, and let fully dry before judging.
- Add tiny amounts, stir, retest.
- Match original gloss and pigment.
- Feather edges with light pressure.
- Let full dry before re-evaluating.
Choose Brushes and Applicators for Flat Paint
Because flat paint hides imperfections but shows brush marks, pick tools that lay down smooth, even coats without texture or streaks. You’ll want a high-quality synthetic-bristle brush for latex flat paints—soft, tapered filaments reduce drag and leave a feathered edge.
For cutting in, choose a 2–2.5″ angled sash brush to control lines near trim.
Use foam brushes or pads sparingly for tiny touch-ups to avoid stipple.
Consider tools recommended for eco-friendly paints, since low-VOC formulas behave differently.
Remember color psychology: matching sheen keeps color perception uniform, so your applicator choice preserves the intended tone.
When and How to Use a Small Roller to Match Texture
When you need to blend a small repaired area into the surrounding flat finish, reach for a small roller that matches the wall’s texture and nap—typically a 1/4″ to 3/8″ microfiber or low-nap foam for smooth walls, and a slightly thicker 3/8″–1/2″ nap for light orange peel or subtle texture.
Use this roller technique to apply thin, even coats and avoid overworking the spot. Lightly feather the edges, keep paint load minimal, and roll in the same pattern as the surrounding wall for consistent texture matching.
Follow these steps:
- Prep and prime small patch.
- Load roller sparingly.
- Lightly roll center to edge.
- Blend edges, let dry.
Brush Technique: Strokes, Direction, and Avoiding Lap Marks
Start with light pressure on the brush so you don’t overload the area.
Match the direction of your strokes to the surrounding paint to keep the finish uniform.
Feather the edges gently to blend and prevent lap marks.
Start With Light Pressure
Although it feels counterintuitive, press lightly as you load the brush so you can control paint flow and avoid excess that causes drips or visible lap marks. You’ll keep edges soft and reduce overlap that highlights color fading or weakens paint durability. Use gentle, confident strokes and let the brush do the work; heavy pressure splays bristles and creates ridges.
- Wipe off excess on the can rim to prevent blobs.
- Start with short, feathered strokes to blend.
- Maintain a consistent, light fingertip grip.
- Pause to inspect for shine differences before more paint.
Match Stroke Direction
Keep the same light touch as you move from loading the brush into matching your stroke direction; consistent pressure won’t fight the paint’s leveling and helps hide seams.
You should follow the existing brush pattern—vertical, horizontal, or a subtle crosshatch—so your touch-up blends with surrounding strokes. Work outward from the repair, maintaining the same stroke length and speed you see on the wall. That preserves color consistency and reduces visible overlap.
Use fewer strokes rather than heavier ones; that protects paint durability by avoiding rework. Step back often to check alignment and stop when the repaired area visually disappears.
Feather Edges Gently
When you feather the edges, work light and fast so the wet paint thins out at the perimeter and melts into the surrounding finish. You’ll mimic existing strokes and avoid lap marks by blending from the center outward, keeping brush hairs barely loaded.
Consider color psychology—lighter shades reveal seams more, so be extra gentle. Proper feathering preserves paint durability by preventing thick ridges that crack or peel. Follow these focused steps:
- Load sparingly and tap off excess.
- Stroke with existing direction, small overlapping passes.
- Soften edge with barely-there, long strokes.
- Inspect in different light, touch up promptly.
Roller Technique: Nap Length, Loading, and Edge Blending
Before you roll, pick the right nap: shorter naps (1/4″–3/16″) work best for smooth flat walls, while slightly thicker naps help if the surface has light texture. You’ll consider color psychology when matching sheen and note paint durability—both affect final appearance. Load the roller evenly, roll off excess on a tray, and work in a “W” pattern, finishing with light passes to blend. Feather the edges by reducing pressure near edges. Use the table below for quick reminders.
| Step | Tip |
|---|---|
| Nap | 1/4″–3/16″ smooth |
| Loading | Even, not dripping |
| Blending | Light feather strokes |
| Finish | Match sheen and edges |
How Many Thin Coats to Apply and Drying Times
Although thin coats take longer overall, they dry faster between layers and give you a smoother, more even finish, so plan on applying two to three light coats instead of one heavy one.
Wait the manufacturer’s recommended recoat time—often 30 minutes to 2 hours—before the next coat. Humidity and temperature change drying times; lower temps slow drying.
Keep mixed paint sealed to avoid skinning and label it clearly for future touch-ups; color mixing records help replicate shade later.
Use a light roller or brush for thin, even layers and avoid overworking.
- Apply first thin coat.
- Wait recommended time.
- Inspect under good light.
- Apply second (and third if needed).
Blend New Paint Into Old Without Overlap Lines
To avoid visible touch-up marks, you’ll need to match the paint’s tone precisely so the repaired spot reads the same as the surrounding wall.
Feather the edges of your touch-up with a light brush or damp sponge so the new paint tapers into the old instead of forming a hard line.
Use the proper roller technique—light pressure, a small-nap roller, and a little overlap into the existing paint—to blend everything smoothly.
Match Paint Tone Precisely
When you’re matching a flat paint tone, focus on subtle blending so the new patch disappears into the old finish; that means feathering the edges, using the same sheen, and working in thin layers until the color reads uniform from different angles. You’ll prioritize color consistency and proper surface preparation before touching up.
Test small swatches and let them fully dry; lighting shifts reveal mismatches. Use the same brand and batch when possible, or adjust tint slightly. Work outward from the repair, checking from multiple viewpoints.
- Test swatches under room light
- Clean and prime the spot
- Thin coats, dry between layers
- Compare from different angles
Feather Edges Smoothly
After you’ve matched tone and built thin, even layers, focus on feathering the edges so the new paint melts into the old without a visible ridge. Work outward from the repair with a slightly loaded brush, tapering pressure so strokes thin at the perimeter. Watch paint drying times; slow drying lets you blend better. Consider color psychology—edges catch light and affect perceived uniformity—so keep strokes consistent. Finish with light, overlapping passes that vanish into the wall. Use the table below for quick reference.
| Step | Tip |
|---|---|
| 1 | Thin edges |
| 2 | Light pressure |
| 3 | Match timing |
| 4 | Observe light |
| 5 | Final blend |
Use Proper Roller Technique
Although rolling seems simple, your technique makes the difference between a seamless repair and visible overlap lines. You’ll want to match color consistency by mixing fresh paint from the same batch and loading the roller evenly.
Pay attention to roller ergonomics: use a comfortable handle and light pressure to avoid lap marks. Work wet edges quickly so new paint blends into old.
- Roll in a “W” pattern, then fill without pressing hard.
- Keep a wet edge by working small sections.
- Reload the roller lightly and roll off excess.
- Feather the last strokes outward for a smooth finish.
Touch Up Under Different Lighting Conditions
If you paint in only one light, you’ll often miss how touch-ups look across the room; different light sources and angles reveal variations in sheen and texture that your eye can’t catch under a single lamp.
Check touch-ups at several times: daylight, overhead, and side lighting to judge lighting contrast and color perception.
Move a portable lamp low and high to expose flaws.
Step back and view from multiple angles, then let paint dry and re-evaluate—wet paint hides mismatches.
If you still see differences, feather edges or apply a thin additional coat until the repaired area reads uniform.
Match Texture on Painted Popcorn or Textured Walls
When you’re touching up painted popcorn or textured walls, matching the texture matters as much as matching the color because uneven stipple or spray patterns instantly give repairs away. You’ll focus on texture matching and careful paint blending so the fix disappears.
- Feather edges of the damaged area and remove loose bits.
- Test spray or stipple on cardboard to match the pattern and density.
- Apply texture with the chosen tool, let it dry, then do small paint blending strokes.
- Step back under normal lighting to confirm the texture and sheen match before finishing.
Handle Tricky Areas: Trim, Corners, and High‑Traffic Walls
When you touch up near trim, use painter’s tape and a thin shield to protect adjacent woodwork and keep crisp edges.
For corners, feather your brush strokes and blend a little paint into both planes so the repair disappears from normal viewing angles.
On high-traffic walls, feather wider and consider a slightly lighter mist coat to match sheen and hide wear.
Protecting Adjacent Trim
Because trim, corners, and high-traffic walls sit right next to the area you’re touching up, you’ll need to shield them carefully to keep new paint from splattering or bleeding over; focus on protecting adjacent trim and preserving your color matching. Prep by cleaning surfaces and taping crisp edges. Use small tools and controlled strokes near trim to avoid overlap.
- Use painter’s tape sealed with a putty knife for sharp lines.
- Cover trim with thin plastic or paper for larger repairs.
- Cut in with an angled brush for tight spots.
- Remove tape while paint is tacky to prevent peeling.
Blending Corners Seamlessly
If you’re touching up paint near corners, trim, or busy hallways, focus on feathering and thin layers so the repair melts into the existing finish. Start by ensuring color matching: test swatches in the corner light, let them dry, and compare.
Tape trim edges tightly and use a small angled brush for control. Apply thin coats, feathering outward from the repair into both planes of the corner to avoid lap marks.
For high-traffic areas, slightly dull sheen with a light scuff pad before painting. Finish with gentle edge blending strokes and allow full cure before normal use.
Touching Up High‑Gloss Trim Next to Flat Walls
While flat walls hide brush strokes, high-gloss trim shows every edge and overlap, so you’ll need steady hands and careful masking to keep the finishes distinct. You’ll prep by cleaning trim and scuffing gloss lightly, matching paint sheen, and evaluating wall texture so touch-ups blend.
Use painter’s tape along a crisp edge, a small angled brush, and minimal paint.
- Tape: protect flat wall and follow trim profile.
- Cut-in: use light, controlled strokes toward trim.
- Feather: remove excess paint immediately.
- Inspect: under angled light for runs or overlap.
Quick Fixes for Common Touch‑Up Mistakes
When touch-ups go wrong, don’t panic—you can fix most mistakes quickly with the right steps. If brush marks appear, gently sand the area with fine grit, wipe clean, then reapply thin, even coats to blend edges.
For drips, scrape after drying, sand smooth, and feather the surrounding paint to avoid texture jumps. If color looks off, consider how color psychology affects perception—warm tones read brighter nearby, cool tones recede—so adjust lighting or add a thin glaze rather than heavy repainting.
Preserve paint durability by using proper primer and matching sheen for lasting, invisible repairs.
How to Tell If a Touch‑Up Is Still Visible (And Next Steps)
Although a touch-up might look fine at arm’s length, inspect it under different lighting and from multiple angles to decide whether it’s still visible. Look for differences in Color consistency and Texture matching that give the repair away. If you spot a mismatch, decide whether a minor tweak or a recoat is needed.
- Check edges: move side to side to reveal sheen or texture breaks.
- Compare wet vs. dry finish to judge true Color consistency.
- Feel the area gently to detect Texture matching issues.
- If still visible, blend surrounding paint or redo the whole section for uniformity.
Seasonal and Humidity Considerations for Repairs
If your touch‑up still stands out, consider how season and humidity affect drying and finish—temperature and moisture change how paint levels and how sheen appears.
You’ll face seasonal challenges: cold slows curing, heat speeds it, and fluctuating temps can leave edges visible.
Humidity impacts blending; high humidity extends open time and can cause a milky finish, low humidity can make paint dry too fast and brush marks show.
Pick a mild, dry day if possible, control indoor climate with heat or AC, and wait longer before evaluating.
Reassess in the season you’ll normally occupy the room for best match.
Using Leftover Paint and Storing Small Quantities Correctly
Because you’ll often end up with small amounts after a touch-up, save them properly so you can fix future chips without repainting the whole wall. Keep leftover samples in airtight containers, label them with room, finish and date, and note color psychology details if you matched a specific hue. Use eco-friendly paints when possible to reduce waste impact. Store cans upside down for a tight seal and keep in a cool, dry spot away from freezing.
- Use small, airtight jars or sample pots.
- Label with formula and room.
- Keep a swatch for color psychology reference.
- Store upright in stable temperatures.
When to Call a Pro: Complex Textures or Faded Walls
When a wall’s texture is complex or the paint has faded unevenly, call a pro—matching stippled, knockdown, or Venetian plaster and blending sun‑bleached sections takes skill and specialized tools you likely don’t have.
You should hire a pro when texture complexity prevents seamless feathering or when color fading covers large areas, since pros can replicate patterns and match sheen. They’ll assess substrate issues, recommend repainting versus spot repair, and use spray rigs or texture guns to blend joins.
If visible seams, mismatched patches, or widespread fading persist after DIY attempts, stop and get a quote to avoid costly redo.
Prevent Future Scuffs: Cleaning, Barriers, and Touch‑Up Strategy
Even if you hire a pro for tricky textures or large faded areas, you can cut down on future touch‑ups by keeping the wall clean, adding simple barriers, and planning a touch‑up strategy now. You’ll protect paint durability and respect wall texture by doing small, consistent actions.
Even small, regular steps—cleaning, adding barriers, and keeping touch‑up supplies—save paint and preserve texture.
- Wipe dirt and oils gently with a damp microfiber cloth weekly to avoid buildup that weakens finish.
- Install chair rails, bumper guards, or washable wall strips where contact is frequent.
- Keep a labeled sample of matched paint and note finish and batch for quick touch‑ups.
- Inspect quarterly and repair tiny scuffs immediately to prevent spreading.
Cost‑Effective Supplies: What to Buy and Where
If you want reliable results without overspending, focus on a few versatile, budget-friendly supplies you’ll actually use. Buy a small sample pot of matching flat paint, a mid-density foam roller, a 2–3″ angled brush for edges, and disposable trays.
Add fine-grit sandpaper, a small putty knife, and painter’s tape. Choose water-based formulas for easy cleanup and consistent painting techniques.
Shop big-box stores for value, local paint shops for custom color matching, and online for sample pots.
Consider how color psychology affects touch-up visibility—softer hues hide imperfections more than stark contrasts.
Before‑And‑After Examples That Actually Worked
Now that you’ve got the right supplies, let’s look at real before-and-after examples that show what works — and what doesn’t — for touching up flat wall paint. You’ll see subtle fixes that preserved color psychology and bold fixes near wall art that kept contrast consistent.
Here are four concise examples you can recreate:
- Small scuff: feathered touch-up blended perfectly after drying.
- Patch from hanger: primed then matched, no halo visible.
- High-traffic strip: skimmed, sanded, full-width retouch avoided streaks.
- Accent corner: matched sheen and color, preserved surrounding art placement.
Study each and copy the method that fits your wall.
Quick Pre‑Work Checklist Before You Start
Before you pick up a brush, take a few minutes to prep: clear the area, gather your tools, and make sure the room lighting and temperature are right for painting.
Check the wall for dust, grease, and flaking; wipe and sand lightly.
Move or protect furniture and any decorative accents so edges stay clean.
Lay down drop cloths and tape baseboards and trim.
Mix paint and test a small, inconspicuous spot to confirm color and sheen match, especially near wall murals or patterned areas.
Keep spare touch-up paint, a small brush, roller, and a damp cloth within reach.
Final Troubleshooting Cheat‑Sheet for Stubborn Marks
When a touch-up doesn’t blend or a stubborn mark refuses to budge, you’ll want a concise checklist to diagnose and fix the problem fast.
- Reclean the area gently; oils or residues block adhesion, so use a mild degreaser and let it dry.
- Feather the edges with fine sandpaper, then reapply thin coats; match sheen and temperature to prevent halos.
- If color still reads off, evaluate lighting and color psychology—warm bulbs can shift perceived hue; adjust or test at different times.
- Consider furniture rearrangement to hide minor flaws or change sightlines, or repaint the whole wall if blending fails.
Frequently Asked Questions
Can I Use Spray Paint for Touch-Ups on Flat Walls?
Yes — you can use spray paint for touch-ups on flat walls, but you’ll need precise color matching and careful application techniques; you’ll feather edges, work in thin coats, and test spray nearby to avoid noticeable texture differences.
Will Touch-Ups on Moisture-Prone Areas Hold up Over Time?
They’ll sometimes fail if you don’t prep properly; you’ll need moisture-resistant primers, proper touch up techniques, and excellent paint color matching to help them hold up over time, plus ventilation and addressing underlying damp sources first.
How Do Pets or Smoke Affect Touch-Up Visibility?
Like a fog settling on glass, pets and smoke make touch-ups stand out: pet hair traps grime and smoke residue dulls sheen, so you’ll need extra cleaning, degreasing, and possibly a full repaint to blend repairs.
Can I Touch up Painted Wallpaper Without Damaging It?
Yes — you can touch up painted wallpaper carefully, but you’ll risk damaging seams or paper. Test first, use minimal water, match paint for paint blending, and avoid aggressive wallpaper removal or scrubbing to preserve the surface.
Is It Safe to Touch up Walls Painted With Lead-Based Paint?
Think of a warning bell: no, it isn’t safe to touch up lead-based paint casually. You’ll need lead paint hazards precautions and safe touch up methods—containment, HEPA vacuum, wet scraping, and certified abatement help.
Conclusion
Touching up flat paint can feel like tiptoeing through a minefield, but with patience and the right technique you’ll blend repairs like a whisper. Match the color and sheen, feather edges, and use thin layers, sanding lightly between coats. Work in good light, keep tools clean, and step back often to check for halos. If a patch still reads obvious, repaint the whole wall—sometimes a fresh canvas is the only true fix.