How to Touch Up Wall Paint With Roller Properly
You can touch up wall paint with a roller by first cleaning and patching the area, then matching color and sheen exactly. Use a small, short‑nap roller that fits your wall texture, load it evenly, and roll from the center outward while feathering edges into the surrounding paint. Work quickly to keep a wet edge, apply thin coats, and let each dry before evaluating. Follow a few more steps and you’ll get a seamless, professional result.
Quick How-To: Touch Up Wall Paint in 5 Steps
If you’ve got a small scuff or a patchy spot, you can refresh the wall quickly using a roller and five clear steps.
First, clean and sand the area so paint adheres.
Start by cleaning and lightly sanding the spot so new paint grips the surface.
Second, apply primer to seal any stains and prevent color fading.
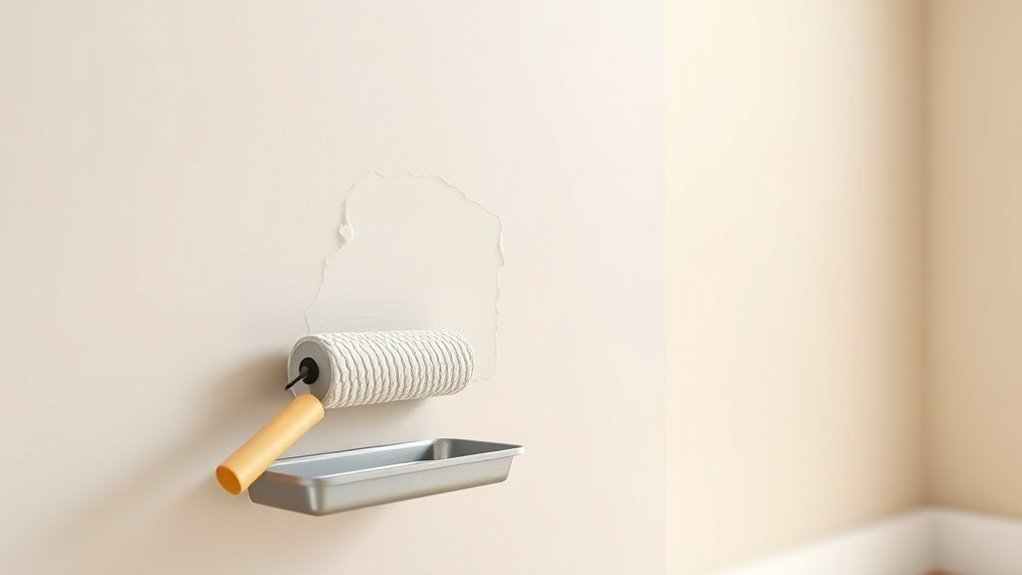
Third, load a mini roller with matching paint, working from the center outward.
Fourth, feather the edges to blend with surrounding finish, paying attention to texture matching so the repair disappears.
Fifth, let it dry fully and inspect under different light.
Repeat thin coats if needed until the repaired patch reads seamless.
When to Touch Up vs. Repaint the Whole Wall
If the damage is small—nail holes, scuffs, or a few chips—you can usually patch and touch up just those spots.
But if large areas are peeling, or the color has faded unevenly across the wall, you’ll want to repaint the whole surface for a uniform finish.
Consider how noticeable the mismatch will be from across the room before deciding.
When To Patch Versus Repaint
When deciding whether to patch a small blemish or repaint the whole wall, consider the size, number, and location of flaws alongside the age and sheen of the existing finish.
If flaws are isolated—nail holes, small dents—you’ll patch, sand, prime, and use targeted painting techniques with a small roller or brush to blend.
Choose patching when wall textures match and the finish is recent.
Repaint when blemishes are widespread, repairs would be visible, or the finish is worn unevenly.
Always test a touch-up area first; if it stands out, plan a full repaint for uniform results.
Extent Of Color Fading
Because faded paint can look patchy even when repairs are small, check how far discoloration stretches across the wall before deciding to touch up or repaint. You’ll want to evaluate Color consistency and Texture matching to avoid obvious repairs.
Consider these factors:
- Area affected: small spot vs. sweep of wall.
- Light exposure: direct sun causes gradual fading.
- Existing sheen and texture: can you match with same roller and technique?
- Paint age and availability: can you get the original batch or must you repaint?
If fading covers a large zone or you can’t match color and texture, repaint the whole wall.
Find the Exact Spots and Measure Repair Size
Before you grab the roller, walk the room and inspect the wall closely to locate every spot that needs touching up. Mark chips, scuffs, and streaks with pencil or low-tack tape so you won’t miss any while work is airing—remember paint fumes can linger, so plan ventilation.
Measure each damaged area: note width and height, and group nearby spots into single repair zones to save time. Record sizes on a sketch or your phone.
Measuring precisely helps you choose the right roller size and amount of paint, limits overworking surrounding areas, and respects color psychology by preserving desired visual balance.
Match Your Existing Paint Color Accurately
Bring a paint sample from the wall—like a chip or a small peeled-off piece—when you head to the store. Use a color-matching tool or app to get the closest formula, and ask the staff to mix a small test pot.
Then compare the swatch in the room light before buying enough paint for your repair.
Bring A Paint Sample
When you’re matching an existing wall, take a paint chip or small scraped sample to the store so they can scan and mix an exact color. Bring the sample in natural light and keep it flat. Explain any fading or previous touch-ups so staff account for color blending versus fresh tint. Note the paint branding if you want a direct reformulation.
- Carry a 1–2 inch chip or thin scraped paint flake.
- Photograph the area for reference under similar lighting.
- Ask for a test pot or small sample can.
- Label can with room and lighting notes for future touch-ups.
Use Color-Matching Tools
Although exact matches can be tricky, color-matching tools let you pinpoint and reproduce an existing wall color quickly and accurately. You’ll bring a small, clean sample—preferably a peeled paint chip or removable trim piece—to a store with a spectrophotometer.
The device reads pigments and suggests a formula, accounting for base color and undertones. Don’t forget paint sheen: match gloss level to avoid visible differences after touch-up. Ask the technician to tint a small test can, then roll a discreet patch and let it cure.
If it blends, buy enough to finish the area; otherwise adjust the formula.
Identify the Paint Finish (Sheen) for a Perfect Match
Since light reflects differently off each sheen, matching the finish is just as important as matching the color. You’ll verify color consistency by identifying whether your wall is flat, eggshell, satin, semi-gloss, or gloss before you roll.
To check sheen, use these steps:
- Inspect a small area under bright light for shine and texture.
- Compare with paint swatches labeled by sheen.
- Test a tiny patch with your touch-up paint and let it dry.
- Stand back and view from different angles to confirm finish matching.
Do this to avoid noticeable patches and achieve a seamless repair.
How Much Touch-Up Paint You Need
Before you start, estimate coverage so you don’t buy too much or run short. Measure the touched area, factor in roller waste, and allowance for mistakes. If you spot color bleeding or need paint scraping before rolling, add extra. Use this quick guide:
| Area (sq ft) | Estimated Ounces | Notes |
|---|---|---|
| 10 | 4 | Small patch |
| 25 | 10 | Multiple scuffs |
| 50 | 18 | Accent wall |
| 100 | 36 | Large repairs |
Buy a bit more than estimated, label leftovers, and store properly for future touch-ups to match sheen and color.
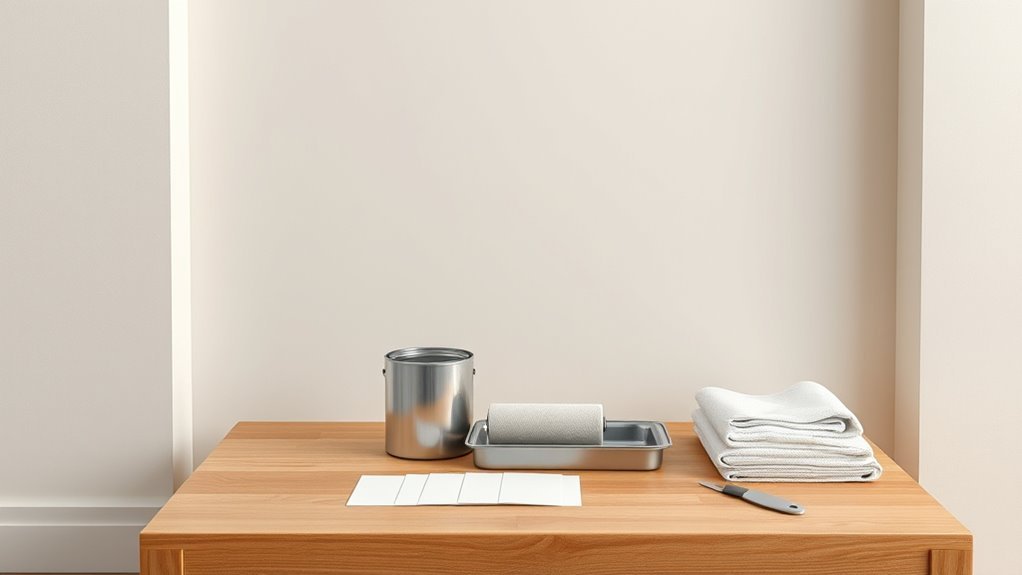
Essential Tools and Materials for Touch-Ups
When you’re ready to roll, gather a few key tools and materials so the job goes smoothly: a small quality roller (3/8″ to 3/16″ nap for most walls), a corresponding mini roller frame and tray, a sample-size can of matching paint, a clean angled brush for edges, painter’s tape, a light sanding sponge, tack cloth or damp rag, and disposable gloves. You’ll also want odor-safe rags and a mixing stick.
Consider color psychology when touching up high-visibility areas to maintain mood and contrast. Keep leftover paint for future touch-ups and paint recycling.
Consider how color affects mood in visible areas; save leftover paint for touch-ups and recycling.
- Roller cover
- Angled brush
- Sanding sponge
- Tray
Choosing the Right Roller for Small Repairs
When you’re doing small repairs, pick a roller with a short nap so it won’t leave texture that clashes with the surrounding wall.
Choose the roller material—microfiber, foam, or woven—based on your paint type and desired finish.
Testing a small patch first helps you confirm the nap length and material match the existing surface.
Roller Nap Length
Although it seems minor, choosing the right roller nap makes small touch-ups blend seamlessly with the surrounding finish. You’ll match nap length to wall texture so repairs disappear. Short naps suit smooth walls; longer naps handle light orange peel or eggshell textures. Consider ventilation to reduce paint fumes while you work.
1/4″ nap — best for ultra-smooth surfaces.
3/8″ nap — ideal for slight texture.
1/2″ nap — use for medium textures.
3/4″ nap — reserved for heavy texture only.
Test on a scrap area, feather edges, and keep strokes consistent for seamless results.
Roller Material Type
Now that you’ve matched nap length to texture, pick the roller material to control finish, linting, and paint pickup for small repairs.
You’ll choose synthetic blends for water-based paints because they resist matting and shed less, preserving paint texture. Natural fibers suit oil-based paints and produce a smoother sheen, but they can lint more and need careful cleaning.
Microfiber rollers give excellent pickup and an even finish on subtle textures, minimizing passes.
For tiny patches, use a short, dense sleeve to avoid stipple.
Match roller material to paint type and desired finish, and test on scrap before touching the wall.
Picking the Correct Roller Nap for Your Wall Texture
Because wall texture determines how paint lands and hides flaws, choosing the right roller nap is essential for a seamless touch-up. You’ll want a nap that preserves texture matching and maintains color consistency while minimizing overlaps.
Consider surface roughness and paint type, then pick accordingly:
- Smooth (egg-shell, satin): 1/4″ nap for even lay-in.
- Light orange peel: 3/8″ nap to follow slight peaks.
- Medium texture: 1/2″ nap to reach crevices.
- Heavy stipple/popcorn: 3/4″–1″ nap for full coverage.
Test a small area, feather edges, and adjust nap if texture or color looks off.
Why Quality Paint Blends Better Than Cheap Touch-Up Cans
When you use quality paint instead of a cheap touch-up can, you’ll notice more consistent color matching across the repaired area. It also provides better coverage and opacity so you need fewer coats to hide imperfections.
Plus, higher-grade formulations resist fading and wear, so your touch-ups last longer.
Color Match Consistency
Although a tiny dab from a cheap touch-up can look tempting, it rarely gives you a seamless result. Quality paint blends better because it uses the same pigments, binder, and sheen as the original, so you won’t see obvious patches or texture differences.
You want color consistency, so match brand and batch when possible. Proper paint blending helps hide gradations and keeps finish uniform.
Consider these steps:
- Test a small area under typical lighting.
- Use the original paint or a matched, same-brand formula.
- Mix thoroughly to avoid streaks.
- Feather edges with a roller for an even look.
Coverage And Opacity
If you want your touch-up to disappear, start with paint that delivers full coverage and true opacity—quality paints have higher pigment load and better binders, so they hide the old color in fewer coats and bond evenly to the wall.
You’ll notice superior color consistency across touched and untouched areas, so the repaired spot won’t look patchy under different light.
Cheap touch-up cans often thin out, requiring multiple applications and leaving sheen differences. Choose a matching quality formula, apply thin even passes with your roller, and the result will blend seamlessly while offering better paint durability than bargain options.
Long-Term Durability
Beyond immediate coverage, choose quality paint because it holds up over time in ways cheap touch-up cans don’t. You want lasting results that match wall texture and resist fading, peeling, or uneven sheen. Cheap cans often lack binders and pigments that guarantee paint durability, so repairs show quickly.
Use a matching finish and proper roller technique to blend seamlessly.
- Superior binders improve adhesion and reduce flaking.
- Better pigments keep color stable against sunlight.
- Matched sheen replicates original surface reflectance.
- Thicker formulas fill slight texture differences, easing blend.
Investing in quality saves repeated touch-ups and preserves appearance.
Prep Checklist: What to Do Before You Paint
Before you roll paint, make a quick walkthrough to assess the surface, gather tools, and protect surrounding areas so the job goes smoothly. Decide color psychology for mood, and consider environmental impact when choosing low-VOC paint. Patch small holes, sand rough spots, and wipe dust. Move furniture, tape trim, and lay drop cloths. Keep matching paint, roller, angled brush, tray, and gloves handy. Test a tiny patch to confirm sheen and color.
| Task | Quick Tip |
|---|---|
| Patch | Use spackle |
| Sand | Feather edges |
| Clean | Dust first |
| Protect | Tape edges |
| Test | Check sheen |
Cleaning Scuffs, Grease, and Stains Properly
Once you’ve patched and sanded, tackle scuffs, grease, and stains so your roller lays down an even coat. Use appropriate cleaning tools: soft cloths, sponge, mild detergent, and a magic eraser for scuffs. Test any cleaner in an inconspicuous spot.
After patching and sanding, clean scuffs, grease, and stains with mild cleaners and test first for an even paint finish.
For grease and grimy spots, apply degreaser, let it sit, then rinse and dry.
For set-in stains, use targeted stain removal products following label directions.
After cleaning, allow full drying before priming or painting to prevent lifting.
- Gather cleaning tools.
- Test cleaner first.
- Treat grease, rinse thoroughly.
- Dry completely before painting.
Filling Holes and Cracks the Right Way
When you’re ready to smooth out walls, start by evaluating each hole and crack so you can choose the right filler and technique. Use spackling for small dings and lightweight joint compound for larger gaps.
For hairline cracks, a flexible caulk often works best. Apply filler firmly, overfill slightly, and let it dry fully per product instructions.
Match wall texture by stippling or rolling before it sets if needed, and be mindful of paint sheen when you touch up later so repaired spots blend.
Clean edges and remove dust—proper prep guarantees a seamless roller touch-up.
Sanding and Feathering Repair Edges
After your filler has fully cured and any texture’s been matched, you’ll need to sand the repaired areas so paint will lay down smoothly. Use fine-grit sandpaper and a sanding block to feather edges until transitions are barely noticeable for texture blending and color consistency.
- Lightly sand center to level filler.
- Feather outward with gentle, even strokes.
- Wipe dust with a damp cloth and let dry.
- Inspect under good light; repeat if seams show.
Keep sanding minimal to avoid altering surrounding texture. Proper feathering ensures the touch-up hides and the roller finish reads uniform.
Priming Patched Areas for Even Adhesion
Because patching materials absorb and reflect paint differently than the original wall, you should prime repaired areas to guarantee even adhesion and uniform sheen.
Patching materials absorb and reflect paint differently, so prime repaired areas to ensure even adhesion and consistent sheen.
Apply a quality primer to patched spots after sanding and wiping dust, using a small brush or pad to cover edges and blend into surrounding paint.
Priming surfaces seals porous filler, prevents flashiness, and promotes color consistency when you topcoat.
Let primer dry fully, follow manufacturer recoat times, and lightly sand any raised texture before rolling.
How to Load a Mini Roller Without Drips
Want to avoid annoying drips while you roll? Load your mini roller carefully to keep edges clean and preserve paint sheen and avoid color fading.
- Pour a small amount into a tray well; don’t overfill.
- Dip roller, then roll on slope area until saturated but not dripping.
- Use the tray’s ridged area to remove excess paint and achieve even coverage.
- Rest roller on its end briefly to let loose drips return to tray; tap gently if needed.
Keep movements controlled and reload frequently with small amounts to maintain consistent sheen and prevent patchy color fading.
Rolling Technique: Apply Thin, Even Coats
When you roll, work in thin, even passes so each coat lays down smoothly and dries uniformly. You’ll keep pressure light, overlap strokes by about 50%, and avoid overloading the nap to prevent drips. Thin coats aid color blending and cut drying time, letting you assess coverage before adding another layer. Check roller maintenance—clean or replace the cover between sessions to prevent lint or contaminant transfer. Move steadily, finish with a light tip-off stroke to minimize texture. Use the quick reference below to guide rhythm and pressure.
| Action | Tip |
|---|---|
| Pressure | Light, consistent |
| Overlap | 50% |
| Speed | Steady |
| Clean | After use |
Feather New Paint Into the Surrounding Wall
As you roll in fresh paint, feather the wet edge into the surrounding wall so the new coat blends invisibly with the old one. Work quickly while paint’s wet, using light pressure to soften any ridge. Focus on color blending and subtle gradations rather than heavy passes.
Keep roller strokes parallel and overlap edges by about 2 inches. If needed, step back and inspect in different light to spot hard lines.
- Reduce pressure near edges.
- Use short, light strokes outward.
- Blend until edge disappears.
- Clean rollers between color shifts.
Let paint level; don’t overwork the area.
Matching Texture: Stippling, Rolling, and Stipple Tools
If your repaired patch doesn’t match the surrounding wall, the mismatch will jump out even with perfect color, so you’ll need to recreate the original texture—stipple, roll, or stipple tool—using the same pattern and pressure. You should inspect texture comparison closely, test on scrap, and mimic rhythm and depth. Use consistent roller ergonomics to keep strokes even. Practice stippling motions, adjust nap length, and choose the right tool: a stipple brush for knockdown, a textured roller for orange peel. Blend edges by feathering texture into surrounding paint until the patch vanishes.
| Tool | Best Use |
|---|---|
| Stipple brush | Knockdown |
| Textured roller | Orange peel |
| Stipple tool | Heavy texture |
| Practice piece | Match test |
Using a Mini-Roller vs. a Full-Size Roller
Although a mini-roller gives you better control for small patches and tight corners, a full-size roller covers more area faster and produces a smoother, more consistent finish on larger sections. You’ll choose based on scope: touch-ups or broad blending.
- Mini roller advantages: use for tight spots, less splatter, precise blending.
- Full size roller differences: faster coverage, uniform texture, fewer seams.
- Swap when scale changes: start small, switch up if feathering becomes obvious.
- Match nap to surface: both need correct pile for texture and paint load.
You’ll work efficiently by picking the right roller for each area.
Cutting In Edges and Corners Before Rolling
Before you roll, pick a brush that fits the job—an angled sash brush for tight corners and a wider one for long runs.
Use steady, controlled strokes to create clean cutting lines so the roller has a crisp edge to blend into.
If you keep the brush loaded but not dripping, you’ll avoid drips and get professional-looking corners.
Choose Proper Brush
Choosing the right brush makes cutting in edges and corners faster and gives you a cleaner shift to the roller, so pick one that matches your paint and trim. You’ll want a brush that helps with color blending and texture matching without shedding. Consider these points:
- Synthetic angled sash brush — great for latex and crisp corners.
- Natural bristle flat — use with oil-based paints and smooth trim.
- 2–2.5 inch width — balances control and coverage for most edges.
- Tapered filaments — reduce marks and help feather into the roller for seamless touch-ups.
Maintain Clean Cutting Lines
Now that you’ve picked the right brush, keep your cutting lines sharp so the roller blends without leaving visible seams. You’ll cut in along ceilings, baseboards, and corners with steady pressure, using short, controlled strokes.
Watch for color contrast at edges; feather slightly when tones differ to avoid hard lines. Match paint texture by loading the brush correctly and smoothing strokes in the same direction the roller will follow.
Clean any excess paint immediately and maintain a wet edge so rolling blends seamlessly. Practice patience: tidy cutting in makes touch-ups invisible and preserves a professional finish.
Spot-Blend vs. Feather: When to Use Each
When a small scuff or nail hole interrupts an otherwise uniform wall, spot-blending gets you back to a seamless finish with minimal effort. You’ll choose spot-blend for tiny areas where matching paint sheen and careful brush strokes or a small roller hide repairs.
Feathering works when larger sections need smoothing into adjacent areas to avoid bands. Follow these steps to decide and act:
- Inspect area size and texture.
- Match paint sheen and color.
- Use spot-blend for chips, dings, isolated marks.
- Feather when edges or larger patches reveal contrast.
Work quickly, blend edges, and let dry before reassessing.
Handling Satin or Gloss Surfaces That Show Touch-Ups
On satin or gloss walls you’ll notice touch-ups more easily, so match the sheen exactly before you roll.
Use the same finish and, if needed, thin a small amount to get the right reflectivity.
Feather the edges outward with light, overlapping strokes so the repair blends into the surrounding surface.
Match Sheen Exactly
Because satin and gloss finishes reflect light differently, you’ll notice touch-ups more easily than on flat paint, so matching sheen exactly is essential. You want Sheen consistency to be indistinguishable, and maintaining Paint durability matters when blending new with old. Follow these concise steps:
- Test small patches with the same finish and manufacturer to confirm sheen match.
- Use the same paint batch or mix batches to the same sheen level, recording ratios.
- Roll with the same nap roller and stroke pattern to avoid texture differences.
- Let full cure before judging reflectivity; adjust only if sheen still mismatches.
Feather Out Edges
If the repaired area sits on a satin or gloss wall, feather the paint edges so new and old blend without a visible rim; you’ll lightly taper the fresh coat into the surrounding finish using diminishing pressure and overlapping strokes.
Start with minimal paint on the roller, work from the center outward, and ease pressure as you reach the perimeter.
Use short, controlled passes to achieve subtle edge blending and avoid a raised ridge from paint layering. If needed, wait for tackiness and lightly roll again with nearly dry nap to soften gradients.
Clean tools between coats to prevent texture differences.
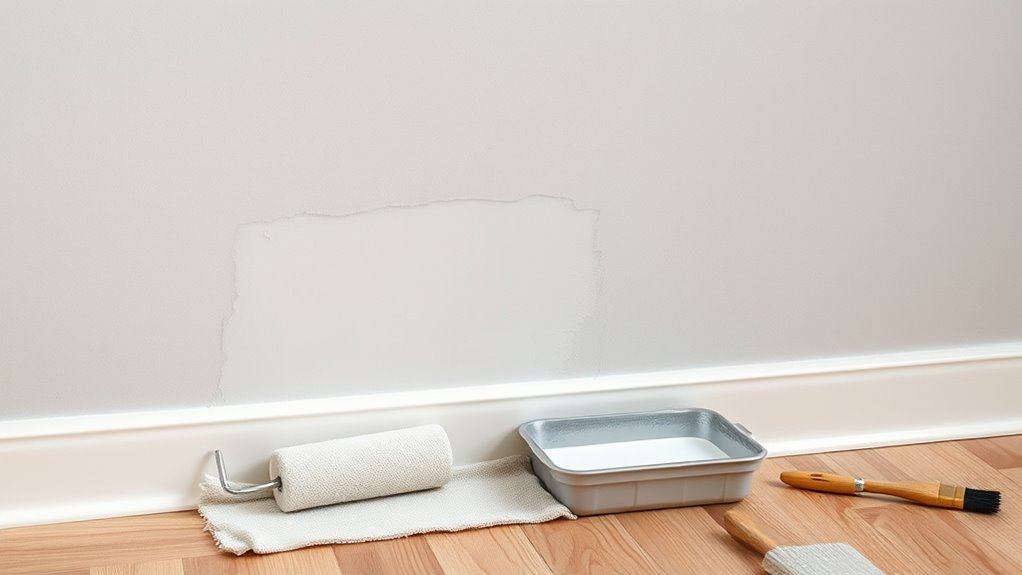
Repairing Large Patched Drywall With a Roller
When a drywall patch is too big for a brush to cover evenly, reach for a roller to blend texture and paint faster; you’ll get smoother results and fewer visible seams by matching roller type and nap to the surrounding wall.
Prepare the patch: sand smooth, remove dust, and prime to prevent color fading and guarantee paint durability.
Load a roller lightly, apply thin even coats, and blend edges with feathering strokes.
- Choose nap matching texture.
- Use high-quality primer.
- Roll from patch outward.
- Let coats cure between applications.
Inspect in good light and touch up as needed.
Fixing Uneven Sheen After Touch-Ups
When your touch-up spot looks shinier or flatter than the surrounding wall, check the paint sheen first and use the same finish (matte, eggshell, satin, etc.) to match it.
Lightly feather the edges of the new paint with a damp roller or dry brush to blend the shift into the old finish.
If sheen still shows, recoat the whole panel with consistent technique to even out the gloss.
Match Paint Sheen
Because touch-ups often sit differently than the surrounding paint, you’ll sometimes see a glossy or dull patch even though the color matches. To match sheen, assess original finish and note environmental impact and any historical paint characteristics that affect gloss.
Then:
- Clean the area; oils alter sheen.
- Lightly scuff with fine sandpaper for adhesion and uniform reflectance.
- Use the same sheen-level paint or add appropriate flattening/gloss additive.
- Re-roll evenly with a short-nap roller, blending into wet edges.
Work in consistent light, test a small patch, and wait full cure before judging final sheen.
Feather Edges Seamlessly
Although touch-ups can leave visible seams where new paint meets old, you can feather edges so they disappear into the surrounding wall by softening and blending the shift with controlled technique and the right tools.
Start by thinning a small bit of paint to match existing sheen, then roll lightly outward from the patch, using a low-nap roller and light pressure. Cross-roll in random strokes to avoid ridges, keeping a damp edge.
Let it dry and assess color fading; repeat feather edges if contrast remains. Finish with a final light mist or glaze only if needed to unify texture and gloss.
How to Avoid Roller Marks and Lap Lines
If you want smooth, even coverage, work quickly and keep a wet edge so each roller pass blends into the last; stop long enough only to reload the roller, not to let the paint set. You’ll prevent lap lines and roller marks by controlling timing, pressure, and overlap.
Focus on color saturation and avoid differences caused by paint oxidation on older surfaces. Use these steps:
Focus on color saturation; blend new paint into older, oxidized areas immediately for an even, consistent finish.
- Load the roller evenly; avoid globs.
- Roll in a “W” pattern, then fill in without overworking.
- Maintain light, consistent pressure across passes.
- Blend new paint into surrounding areas immediately for uniform finish.
Assessing a Successful Touch-Up: What to Look For
When you inspect your touch-up, start by checking the color match to make sure the patched area reads the same as the surrounding wall in different light.
Next, run your hand lightly over the surface to confirm the texture blends seamlessly with the rest of the finish.
If both color and texture are indistinguishable, your touch-up is successful.
Color Match Accuracy
Because even a small mismatch draws the eye, evaluating color match accuracy starts with careful inspection under the right conditions. You’ll check Color consistency and Shade precision by viewing the touch-up in natural and artificial light, at different times of day. Focus on hue, value, and chroma rather than brand names.
- Compare side-by-side from several angles.
- Inspect in indirect daylight and warm indoor light.
- Look for flashes or halos at edges.
- Retest after full drying (24–48 hours).
If discrepancies persist, remix paint or adjust tinting slightly before reapplying for best results.
Seamless Texture Blend
Although paint color is key, your touch-up will still stand out if the texture doesn’t match the surrounding wall, so check surface continuity closely. You want both color consistency and texture matching to be convincing.
Inspect under different lighting and at varying angles to spot ridges, stipple differences, or roller nap marks.
Feather edges by lightly rolling outward and blend with the original finish—matte hides more than satin or gloss.
If textures differ, replicate the pattern with the same roller or a texture tool before paint dries.
Step back, let it cure, then confirm the repair is visually seamless.
Retouching a Failed Repair Without Repainting the Wall
If your touch-up didn’t blend, you can fix the spot without repainting the whole wall by matching texture, feathering edges, and carefully reapplying paint only where it’s needed. Start by cleaning the area and letting it dry. Check color consistency against surrounding paint in natural light. Lightly scuff gloss, sand edges to feather, and match texture with thin compound if required.
- Compare paint swatch and mix small batch for exact color consistency.
- Sand and feather edges for a seamless blend.
- Apply thin coats with a mini roller, blending outward.
- Inspect dry, adjust texture matching, repeat if needed.
Touching Up Textured Surfaces: Orange Peel & Knockdown
When you’re fixing orange peel or knockdown texture, the goal isn’t just color match but replicating the surface pattern so the repair disappears. Start by closely examining the existing texture, then match the spray or trowel method and material before you touch paint.
You’ll prep by cleaning, sanding feathered edges, and applying joint compound or texture mix to mimic peaks and valleys. Practice the motion on scrap to get scale right.
Once texture cures, prime the patch, then use the same paint sheen and application technique to blend. Work lightly in stages until texture and sheen integrate seamlessly with surrounding textured surfaces.
How Lighting Affects Visibility : And How to Test It
Hold a light at different angles to see how bumps and brush marks catch the beam, because lighting angle matters for spotting imperfections.
You’ll also want to check the wall in natural light at different times of day to make sure the touch-up blends in.
If something still shows, adjust your technique or feather the edges until the repair disappears in both artificial and daylight.
Lighting Angle Matters
Because light hits walls at different angles, imperfections that looked invisible can suddenly stand out, so you’ll want to check how lighting changes what you see before you paint.
You’ll assess lighting dynamics and even note paint temperature effects on sheen perception. Move a portable lamp and inspect from different spots.
Try this quick checklist:
- Place lamp low, scan for shadows along the wall.
- Raise lamp high, note gloss differences.
- Stand at eye level, walk sideways to spot streaks.
- View from corners to reveal texture mismatches.
Adjust sanding or blending based on what each angle reveals.
Test With Natural Light
After checking with a lamp and moving around the room, step outside to test your touch-up under natural light—it shows color and sheen shifts that artificial sources can hide.
Walk the wall at different times of day; morning, midday, and late afternoon reveal contrasts you missed.
Hold a small swatch of original paint beside the repaired area to compare hue and reflectivity.
If differences appear, adjust paint consistency—thin slightly for smoother blending or add body for fuller coverage.
Re-roll small sections, let them dry, and re-evaluate outside until the repair disappears in direct and indirect daylight.
Best Wait Times Between Coats for Seamless Blending
Getting the timing right between coats is essential if you want your touch-up to disappear into the surrounding wall; you’ll let paint set enough to avoid lifting the previous layer but still keep edges tacky enough to blend.
Aim for these wait times to minimize color fading and preserve paint longevity:
- Light coats: wait 30–60 minutes.
- Standard latex: wait 2–4 hours.
- Oil-based or high-gloss: wait 6–8 hours.
- Multiple thin coats: stagger 1–2 hours between each.
Always test a small area before blending fully, and avoid heavy brushing that disturbs the tacky edge.
Seasonal and Humidity Tips for Drying and Curing
When temperatures and humidity swing with the seasons, you’ll want to adjust your drying expectations and workflow. Warm, dry conditions speed evaporation but can cause skinning and rapid tack loss, while cool or humid air slows drying and raises the risk of sagging or mildew.
You should monitor Seasonal changes and Humidity effects before starting touch-ups. In summer, work smaller sections, use slower-drying formulas, and increase ventilation to avoid roller marks.
In cold or damp months, raise room temperature gently, use a dehumidifier, and wait longer between coats. Track manufacturer cure times; don’t rush furniture placement or light cleaning.
Protecting Floors and Furniture During Touch-Ups
While you focus on matching texture and color, don’t let paint mishaps ruin floors or furnishings—cover high-traffic areas with drop cloths or plastic sheeting and move smaller pieces out of the room. You’ll want smart Furniture rearrangement and Flooring protection before you roll.
Plan a tidy workspace, keep paint trays on low tables, and tape sheeting edges to prevent slips.
- Clear walkways and relocate fragile items.
- Use weighted drop cloths or taped plastic on floors.
- Protect furniture legs with cardboard or painter’s tape.
- Keep a damp rag and small bin for accidental drips.
Cleaning and Storing Rollers After Small Jobs
When you’re done, rinse out excess paint from the roller under running water until it runs clear.
For a deeper clean, work a brush or your hands through the nap with soap to remove trapped pigment, then rinse thoroughly.
Let the roller dry completely on a rack or hang it in a well-ventilated spot before storing to prevent mildew and deforming the nap.
Rinsing Out Excess Paint
After you’ve finished touching up the wall, don’t let the roller sit with paint in it—rinse out as much excess as you can right away so the nap doesn’t harden and ruin future jobs. Open windows to reduce paint fumes and follow safety precautions like gloves and a mask. Work quickly to prevent drying.
- Squeeze roller over the tray to remove surplus.
- Rinse under warm running water, rotating to flush nap.
- Use a mild soap and repeat until water runs clear.
- Spin or shake off water, then stand roller on end to air-dry.
Deep Cleaning Technique
Once you’ve rinsed out the bulk of the paint, give the roller a deeper clean to remove trapped pigment and oils so it performs well next time. Work warm, soapy water into the nap, squeezing repeatedly until runoff clears.
For stubborn latex, use a mild brush or comb to lift fibers and dislodge pigment lodged from wall texture. Rinse thoroughly, checking that no color or sheen residue remains; leftover gloss can alter your paint sheen on touch-ups.
If you used solvent-based paint, follow manufacturer instructions and ventilate.
Finish by reshaping the roller and preparing it for drying and storage.
Proper Drying And Storage
If you want your roller to keep its shape and perform on your next touch-up, let it dry thoroughly in a dust-free spot with good air circulation and hang or stand it so the nap stays rounded.
After cleaning, focus on drying techniques to prevent mildew and preserve color consistency. Follow this quick routine:
- Spin excess water off and blot with a clean cloth.
- Rinse until water runs clear, then shake out remaining moisture.
- Air-dry vertically or hang in a shaded, ventilated area.
- Store in a breathable bag or wrap loosely to keep dust off and the nap intact.
Saving Leftover Paint and Labeling for Future Touch-Ups
When you finish a roller job, don’t toss the leftover paint—save and label it so future touch-ups match perfectly. Store a small amount in its original can or an airtight container, wipe the rim clean, and press plastic wrap over the surface to minimize skinning.
Note the paint name, sheen, mixing ratio, date, and room location on the label. Proper paint storage preserves color durability and prevents separation.
Keep cans upright in a cool, dry place away from heat. For quick ID, add a small swatch of paint on the lid.
Check stored paint before use, stir thoroughly, and strain if needed.
Creating a Simple Home Touch-Up Kit
Keeping a labeled can of leftover paint is smart, but you’ll also want a compact touch-up kit on hand so small fixes don’t turn into big jobs. Assemble tools that respect color chemistry and proper paint storage so patches match and last.
Include:
- A small roller and mini tray for even texture.
- A sample-size brush for edges and corners.
- Touch-up pots labeled with paint name, batch, and date.
- Fine-grit sandpaper and a tack cloth for prep.
Store the kit in a cool, dry spot. Check labels before use and shake or stir pots to re-blend pigments.
When to Call a Pro for Large or Tricky Repairs
Because some repairs affect structure, safety, or large visible areas, you shouldn’t tackle every problem yourself — call a pro when damage extends beyond a small patch, the underlying surface is compromised, or matching texture and finish matters for resale or aesthetic reasons.
When damage is more than a small patch or affects structure, safety, or finish, call a pro.
You should also hire help if water damage, mold, or cracks suggest structural issues, or if your wall texture is intricate and hard to replicate.
Pros can assess hidden damage and use techniques that survive under varied lighting conditions, avoiding obvious touch-up spots.
If patching risks warping, uneven sheen, or repeated fixes, get a professional.
Estimating Time and Cost for a DIY Touch-Up
If you’re planning a DIY touch-up, budget a short block of time and modest cost for most small repairs: a straightforward spot (nail holes, scuffs, or a 4–6 inch peeled area) usually takes 30–90 minutes including prep and drying times, and will cost $5–$25 for paint, primer, sandpaper, and a disposable roller or brush.
Plan for color consistency and smart budget planning to avoid repeats.
Estimate needs with this quick checklist:
- Surface prep: 10–20 minutes.
- Primer/paint application: 10–30 minutes.
- Drying time: 15–30 minutes.
- Cleanup: 5–10 minutes.
Preventing Future Marks: Care and Maintenance Tips
Once you’ve finished touch-ups, protect the repaired area so you don’t have to repaint again soon. Wipe walls gently with a damp microfiber cloth weekly to remove dust and prevent scuffs. Use felt pads on furniture and teach family to avoid leaning items against walls.
For high-traffic zones, consider a washable topcoat or higher-sheen finish per manufacturer recommendations. Don’t fall for wall paint myths that promise indestructible finishes; routine care matters more.
Be mindful of color psychology when choosing touch-up shades—darker tones hide marks better, while lighter hues show wear sooner—so pick wisely for each room.
Quick Troubleshooting Checklist for Common Touch-Up Problems
When touch-ups don’t look right, follow this quick checklist to identify and fix the problem fast. You’ll assess color, texture, and finish, then correct with targeted steps.
- Check for color fade: compare against an unexposed area; use tint or fresh paint if faded.
- Inspect texture matching: roll lightly to blend; use same nap roller and technique for consistency.
- Look for sheen differences: scuff, prime, then apply matching finish to avoid obvious patches.
- Spot edge lines or lap marks: feather edges, keep a wet edge, and re-roll surrounding area for seamless repair.
Frequently Asked Questions
How Long After Touch-Up Can I Hang Pictures or Shelves Back Up?
You can hang pictures or shelves after 24–48 hours if the touch-up feels dry; wait 7 days for full cure to avoid marks. Make sure color matching and paint blending were good so repairs remain invisible under load.
Can I Touch up Paint Over Nicotine or Heavy Smoke Stains?
Yes — but you’ll need to strip the “shadow” first: you should clean and prime before painting because nicotine stains and smoke residue bleed through. Use a degreaser, stain‑blocking primer, then repaint for lasting results.
Is It Safe to Use Touch-Up Paint in a Nursery or Baby’s Room?
Yes — you can use touch-up paint in a nursery if you choose low‑VOC, zero‑VOC or certified child safety formulas, ventilate well to limit paint fumes, and keep babies away until surfaces fully cure and odor dissipates.
How Do I Touch up Paint on a Wall With Wallpaper Remnants?
Like peeling a memory, you’ll scrape loose wallpaper remnants, sand smooth, prime bare spots, then use paint blending to feather edges with thin coats; you’ll match texture, let dry, and roll lightly for a seamless finish.
Can Touch-Up Paint Be Applied Over Previously Waxed or Polished Surfaces?
Yes — but you’ll need thorough surface preparation first. You’ll strip wax or polish residue, clean and sand, then prime. Make certain paint matching after priming so your touch-up blends; test a small area before finishing.
Conclusion
You’ll finish faster than you think: touch-ups typically take under an hour for small spots, and studies show homeowners spend about 1.6 hours per month on basic home maintenance—so this pays off. If you’ve matched color, sheen, and feathered the edges with a roller, your wall should blend seamlessly. Follow care tips to prevent scuffs, and call a pro for large, textured, or water-damaged areas. Regular maintenance keeps walls looking fresh.